
I can’t believe it, this month my husband and I are celebrating our 13th wedding anniversary!
Every May as our wedding anniversary comes around, I get worried. What do you give the best husband ever for your anniversary?
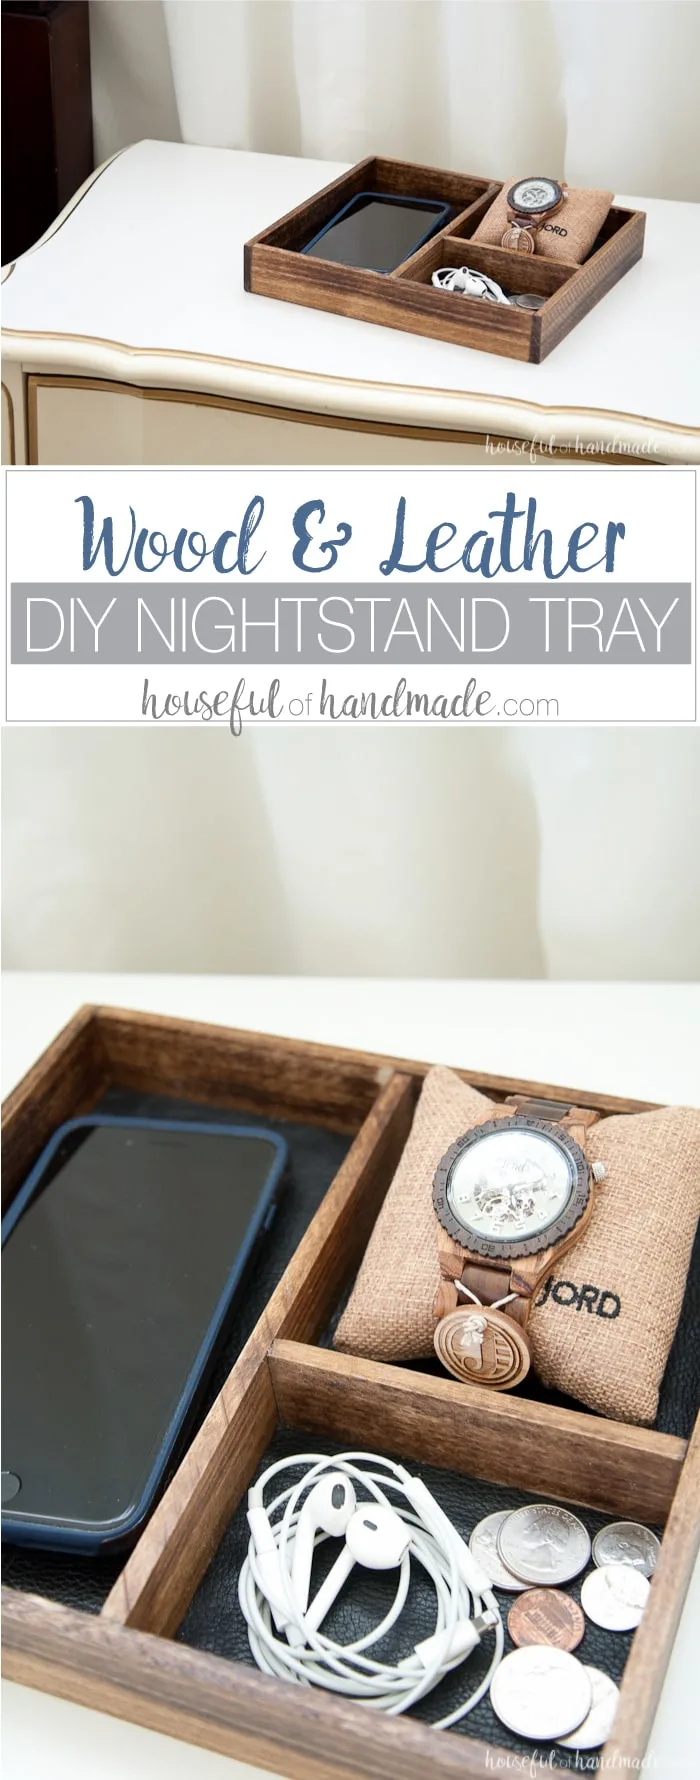
This year I wanted to give my husband an amazing DIY anniversary gift. And this easy DIY nightstand tray has been such a hit!
This post may contain affiliate links. As an Amazon Associate I earn from qualifying purchases. Click here to read my full disclosure policy.

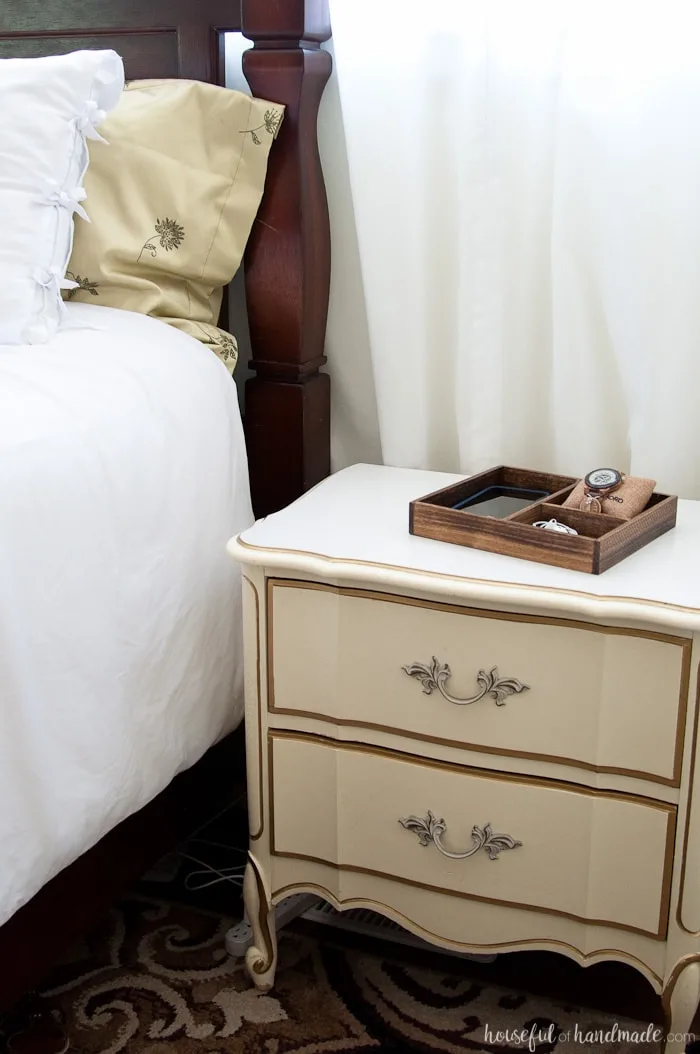
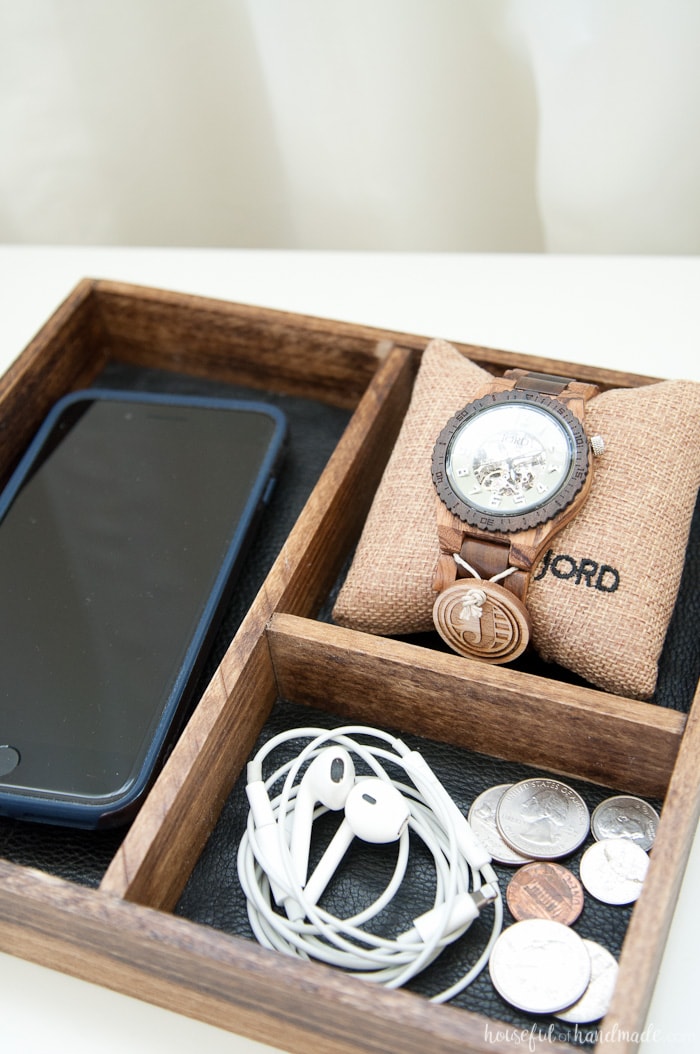
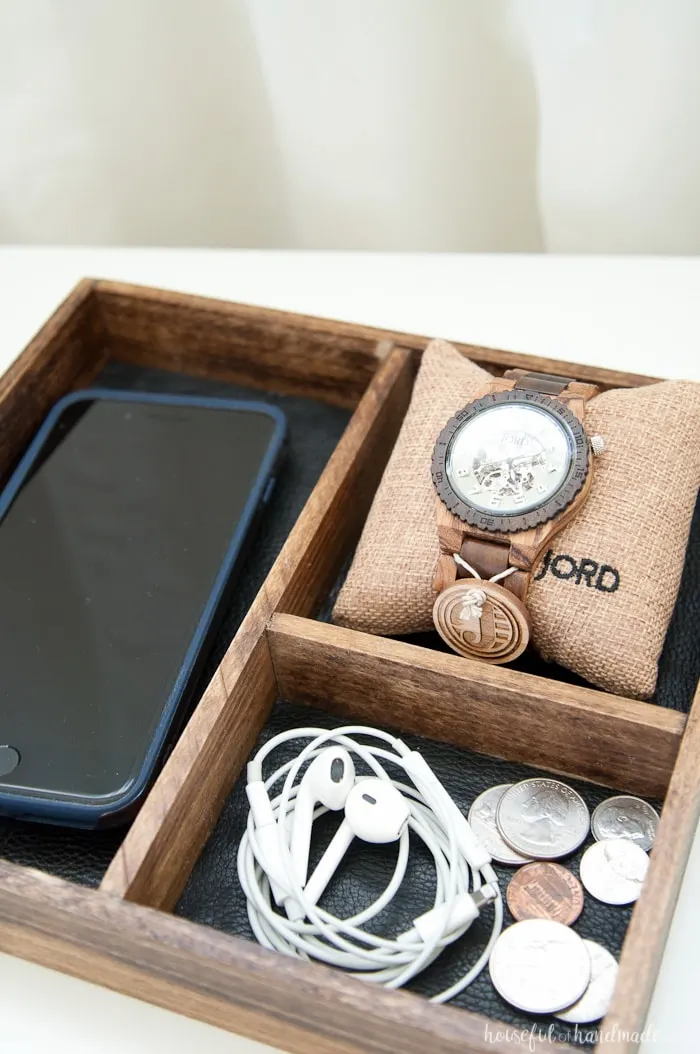
After a long day at work, my husband comes home and empties out his pockets. He unloads his cell phone, earbuds, and pocket change onto the nightstand.
Where it sits until the next day when he loads his pockets again. He really needed a place to unload the day. Someplace to catch all his things until he needed them again.
This DIY nightstand tray is the perfect solution. I has a large compartment for a phone, and two smaller compartments for change, earbuds, a watch, or anything else he collects during the day.

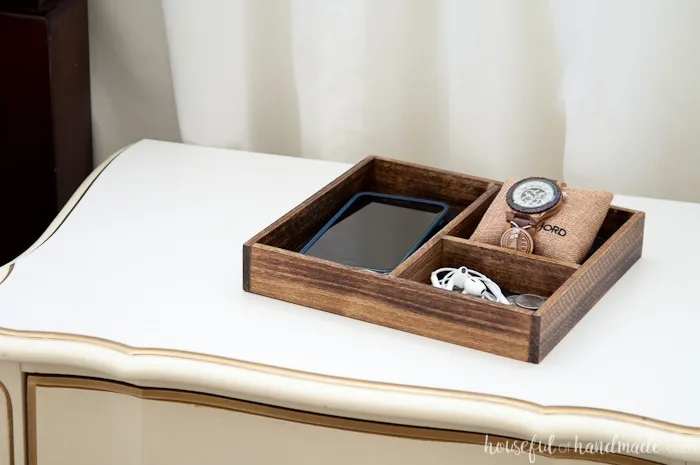
While the simple wood nightstand tray is nice, I decided to make it even better by adding a bit of leather!
The bottom of each compartment is finished off with a piece of leather. It makes a softer landing for all the things. Plus it looks really expensive.
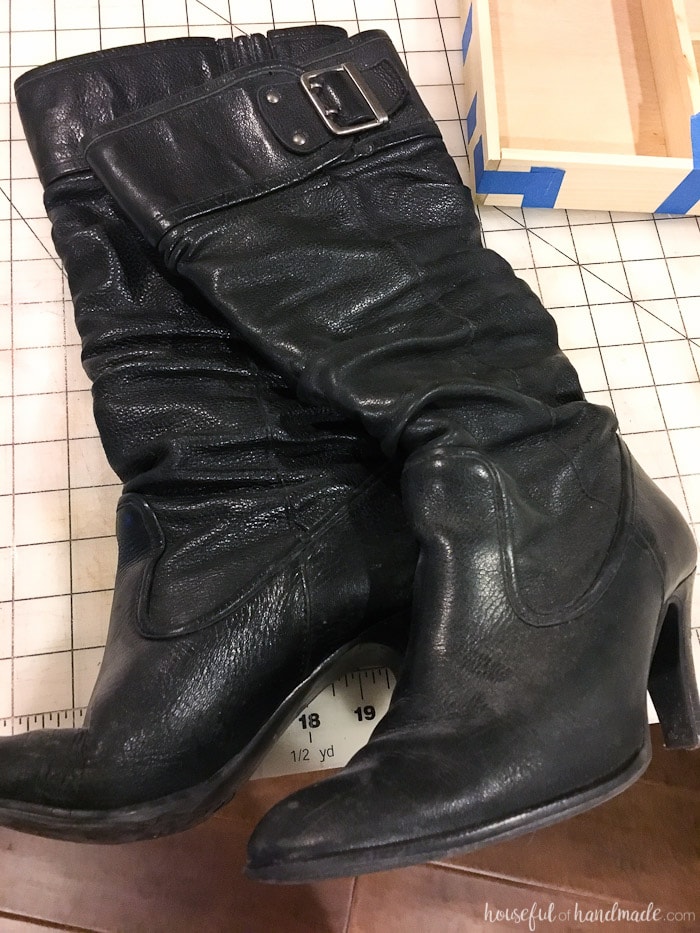
But it was not, because I used old worn-out leather boots to get the leather for the wood tray!


How to Make a Wood & Leather Nightstand Tray
Supplies:
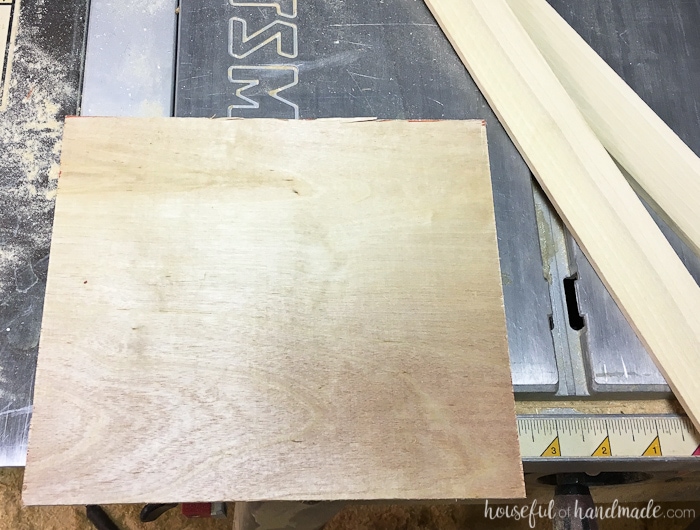
- 8″ x 9″ piece of 1/4″ plywood
- 48″ piece of 1/4″ x 2″ board
- These thin boards are sometimes called hobby boards at the home improvement store.
- Wood glue
- Painter’s tape
- Stain and sealer
- Pieces of leather
- I used a pair of old worn out boots for my leather.
STEP 1- Cut the pieces
Cut your plywood to size.

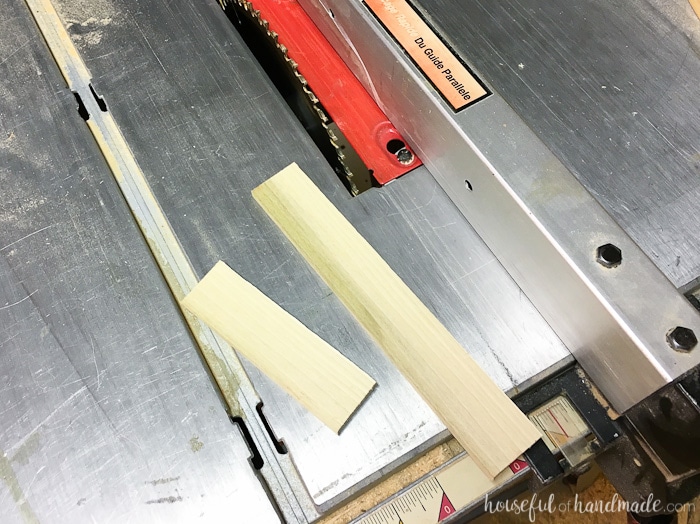
From the 1/4″ x 2″ board cut:
- (2) 9″ pieces
- (2) 8 1/2″ pieces
- (1) 8″ piece
- (1) 4 1/4″ piece
Trim the 8″ and 4 1/4″ piece down to 1 3/4″ wide. I used my table saw to do this.
If you do not have access to a saw for ripping boards, you could buy a 1 1/2″ wide board for these inside pieces. They wouldn’t be flush to the top like my tray is, but they would still allow separation.

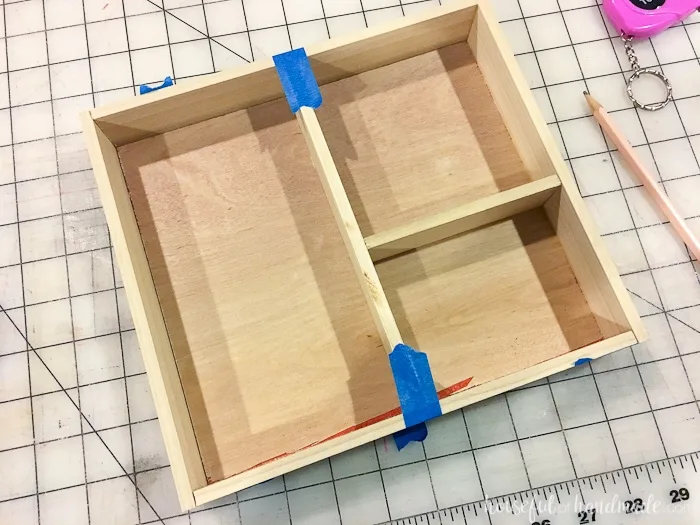
STEP 2- Assemble the tray
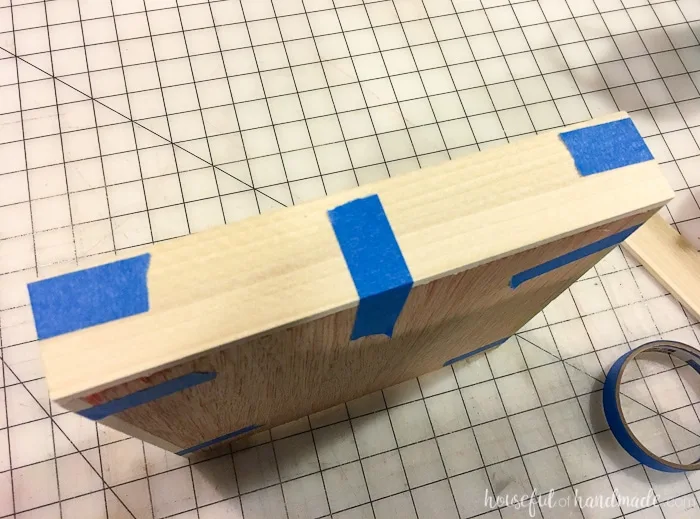
Apply a thin bead of wood glue to the 9″ edge of the plywood.
Line one of the 9″ pieces of board with the plywood so it is flush on the bottom. Hold the pieces tight together with painter’s tape.
Repeat on the opposite 9″ side.
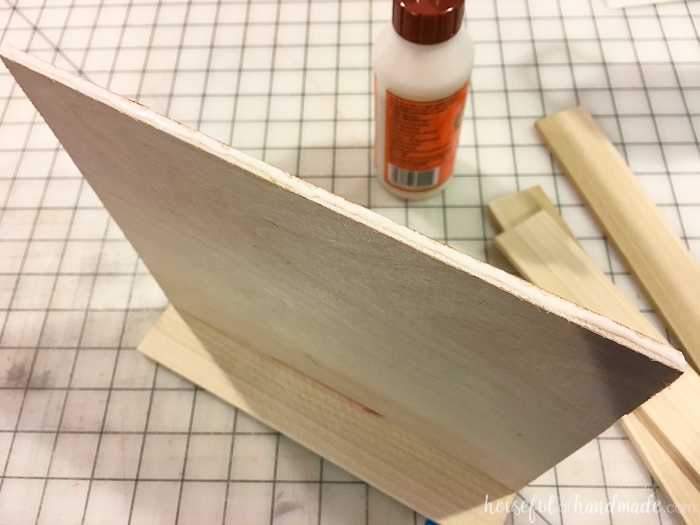

Secure the 8 1/2″ boards to the other sides of the plywood the same way, but make sure to add wood glue to the sides of the 9″ boards as well.
“Clamp” with the painter’s tape.

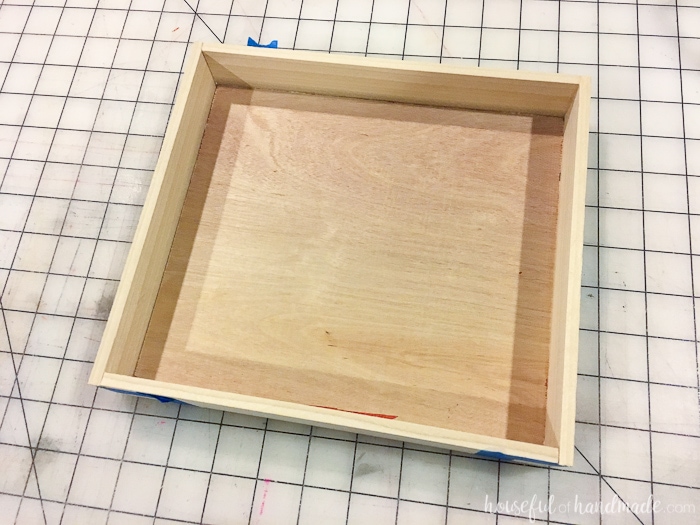
Now you have a beautiful tray.
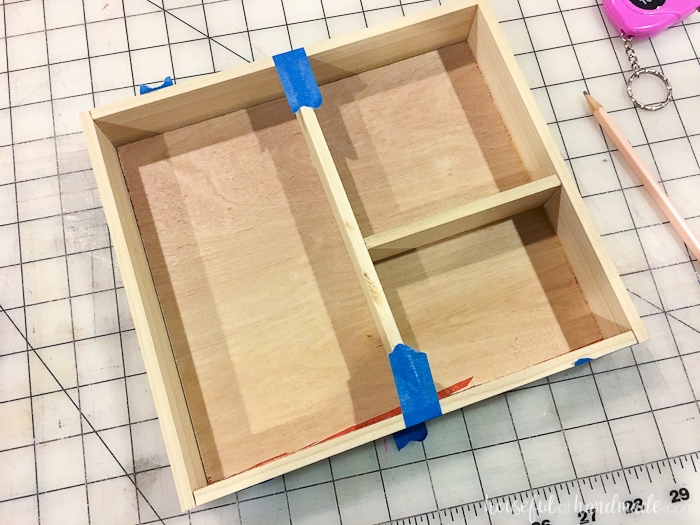
It would be perfect this way, but I wanted to add some separators to help keep all my husband’s items super organized.

Glue the 8″ and 4 1/4″ board into the tray with the wood glue.
Add glue to all edges except the top to attach them securely. Hold them with tape until the glue dries.
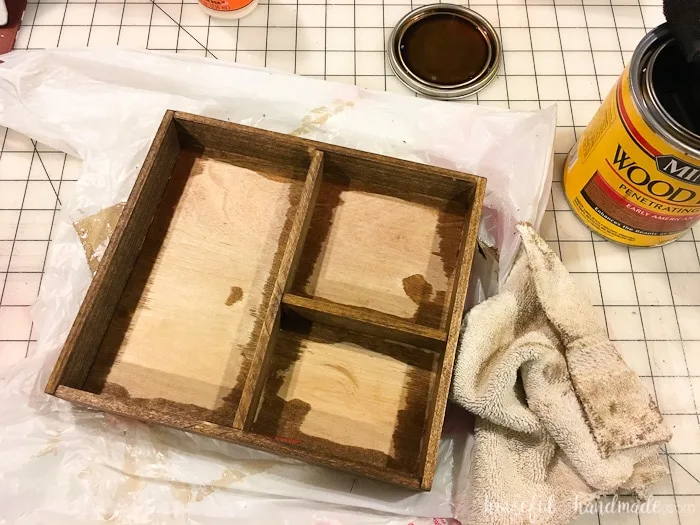
Let the glue dry, then remove the painter’s tape and sand.
Stain the sides of the tray. Then seal it to protect the wood. I used a simple clear spray coat.

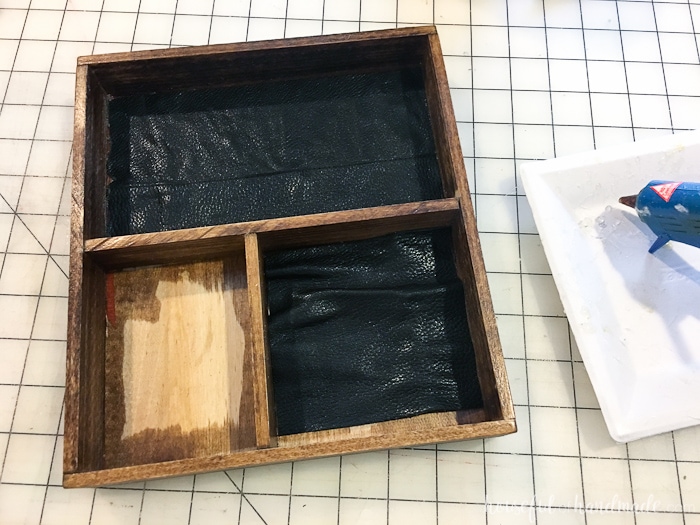
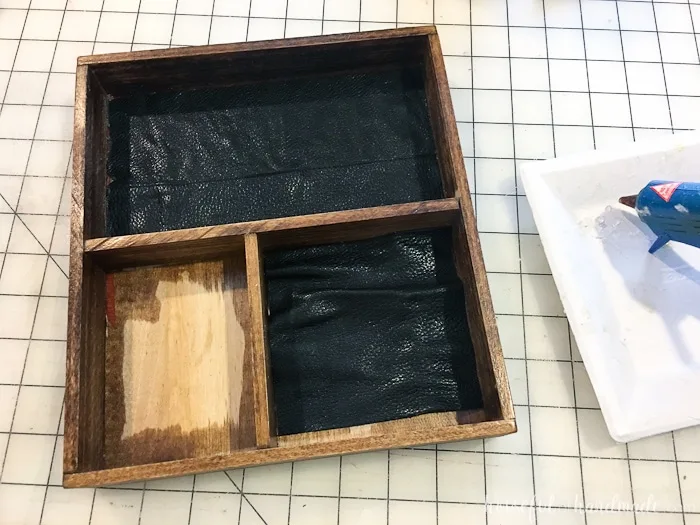
STEP 3- Add leather
To give the tray a little cushion, and make it more masculine, I covered the bottom of the tray with leather.
I have been hanging onto these old boots for a few years now. The bottom of the boots are completely worn out and the soles have broken, but the leather on the top was still beautiful. So I kept them to use eventually.

Cut a piece of leather to fit into each of the tray compartments.

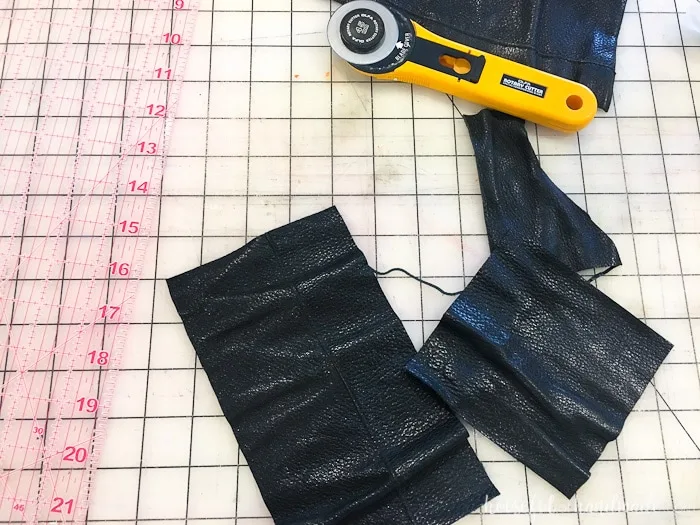
Glue the leather into the bottom of the tray.
I used hot glue so the glue would dry quickly. That way I could stretch the leather to lay flat in the bottom of the tray.
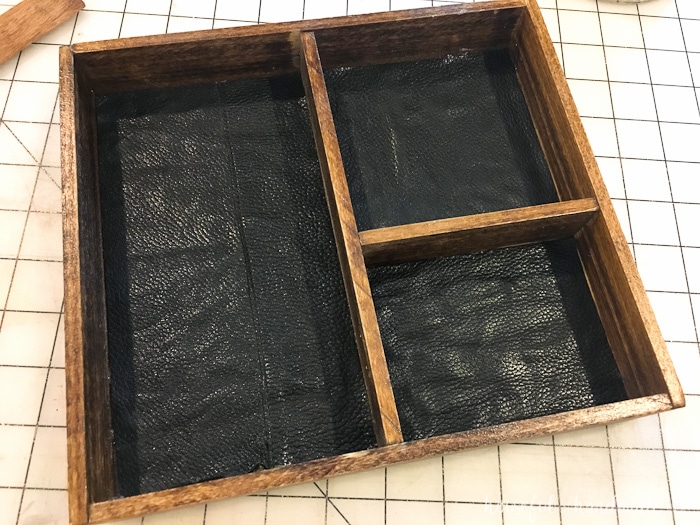
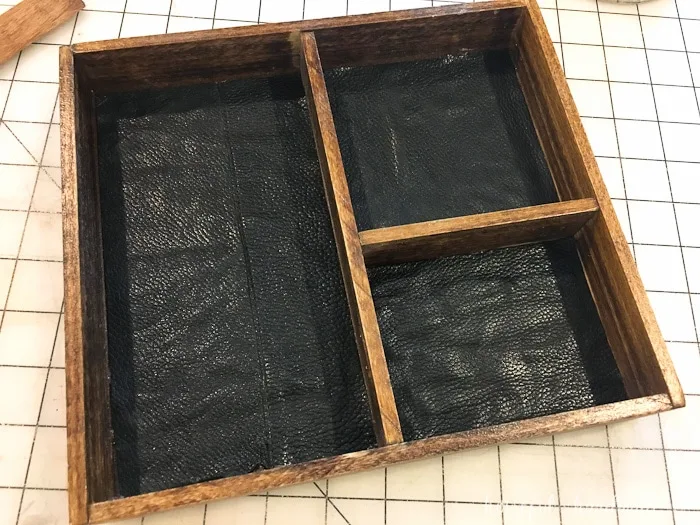
Now your new tray is ready to use!
Or to wrap it up to give as a DIY gift.
My husband loves his new tray so much. It truly is the perfect anniversary gift for him.
Here’s to many more amazing years!


johannes Megele
Monday 21st of October 2019
Love this site! Thanks for all the help!
Kati
Monday 11th of November 2019
Awe thanks Johannes :)
Cheryl
Friday 12th of May 2017
A rainbow anniversary sundial (a sun clock) for the window sill is a good idea, especially if you get a date line added to it that the time shadow will follow every year on the anniversary day. He'll never forget his anniversary with something like that in the house!
Kati
Friday 2nd of June 2017
That is a beautiful gift idea too! I love the subtle reminder of the date too ;)
Maria
Wednesday 10th of May 2017
Such a cute guy and love the watches, My son has one and its really great quality. Maria
Kati
Friday 2nd of June 2017
Thanks so much Maria! My husband loves his watch so much. It's beautiful!
bonbon
Tuesday 9th of May 2017
Hi Kati.....love the wood watch and the caddy is perfect as a gift for guys. Thanks for the ideas.
Kati
Friday 2nd of June 2017
Thank you BonBon!
Claire | Heart Handmade UK
Monday 8th of May 2017
Hi Kati, that little nightstand caddy is super and would make a great project for any of the Misters in my life! x
Kati
Friday 2nd of June 2017
Thanks so much Claire! I agree, it would be perfect for any man :)