Beautiful Easter egg shaped boxes are the perfect alternative to plastic Easter eggs.
Are you ready to start filling up your Easter baskets? It is one of my favorite times of year. The hope of spring right around the corner… and Easter candy is by far the best candy out there!
One of the things I hate though, is those cheap plastic eggs! They never stay closed! And the kids always end up breaking them.
Last year I stepped on a piece of broken plastic egg hiding in the carpet. Ouch! Cut my foot good.
This post may contain affiliate links. As an Amazon Associate I earn from qualifying purchases. Click here to read my full disclosure policy.
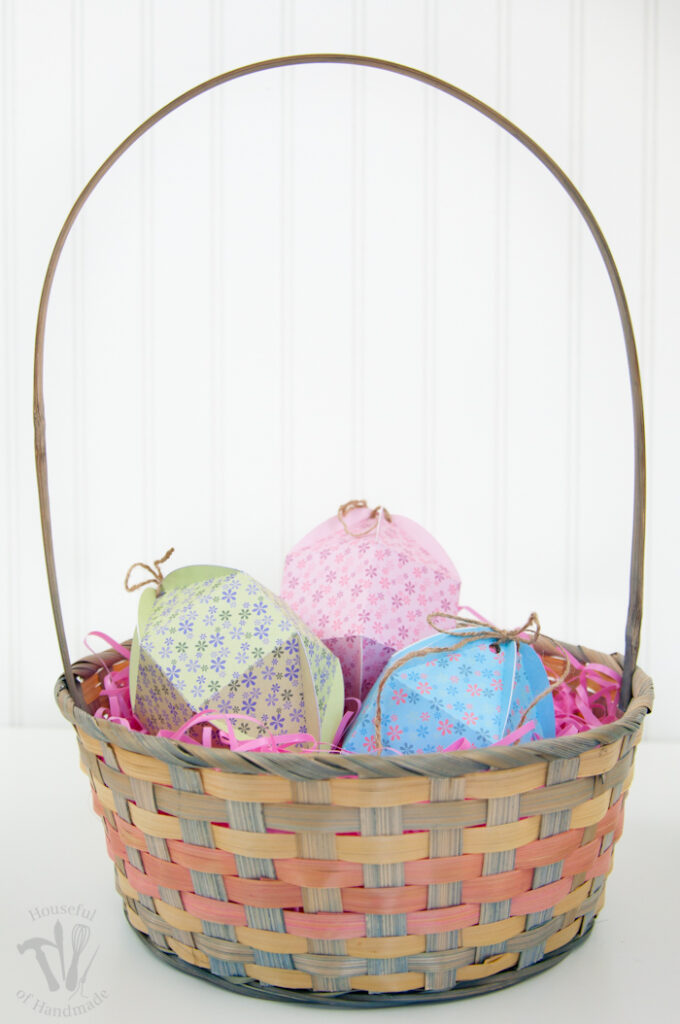

So this year I am not using any plastic eggs. Better for the environment and better for me! I made some jumbo zipper eggs that hold large Easter surprises, but for smaller items we have the perfect solution!
We will be filling our baskets with these pretty egg shaped boxes. Aren’t they so much better???
The egg shaped boxes are easy to make out of paper. I used my Silhouette Cameo to make cutting and folding super easy, but you don’t have to use one. You can easily cut them out with a simple pair of scissors.
These Easter egg boxes are also a bit bigger than those plastic eggs. Which is great for filling with all your favorite treats. A bigger box of Cadbury Mini Eggs is fine by me!
Or they are perfect for small toys too! But the best part, you can even make them bigger if needed for larger items.
How to Make Egg Shaped Boxes from Paper
SUPPLIES:
- Pallet wood clock template
- The cut file & PDF for the egg-shaped boxes were free to my subscribers until 3/3/2019. Now they are available to purchase in the shop. Make sure to subscribe so you will be notified of new freebies!
- Cardstock
- Printer
- Hot glue gun and glue sticks
- Scissors
- Hole punch
- Twine
- Optional: Electronic cutting machine like a Silhouette Cameo or Cricut Maker
Click here to see my favorite Paper Crafting Tools
If using an electronic cutting machine, open the cut file in your software. Set up your file for Print & Cut. Print and cut out the boxes.
If using scissors, print the PDF and cut along the solid lines. Score along the dotted lines for crisp folds.
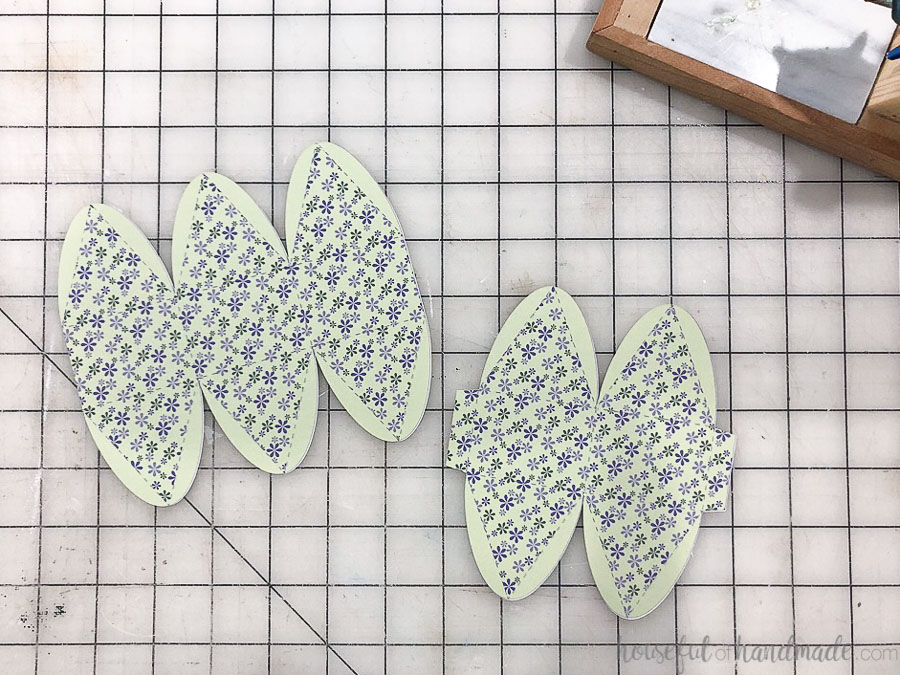
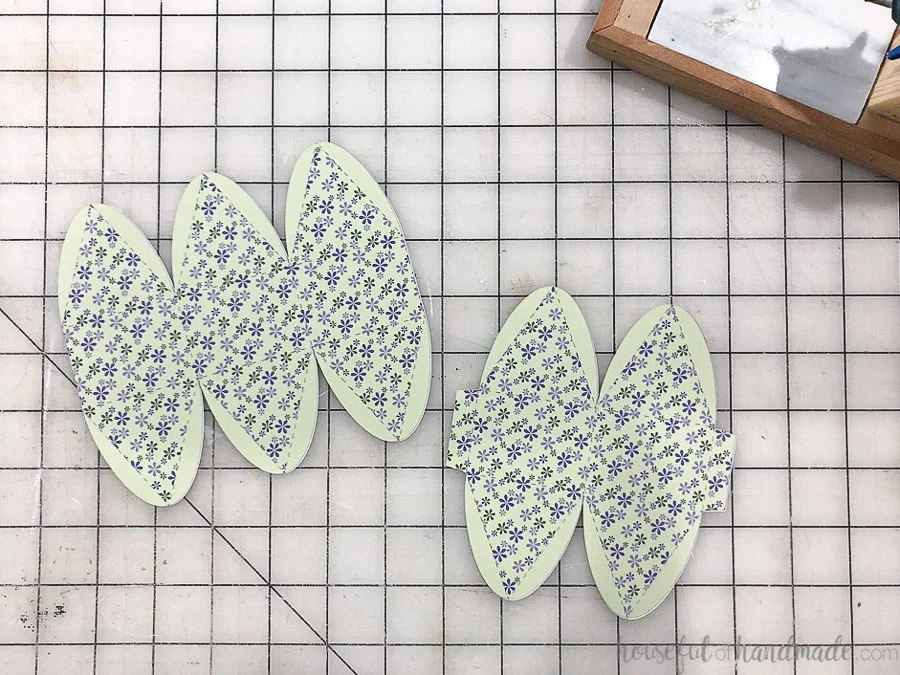
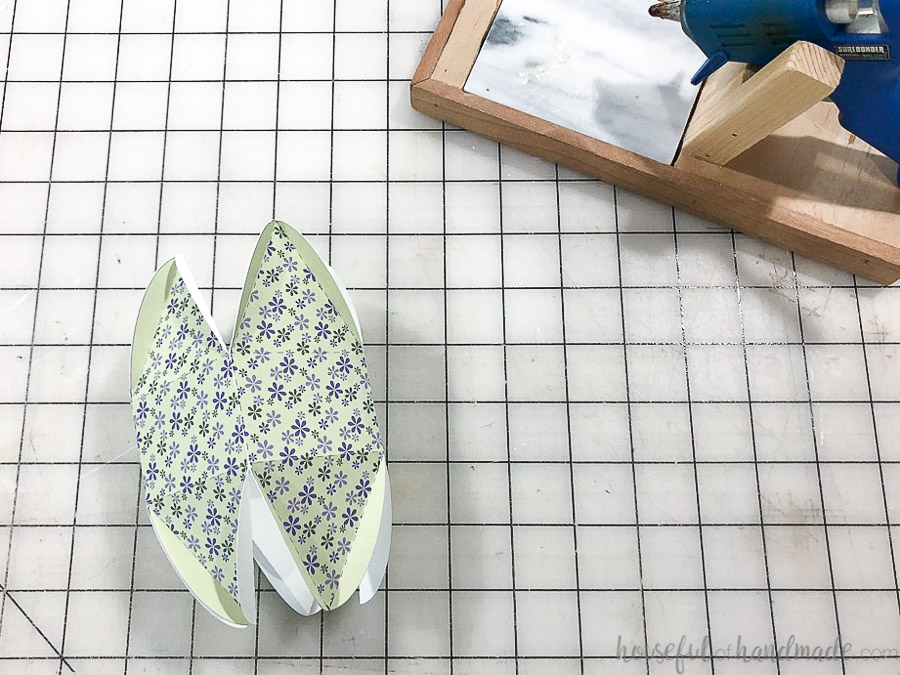
Fold along all the dotted lines. Fold all the lines towards the back, except the flaps at the top & bottom of the egg.
Glue the tabs on the smaller piece to the larger piece to make a circle.

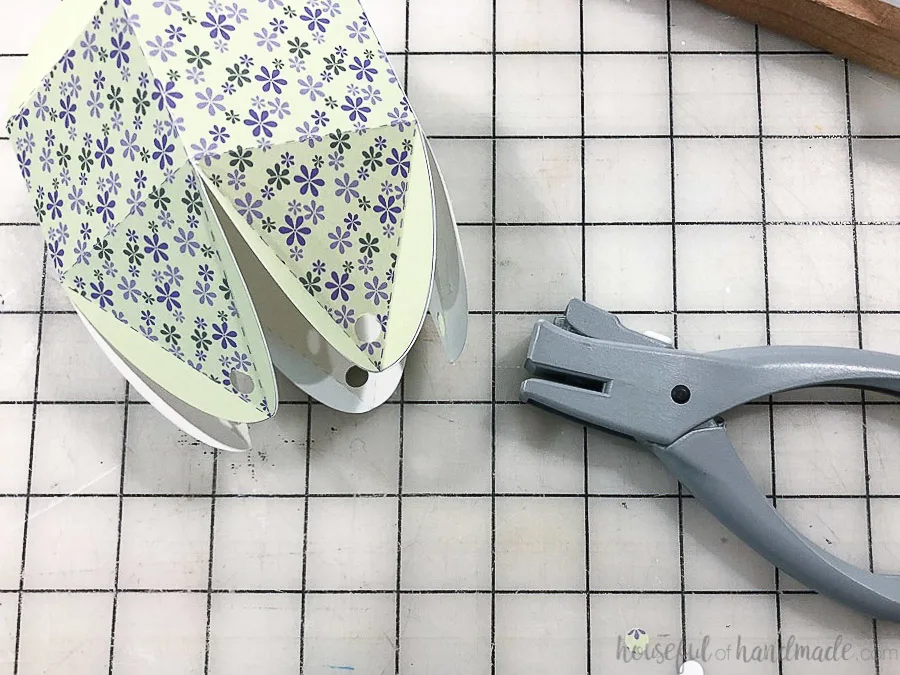
For the bottom of the egg shaped box, add glue to the tabs and pinch to secure. Repeat all around until it’s closed up.


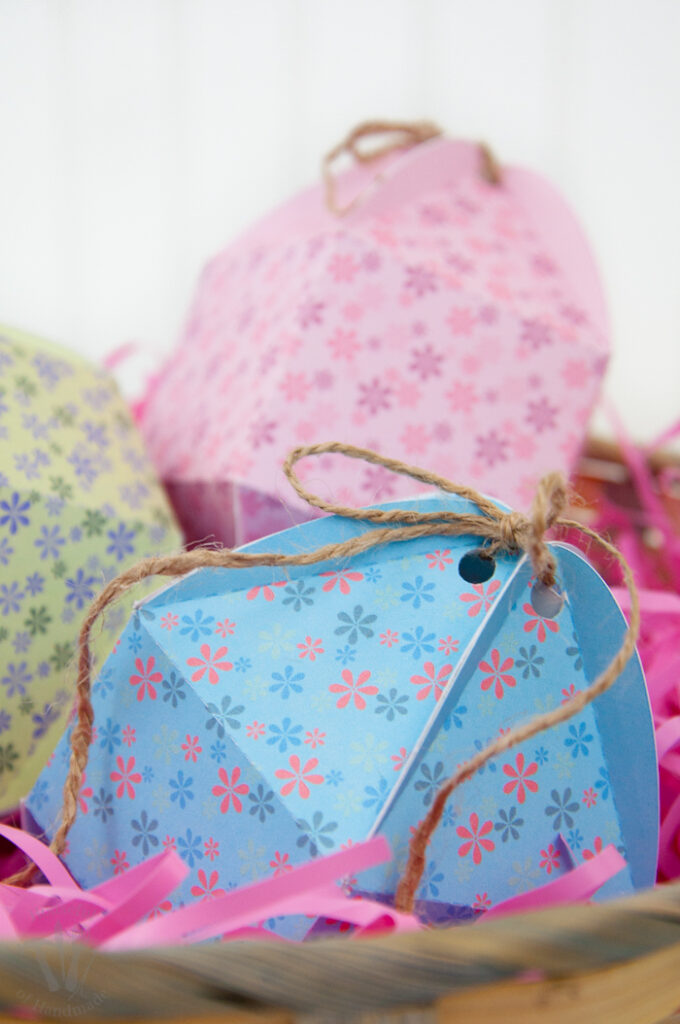
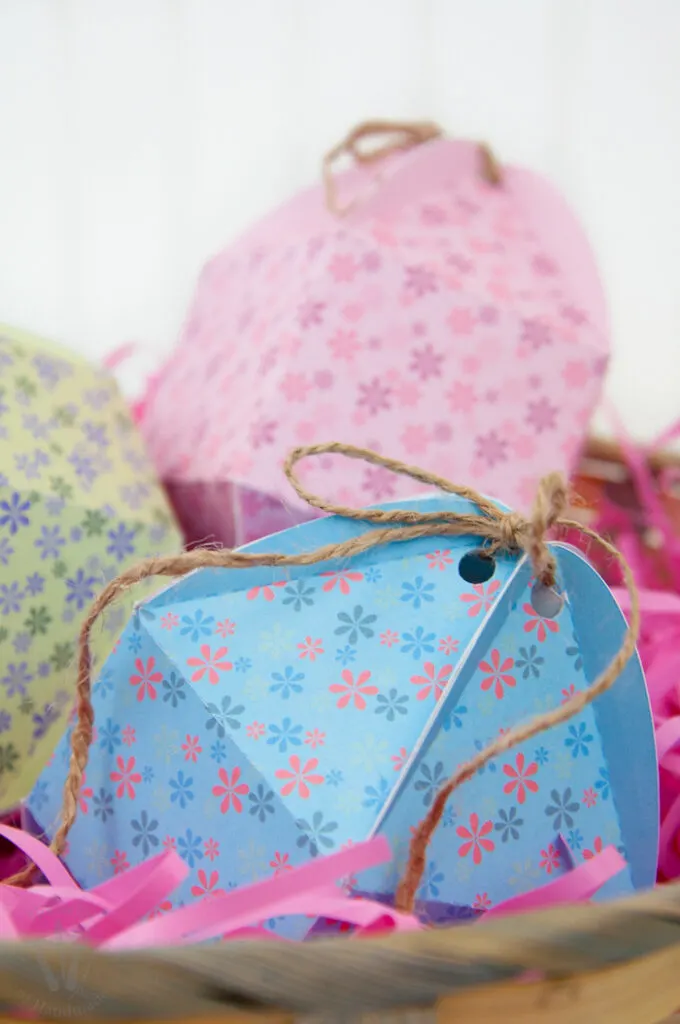
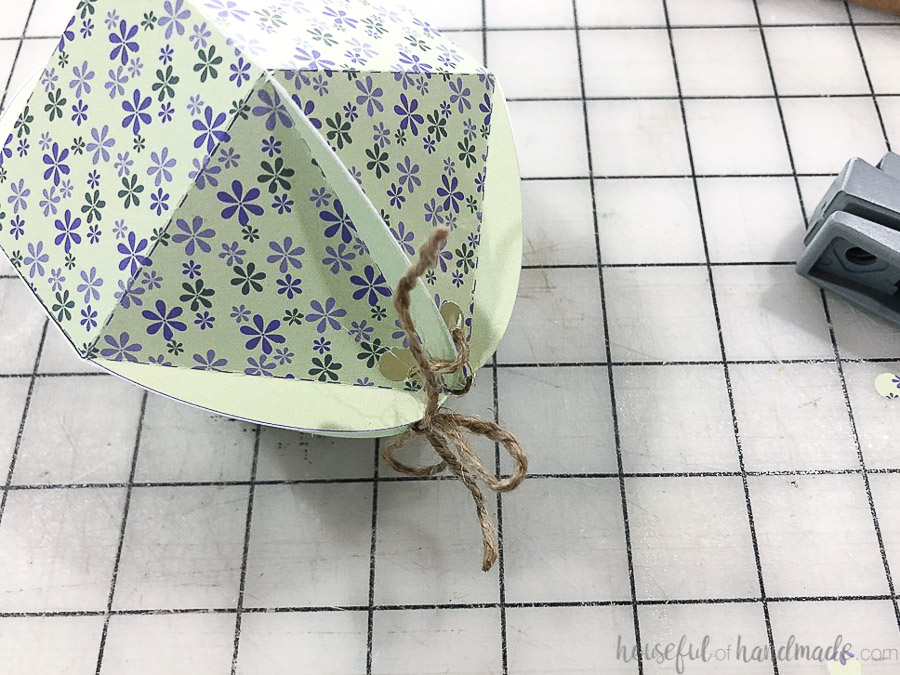
To close up the top, you can fill the egg shaped box up and glue to the tabs closed. Better to keep people out until Easter!
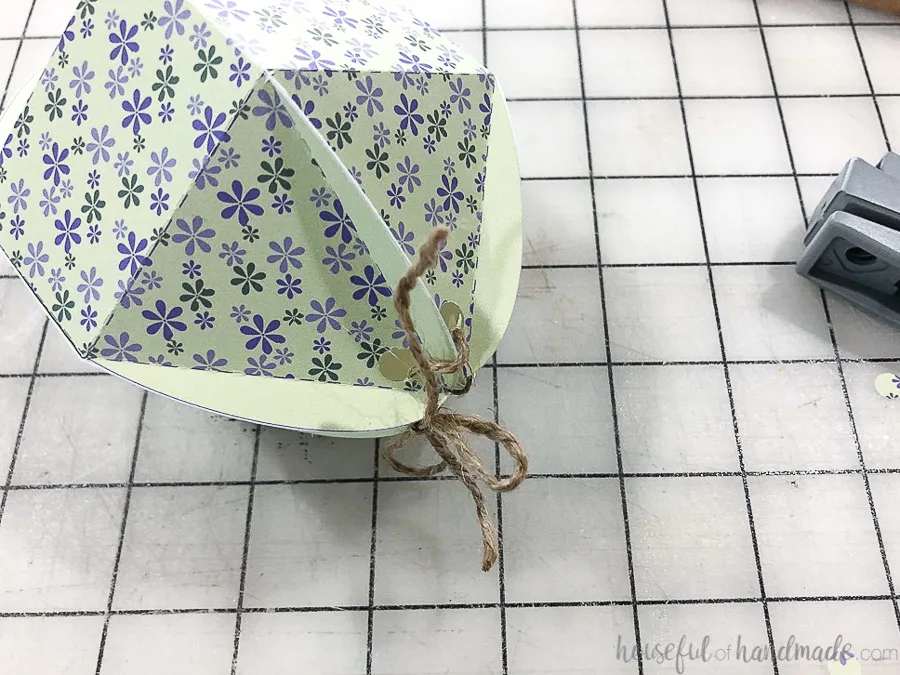
Or you can make them reusable by punching a hole in the top of each flap.

Then string a piece of twine or ribbon through the holes and tie to close.
Now all the is left is to fill them up for Easter! These make great eggs for an Easter egg hunt or to hold items in an Easter Basket!


And to finish off your Easter decorations, why not print out the cute Easter bunny art print or check out these flower seed packet art prints.


How to Make Egg Shaped Boxes
What's Easter without candy filled eggs? These colorful printable egg shaped boxes are perfect for filling your Easter basket with the best treats or toys.
Materials
- Egg shaped boxes template
- White cardstock
- Glue sticks
- Twine
Tools
Instructions
- Cut out the egg shaped box templates along the solid lines.
- Score along the dotted lines for crisp folds (or cut them as dotted with an electronic cutting machine).
- Fold along all the dotted lines.
- Glue the tabs on the smaller piece to the larger piece to make a circle.
- To close the bottom of the egg shaped box, add glue to the tabs and pinch to secure.
- Repeat all on all tabs.
- To close up the top, fill the egg shaped box up and glue to the tabs closed, or make them reusable by punching a hole in the top of each flap.
- Tie it closed with a piece of twine or ribbon.
Happy Easter!