Sew your own amazing purse that looks like a vintage flour sack with this printable pattern.
I’m so excited to share this project! I first had the idea to make this handmade purse last fall, I sketched it out in my idea book and thought about it a lot!
Then Thanksgiving happened, then Christmas, then I started decorating for spring and it just kept getting pushed back for other seasonal projects.
But I never forgot about it, it was still there in the back of my mind and I was excited about it. So after Easter was over, I decided I needed to set aside some time for sewing and actually make this amazing new purse.
This post may contain affiliate links. As an Amazon Associate I earn from qualifying purchases. Click here to read my full disclosure policy.
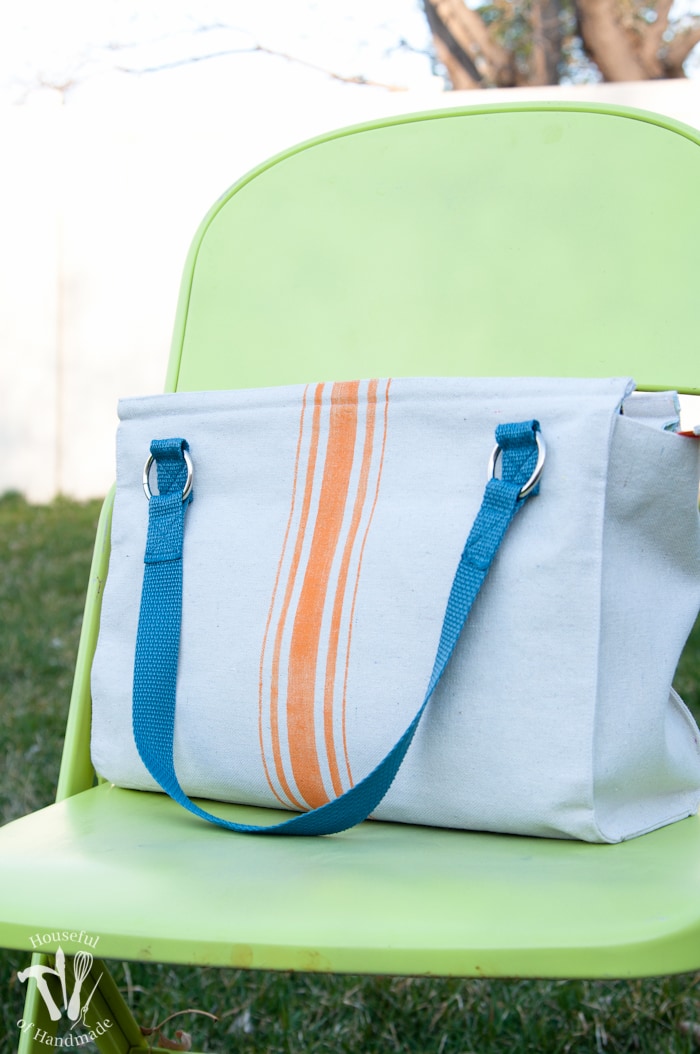
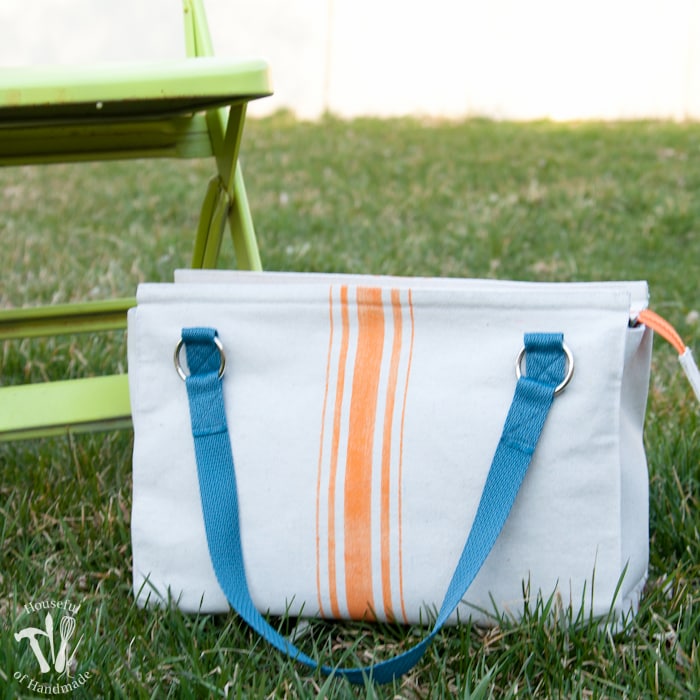
Vintage Grain Sack Inspired Purse
This purse is inspired by a vintage grain sack. I even thought about painting a flour inspired label on the front. But as you can see, decided against it.
Instead I let the simple stripes from the grain sack be the main design.
You could use grain sack fabric, you can find it on Etsy here. But I didn’t want to wait for shipping.
I just happened to have more drop cloth left over from my spring door pennant and monogrammed Christmas stockings. It was the perfect solution to get to sewing today. And I knew it would give me the look I wanted and hold up to regular use.
To make the drop cloth fabric look like a vintage grain sack, I painted stripes down the center of my purse pieces before sewing.
Using a thin painters tape, you can create the iconic grain sack stripes on any fabric, including inexpensive drop cloth! And bonus, you can paint the grain sack stripes in any color you want.
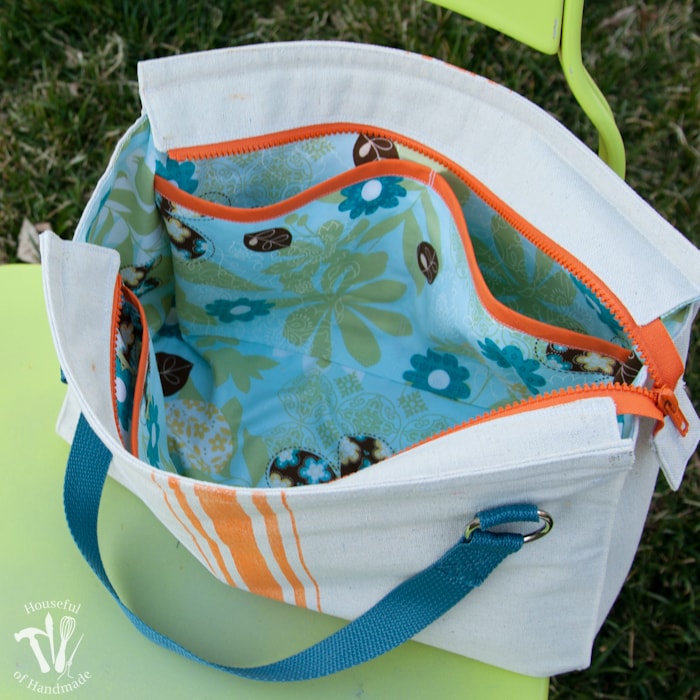
Handmade Purse with Pockets
Pockets are a must for keeping your purse organized! I have a few items that must always be kept in their specified spot so I can easily find them.
So I designed this purse sewing. pattern with lots of pockets.
There are 4 pockets on the inside of the purse to keep things organized. Everything has it’s own place. It also adds another spot to create a design element with a pop of color along the top of the pockets.
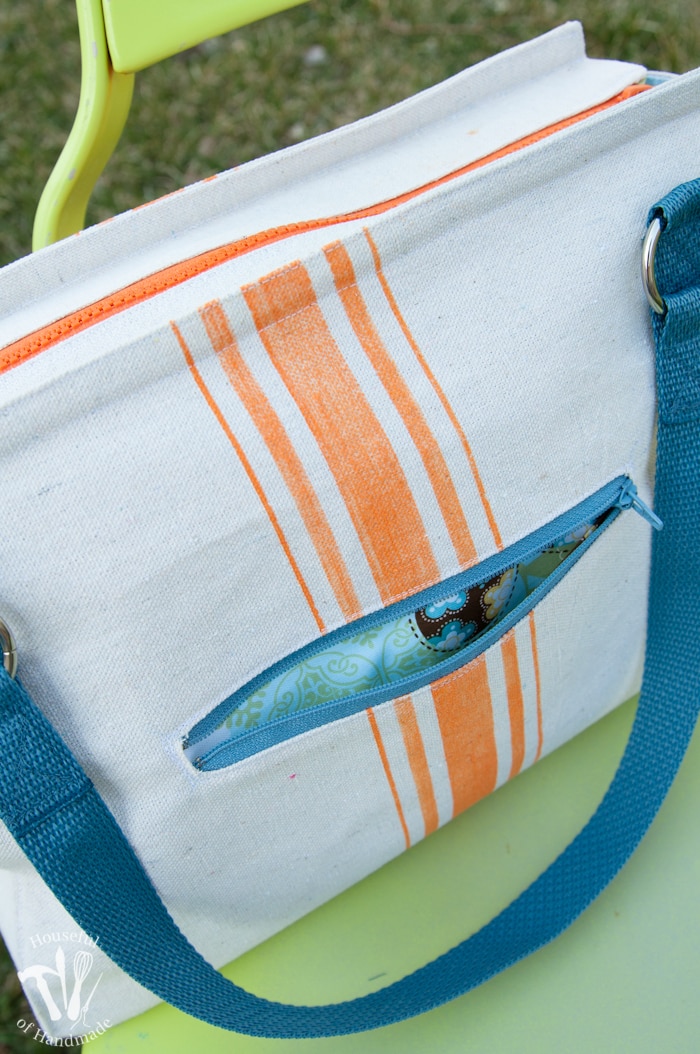
And for those really important to find items (keys and phone), I added a pocket to the back of the purse.
It’s the perfect place to quickly stash things. And they won’t get lost in the big pockets for easy retrieval.
How long does it take to sew the handbag?
This handmade purse took me about 4 total hours to sew. I was figuring things out a bit as I was going, and I am an advanced seamstress.
For a novice seamstress, plan about 4-6 hours to complete your purse. For a more advanced sewer, you can complete it in 3-4 hours.
Please note: This is not a purse pattern for a first time sewer. I took lots of pictures to help you through the process, but there are some tight corners and curves that you need to know how to maneuver on the sewing machine before jumping into this project.
If you are ready to jump in, let’s get going (this is going to be a long tutorial with lots of pictures).
How to Sew a Handmade Purse
Supplies:
- Handmade purse pattern
- The purse template was free to my subscribers until 11/25/2018. Now they are available to purchase in the shop. Make sure to subscribe so you will be notified of new freebies!
- 3/4 yard drop cloth or heavy weight fabric (outer fabric)
- 1 yard medium weight fabric (lining fabric)
- 15” x 4” double sided fusible web
- 1 yards bias tape
- 2 yards 1 1/4” nylon strapping
- 7 in zipper
- 16 in zipper
- 4 metal purse rings
- Fabric tracing paper
- Optional: fabric paint and 1/4″ painters tape to make grain sack stripes
Printable Purse Template
The template is printed on 11 letter sized pages. You can print easily from a home printer or send to an office store to print.
After you’ve printed the pattern, tape together all the pieces matching up the red triangles by number (1A will match next to 1B). You will have to cut away the border on one side to line them up.
Separate the different pattern pieces then cut them out of your fabrics. Make sure to clip notches and mark the green dots.
You will need to transfer the back pocket zipper opening to one side of the front/bottom/back piece. I did this by using some fabric tracing paper taped to the back of the pattern and then ran along the cut lines with my tracing wheel.
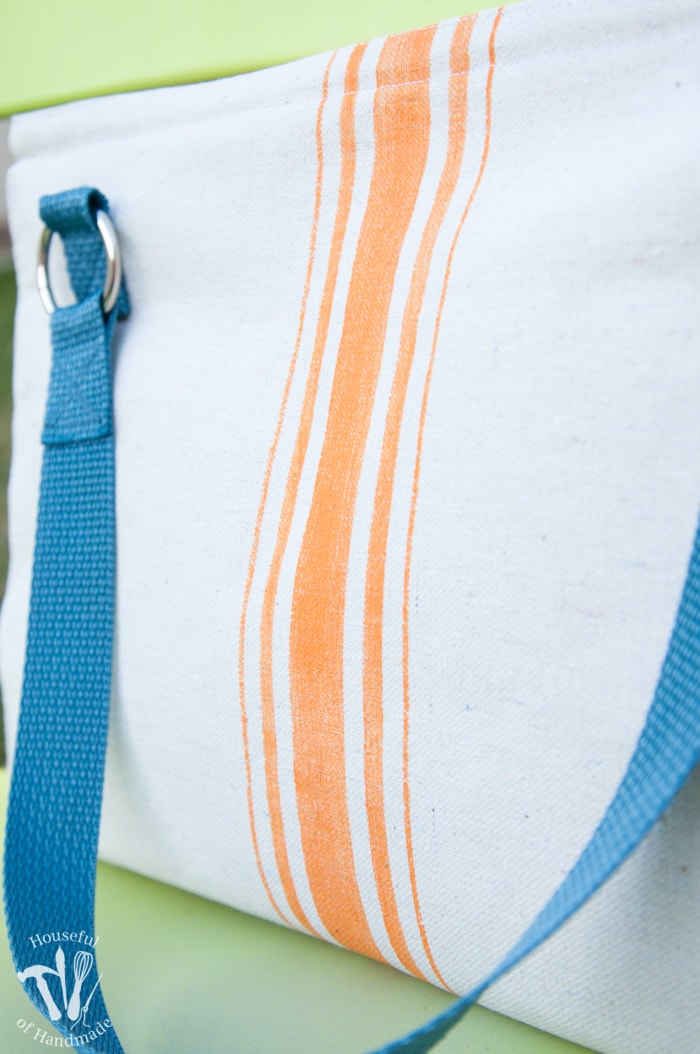
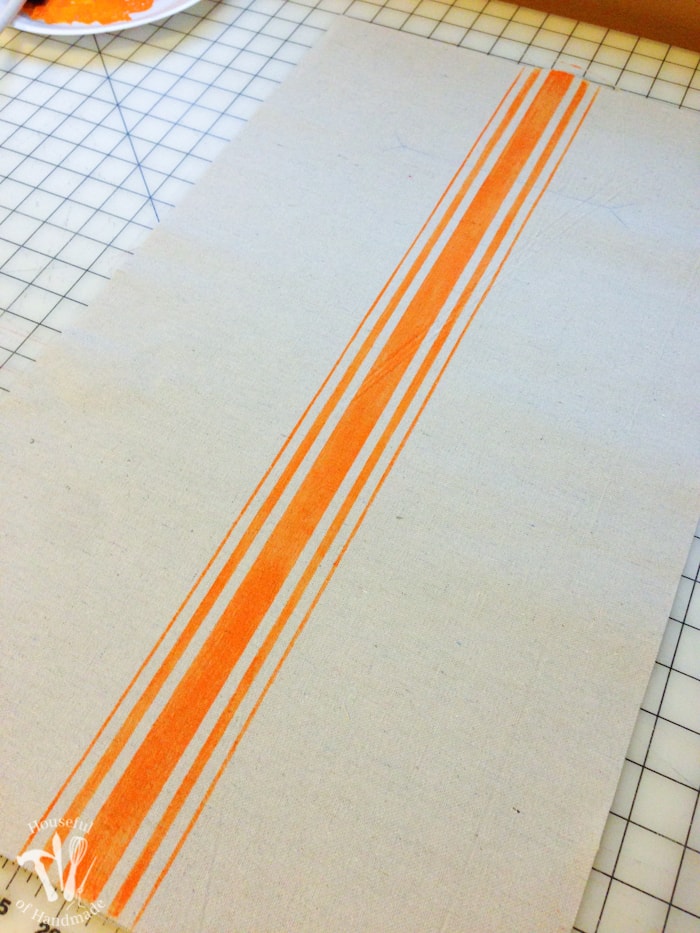
Add the Grain Sack Stripes
Once everything is cut and marked, it’s time to add the vintage flour sack detail.
Using the 1/4″ blue painters tape, design your stripes on the front of the piece marked Front/Bottom/Back. Painted the stripes with fabric paint using a foam brush to make it look a little worn and vintage.
Let it dry before removing the tape to admire your work!
Then iron the stripes with a hot, dry iron to seal in the fabric paint. Use a pressing cloth (or scrap of fabric) to protect your iron.
Now it’s time to sew!
Sew the Inside Pockets & Lining
All seam allowances are 1/2″ unless otherwise noted.
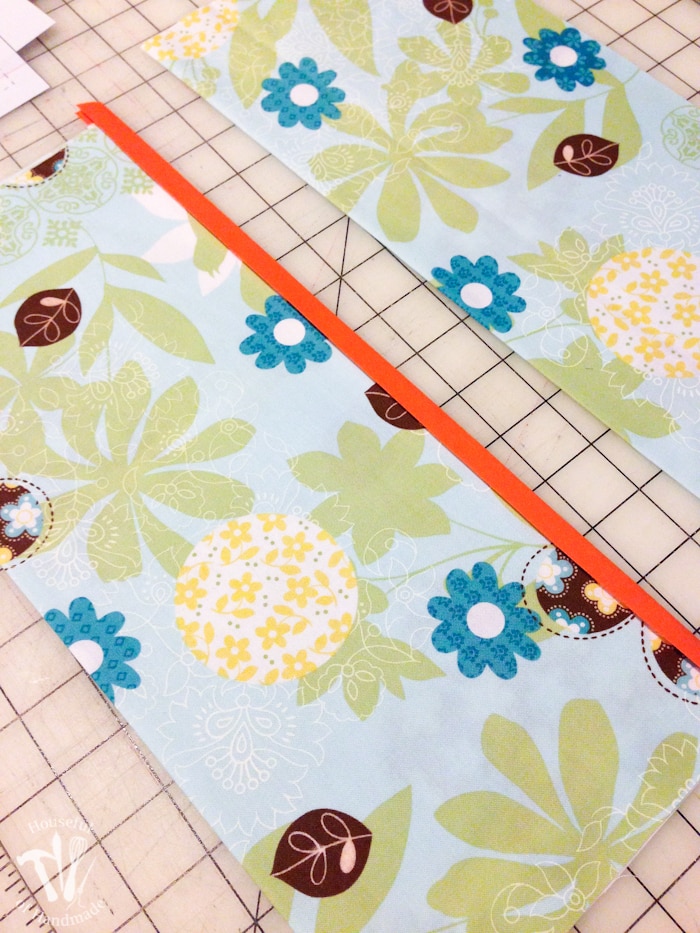
If you want pockets on both sides of the purse (like I did), cut 2, if you only want them on one side, cut 1.
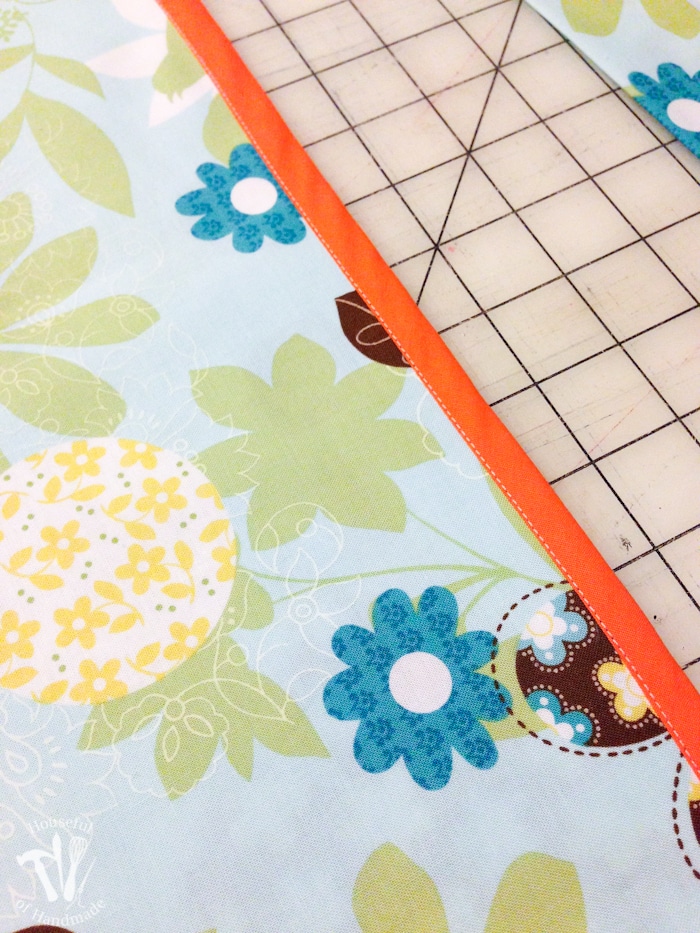
Fold the inside pocket piece in half with the right sides out. Iron the seam flat. Then sandwich the unfinished seams inside a strip of bias tape.
Sew down the bias tape to enclose the edges of the fabric inside.
Now line up the pocket pieces with the front/bottom/back piece. The top of the pockets (the side with the bias tape on it) will be lined up along the green dotted line. Pin it well.
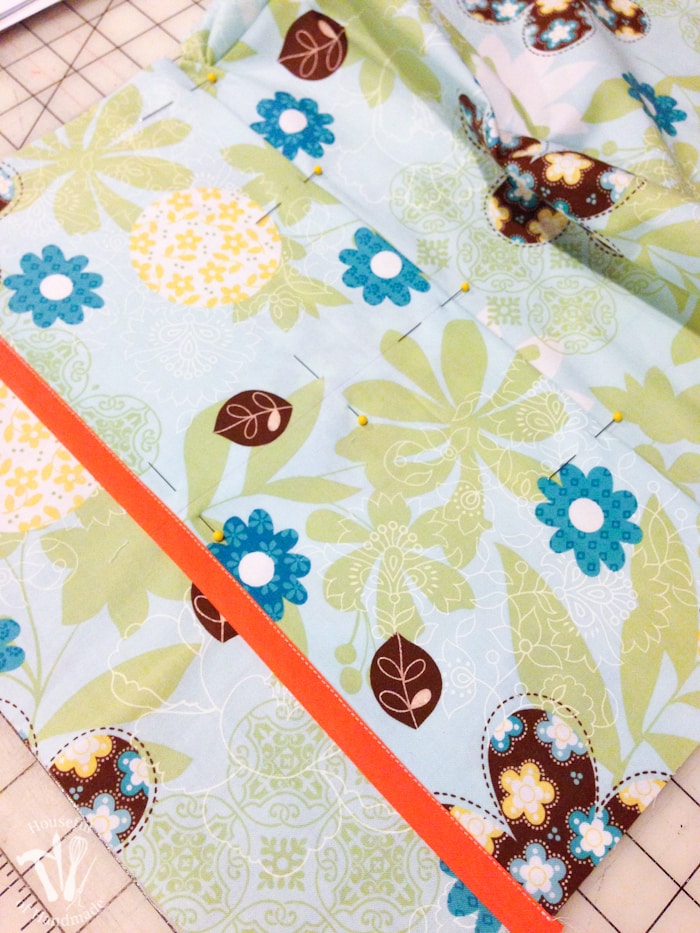
Sew along the entire bottom of the pocket piece. I did two seams 1/8″ apart for extra strength.
Then sew the center from the top of the pocket to the bottom of the pocket to split the one large pocket into 2. Again, I sewed 2 seams 1/8″ apart.
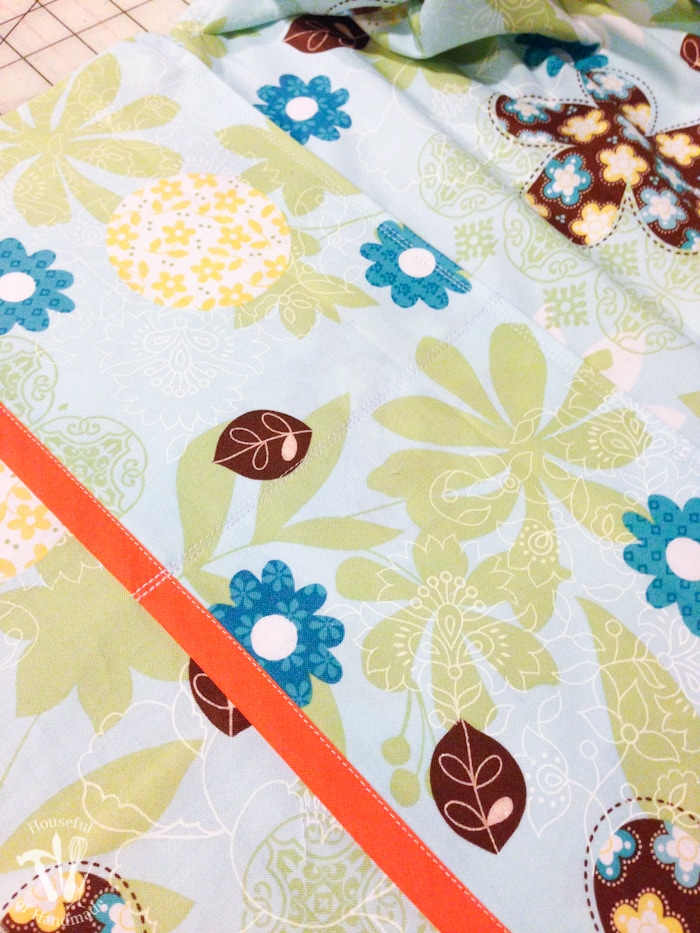
Next, line up the front/bottom/back piece (with the pockets laying flat) with a side piece. Line up the notches and green dots.
Sew from green dot to green dot, enclosing the edge of the pockets into the side seam.

Then repeat on the other side.
Set lining aside.
Sew Outside Purse Pocket
First we will add the zipper. Cut along the solid lines you traced at the beginning, then fold along the dotted lines and press. You will have a nice flat opening in the purse outside fabric.
Center a 7″ zipper behind the opening and pin into place. Sew all around the opening 1/8″ away from the center edge.
Pin together the outside pocket lining pieces and sew from green dot all around 3 sides to green dot.
Fold over the unsewn edge on one half and press flat.
Pin the folded over seam to the bottom of the zipper on the back side of the front/bottom/back piece. Then sew along the bottom line you sewed to secure the zipper, but make sure you only catch the one folded over edge.
I do this by placing the unfolded side of the pocket lining under my sewing machine arm to keep it out of the way.
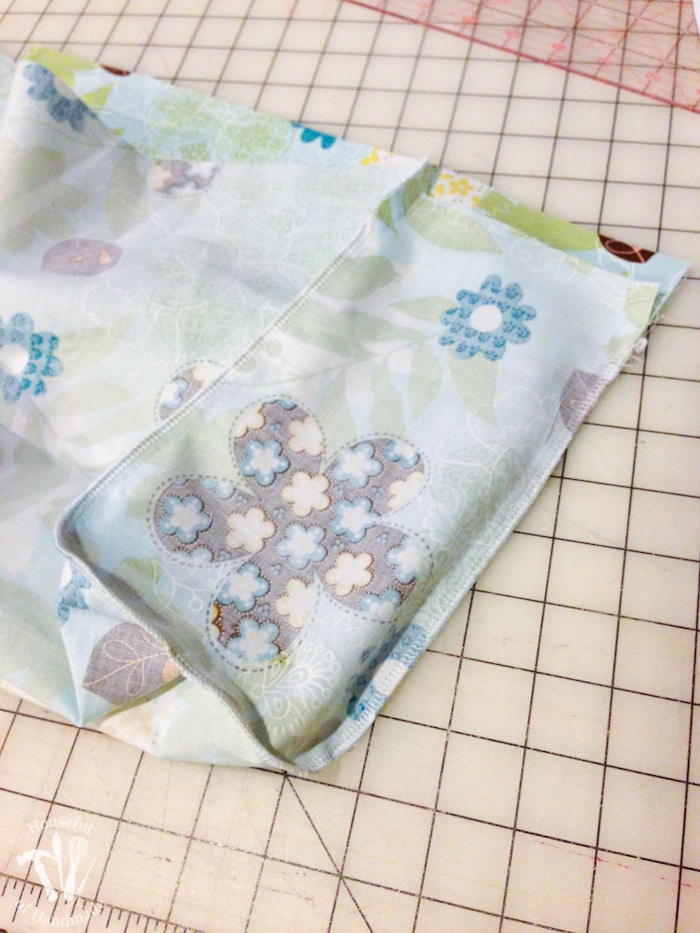
Next you will flatten the unfolded side of the pocket lining and sew the remaining 3 sides of the box you sewed to secure the zipper. This will secure the top of the pocket lining to the purse.
You can unzip your pocket now and see the fun lining fabric.
Sew the Outside of the Purse
Start with the bottom reinforcement piece and iron the fusible web to the back of the fabric.
Then fold over 1/2″ on each long side of the piece and iron flat.
Pin it to the center of the front/bottom/back piece, lining up the notches. Sew along both folded sides 1/4″ away from the edge.
On the outer side pieces, fold the top down 1/2″ (at the green dots) and iron flat. Then line up a side piece with the side of the front/bottom/back piece, lining up the notches and green dots.
While sewing, make sure to keep the side pieces folded.
Repeat on the other side.
To give some dimension to the sides of the purse, I topstitched the edges of the side pieces 1/8″ in from the edge. It gives the purse sides some structure too.
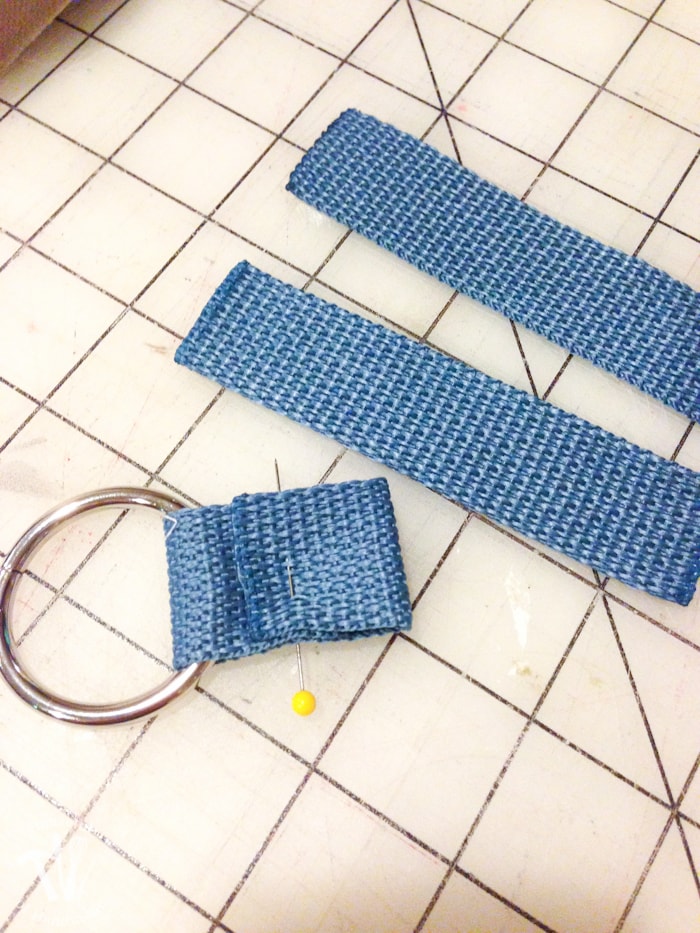
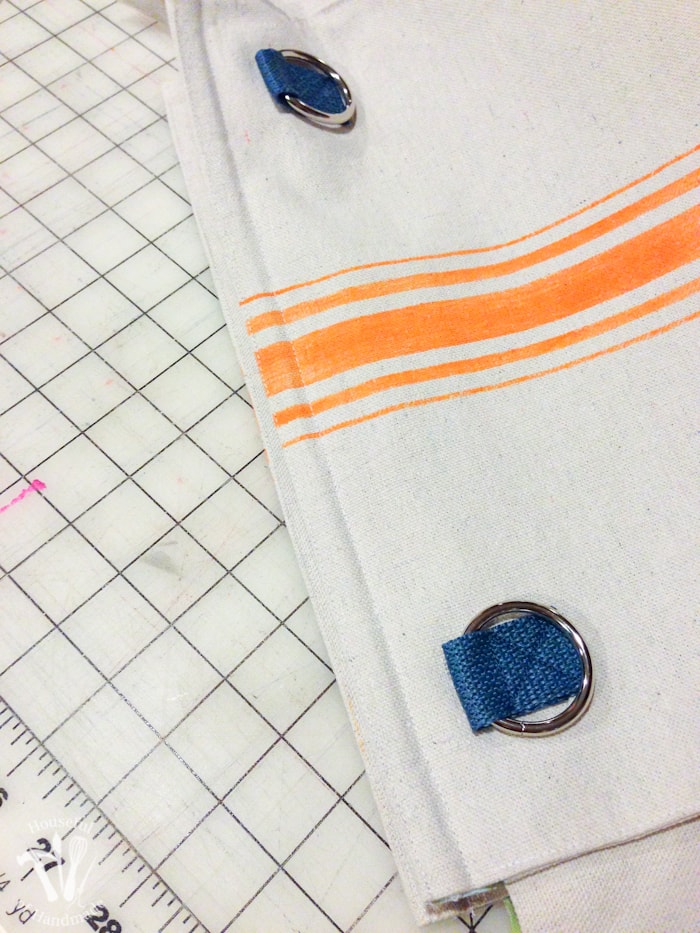
Attach Rings for the Handles
You can cut out the pattern piece for the handle tabs and sew them into a tube with right sides together, then turn it right sides out. Or you can do what I did and use a 4″ piece of the 1 1/4″ strapping that I used for the handles.
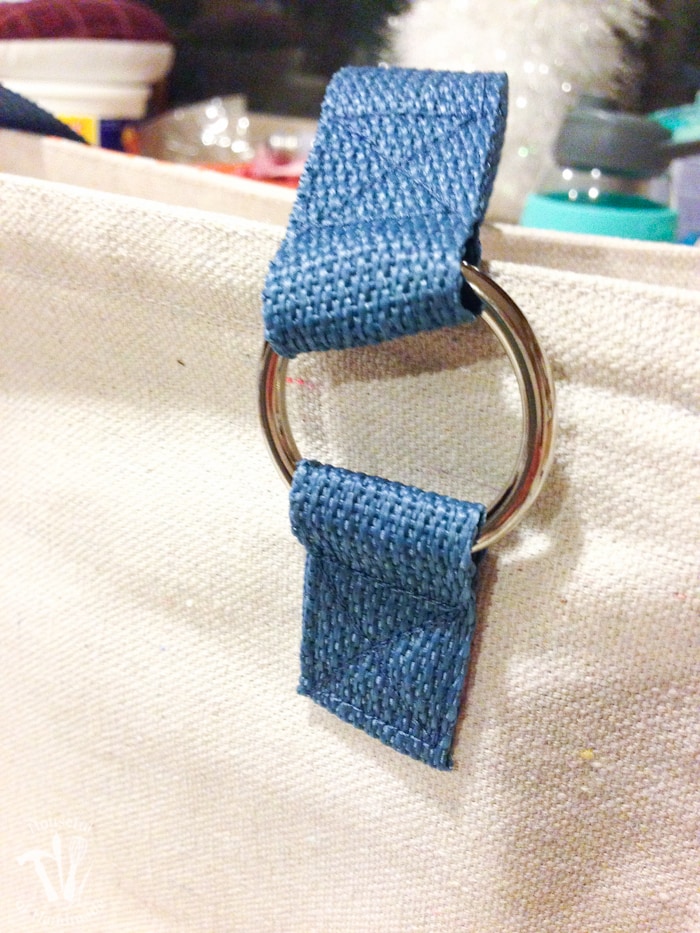
Fold the handle tabs around the metal purse rings and pin.
Line the handle tabs up on the front and back of the purse.
You may notice that I already have the lining attached in this picture (oops). You want to make sure to sew the handle tabs on before attaching the lining (you know, do as I say not as I do).
Line the handle tabs 1 1/2″ down from the top and 1 1/2″ in from the sides.
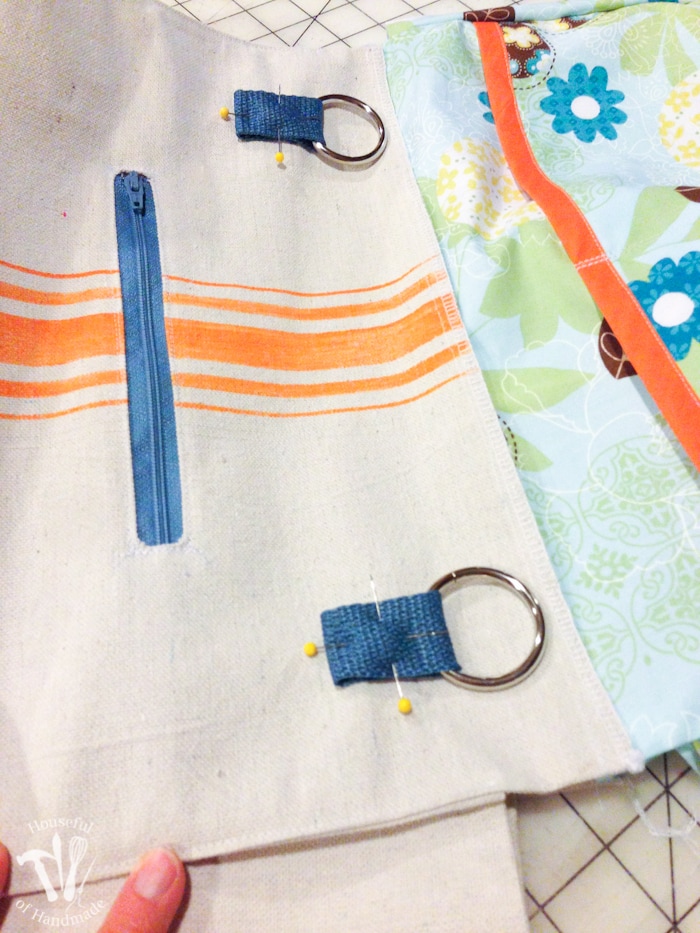
Pin into place and then sew securely.
I sewed around the tab 1/4″ in from the edge then sewed an X inside.
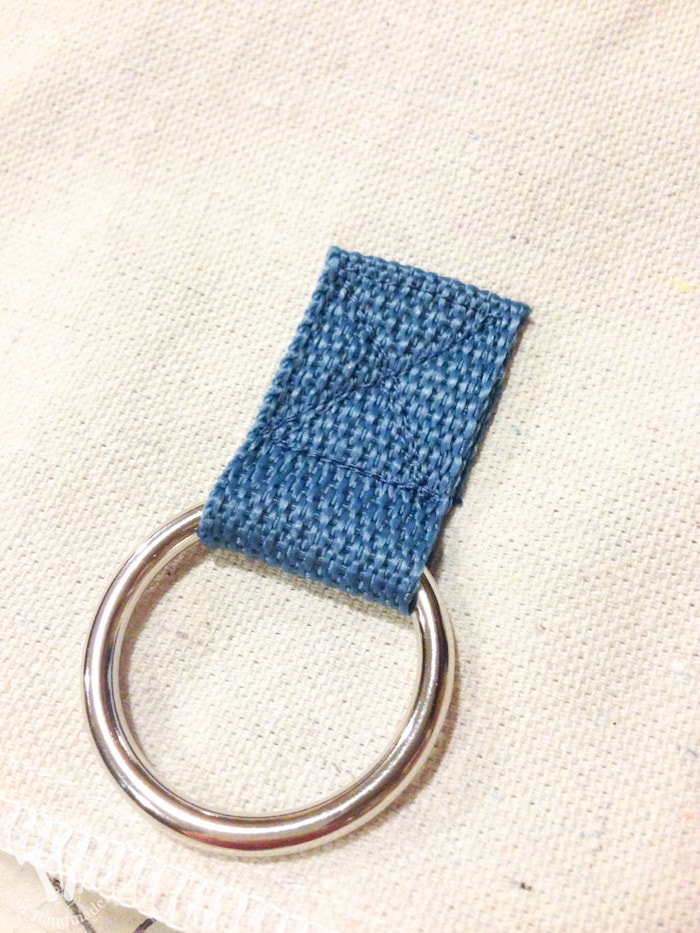
Repeat for the other 3 handle tabs.
Attach the Lining
Put the lining inside the purse with wrong sides touching. Then sew across the top on both sides with a 1/4″ seam allowance.
Create the Top Zipper Closure
Line up the lining with the outer fabric and sew the short side edge from the edge to the green dot (all but 1/2″ of the seam). Only do this on one side.
Then sew the long side from the green dot to the edge and the other short side with a basting stitch and no backstitching.
Repeat for the other piece making sure the pieces mirror each other (the regular stitched side is the opposite side).
Clip the two corners. Then turn the piece so the right sides are out.
Press the pieces nice and flat.
Now remove the basting stitches along the one long side and the one short side. Your pieces will be attached on the one edge and have a nice flat fold on the other two sides.
Take you zipper and sandwich it inside the one side of the piece. The top of the zipper should be at the sewn edge and the bottom of the zipper will extend past the end of the piece.
Sew along the two short sides and the long side by the zipper 1/4″ away from the edge to secure the zipper.
Repeat on the other side.
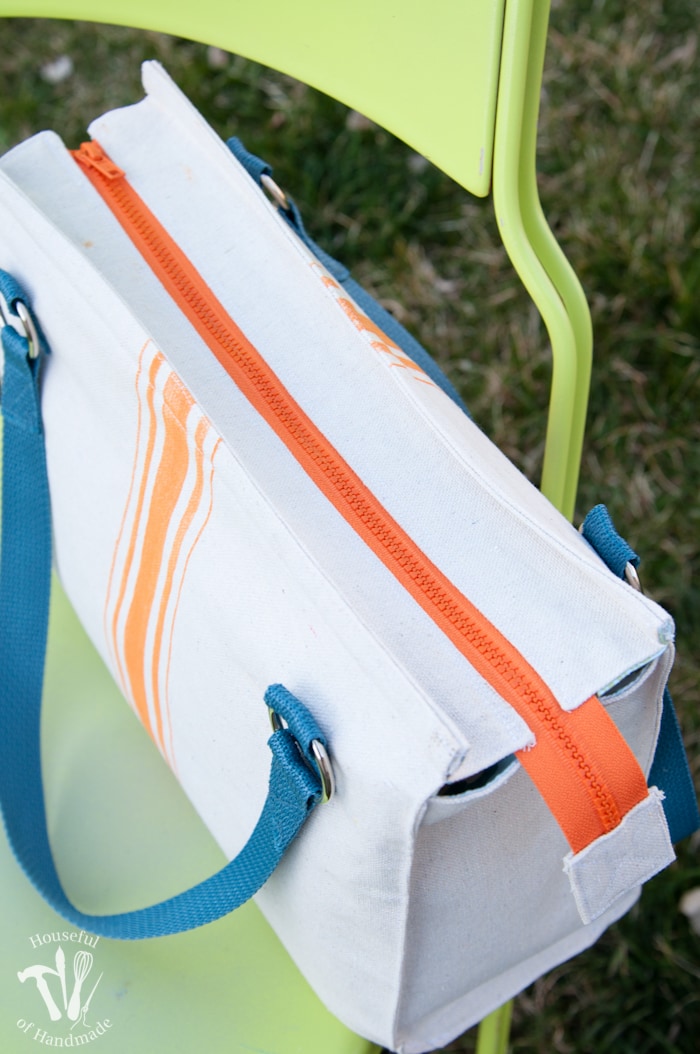
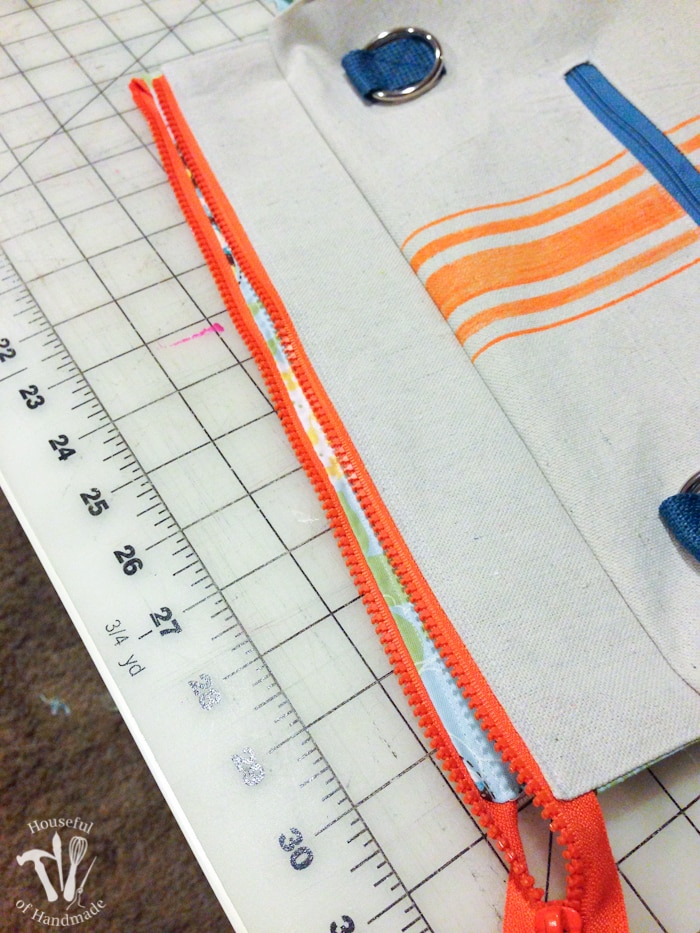
You only need a 14-16″ zipper for the top of the purse, but I wanted the look of the larger teeth and could only find it in 24″ length.
Once I got the zipper sewn into the piece I zipped it up and then sewed across the bottom a few inches below edge. Then I cut the excess zipper off.
To make the back of the cut zipper look finished, fold the sides and the top of the zipper tab piece in 1/2″ and ironed it flat into a little box.
Place it over the bottom of the zipper and sewed around the edges and and X over the center to secure it.
Line the top of the zipper pieces with the top of the purse and sew with a 1/4″ seam allowance.
I could have ironed it and left it there, but I wanted to add some more dimension and structure to the top.
So I topstitched along the top line 1/2″ from the edge and 1/8″ from the edge. This also enclosed the entire seam to hide the unfinished edges.
You are almost done…
Add Handles to the Purse
Finish the purse by adding the handles. I used a 24″ piece of strapping and overlapped it 1 3/4 inches to give plenty of room to sew a box and X to secure it.
Also, if wanted, use a little hand stitching to secure the lining to the outer fabric on the top of the sides.
And now you are done!
Pat yourself on the back, grab yourself a glass of wine, and then fill up your purse with all your stuff because it’s time to go out and show it off.

Aud
Sunday 27th of February 2022
What are the dimensions of this bag please?
Magnólia
Thursday 2nd of December 2021
Obrigada pelo tutorial. Belíssima bolsa
Barbara Raisbeck
Sunday 21st of July 2019
Thanks for the tutorial. Looking forward to your newsletter
Kati
Monday 22nd of July 2019
Thanks Barbara! Enjoy your new project.
Ivana Costa Nasser
Friday 19th of April 2019
Hello Kati! I´m Ivana, from Brazil´s Southern Region (60 years old!). I love to sew bags and I´m very happy to try your template! I usually produce them to a charity institution, so we gather all material from different friends (recycling fabrics and all sort of accessories) Thank you for sharing it! Congrats and Happy Easter to you and your family! Ivana
Kati
Tuesday 23rd of April 2019
What an amazing project! I am so happy my bag pattern can help. Enjoy!
Monique
Monday 25th of February 2019
Bonjour Kati je ne trouve pas l'endroit ou je dois mettre le mot de passe pour avoir le tutoriel Pouvez vous m'aider? merci beaucoup
Kati
Monday 25th of February 2019
You do not put the password in the tutorial, you will need to go to the Subscriber Library and enter the password there to get access to the downloads.