
Decorate the handmade dollhouse exterior to look like a country cottage.
Beautiful and inexpensive dollhouse exterior decorating ideas including faux brick and shingles.
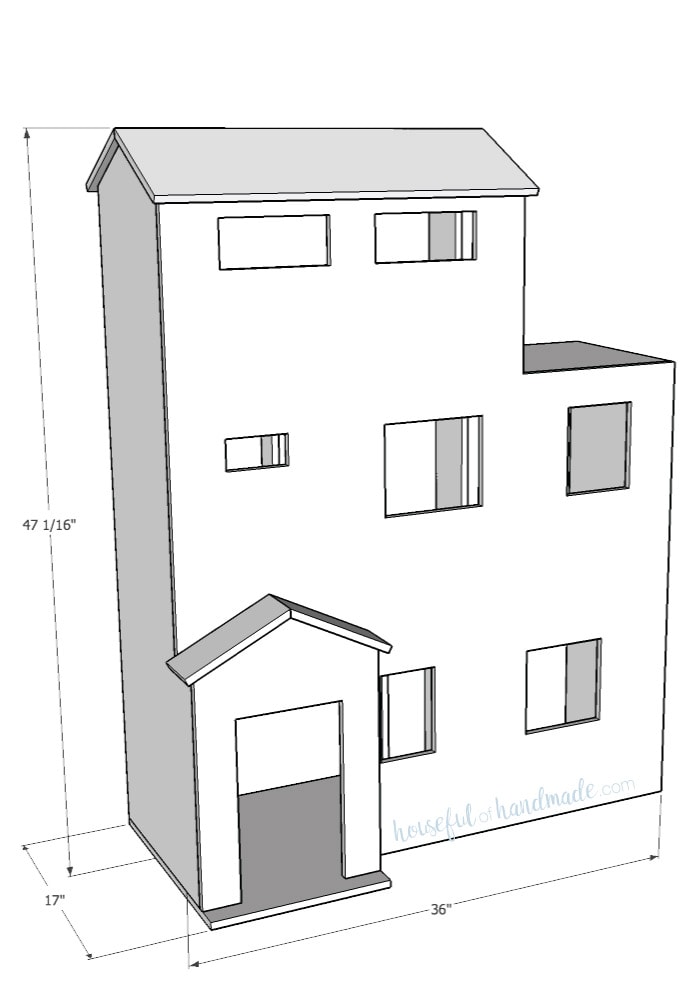
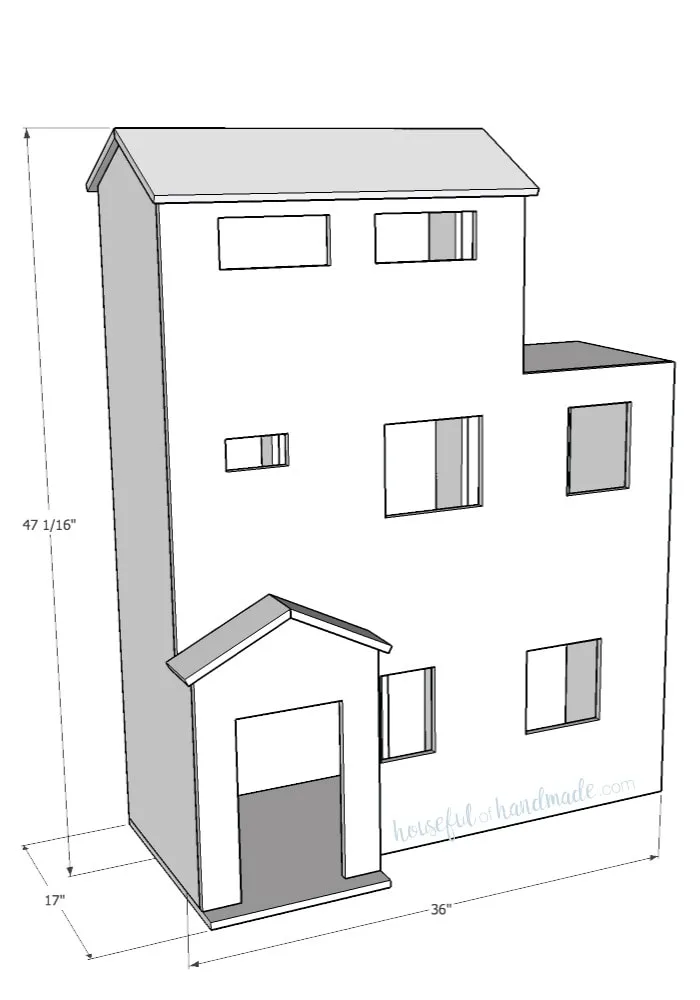
I am having a blast making a handmade dollhouse for my daughter for Christmas. This dollhouse is scaled to fit 11″ dolls.
The dollhouse exterior was a large flat piece of wood, with just a little entryway for architectural detail. I knew I wanted to add some dimension to the front of the house and I did that with brick paper and wood trim.
This post may contain affiliate links. As an Amazon Associate I earn from qualifying purchases. Click here to read my full disclosure policy.

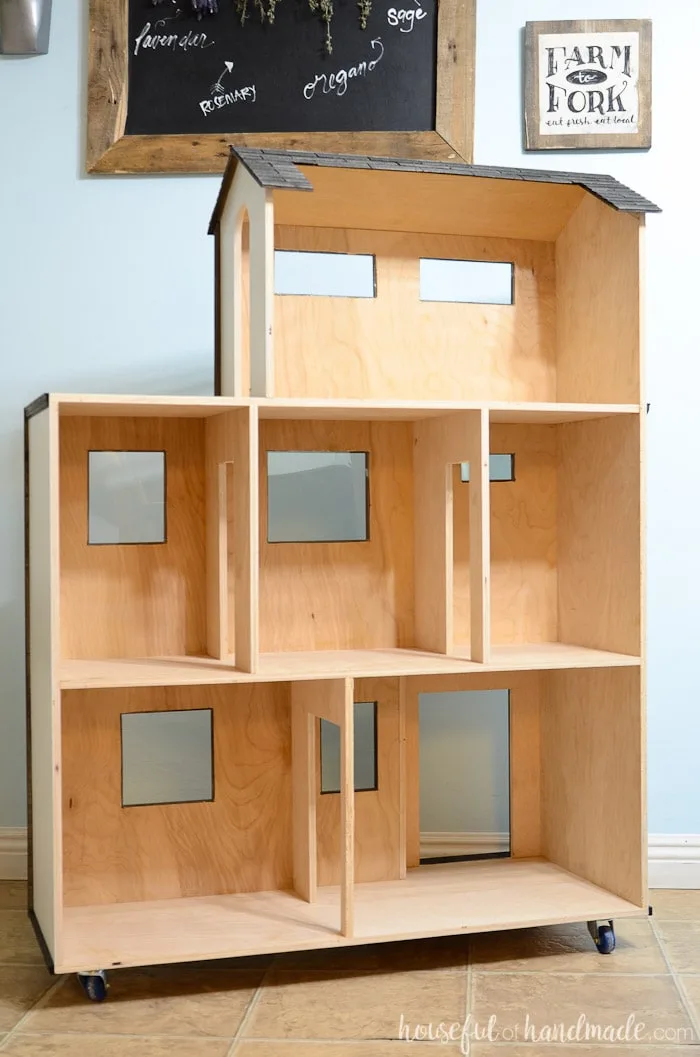
If you missed the first post for the handmade dollhouse, make sure to check out the wooden dollhouse build here.
This entire house was built out of 1/2″ plywood in just an afternoon. It’s an easy build!
But once the dollhouse is built, the fun part happens… decorating it.
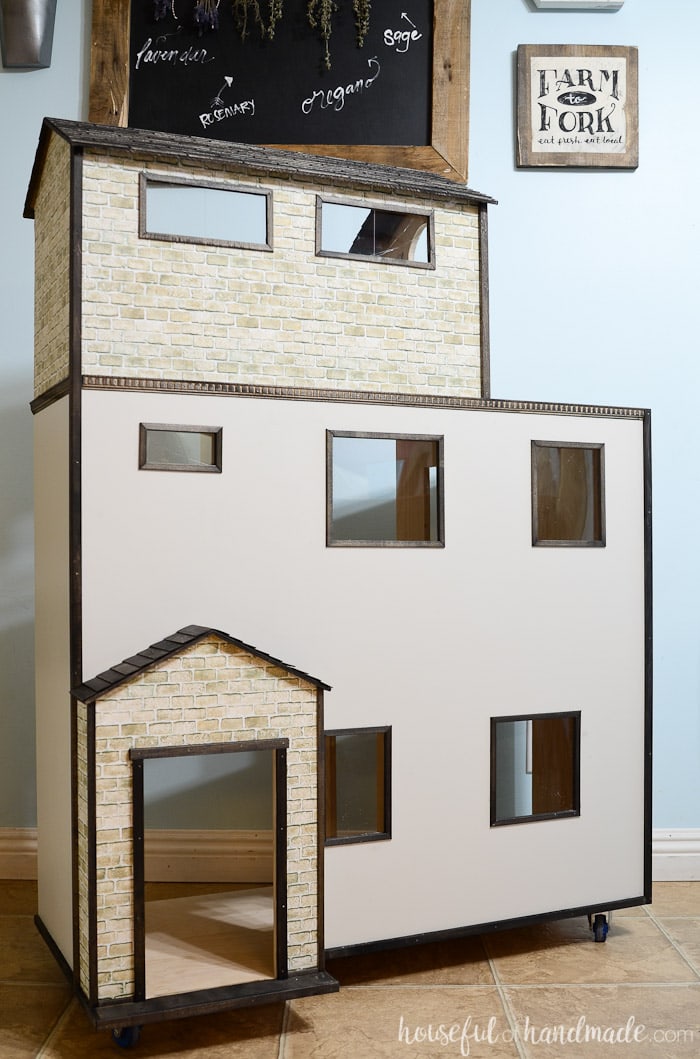
I knew I wanted to add some architectural details to the front of the playhouse. However I still wanted to keep it simple.
The important thing is to allow my daughter the perfect place for creative play. And of course I didn’t want to spend a fortune.
Grab the premium printable PDF plans here!
Premium plans include:
- Recommended Tools
- Materials list
- Detailed plywood cut diagrams
- Step-by-step instructions with 3D renderings
- Helpful resources
- BONUS: 3D SketchUp file
Adding Brick Detail
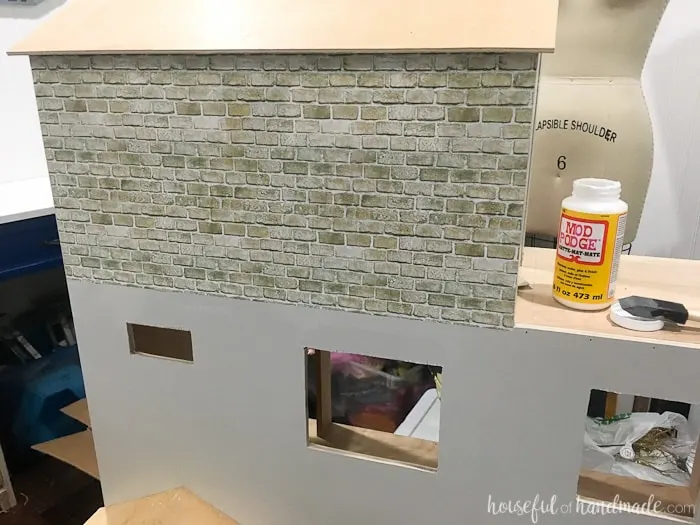
I decided to add some faux brick texture to the house with scrapbook paper. I went looking for the perfect brick pattern and in the preprinted papers, there was nothing I liked.
Actually I only found 2 different brick patterns and they were both reminded me of an 80s basement fireplace. Not the look I was going for.
So I decided to look on Etsy for digital scrapbook paper. Jackpot! I found the perfect brick for my vision and then layered the paper so it was actually 18″ x 24″ instead of just 12″ x 12″.
Then I printed it at my local Office Depot.

Before attaching the faux brick, I painted the dollhouse exterior with 2 coats of paint. I used left over griege paint from our Living Room remodel.
Then I used Mod Podge to glue the brick paper down to the parts of the house I wanted. It took 2 18″ x 24″ papers to cover the top of the house and the front entryway.
And I have a little left over that I think might become a fireplace for the living room (hopefully I get time to do it before Christmas).

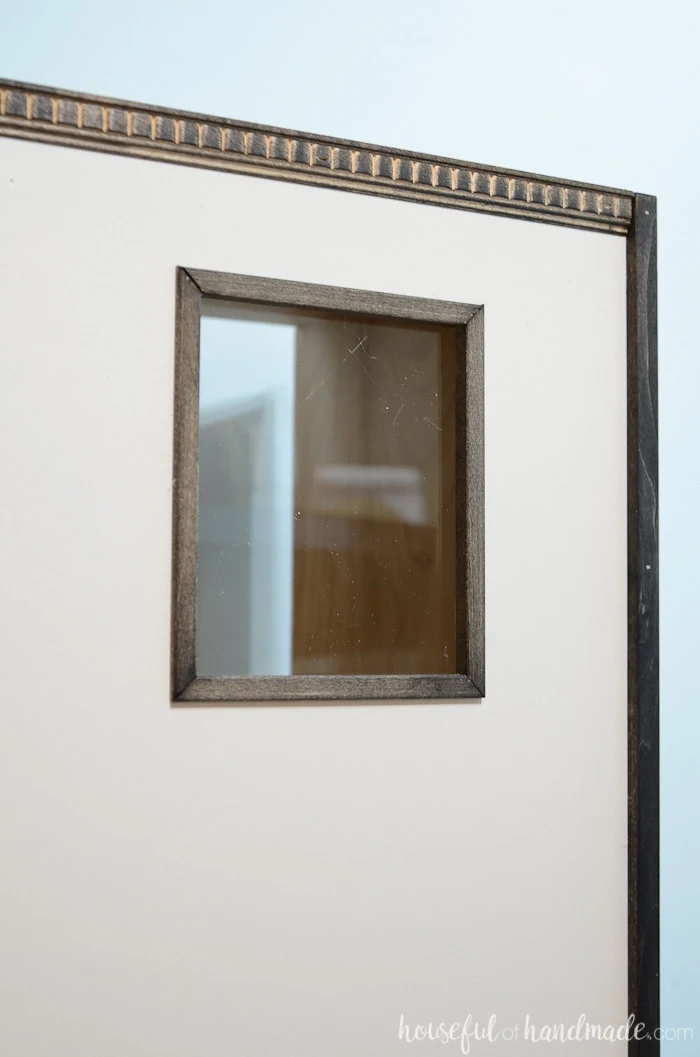
Adding Dimension with Wood Trim
Next I used wood trim to help cover the less than beautiful corners and paper seams. Because I have always loved dental moulding, I decided I would use it as a decorative element on the house right under the brick.
The 4′ piece of moulding was the most expensive at $3.09 a piece so I limited my use to just around the brick (and the left overs will be used to make the perfect fireplace mantle!).
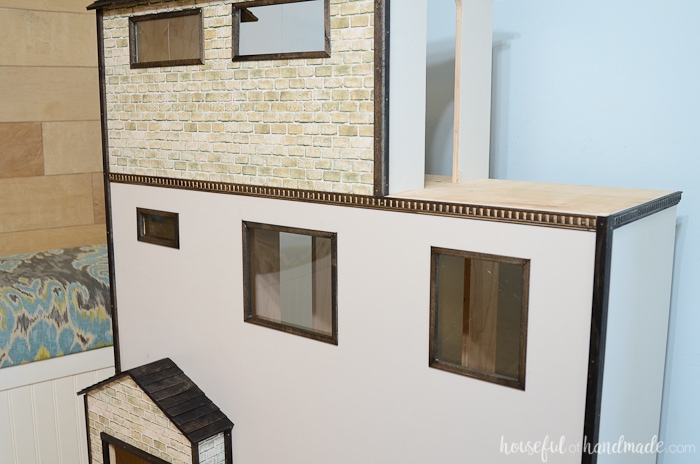
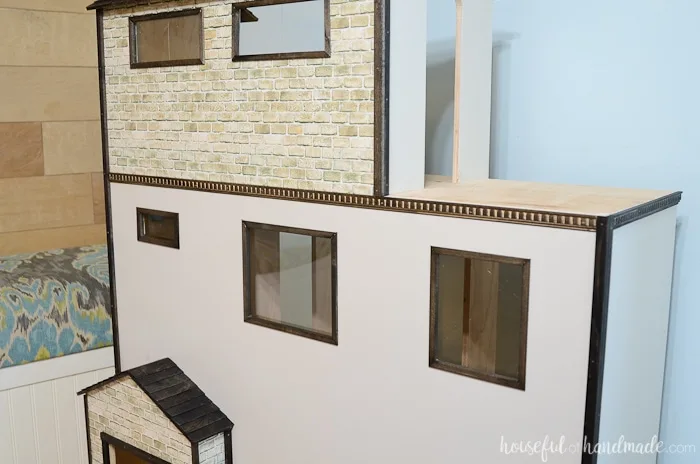
For the sides of the house, I used 1/4″ x 1/2″ wood trim. It was $1.84 per 4′ piece and I used 6 total to trim out the front corners, base and around the front door.
For the front corners, I used 2 pieces of trim, one one each side. They are not mitered, just butted up against each other. It helps cover up the plywood edges and give the whole house some dimension. I think it looks like an English cottage.

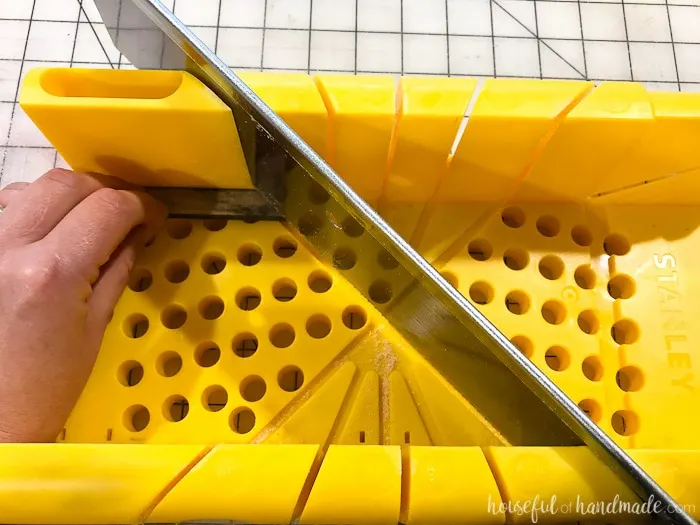
For the windows, I used 1/4″ corner trim. It is the tiniest corner trim and was also $1.84 per 4′ piece. I used a miter box to cut all the wood trim because I was worried my miter saw would just break these tiny pieces.
But the corner pieces were definitely the most fragile. They were super quick to miter with the miter box though.

I also used the corner trim on the front corners of the entryway. Because the brick paper covered up most of the plywood edges, I only needed the thin trim to cover the paper edges.
The dental moulding and larger wood trim was attached to the house with wood glue and 5/8″ brad nails. But the smaller corner pieces were easily attached with hot glue! And those babies are nice and stuck!

Plexiglass Window Panes
After adding the moulding around the windows, I decided I needed to add glass to the windows too. I wasn’t exactly planning on this, but I knew it would look really awesome!
To make life easier, I used plexiglass. It is easy to cut plexiglass with a ruler and razor. All you have to do is score the line you want cut 10-15 times, then hold it over a straight edge (like the edge of a table) and snap it.
This was easy for windows because they are nice and square. Then I used the hot glue to secure the plexiglass in place. On the inside of the windows I will also be adding trim (but that will have to wait until next week).

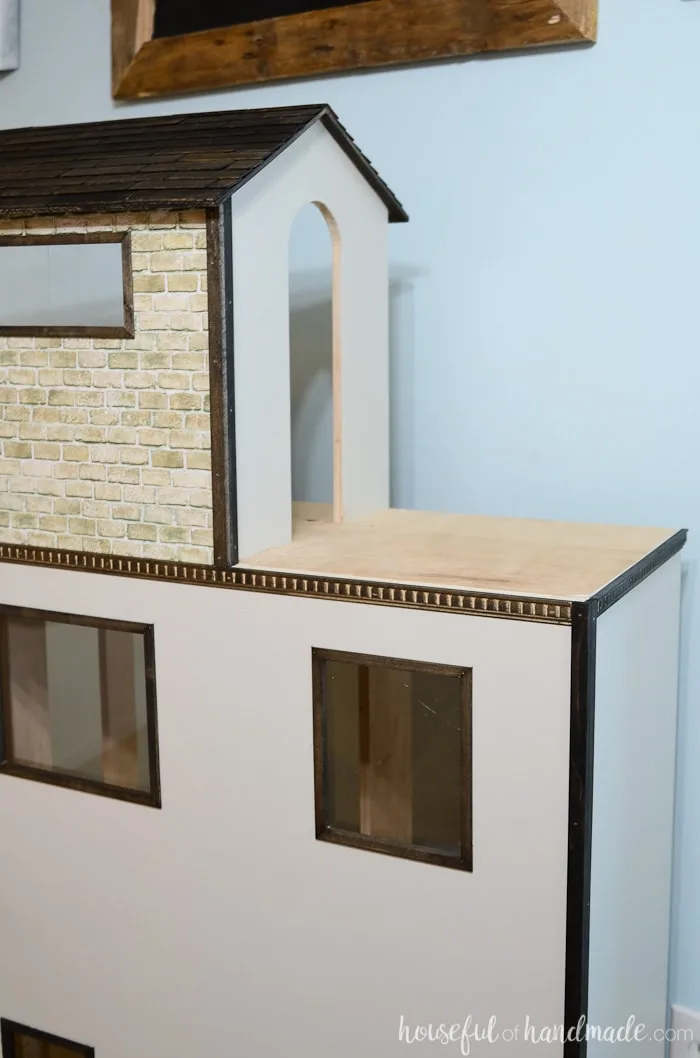
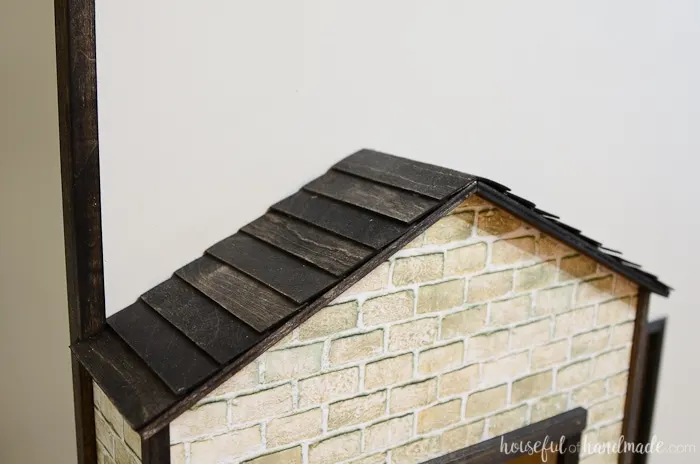
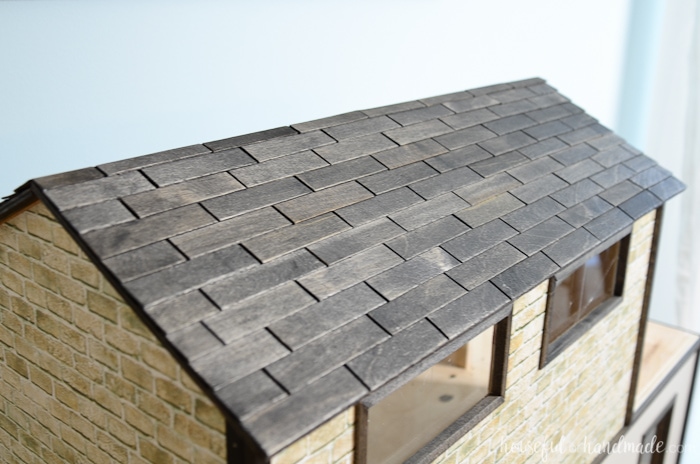
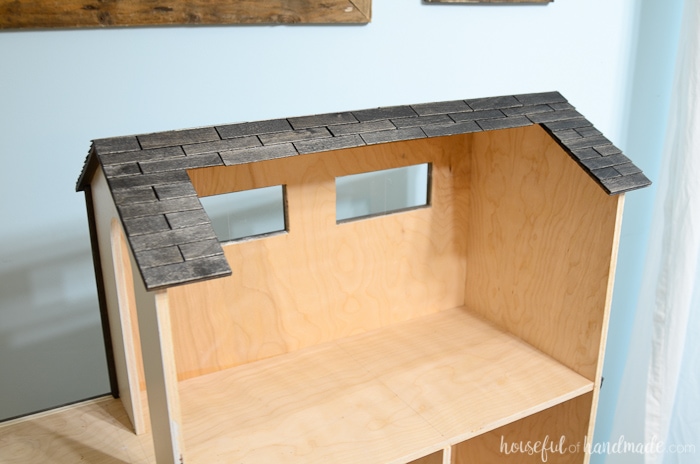
Easy Shingle Dollhouse Roof
The final touch of the dollhouse exterior was the roof!
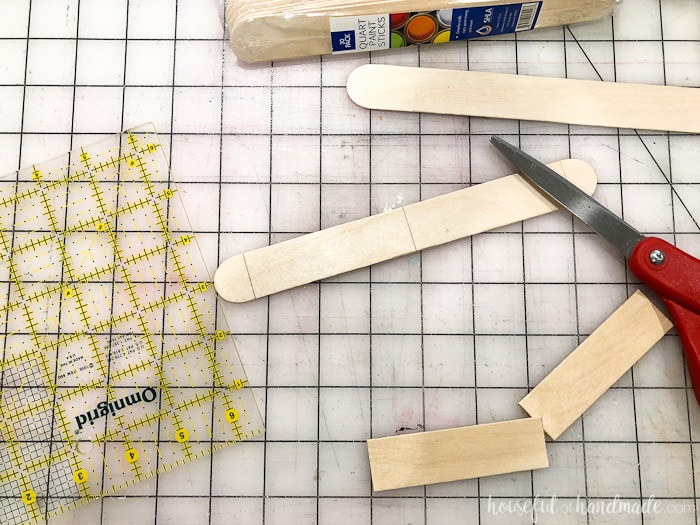
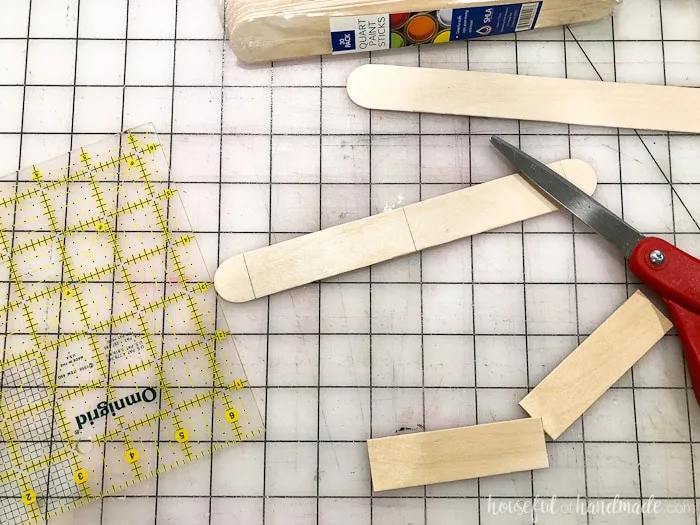
I knew I wanted to make a shingled roof and grabbed some packs of these extra-large popsicle sticks at the Home Depot that they call quart paint sticks. They are only $1 for a pack and I used just under 3 packs.
The stir sticks were easy to cut with a pair of plain ol’ scissors. I cut each one for the roof to 3 1/4″ long and the entryway roof were 3 1/2″ long.
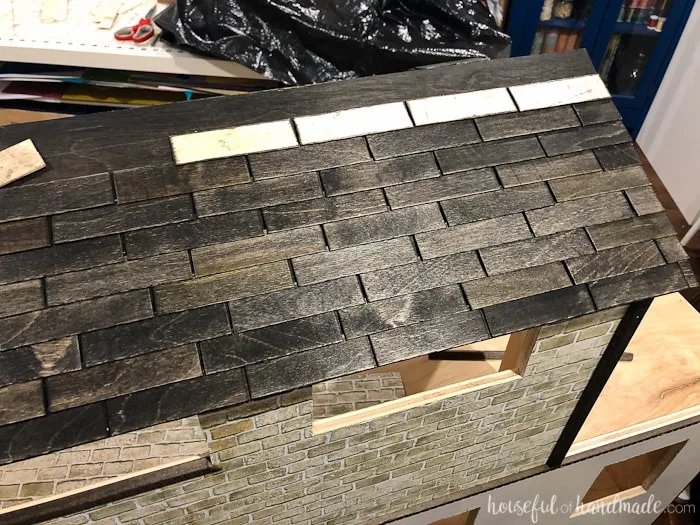
I stained the 1/4″ plywood part of the roof and the sides of all the roof shingles. Then got to work.
The roof shingles are held on with hot glue. Super easy!
I used an extra stick to act as a spacer between the shingles. My roof is not in a pattern, I just started glueing on and hoped for the best.
I actually like the total randomness of it. After I got the first line of shingles on. I stained the tops. Then I drew a line 3/4″ above the top of the shingles and added the next line.

The roof did take the most time. But I was able to binge watch a couple episodes of my favorite show after the kids went to bed and get through it in 2 evenings.
For the entryway roof, I did not stagger the shingles, they are all 3 1/2″ wide (the total width of the roof).

I absolutely love how the roof turned out. It really is the icing on the cake of our dollhouse exterior. And totally completes the country cottage look.

If you want to make your own DIY dollhouse, grab the printable PDF plans to make it easy to follow along on the build.

Now I am eager to start working on the interior of the dollhouse. Honestly, I could completely ignore everything else on my to-do list and just play house with this dollhouse all month.
It’s just as satisfying as remodeling our actual house, but way easier 😉

I hope this gave you some ideas for decorating the exterior of your own handmade dollhouse. Also check out these other homemade gift ideas they will love.


JB
Thursday 7th of May 2020
Absolutely amazing doll house.. you have done a great job. Have you finished it now? Would love to see the finished product..?
Kati
Monday 11th of May 2020
You know I haven't totally finished it yet because I wanted to do it with my daughter. She just wanted to play in it and was a little young to work with me. She is a couple years older now so we probably will start making some furniture and finishing out the rooms. I'll make sure to share when we do.
Maria
Thursday 27th of February 2020
Nice project! How did you paint the roof tiles?
Kati
Thursday 12th of March 2020
I used a dark wood stain on the wood popsicle sticks.
Amanda Thomas
Thursday 21st of December 2017
I'm so happy that I ran across this. By pure accident too, because I have been searching online for weeks for this exact "project". I've been debating whether to remodel the current dollhouse my daughter plays with now or build a custom one from scratch. Thank you so much for sharing this.
Kati
Sunday 24th of December 2017
I am so glad to hear that! I can't wait to give the house to my daughter tomorrow. It's been a labor of love but so much fun!