


Make a beautiful chalkboard wreath out of reclaimed wood to welcome your guests to your home.
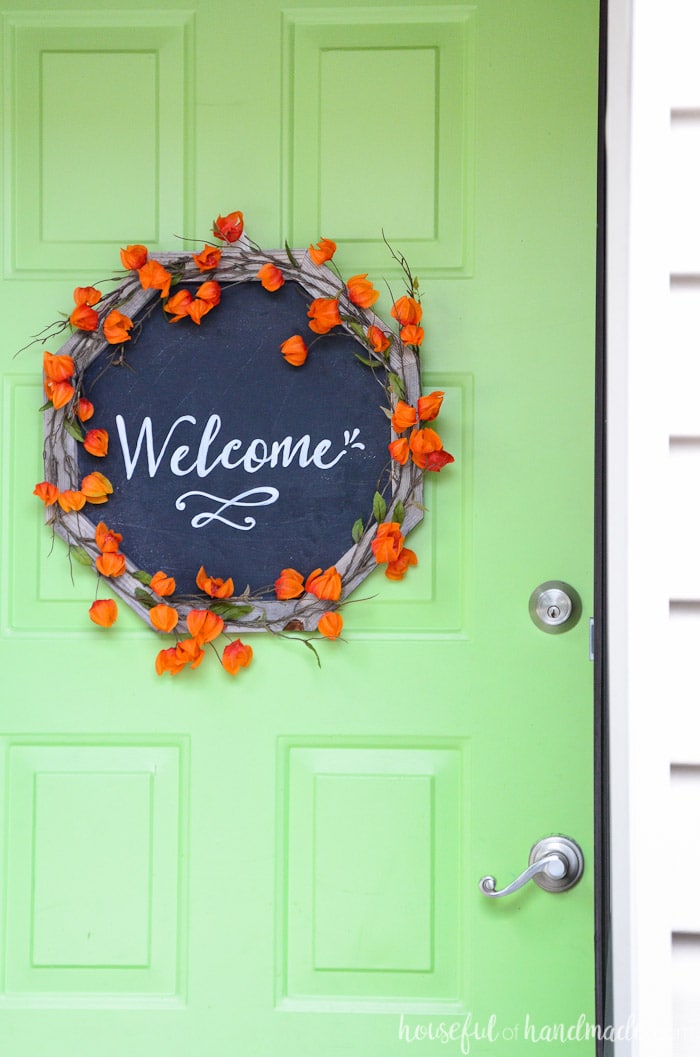
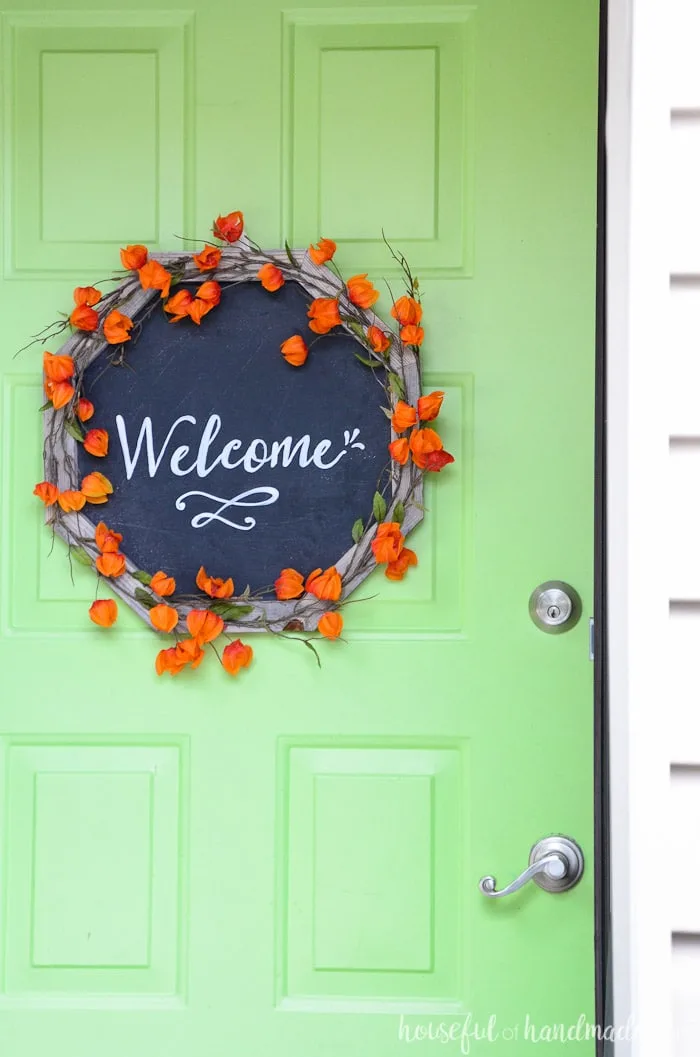
This rustic framed chalkboard is the perfect wreath for any season.
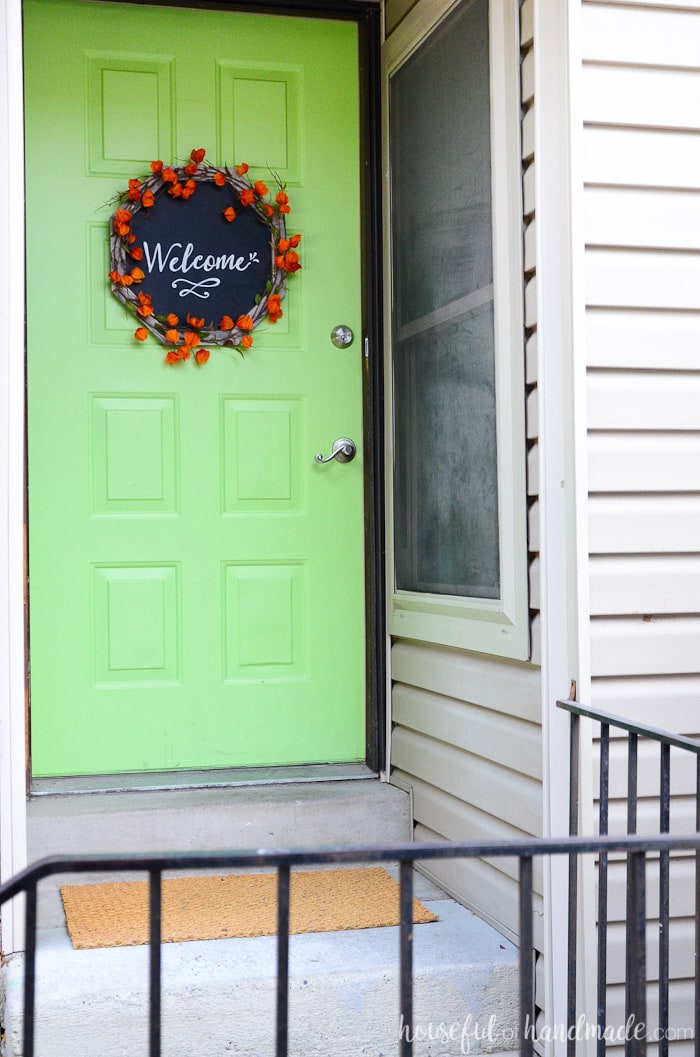
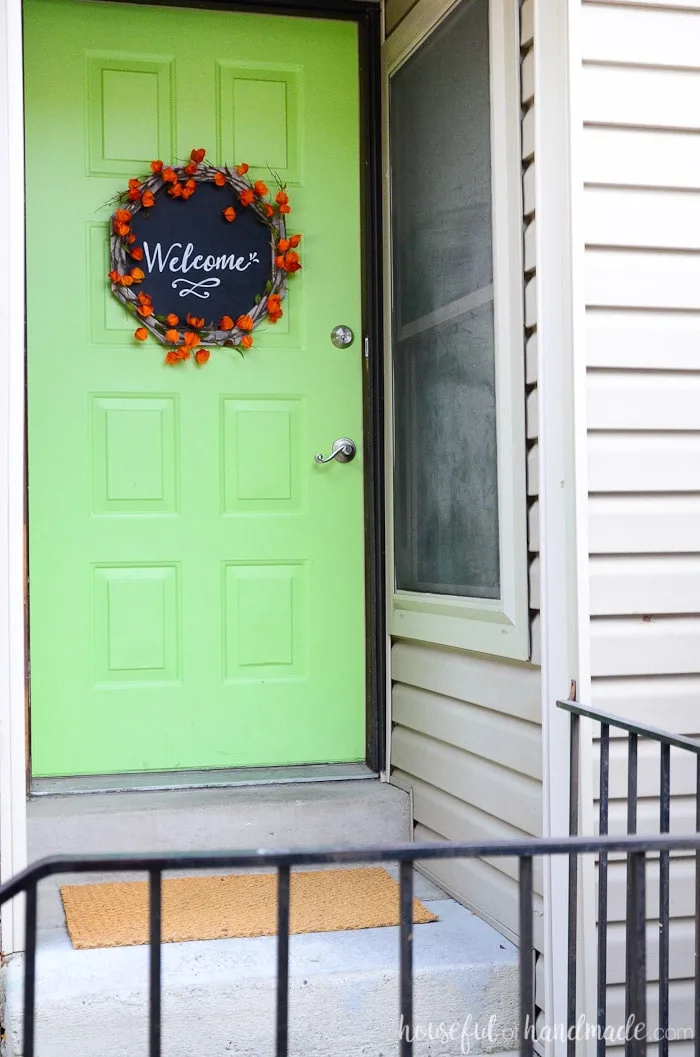
A chalkboard wreath is perfect for being able to change up your welcome message whenever you want. This reclaimed wood chalkboard wreath is easy to make from scraps of old wood.
This post may contain affiliate links. As an Amazon Associate I earn from qualifying purchases. Click here to read my full disclosure policy.
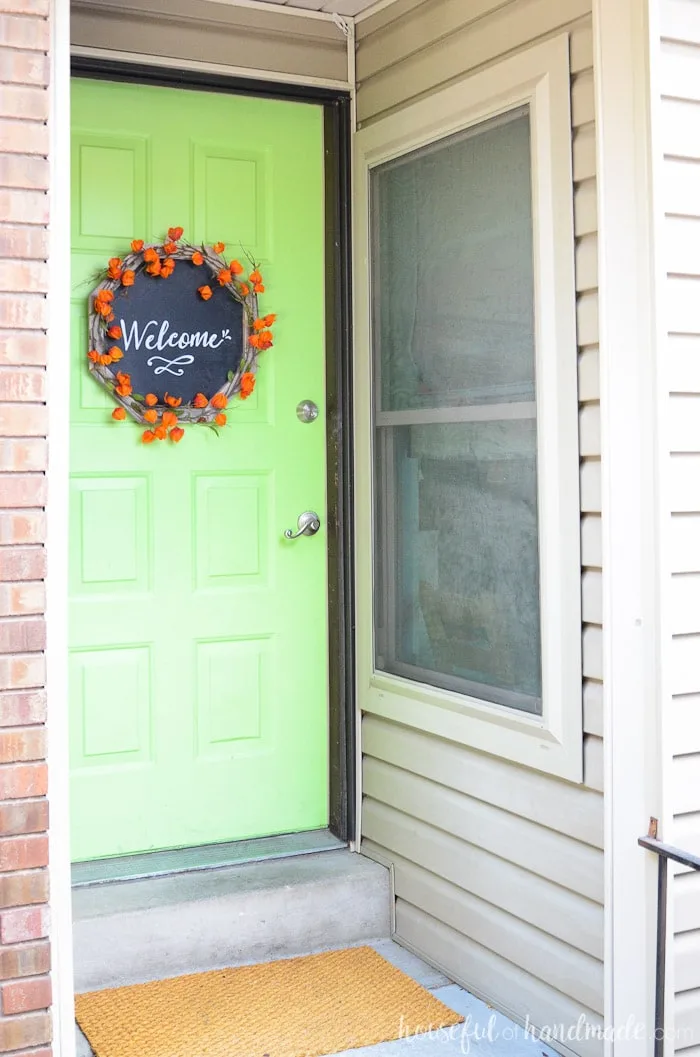
The reclaimed wood is the perfect background for a rustic floral wreath. I added beautiful orange flowers to add fall warmth to my front door this season.


I love using wood to create wreath forms. They are super easy to make and use up the scrap wood that is taking over my garage.
And wood wreath forms add beautiful rustic charm to any wreath. That is why I have used them for my Christmas Card Wreath, Spider web Wreath and Woodsy Fall Log Wreath. If you can make a hexagon or octagon (which is really quite easy), you can make a wood wreath form.


Since I still have two buckets of reclaimed 1×2 boards (even after using them for so many reclaimed wood projects), I decided it would be the perfect wood to use to create a chalkboard wreath for our front door for fall.
I love how the reclaimed wood wreath turned out too. It’s the perfect mix of rustic and floral and fall and warmth. Absolutely perfect for fall!


For the last couple wood wreaths, I made hexagons. But I knew I wanted this wreath to be more of a round shape, so I decided to make an octagon wreath form for it.
The only difference is the angle that you cut the boards at. Figuring out the angle needed to create any wood shape is easy.
You need to first divide 360 by the number of sides you want. In this case it was 360/8=45. Then you cut each board at 1/2 that number on each end.
So for an octagon, you cut 8 pieces of wood with 22.5 degree angles on both ends. Make sure the cuts angle together at the bottom and when they are attached all the way around you will have your wooden octagon (or whatever shape you are making). See I told you it was easy!
Once I had my cut plan, the thing that took the longest was waiting for the 2 coats of chalkboard paint to dry. This framed chalkboard wreath came together so fast, but looks so amazing.
And since the back of the wreath is a real chalkboard, I can change out the message whenever I want. Maybe before our guests arrive for Thanksgiving I will change it to say Give Thanks or Gather.


The rustic chalkboard wreath would also be perfect a wreath in the house. It would be beautiful as the center of a family gallery wall.
The chalkboard message can be changed for the seasons. There are so many places you could use this beautiful framed chalkboard wreath. Maybe I need to hurry and make a few more!

How to Make a Chalkboard Wreath
Supplies:
- 64″ of 1×2 reclaimed wood
- If you don’t have a bucket of reclaimed wood handy, you can always use this weathered wood accelerator to get the look in minutes.
- 24″x24″ piece of 1/4″ plywood
- Miter saw
- If you don’t have a miter saw, you can also cut your wood with another saw or even a miter box and hand saw.
- Jigsaw
- Impact driver (or screwdriver)
- Wood glue
- Staple gun and staples
- 5/8″ wood screws
- Chalkboard paint and paint supplies
- Faux flower stems
- Hot glue gun and glue sticks
Cut your reclaimed wood into (8) 7 1/2″ pieces. Cut each end so they are at a 22.5 degree angle with the angles pointing towards the center on the bottom of the boards.
Connect the wreath frame by adding wood glue to the cut ends of the wood. Place the two pieces so they are flush together and secure with 3-4 staples over the seam. Clamps come in really handy to hold everything together while you staple.
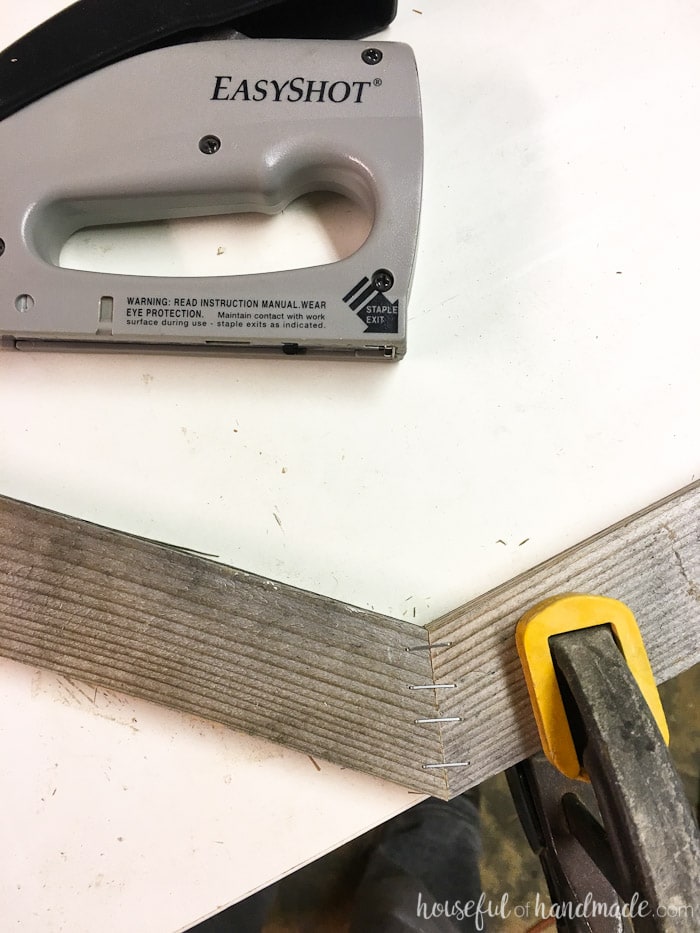

Continue around the entire octagon until you come back to the beginning and have a complete shape. The octagon wreath form will not be super sturdy until the wood glue is given a chance to dry completely. Leave alone on a flat surface to dry.
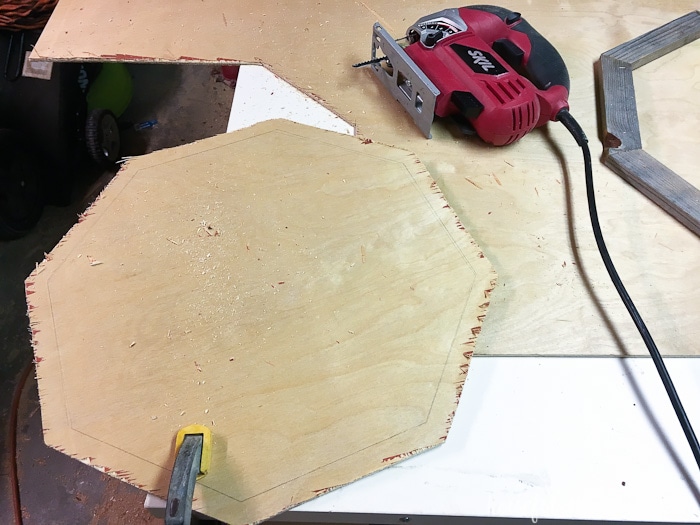
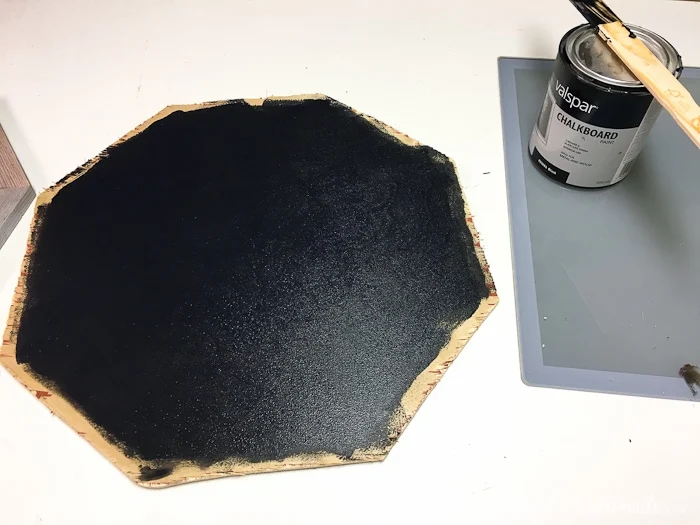
Trace the inside of the octagon on the plywood. Then using a jigsaw, cut out the shape 1/2″ bigger than the inside of the octagon. Don’t worry if it isn’t a perfectly clean cut (I was too lazy to change my jigsaw blade to a dinner tooth for the plywood) because it will be totally hidden.

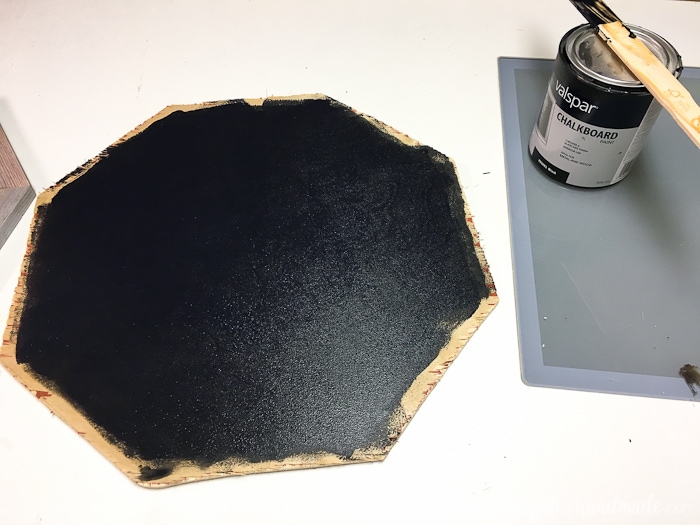
Paint the top of the plywood with at least 2 coats of the chalkboard paint.
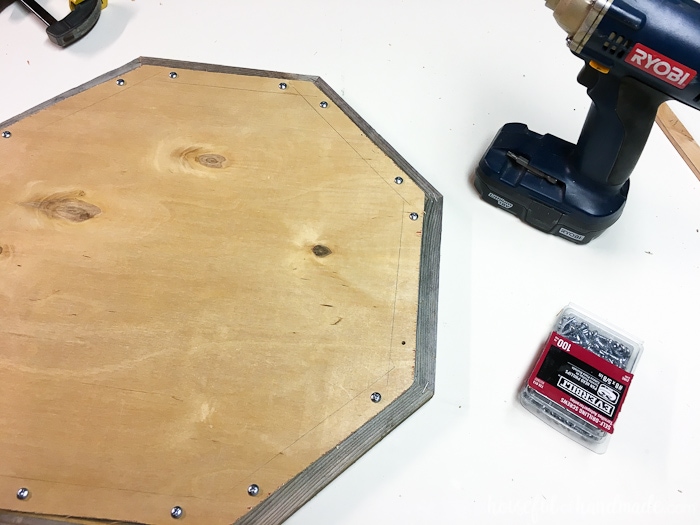
Place the plywood face down on the back of the octagon wreath form. Center it up and secure it to the form with the wood screws. This will also help to add sturdiness to the octagon frame.

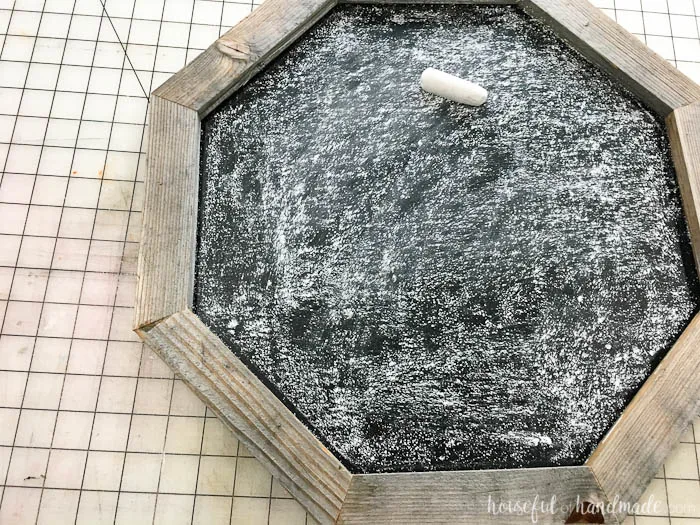
Prime the chalkboard by rubbing a piece of chalk over the entire surface then wiping it off. Now you are ready to add your message.

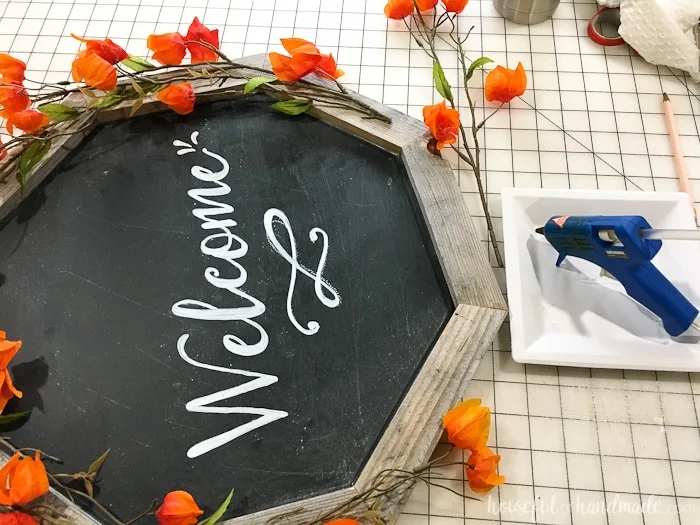
Since my handwriting is not very good, I use a cheater method for creating the perfect chalkboard.
How to fake beautiful chalkboard lettering:
- Print the text on a regular piece of paper.
- Rub a piece of chalk all over the back of the paper where the lettering is.
- Lay the paper over your chalkboard.
- Trace the outside of the lettering with a pencil.
- Remove the paper and fill in the traced lines with your chalk or chalk markers.


Once your message is finished, you can add the flowers to the framed chalkboard wreath. Cut the floral stems into smaller pieces and hot glue them to the frame.

Now your beautiful reclaimed wood chalkboard wreath is ready to hang. I absolutely love how it turned out. And the bright orange-red flowers really pop on our green front door.
For more easy woodworking projects, don’t forget to check out all my Woodworking Tutorials.


Barb
Friday 10th of November 2017
That is gorgeous! Love the blackboard with the old wooden frame and the Chinese lanterns (?) look fantastic. They really pop against your green door. What shade of green is that? Love it!
Kati
Tuesday 14th of November 2017
Thanks so much Barb! Yes this is my first book. So excited to share it soon.
Linda
Thursday 9th of November 2017
Gorgeous Orange for Fall and Thanksgiving. Look forward to your book! Congrats! First one?