Save lots of money this Christmas by decorating with these beautiful paper Christmas wreaths.
It’s the last day of our Paper Christmas Decor series. After just 7 days of creating and crafting my house is looking quite festive! Have you been following along? If not, make sure to check out the rest of the posts below. And for more ideas, I’ve got 19 Amazing Paper Christmas Decor Ideas for you too!
Nothing says Christmas like a wreath. So it’s only fitting that we have to make a paper wreath this week. This beautiful paper holly wreath is the perfect way to end the 7 days!
Day 7: Paper Holly Wreath
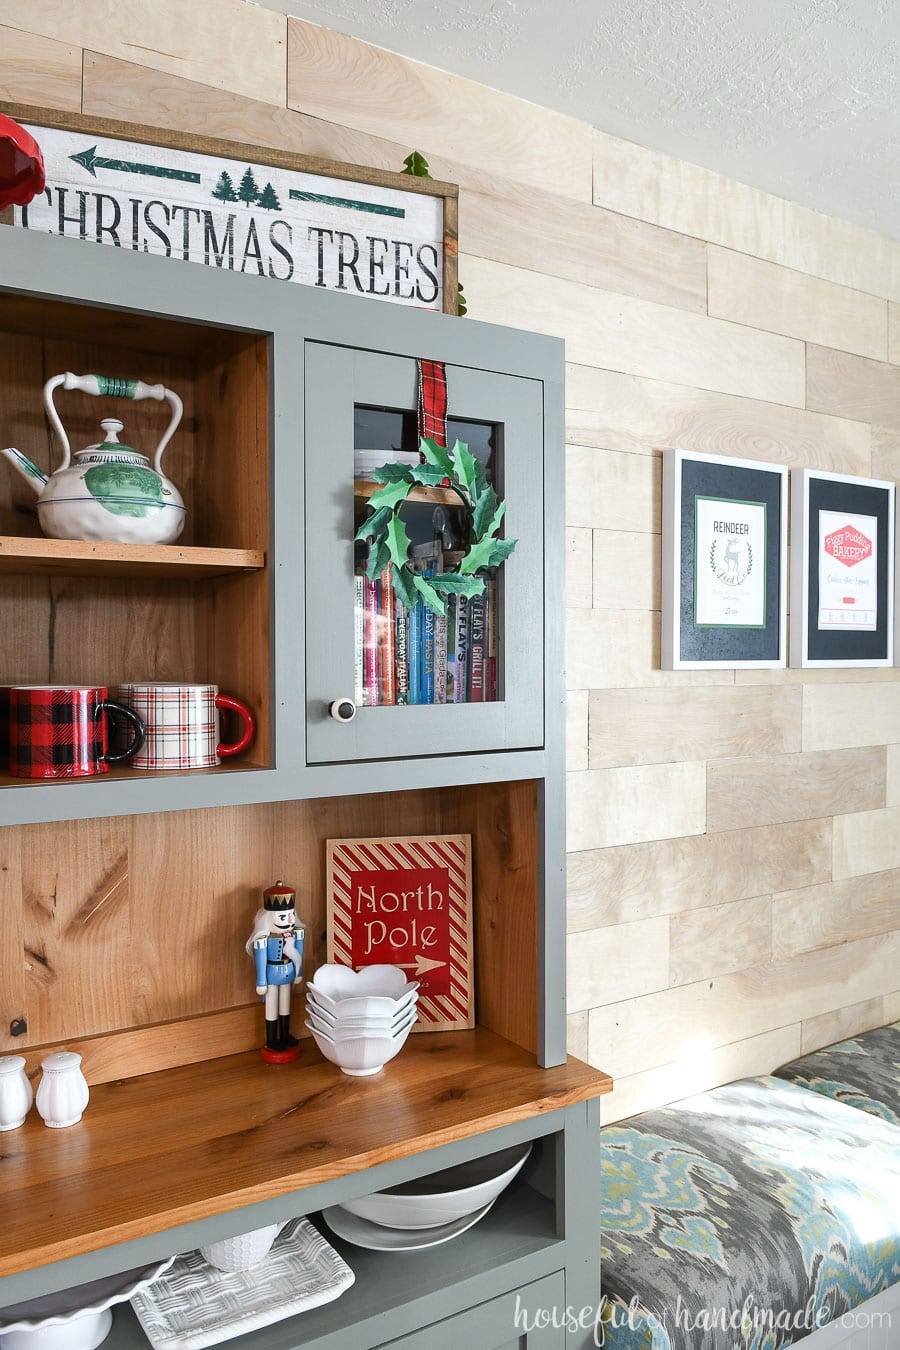
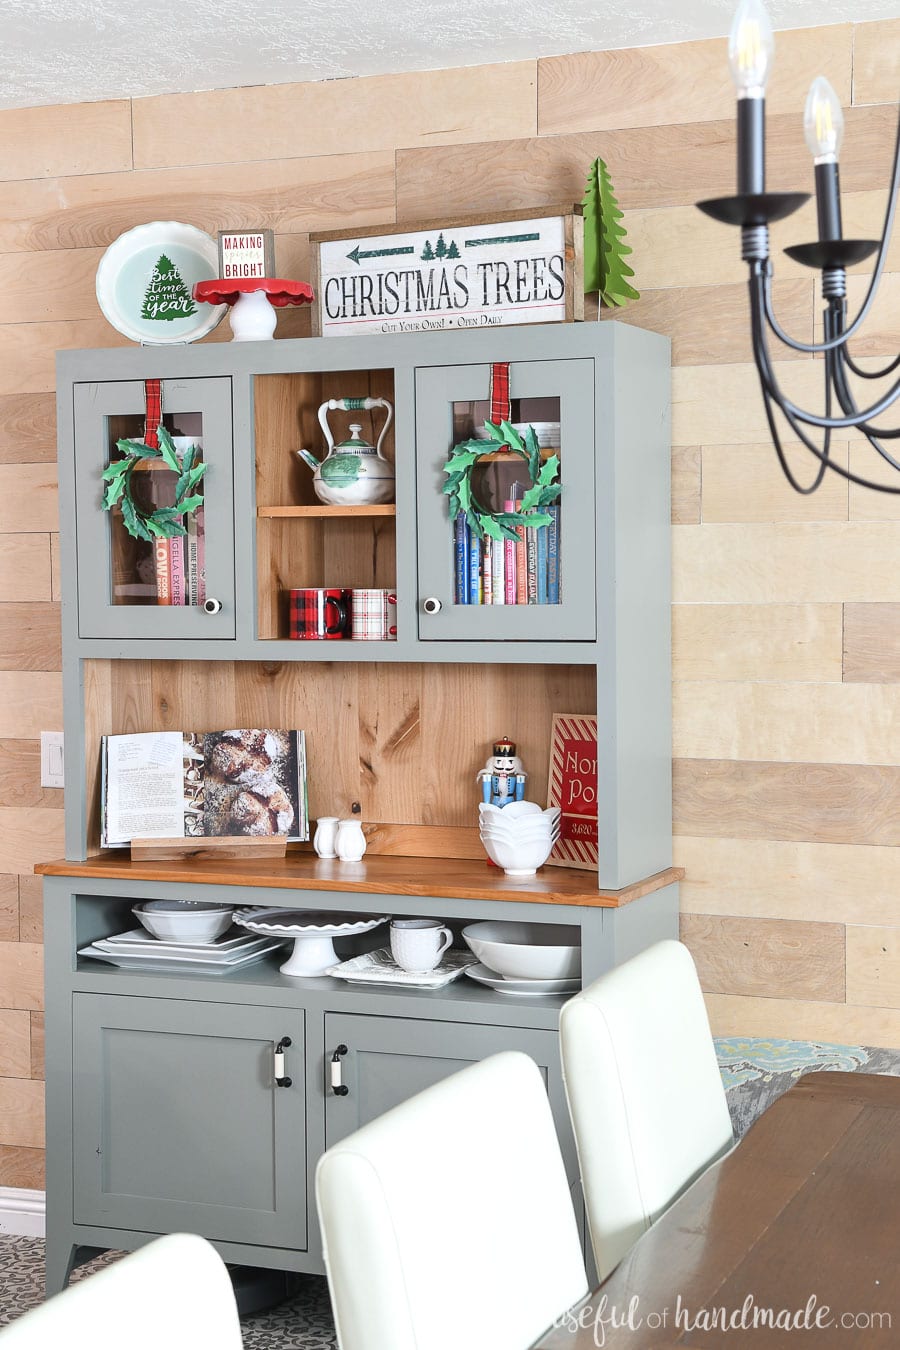
I have always wanted a hutch in the dining room to decorate for Christmas. We had the coffee station for many years, and I decorated the shelf above it. But it just wasn’t the same. Well this year I finally have it!
This post may contain affiliate links. As an Amazon Associate I earn from qualifying purchases. Click here to read my full disclosure policy.
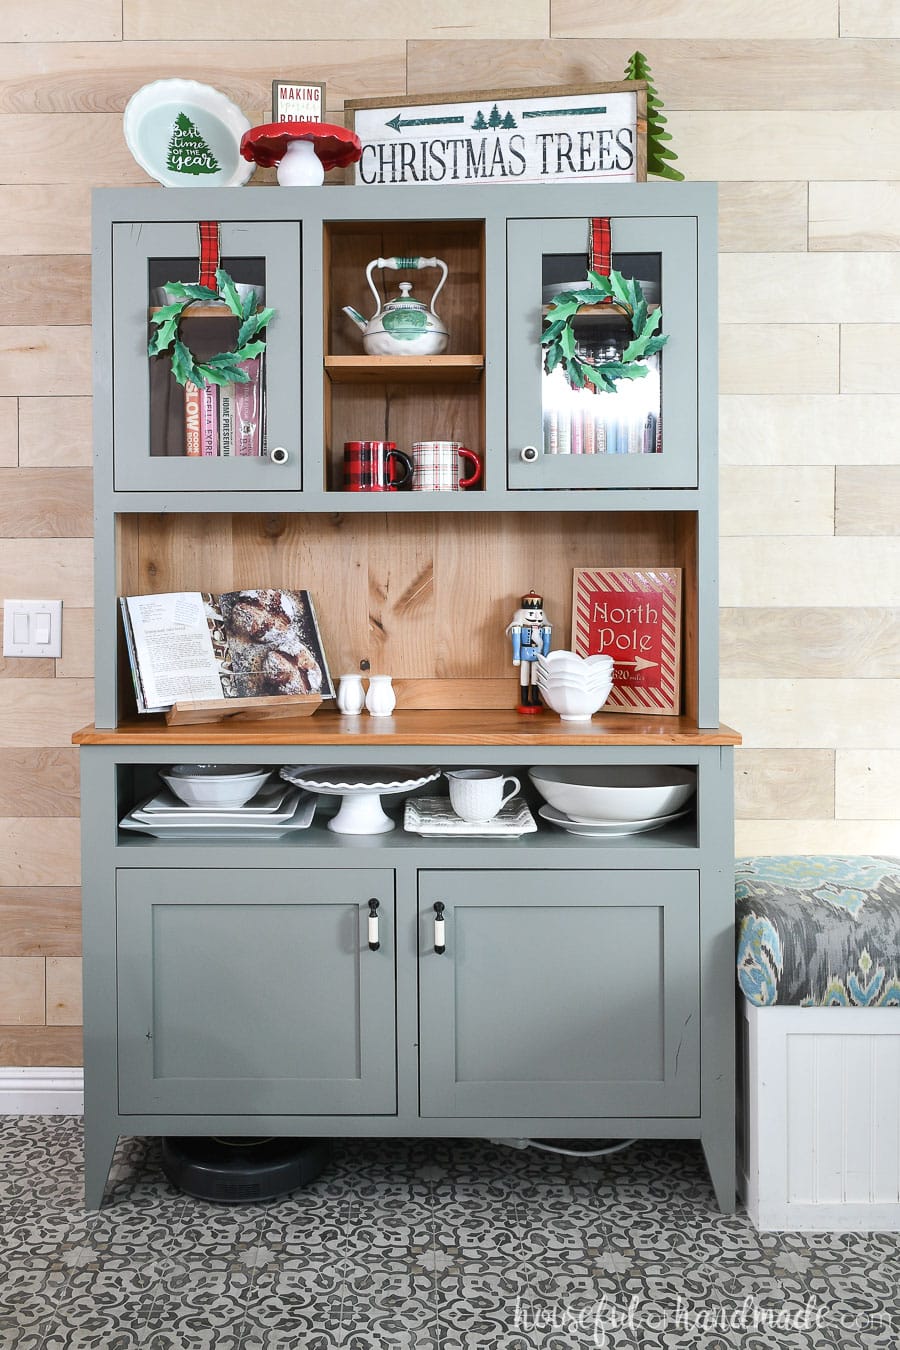
I built this amazing hutch in October (and shared the hutch build plans here) to get us ready for all the holiday entertaining. So when working on our 7 days of paper Christmas I knew there had to be a project for the hutch.
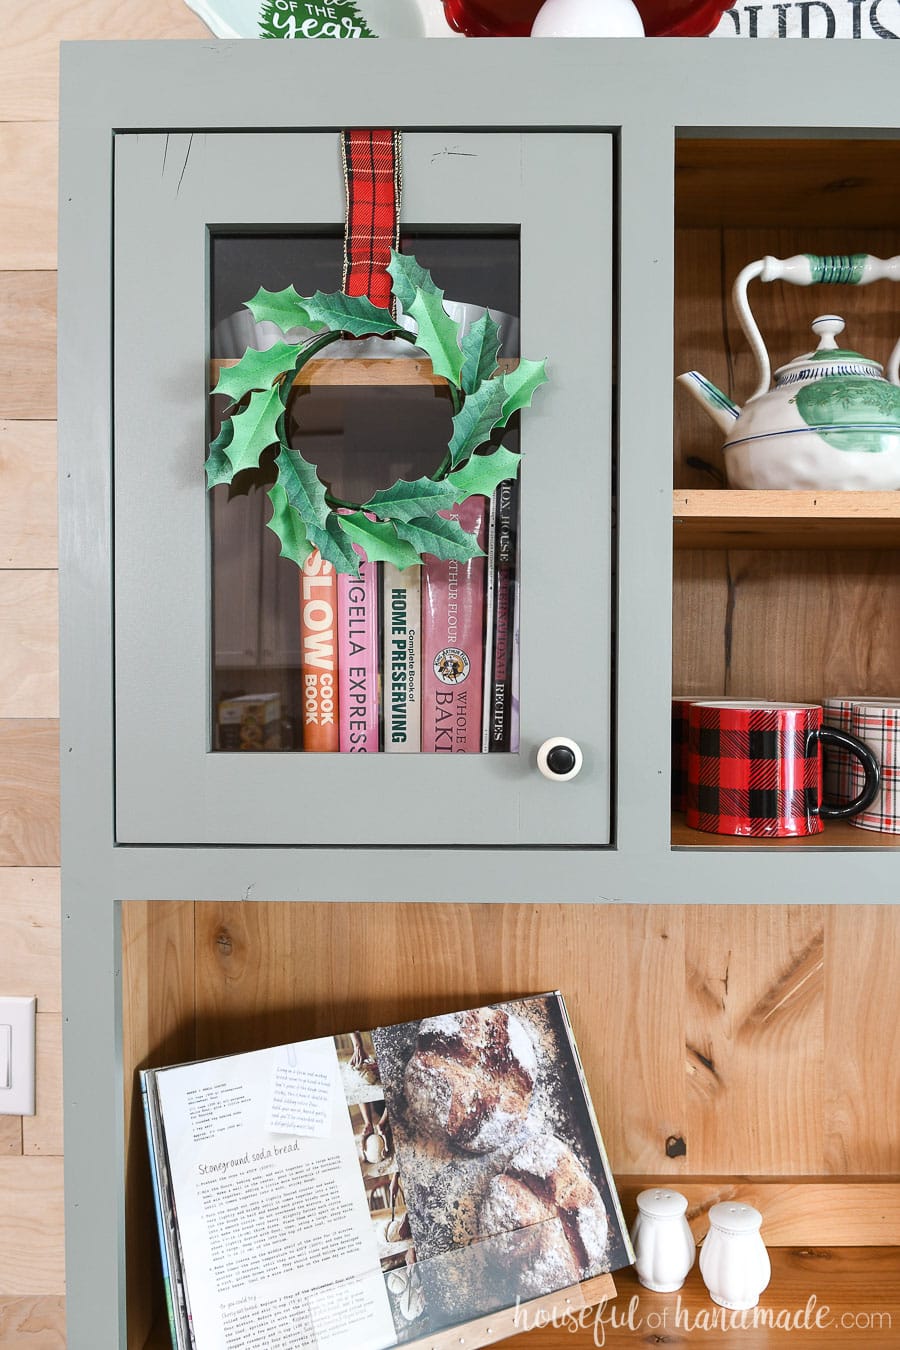
After decking out the hutch with loads of Christmas cheer, I decided it still needed something more. And who doesn’t love a classic Christmas wreath on a cabinet door? So simple, but nothing says Christmas more!
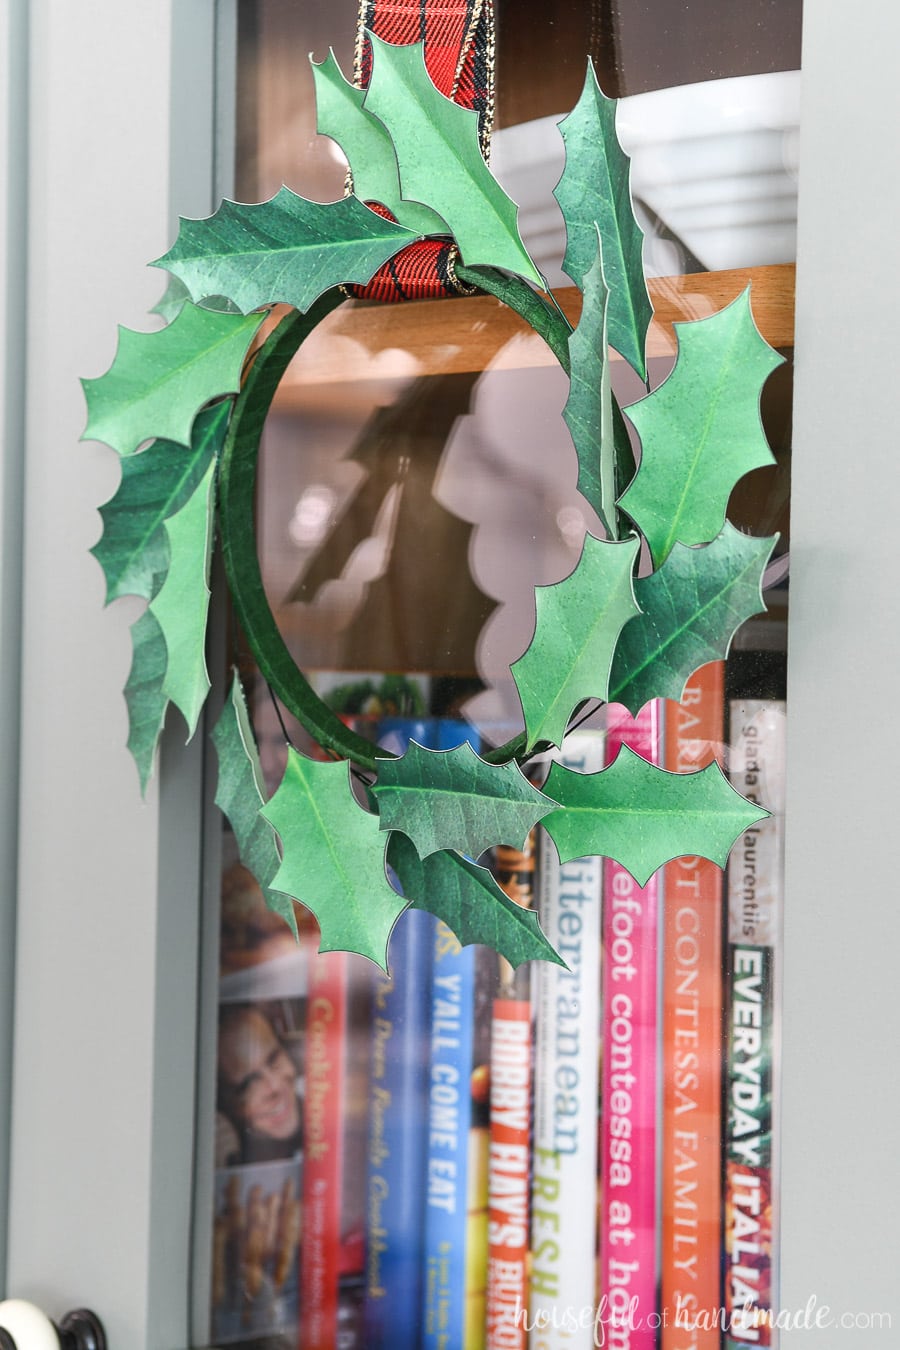
So I set out to create the perfect paper Christmas wreath. When I think of Christmas, I think of mistletoe and holly. Maybe it’s all those Christmas songs. But since I already used mistletoe in the printable Christmas signs, holly it was!
These paper holly wreaths are easy to make, but do take a little bit of time. But that is my excuse to grab a seat and watch a Hallmark Christmas movie while sipping some eggnog and crafting ????.
And I learned that you need to take a little time when glueing the leaves to the floral wire. As you can see in my video, I had some struggles keeping them attached. That is because I was trying to hurry. Holding a piece of wire for a few seconds does not make for exciting TV. But then they kept popping off. The first one I made (while taking photos) was properly glued down and not a single one has popped off!
So grab that cup of nog and lets make some adorable paper holly wreaths!
How to Make a Christmas Wreath from Paper
Supplies:
- Holly leaves cut files
- The cut files & PDF for the paper holly wreath were free to my subscribers until 11/28/2018. Now they are available to purchase in the shop. Make sure to subscribe so you will be notified of new freebies!
- Light Green Cardstock
- 5″ embroidery hoop
- You can make it any size but you will need more leaves for larger ones. The leaves would also be great pressed into a foam wreath form for a fuller/larger wreath.
- Green floral wire
- Green floral tape
- Hot glue gun and glue sticks
- Optional: Silhouette Cameo
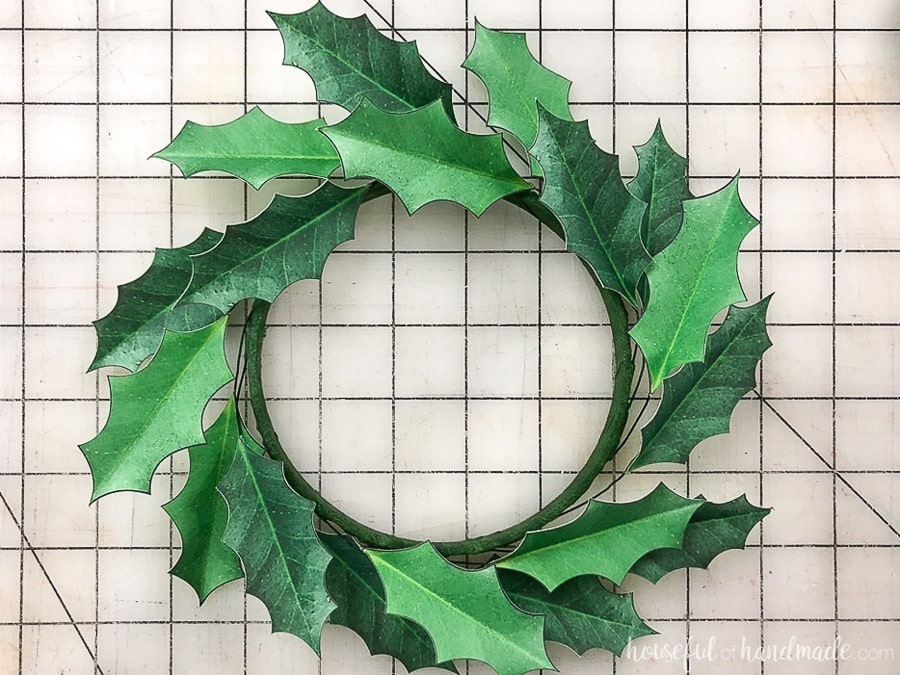
Print the holly leaves onto a light green cardstock. You can use white, but the light green makes it so that the back of the leaves looks more natural too. For my 5″ embroidery hoop wreaths, I used 1 page of leaves. Add more or less depending how full you want your wreaths.
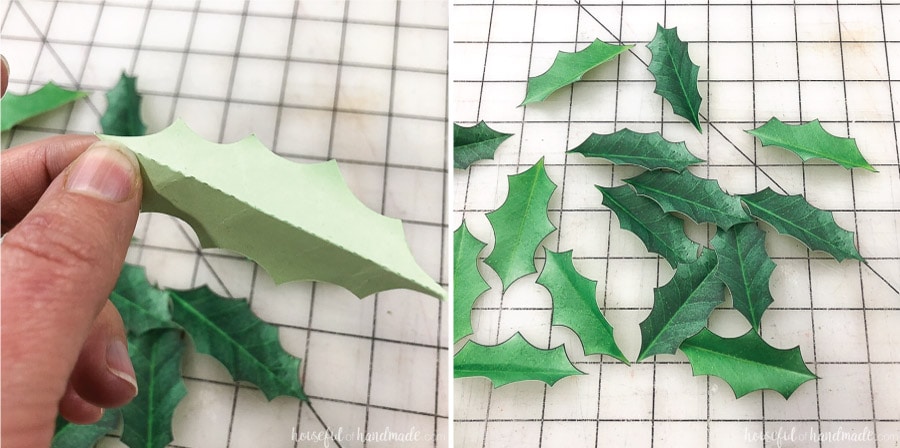
Fold the leaves along the dotted lines. First in half, then press to give them a slight crease at the veins.
Curl the edge of the leaves by rolling the points around the side of a pencil (or other small round object).
Glue a 3″ piece of floral wire to the back of each leaf. Run a bead of hot glue along the center ridge, then press the floral wire into it. Make sure the wire is fully pressed into the glue, even give it a little twirl to fully encase it. That will help make sure it doesn’t pop off as you handle the wreath.
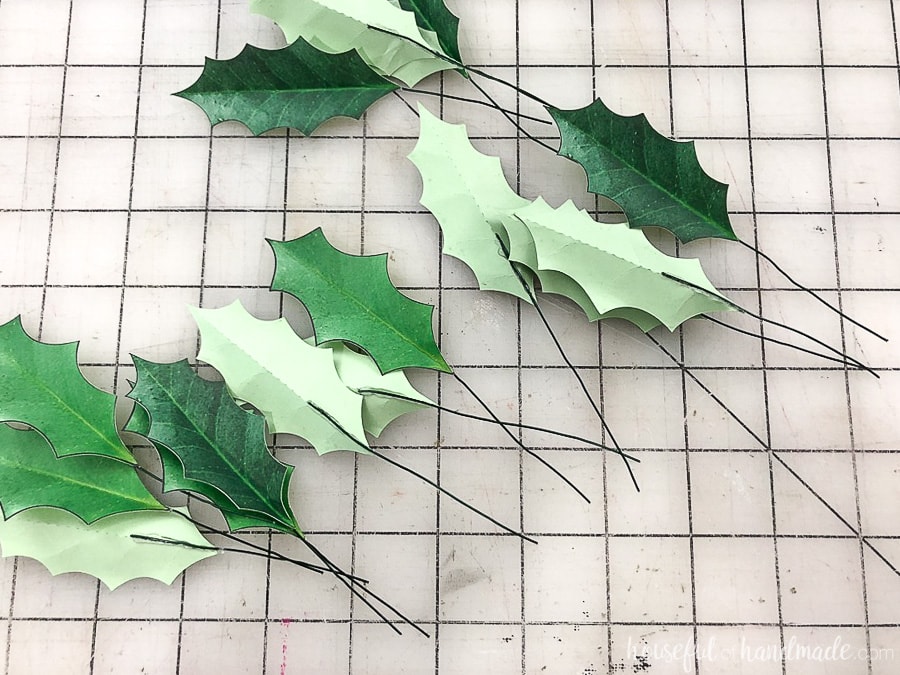
Bend over about 1/2-3/4″ of the bottom of the floral wire and give it a slight curve. Add glue to the side of the floral wire and press the folded over piece into it.
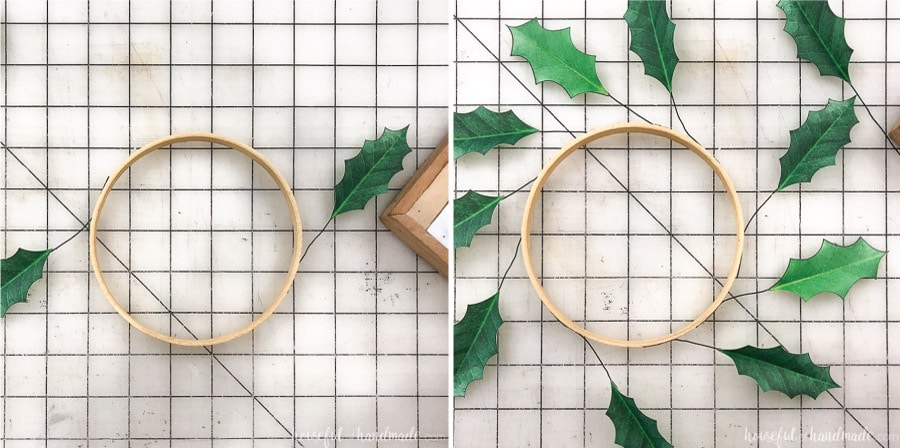
Continue all around the wreath until you have added all the holly leaves.
Wrap the embroidery hoop with floral tape. Make sure to cover the glued on wire parts, but go around the wire once it is sticking out from the hoop. I found it easiest to rip of a 6-8″ piece to work with instead of leaving the whole roll attached. Way easier to go in between the leaves.
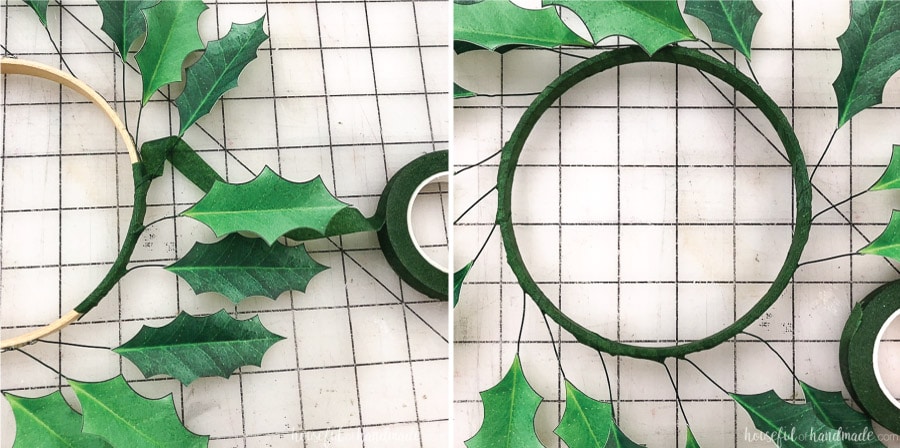
Once it is all wrapped and secured, shape the wreath by folding down the wire to make the leaves go in a sweep around the hoop. fold and tweak until you find a shape you love.
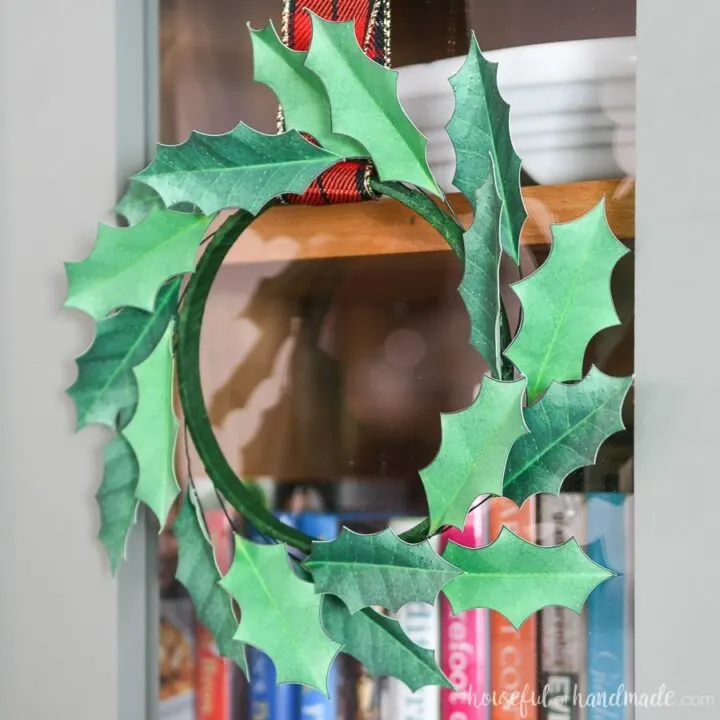
I choose not to add any berries (they are hard to make out of paper) but instead used red wire to give the pop of red to the wreath. If you want to add berried, you can use whatever you can find or create and just glue them around your wreath.
Then you are ready to hang your new paper holly wreaths! To make hanging them on our new hutch super easy, and not damage the hutch. I used wired ribbon. Then you just fold over the ribbon at the top to create a hook and it perfectly hangs on your cabinet door!
And I am so in love with our Christmas hutch. I really don’t think I could add any more to it to make it more festive. Now its time to decorate the rest of the house!
If you missed any of the preview paper Christmas decor posts, here they are. The templates are only available for free in the subscriber library until 11/25 so don’t wait!
- Day 1: Gingerbread House Paper Christmas Ornaments
- Day 2: 3 Easy Paper Christmas Trees
- Day 3: Christmas Cookie Boxes
- Day 4: Paper Lantern Christmas Ornaments
- Day 5: Printable Christmas Signs
- Day 6: Christmas Reindeer Figurines
- Day 7: Paper Holly Wreaths
And now decorate your home for the holidays without spending all your money!

Paper Holly Wreath
These paper holly wreaths are easy to make with just a little bit of time. You can save so much money this holiday season by making your own DIY holly wreaths.
Materials
- Holly leaves cut files
- Light Green Cardstock
- 5″ embroidery hoop
- Green floral wire
- Green floral tape
Tools
- Optional: Silhouette Cameo
- Hot glue gun and glue sticks
Instructions
- Print the holly leaves onto a light green cardstock.
- Fold the leaves along the dotted lines.
- Curl the edge of the leaves by rolling the points around the side of a pencil.
- Glue a 3″ piece of floral wire to the back of each leaf.
- Run a bead of hot glue along the center ridge, then press the floral wire into it.
- Bend the bottom of the floral wire and give it a slight curve.
- Add glue to the side of the floral wire and press the folded over piece into it.
- Continue all around the wreath until you have added all the holly leaves.
- Wrap the embroidery hoop with floral tape.
- Shape the wreath by folding down the wire to make the leaves sweep around the hoop.
- Fold and tweak until you like the shape.
- Leave as is, or add red wire to give a pop of color to the wreath.
Recommended Products
As an Amazon Associate and member of other affiliate programs, I earn from qualifying purchases.


Susan
Tuesday 18th of June 2019
What a great idea to print the dark green on the light green paper - the fronts and backs really work together to make this look real! I'm trying to plan this year's holiday crafting (yes, already!) and this one is definitely on the list.
Kati
Tuesday 25th of June 2019
You are so on top of it! I haven't even though Christmas yet. Enjoy.