


Build these beautiful tall nightstands to give your bedroom extra storage and style.
New nightstand in our master bedroom has been on my to-do list for way to long. With all the other projects, I kept putting them off. But not anymore…
I partnered with Kreg Tools and their new project plan site, BuildSomething.com, to design the perfect nightstand and share the build plans with you for free!
And now I am so sad that I didn’t build these gorgeous DIY nightstands earlier!
This post may contain affiliate links. As an Amazon Associate I earn from qualifying purchases. Click here to read my full disclosure policy.
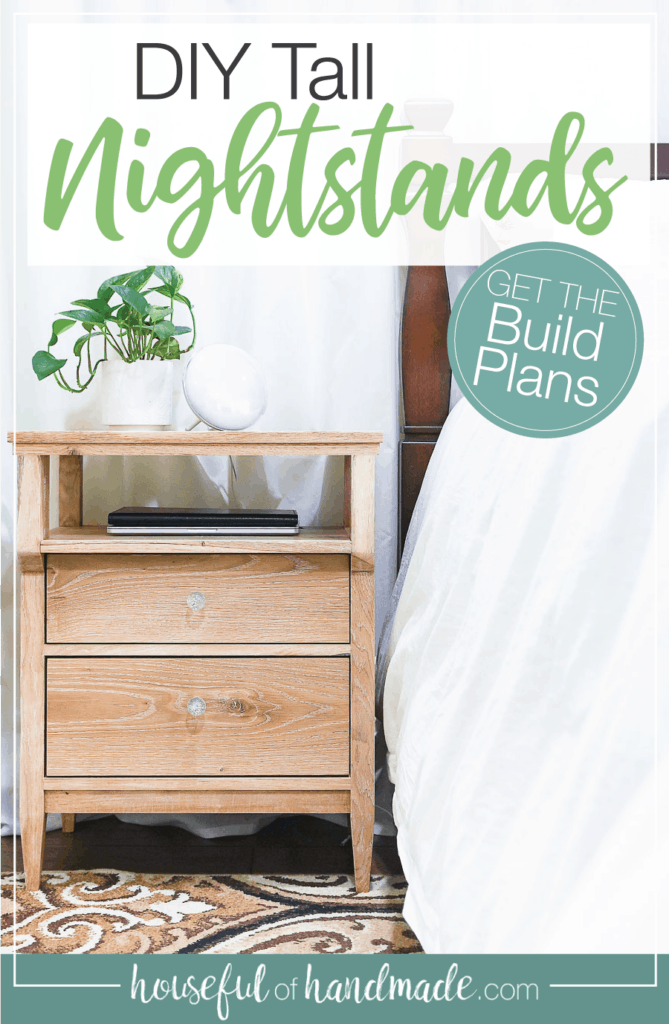
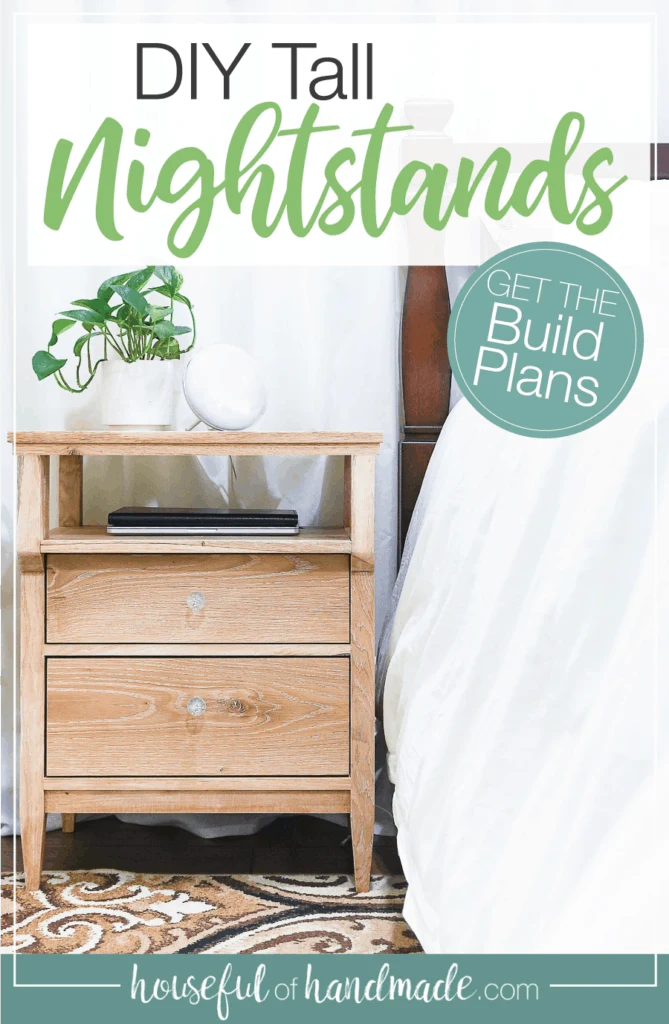
Tall Nightstands
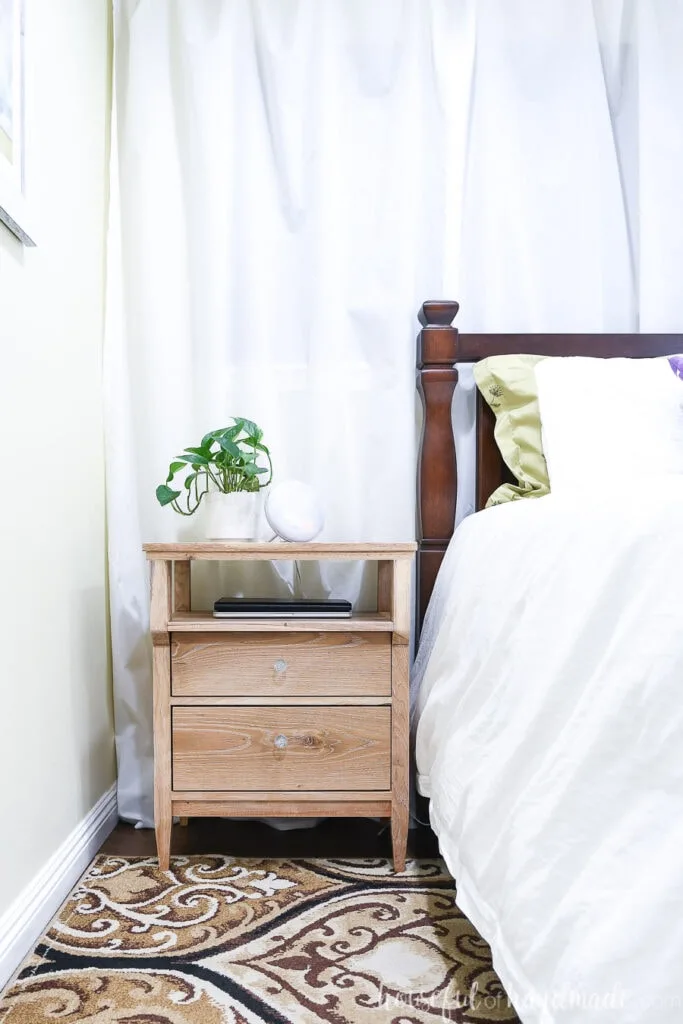
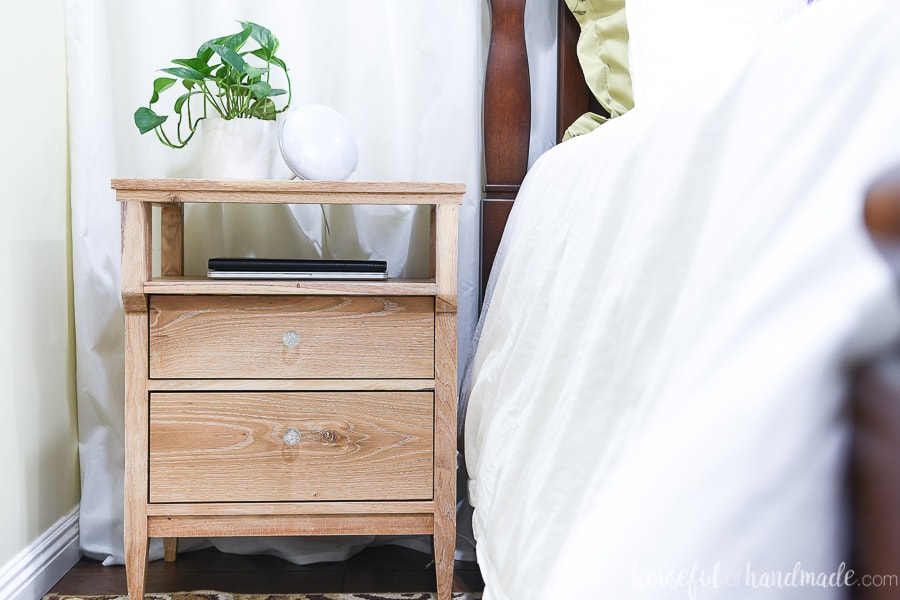
One of the best things about building your own furniture is you are not limited to standard heights. Most nightstands you will buy in the stores are 24-26″ tall.
But mattresses have gotten thicker and beds have gotten higher. So you these nightstands are so tiny next to the bed and make it hard to find items on the bedside table.
How tall should a nightstand be?
You nightstands should be the same height as your mattress, give or take an inch or two. That will put those necessary items easily within reach when in bed.
So I designed these DIY nightstands to be tall enough to fit next to taller modern mattresses. They come in at 28 3/4″ tall! Plus that means there is room for loads of storage in your bedroom.
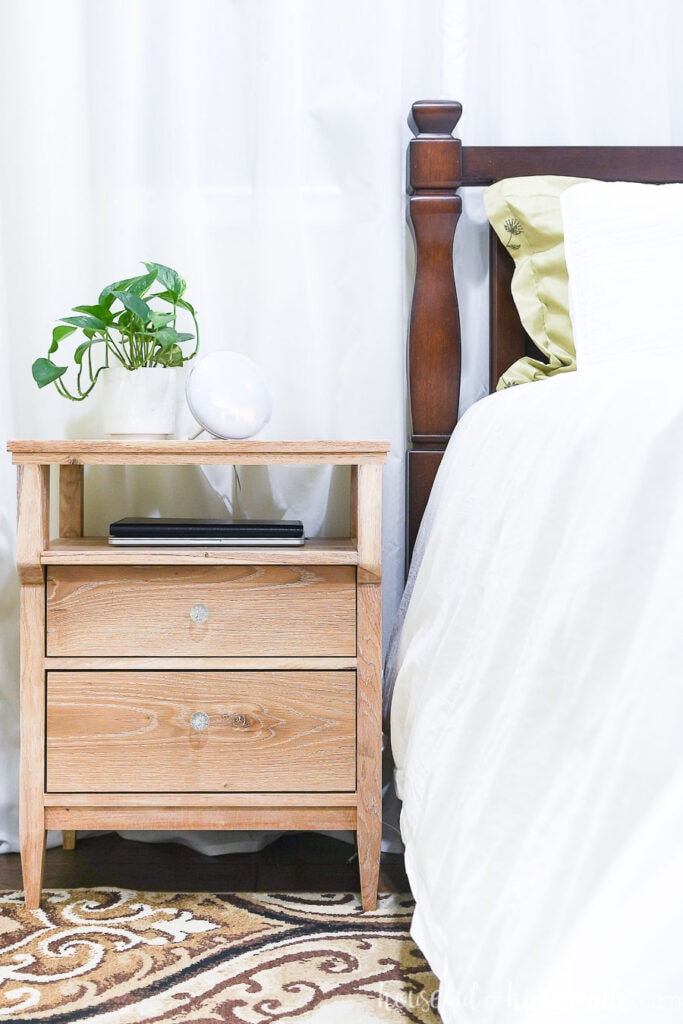

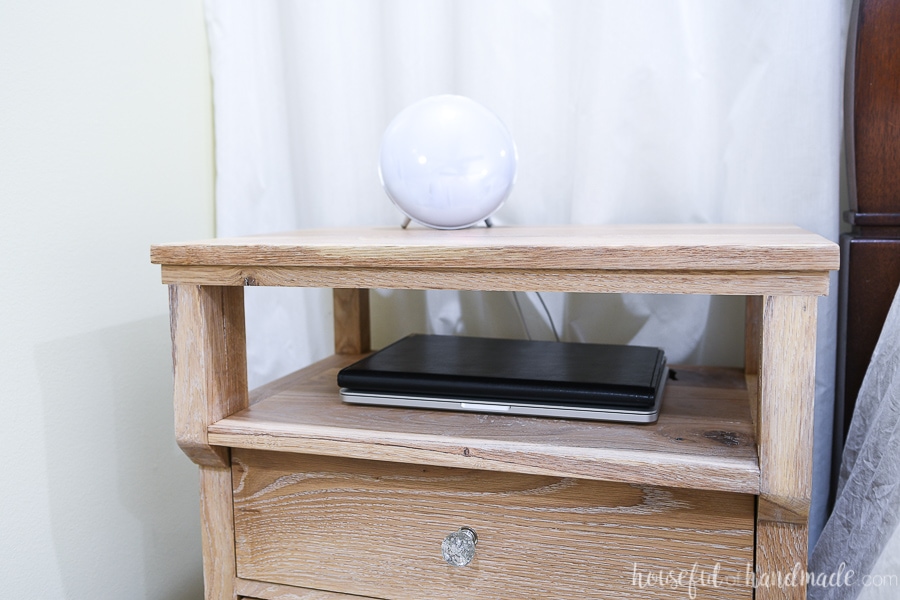
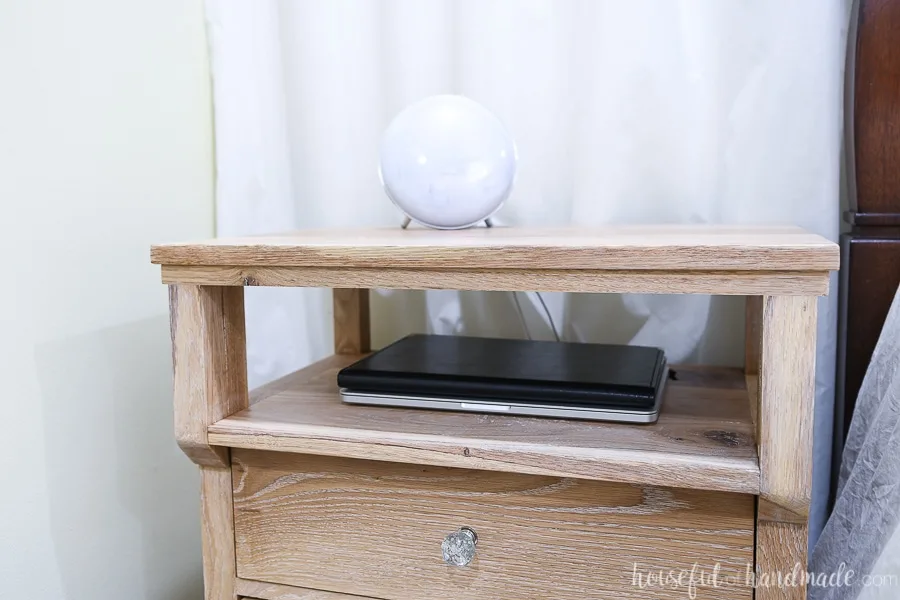
Beautiful Nightstand Storage
We use our nightstands as charging stations for our electronics. This includes our phones, tablets, earbuds, and more! But all those cords and cases really cluttered up the table top.
So for these nightstands I designed them with a second shelf! Now all the charging can still happen, but the top of the nightstand is clean and clear. Or at least ready for me to decorate properly.

But I wanted to make the additional shelf feel like it was purposeful, not just like the third drawer was left out of the plans.
This idea went through quite a few designs until I finally figured it out. The top and shelf are slightly extended from the base of the nightstand. And the sides are built out with a corbel like piece.
Now the shelf looks like it was there first! And the open sides to the shelf make it super easy to access your charging devices if necessary.
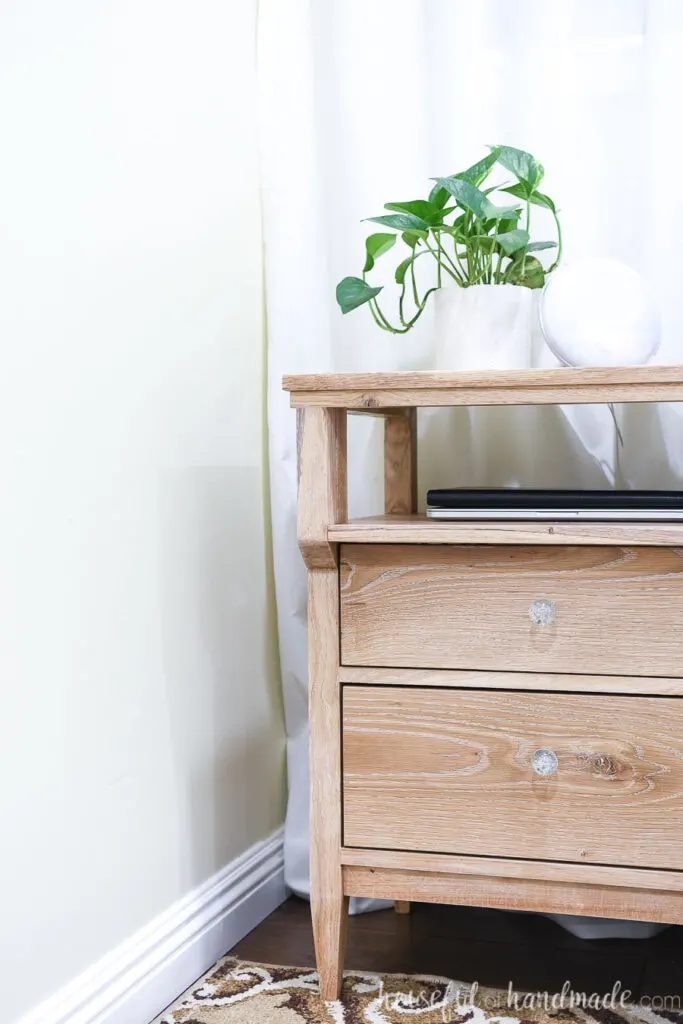
Solid Wood Nightstands
The design of these DIY nightstands was also made to use standard sized lumber. And all the joints easily come together with the Kreg Jig. This makes them great for anyone to build.
The only plywood used in the design is for the drawer boxes. This leaves you with a solid piece of furniture that will last forever.
You could use solid wood for the drawer boxes too if you prefer. I like to build drawer boxes out of plywood since I know I can cut straight boards easily on my table saw giving me perfectly square drawer boxes.

White Oak with Liming Wax Finish
Oak has had a bad rap since the bad builder grade cabinets of the 90s. But I am truly loving the beauty of this less expensive hardwood! It all started with the wood light fixture I made last month.
So when my local lumber yard had white oak on sale I knew I wanted to try building with it. I have worked with softer hardwoods in the past, but the white oak was definitely the hardest I have made a bigger project out of.
Because of that these nightstands are a lot heavier than I thought. But I love that they will not be sliding around on the hardwood floor next to the bed.
Also, I broke a two bits drilling my pocket holes into the harder wood. I learned that you need to make sure to get the drill up to speed before touching the bit to the wood so it can bite through it without breaking off the tip.

To finish my DIY nightstands, I decided to play up the grain of the white oak. The open grain pattern on it was perfect for trying out a liming wax finish which I have been admiring on my friends dining room table for a while now.
The white wax fills in the grain of the wood making it stand out. But also making the oak a little brighter and whiter. Then I finished it off with a coat of my new favorite sealer: Maker Brand Simple Finish.
The end result is amazing! I am excited to try the liming wax on other woods soon.
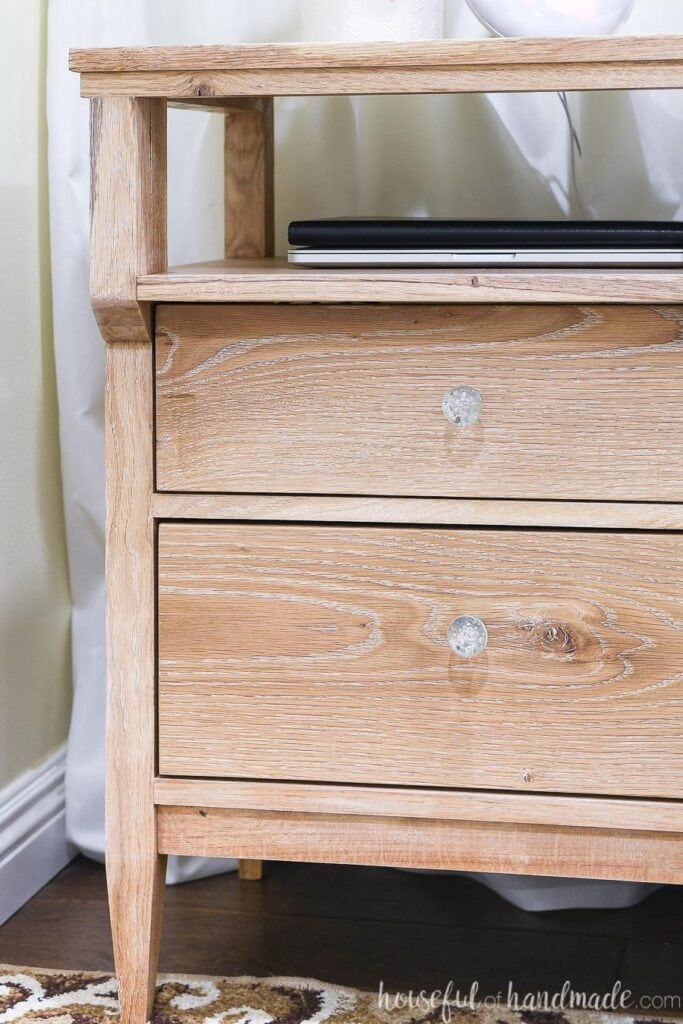

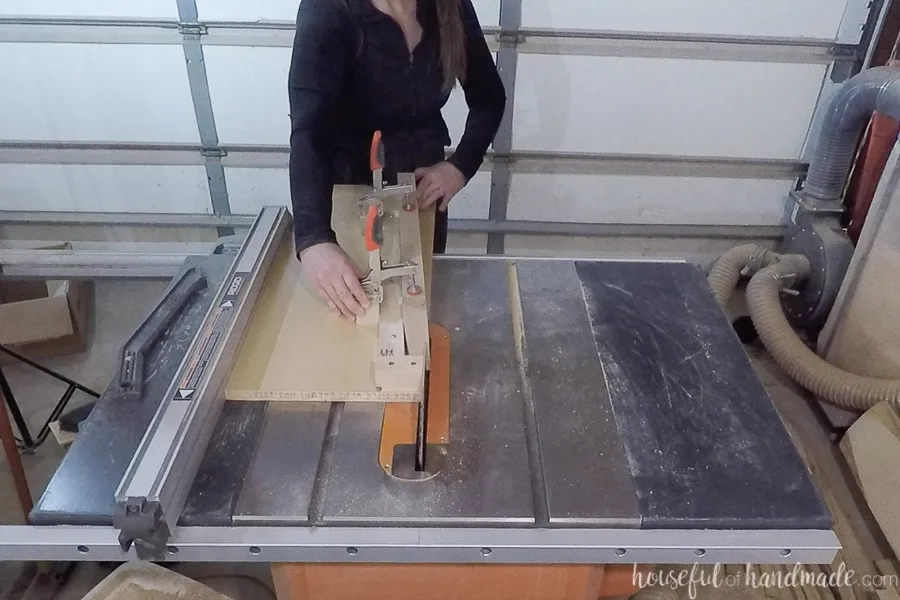
Easy Tapered Leg Jig
One thing I like to do with each new build plan is to try something new. And besides using a new wood, I also made my first table saw jig!
The legs of this nightstand are tapered. It gives them an extra fancy appearance. And while it looks hard, with a simple jig it is not.
The jig is made with a scrap of 3/4″ plywood and scraps of 1×2 and 2×2 boards.
No math or knowledge of angles are needed to get perfect angles or tapers. Instead, you clamp the leg board to the edge of the plywood so the part you want cut off is hanging over the edge.
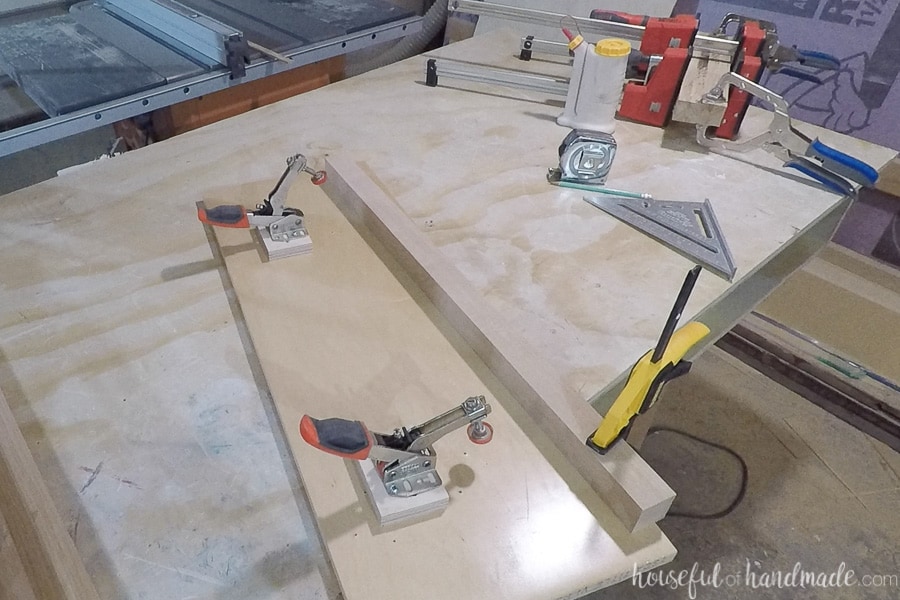

All the details for making the simple DIY tapered leg jig can be found here. I love that you only have to set the jig up once, then you can quickly cut all the tapers in all the legs.
And it makes cutting angles on all 4 sides of your board easy creating the perfect tapered leg!

DIY Nightstand Build Plans
If you are ready to build your own nightstands, I am sharing the plans for free on Kregtool.com.
Click here for the complete build plans!


Thank you to Kreg Tools for sponsoring this post. I only recommend products that I use and love and all opinions are 100% my own. Click here to read my full disclosure policy.
Mitch
Saturday 6th of May 2023
Katie,
Finished 2 nightstands for my daughter. She loves them. Pretty much according to plans. Had to use red oak instead, but with an antique white stain they came out really nice! Thanks. Wish I could upload the picture.
Mitch
Cherie
Tuesday 14th of December 2021
Hi Kati,
I built the first of two of these nightstands and it turned out great. When preparing the cut list though, I think there might be an error.
The fourth item on the cut list - Side Top , 3/4" X 3 1/2" X 11 1/2" --- I think this should be 3/4" x 1 1/2" x 11 1/2"
I originally cut it out of 1x4 but then realized it was too wide for Step 2 so I cut a new piece out of 1x2 and it worked great.
Now to get started on table #2. Thanks for this great project!
Kati
Monday 20th of December 2021
Thanks for the comment Cherie! I would love to see pictures of your finished nightsands.
Candy
Tuesday 28th of September 2021
Do you have photos of the sides and back you could share?
Kati Farrer
Thursday 30th of September 2021
I am sorry, I do not. You can get an idea of what they will look like from https://learn.kregtool.com/plans/tall-nightstand-with-open-shelf/?bmr=1
Katy
Monday 26th of July 2021
My 14 year old son is working on making this for his sister. He is loving working with the white oak! What liming wax do you recommend. He has never worked with it before. Thank you for such a beautiful set of plans.
Julie
Tuesday 4th of August 2020
Hello, would you ever make the night stands? I live in an apartment and do not have the space to make night stands. I of course would pay for the material and your time! Please let me know if you are interested
Kati
Thursday 13th of August 2020
I do not make items to sell. I would suggest you try to find a local maker in your area that does make items to sell. They can make them off my plans.