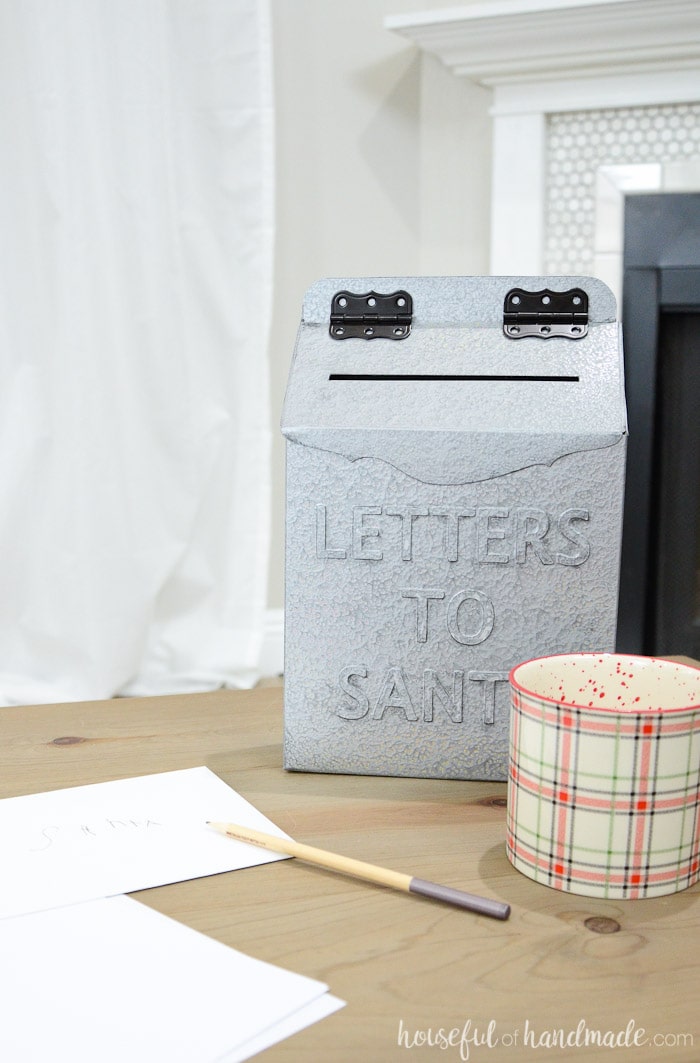
Create a faux metal Letters to Santa mailbox for Christmas with this amazing upcycle.
I was at Target last week, killing time and checking out the new Hearth & Hand line. Since I am so excited to decorate for Christmas I was excited to see their Christmas decor.
I fell in love with the metal Letters to Santa mailbox. But I didn’t buy it, and when I went back it was sold out.
Since I couldn’t stop thinking about that Santa mailbox, I decided to make my own! There were a lot of things I thought about using.
This post may contain affiliate links. As an Amazon Associate I earn from qualifying purchases. Click here to read my full disclosure policy.
I knew I could build it easy enough out of wood (and there are plenty of scraps in my garage that I could have used), but then it would be big and bulky.
I thought about using sheet metal to mimic the original, but I knew there had to be an easier way. Then it hit me…
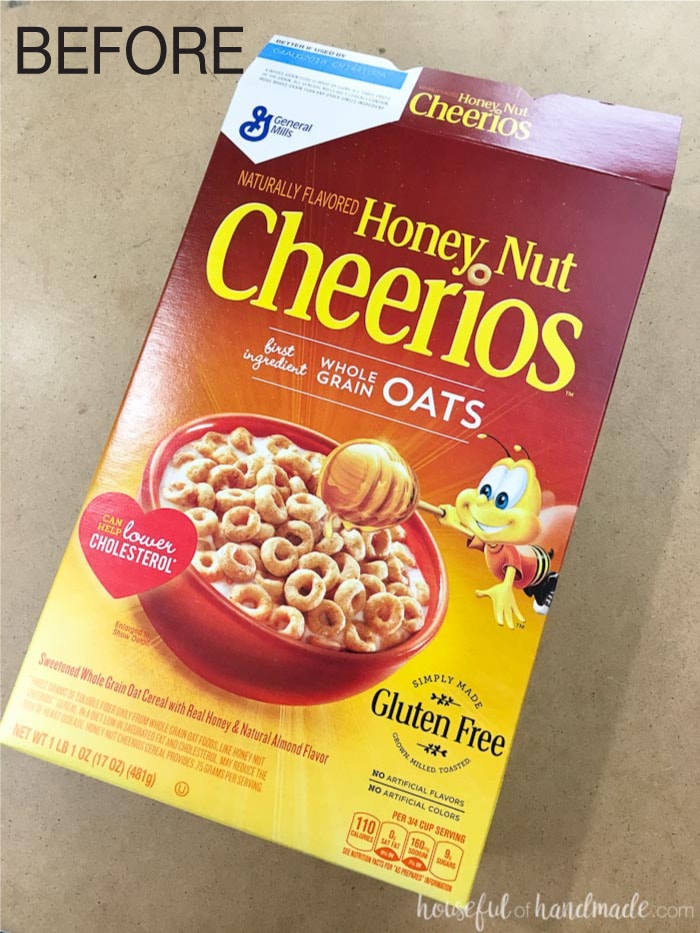
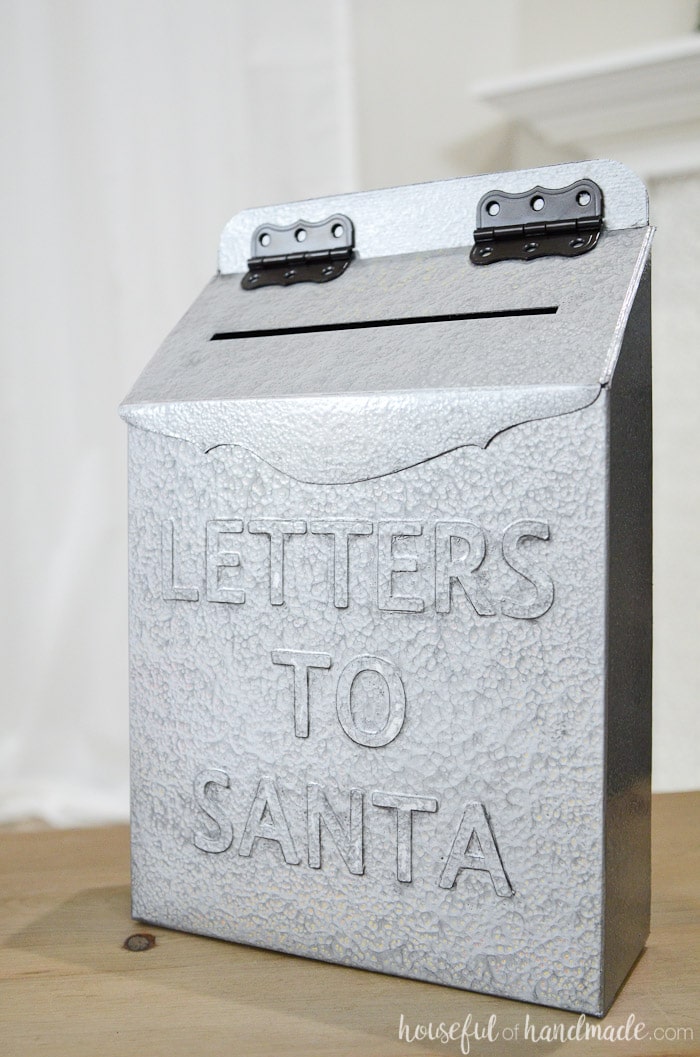
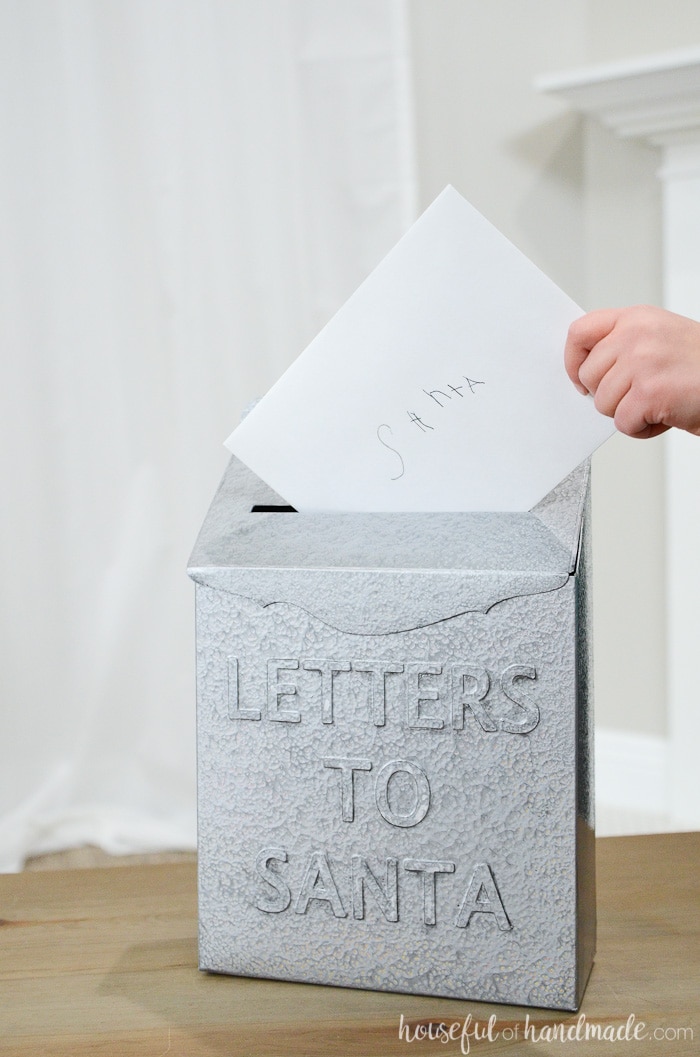
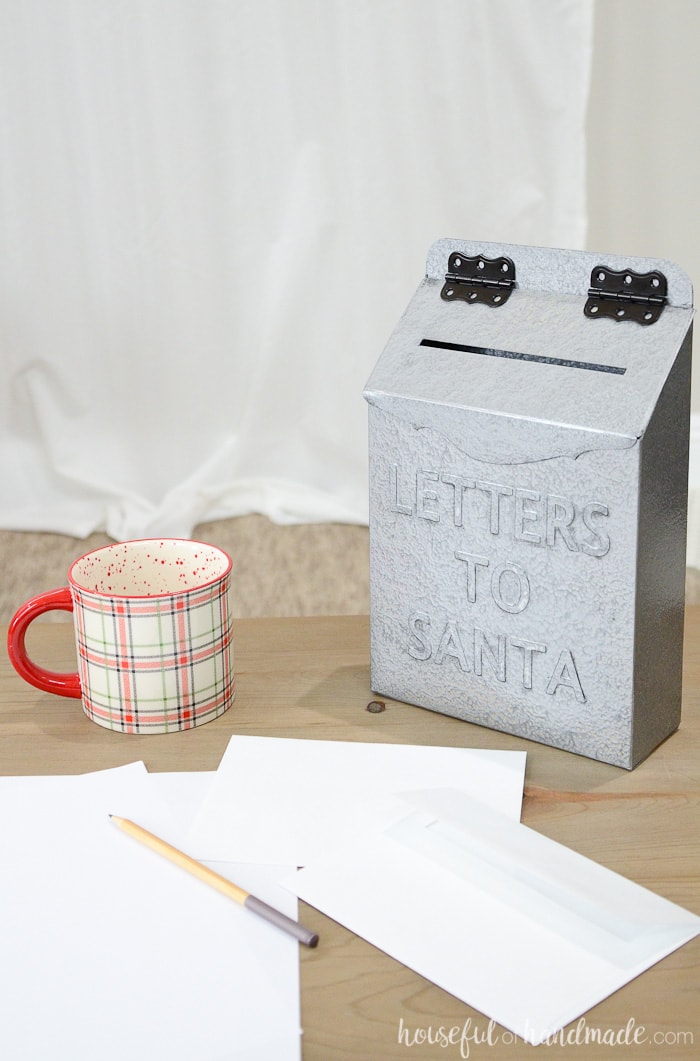
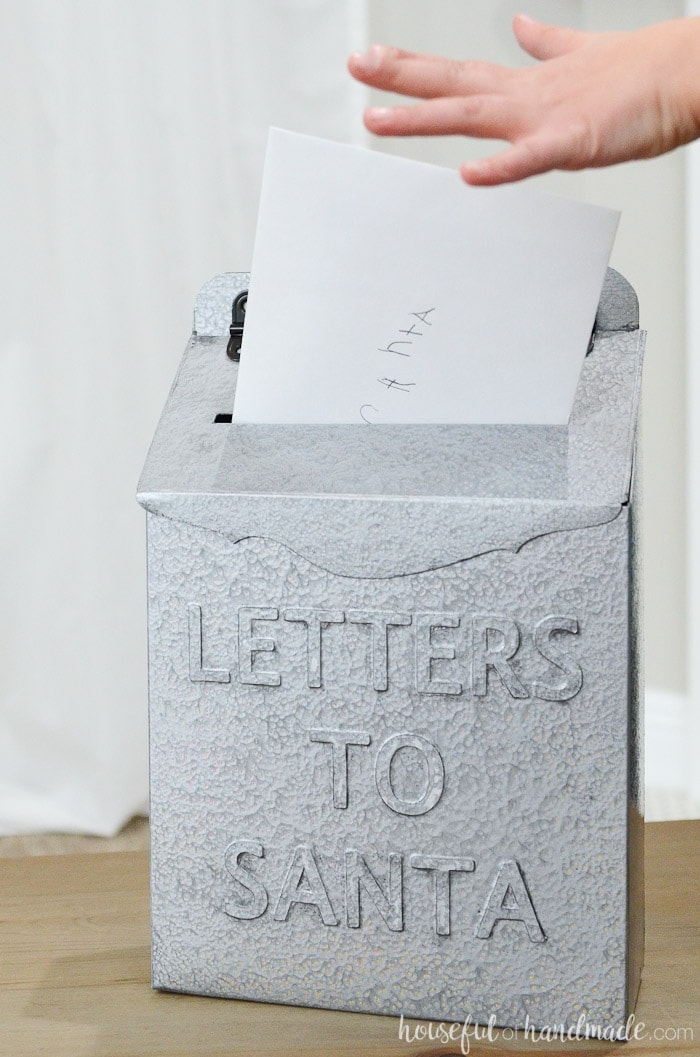
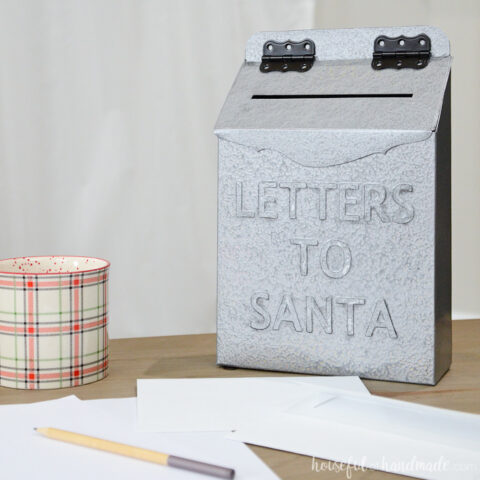
Can you believe this beautiful Christmas mailbox was made from a cereal box? Seriously, I keep touching it to remind myself it’s not actually metal.
It turned out so amazing. My husband was shocked when I told him it was made out of a cereal box too. The words seriously look like they have been stamped into the metal.
And it was so easy to make!
My kids are excited to fill it up with their letters to Santa. I told them I would take them to the post office from this new mailbox so they can get all the way to the North Pole!
Christmas with kids is the best thing ever!!!!
Now I can’t wait to decorate the entire house for Christmas! This Santa mailbox was the perfect DIY to start off the season. And I promise so much more will be coming soon!
I will be sharing lots of DIYs for our Christmas mantel and I have a bunch of Christmas ornaments to make too. I am so excited for Christmas. How about you?
If you want to make your own Letters to Santa mailbox, read below for the complete (and easy) tutorial. Then don’t forget to check out the rest of my Christmas Decor tutorials.
How to Make a Letters to Santa Mailbox
Supplies:
- Cereal box
- X-acto knife
- Coverstock
- Hot glue gun and glue sticks
- Paintable caulk
- Hammered spray paint
- Pick any color you want, I used Rustoleum Hammered in Silver.
- Decorative hinges
Shape the Mailbox
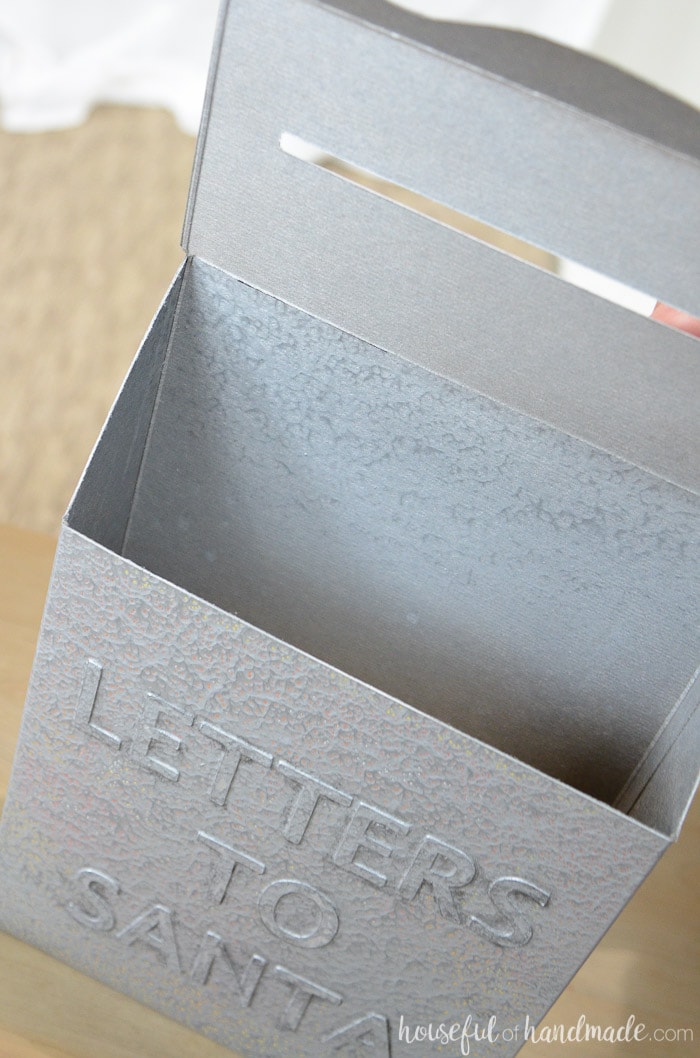
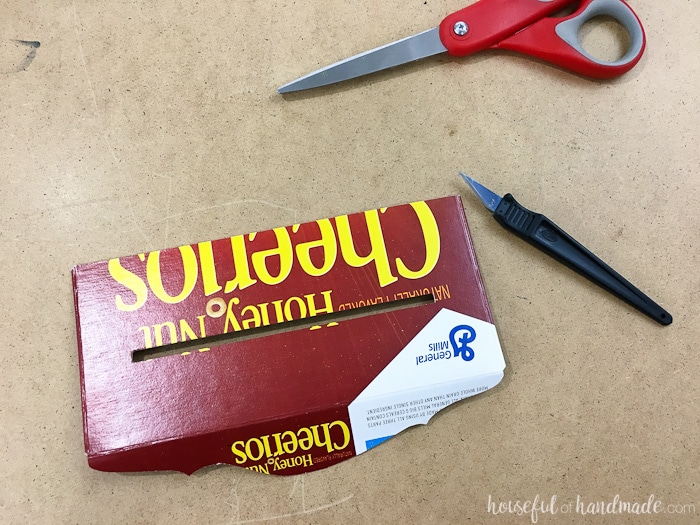
Cut the top flap of the back of the box off. Then cut the sides of the box at an angle by measuring down 1″ at the back of the box and 2 1/2″ at the front of the box.
Cut along this line with the X-acto knife. Now cut the front of the box off between the 2 1/2″ marks.
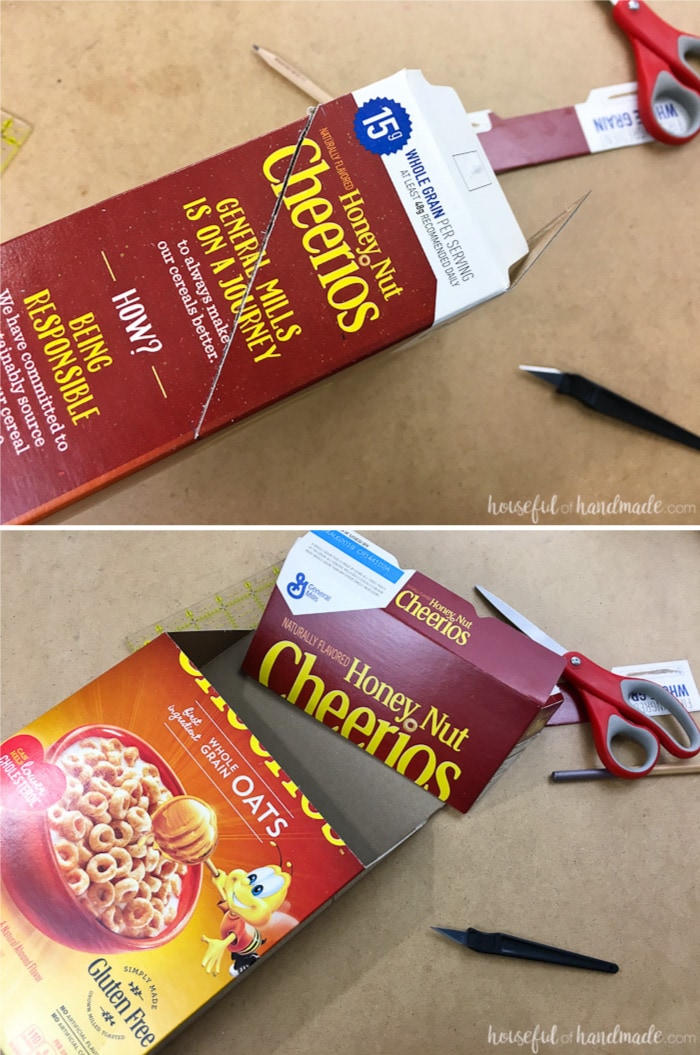
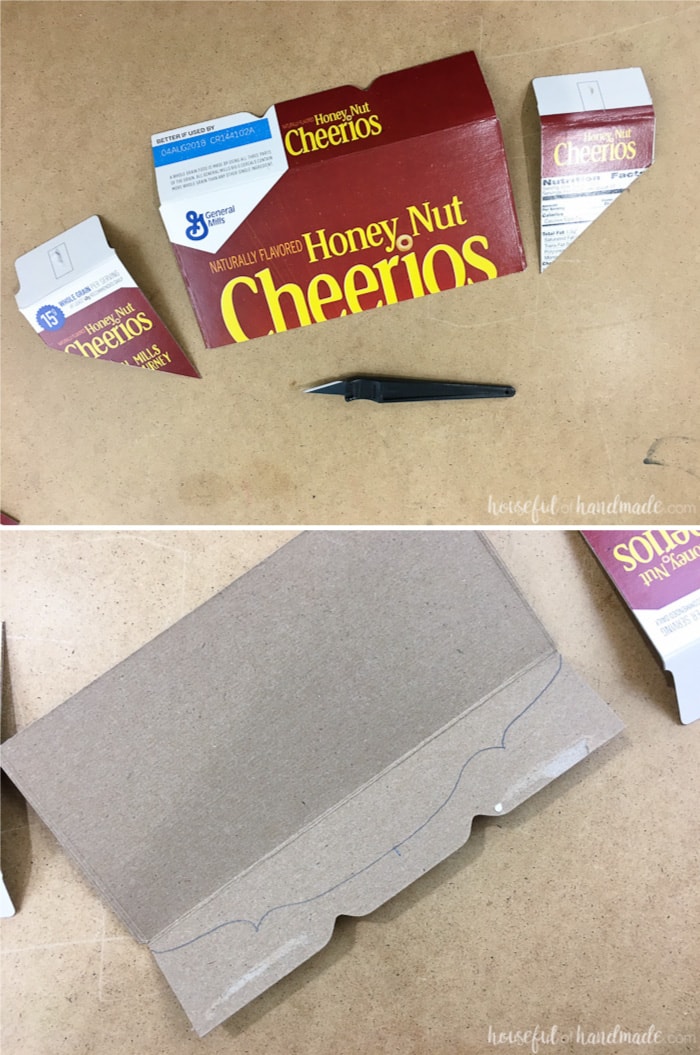
Cut the sides off the top piece of the box you just cut off. Then draw a decorative edge on the top flap and cut it out.
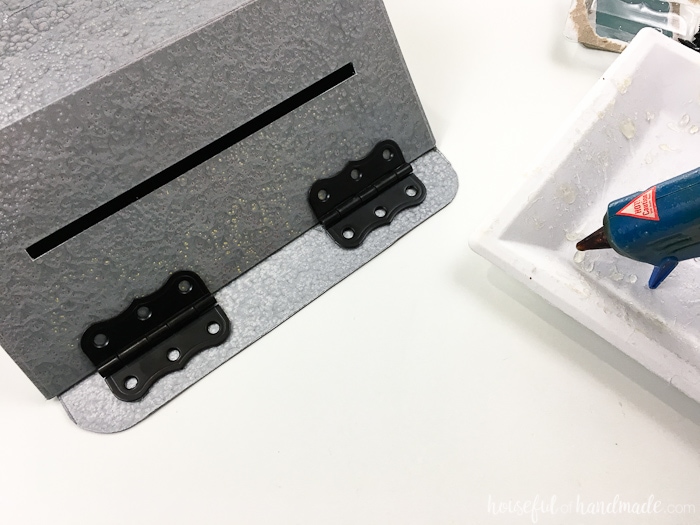
Cut a slit in the top of the box with the X-acto knife.
Add 3D Letters
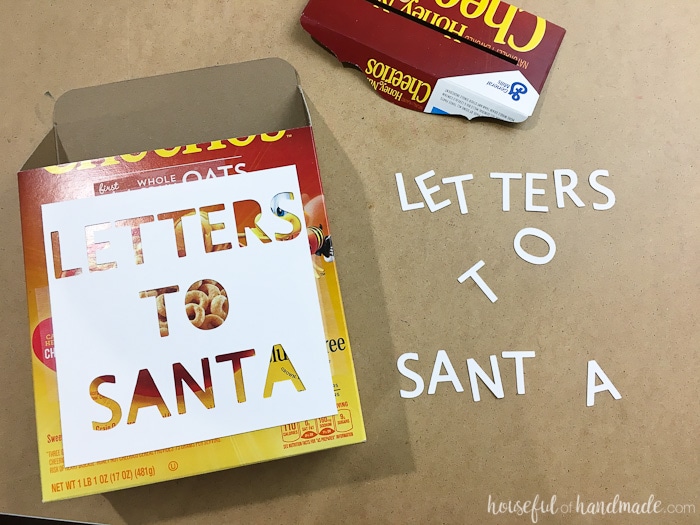
Cut the letters you want out of the coverstock. I used my Silhouette electronic cutting machine to do it, but you can cut it out with scissors or the X-acto knife too.
I kept the paper I cut the letters out of to use as a template to help me glue the letters on straight. Just tape it to the center of the cereal box.
Add hot glue to the back of the letters and then place them back in their spot on the template.
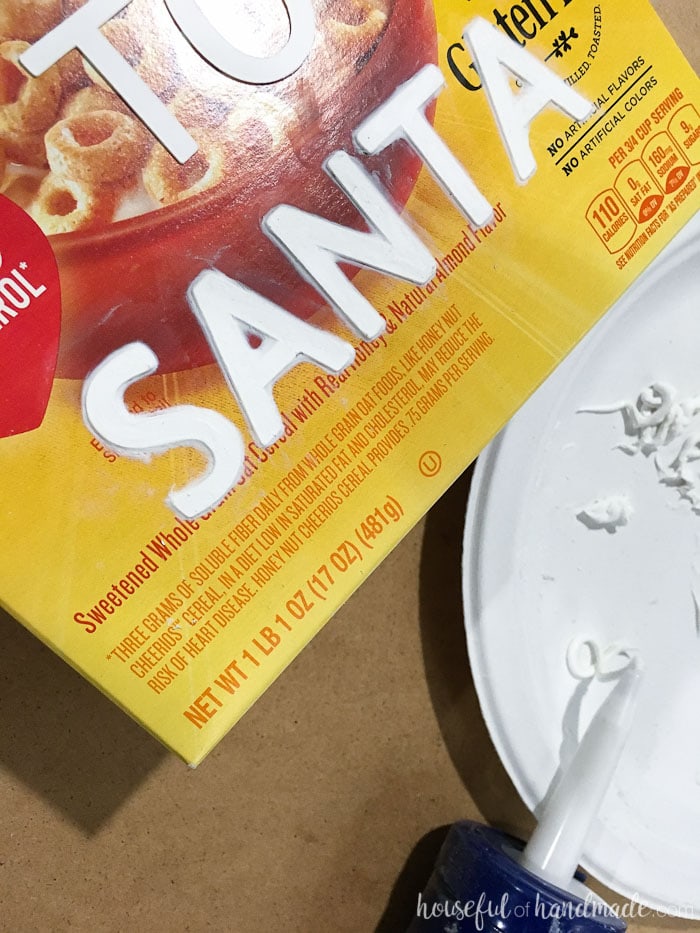
To make the letters look like they were punched out of the box, caulk around all the letters to give them a curved appearance.
The easiest way I found to do this was to use my finger to press the caulk around the edges of the letters.
Finish the Santa Mailbox
After the caulk is dry, spray paint the entire Santa mailbox with the hammered metal spray paint. The hammered metal requires a thick coat to create it’s texture.
Let the paint dry completely (the thick coat of paint takes longer than normal).
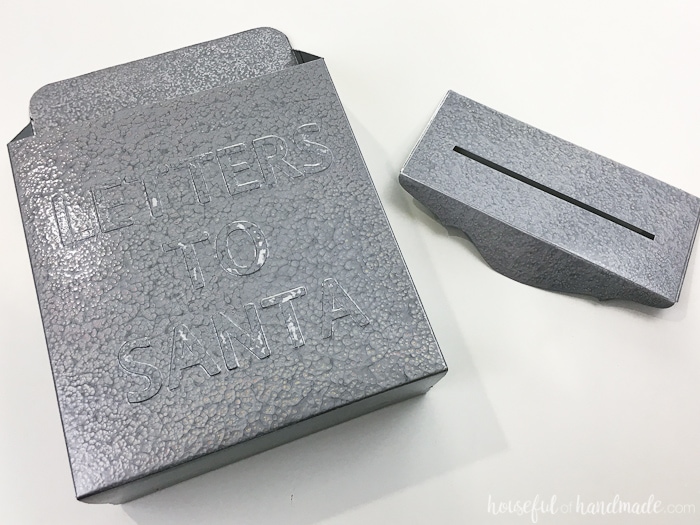
Glue the hinges to the top of the box and flap with the hot glue. I also dry brushed a tiny bit of black craft paint round the letters to help them really pop.
And now it is ready for all those letters to the North Pole! I am hoping the kids have fun filling it with all kinds of Christmas wishes.
Here’s to a wonderful Christmas season!

Letters to Santa Mailbox DIY
Create an amazing DIY Letters to Santa Mailbox using a recycled cereal box!
Materials
- Cereal box
- Coverstock
- Paintable caulk
- Hammered spray paint
- Decorative hinges
Tools
- X-acto knife
- Hot glue gun and glue sticks
Instructions
- Cut the top flap of the back of the cereal box off.
- Cut the sides of the box at an angle by measuring down 1″ at the back of the box and 2 1/2″ at the front of the box.
- Cut along this line with the X-acto knife.
- Next, cut the front of the box off between the 2 1/2″ marks.
- Cut the sides off the top piece of the box you just cut off. Draw a decorative edge on the top flap and cut it out.
- Cut a slit in the top of the box with the X-acto knife.
- Cut the letters you want out of coverstock using a cutting machine or scissors.
- Caulk around all the letters to give them a curved appearance.
- After the caulk is dry, spray paint the entire Santa mailbox with the hammered metal spray paint.
- Let the paint dry completely.
- Glue the hinges to the top of the box and flap with the hot glue.
- Dry brush a tiny bit of black craft paint around the letters to help them really pop.
And don’t forget to check out the rest of my Christmas Decor tutorials.
Carole
Thursday 1st of February 2018
I saw the box at our local Target (although they only had one), and it was cute, but too spendy for me. This is great!
Kati
Monday 5th of February 2018
That was my thoughts exactly, I like it but too spendy (especially for only being able to use it one month of the year). This was the perfect solution!
Barb
Sunday 19th of November 2017
Love it! Thank you for reminding us that Christmas can be homemade and fun, and inexpensive! What a good time kids will have sending their letters, and imagine their delight when one of their wishes actually appears under the tree! This is such a cute idea. Thanks for sharing.
Kati
Thursday 30th of November 2017
Thanks so much Barb! I love a handmade Christmas. Things are too expensive these days. My kids have already started filling up their mailbox and are so excited to see if Santa brings them what they want. It's too magical!
Linda
Thursday 16th of November 2017
WOW. I haven't seen how you made this, but will later on. Just wanted to say that it was adorable!!! The letters look like they are stamped in the metal & so perfectly done. You are amazingly resourceful, good going!!
Kati
Thursday 30th of November 2017
Thanks so much Linda! I love how the letters really look stamped.
Maria N
Thursday 16th of November 2017
Omg ,you're a genius! I fell in love with it too, although I don't have little ones, So I passed it up.Hope I have time to try this. Thanks ????
Kati
Thursday 30th of November 2017
Thanks so much Maria! You don't need little ones to have a letters to santa box right ;) This one is a perfect substitute for the expensive version!