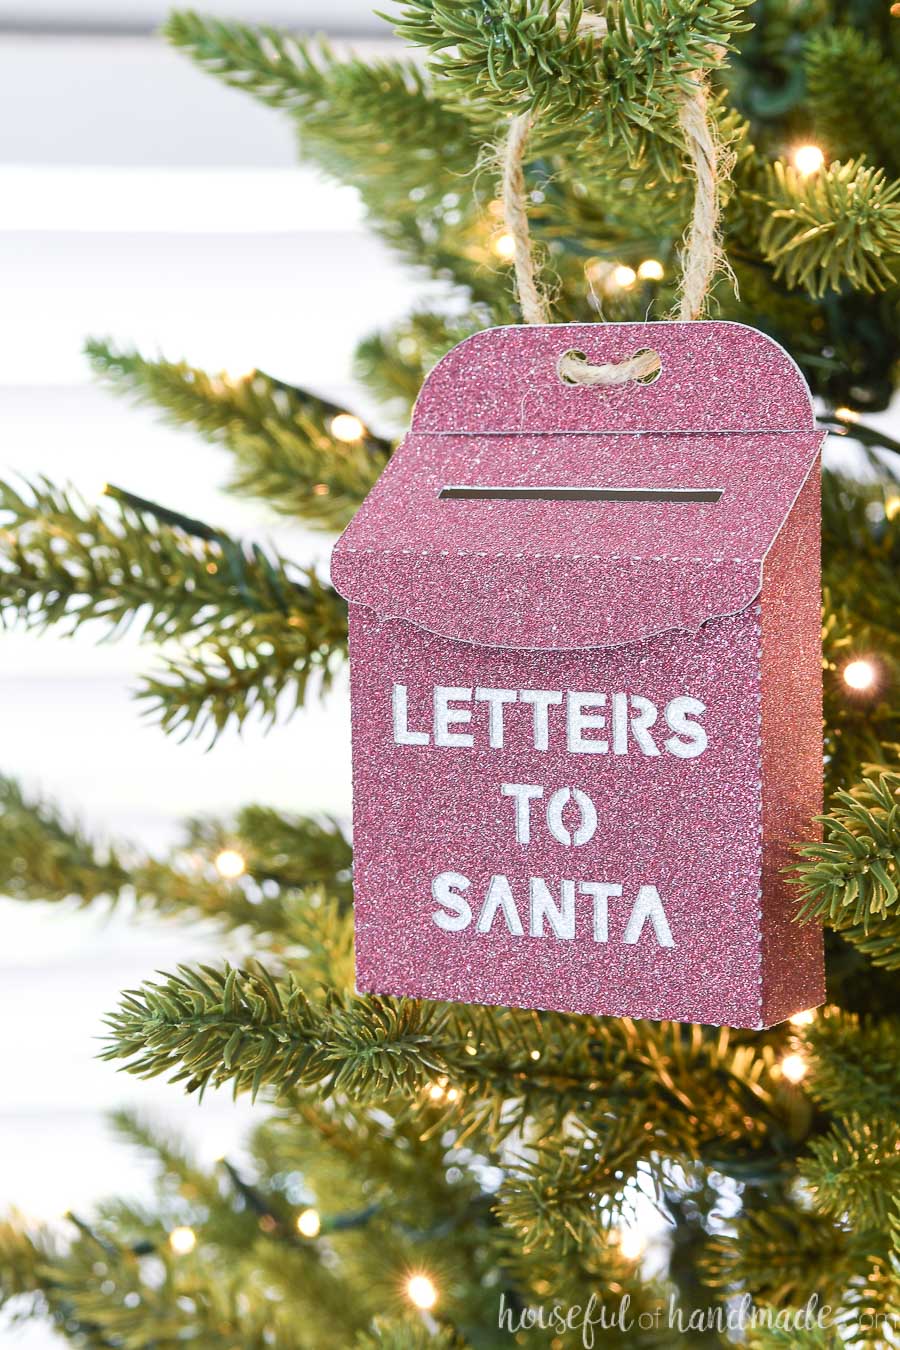
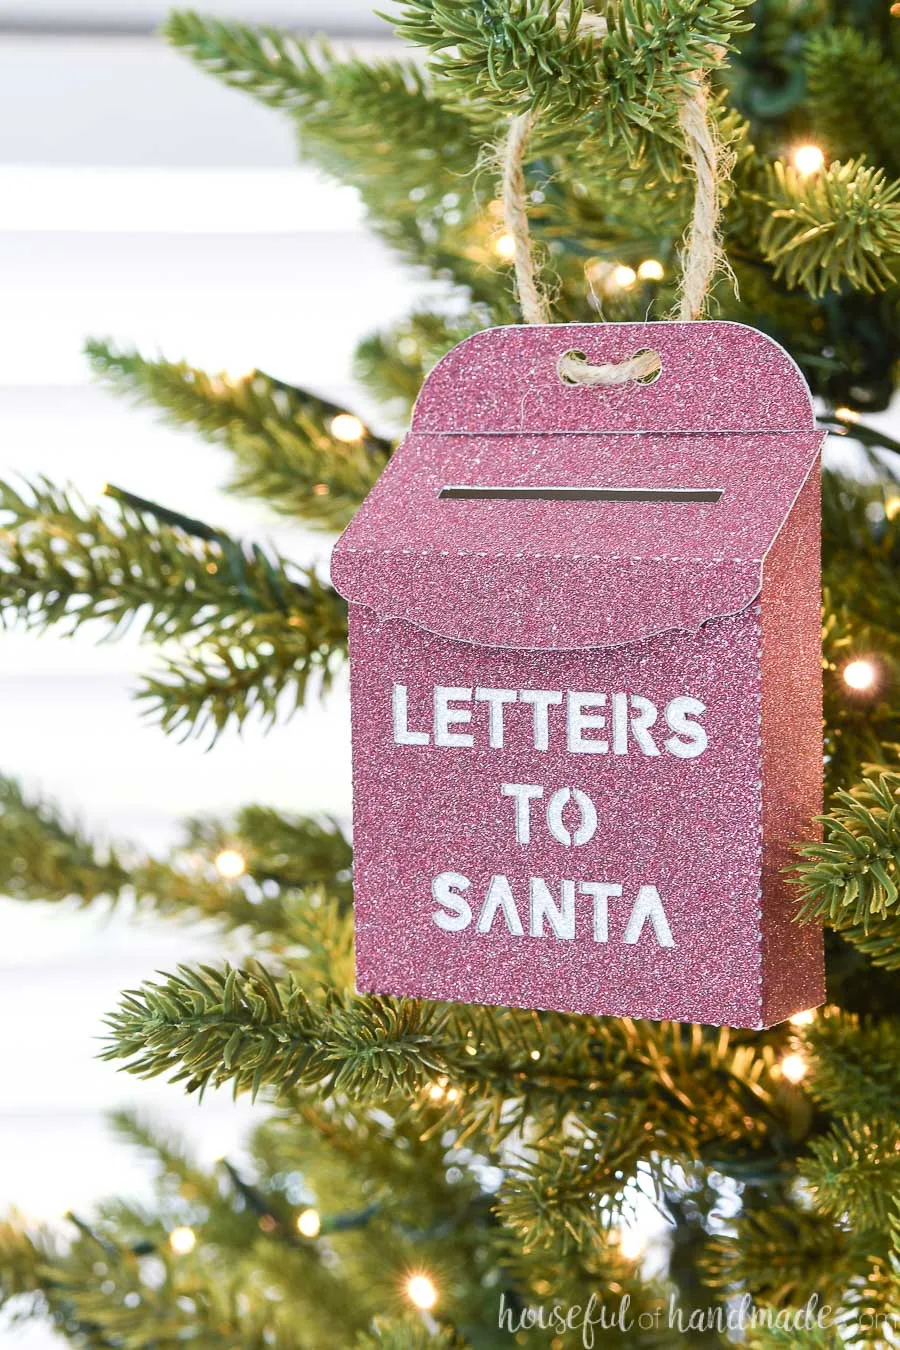
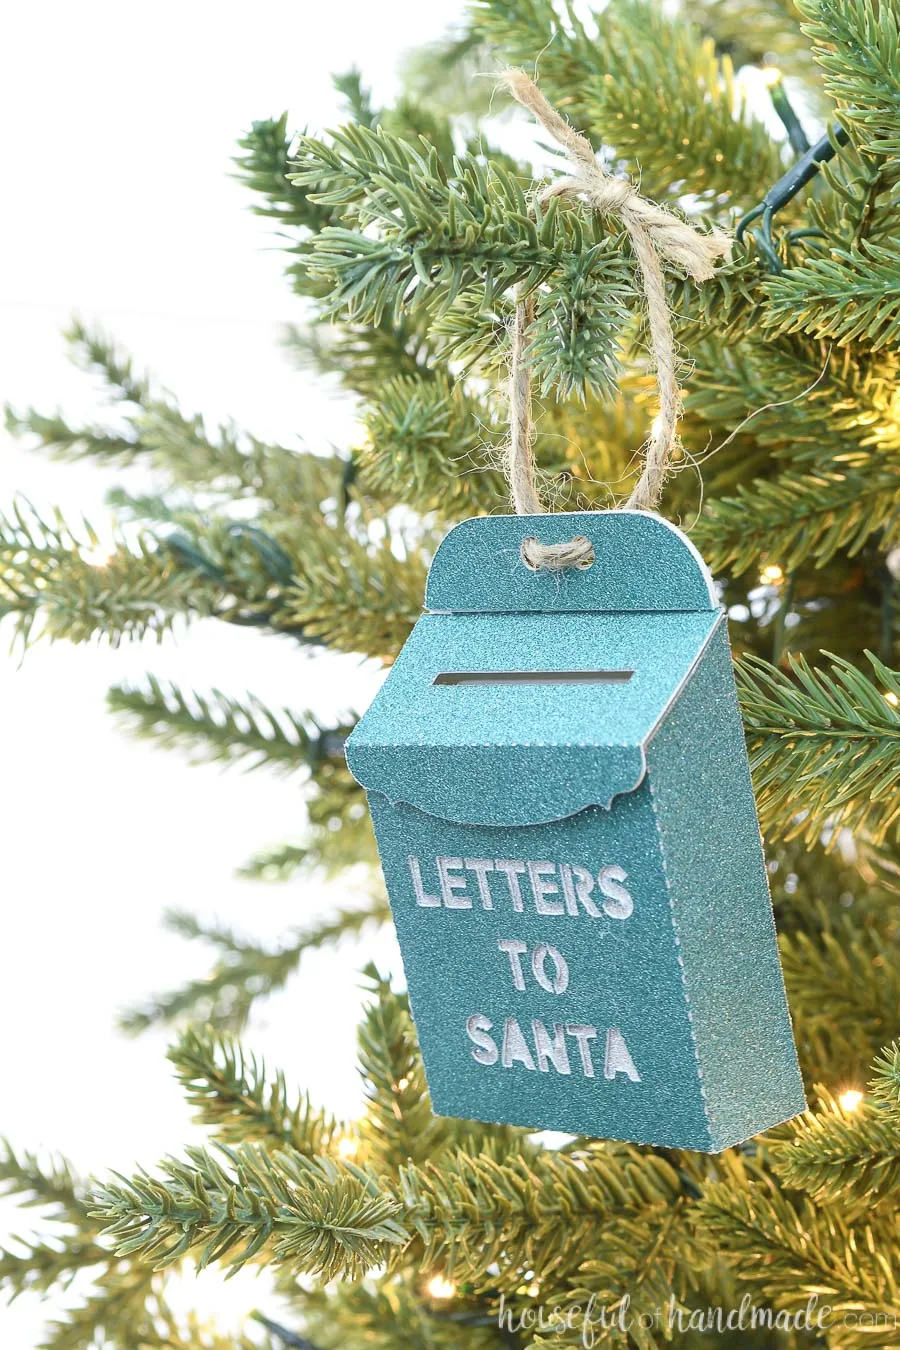
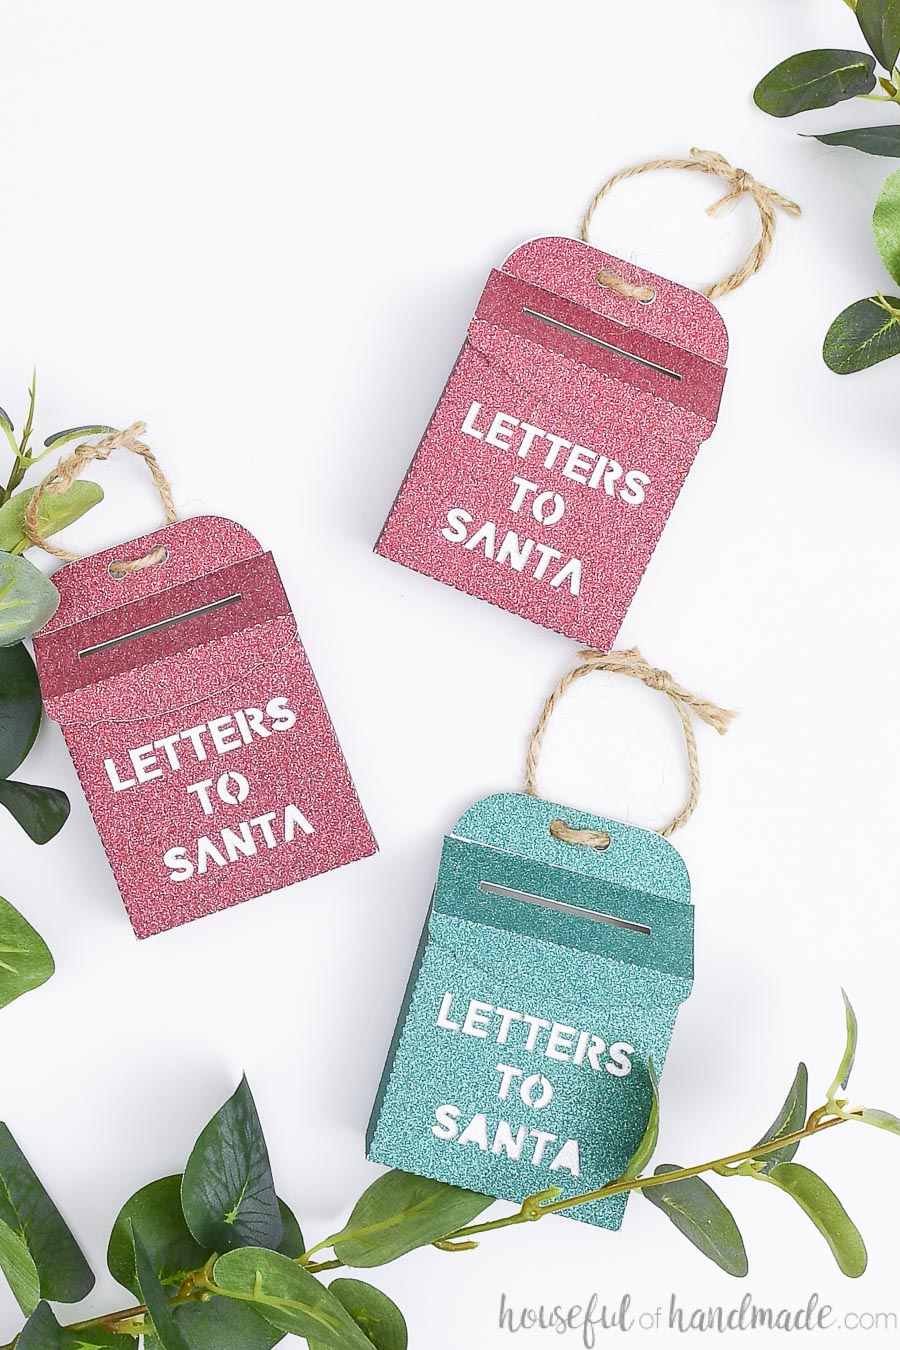
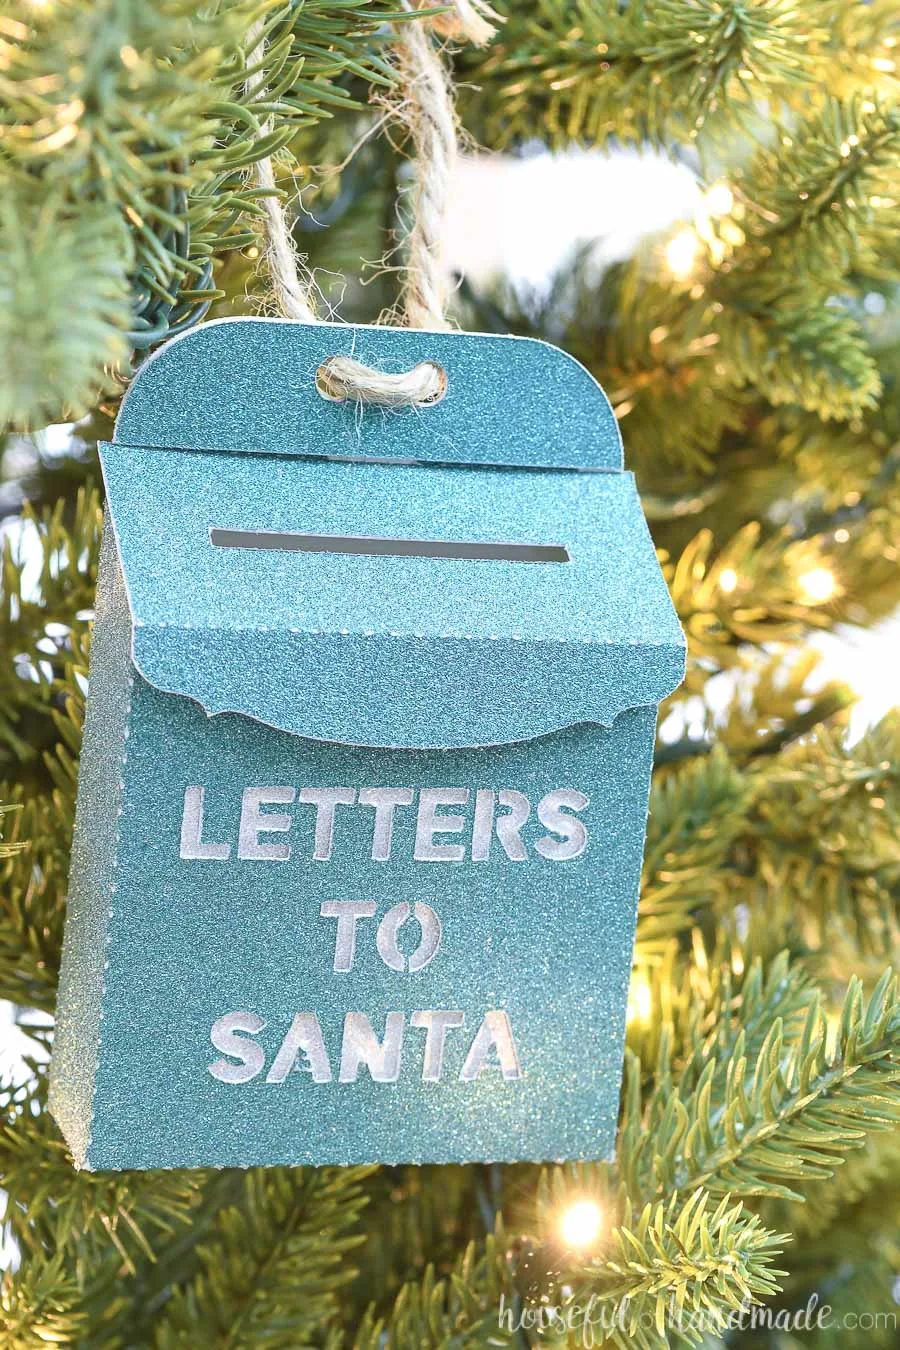
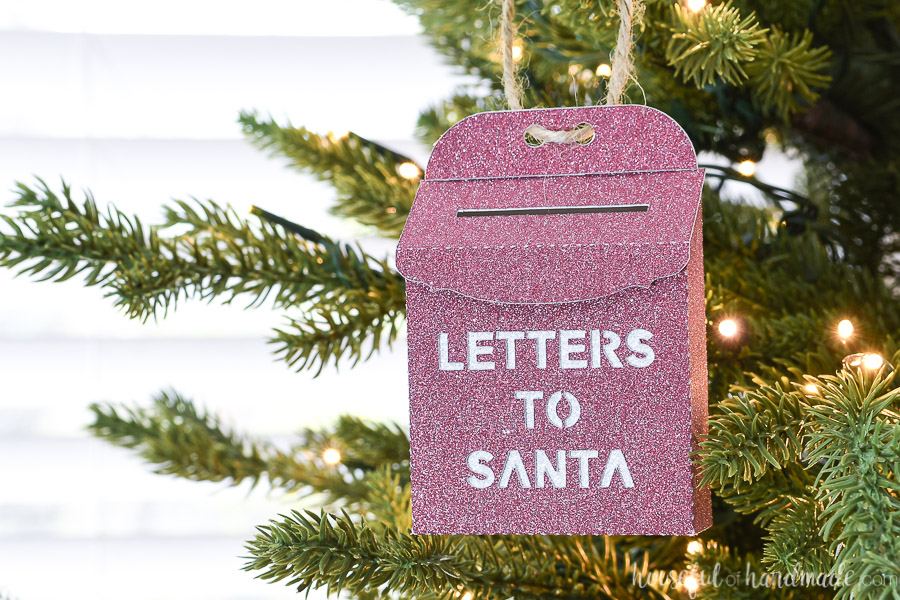
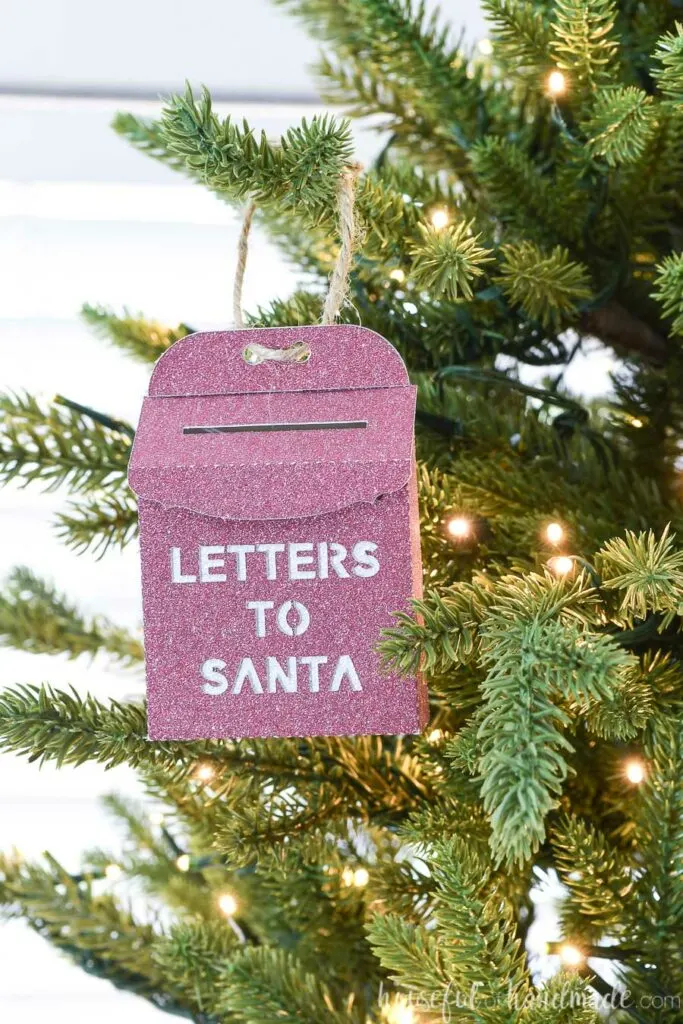
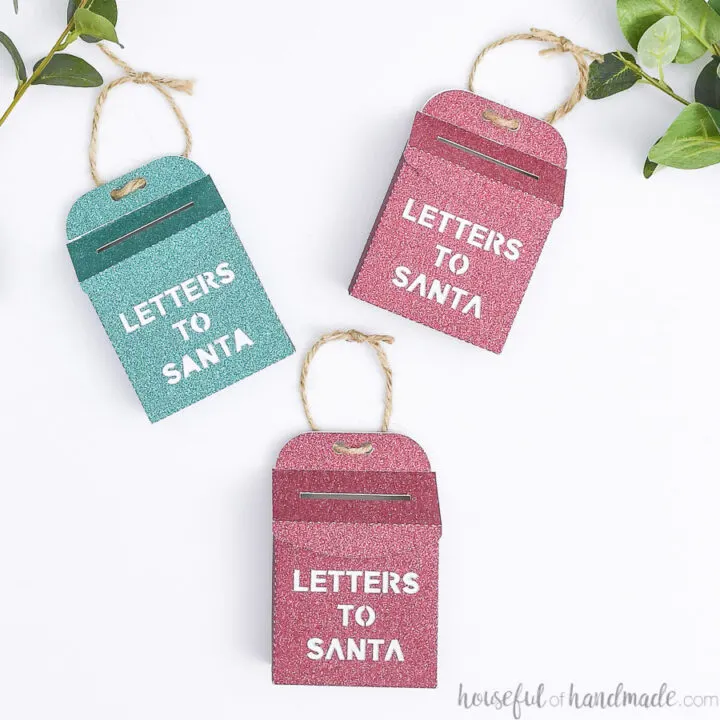
This miniature Letters to Santa mailbox is the sweetest Christmas ornament for some holiday magic.
For Day 6 of the 7 Days of Paper Christmas I was just dying to make more Christmas ornaments! You need lots of ornaments to decorate a full tree, and paper Christmas ornaments are the best!
For this project, I shrunk down the Letters to Santa mailbox I made a couple years ago from an old cereal box. This project was so much fun, and we still hang our mailbox every year for the kids to put their letters into.
Miniature Santa Mailbox
So why make a mini version? Cause everything is cuter when it’s miniature! And this Letters to Santa mailbox ornament is no exception to the rule.
This post may contain affiliate links. As an Amazon Associate I earn from qualifying purchases. Click here to read my full disclosure policy.
While these small ornaments are probably not big enough to actually tuck a letter into, they are still fully functional little mailboxes. The top has a slot in it and even lifts up to access the inside.

I am sure my kids will have fun writing miniature letters to tuck away into the mini mailboxes. That is the magic of Christmas!
I guess I should make some miniature Santa letters for them to fill out 😉

Making Paper Look like Metal
To give my mailbox Christmas ornaments some sparkle, I used glitter cardstock. The thicker cardstock makes the little mailboxes look a bit like glittery metal boxes.
But if you want your mailboxes to look more like metal, you can spray paint them like I did for this Letters to Santa mailbox I made or this DIY Santa mailbox. You could totally do that with these mailbox ornaments too.

Cut out the mailboxes out of cardstock and assemble the box, but don’t attach the lid just yet. Instead, spray paint the top of the lid and the outside of the mailbox. Then finish the assembly once dry.
However you decide to make your Letters to Santa mailbox ornament, the most important thing is to have fun!

How to Make Santa Mailbox Christmas Ornaments
Supplies:
- Santa mailbox template
- I am sharing the SVG & PDF in my subscriber library until 11/29/2020, then they will move to the shop. Click here to subscribe to my newsletter and gain access to all the freebies. If you already have your password, click here to download them.
- Glitter cardstock
- Hot glue gun and glue sticks
- Twine or ribbon
- Optional: Electronic cutting machine
- I love using my Silhouette Cameo to quickly cut out paper decor projects, but you can also print the PDF and cut it out with scissors and an x-acto knife.
Cut out the pieces
The template cuts out the pieces for 2 mailboxes on each 8 1/2″ x 11″ sheet of paper.
Once cut, fold along all the dotted lines to prepare for glue.

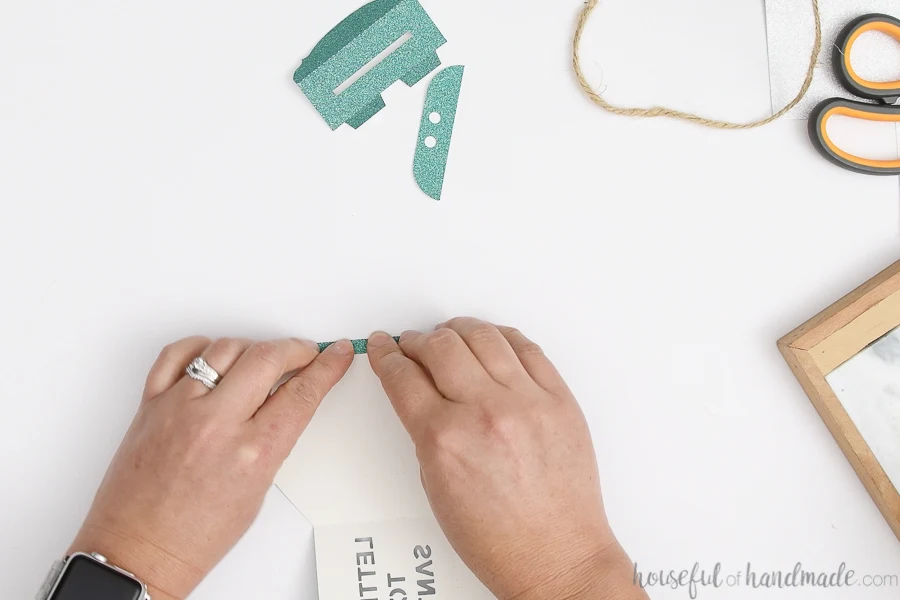
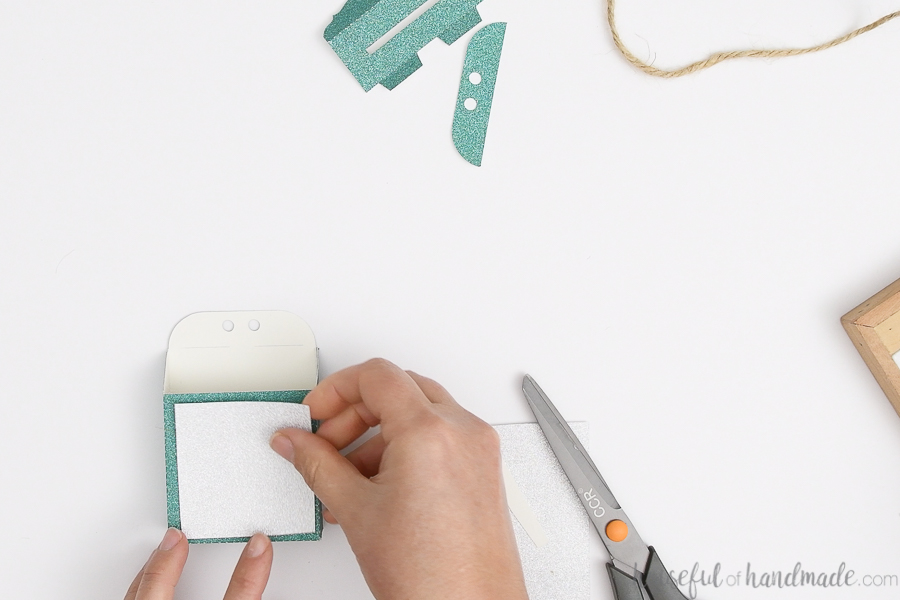
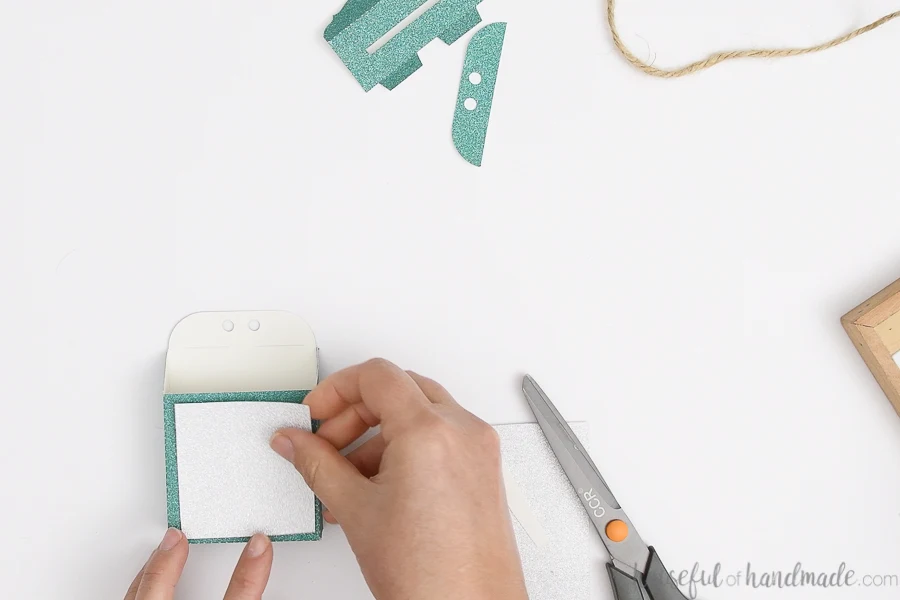
You will also need to hand cut a piece of coordinating paper to cover in the Letters to Santa words that are cut into the mailbox. Measure inside the fold lines on the front of the mailbox and cut a piece of paper just smaller than it.
Assemble the mailbox
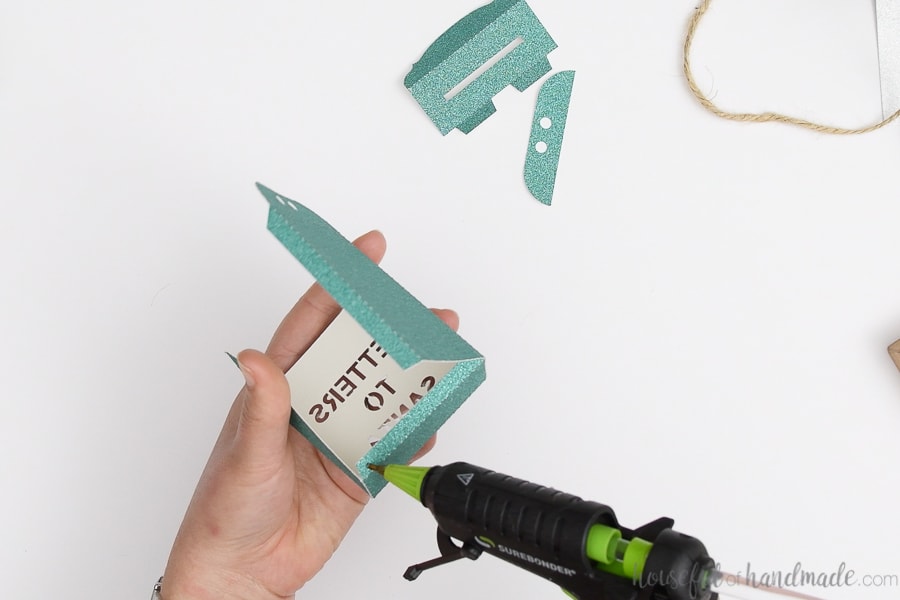
Start at the bottom of the mailbox and add glue to one of the flaps. Secure it to the bottom side.
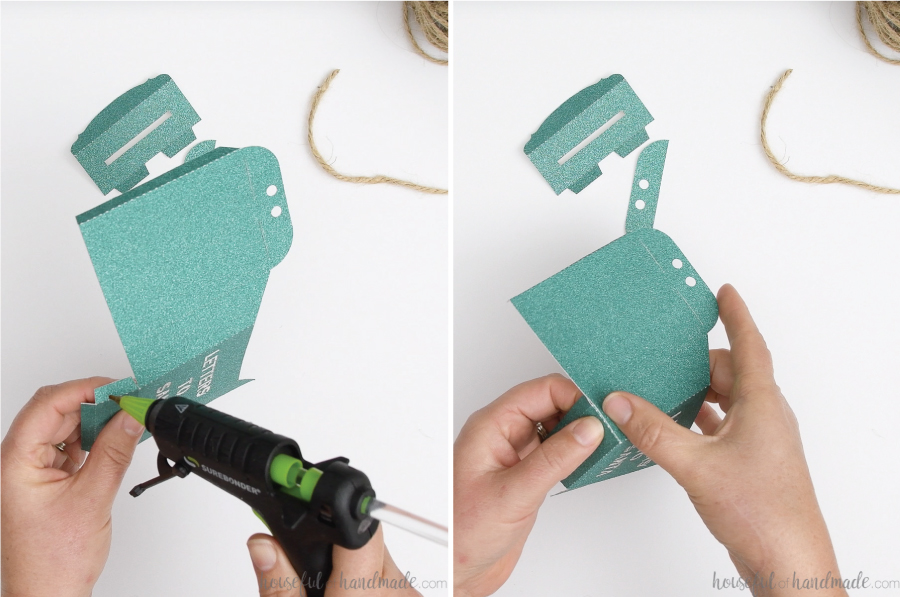

Then finish by glueing the tabs on the back to close up the entire mailbox piece.
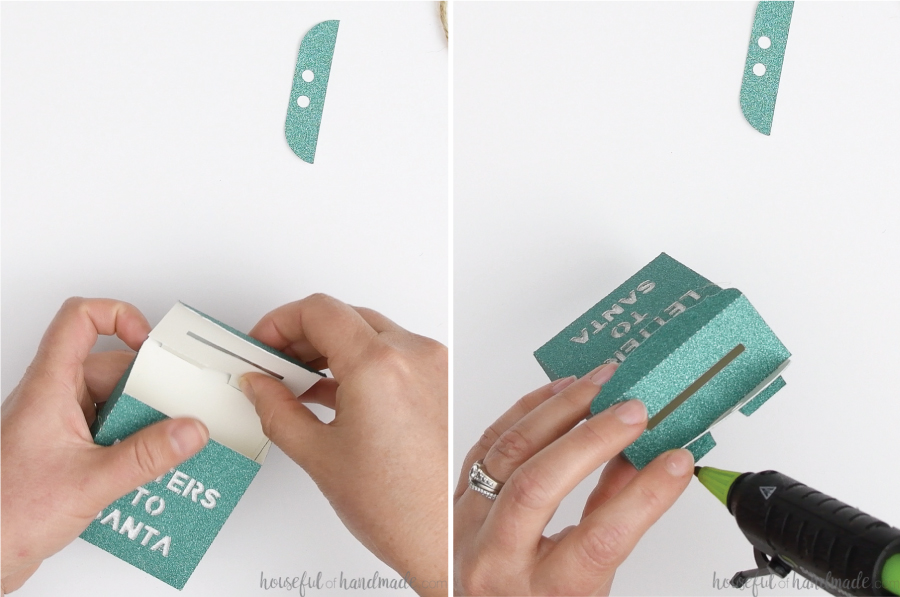
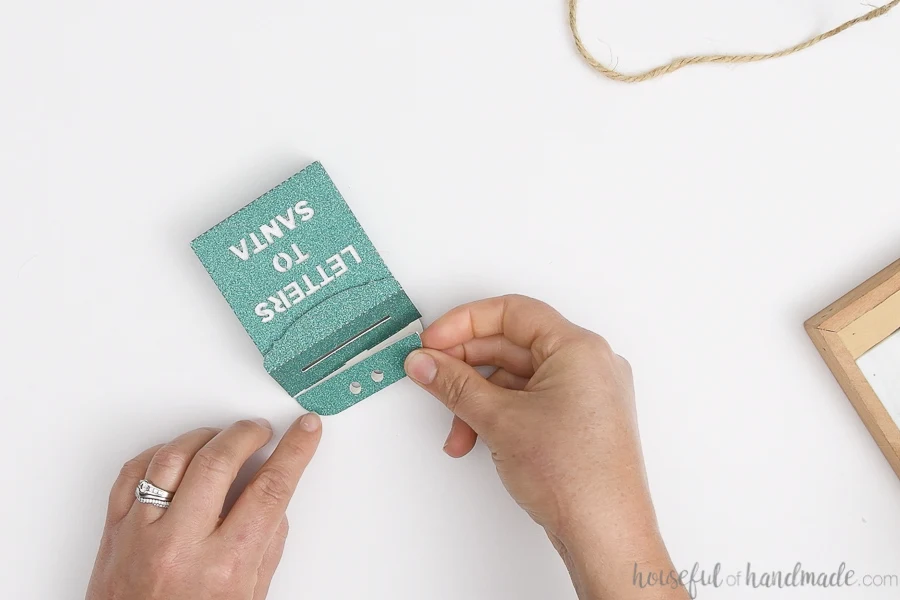
To attach the top of the mailbox, first slide the tabs into the slots on the back. Make sure they are pulled all the way through.
Face the flaps toward the top of the mailbox to keep the top angled properly. Glue to the back of the ornament to secure.

If using a double-sided cardstock, you do not need to add the last piece.
But if using a single-sided cardstock like this glitter cardstock, you will need to glue the top piece over the front of the back to cover up any exposed back.

Add a hanger
Cut a piece of twine or ribbon to make a loop through the two holes on the top. Tie it to secure.
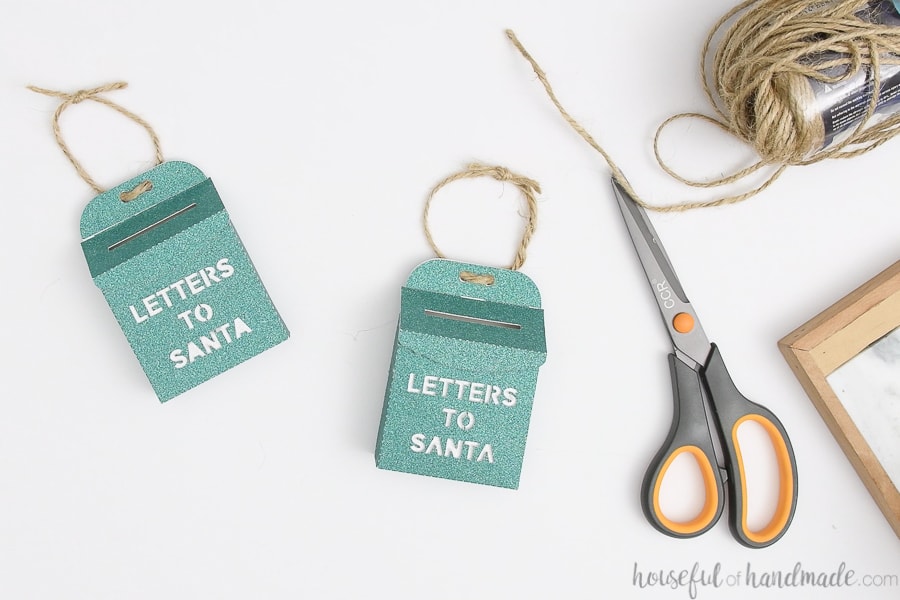
Now you can hang your new Santa mailbox ornaments. I love the cute mailboxes with a the little bit of sparkle the glitter adds.

More Paper Christmas Decor
And now we only have 1 more day left of the 7 Days of Paper Christmas Decor. Make sure to check back tomorrow, and don’t forget to check out any of the projects you missed below.
Happy crafting!
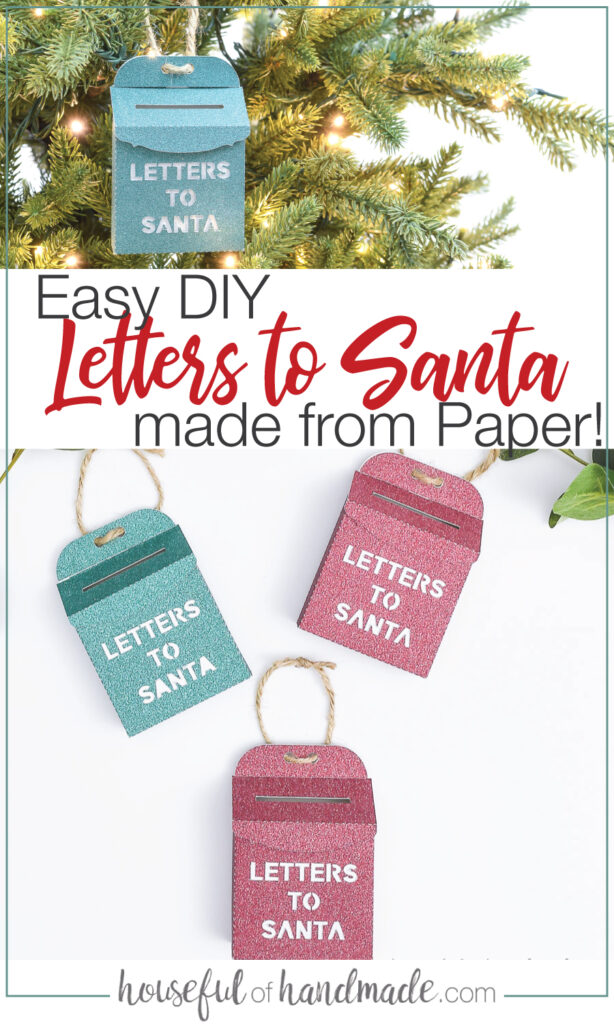


DIY Paper Craft Letters to Santa Mailbox Ornament
Let me show you how to make an adorable Letters to Santa mailbox ornament, which is a mini version of a Santa mailbox I made out of cereal boxes a few years ago. My kids still look forward to taking it out every year!
Materials
- Santa mailbox template
- Glitter cardstock
- Hot glue gun and glue sticks
- Twine or ribbon
Tools
- Optional: Electronic cutting machine
Instructions
- Cut out the pieces for 2 mailboxes on each 8 1/2″ x 11″ sheet of paper.
- Once cut, fold along all the dotted lines to prepare for glue.
- Measure inside the fold lines on the front of the mailbox and cut a piece of paper just smaller than it.
- Add glue to one of the flaps starting at the bottom of the mailbox.
- Secure it to the bottom side.
- Finish by gluing the tabs to close up the entire mailbox piece.
- Attach the top of the mailbox by sliding the tabs into the slots on the back.
- Face the flaps toward the top of the mailbox to keep the top angled properly.
- Glue to the back of the ornament to secure.
- Add glue to the top piece over the front of the back to cover up any exposed back.
- Cut a piece of twine or ribbon to make a loop through the two holes on the top.
- Tie it to secure.
Recommended Products
As an Amazon Associate and member of other affiliate programs, I earn from qualifying purchases.


Jessie
Wednesday 29th of November 2023
This ornament is so cute! A little bummed I can't find it.