

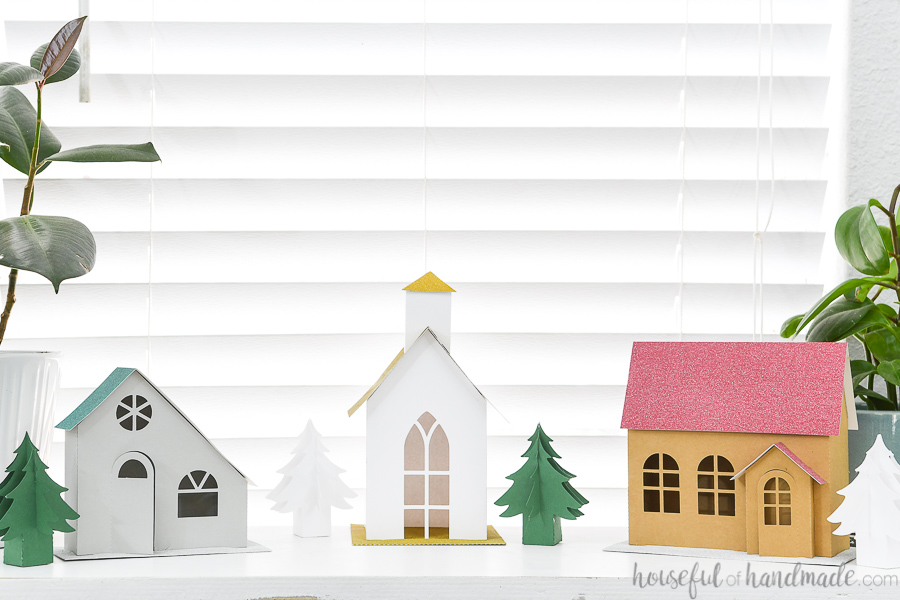
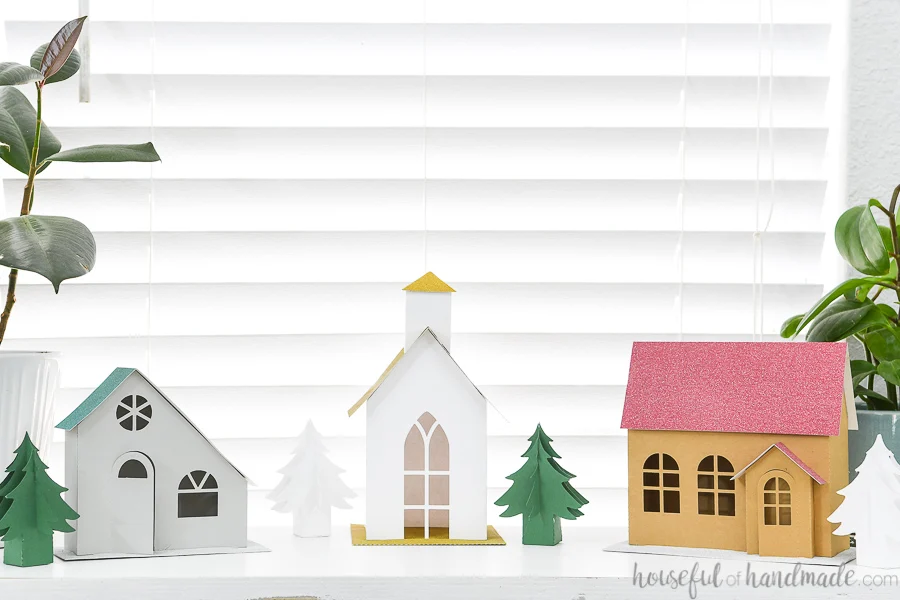
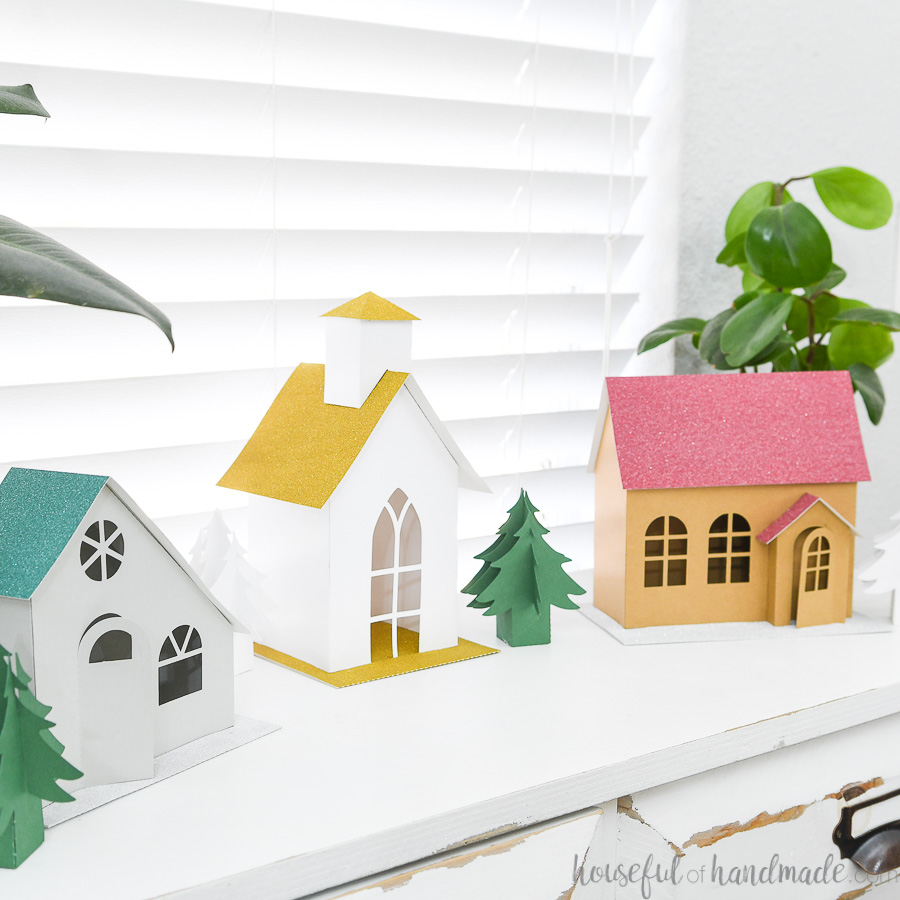
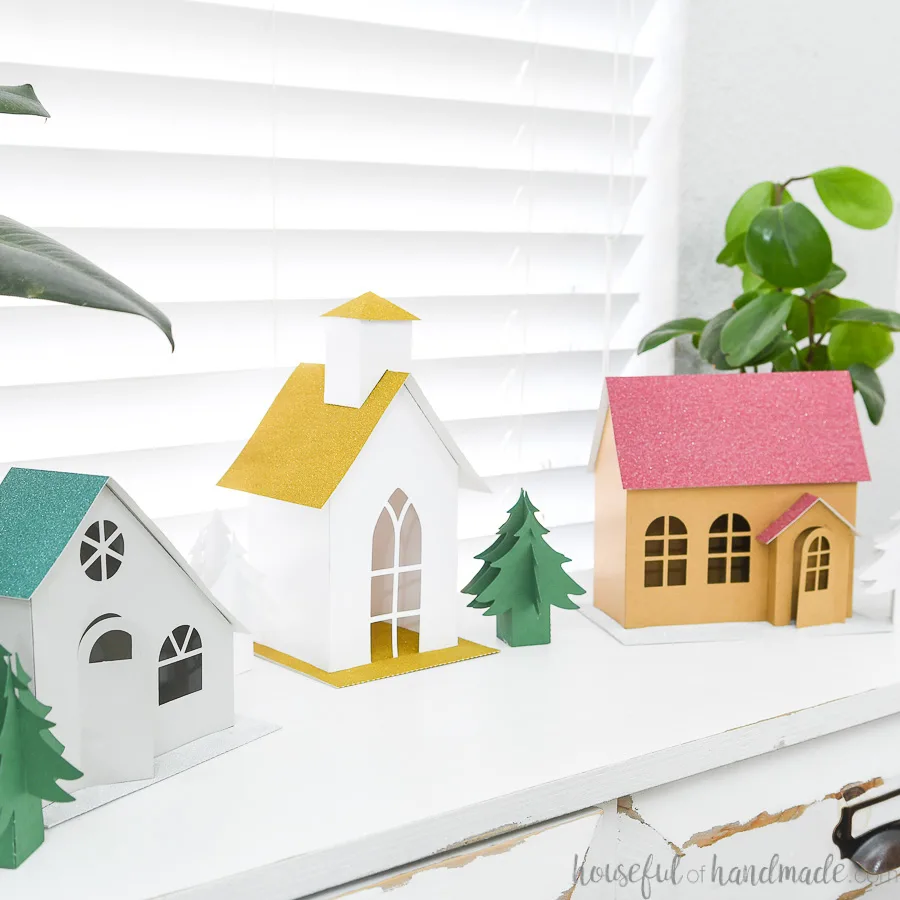
Nothing says Christmas like a little Christmas village, and this one is made out of paper!
It’s Day 3 of the paper Christmas decor series. And I knew I wanted to make another paper Christmas village cause I adore Christmas villages.
Recently I discovered the little, vintage, red-brick cardboard Putz Christmas houses. I immediately fell in love! So when I decided to make a paper Christmas village this year, I knew I wanted to recreate that style.
But to fit in with my more modern Christmas decor this year, I did my houses without the red brick. Instead I had fun making my houses with solid colors and glitter cardstock roofs.
This post may contain affiliate links. As an Amazon Associate I earn from qualifying purchases. Click here to read my full disclosure policy.
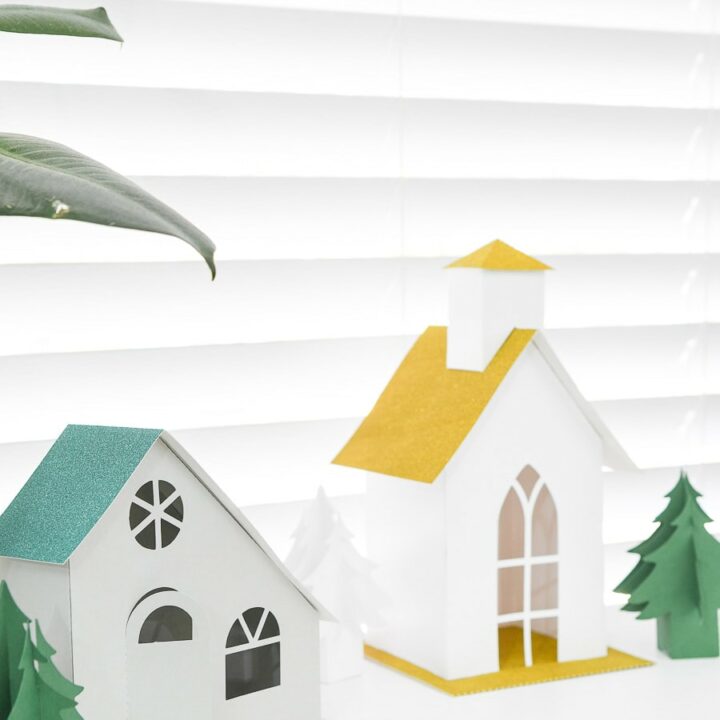
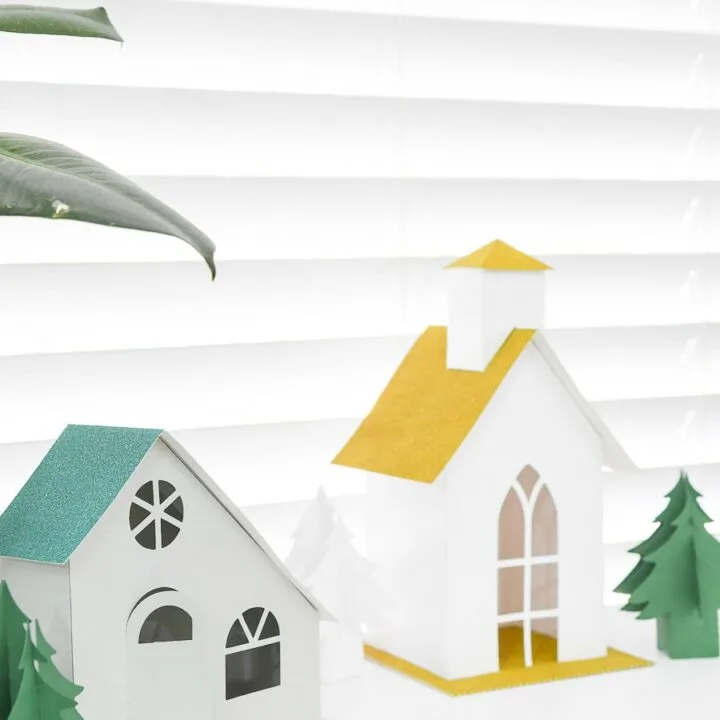
Christmas Village Houses
There are 3 different house shapes in my Putz-style Christmas village. I made one of each, but you could always expand your village by making more of each house in varying colors. Even try mirroring them for variation.
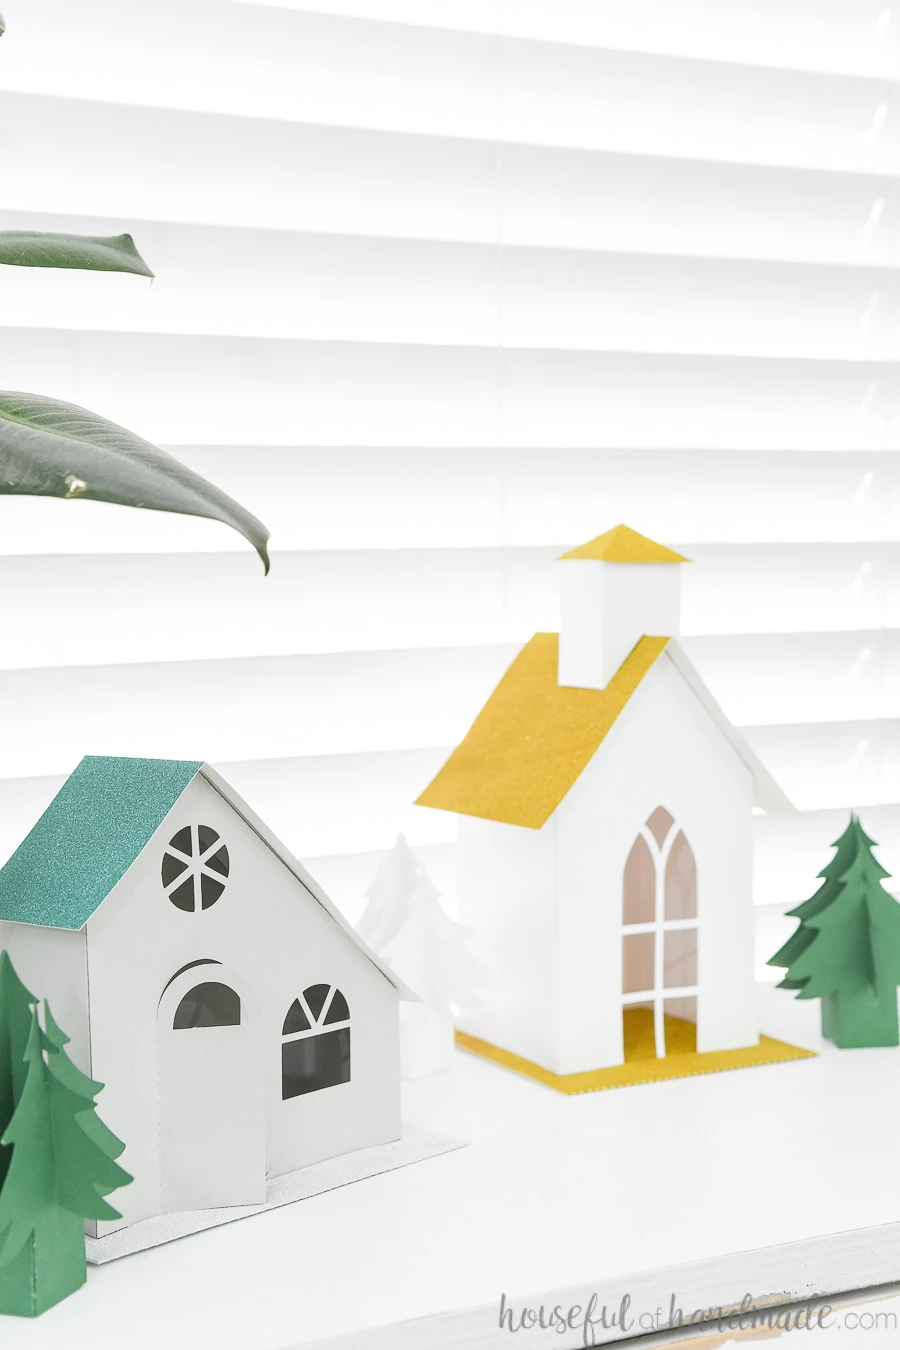
Of course I had to create a church since no Christmas village is complete without one. I kept the Church design simple, it reminds me of the classic little white church.
But then to really make it look like a Christmas church, I gave the front a fun stained-glass-inspired window. And finished it off with a simple steeple.

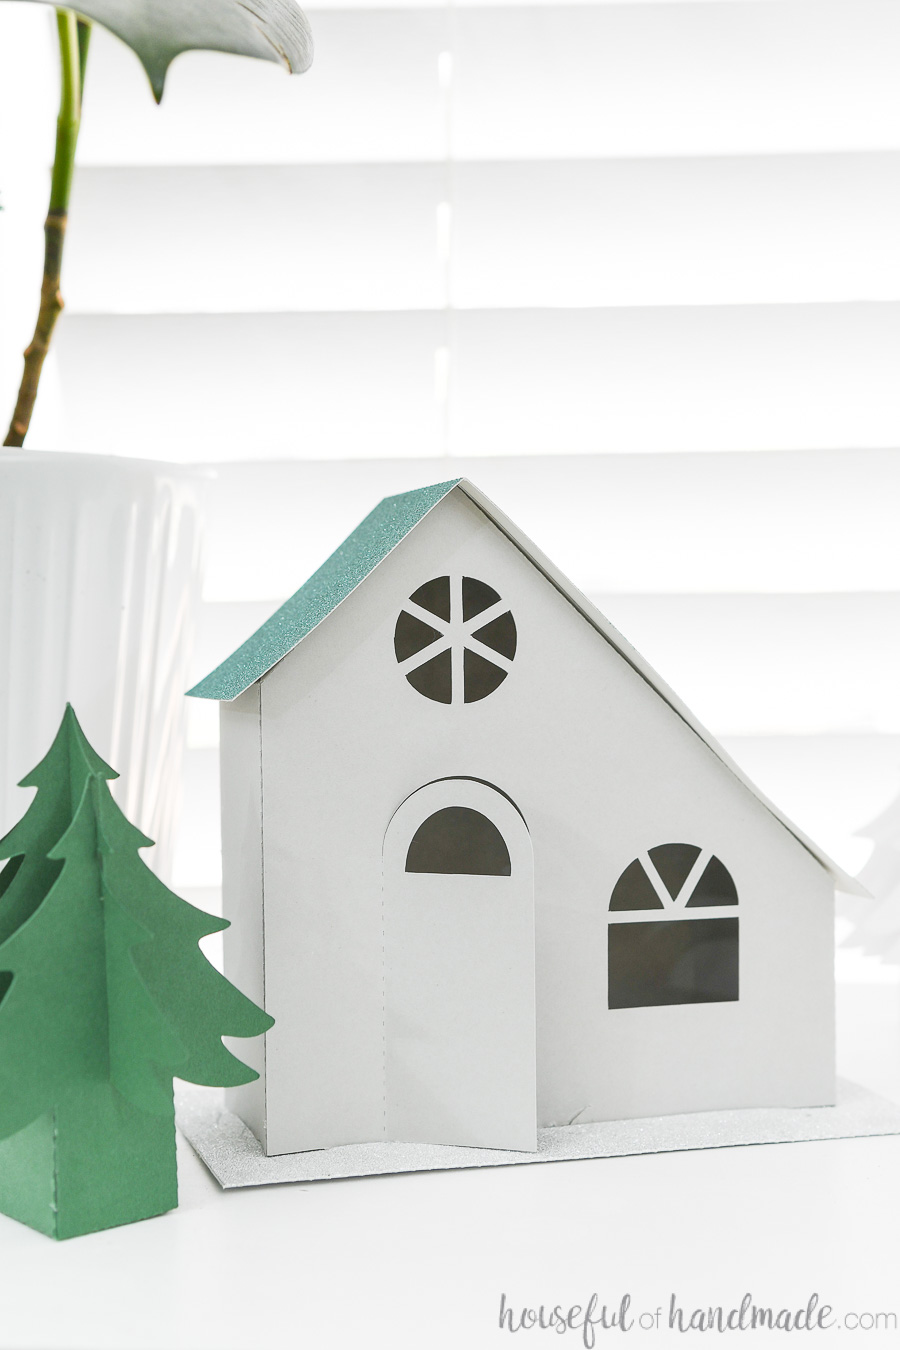
To go along with the modern theme of my Christmas decor, I decided I also needed a modern home. The asymmetrical roof line is the perfect recreation of a vintage, modern home.
And I saw that the original Putz Christmas village had an asymmetrical roof house!

The third house is a classic Christmas house. With it’s peaked roof and 3D entry. I can just image it dripping with Christmas lights in a Christmas movie!


And since these adorable houses didn’t look Christmasy enough just yet… I decided I needed Christmas trees too. These simple little pine trees add the perfect amount of Christmas to our little village.
Of course you can add more Christmas to your village however you want. Have fun decorating your little paper houses. I am enjoying the clean, modern look this year.
Paper House Sizes
The houses in my paper Christmas village are nice and big. But the design makes them super sturdy.
Here are the finished sizes of each different piece:
- Church
- Building (with roof overhang): 5″ wide x 4 1/2″ deep x 9″ tall
- Building (without roof): 4″ wide x 3 1/2″ deep
- Base: 4 3/4″ x 5 1/4″
- Modern House
- Building (with roof overhang): 6 1/4″ wide x 2 1/2″ deep x 5 1/2″ tall
- Building (without roof): 5 1/4″ wide x 2″ deep
- Base: 6 1/4″ x 3 1/4″
- Classic House
- Building (with roof overhang): 6 3/4″ wide x 3 1/2″ deep x 6 1/4″ tall
- Building (without roof): 6 1/4″ wide x 3″ deep
- Base: 7″ x 4 1/4″
- Trees
- 2 3/4″ x 2 3/4″ x 4″ tall


Resizing Christmas Houses
Plus, did you know, you can always resize any of the 3D paper crafts? Make your houses smaller or larger to match the size of Christmas village you want!
When resizing 3D paper crafts, always resize all pieces the same percent. Also, it is important to lock the aspect ratio so the pieces are resized the same amount for the width and height.
If resizing on a printer, just increase or decrease the size of the print percentage. Be careful when increasing so that all pieces are still printing on the paper.

How to Make a Paper Christmas Village
Supplies:
- Christmas house & trees templates
- I am sharing the SVGs & PDFs in my subscriber library until 11/29/2020, then they will move to the shop. Click here to subscribe to my newsletter and gain access to all the freebies. If you already have your password, click here to download them.
- Cardstock
- Hot glue gun and glue sticks
- Optional: Electronic cutting machine
- I love using my Silhouette Cameo to quickly cut out paper decor projects, but you can also print the PDF and cut out with scissors and an x-acto knife.
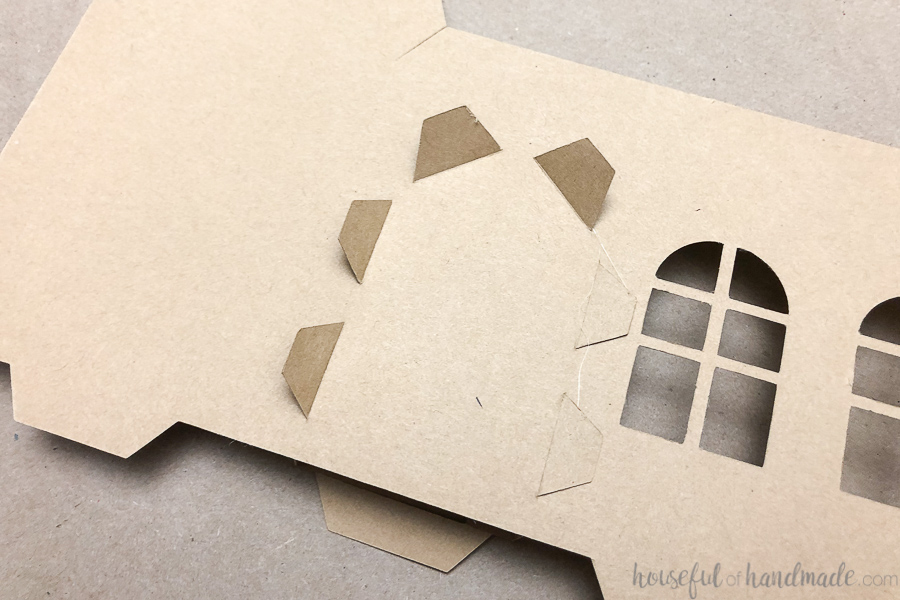
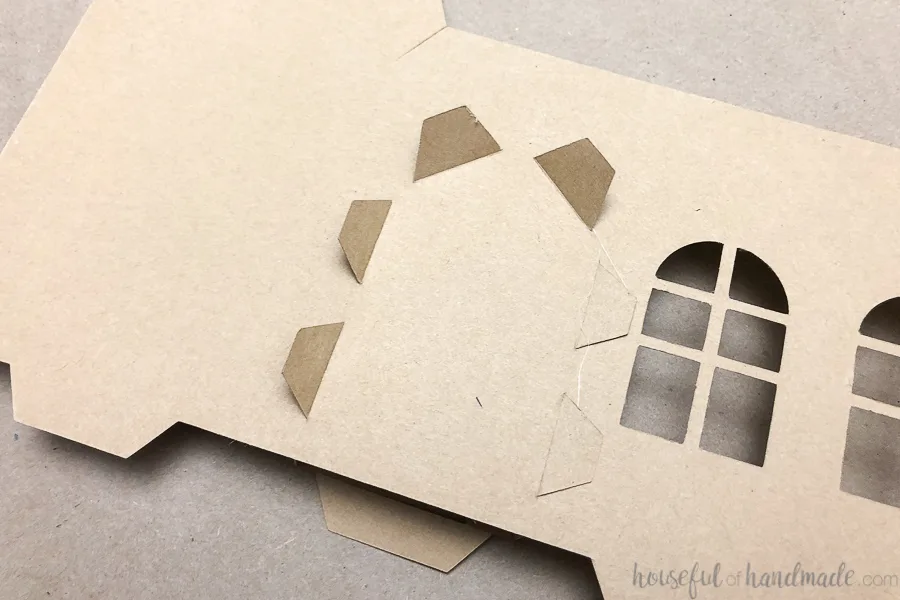
Cut out all the pieces
Cut out all the pieces along the solid lines for each house. Make sure to cut the slits in the bases, on the front of the classic house, and on the trees.
Fold along all the dotted lines.
Assemble the Houses
For the classic house, start by attaching the entry. Fold all the tabs back, no need to glue the tabs since it is very secure once attached to the house.
Press the tabs on the back of the entry into the corresponding slots on the front of the house. Tug slightly to pull them all the way through, then glue to the inside to secure.
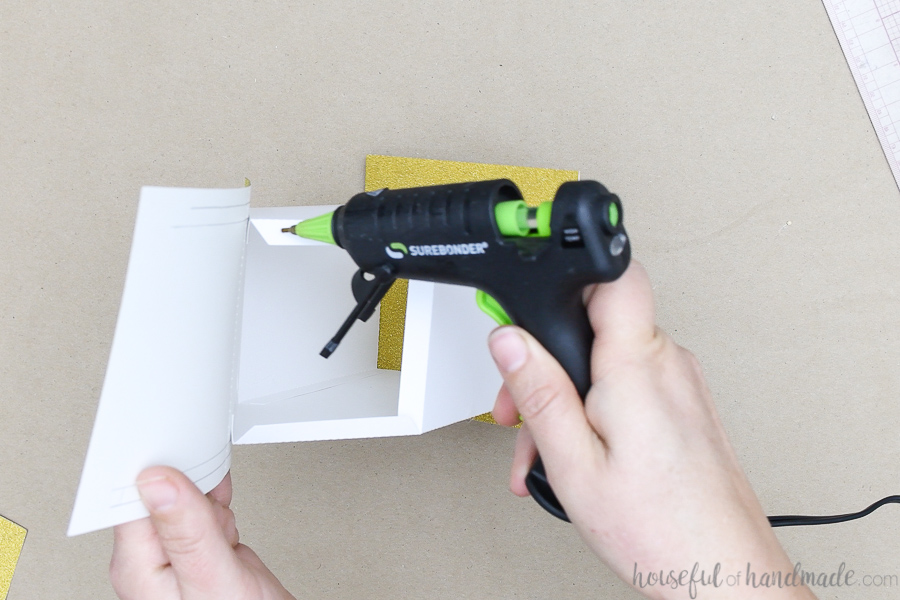
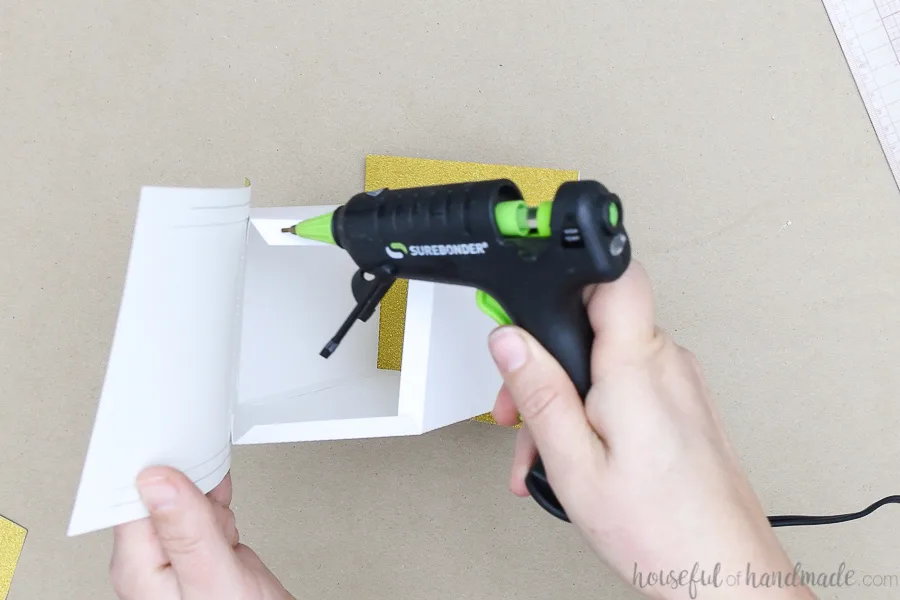
Glue the tabs on the sides of the house to create a box.
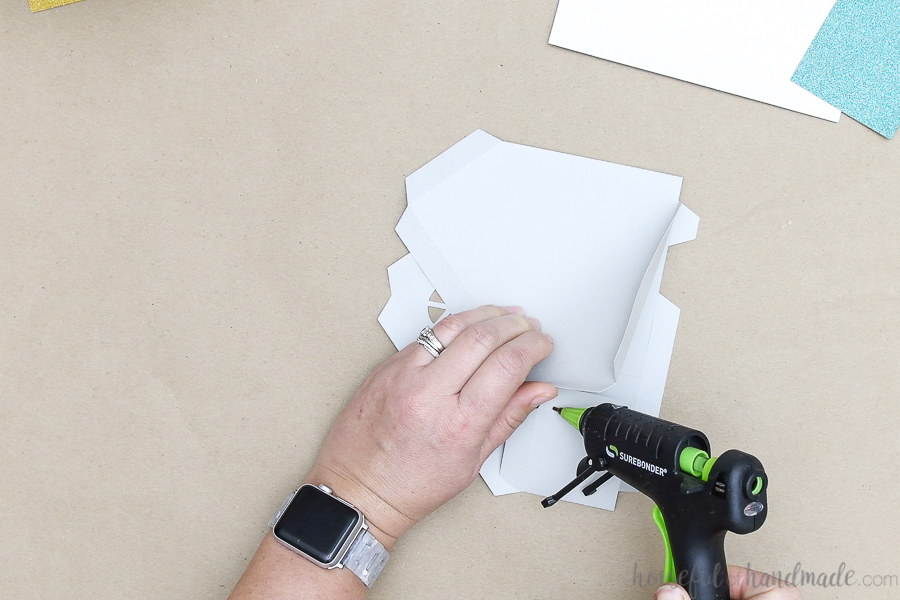

Press the tabs on the bottom of the houses into the corresponding slots on the base. Tug carefully to make sure they are fully through (they are a snug fit).

Fold over and glue them to the bottom of the base.

Fold the base in half and glue to secure and hide the tabs.
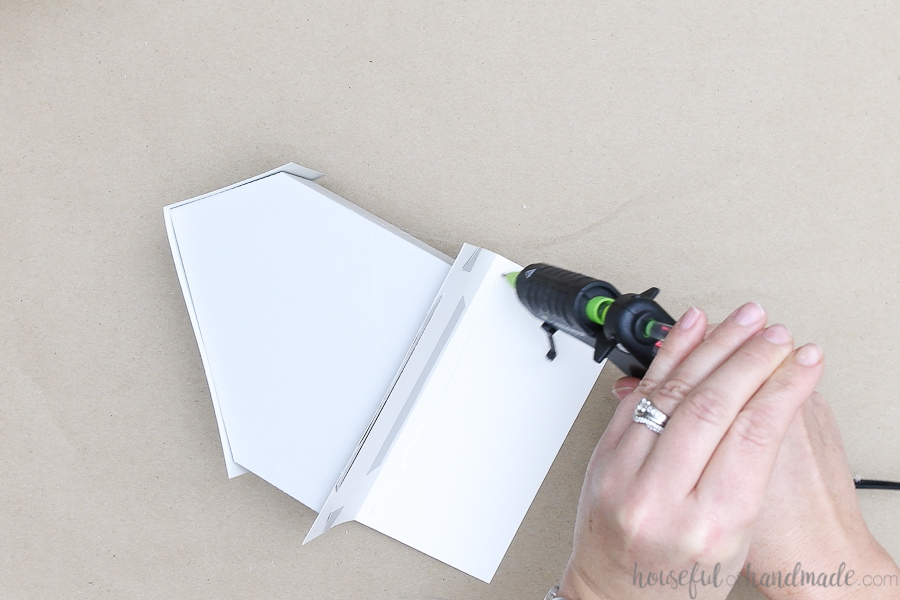
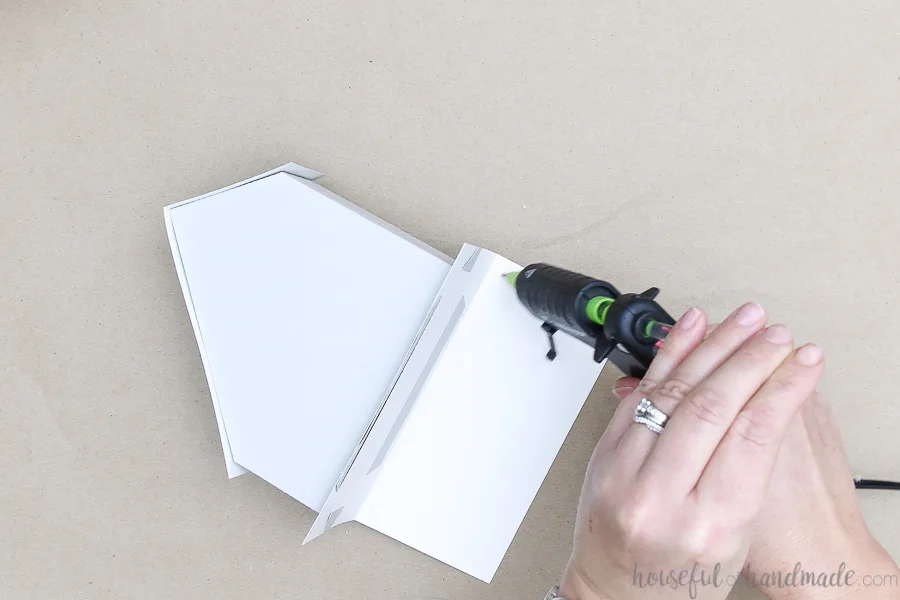
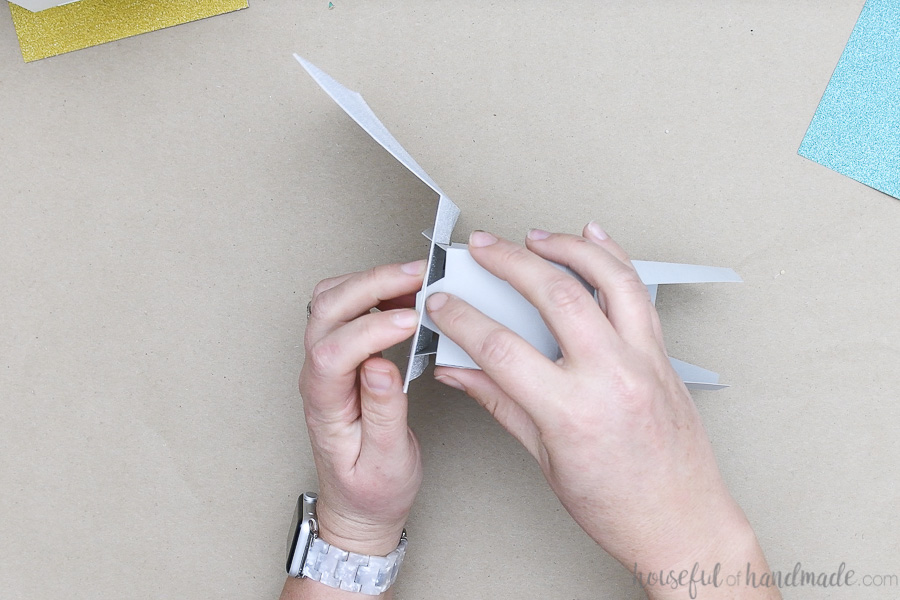
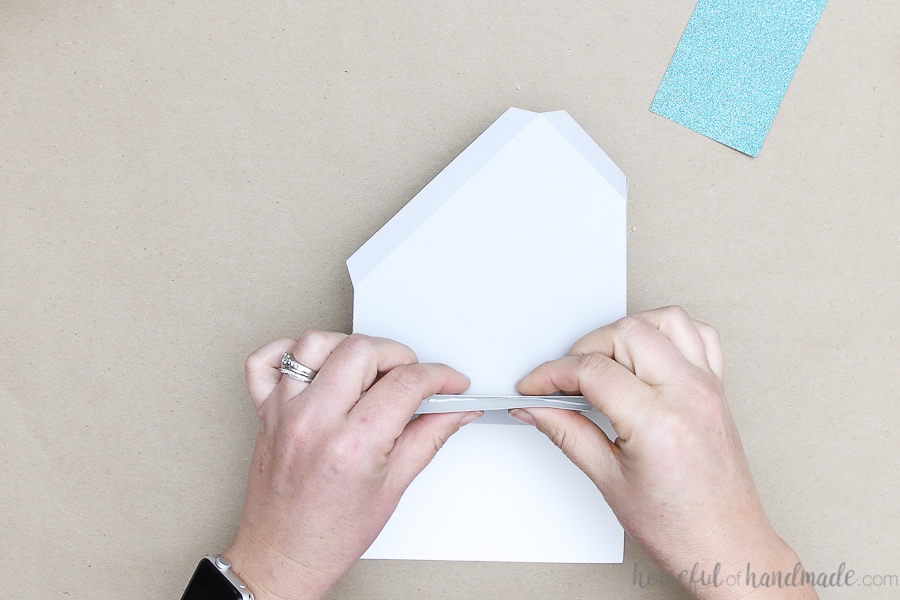
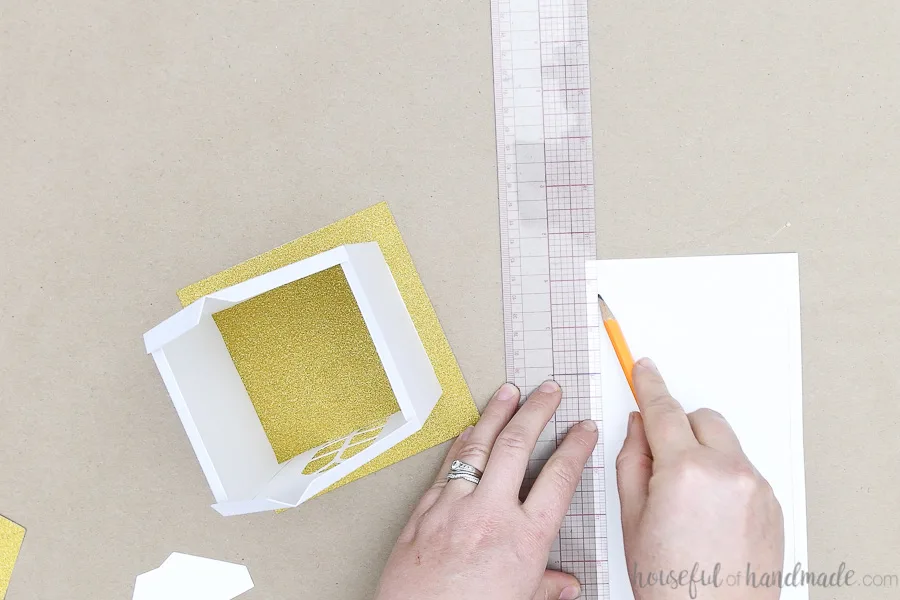
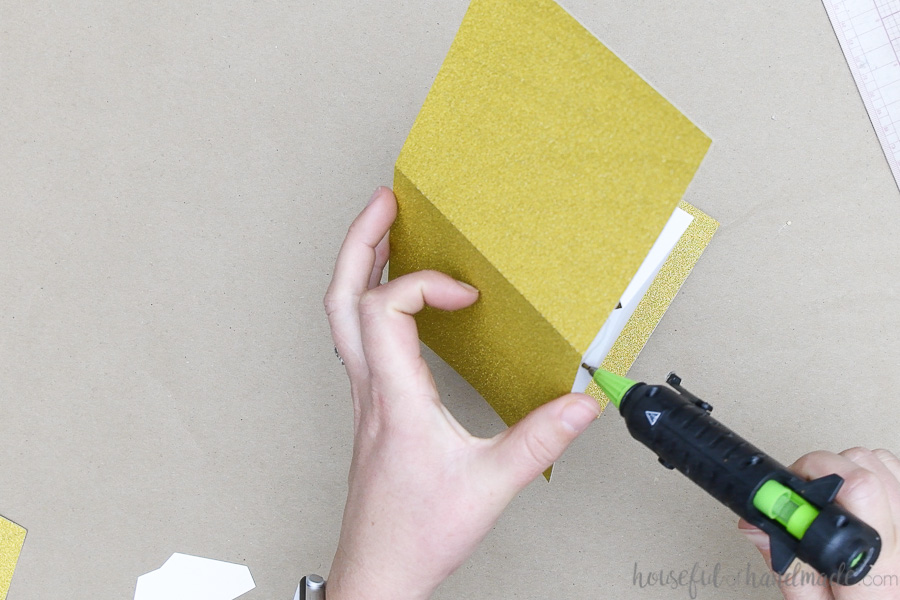
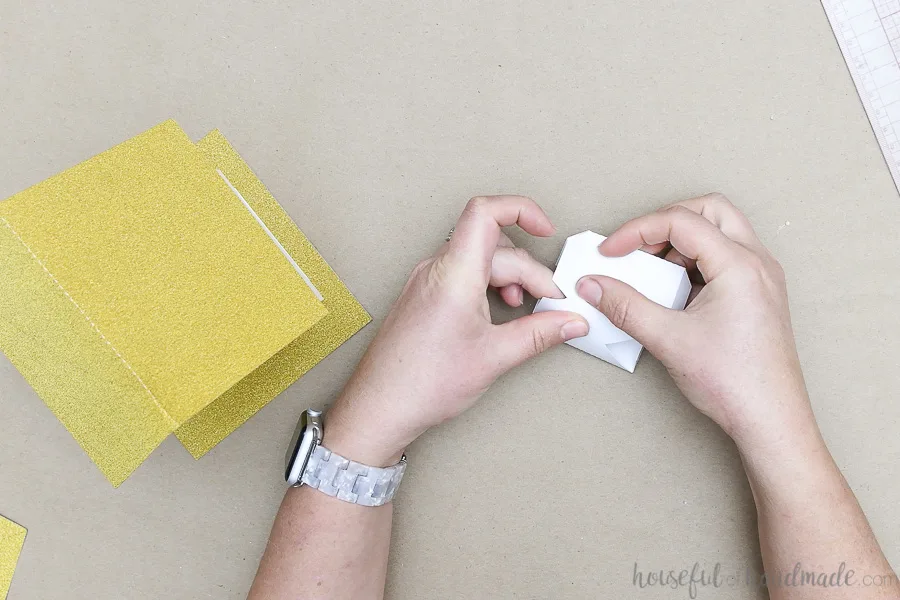
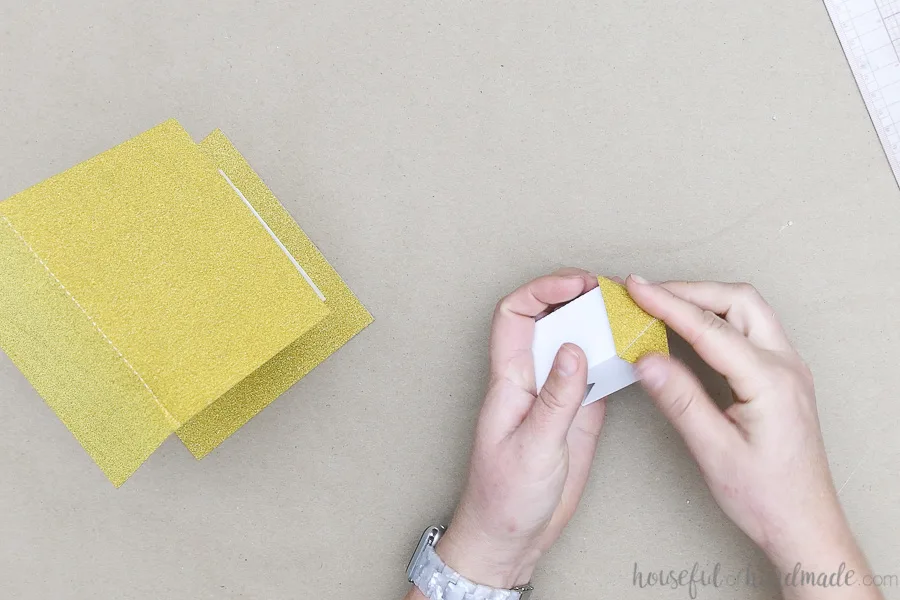
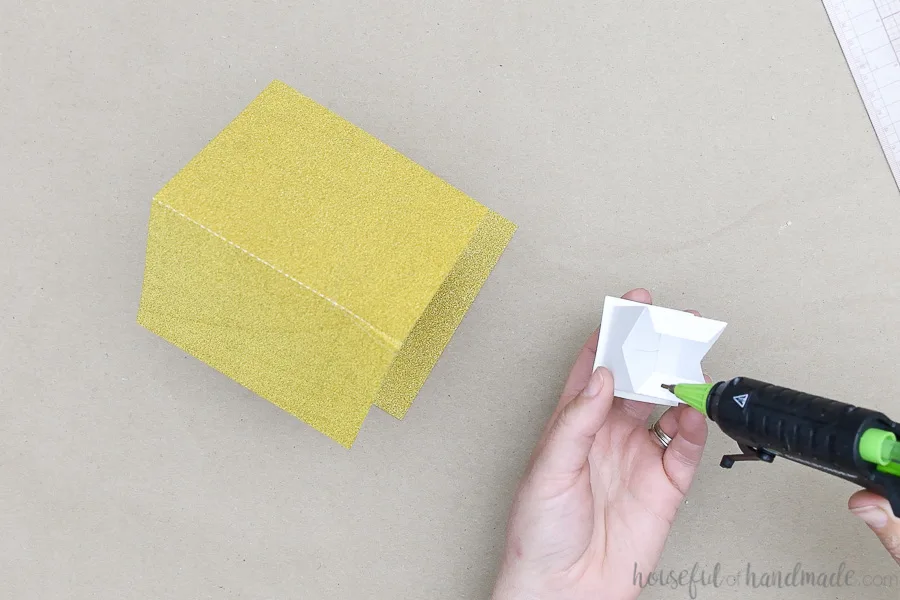
Add glue to one of the side tabs for the roof. Line up the roof and secure.
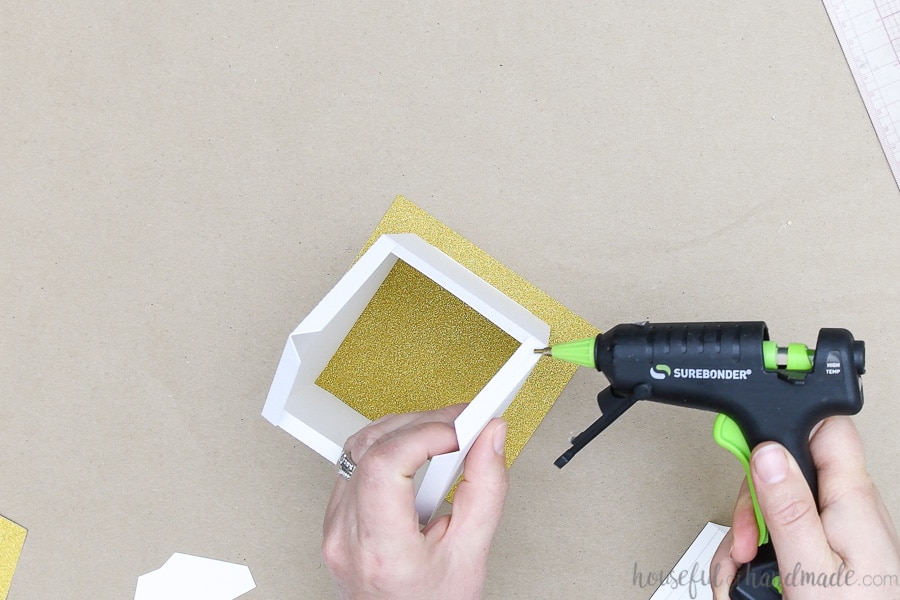
I used a ruler to draw a straight line for my overhang to make it easier to line it up.

Repeat for the other tab on the other side.

Then repeat for the other half of the roof. I didn’t bother adding glue to the horizontal roof tabs, the roof was very secure with just glueing the side tabs.
For the classic house, glue the roof to the top of the entry as well.
For the church, fold the steeple into a square and glue the side tab to secure.
Fold and glue the steeple roof together. Glue it to the top of the steeple with glue on the tabs.

Then fold the bottom tabs underneath the steeple. Add glue to them and place on top of the church roof. Hold to secure.

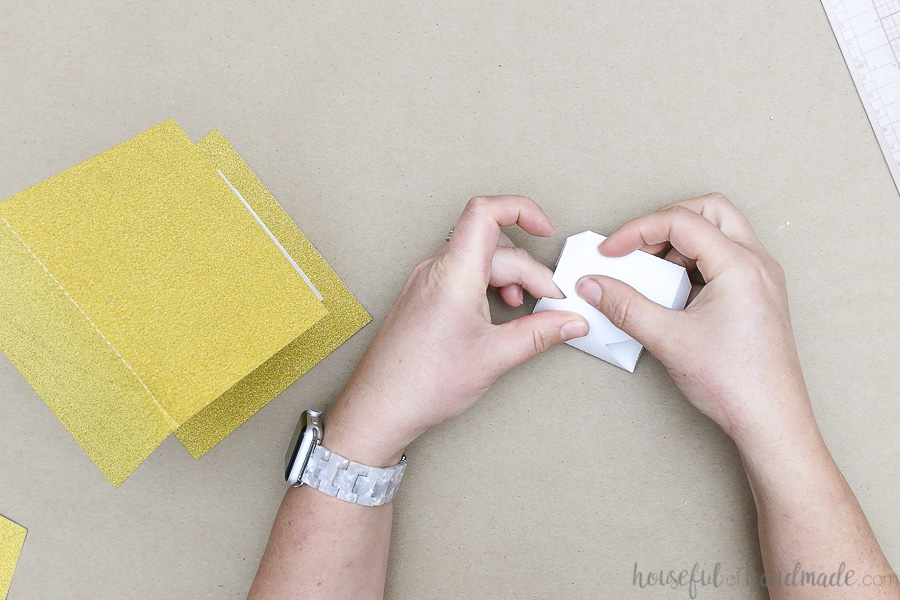
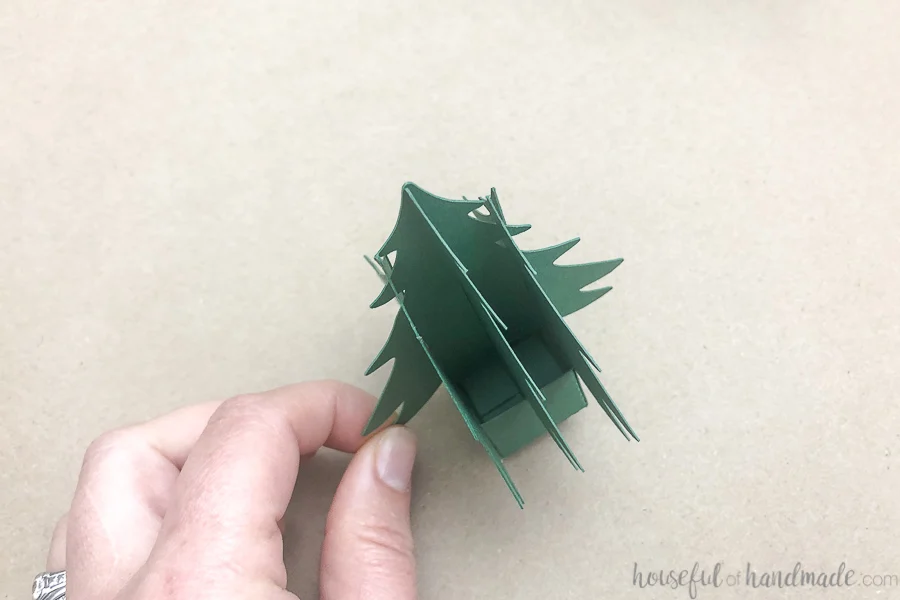
Assemble the Trees
When folding along the dotted lines, fold the bottom of the center piece so each side is an opposite direction.
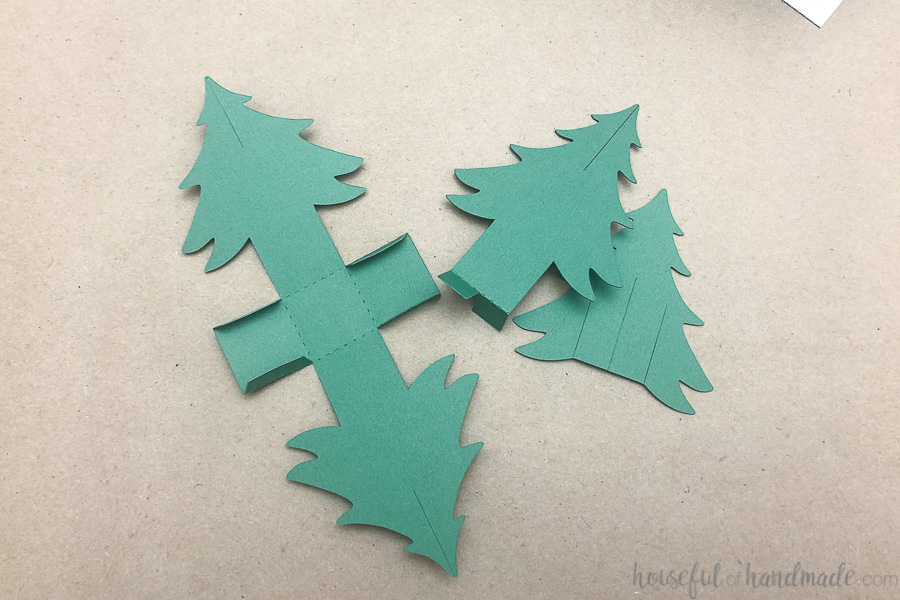
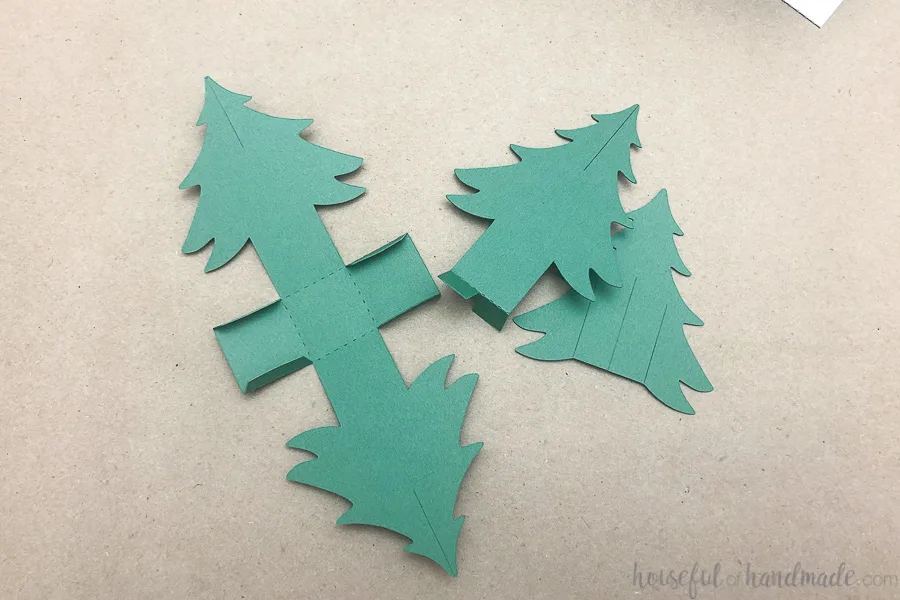
Place glue on the bottom of these tabs and secure it to the center of the box on the side pieces.
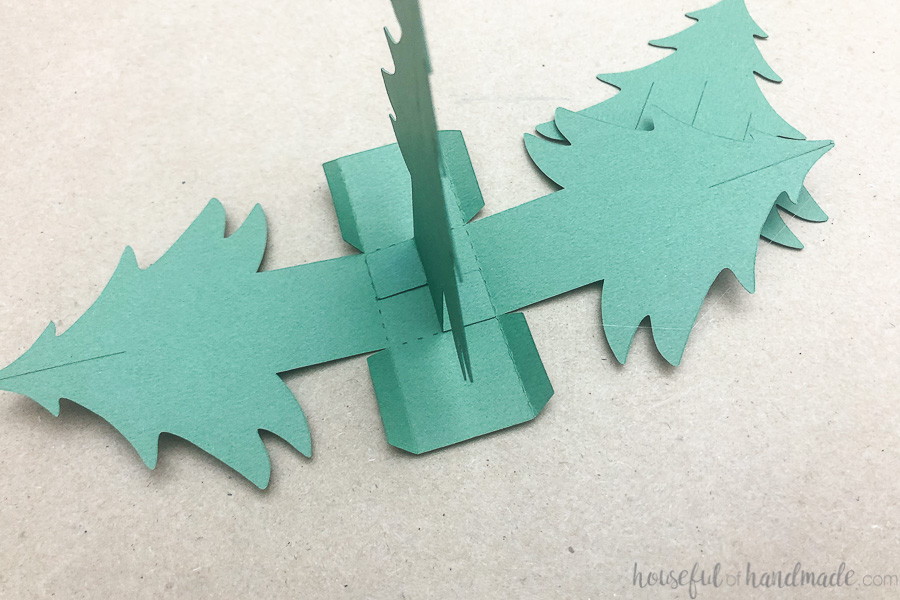
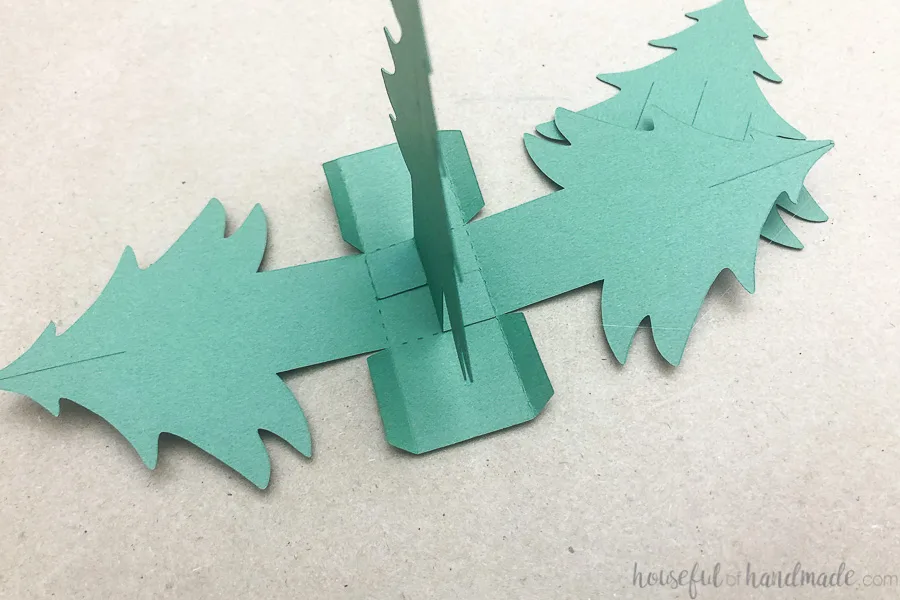
Fold the sides of the box up, you will need to tuck them under the middle pieces branches. Glue the tabs to secure.
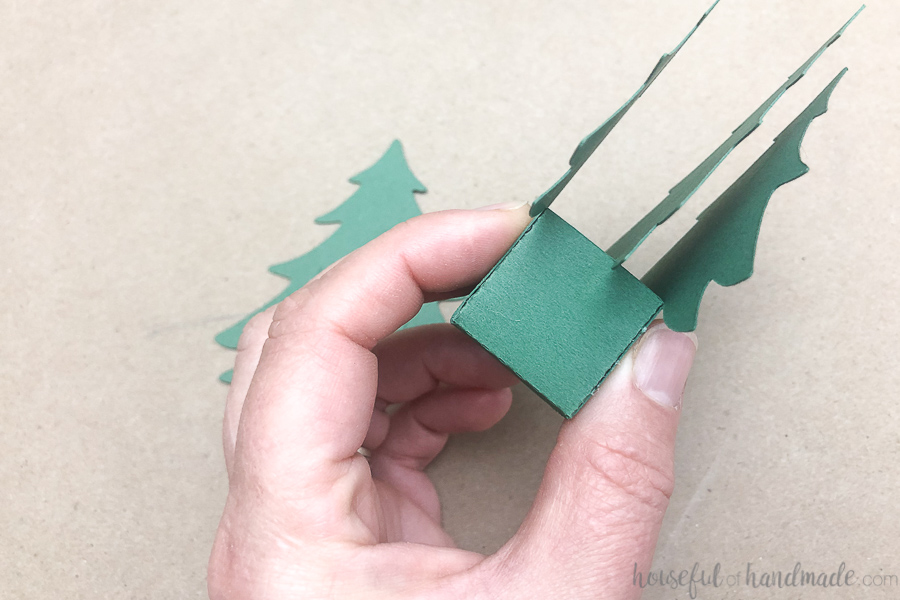

Line up the slits on the piece with 3 slits to the slits on the assembled tree. Carefully tug it down until the top is flush with the top of the center piece.

Display your Paper Village
Now your little paper Christmas village is done! Have fun making a display with your houses and trees.
And how cute would it be to make some house for the kids to have fun decorating? So many ideas for a fun Christmas project!
If you want more sturdy houses (even though the tabs securing them into the bases does make them very sturdy), you could always cut them out of coverstock (110 lb cardstock).
Or, the brown kraft paper I cut the classic house out of was more sturdy than the regular cardstock.
More Paper Christmas Decor
And remember, we are only on Day 3 of the 7 Days of Paper Christmas decor! Make sure to come back every day until Thanksgiving for more.
Plus check out any posts you missed below.
- Day 1: 3D Jewel Christmas Ornaments
- Day 2: Large DIY Paper Lanterns
- Day 3: Putz Style Paper Christmas Village
- Day 4: Simple Watercolor Christmas Printables
- Day 5: Gingerbread House Napkin Rings & Place Card Holders
- Day 6: Letters to Santa Mailbox Ornament
- Day 7: Reusable Christmas Advent Calendar
Happy Crafting!
Putz-Style Paper Christmas Village {7 Days of Paper Christmas}
Add a fun paper Christmas village with pretty glitter roofs. It's a modern twist to a classic Christmas village. But, you can easily change out the roofs to a brick style if you like.
Materials
- Christmas house templates
- Cardstock
Tools
- Hot glue gun and glue sticks
- *Optional - electric cutting machine
Instructions
- Cut out all the pieces along the solid lines for each house.
- Make sure to cut the slits in the bases, on the front of the classic house.
- Fold along all the dotted lines.
- Assemble the houses by folding all the tabs back.
- Press the tabs on the back into the corresponding slots on the front of the house.
- Glue to the inside to secure.
- Glue the tabs on the sides of the house to create a box.
- Press the tabs on the bottom of the houses into the corresponding slots on the base.
- Fold over and glue them to the bottom of the base.
- Fold the base in half and glue to secure.
- Add glue to one of the side tabs for the roof.
- Repeat for the other tab on the other side.
- Repeat for the other half of the roof.
- For the classic house, glue the roof to the top of the entry.
- For the church, fold the steeple into a square and glue the side tab to secure.
- Fold and glue the steeple roof together.
- Fold the bottom tabs underneath the steeple.
- Add glue to them and place on top of the church roof.
Recommended Products
As an Amazon Associate and member of other affiliate programs, I earn from qualifying purchases.


Caroline
Monday 21st of November 2022
I love them. But I can't download the tree for some reason (PDF or SVG)
Fred
Sunday 22nd of November 2020
Thank you very much for the files, it's beautiful!
Dorothy
Saturday 21st of November 2020
These are perfect. Thanks so much for sharing.
Laurie Black
Saturday 21st of November 2020
I love these adorable houses! Thank you for sharing the files.