Now that the nights are cooler, and darker, it’s almost time to decorate the outside of our house for Halloween. I love to go all out and create the perfect spooky entrance to our house.
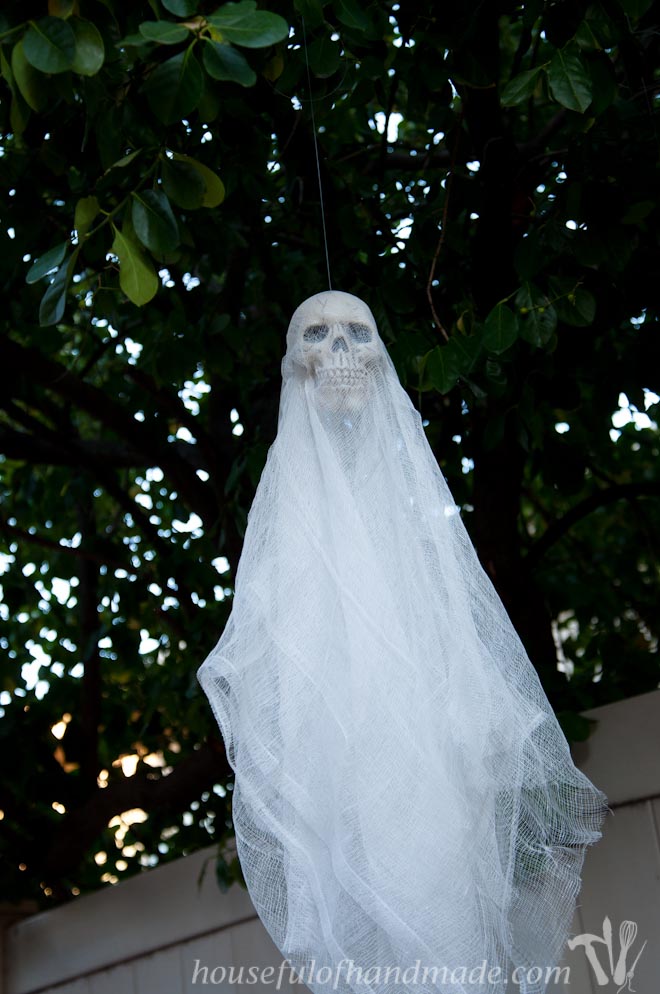
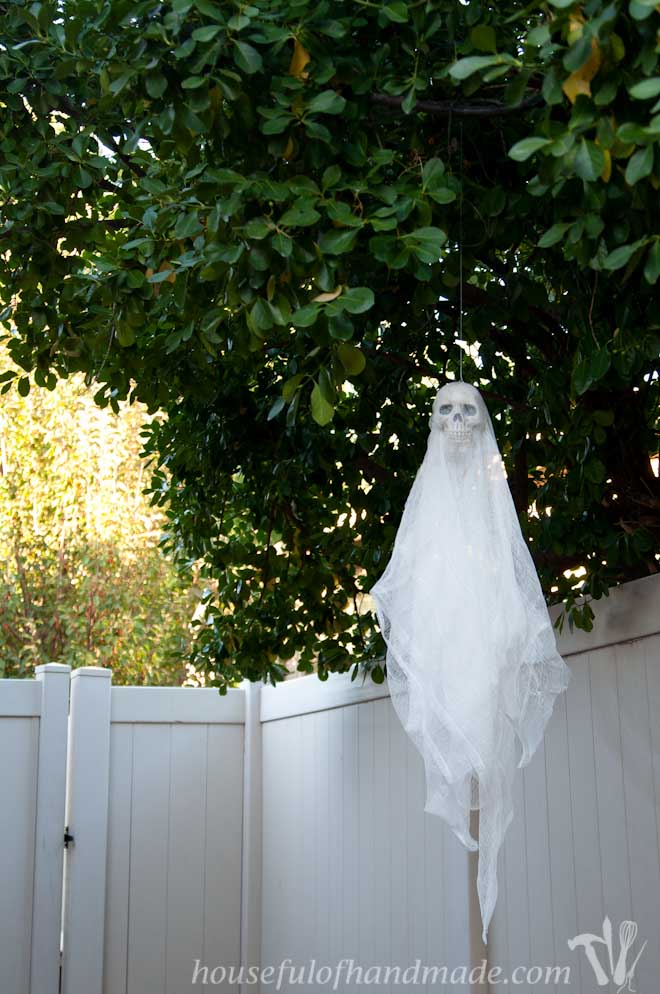
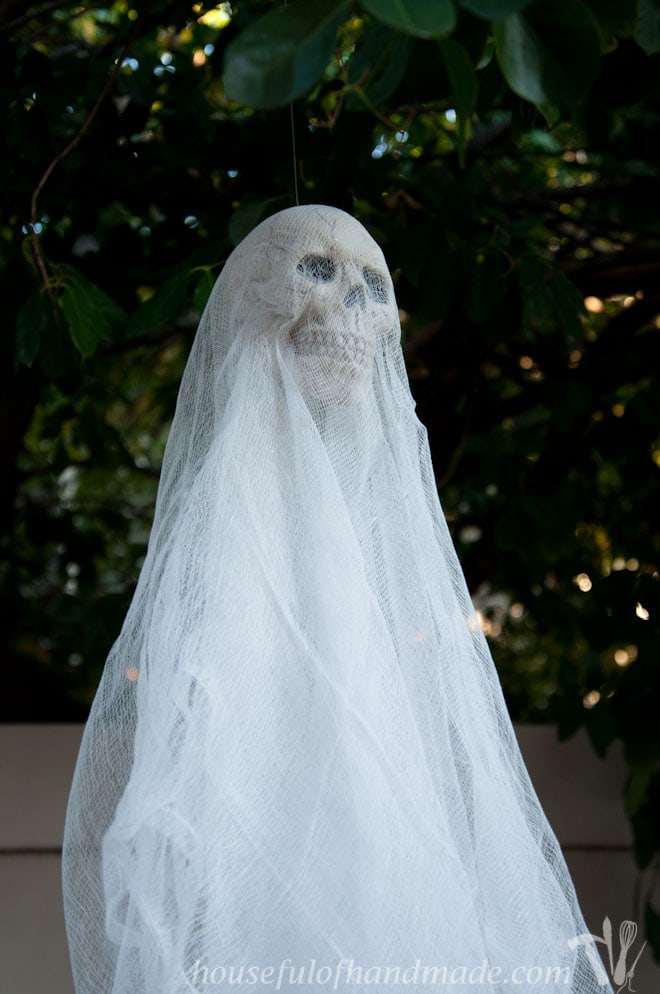
This year I made these easy $3 skull ghosts and they look so spooky. But more importantly, they were so easy and inexpensive to make too!
The other day I had an hour to kill, so what better way to spend your time then to go to Target? Wandering the isles is the best form of therapy. They had just filled the Halloween section so we spent our time getting excited for October!
This post may contain affiliate links. As an Amazon Associate I earn from qualifying purchases. Click here to read my full disclosure policy.
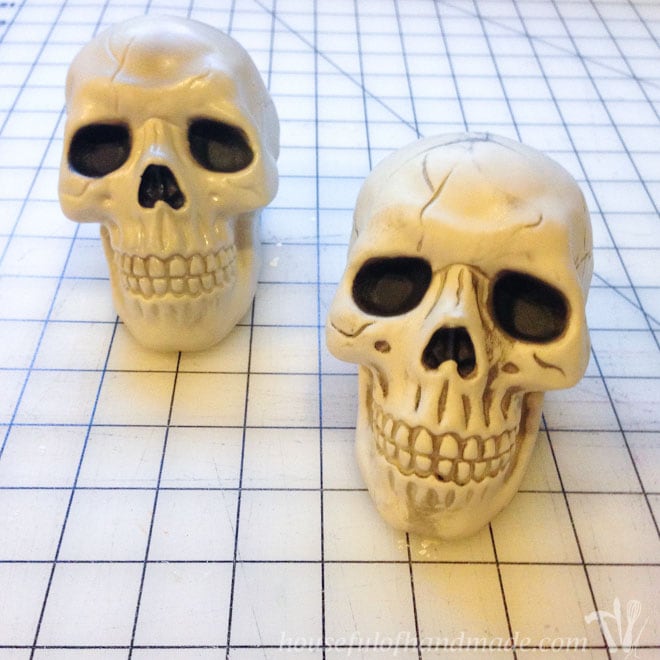
We came across some small plastic skulls for only $2, and I knew exactly what I wanted to do with it… make spooky skull ghosts to hang in the trees in our from yard. Yeah! The perfect decor to really make the entrance awesome.
After a quick trip to Walmart to snag some cheese cloth for $0.50 a yard (I used 2 yards per ghost), I was ready to craft.
I don’t know what is the best part of these ghosts, that they cost only $3 each or that they took about 10 minutes total to make?
How to make Easy $3 Skull Ghosts
Supplies:
- Plastic skulls
- Mine were about the size of a grapefruit
- Eyelet hooks
- Cheesecloth
- I used about 2 yards per ghost
- Mod Podge
- Foam brush
- Transparent fishing wire
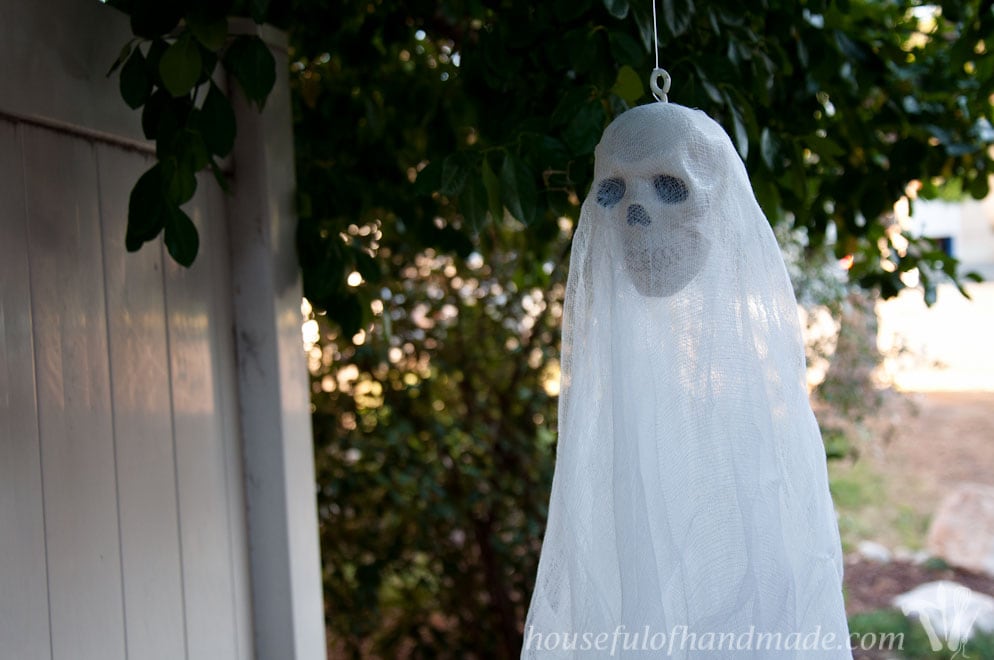
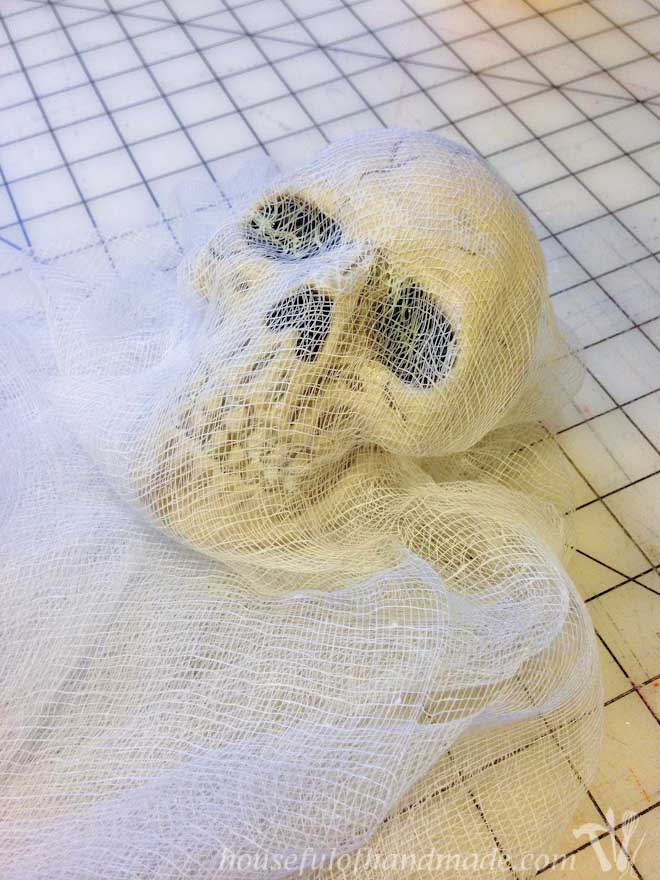
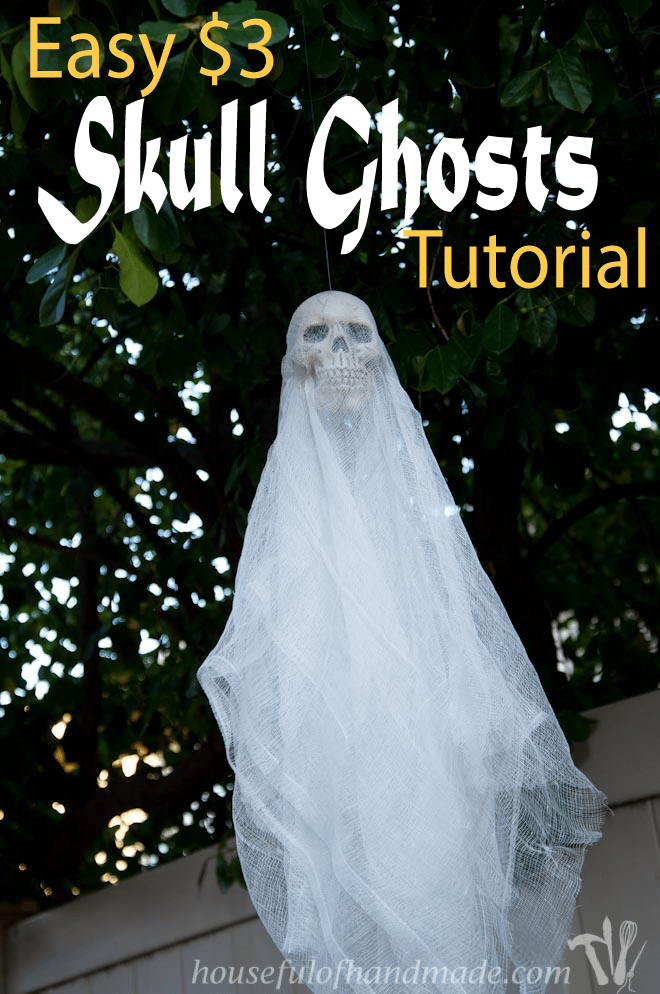
The skulls already had a hole in the top of them, but it was kinda big, so I drilled a new tiny hole just behind it and screwed an eyelet hook into it.
Then I cut 1 yard of cheesecloth. It was 36 inches wide so I ended up with a square.
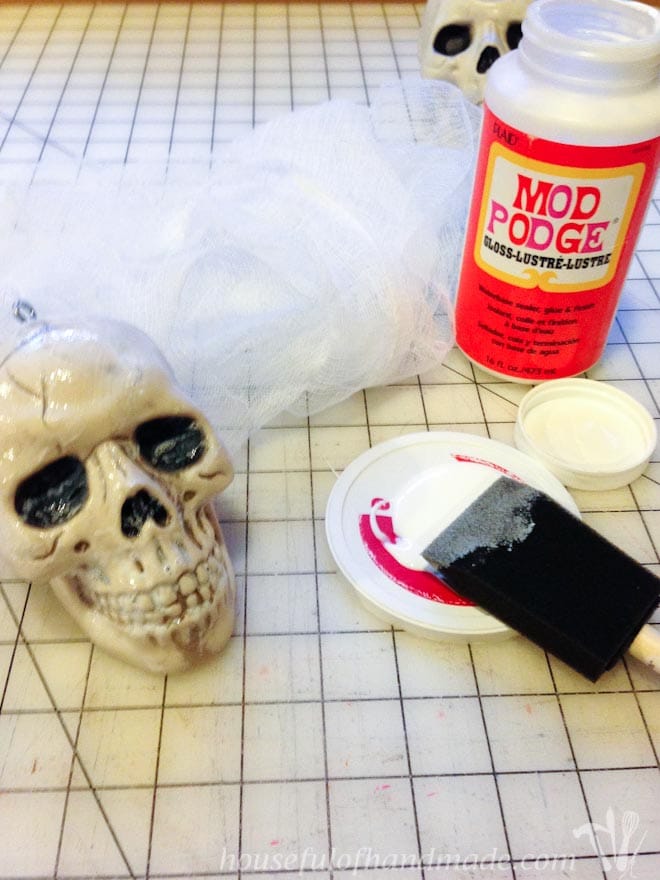
I centered the cheesecloth square over the hook. I wanted the cheesecloth to conform to the skull so I put some Mod Podge on the face of the skull and then used my hands to press the cheesecloth into the eye sockets and around the cheek bones.
Then I added another layer of cheesecloth on top of that, making sure to conform it to the skull again.
Then it was done, all I had to do was wait for them to dry before hanging them up with some fishing wire.
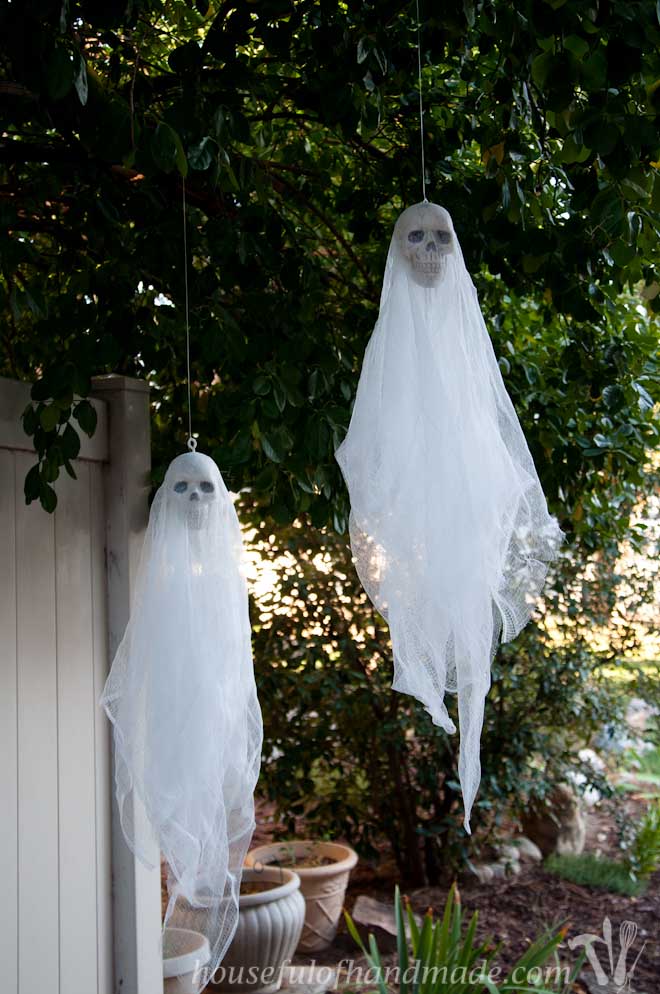
Now I am not going to lie, the Mod Podge I had on hand probably won’t withstand the rain, but I am planning on hanging our skull ghosts up outside where they will most likely be protected. If not, the rain will help the cheesecloth to stick to the skull too.
You can purchase Mod Podge that is made to use outdoor to help ensure your ghosts last all the way till Halloween!
These are really spooky, hopefully not too spooky for my kids. They seem to be okay with the spooky stuff when they watch me make it.
We just have to keep reminding them that they are pretend, we want them to be able to sleep in their own beds during October!
Stay turned for pictures of my Halloween house tour.
Denisha J'na
Sunday 18th of October 2020
I love the way mine turned out! Not sure if this was mentioned in the comments but I attached fish weights to the ends and it kept them tame on windier days! I posted pictures of the end result on my Pinterest! Just search my name! :) thanks for the inspiration.
Kati
Tuesday 27th of October 2020
Fish weights are a great idea! Thanks so much for sharing.
Sarah Eliza @ devastateboredom
Tuesday 29th of September 2015
Ahhhhhhhh these are AMAZING! I feel like I am constantly raving about how creative you are but it is SO TRUE. :P
They are wonderfully spooky! Fingers crossed they won't freak out your kids. :)
Kati Farrer
Wednesday 30th of September 2015
Thanks Sarah! If we can make it through all of October without the kids getting too scared, it'll be awesome.
FABBY
Sunday 27th of September 2015
This is fun and cute! Kids will love it. Thanks for sharing. FABBY
Kati Farrer
Tuesday 29th of September 2015
Thank you! My kids think they are pretty fun, not too spooky ;)
Jeanette
Friday 25th of September 2015
I'm a huge Halloween nut and love thrifty holiday decor. This hits the mark for me. Inexpensive and easy! Pinning!
Kati Farrer
Saturday 26th of September 2015
A woman after my own heart :) I love thrifty decor too, especially seasonal decor that will only be used for a short period of time.
Mary-In the boondocks
Friday 25th of September 2015
My daughter wants to have a holloween party so I need all the inspiration I can get. This is perfect. Thanks for sharing.
Kati Farrer
Saturday 26th of September 2015
I hope you have so much fun planning a party! I just love Halloween parties :)