Reuse your paper Christmas decor to make a cozy papercraft winter tablescape.
Winter is such an odd season to decorate for. You remove all your Christmas decor and then are left with an empty home. But if you are not ready to pull out spring (especially because it’s a blizzard outside), then why not repurpose some of that Christmas decor for a couple more months.
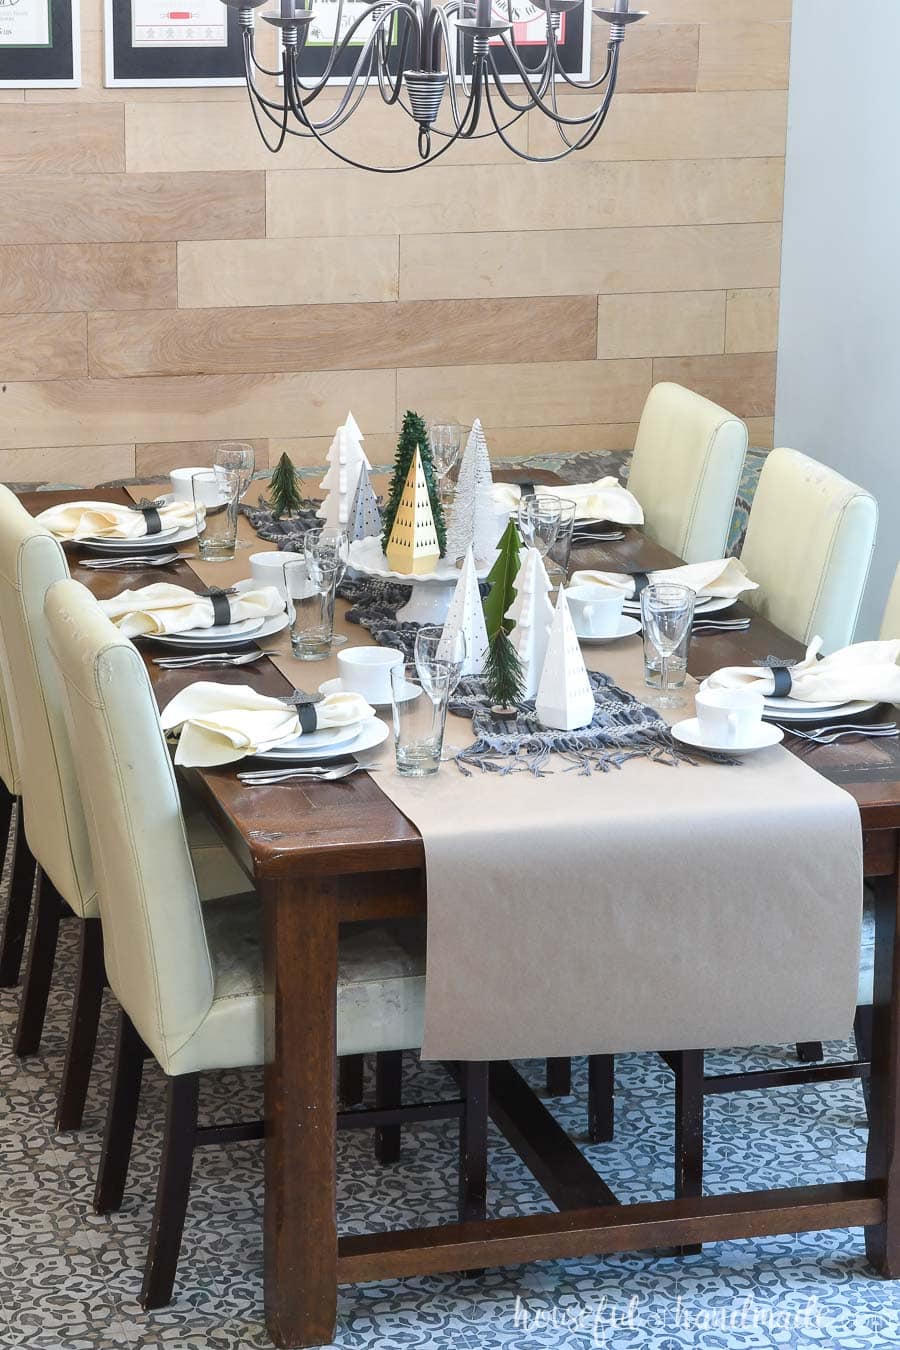
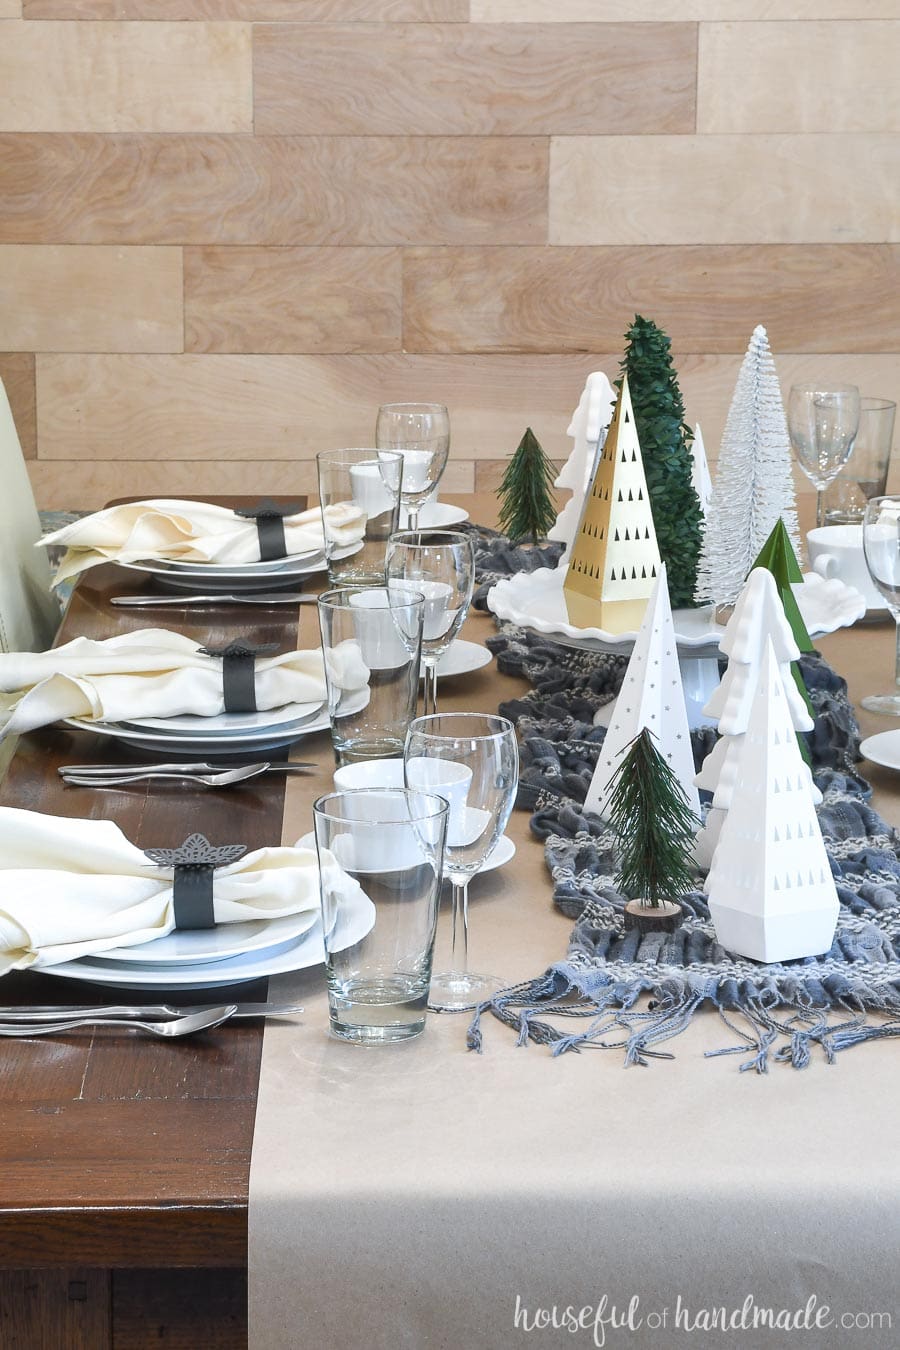
We created a fun papercraft winter tablescape full of winter trees (left over from Christmas).
How to Reuse Paper Christmas Decor
If you were following along before Christmas, you may have seen our fun 7 Days of Paper Christmas series. I love creating budget friendly decor out of paper, and if any season needs budget decor, it’s definitely Christmas.
This post may contain affiliate links. As an Amazon Associate I earn from qualifying purchases. Click here to read my full disclosure policy.
One of my favorite paper Christmas projects were these easy paper Christmas trees. I made a whole bunch of them and sprinkled them all over the house.
And when it was time to pack up all the Christmas decor, I decided to leave them out. They are neutral colors (mostly white) and make a wonderful mountain winter scene. Perfect for a mantel, console table (where I originally left them) or a winter tablescape!
Decorating a Winter Tablescape
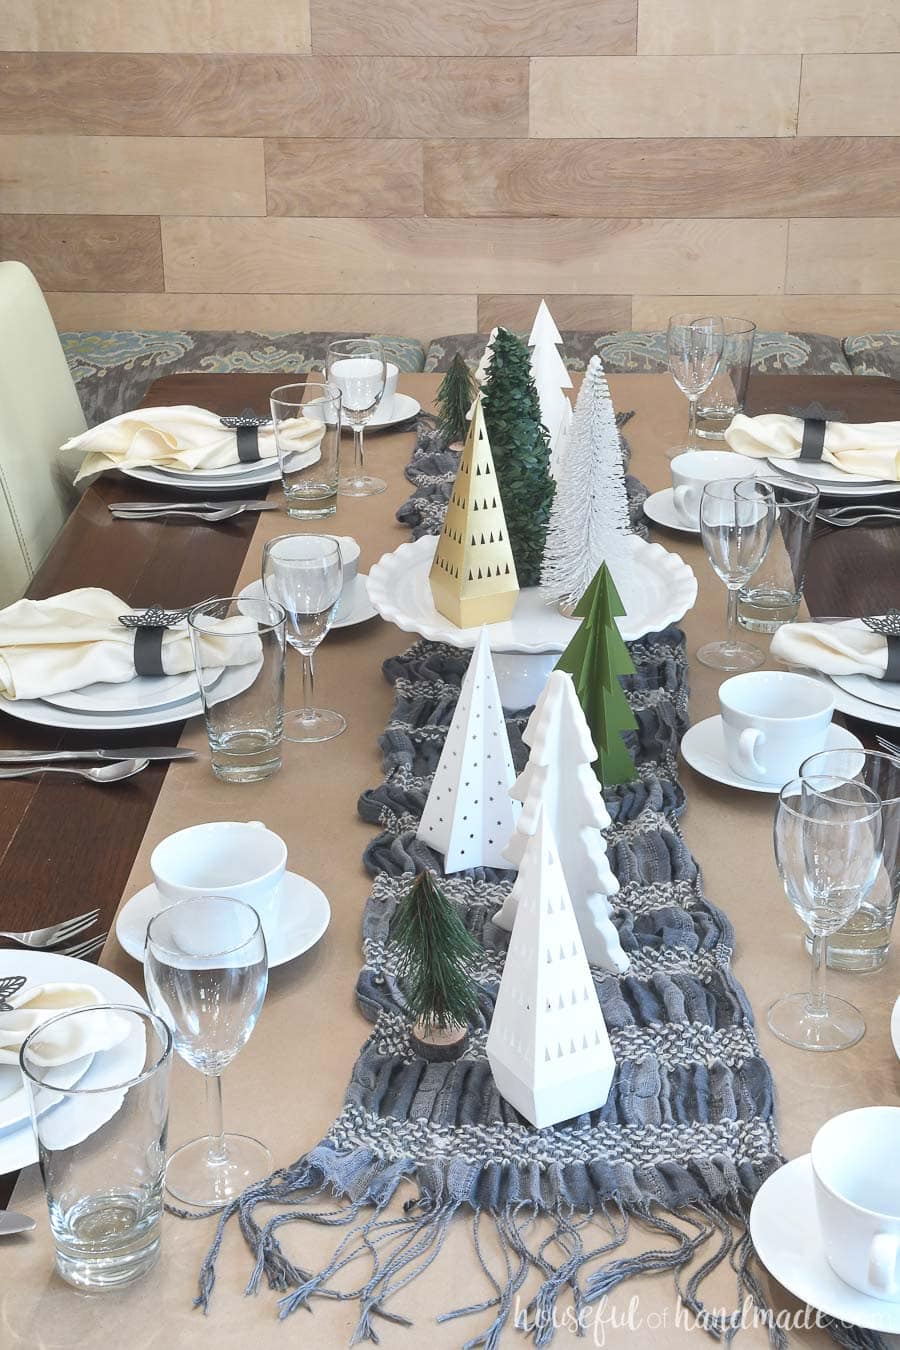
The paper Christmas trees make the perfect ski decor. It is like bringing the ski slopes home for dinner. But we didn’t start with the trees, they were just the inspiration.
To start, I added a strip of brown packaging paper to the center of the table. I love the rustic feel of the brown paper and it breaks up the large expanse of dark brown.
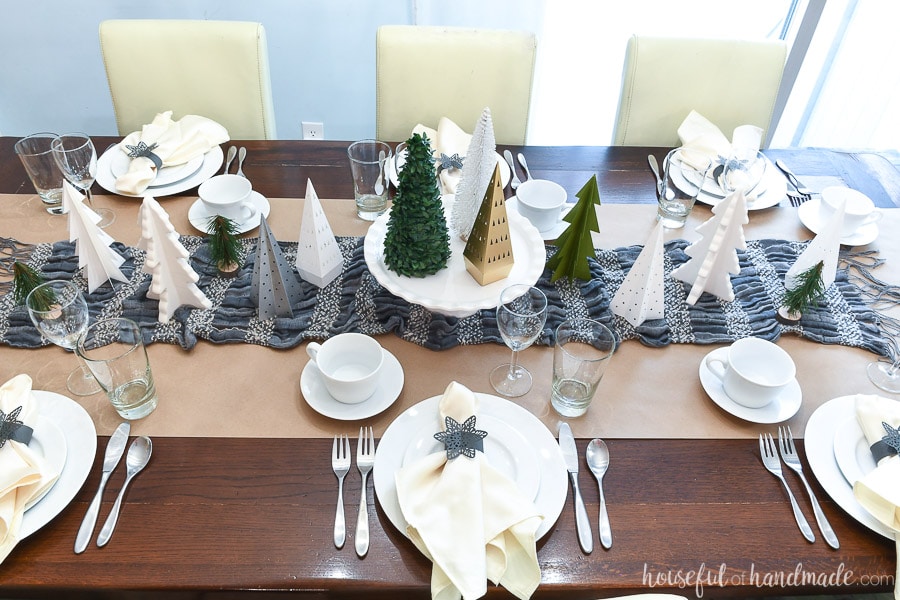
Then to add a layer of warmth, I used a winter scarf. I used a neutral colored scarf, but you could have fun with any color you have. And if you don’t want to use a scarf you love to wear, you can always find inexpensive scarves at the thrift store, or even the clearance bins, after Christmas.
Instead of leaving the scarf flat, I made sure it was fluffy and textured. Just like the snow on the mountains!
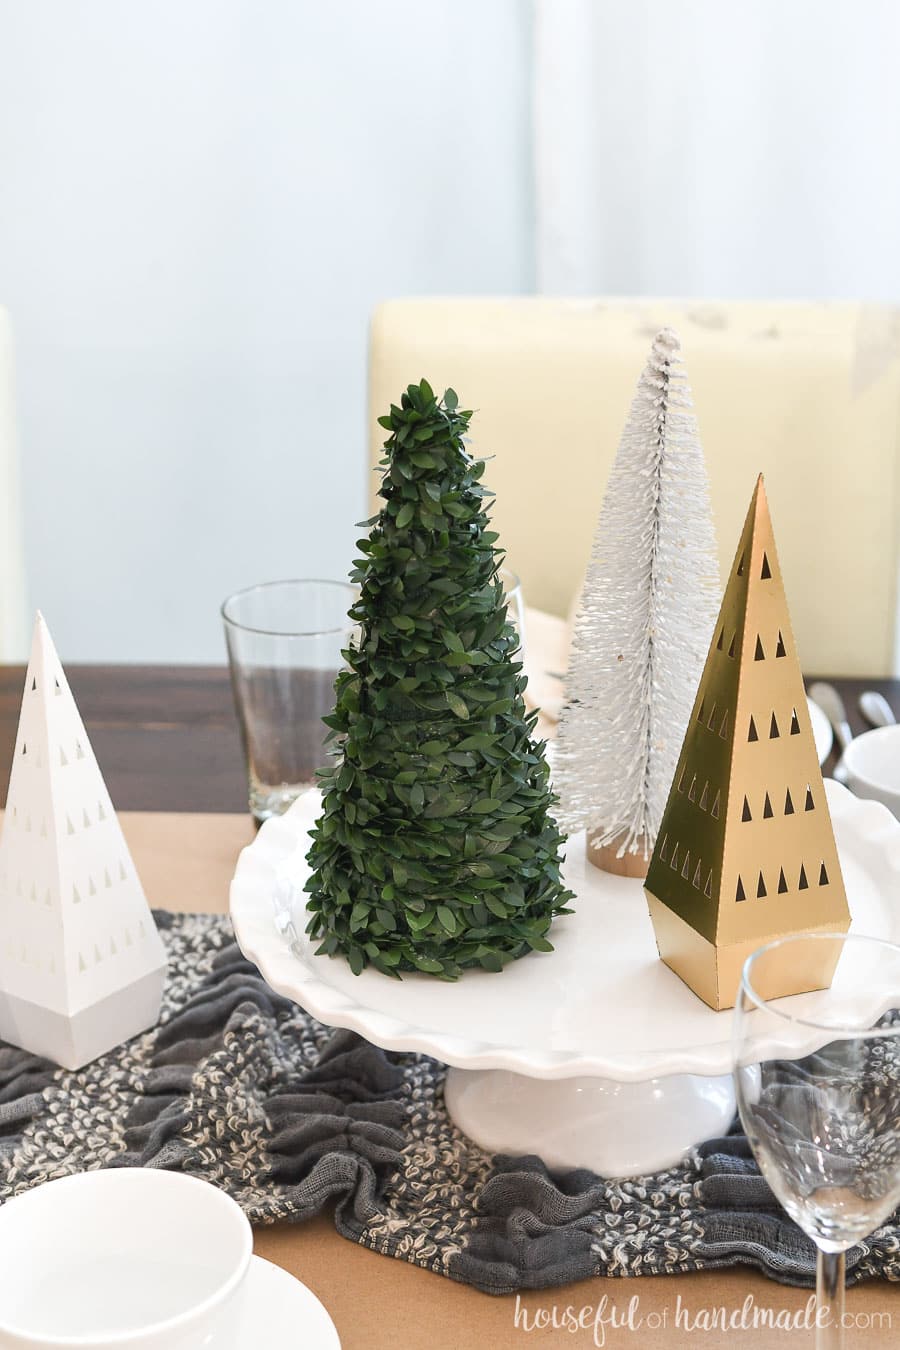
And now it was time for the trees! I nestled the paper trees, with a couple inexpensive store bought trees in neutral colors, down the center of the table. The trees were just randomly placed.
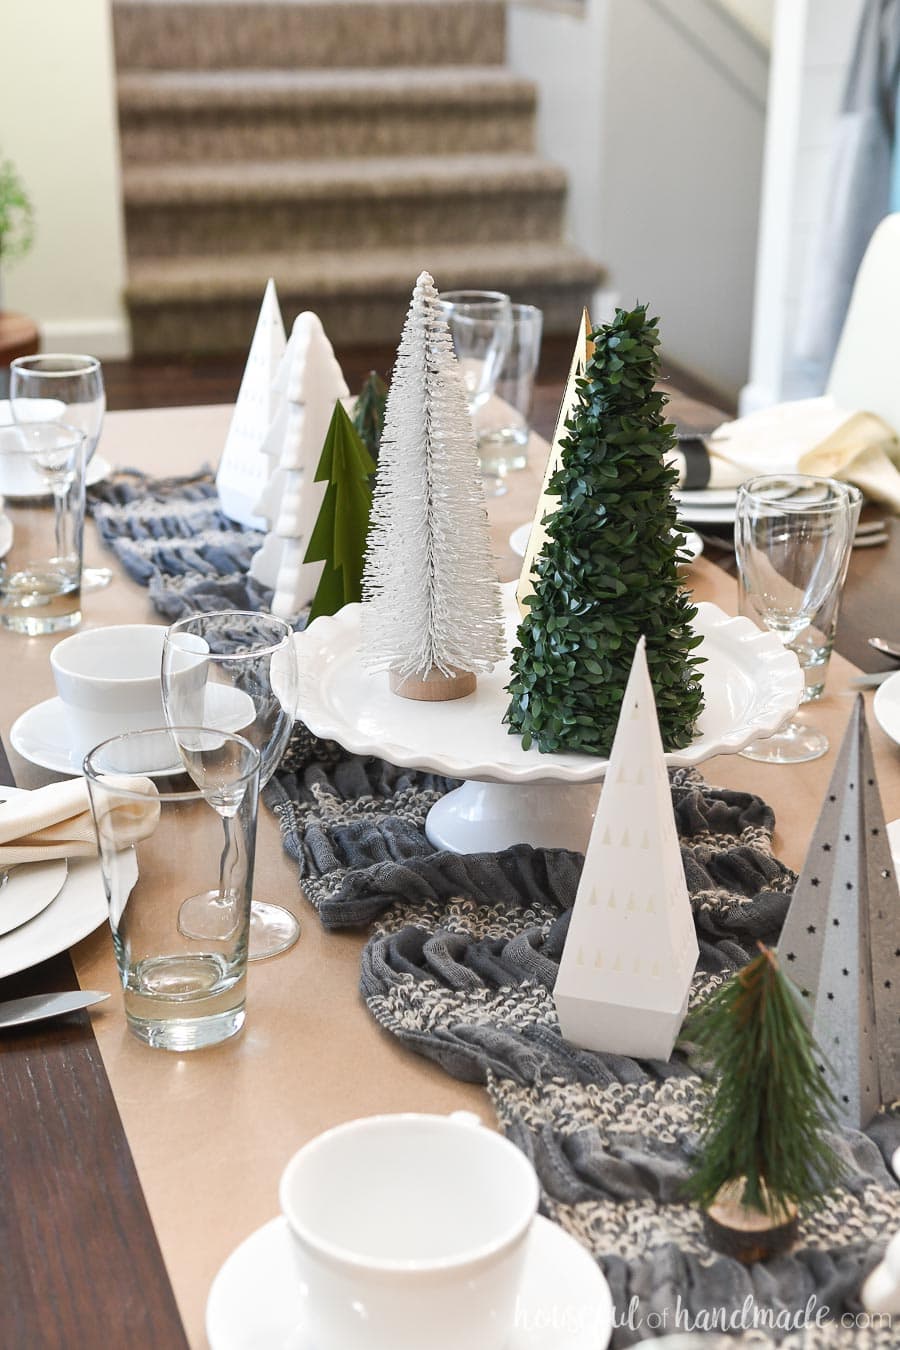
But the center of the winter table seemed a little boring. It needed some height. So I used a cake plate to elevate a group of 3 trees in the center and instant dimension!
I love using cake plates for adding height to tablescapes or countertop vignettes. Or for serving cake! Whatever is needed.
Then it was time to set the table…
For our papercraft winter tablescape I made sure to set the table with wine glasses and mugs. Nothing is better than a couple glasses of wine after a long day on the slopes. And then you can finish off the meal with an espresso or even hot cocoa!
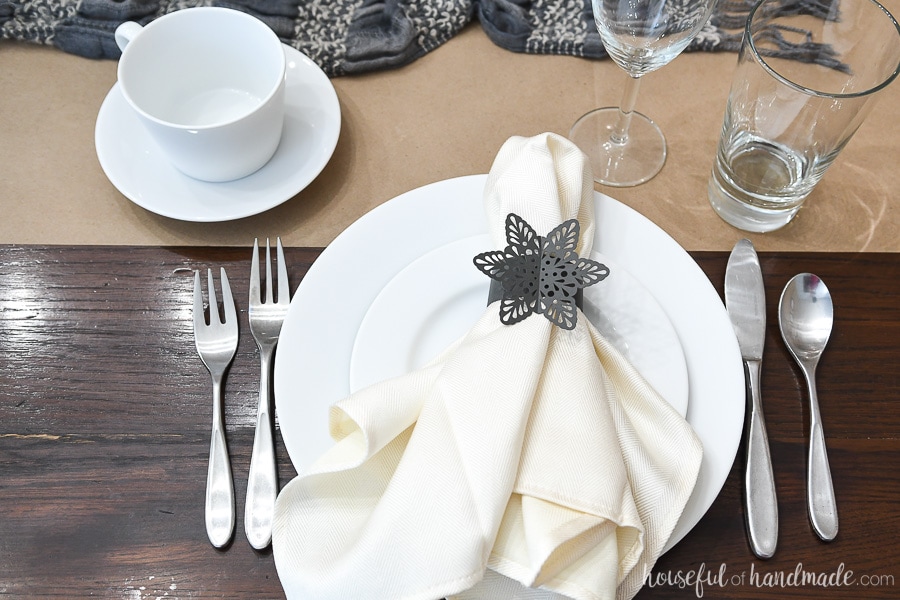
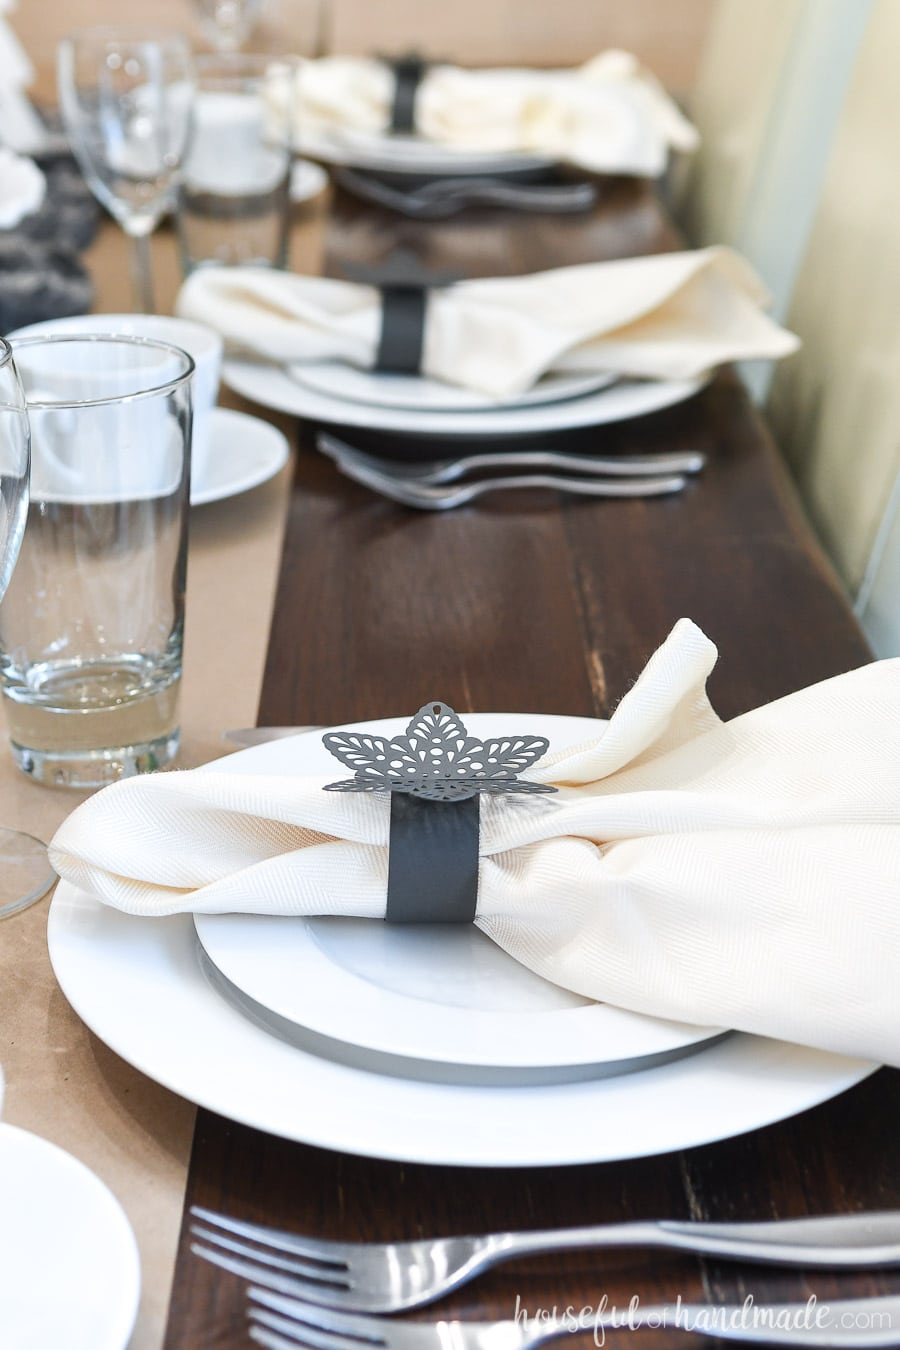
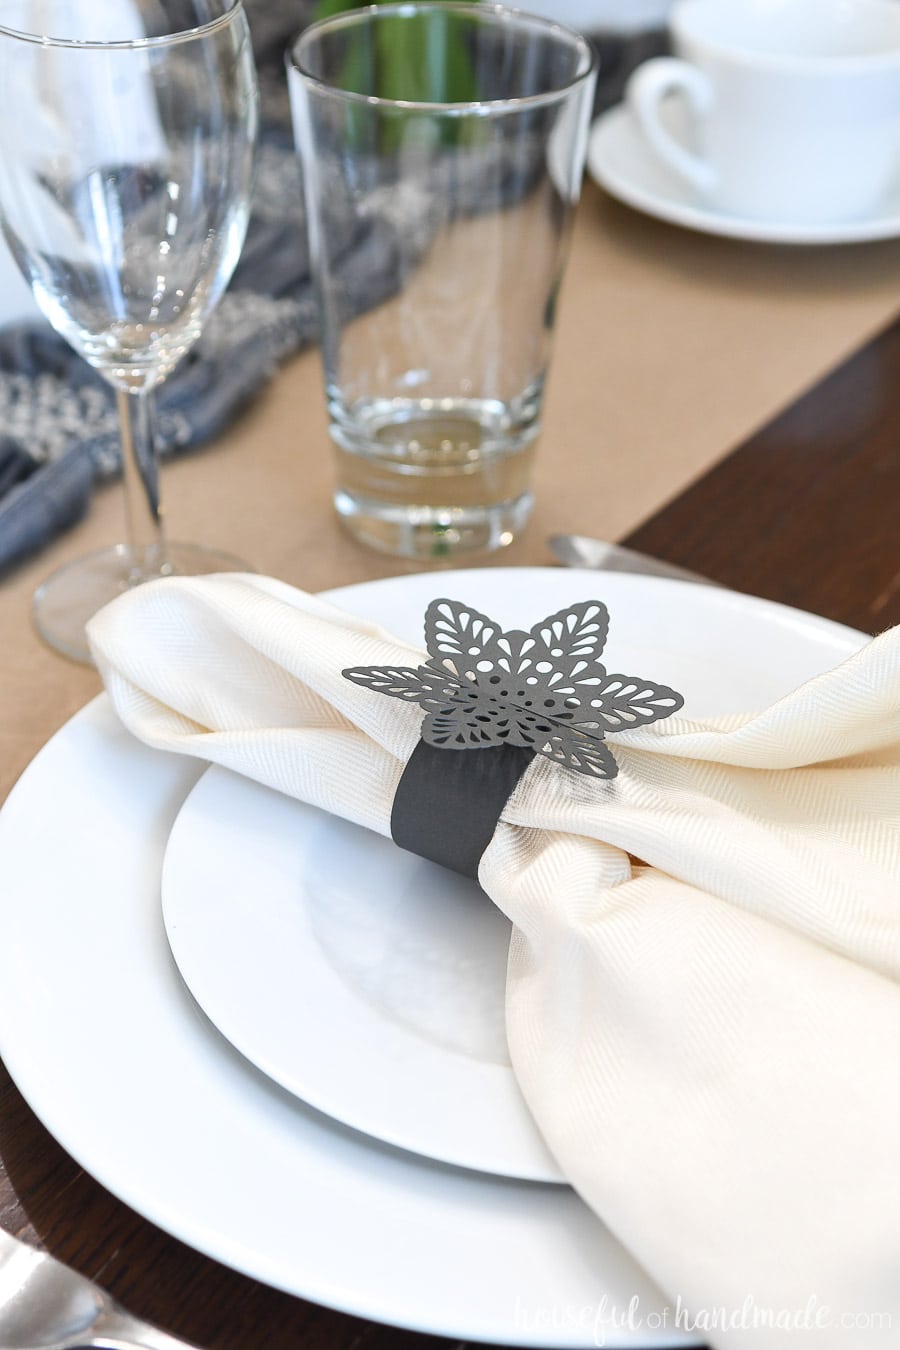
The last finishing touch to our winter tablescape are these beautiful papercrafted snowflake napkin rings.
I always use plain white plates so that they can be decorated to fit any season or theme. And that keeps my cupboards from getting filled with too many different sets of dishes.
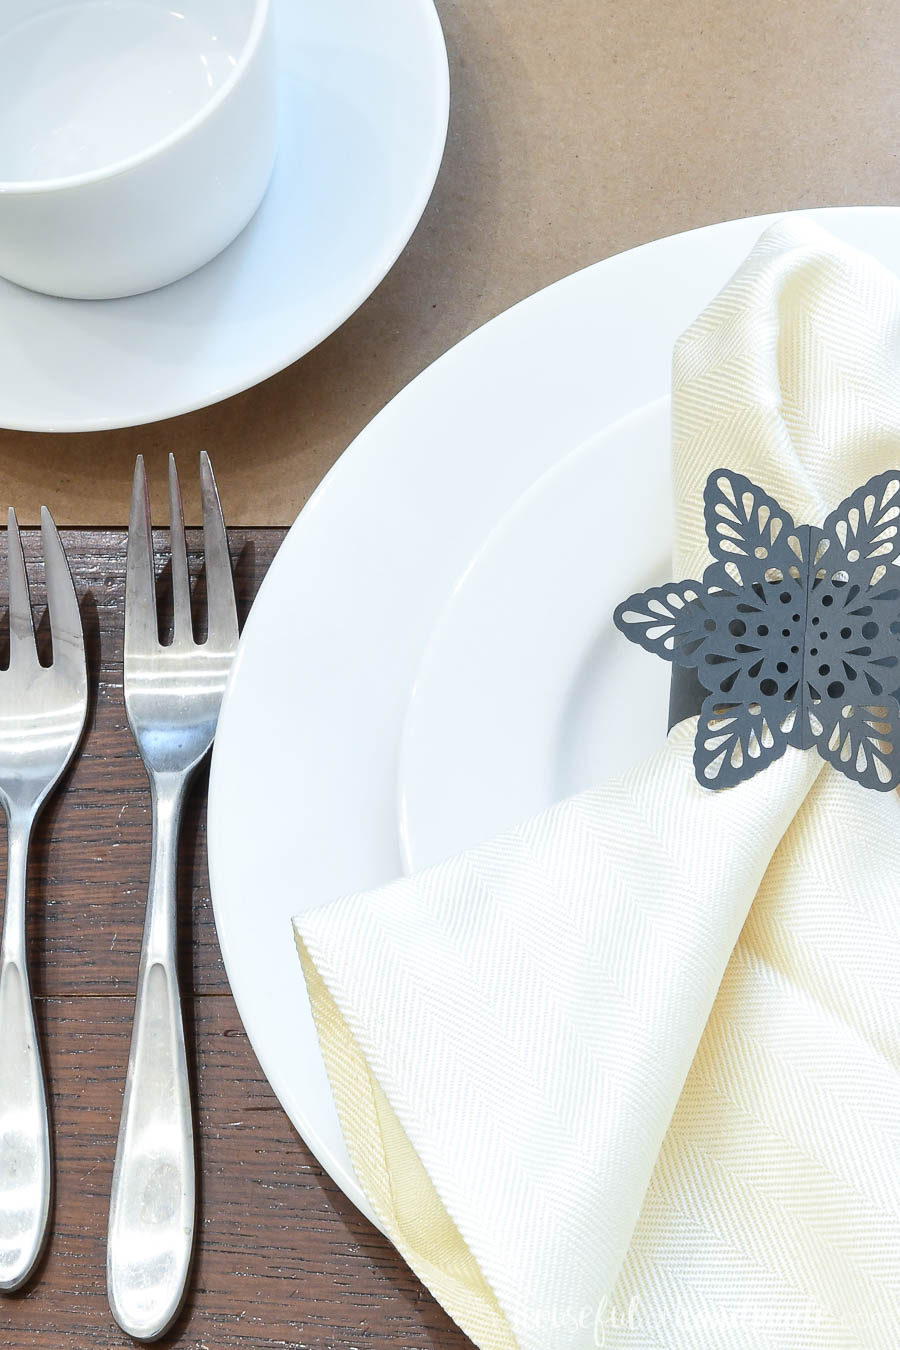
But the plain white plates where just too, plain, with the neutral winter decor. So to add a little pop to them, I made some snowflake paper napkin rings out of gray (to match the scarf in the centerpiece).
And they worked great to hold the napkins to give our place settings some much needed pizzaz! Now we are ready to enjoy a dinner with friends to stay warm on these cold winter nights!
And if you want to make your own papercraft winter tablescape, I am sharing the tutorial for how to make your own snowflake paper napkin rings below. Then don’t forget to check out the rest of the fun winter table ideas all week long!
How to Make Snowflake Paper Napkin Rings
Supplies:
- Napkin ring cut file
- I am sharing the cut files & PDF for these paper napkin rings in my subscriber library until 01/31/2018, then they will move to the shop. Click here to subscribe to my newsletter and gain access to all the freebies. If you already have your password, click here to download them.
- Cardstock
- Electronic cutting machine
- I love my Silhouette Cameo for making quick work of cutting intricate paper crafts.
These snowflake napkin rings are almost too easy to share a tutorial for! But just in case, here are the steps.
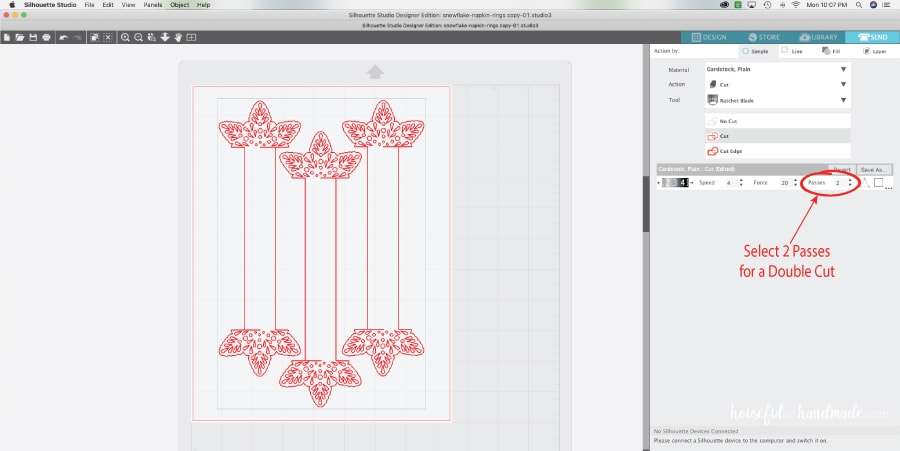
Open the cut file for the napkin rings with your electronic cutting machine software. There will be 3 rings be 8 1/2″ x 11″ sheet of cardstock.
Place a sheet of cardstock on your cutting mat.
Cut out the design on whatever color cardstock you want with the cardstock cut setting. To make sure the intricate design fully cuts, select the double cut option.
To keep the paper from curling when removing it from the cut mat, turn the mat upside down (so the paper is on the bottom). Then peel the cut mat off the cardstock. Scrape the little bits of the design off the mat with a vinyl scraper.
Roll the paper napkin rings into a circle and loop them together by sliding the two slits together.
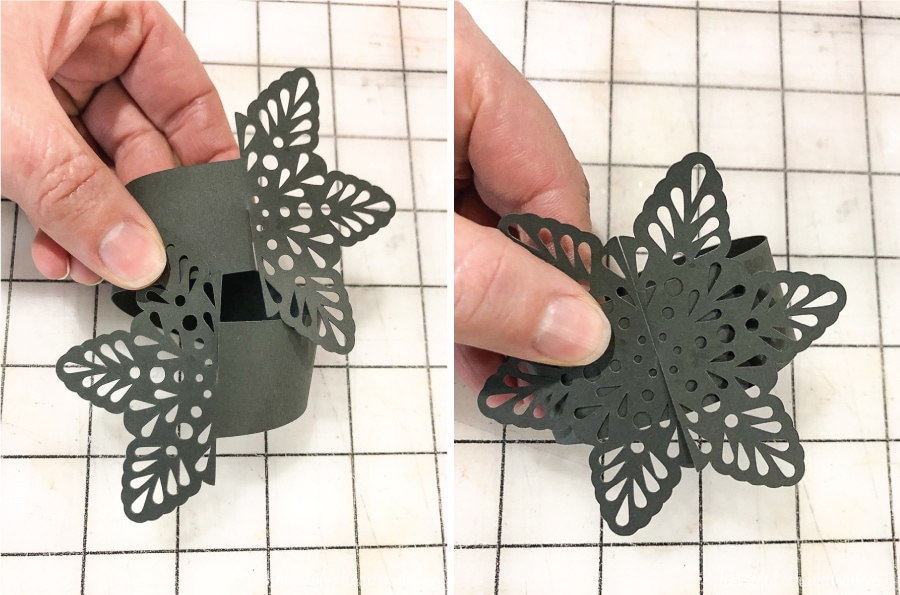
Carefully hold the napkin rings together with one hand as you pull the napkin through it. Or shape your napkin as desired, then wrap the napkin rings around it and secure to hold.
Either way, the fun little snowflake napkin rings are the perfect addition to the winter tablescape, without adding a huge expense!
Happy Skiing!
Teri Moore
Tuesday 29th of January 2019
I love paper crafts! I should totally invest in a Cricut! I've never felt compelled to do vinyl but paper crafts are my jam!
Kati
Monday 4th of February 2019
Paper crafts are my jam too! And while I do find doing a vinyl project here or there to be fun, I truly love how easy it is to create with paper!
Tammy Mitchell
Tuesday 29th of January 2019
I love the idea of using all of those trees down the length of the table. It looks awesome!
Kati
Monday 4th of February 2019
Thank you Tammy! It's a fun little forest.
Mansa
Monday 28th of January 2019
Your paper trees and napkin rings are so darling!
Mansa
Monday 28th of January 2019
Your napkins and trees are just so darling! I love them!!
Kati
Monday 4th of February 2019
Thanks Mansa!
ariel
Sunday 27th of January 2019
I absolutely love that yours is paper centred! Such a fun, fresh, approach, and the patterns you chose were great. Thanks for joining.
Kati
Monday 4th of February 2019
Thanks for hosting something fun to decorate for in January!