Turn boring cardboard boxes into beautiful fabric storage boxes with this easy tutorial.
As I was designing the console for our super awesome coffee bar, storage was a must! I try really hard to declutter, I throw away stuff all the time. I even got caught throwing out my kids artwork. Yikes! Luckily I was able to talk myself out of that one.
But even though I do not feel like I am anywhere close to being a pack rat, I also feel like there is always a pile of stuff I cannot find a home for. That is why I had to make sure I made our coffee bar with lots of storage.
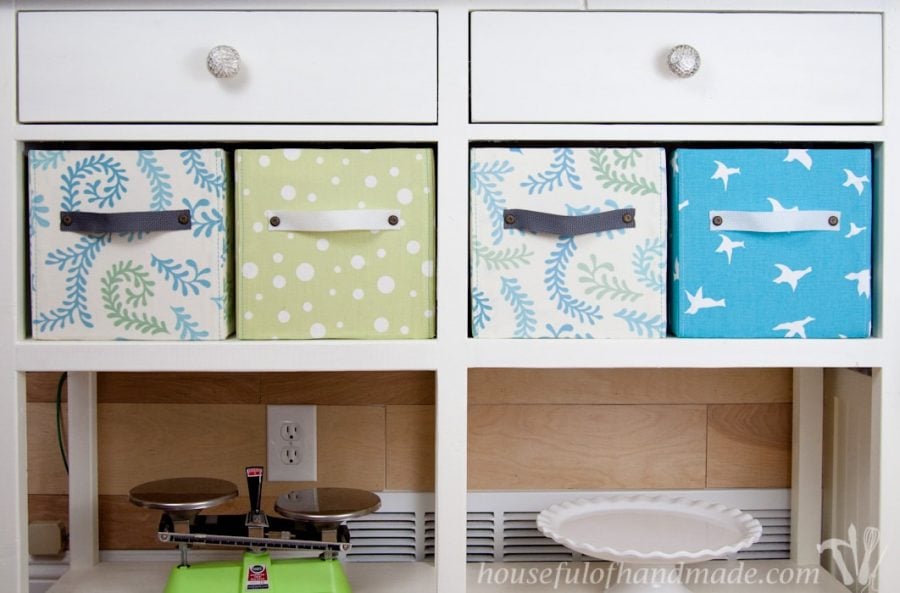
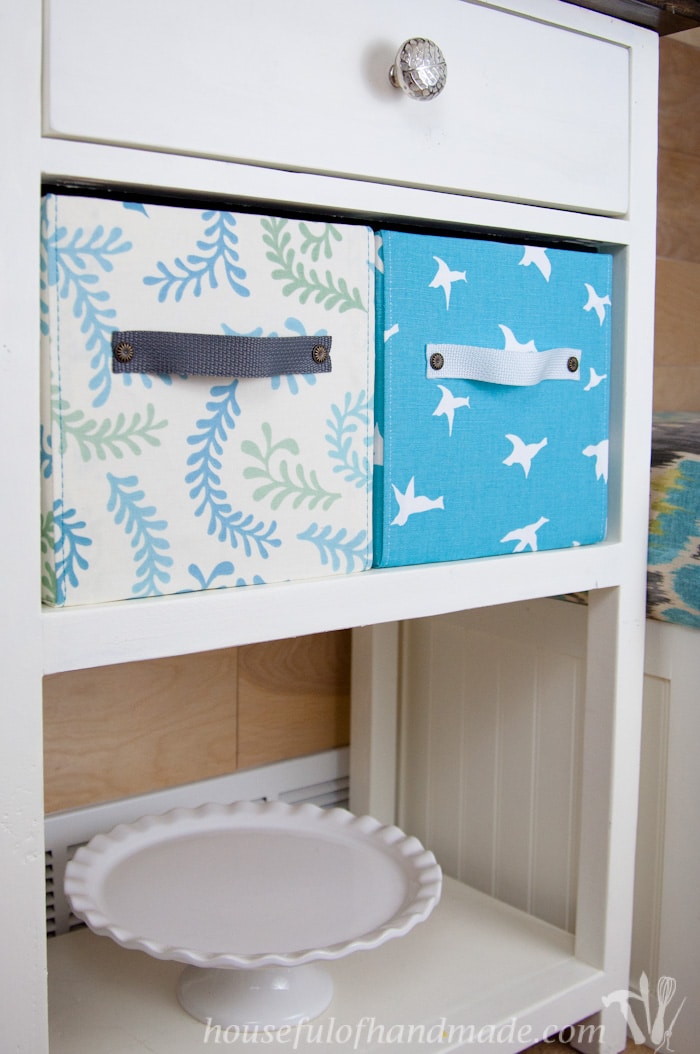
The two drawers were a good starting point, but then I got crazy and added 4 of these easy DIY fabric storage boxes. Now I have lots of storage space for all those little piles.
This post may contain affiliate links. As an Amazon Associate I earn from qualifying purchases. Click here to read my full disclosure policy.
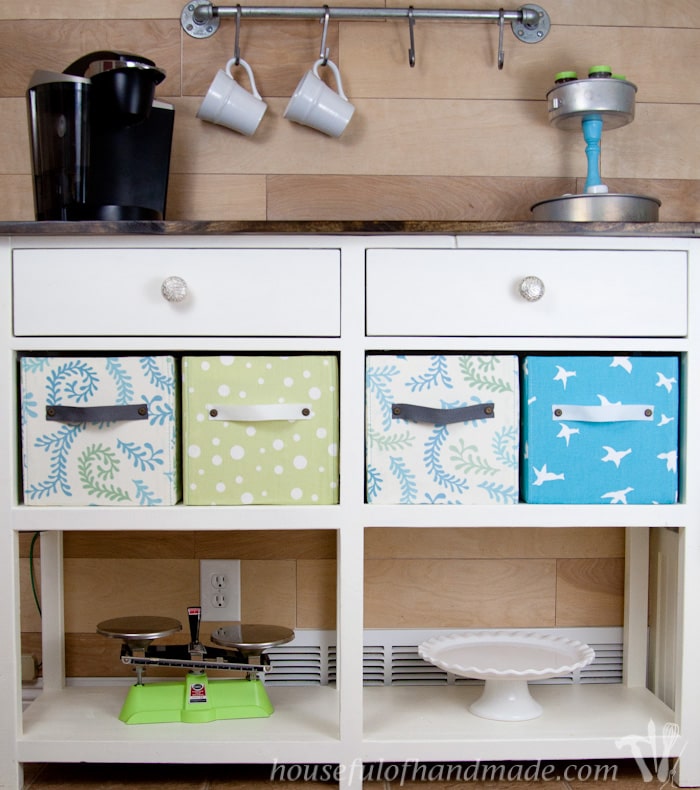
I knew I wanted to put storage boxes on our coffee bar. We need the space to store extra K-cups (we love our coffee so we buy in bulk), random tea and coffee stuff that isn’t pretty enough to be displayed.
One of the boxes hides our wireless router, and the other is perfect for me to stash anything that accumulates on the edge of the kitchen island when company is coming over (always a good idea to have an empty place ready for this exact reason)!
The problem was I couldn’t find boxes that worked with the dimensions I wanted. I know, when you build it yourself you can make it fit anything, but most boxes are 12x12x12 and that dimension just didn’t work. It was too big for the console.
I didn’t want to change the size or height of the console, so I made the only change I could. I made the space for the boxes smaller. I knew I could come up with the perfect solution, hey that’s why I DIY 🙂
I found this amazing tutorial from Craft Passion and knew I wanted to make my own DIY fabric storage boxes for our coffee console. So I started trying to find some boxes that would fit the space I made for them.
Apparently, that was too much to ask for too! I needed boxes that were 10″ wide x 10″ tall and about 13″ deep. I figured it wouldn’t be to hard to find a 10x10x12 box, but I was wrong! I couldn’t find anything but 12x12x12.
I eventually came across some boxes that were 9″ tall x 13″ wide x 13″ deep. So close to perfection. I figured I could work with that so I grabbed 5 (always good to have an extra).
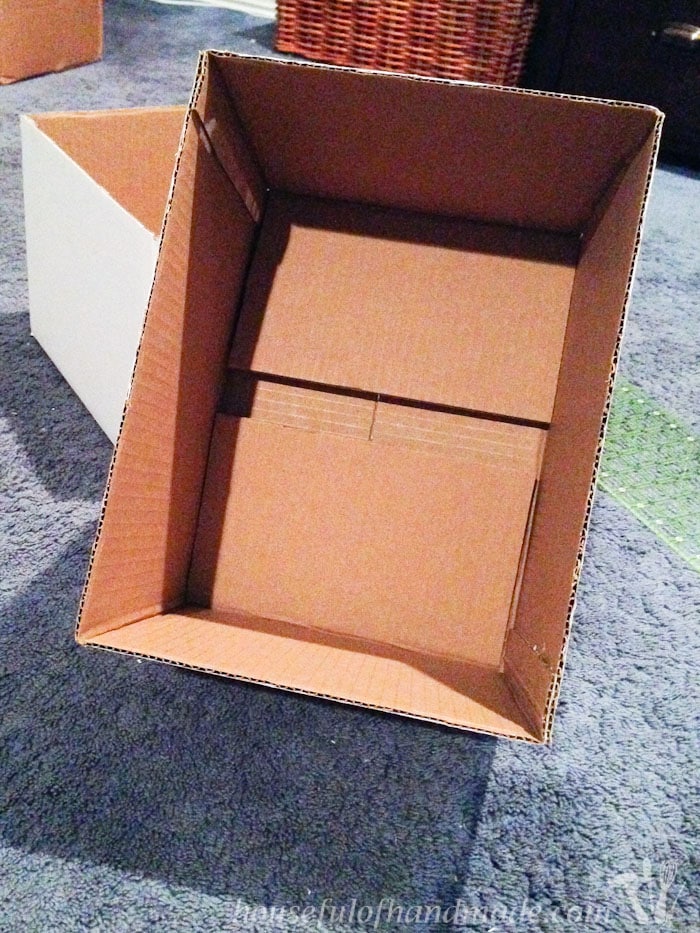
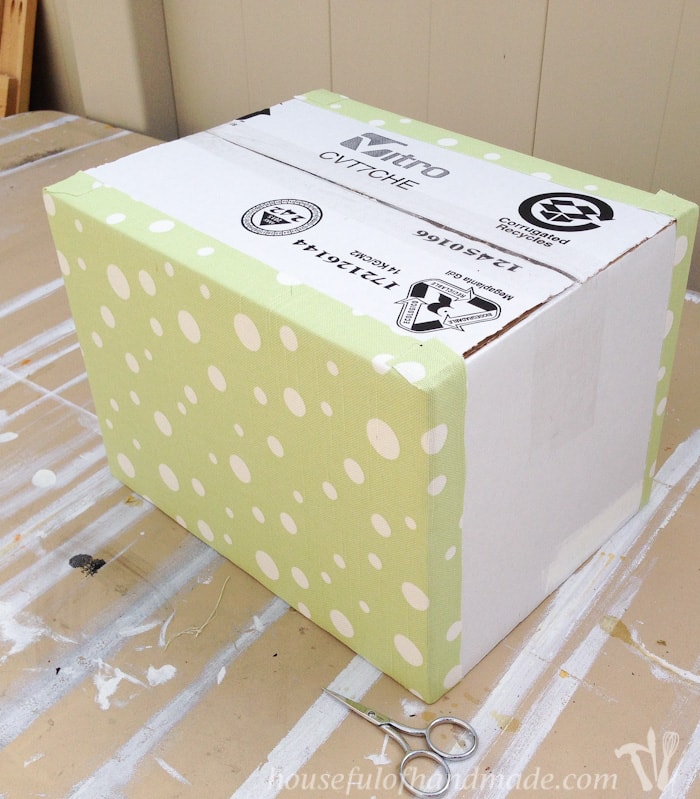
How to Resize Cardboard Boxes:
You can make any cardboard box smaller before covering them in fabric. And it is easy with some glue and scissors.
- Cut apart the tape at the bottom of box.
- Cut the box apart at opposite corners.
- Cut the front/back panels of the box to the desired size, plus a couple inches for a tab.
- Trim the sides of box also if needed.
- Fold over the tab so the front of the box is the size needed.
- Glue the tabs the inside of the sides with hot glue.
- Re-tape the bottom of the box closed.
For the side panels I cut them to size plus 2 inches. Then I folded the sides at the 2 inch mark. Using hot glue, I glued the 2 inch tabs to the back side of the front panels. Then I glued the bottom panels together and was ready to go! I ended up with a box that was 9 3/4″ x 9″ x 13″. Perfect.
Sadly I got the boxes resized then left them uncovered for way too long! I do that way too often. I filled the uncovered boxes and put them to use, but if I’d have known how easy they were to finish, I would have done it earlier (I think).
How to Make DIY Fabric Storage Boxes
Supplies:
- Cardboard boxes
- You can make your boxes fit any space with the instructions above.
- Fabric
- I bought mine at Fabric.com
- 1″ wide webbing
- Permanent spray glue
- Fabric glue
- I love Fabri-tac and use it in all kinds of projects like these roman shades and Halloween costumes
- Decorative brads
- Ribbon
- Optional: for sewing projects I couldn’t live without my seam gauge, quilter’s rulers and rotary cutter
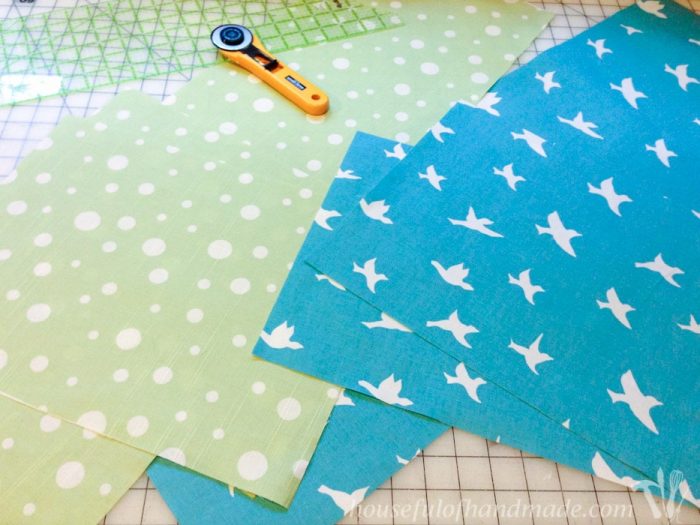
Start by cutting out the fabric. For each box:
- cut one piece that is the length of the front, bottom, and back combined plus 2-3″ by the width of the box front plus 1″;
- cut two pieces that are the height of your box plus 2-3″ and the depth of your box plus 2-3″
For each box I cut 1 piece at 10 3/4″ x 34″ for the front/bottom/back and 2 pieces at 15″ x 11 1/2″ for the sides.
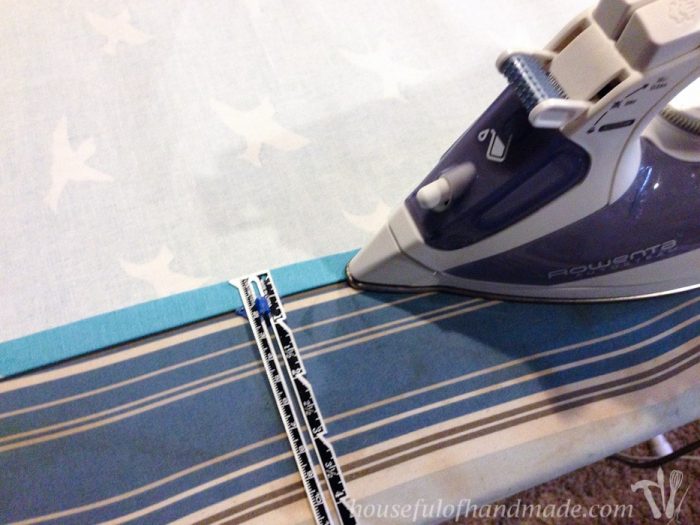
Fold over 1/2″ on each side of the front/bottom/back piece and press (this is where the seam gauge comes in really handy).
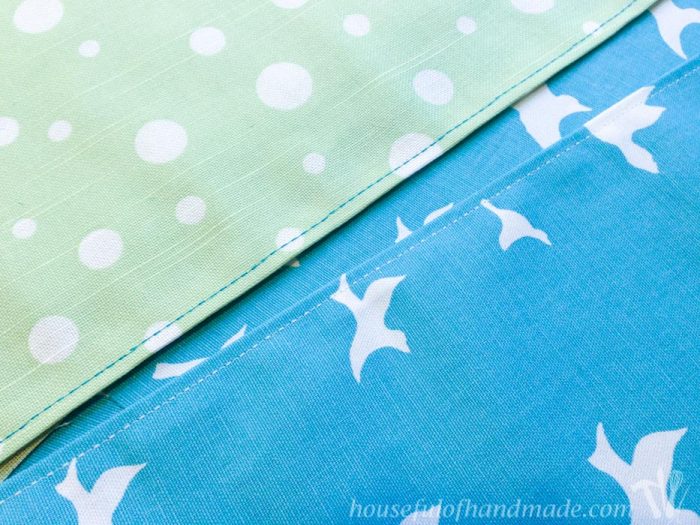
Stitched a line 1/4 inch from the edge with a contrasting color for some added detail. I used a stitch on my machine that does a duplicate stitch (forward three, back one, forward three, back one, etc.) so it looks like a thick line of stitching.
If you don’t have this stitch on your sewing machine you can always use a thicker thread to get a similar look.
Now it’s time to glue. Add spray glue to the side pieces of the fabric. Be careful not to get it on the front of the fabric because it is permanent.
Wrap the extra around the sides of the box and make sure they are glued down (use the fabric glue if you need extra glue, don’t try to spray it again or you will get it all over). The corners on the bottom of the box will need to be cut to lay flat.
Spray glue the front/bottom/back piece and center it on the box. Smooth it over the whole thing and wrap the edge inside the box.
Originally I did not use extra glue on the edges of the boxes like the original tutorial called for. But my sweet children quickly made it necessary to use a stronger glue on the edges. I wouldn’t recommend skipping this step unless you don’t have kids 🙂

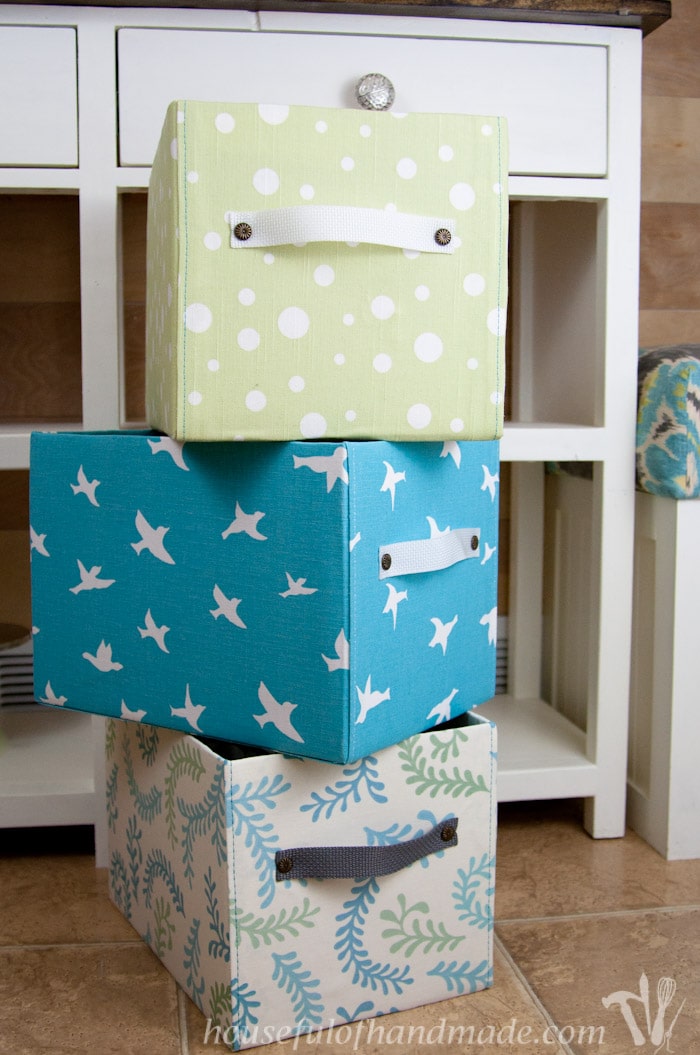
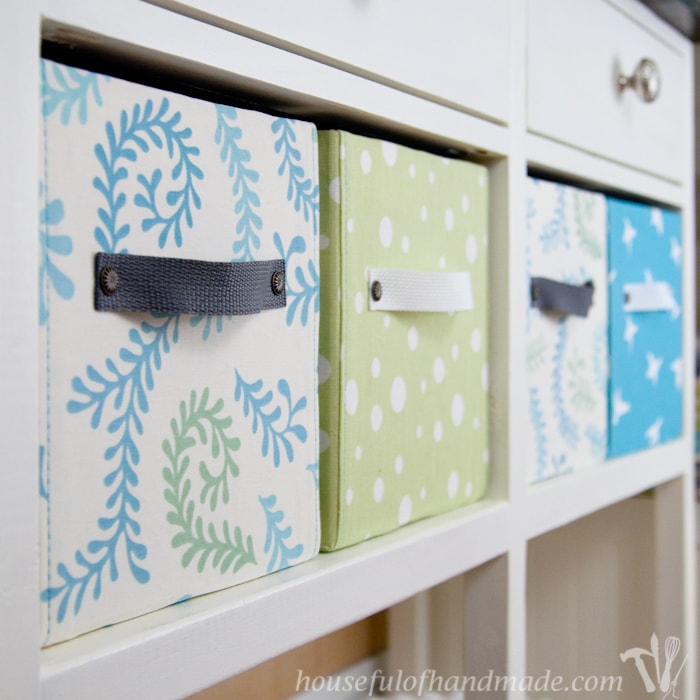
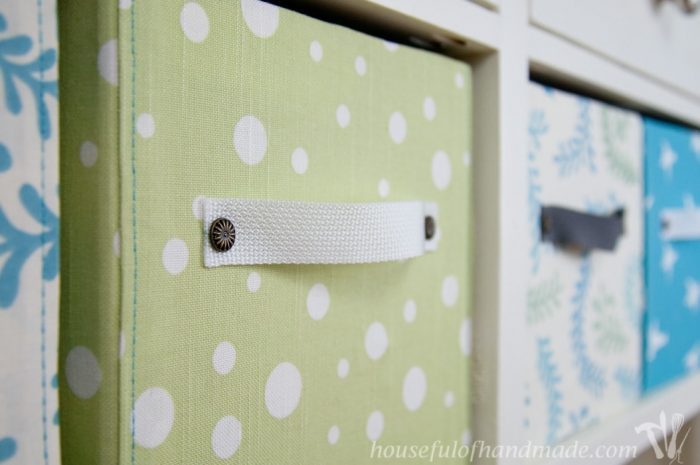
Next, secure the handles. I didn’t take pictures since Joanne’s tutorial is so great. Make sure to check it out to see how to attach the handles. They look so great and I just love the decorative brads!
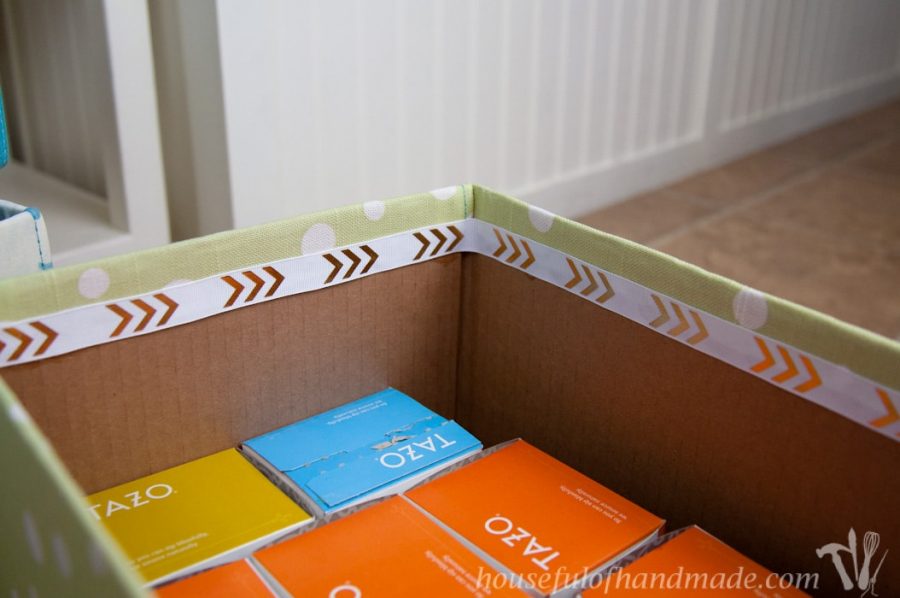
To really make the boxes look fabulous and not homemade, don’t skip the step where you cover the unfinished inside edge with a fun ribbon. I couldn’t believe the difference it made.
The uneven, unfinished edge was instantly hidden and made to look even. I used a 3/8 inch wide ribbon so it was super forgiving. And it makes me smile every time I open a box.
I was able to knock out all 4 boxes in about 4 hours, including the extra sewing! You can whip them up faster than you can binge watch a season of your favorite show on Netflix! And then you can quickly stash all of your unsightly piles and fake a perfectly clean house 🙂
If you like this project, don’t forget to subscribe to the newsletter where I will continue to share my love of DIY and all the projects in our home.
How to Make Easy Fabric Storage Boxes
Let me show you how easy it is to turn inexpensive cardboard boxes into beautiful fabric storage boxes with this easy tutorial.
Materials
- Cardboard Boxes
- Fabric
- 1″ wide webbing
- Fabric glue
- Decorative brads
- Ribbon
Tools
- seam gauge
- quilter’s rulers
- rotary cutter
Instructions
- Start by cutting out the fabric. For each box cut one piece that is the length of the front, bottom, and back combined plus 2-3″ by the width of the box front plus 1″.
- Cut two pieces that are the height of your box plus 2-3″ and the depth of your box plus 2-3″.
- For each box I cut 1 piece at 10 3/4″ x 34″ for the front/bottom/back and 2 pieces at 15″ x 11 1/2″ for the sides.
- Fold over 1/2″ on each side of the front/bottom/back piece and press (this is where the seam gauge comes in really handy).
- Stitched a line 1/4 inch from the edge with a contrasting color for some added detail. I used a stitch on my machine that does a duplicate stitch (forward three, back one, forward three, back one, etc.) so it looks like a thick line of stitching.
- Add spray glue to the side pieces of the fabric. Be careful not to get it on the front of the fabric because it is permanent.
- Wrap the extra around the sides of the box and make sure they are glued down (use the fabric glue if you need extra glue, don’t try to spray it again or you will get it all over).
- Spray glue the front/bottom/back piece and center it on the box. Smooth it over the whole thing and wrap the edge inside the box. Secure the handles and you are done!
And the colors I chose work with our dining room bench perfectly! The dining room remodel is looking so good (only a couple more things on my to do list).
Barbara Lawer
Thursday 2nd of January 2020
Hello! I wonder if you can tell me what type of material you used? Is it like bed covers/cotton or thicker like curtains?? I hope that makes sense... ?
Kati
Friday 3rd of January 2020
Hi Barbara, I used a thicker home decor fabric. Like the stuff you use for curtains. Look for upholstery weight fabrics cause they will hold up better over time!
Patricia
Saturday 12th of October 2019
Thank you so much for these instructions. I have been thinking of covering boxes, didn't know how. now I will have beautiful boxes to store my quilting fabric in.
Kati
Monday 14th of October 2019
Have so much fun covering boxes! It's easy, and addicting!
Mel
Wednesday 20th of February 2019
I love your site except the pop-ups and the stuck OVER print Pinterest, Facebook Tweet, G+, and email boxes. This is freaking annoying cause I've gotta move it back/forth to read. I want to try some of your projects. Pls take these off!
Kati
Monday 25th of February 2019
I am not sure what pop-ups you are having on the site Mel, I do not have any pop-ups at all. What browser are you using?
Teresa
Monday 7th of August 2017
Hello, my 6 yr old granddaughter and I just Absolutely Love Your Fabric Box Storage Idea! We are going to use her Pale Pink with Black Polka-dot fabric along with cordinating Black with Pale Pink Polka-dot fabric to cover the boxes in. She can't wait to put her Pretties and Toys in them! Thanks So Much for Sharing! Great Rainy Day Memory Maker for us!
Noëlle
Monday 5th of November 2018
Those boxes are really nice ! I'm going to make some big to organise my dressing with Konmari method, Pullovers and trousers will be placed in them. Thank you for exchange. Noëlle from France
Kati
Tuesday 8th of August 2017
I love that you are going to make them together! This will be perfect for all her pretty things.
Pam Weston
Tuesday 13th of December 2016
I could see adding labels to the front of boxes, especially if you make them for a craft room. You could either glue a small chalkboard to the front or tie on a decorative cardboard label. I did something similar to those cardboard pattern boxes that you can purchase at most fabric stores and I even covered the lid. I just wrapped the cloth vertically around the box, gluing down the edges that overlapped the bottom and the inside of the box. Where the ends met, I folded the top edge about 1/2 inch and glued it over the raw edge of the under edge.
You can find nice fabric choices in the quilting section of a fabric store. There are even coordinated sets of fabrics to mix and match. Even lightweight home decorator fabric would work.
Kati
Saturday 17th of December 2016
These are all such great ideas! Thanks so much for sharing.