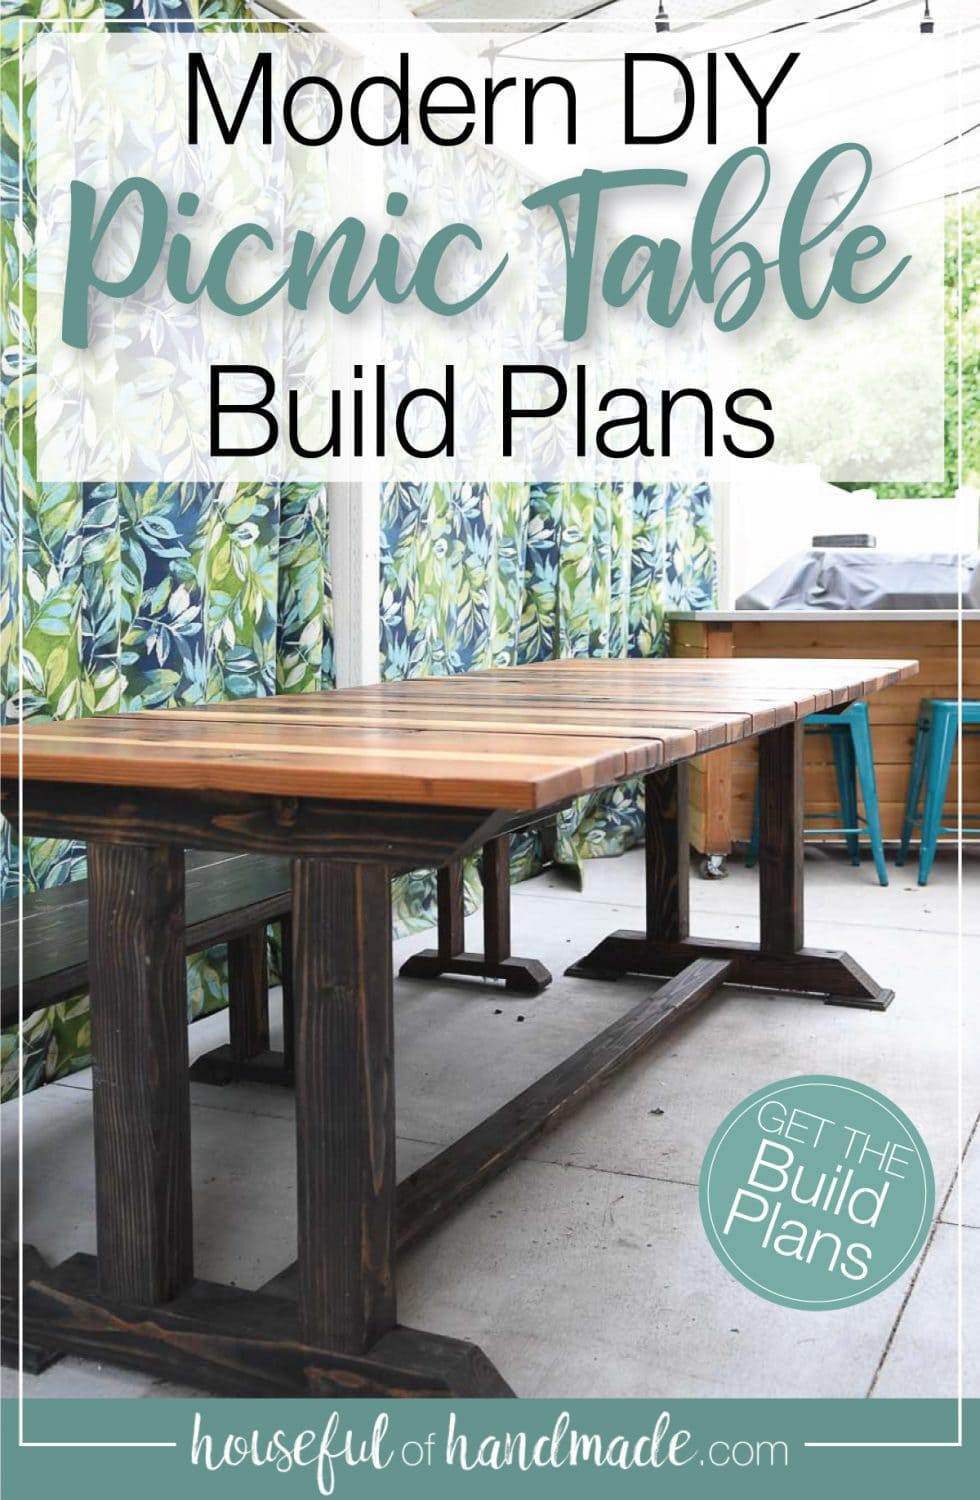
A couple years ago I built a large outdoor table with a table top from a scratch & dent store.
Even though the table top was from a pricey retailer, it was not solid wood. After 1 season with a little moisture it was destroyed.
But I didn’t let that stop me from enjoying our DIY picnic table! Instead, we pulled off the ruined table top and set out to design the perfect wood picnic table plans.
This post may contain affiliate links. As an Amazon Associate I earn from qualifying purchases. Click here to read my full disclosure policy.
The Perfect Picnic Table Design
When designing an outdoor picnic table, you need to be way more aware of water!
While indoor tables do need to be able to withstand the occasional spills. Outdoor tables need to withstand the occasional rain storm or snow.
Making a way for the water to slide off the table will make your DIY picnic table last much longer. So the new wood table top was designed to last for a long time.
A 1/4″ space between all the boards on the table top build mean water can just fall right on through instead of ending up in large puddles.
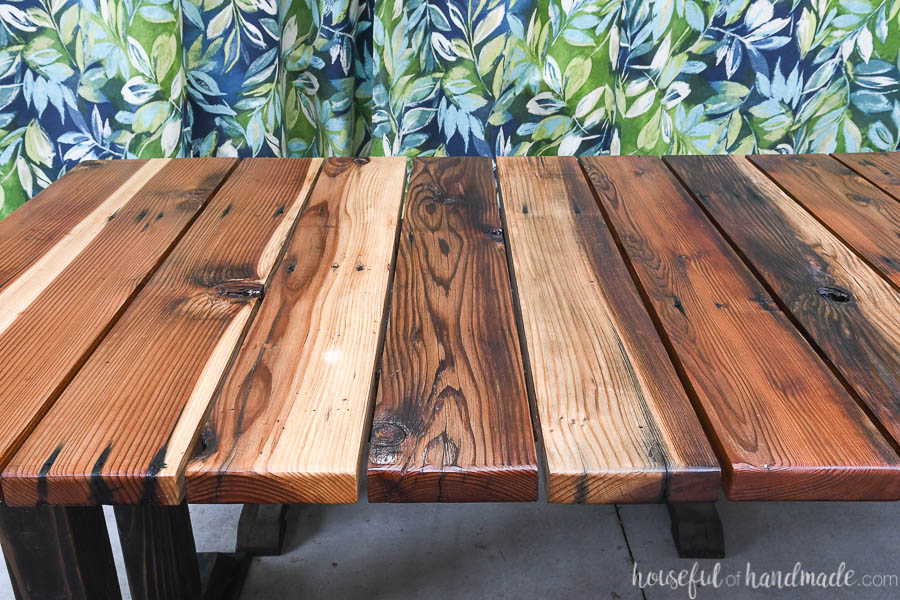
The Best Wood for Outdoor Picnic Table Plans
When building any outdoor furniture you need to be careful with what wood you choose. Pick the right wood to build a picnic table that lasts!
- Redwood is great for outdoor projects. It is naturally resistant to decay and bugs. Redwood also holds its moisture as the elements change to minimize moving and warping.
- Cedar is another favorite for outdoor projects. It is resistant to rot and insects and the earthy aroma actually repels insects too. Cedar also does not shrink and swell as much as other lumber so it doesn’t move as much when the weather changes.
- Construction studs can be used for making budget friendly outdoor projects if sealed and cared for properly.
Sealing Construction Lumber to Last Outdoors
Using inexpensive wood for outdoor projects is a great budget friendly option. And if done correctly, the wood will last for years outside.
- Make sure to seal with an outdoor sealer like spar urethane.
- Thin the first coat of sealer 50/50 with odorless mineral spirits to allow it to soak deep into the wood.
- Apply a second thinned coat if the wood is thirsty.
- Finish with at least 2 more non-thinned coats of the outdoor sealer.
- Make sure to cover the table when not in use to limit standing water.
And these tips don’t work for only construction lumber. Use them to seal any wood for years of outdoor use.
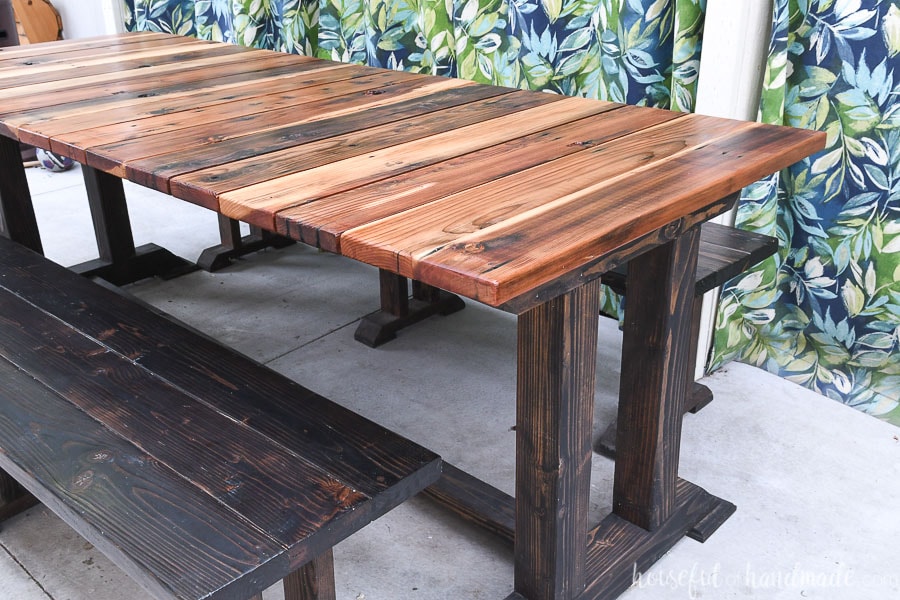
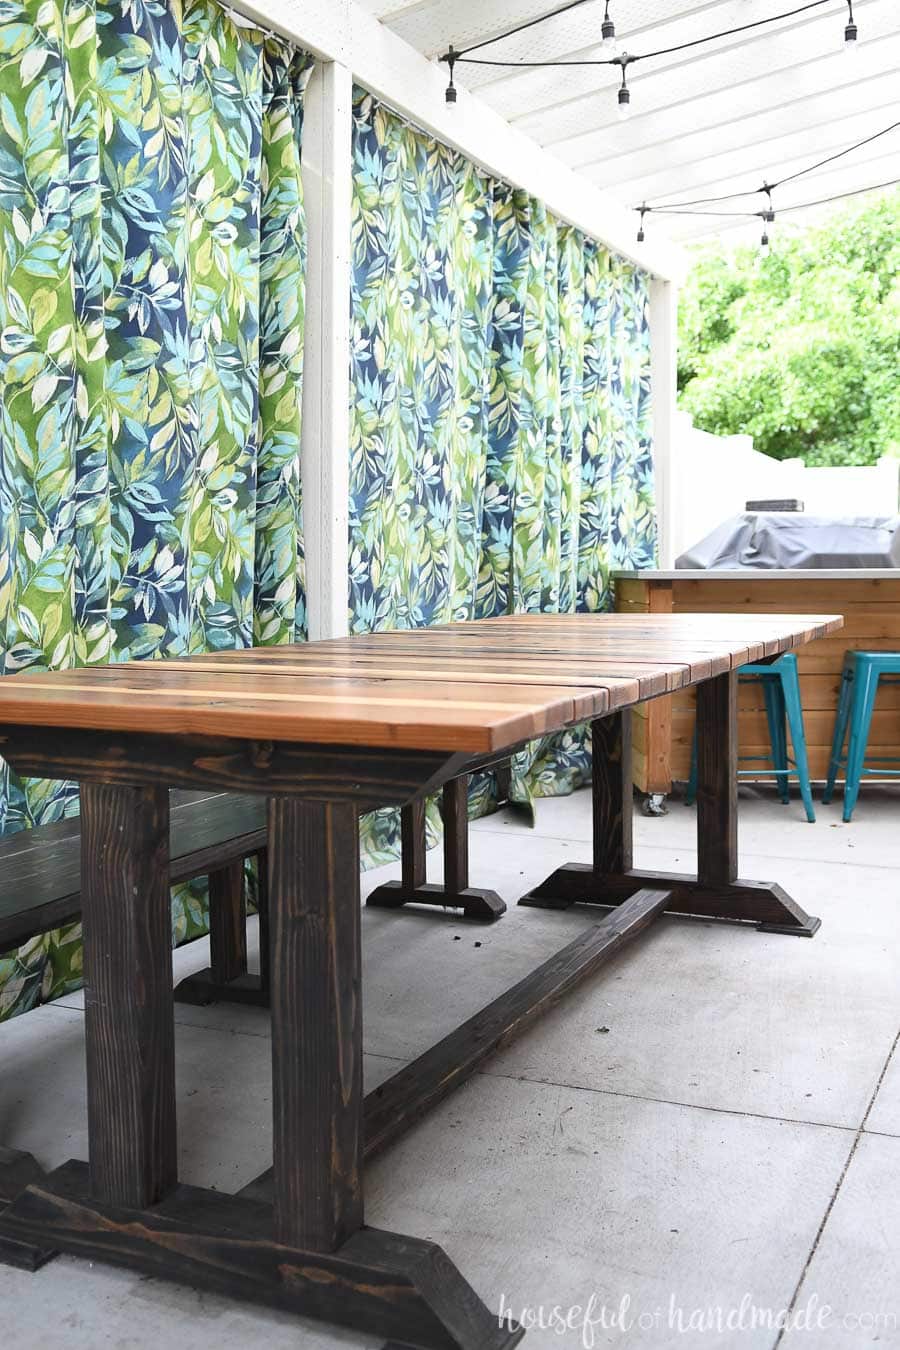
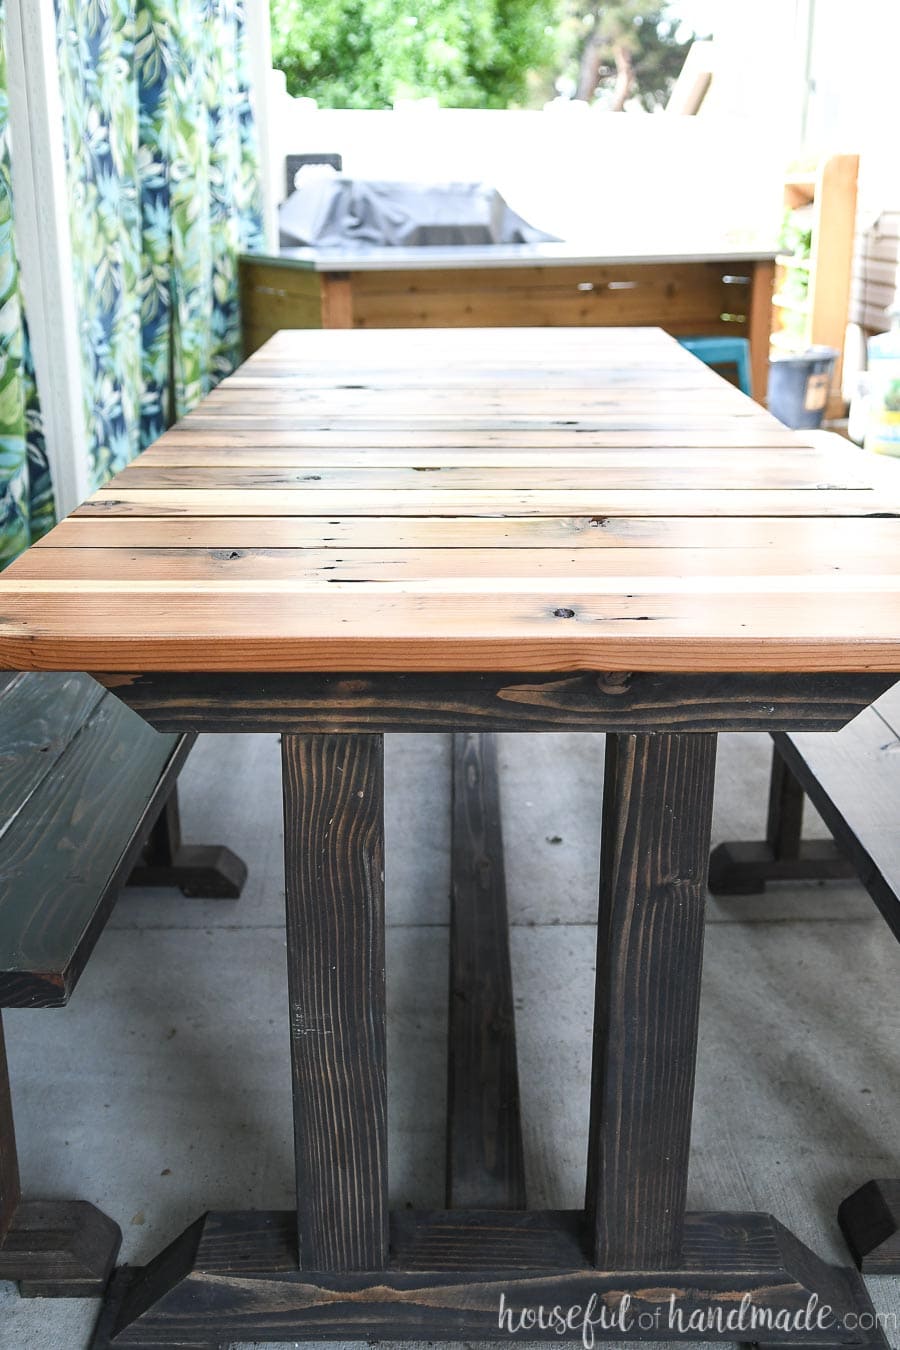
For our picnic table, we used construction studs for the base and redwood for the top. Since we have a covered pergola, our picnic table is rarely dealing with standing water, just the occasional sideways rain storm.
The wood on the top of our picnic table was actually reclaimed from our friends deck. You can see the old screw holes and years of use.
But with a little love, we were able to give it a new life. I adore the character from the reclaimed wood, but even more I love the free price tag!
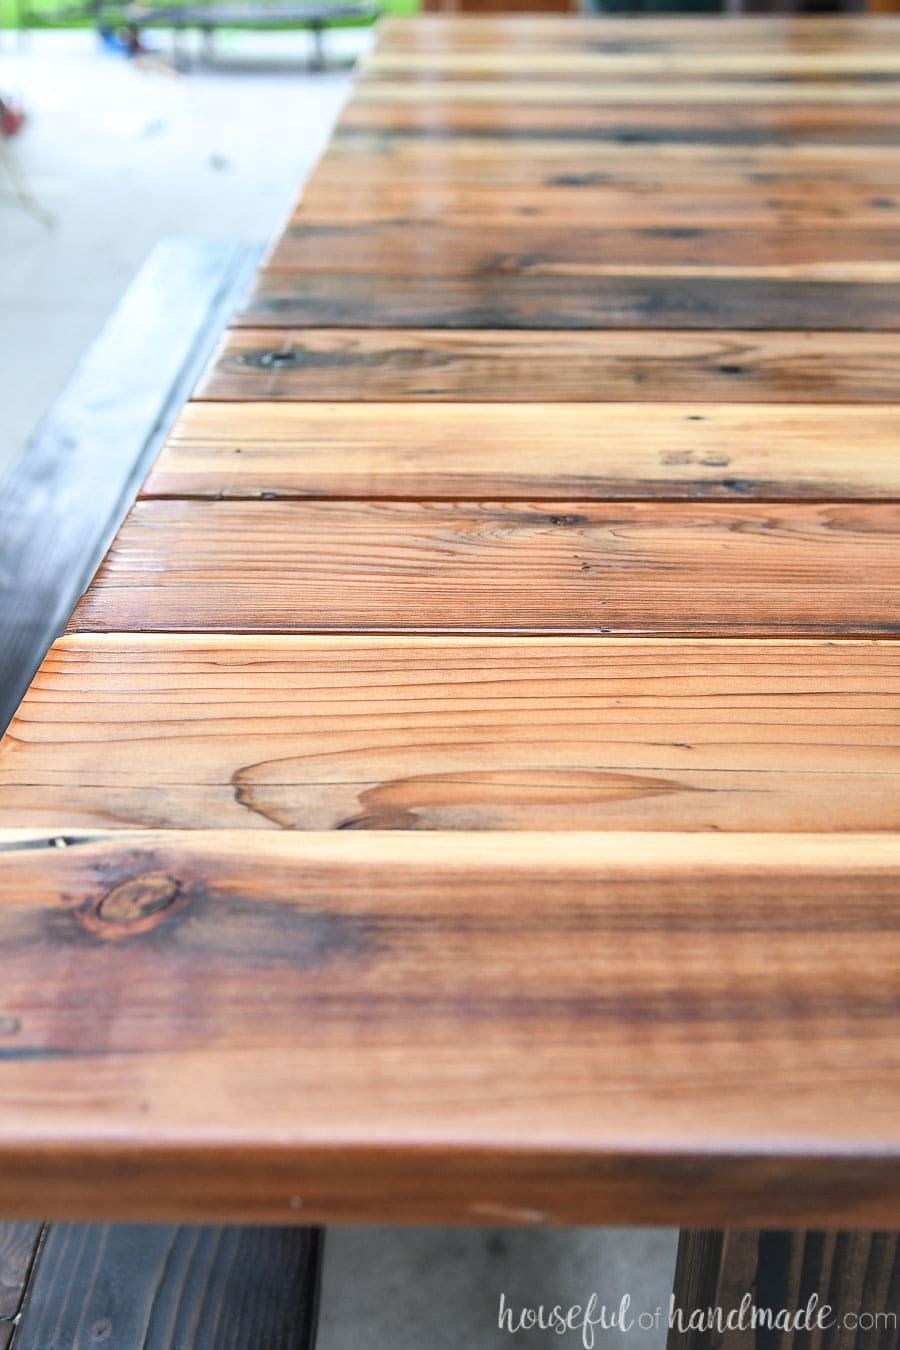
Oh, and have I mentioned how big this wood picnic table is? It is almost 8′ long.
Do you know how many people can sit at an 8′ long table? We have been able to easily fit 8-10 people.
To maximize your space at the picnic table, add a set of matching dining table benches. It’s easy to squeeze even more kids along a bench than with chairs.
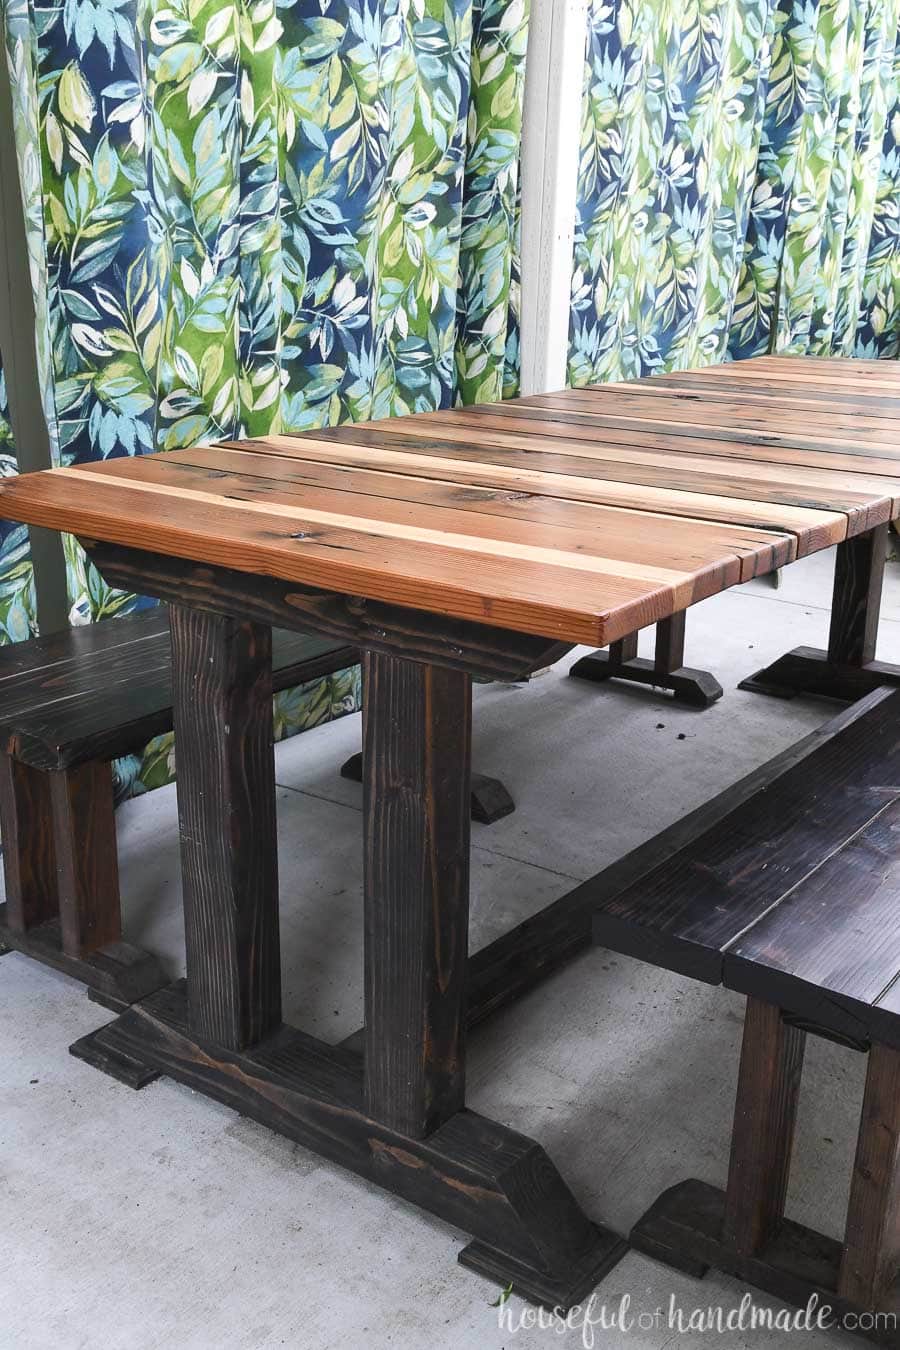
How To Build a Picnic Table
Tools & Materials
Recommended Tools:
- Miter saw
- Pocket hole jig
- Router
- I love this small palm router for finishing work on projects like this.
- Self centering dowel jig
- Drill and impact driver
- Table saw or circular saw with guide track
- Measuring tape
- Square
- Clamps
- Sander
Supplies:
- Wood products
- (3) 4×4, 8’ long boards
- (3) 2×4, 8’ long boards
- (1) 1×6, 1’ long board
- (9) 2×6, 6’ long boards
- 2 1/2″ pocket hole screws
- 4″ wood screws
- 1 1/4″ wood screws
- Wood glue
- I love this Gluebot for easy glueing of all my woodworking projects.
- Sand paper
- Outdoor wood sealer
Overall Dimensions
The finished table is 91″ long by 35″ wide and 31 3/4″ tall.
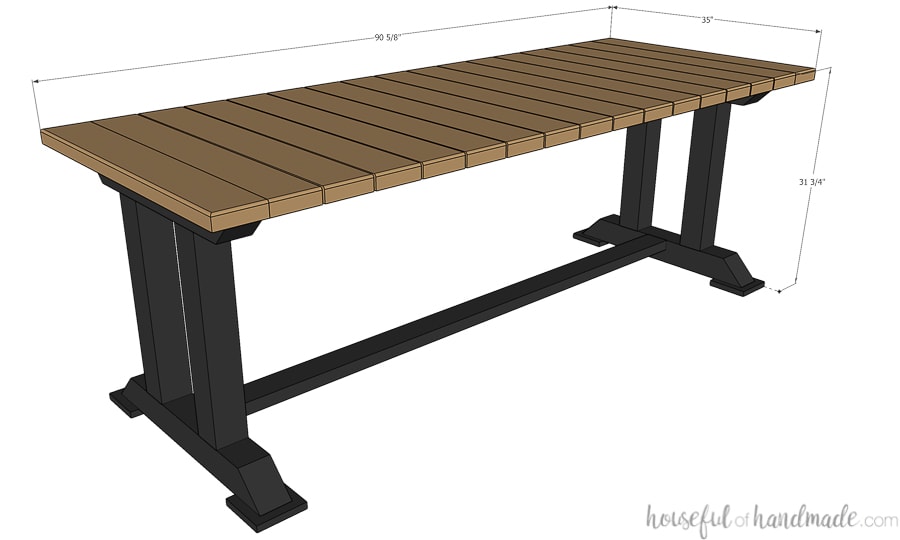
Cut List
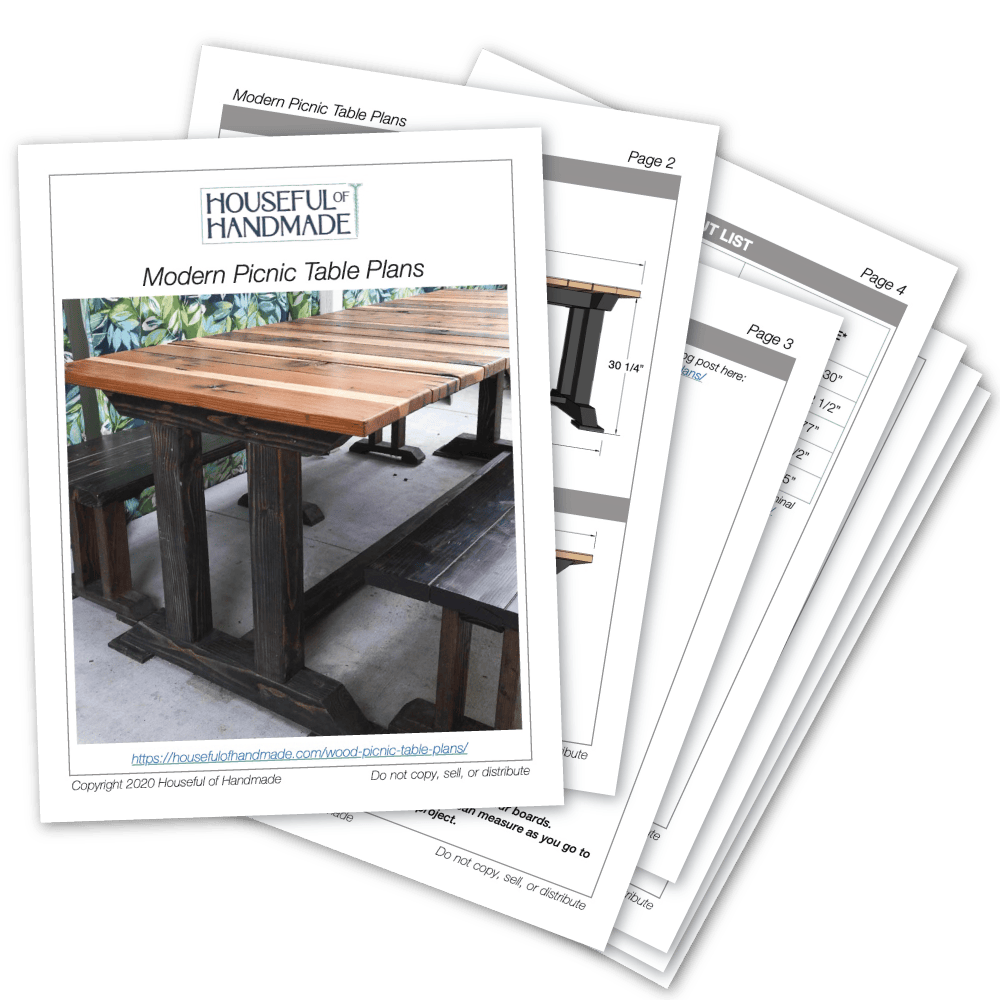
Cut out the pieces according to the easy-to-read table in the premium PDF plans.
STEP 1- Build the Table Legs
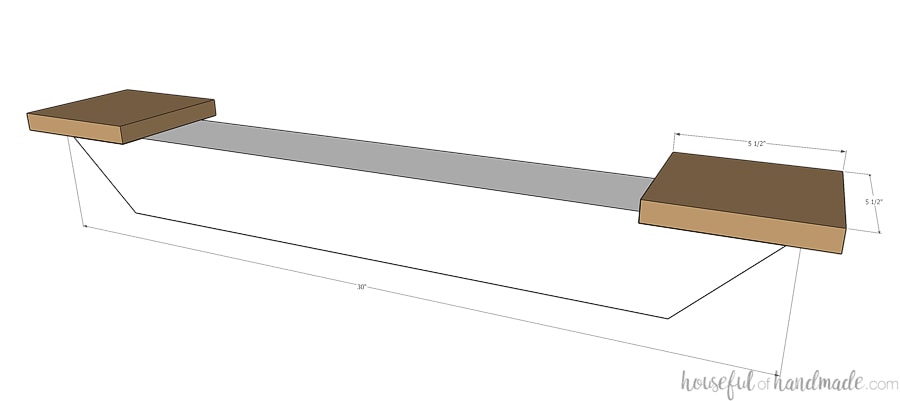
Cut the feet of the table according to the printable plans. Add a decorative router edge around the entire top of the feet.
Cut the table leg bottoms so the ends are angled at a 45 degree angle toward the center.
Attach the feet to the bottom of the table leg bottoms with wood glue and 1 1/4″ construction screws.
Be careful not to attach the feet too close to the outside of the leg bottoms where it is angled or the screws will come through the top.
Repeat for the other table leg.
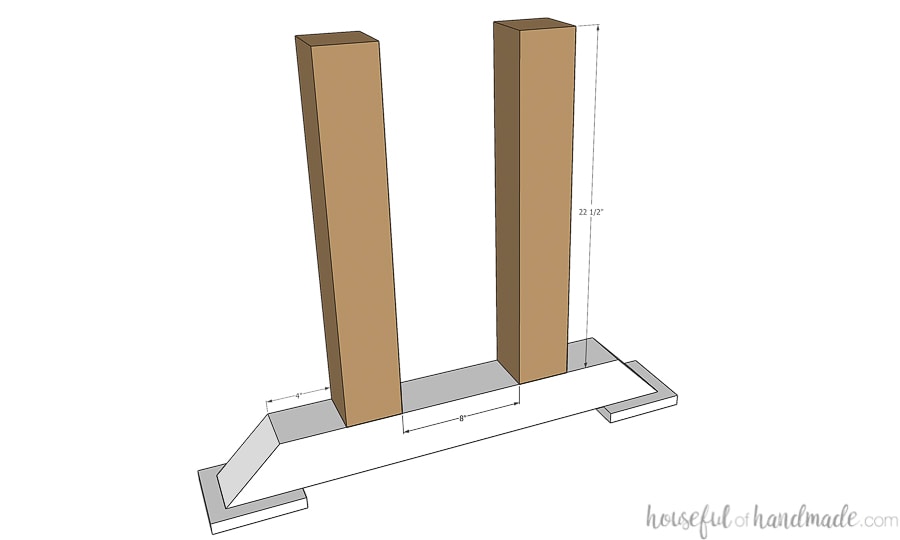
Attach the table leg posts to the top of the table leg bottoms. Space the posts so they are 8″ apart from each other and centered on the leg bottom.
Predrill 1″ deep holes in the bottom of the leg bottoms and secure the legs with 4″ screws through the predrilled holes into the leg posts.
Repeat for the other table leg.
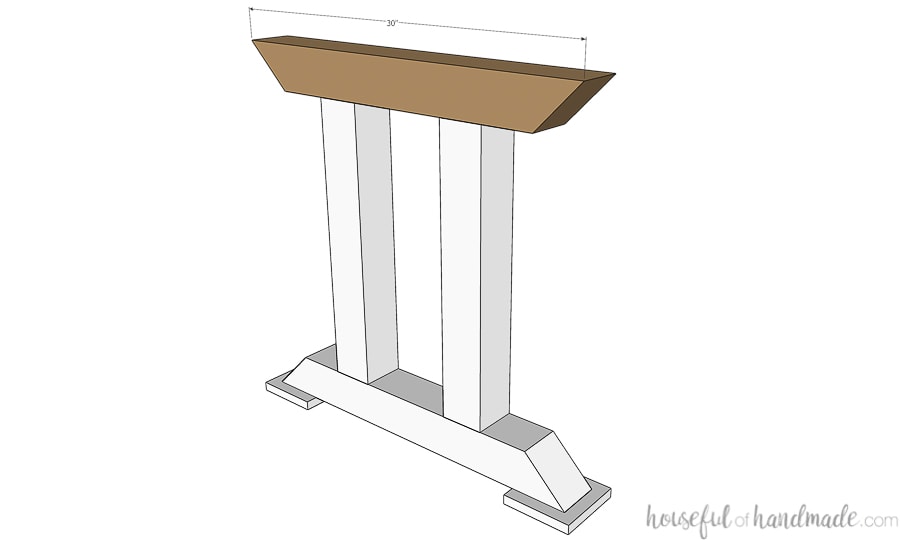
Attach the table leg top to the top of the leg posts in the same manner as you attached the posts to the table leg bottoms.
Make sure the posts are 8″ apart and center on the leg top. Repeat for the other table leg.
STEP 2- Build the Table Base
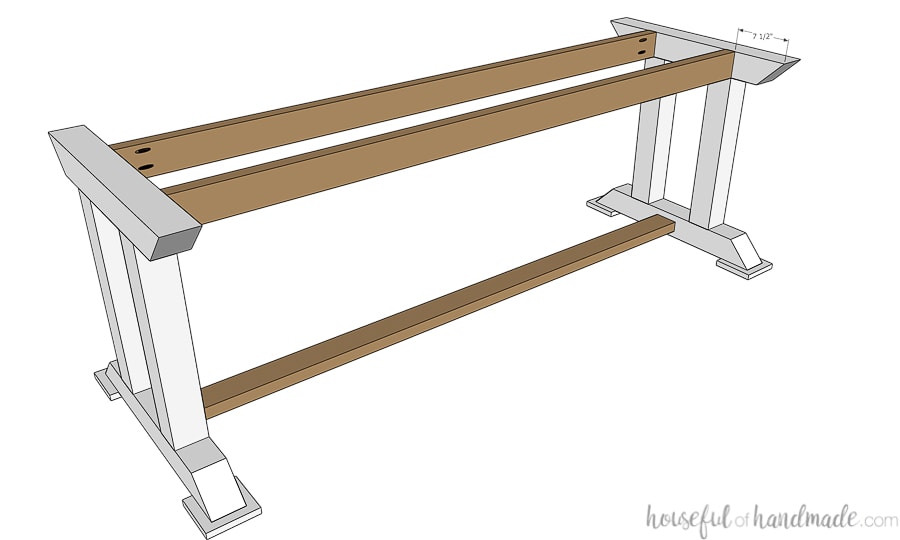
Drill pocket holes set for 1 1/2″ material in each end of the table apron boards.
Attach the boards to each of the legs to create a complete table base. Two of the boards will be on the top flush with the top of the of the 4x4s.
The third one will be on the center of the bottom 4×4 so it is flush with the top of it.
STEP 3- Build the Table Top
Cut the table top slat boards according to the diagram in the plans.
Using a table saw or circular saw with guide track, cut off the curved edges of the boards. Your final boards should be 5 1/8″ wide.
For the end pieces of the table top, glue two of the boards together with 3/8″ x 2″ dowels. Use a self centering doweling jig to make sure the holes are straight and centered.
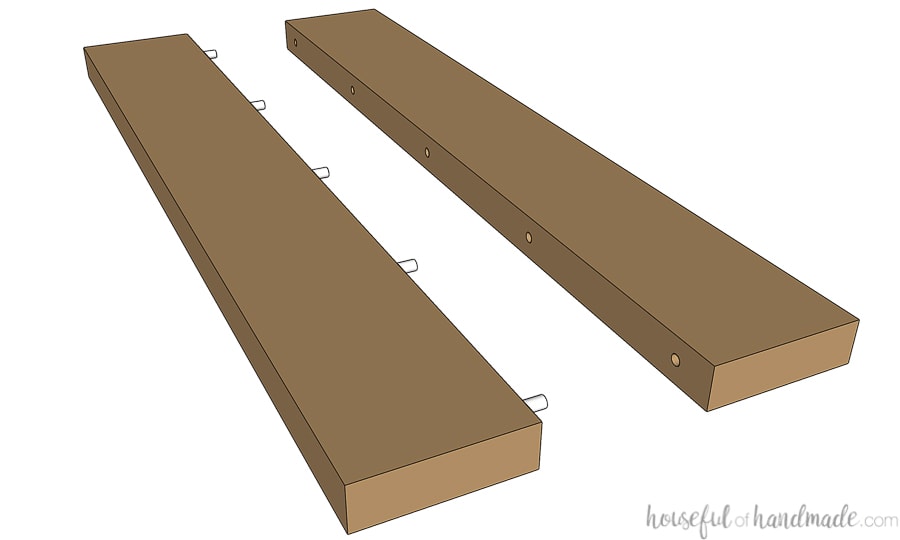
To make the outside of the picnic table less sharp, router a 1/4″ round-over bit on the short edges of the slat boards. You can either do this before or after attaching it to the table base.
If you do it before, I would also suggest sealing the boards before attaching to make it easier to get in between them.
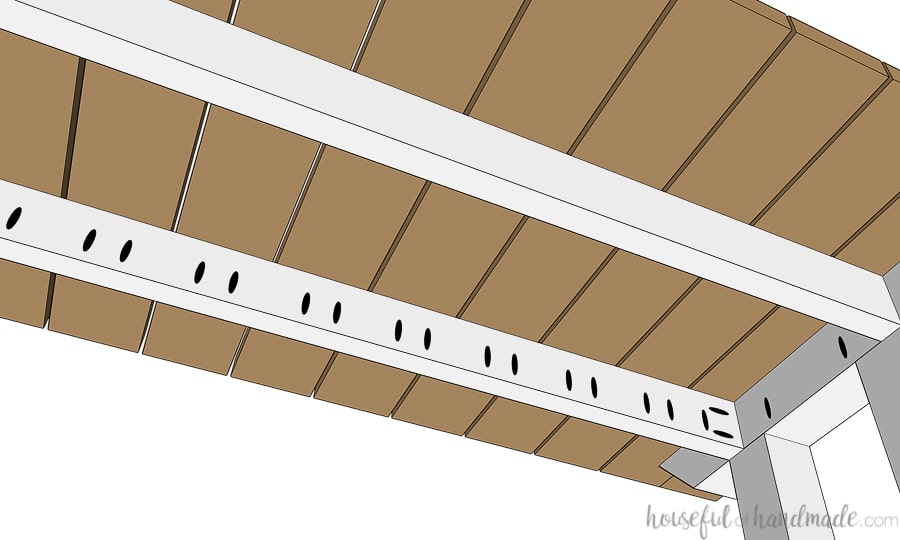
To attach the top, start by marking the center of the boards on the table base. Drill pocket holes set for 1 1/2″ material about an 1 1/2″ away from the center line on each side on the inside of the apron.
Center one of the top boards and secure with pocket hole screws from underneath the table.
Use a 1/4″ spacer between boards (I use a scrap of wood ripped to 1/4″). Mark for 2 new pocket holes to attach the next boards. Drill and attach. Repeat until you have all the center top boards.
For the outer top boards, you will also need to a couple drill pocket holes on the inside of the 4×4 leg tops.
The pocket hole jig did not fit around the 4×4, so I used a clamp to hold it in place to drill my pocket holes set for 1 1/2″ material. Secure the ends of the table top with pocket holes screws.
STEP 4- Finish for outdoor use
Make sure to finish your newly built picnic table to last for years outside.
For our wood picnic table, I stained the construction lumber with an ebony stain and sealed with an outdoor wood oil. It does require reapplication every year, so if I did it again I would use a sealer.
The top is sealed with Total Boat Wood sealer according the sealer instructions above. And I love the high gloss for easy cleaning.
You did it!
Premium plans include:
- Recommended Tools
- Shopping list
- Easy to read cut list table
- Cut diagrams
- Step-by-step instructions with 3D renderings
- Helpful resources
- BONUS: 3D SketchUp file
Now you can enjoy entertaining and eating outside with your new large picnic table built from these picnic table plans.
Happy Building!

