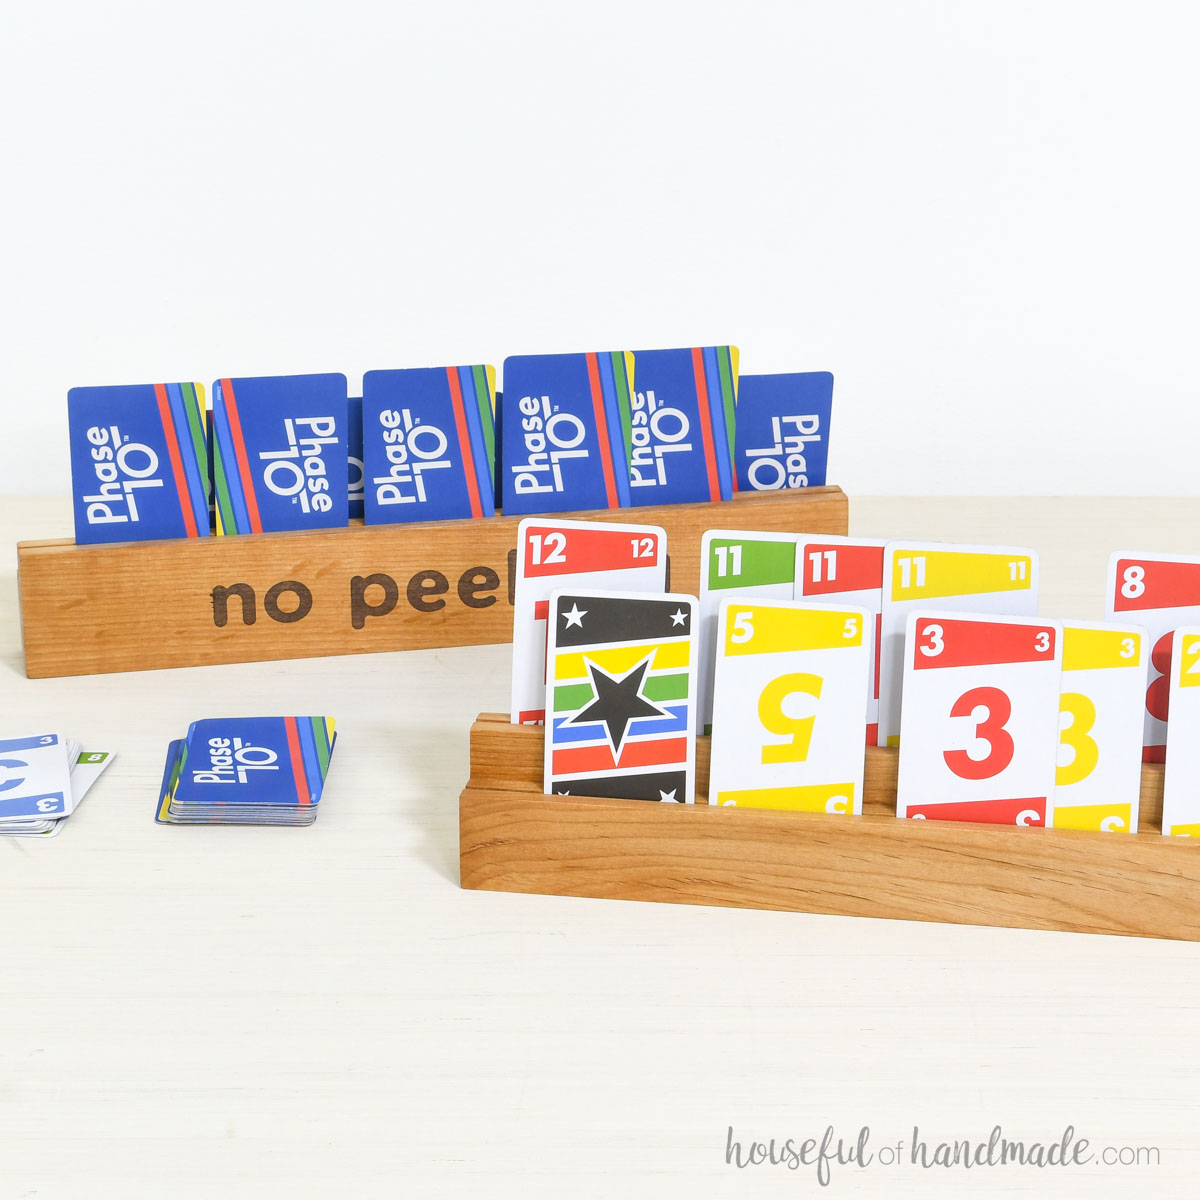
If you love to play card games, you will love this easy DIY project.
When I was sick over the summer, my daughter loved sitting in bed with me and playing cards. But the cards kept slipping all over the blankets.
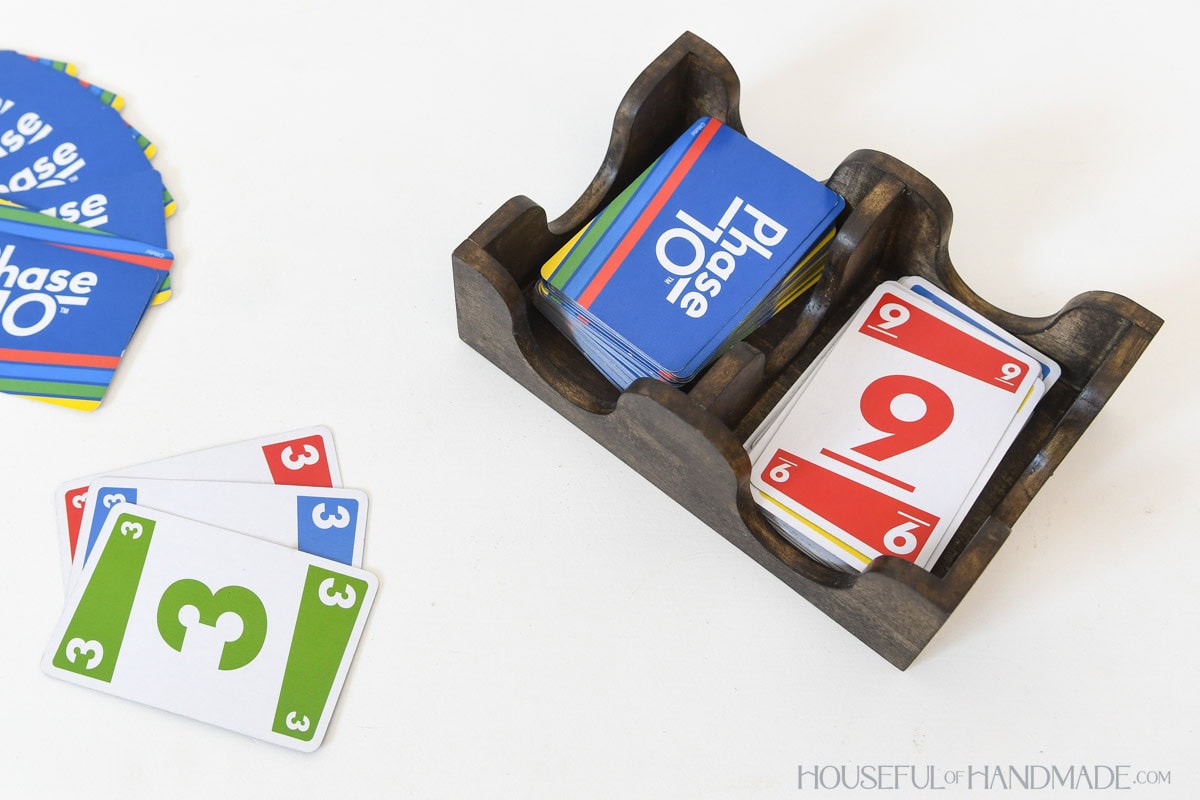
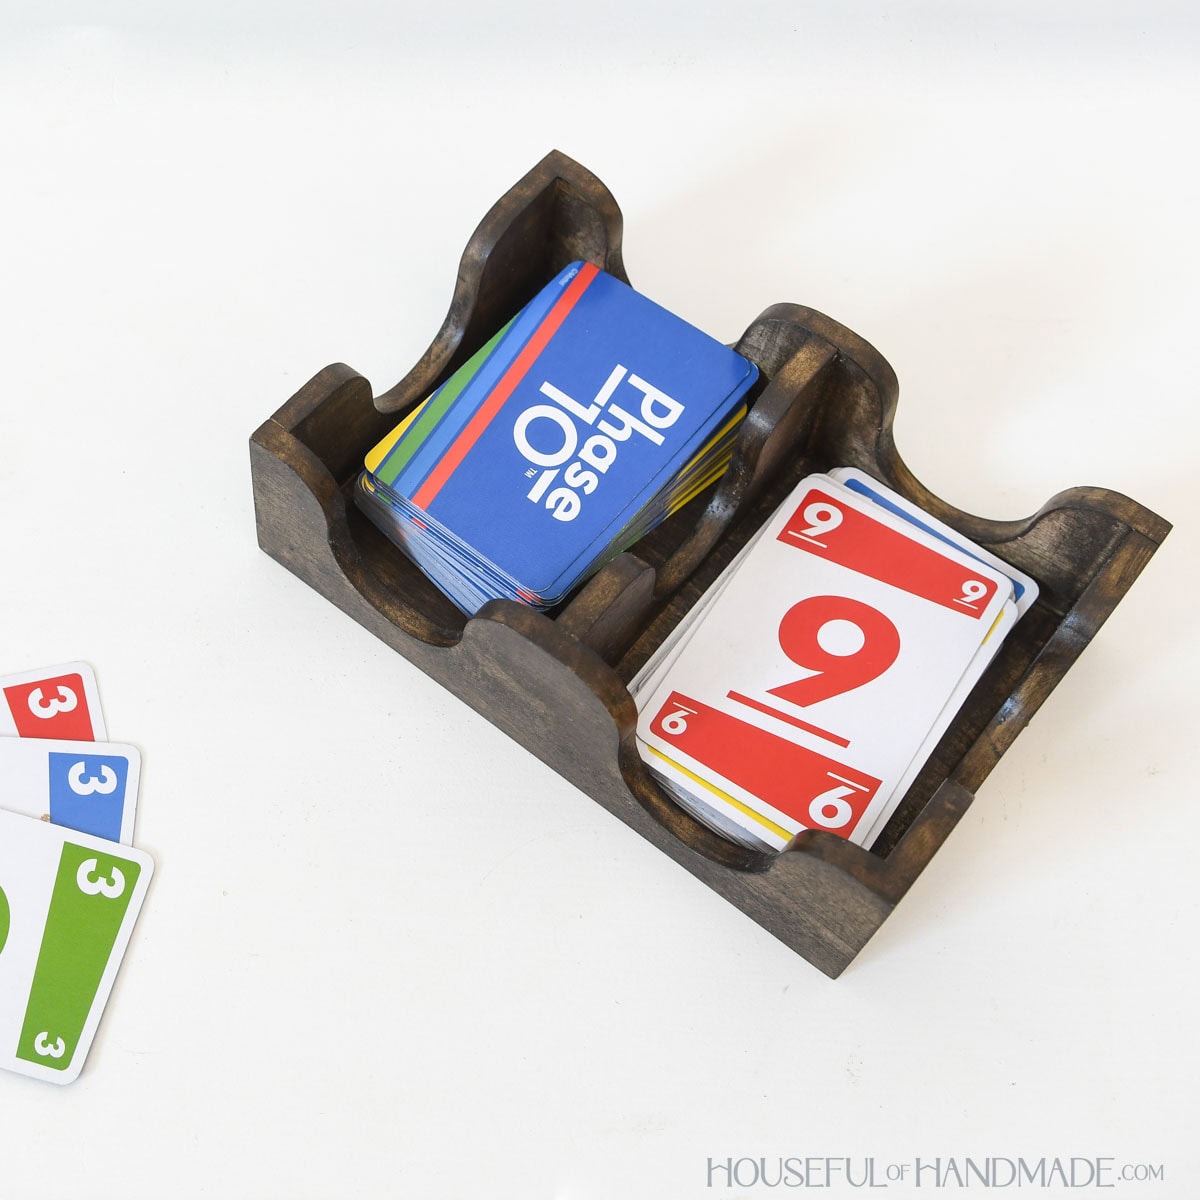
So when I was thinking of fun DIY gift ideas for the season, I knew I wanted to build a playing card tray. Now the cards are contained no matter where we play.
This post may contain affiliate links. As an Amazon Associate I earn from qualifying purchases. Click here to read my full disclosure policy.
And I made the tray slightly oversized so it can work for standard playing cards, as well as unique card games.
Today is Day 1 of DIY Gift week. This week I am sharing 5 new easy DIY gifts ideas along with 2 other great builders.
Check out their gift ideas below and get excited to build some amazing DIY gifts!
Wood Card Tray
This tray is a simple build, so I had some fun with the design!
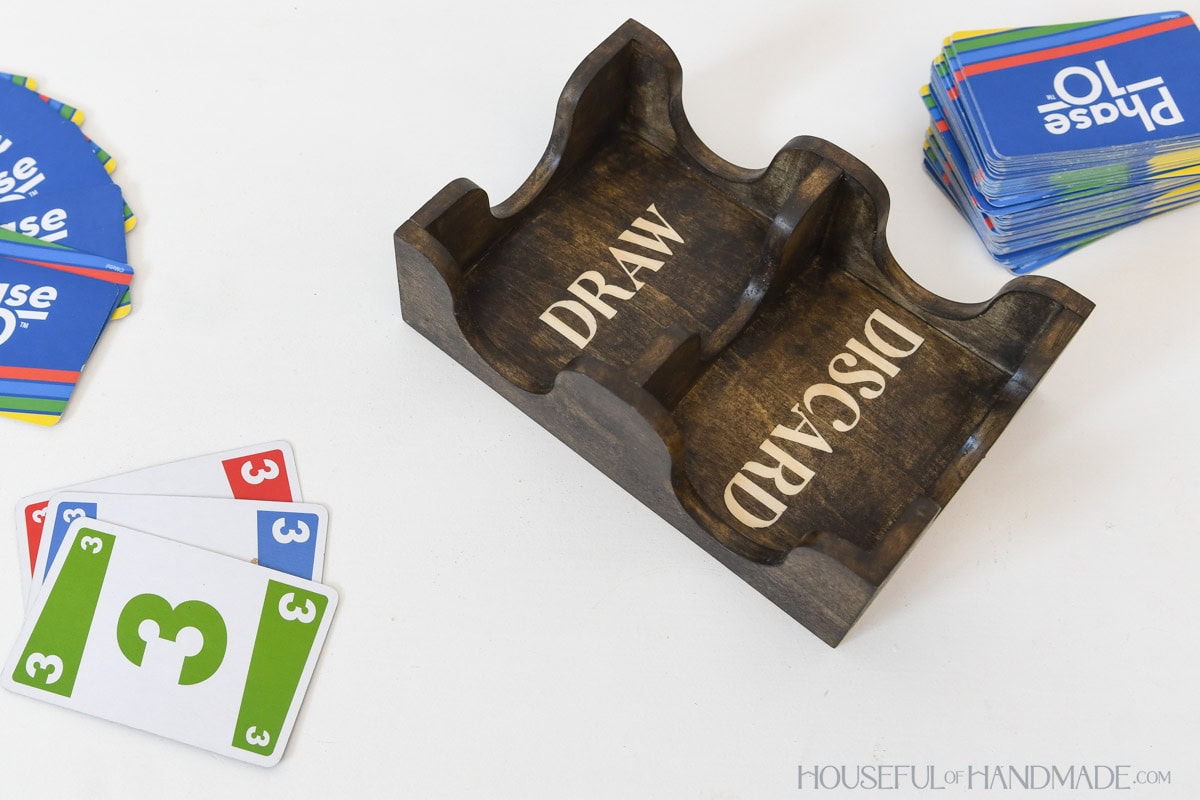
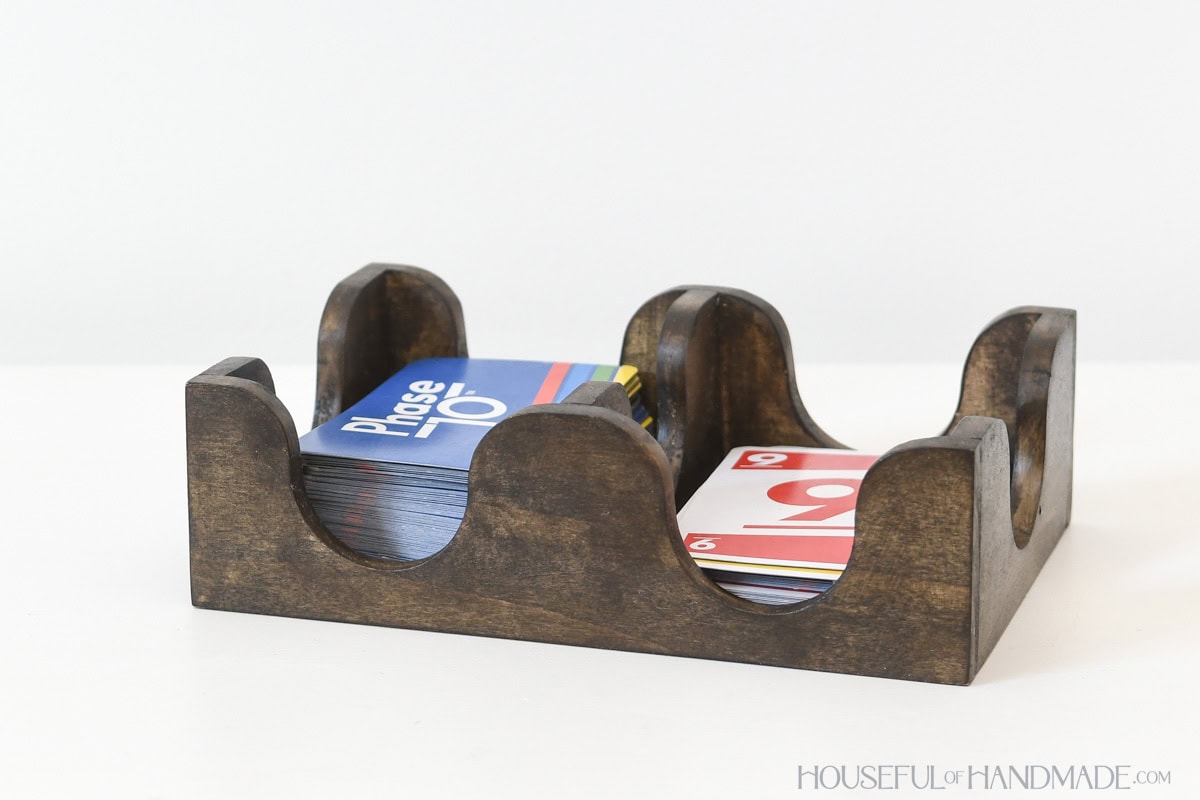
Instead of plain sides, I created a wavy design. Not only does it look cool, but it also makes the cards easier to draw, even when the pile is low.
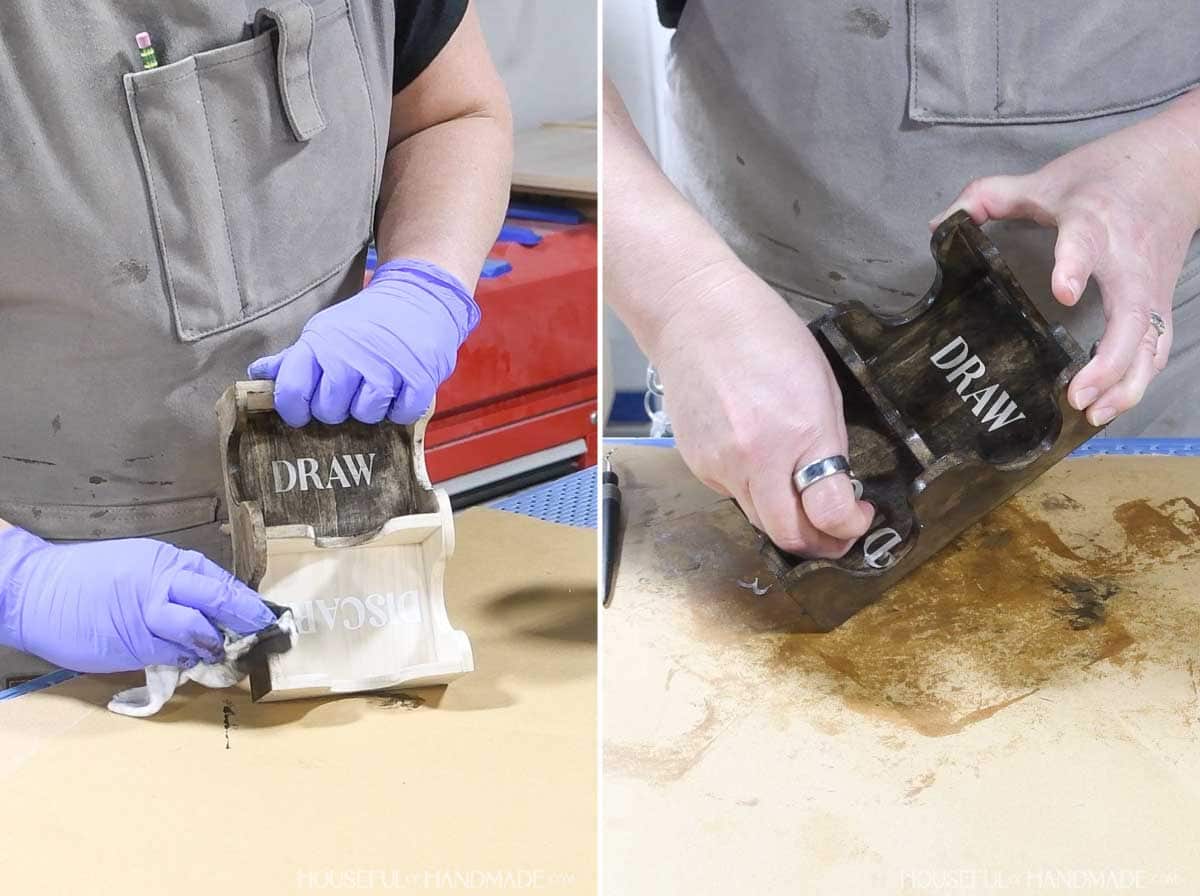
I also stained the words “Draw” and “Discard” into the bottom of each side of the tray. I reversed my technique for creating fake laser engraving on wood to do it.
And I think it adds a little something extra to a simple build.
This card deck tray was built entirely from 1/4″ thick boards to keep it small and lightweight.
You can purchase these thinner boards (sometimes called “Project Boards”) at most home improvement stores.
Or you make them yourself if you have a planer available. I turned some small scraps of poplar into 1/4″ thick boards to build my tray.
More DIY Gift Ideas
For DIY Gift week this week, I am sharing 5 new DIY gift ideas along with my friends from WoodShop Diaries and Anika’s DIY Life.
Check out their DIY gift ideas below along with a couple more ideas from me.


How to Build a Card Deck Caddy
Tools & Materials
Recommended Tools:
- Miter saw
- I recently upgraded to this sliding miter saw (watch for it to go on sale), but previously used this inexpensive miter saw that I love.
- Circular saw or Table Saw
- Jig saw
- Drill
- Multi-mark measuring tool
- Sander
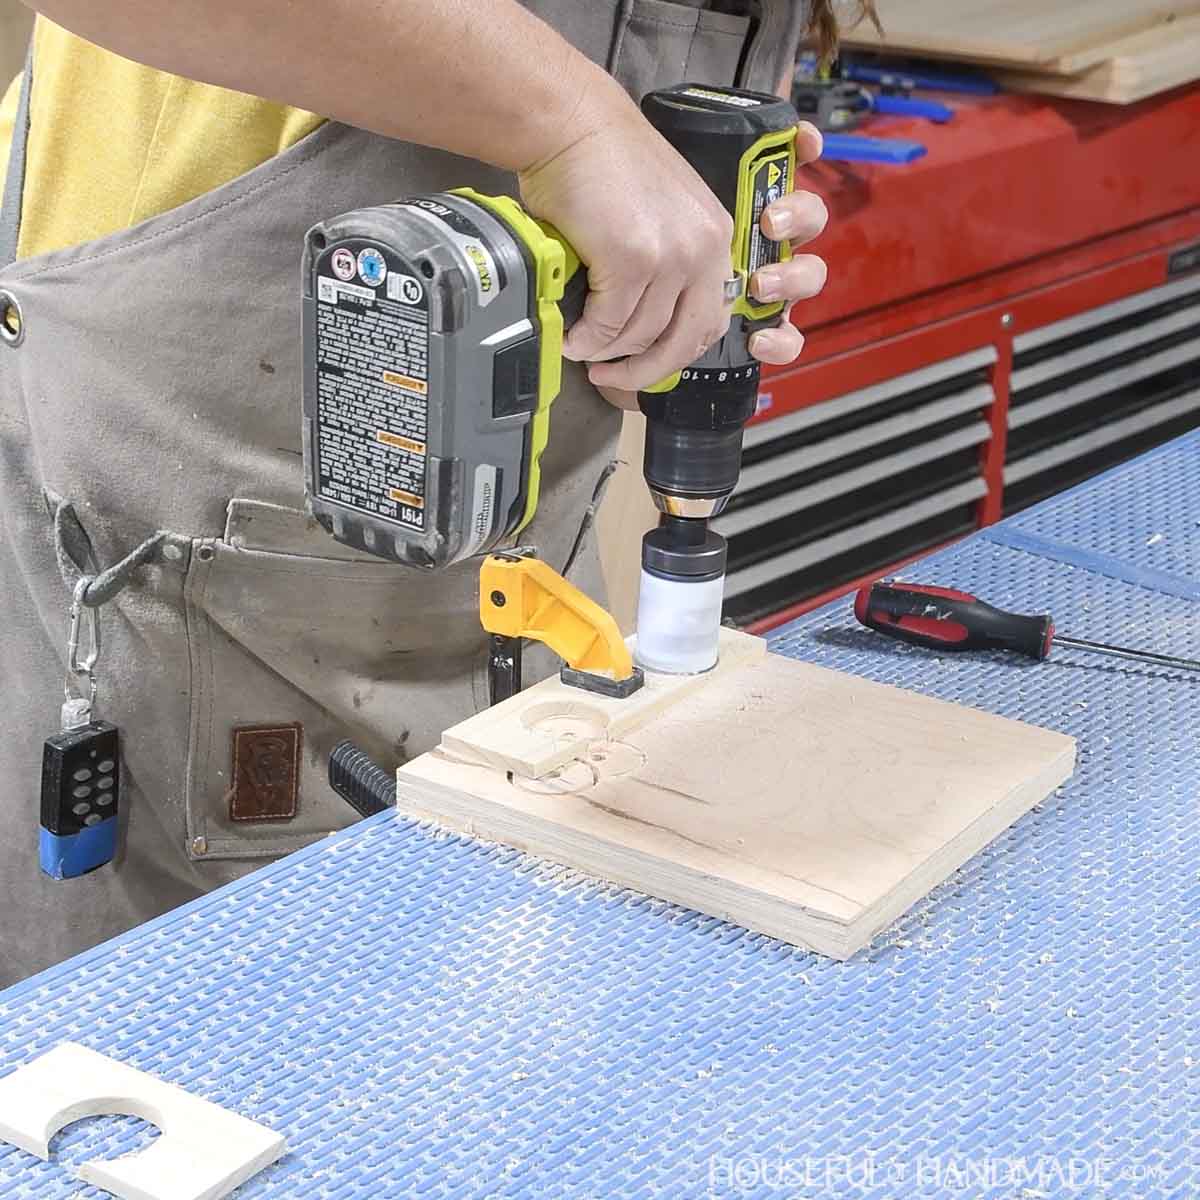
- 1 1/2″ hole saw bit
Supplies:
- Wood products
- (1) 1/4 x 6 project board, 6” long
- (1) 1/4 x 3 project board, 3’ long
- Wood glue
- Sandpaper
- Stain/sealer or paint
- Optional: Vinyl stickers
Cut List
Cut out the pieces according to the easy-to-read table in the PDF plans.

The boards need to be ripped to non-standard widths. You can do it with a table saw, circular saw, or even a jig saw.
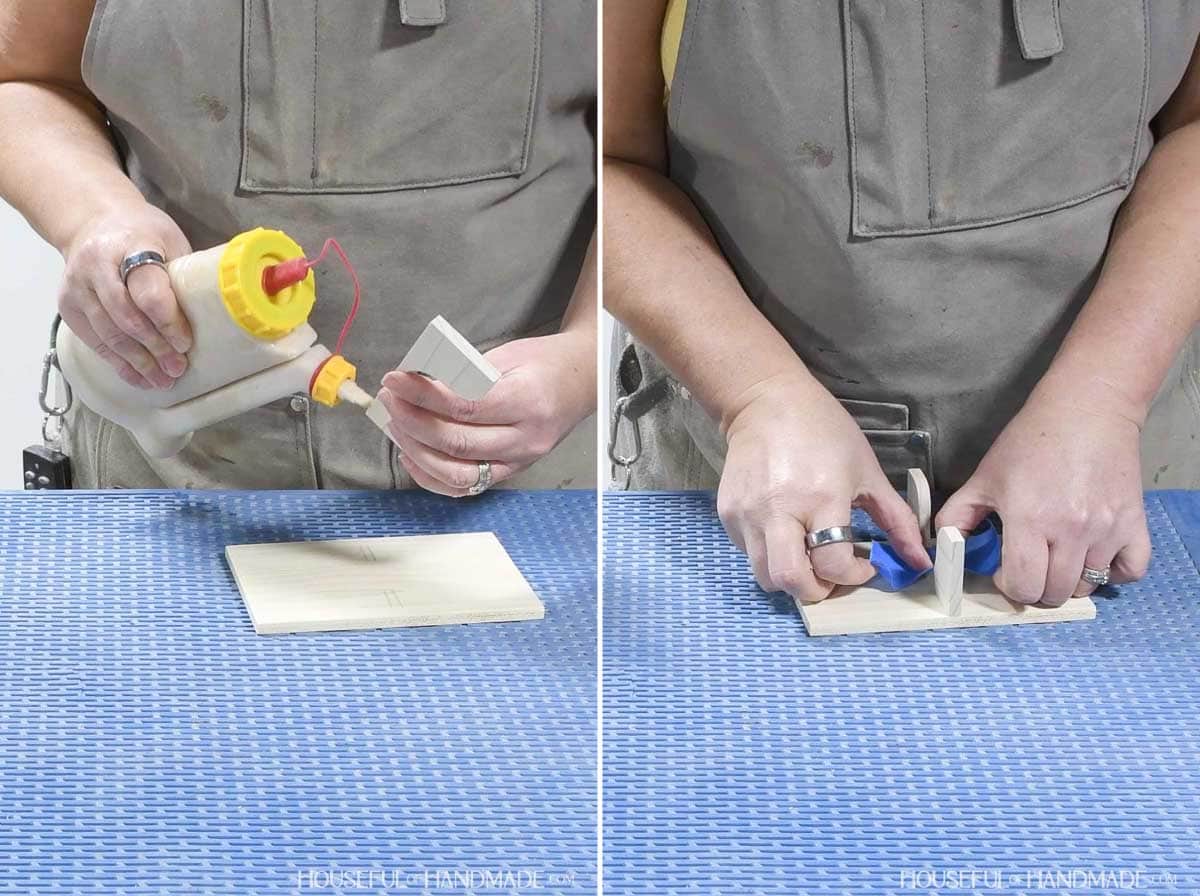
STEP 1- Shape the boards
Print and cut out the template in the plans. Trace the curved design on the front/back, side and center pieces.
Also measure and mark the center point of the lower curves.

With the 1 1/2” drill bit in the drill, cut out the lower curves by drilling a hole through the board.
Make sure the center of the drill bit is on the center point of the curve.
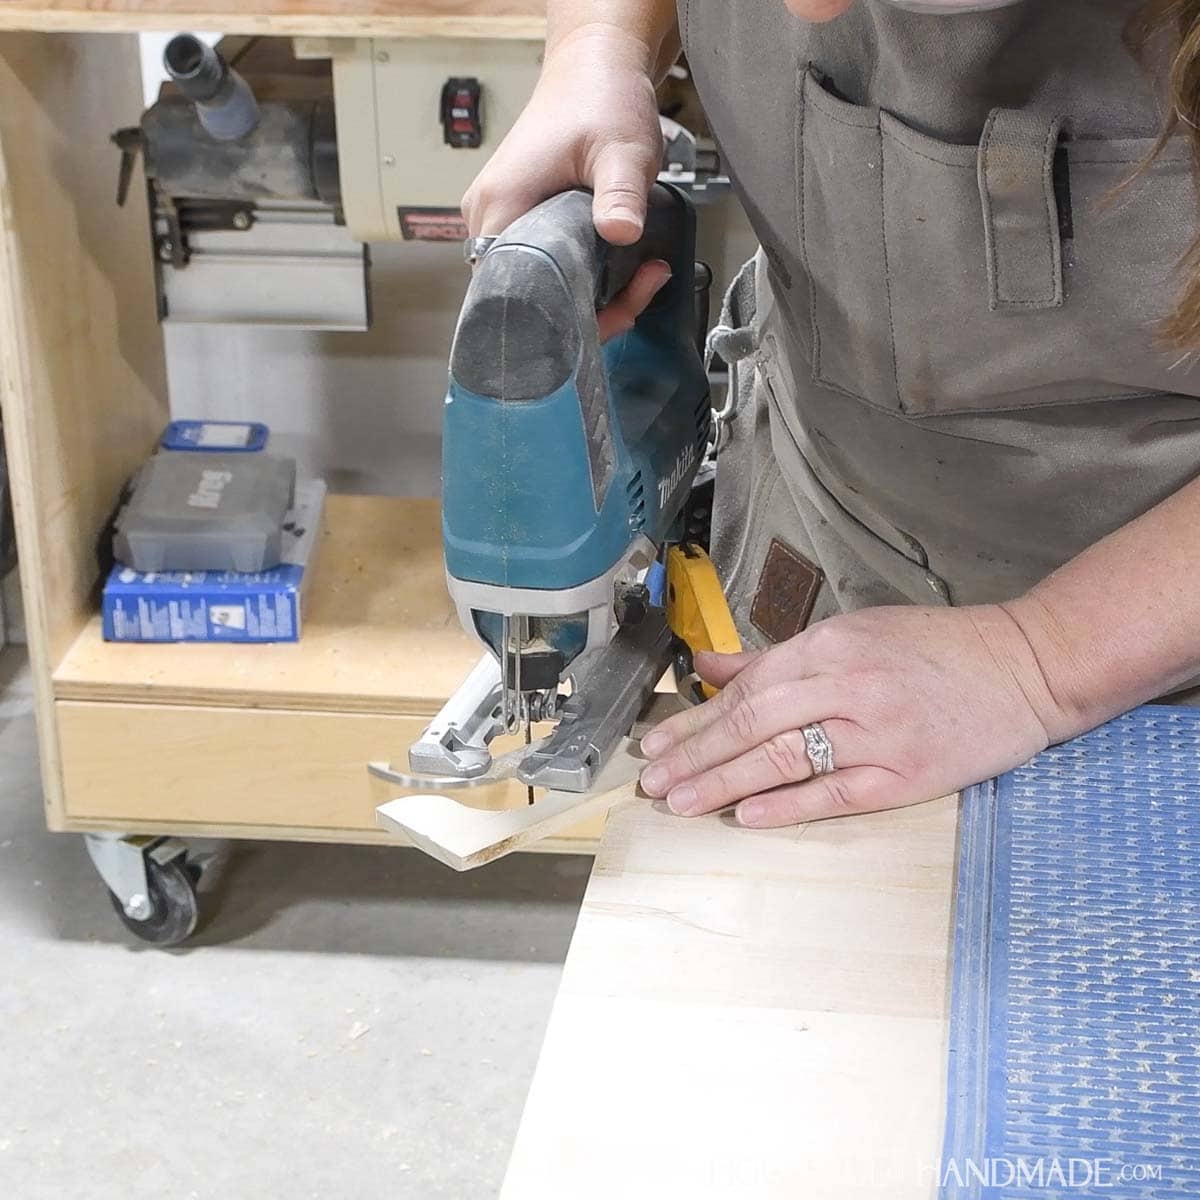
Then use the jig saw to cut the top curves and connect them to the side of the holes.
Be careful not to shake the boards too much with the jig saw to prevent breaking, they are fragile at the thin points.
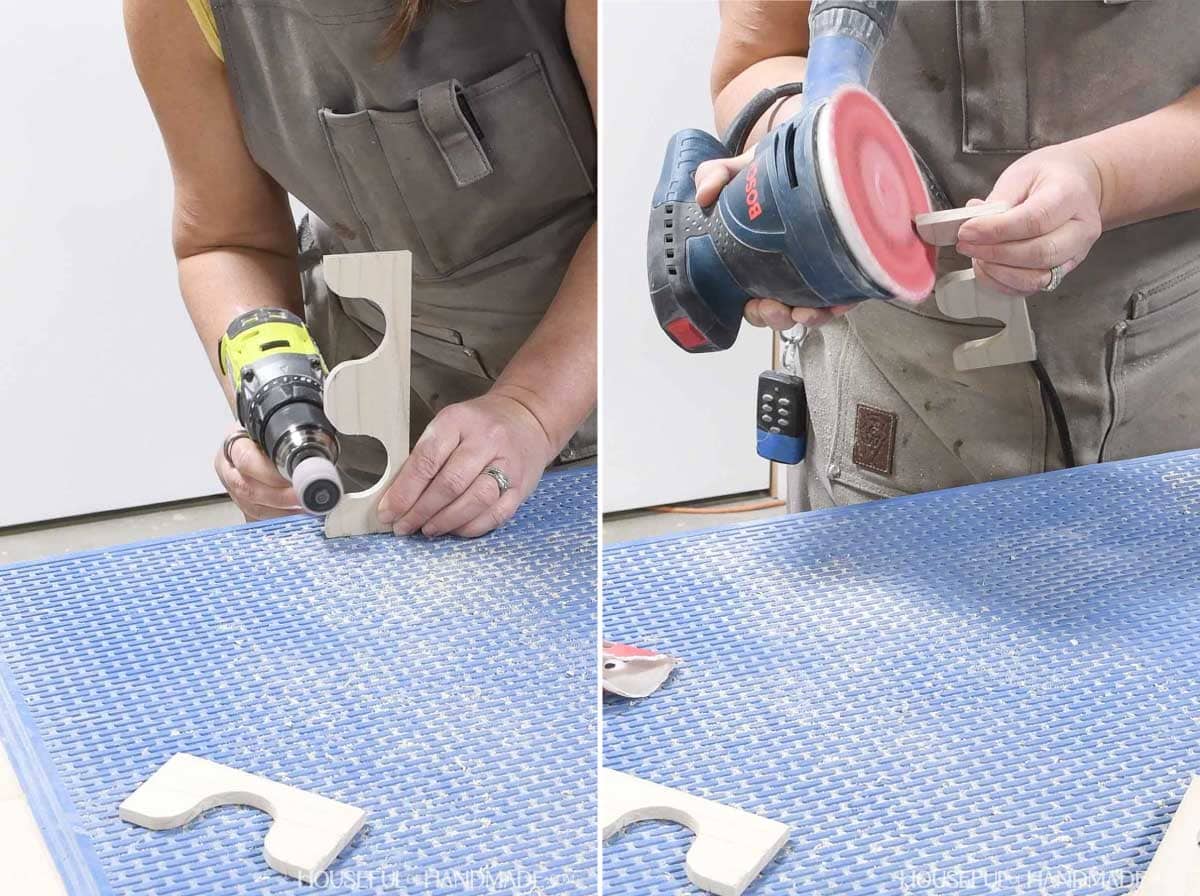
Sand the curves and all the boards before assembly.
I love using these drum sanding bits on my drill to sand curves in my designs.
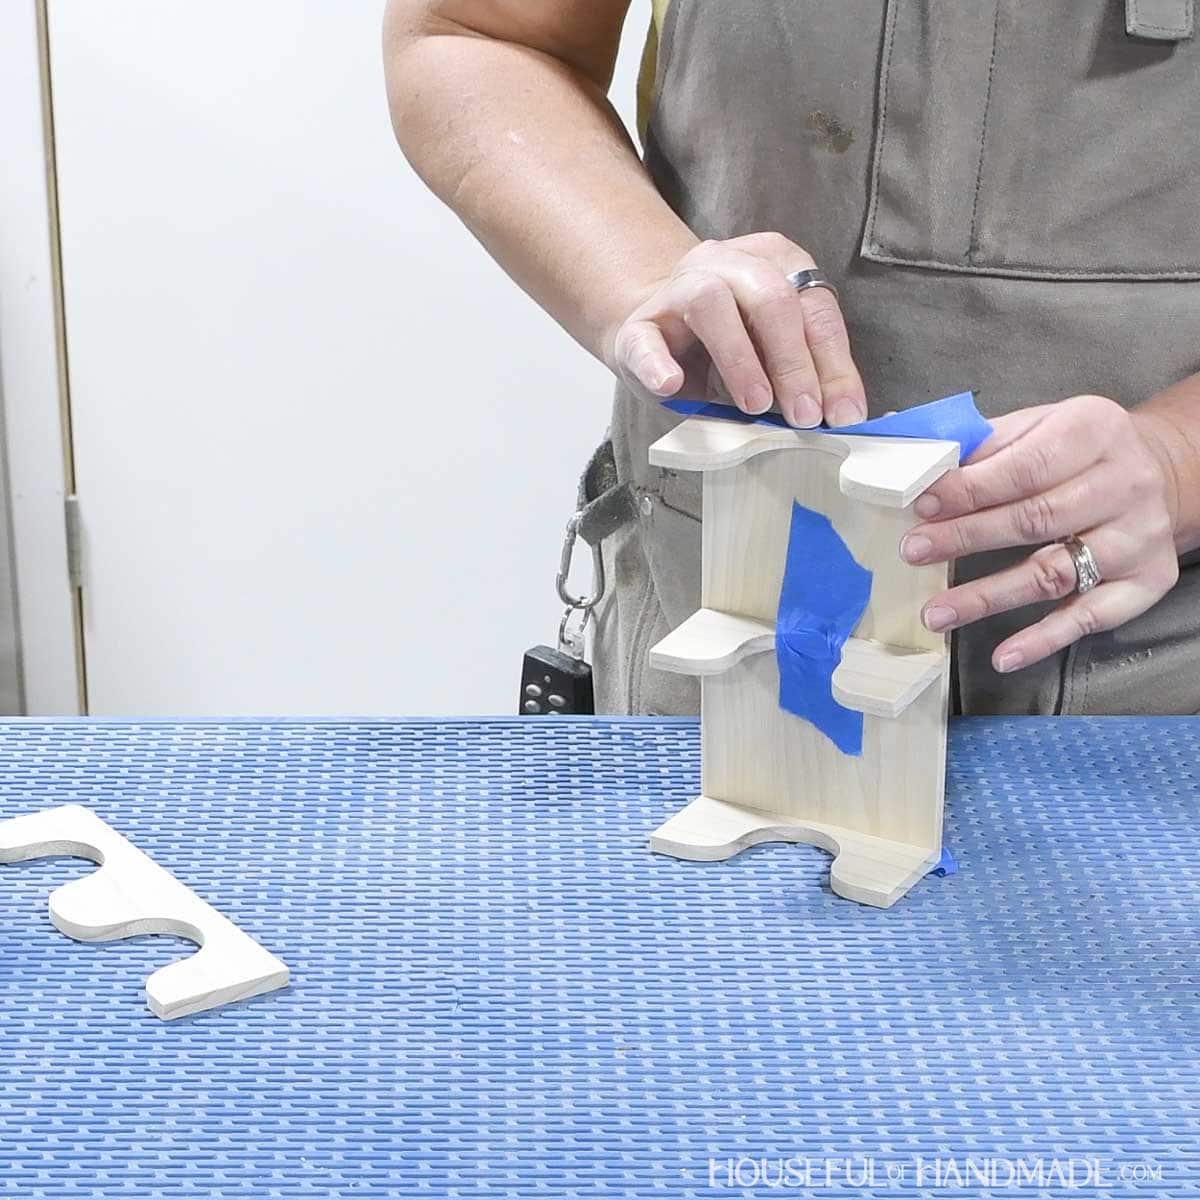
STEP 2- Assemble the tray
Glue the center piece on top of the bottom so it is centered and flush on the edges.
Use a piece of painters tape to hold it in place.
Then glue the two side pieces to the short edge of the bottom piece so they are flush with the edges and the bottom.
Again, use tape to hold them in place.
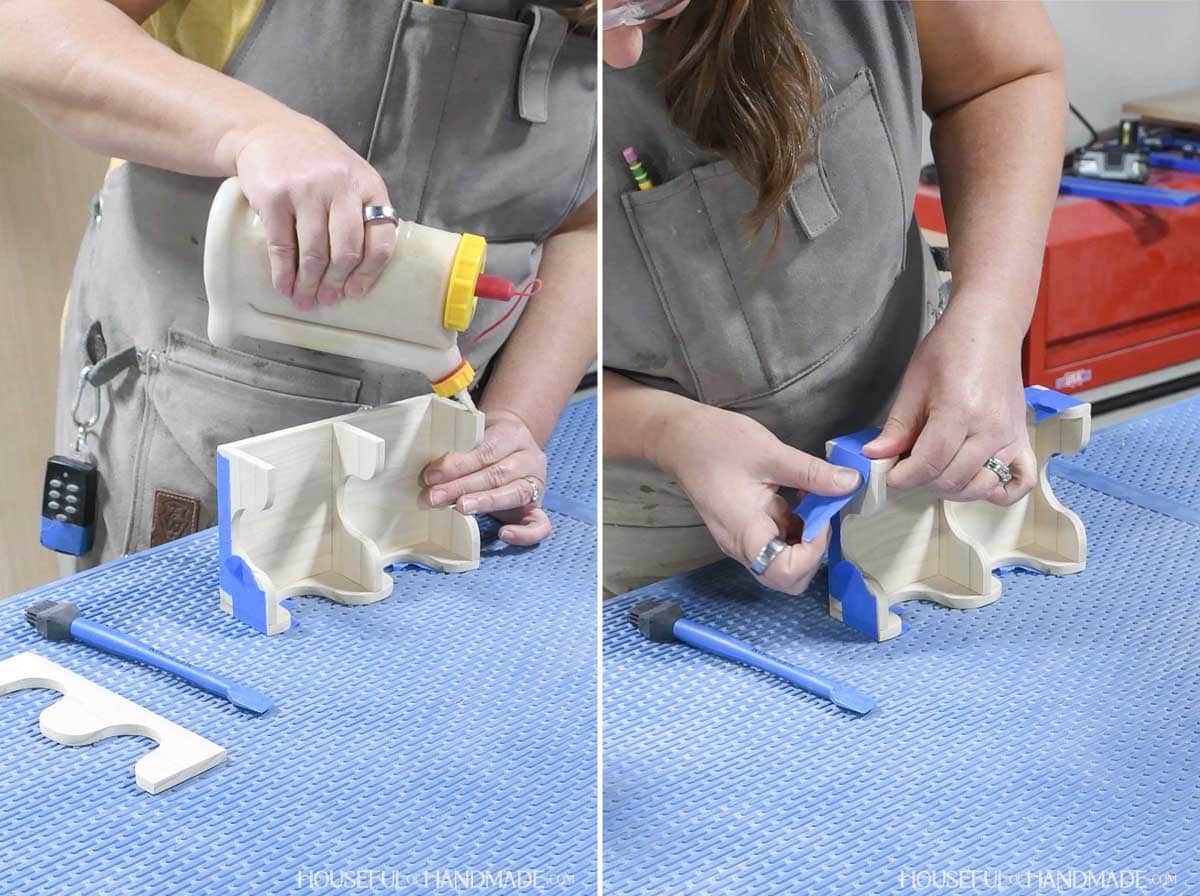
Apply glue to one edge of the side, center and bottom pieces. Then place the front piece on top.
Line it up so it is flush all around. Use tape to hold it in place.
Then repeat for the other side to attach the back.
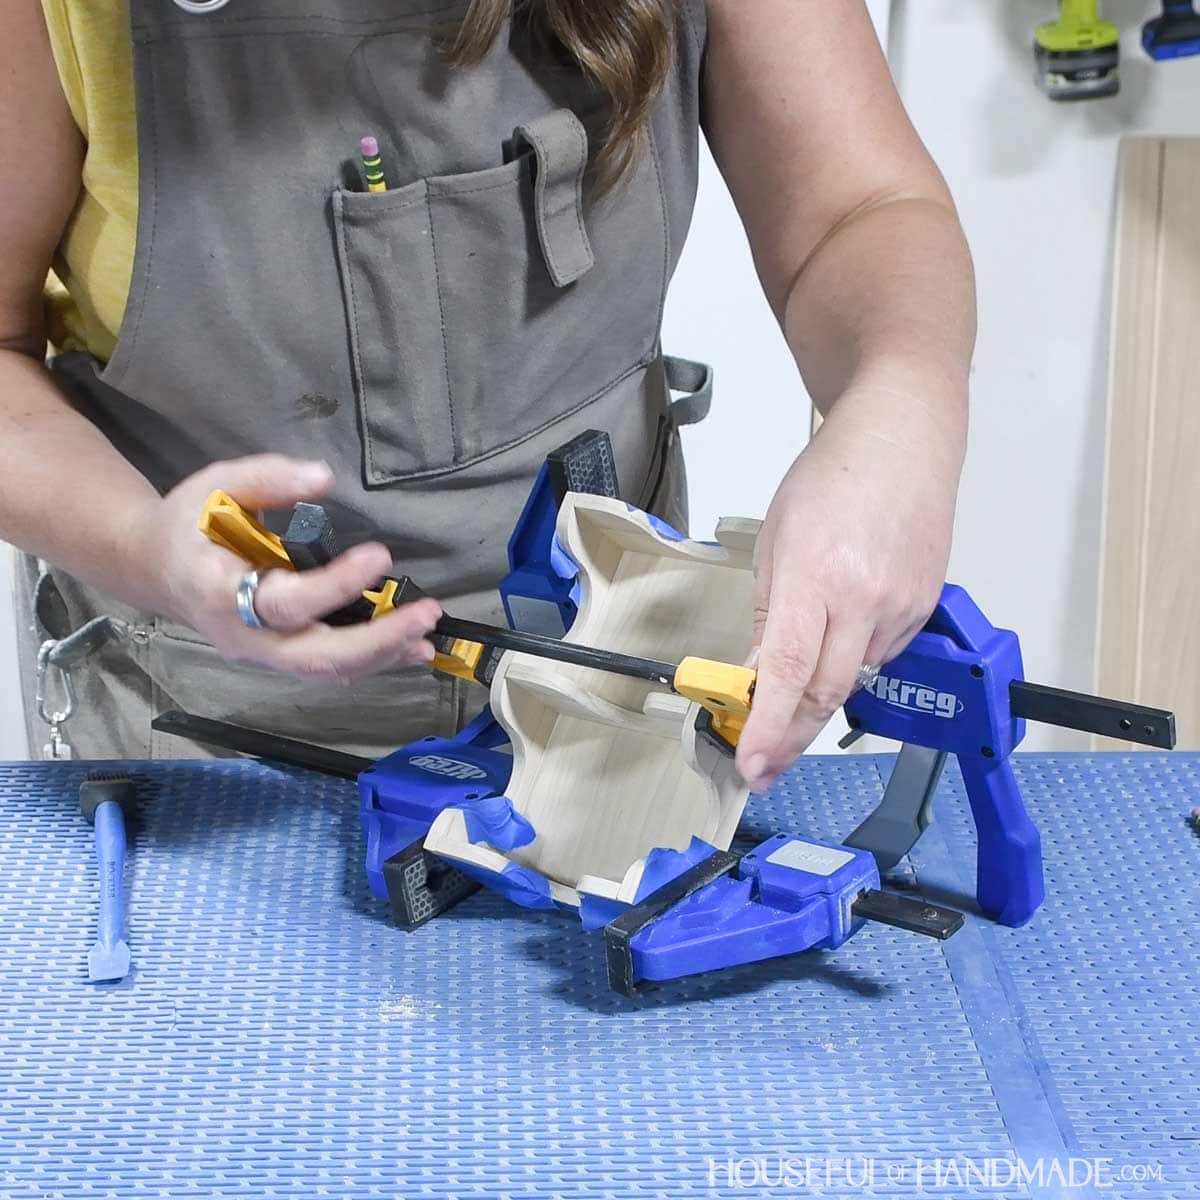
Once all the pieces are in place, use a couple clamps to hold it securely while the glue dries. Alternately, you can secure with pin nails if you prefer.
When the squeeze out of the glue is tacky, but not fully hard, use a chisel or knife to carefully cut away the glue dots.
STEP 3- Finish
Hand sand any parts needed on the finished tray.
If desired, use vinyl letters to add the words “Draw” and “Discard” to the bottom of the different sections in the tray.
Then stain the tray with a water-based stain (oil-based will bleed under the stencil).
Once dry, remove the letters and seal with your desired sealer.
PDF mini plans include:
- Recommended Tools
- Shopping list
- Easy to read cut list table
- X-ray view with measurements
- Step-by-step instructions
- BONUS: 3D SketchUp file
You did it!
Then get ready to play! Add your playing cards to the draw pile and have fun.
Happy building!
