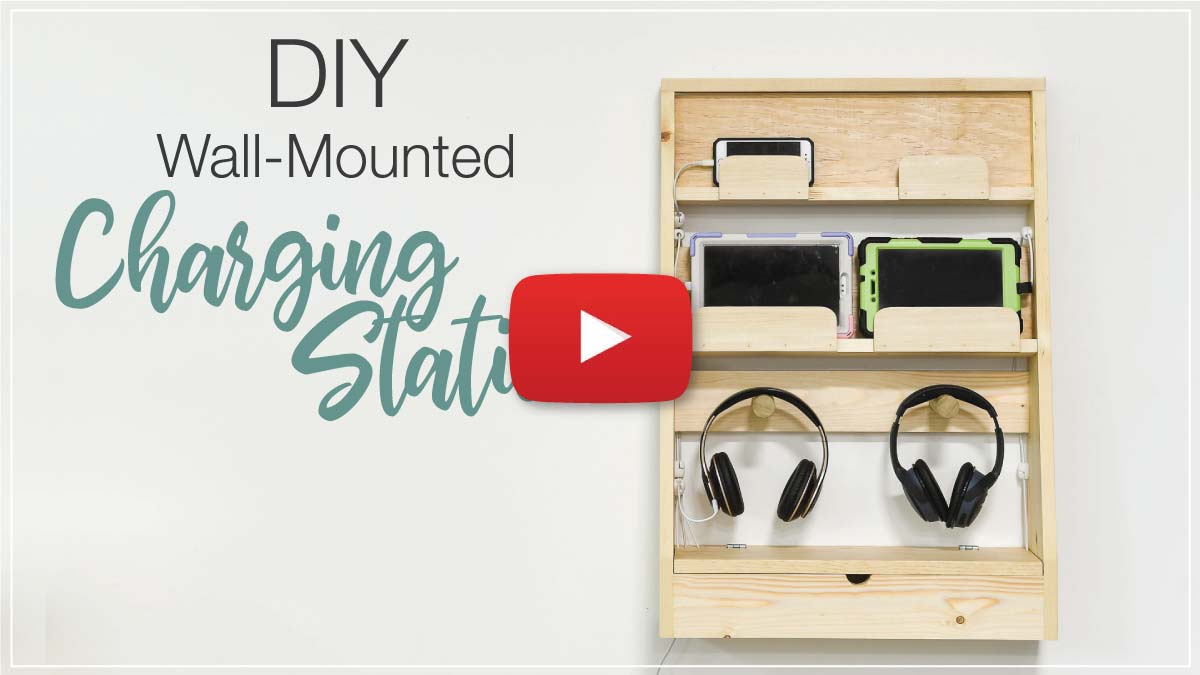
Keep all your devices charged and organized with a DIY charging station.
With the kids out of school for the summer, their electronics have been all over the house. And everyday someone has lost their charging cord or brick.
But not anymore!
I partnered with Kreg Tools to create the perfect place to store and charge the kid’s phones, tablets, and headphone. The cords and USB power strip are hidden away in the bottom compartment and now there is a dedicated cord for everything!
This post may contain affiliate links. As an Amazon Associate I earn from qualifying purchases. Click here to read my full disclosure policy.
USB Charging for Multiple Devices
With multiple people in the house comes lots of devices!
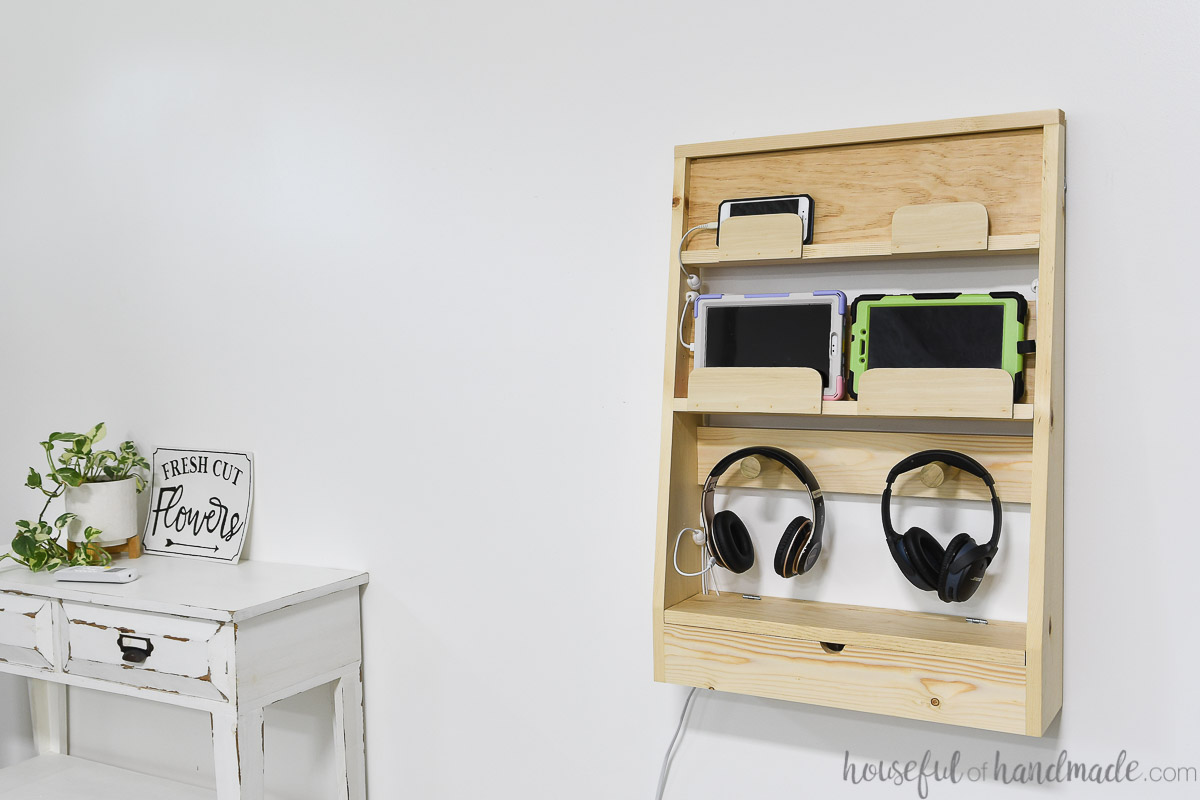
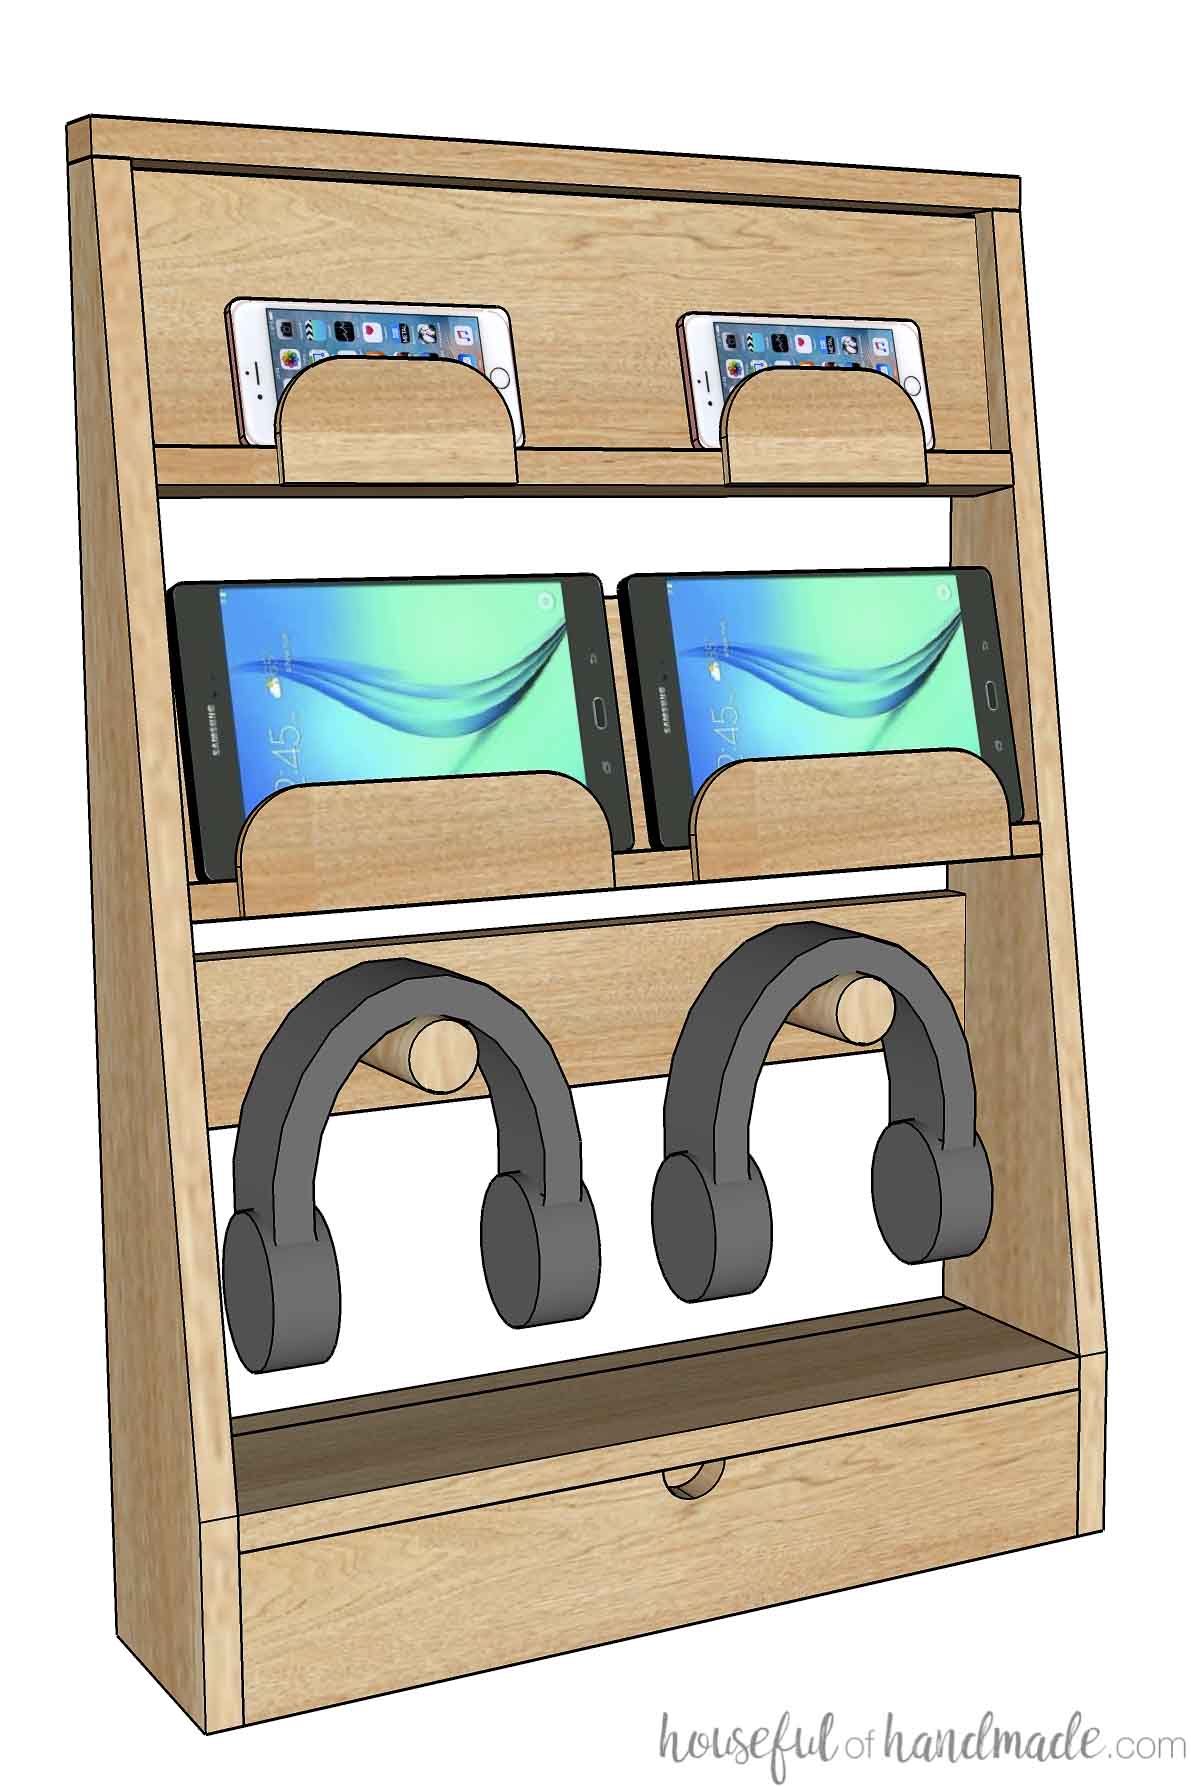
This easy to build charging station has room for 2 phones, 2 tablets and 2 bluetooth headsets. The phone area is large enough for the largest cell phone or even a mini tablet.
The tablet section has two 10″ wide spaces for tablets. It holds the Galaxay Tab A tablets my kids have with their large cases, perfectly.
If you have large tablets, you may want to widen the charging station to give you more room.
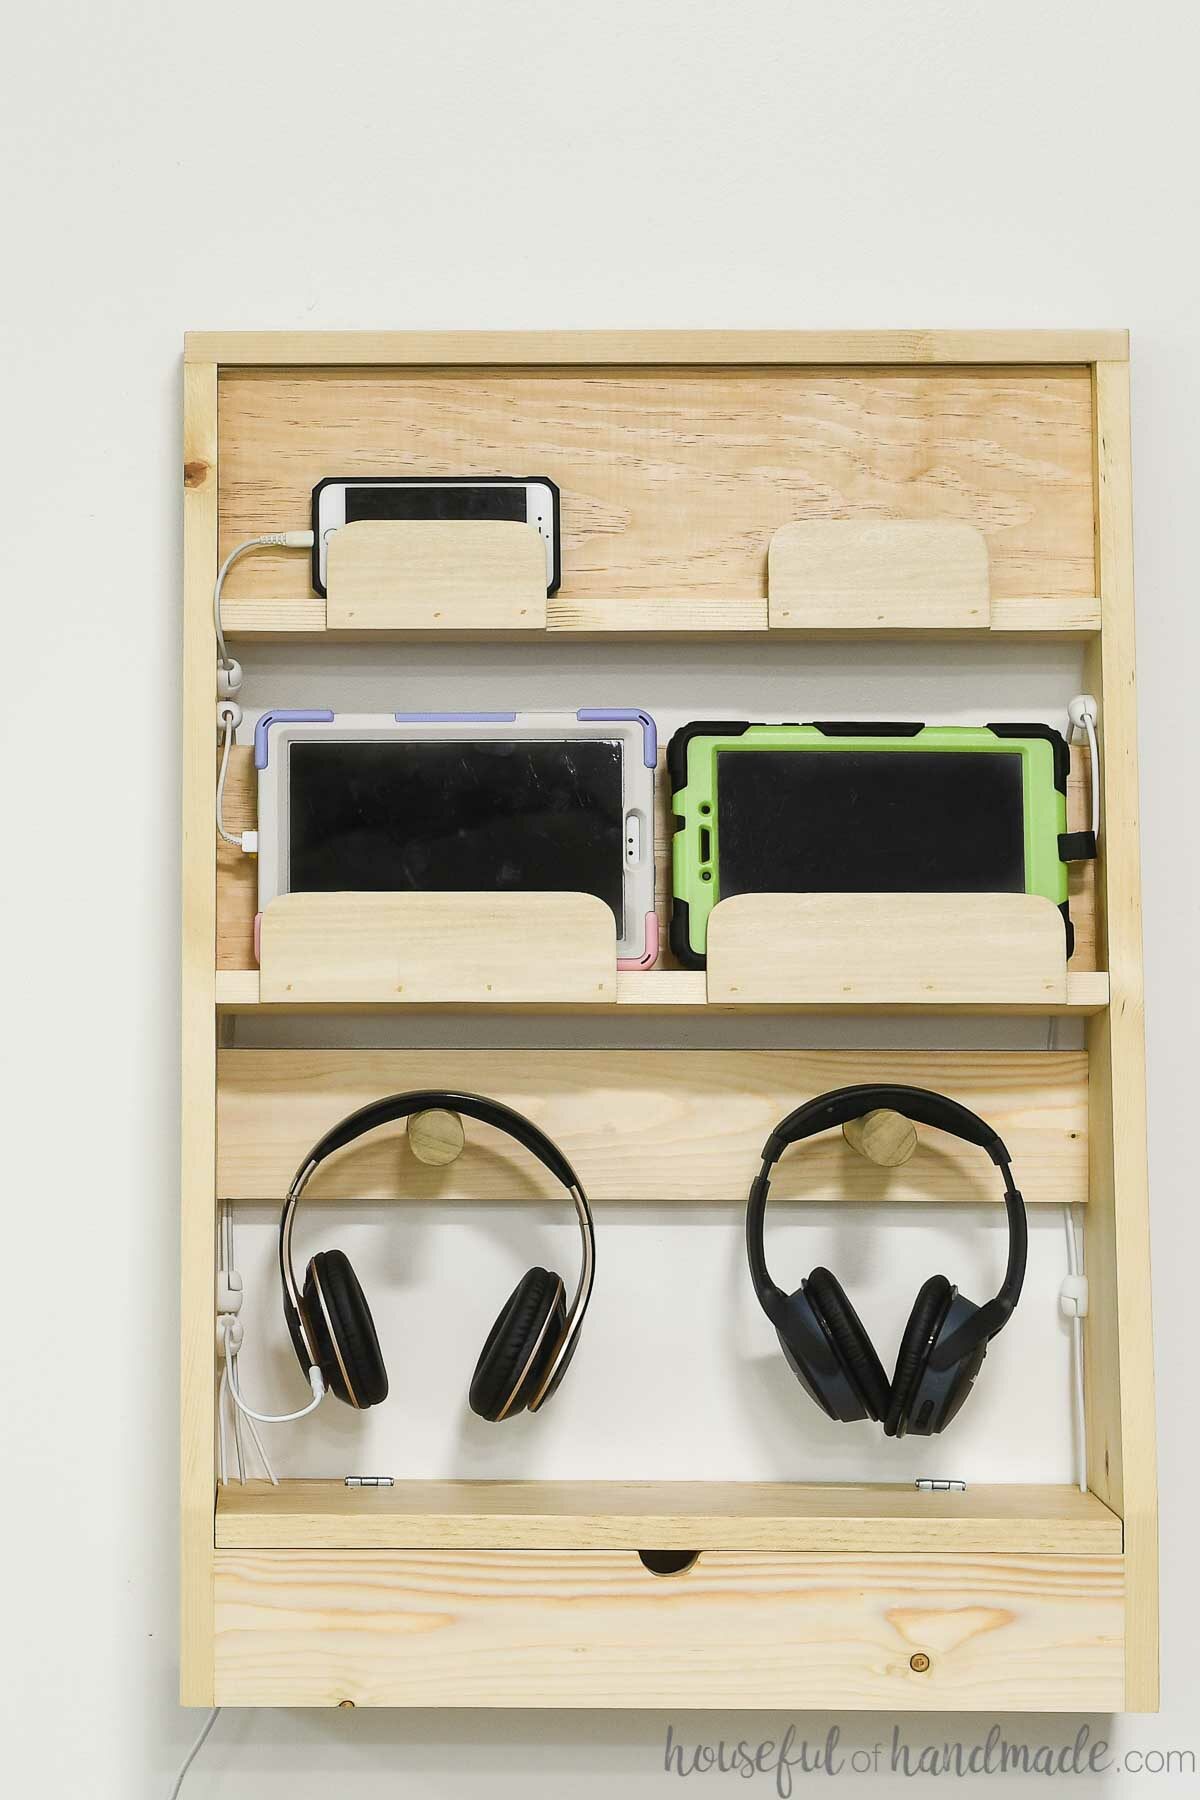
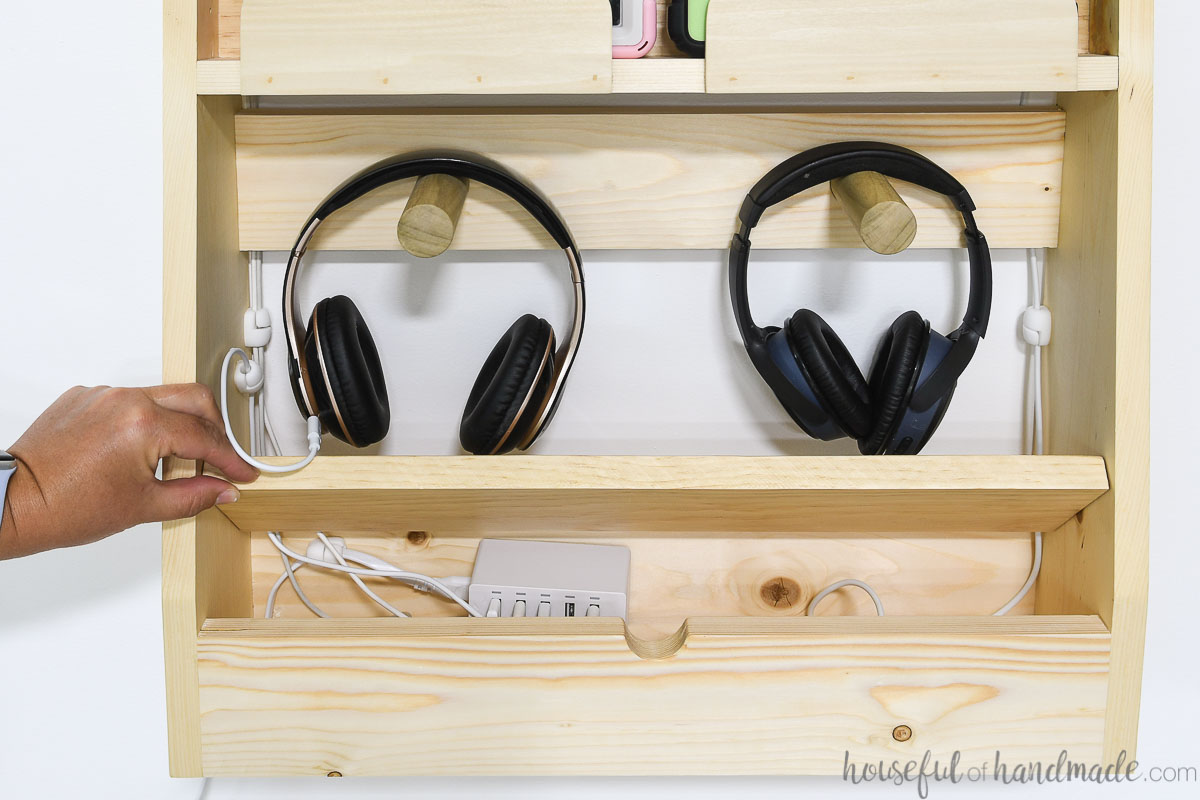
Below the phone and tablet charging is my favorite part: headphone charging stations!
With the popularity of bluetooth, my kids have fancy headphones that need to be charged too. In a standard plug, you do not have room for all the cords so you have to pick which one is most important to charge.
That meant the headphones were always dead. Which meant the house was full of noise as the kids kept increasing their volume to compete with each other. Not fun for me!
But now they have a dedicated spot to nicely store and charge their headphones so they are ready whenever they earn tablet time. See how my kids earn screen time with our amazing chore system here.
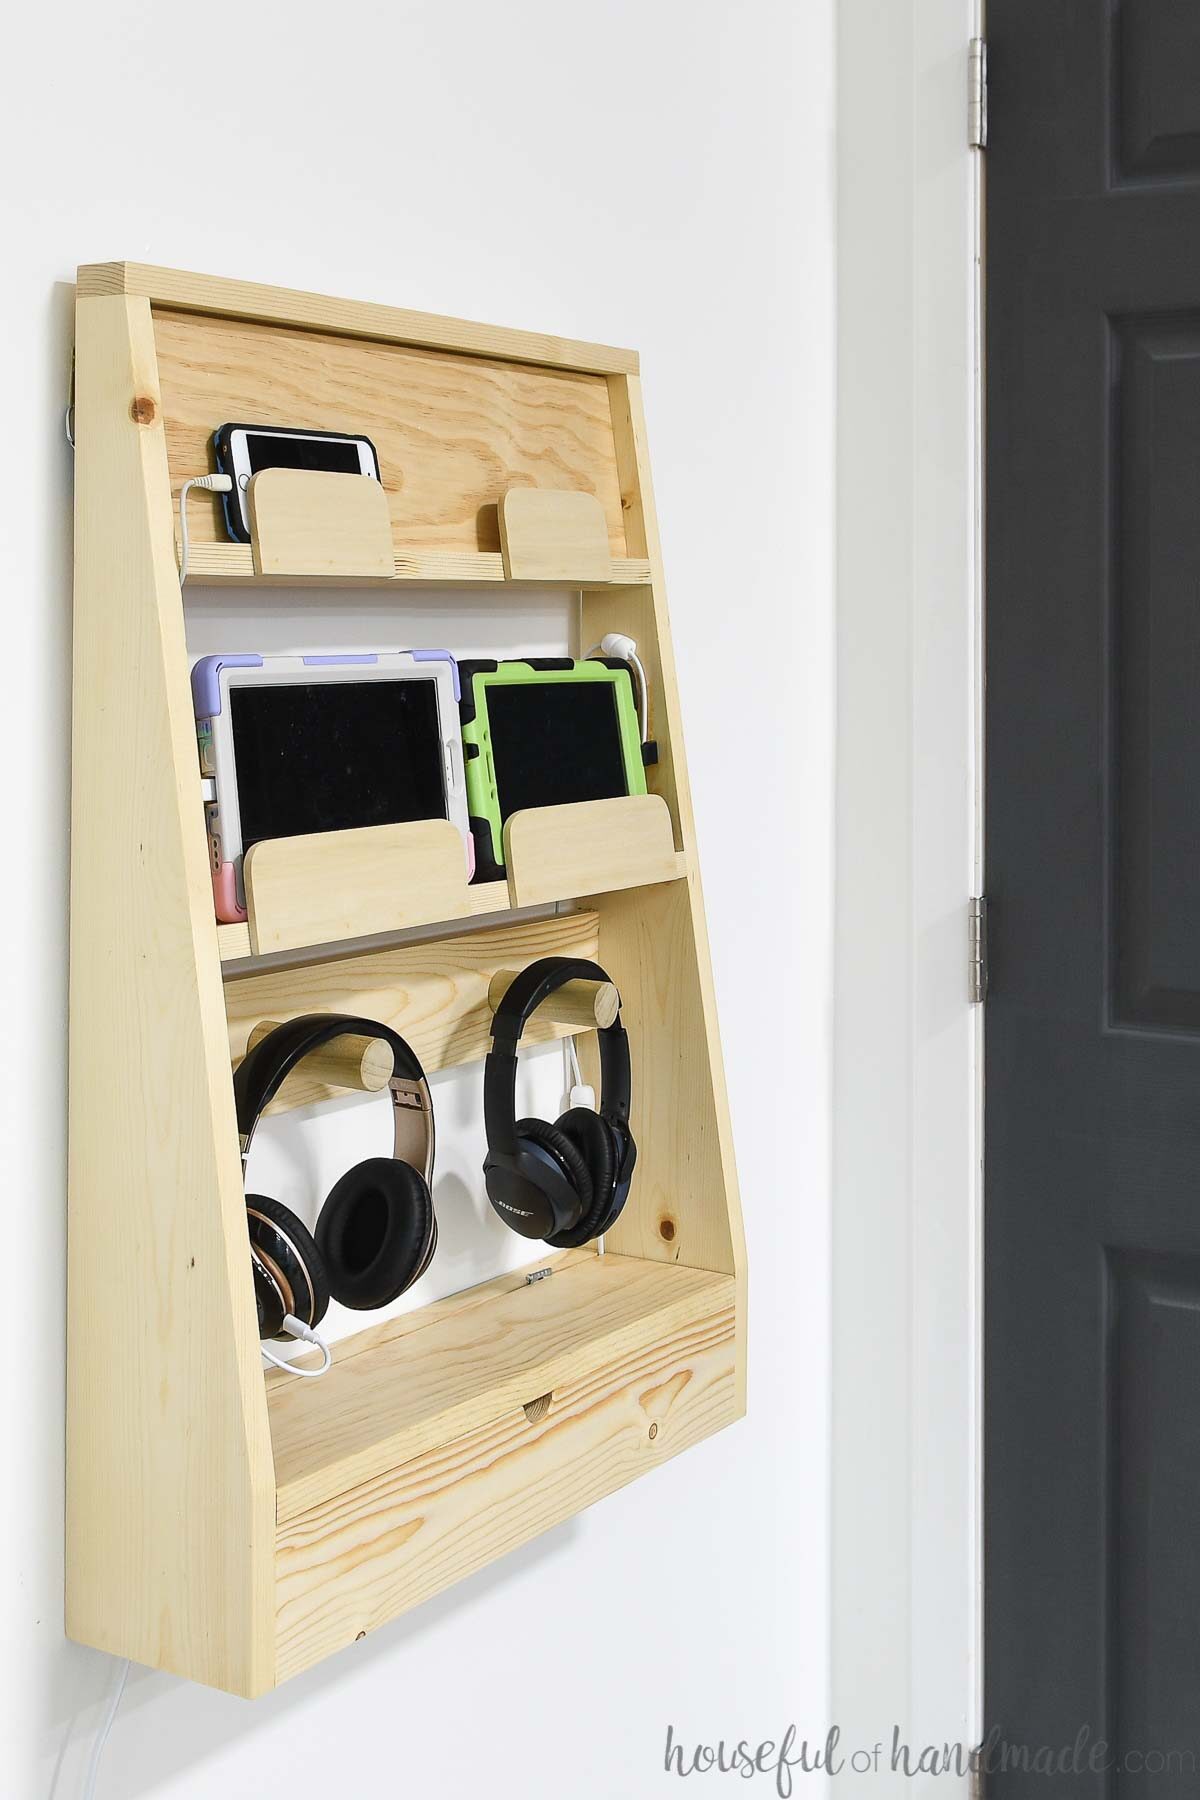
But the magic in this charging station is the simple bottom compartment. Inside the box, you can put a USB power strip with spots to attach all your cords.
Then the cords are brought up through the lid or off the back and held right where you need them with inexpensive cord holders. These stick right to the side of the charging station to make sure the cords are always were you need them.
Any excess length of cord can also be hidden in the bottom compartment. I love when cord clutter is out-of-sight!
Prefer to Watch? Check out the Video Below

How to Build a DIY Charging Station
This wall mounted charging station is perfect for keeping your kid's electronics organized and charged. It holds 2 phones, 2 tablets, and 2 headsets.
Materials
- 1x6 boards
- 1x4 board
- 1x3 board
- 1x2 board
- ¼” x 2 ½” board
- 1 ¼” dowel
- 1 ¼” pocket hole screws
- 1 ¼” brad nails
- Wood glue
- 1” hinges
- D-ring hangers
- USB Power strip
- Cord holders
Tools
- Kreg Pocket Hole Jig
- Miter saw
- Circular saw, table saw, or Kreg ACS
- Drill
- Impact driver
- Kreg right angle clamp
- Brad nail gun
Instructions
Cut all the pieces, except the top piece, according to the plans shared on Kregtool.com. The top piece should be cut to fit in Step 11.
- STEP 1- Draw the angle on the side pieces and cut it out. You can cut the angle with a circular saw, on the Kreg ACS, or with a tapered jig on a table saw.
- STEP 2- Drill pockets holes in the ends and bottom of the back rest pieces. Attach the tablet ledge to the bottom of one of the back rests and attach the phone ledge to the bottom of the other.
- STEP 3- Drill holes through the headphone piece to attach the dowels later. Drill a half circle through the top center of the box front piece. Add pocket holes to the ends these boards and the other box pieces.
- STEP 4- Attach the ledges to one side piece with glue and 1 1/4" pocket hole screws. The front of the ledge should be flush with the front of the side and the back rest will mimic the angle on the front.
- STEP 5- Attach the headphone piece below the bottom ledge so it is flush with the back of the sides. Secure with glue and pocket hole screws.
- STEP 6- Attach the box pieces to the bottom of the side piece. The front will be flush with the front & bottom and the back will be flush with the back and bottom. The bottom pieces will have a 1/4" gap on each side (for airflow) and be flush with the bottom.
- STEP 7- Attach all the pieces to the other side piece.
- STEP 8- Glue the dowels into the holes for the headphones to rest on.
- STEP 9- Rip the lid piece into 2 pieces so you have a 1" wide piece and the remaining piece.
- STEP 10- Attach the 1" lid piece to the top of the back of the box with glue and brad nails. Attach the two lid pieces together with hinges.
- STEP 11- Attach the phone and tablet holder pieces to the front of the ledges with brad nails. Measure and cut the top piece and attach with glue and brad nails.
- STEP 12- Sand and paint or stain your charging station. Drill holes in the box to fit your USB power strip into it. My cords fit up through the gap in the lid made by the hinges. If not, drill holes in the box for cords to come through. Use cord holders to hold the cords next to each charging area. Use D-rings to hang on the wall.
Notes
Click here to get the complete build plans on Kregtool.com.
My charging station was built from whitewood boards from the home improvement store and finished with 2 coats of wipe on polyurethane.
Happy Organizing!
