If you are looking for more storage, but are running out of space, it’s time to use the space hidden behind your doors!
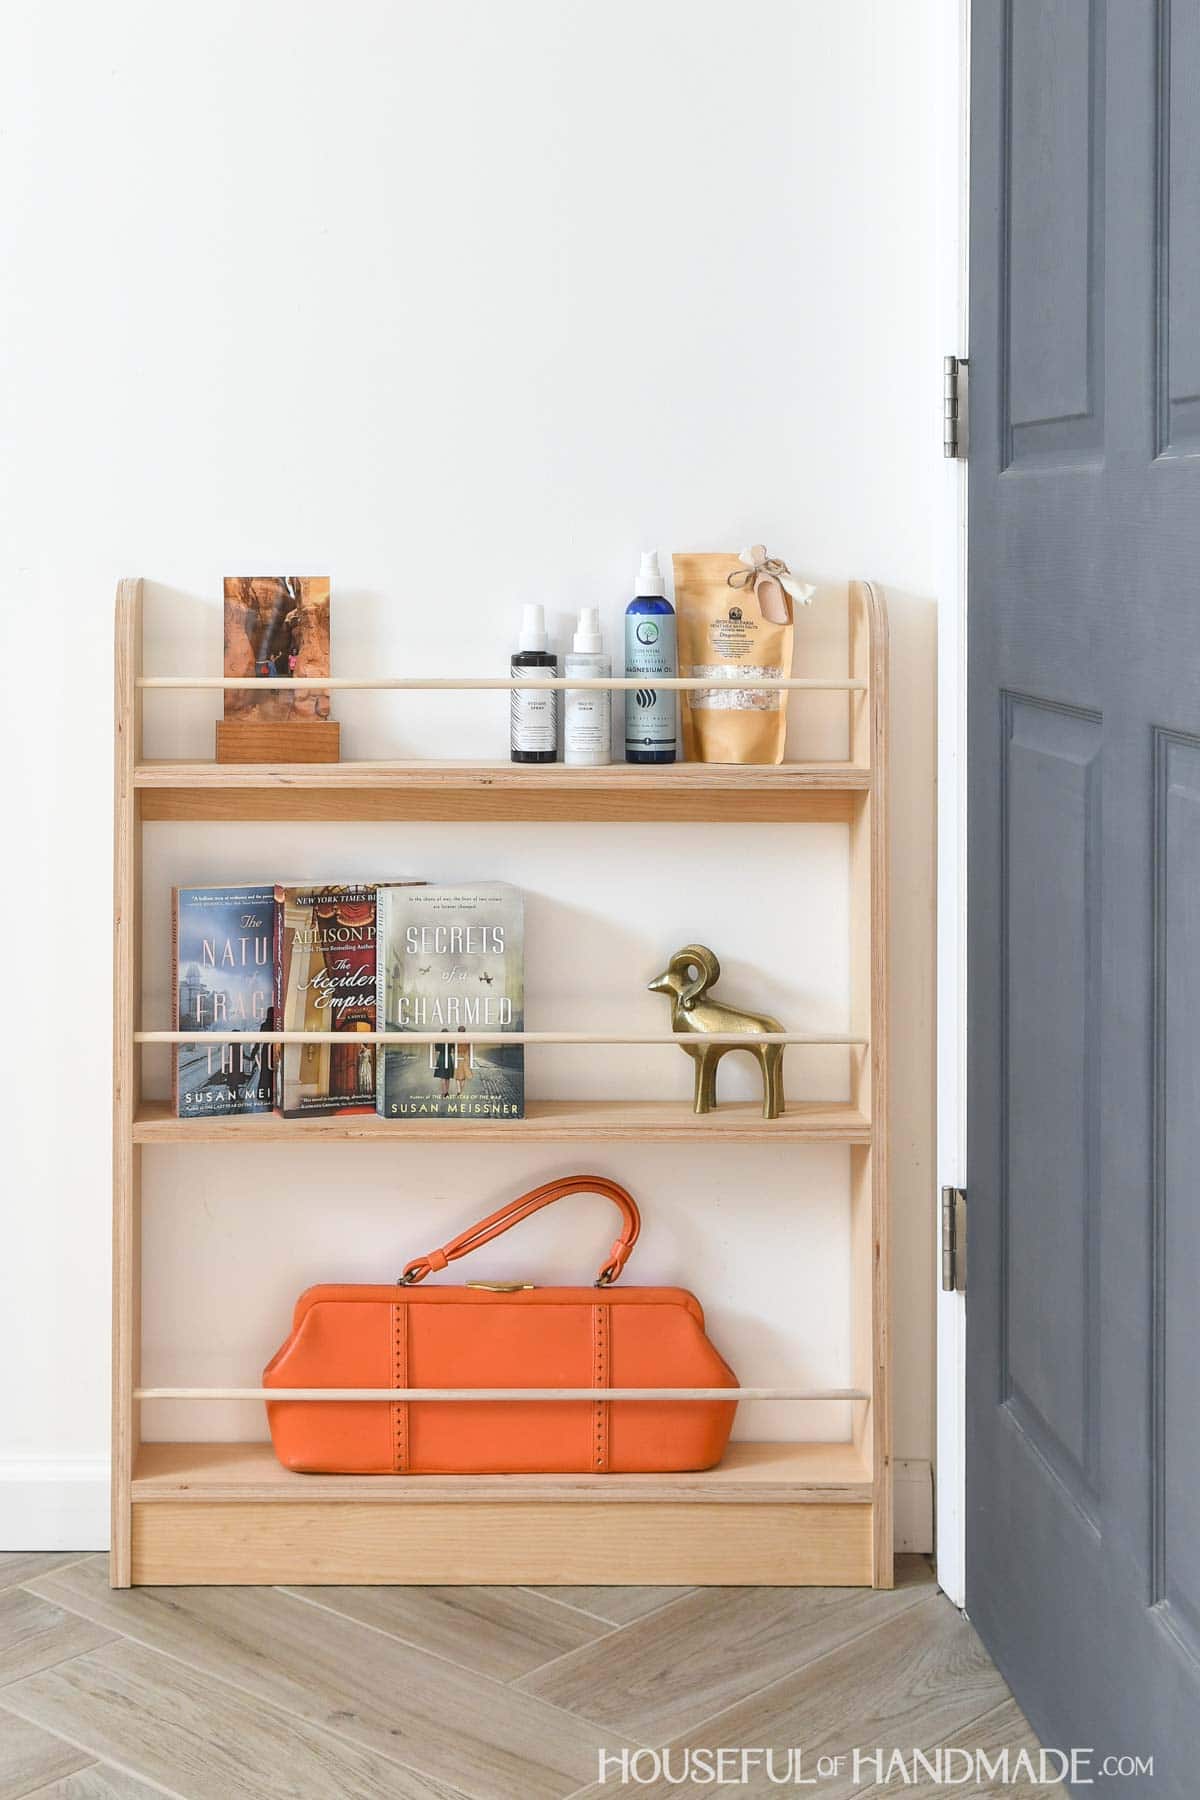
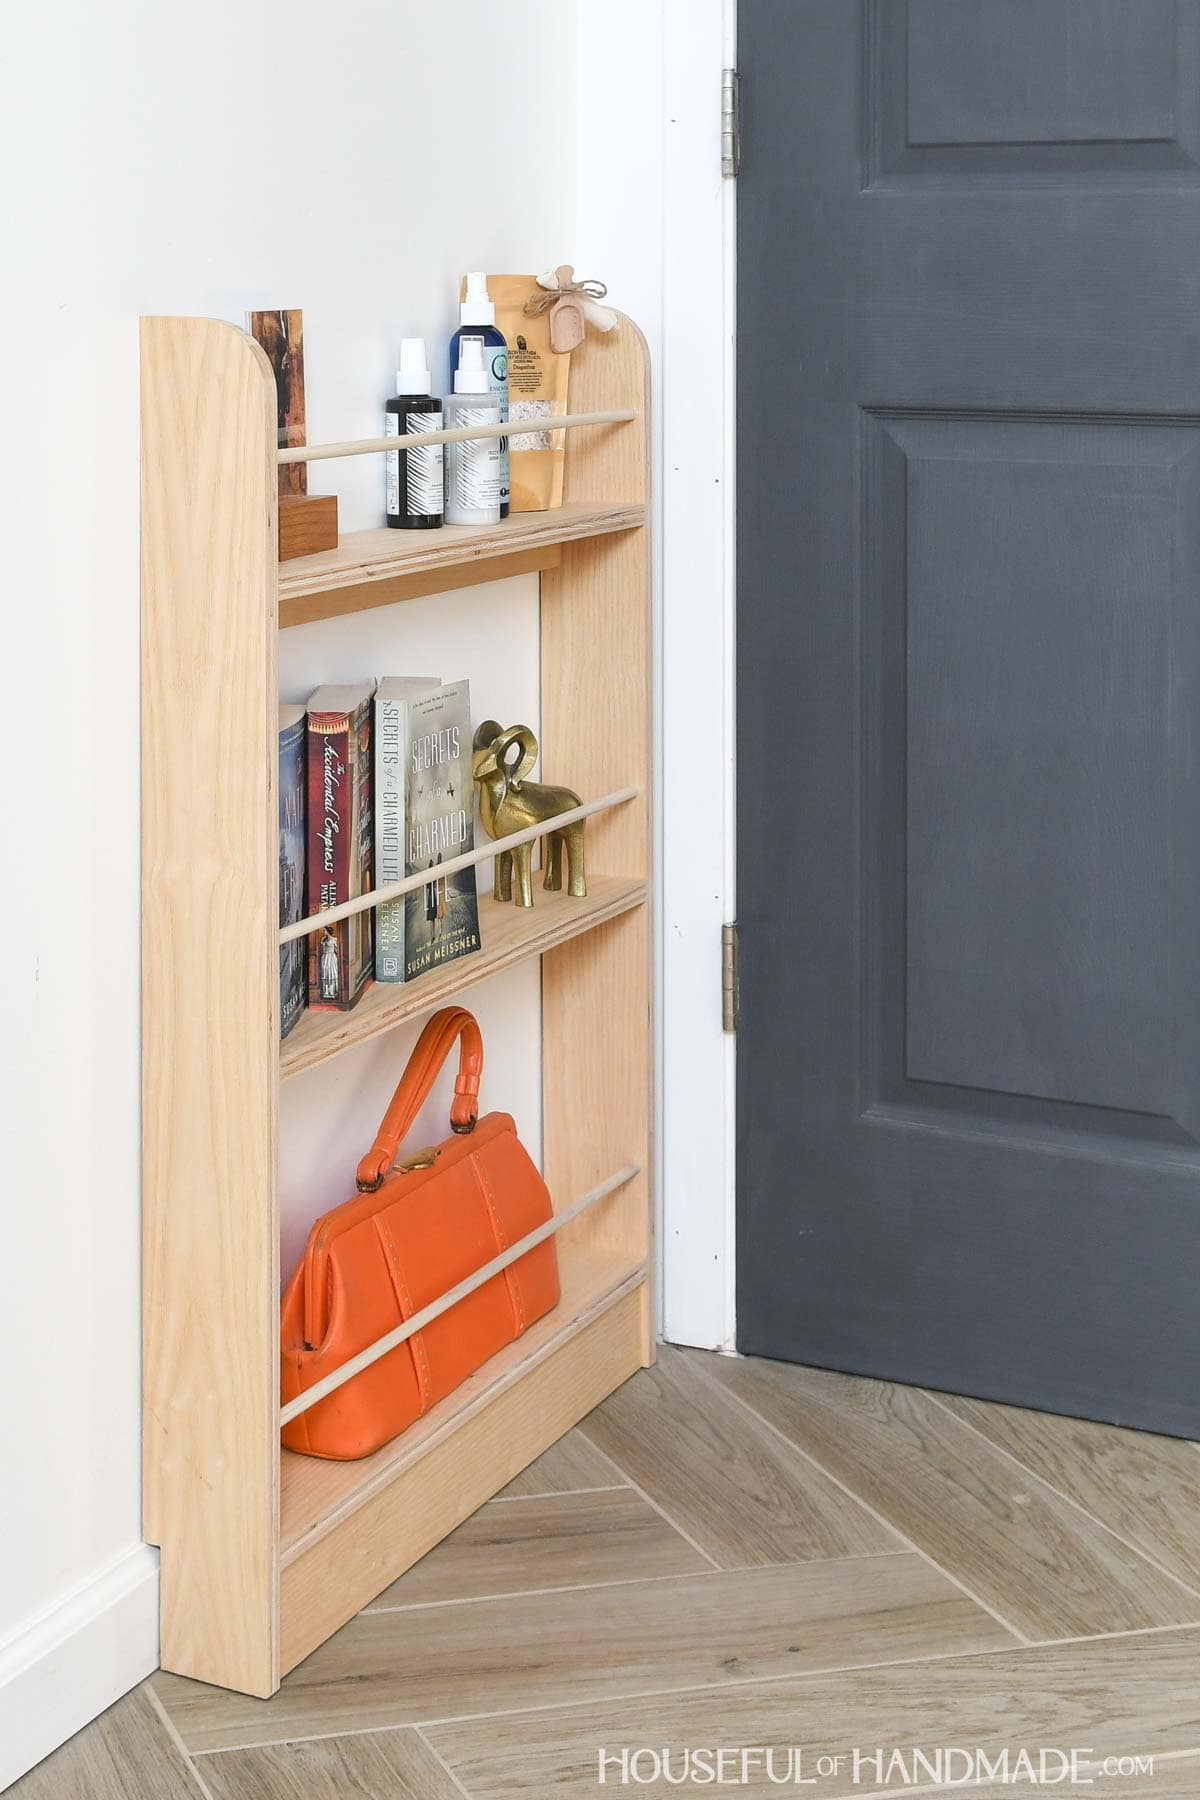
This easy to build shelf is small enough to tuck behind a door in a bedroom, bathroom or pantry.
Even though it is small and shallow, it can hold a lot!
This post may contain affiliate links. As an Amazon Associate I earn from qualifying purchases. Click here to read my full disclosure policy.
Ways to use a Narrow Shelf
This behind the door shelf is narrow but that does not mean it isn’t full of storage possibilities!
You can use it in any room with a door. It won’t take up any additional space in your room, jut help you keep things organized.
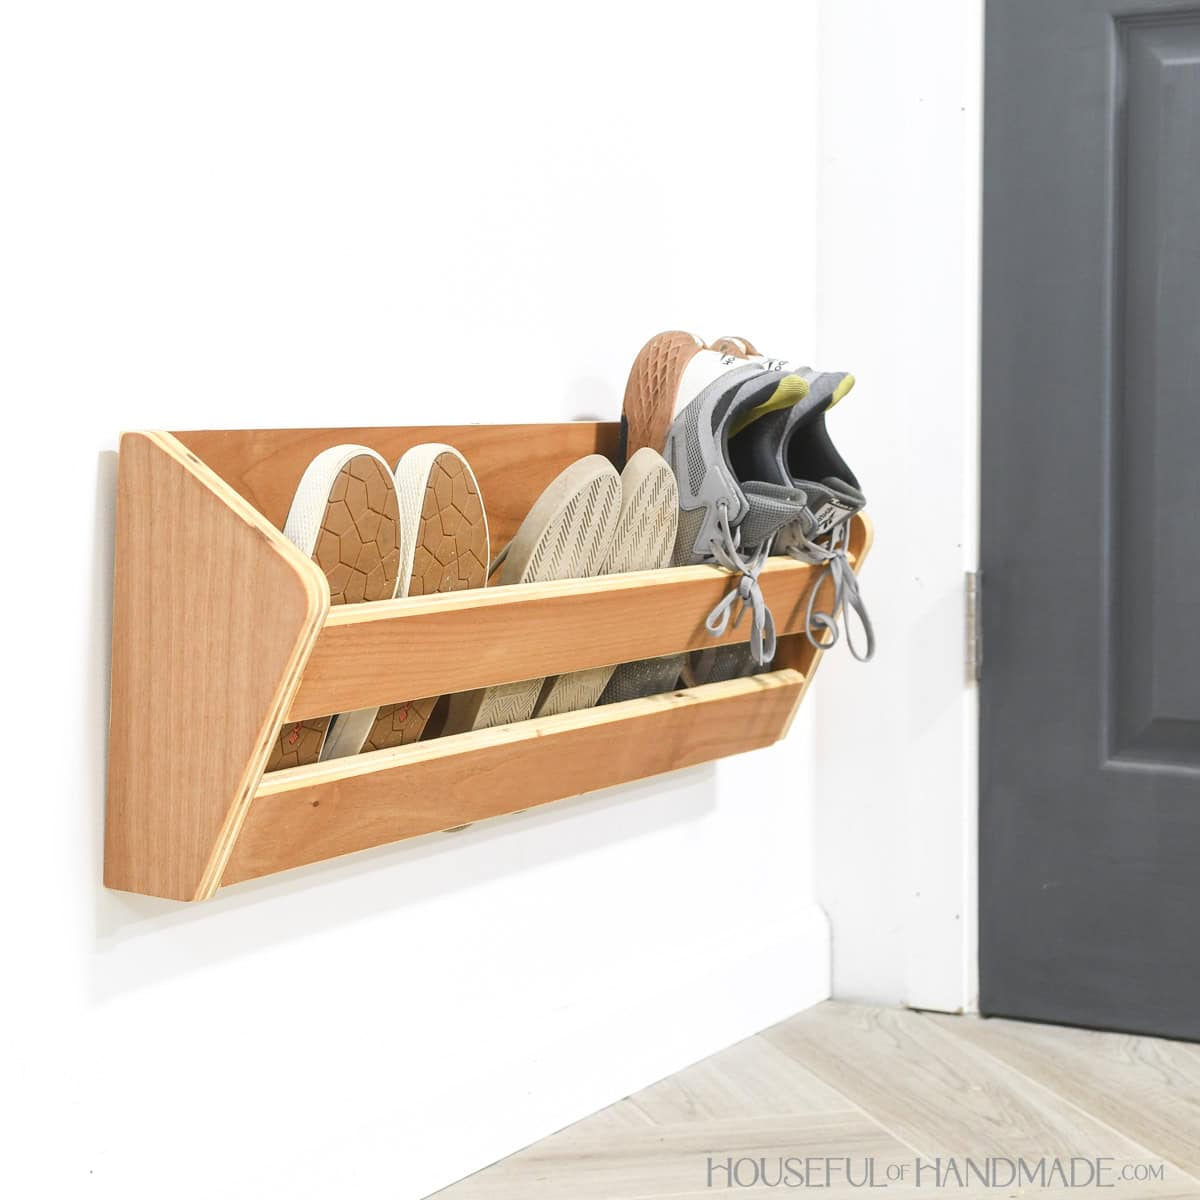
It can also be used in a room without a door without getting in the way. It’s a great way to turn unusable walls into amazing storage.
I built my narrow storage shelf from a scrap of plywood left over from another project. All you need is a 2′ x 3′ piece or a few longer narrow strips.
So go search through your plywood scraps because you will want one of these simple, but very useful, shelves in every room!
Here are just a few ideas for ways you can use a behind the door shelf in your home:
- Makeup and hair products in a bathroom
- Spices, oils and storage baggies in a pantry
- Books and magazines (Montessori style) in any room
- Shoes and accessories in a closet
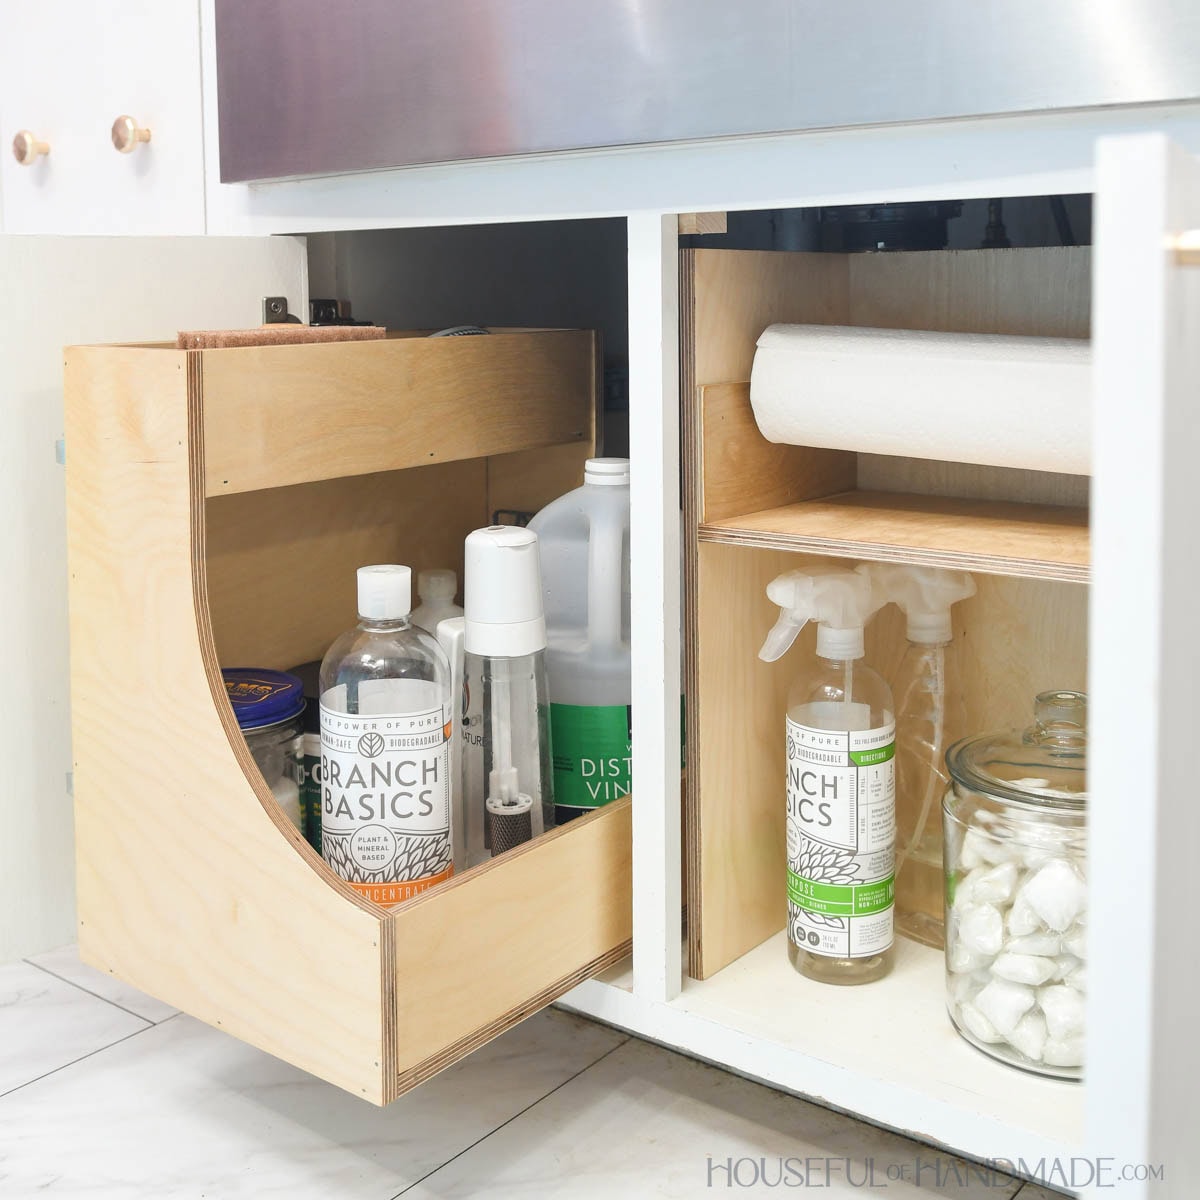
- Cleaning supplies in a laundry room
- Crafting supplies in a spare room
- Spray paint and other canisters in a garage
- Files and mail in an office
I built this project as part of the Plywood Scrap Challenge in February. Check out the rest of the simple scrap wood projects below.
How to Build a Simple Shelf
Tools & Materials
Recommended Tools:
- Miter saw
- I recently upgraded to this sliding miter saw (watch for it to go on sale), but previously used this inexpensive miter saw that I love.
- Circular saw with rip guide or Table saw
- Jig saw
- Pocket hole jig
- Drill
- Impact driver (optional, but I love not having to switch bits with the drill)
- Speed square
- Sander
Supplies:
- Wood products
- (1) 3/4” plywood, 2×3 sheet
- (3) 3/8” dowels, 3’ long
- (14’) iron-on edge banging (optional)
- 1 1/4” pocket hole screws
- Wood glue
- 2” wood screws
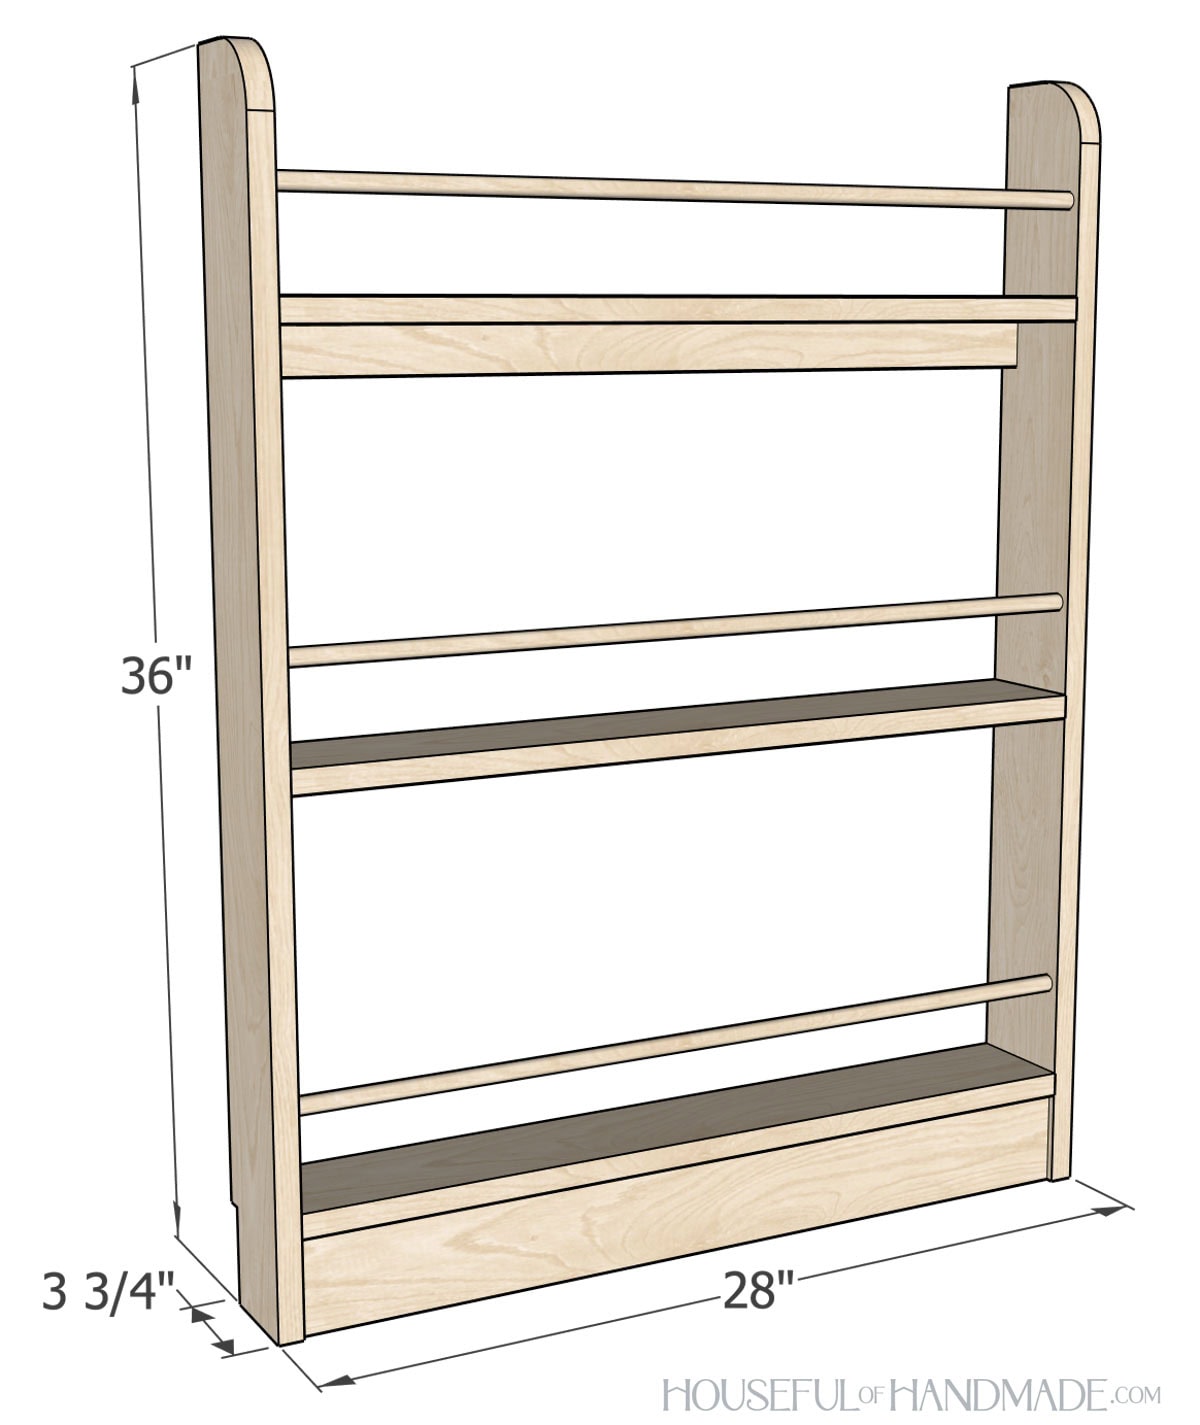
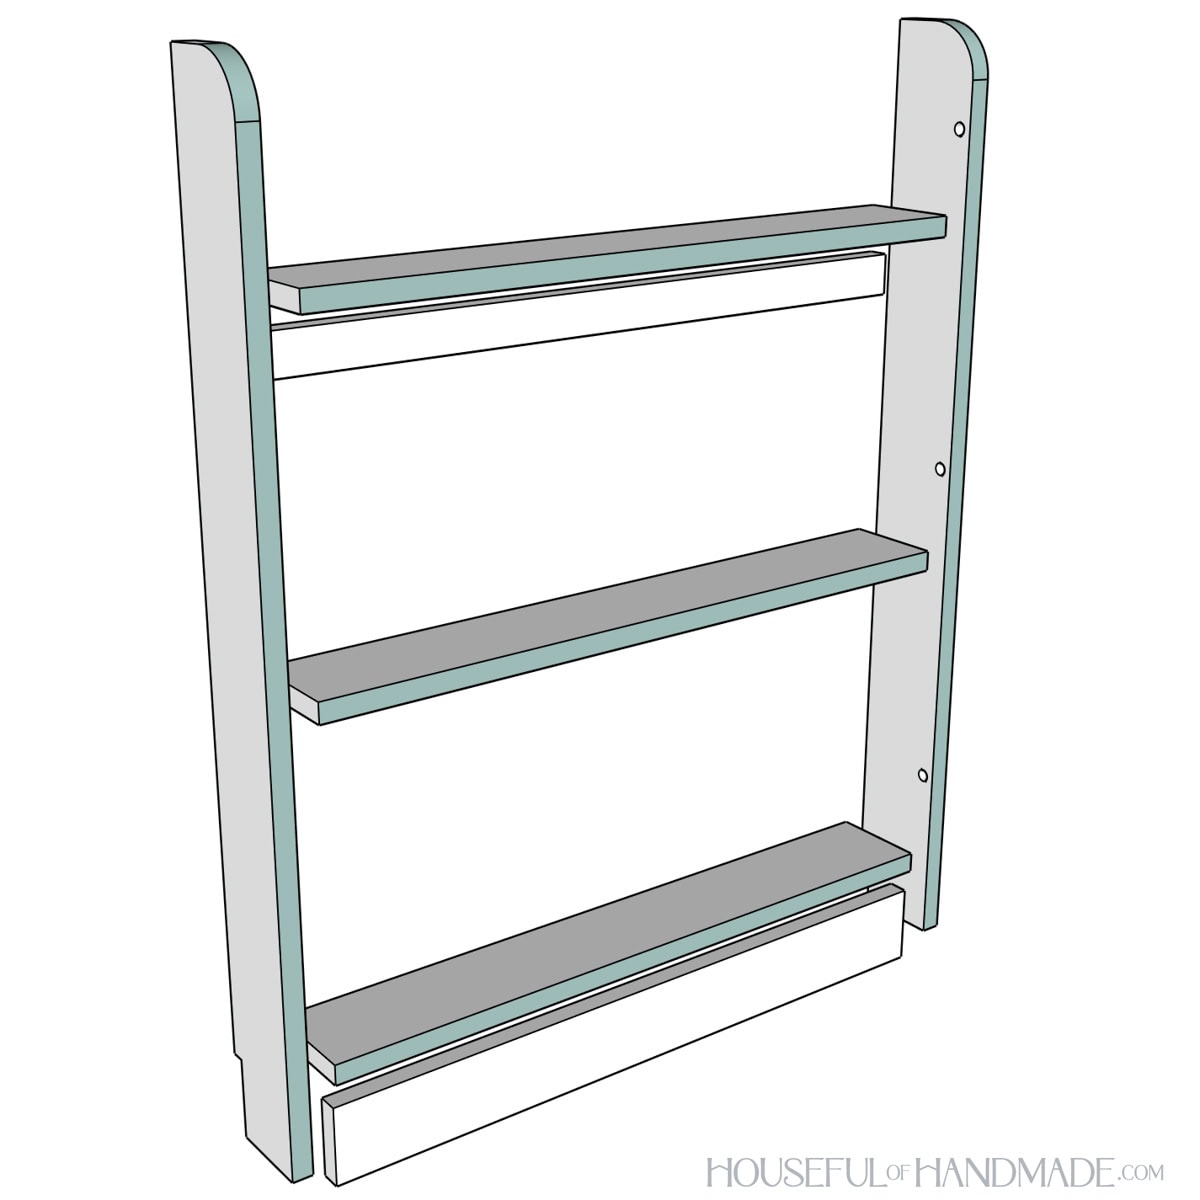
Overall Dimensions
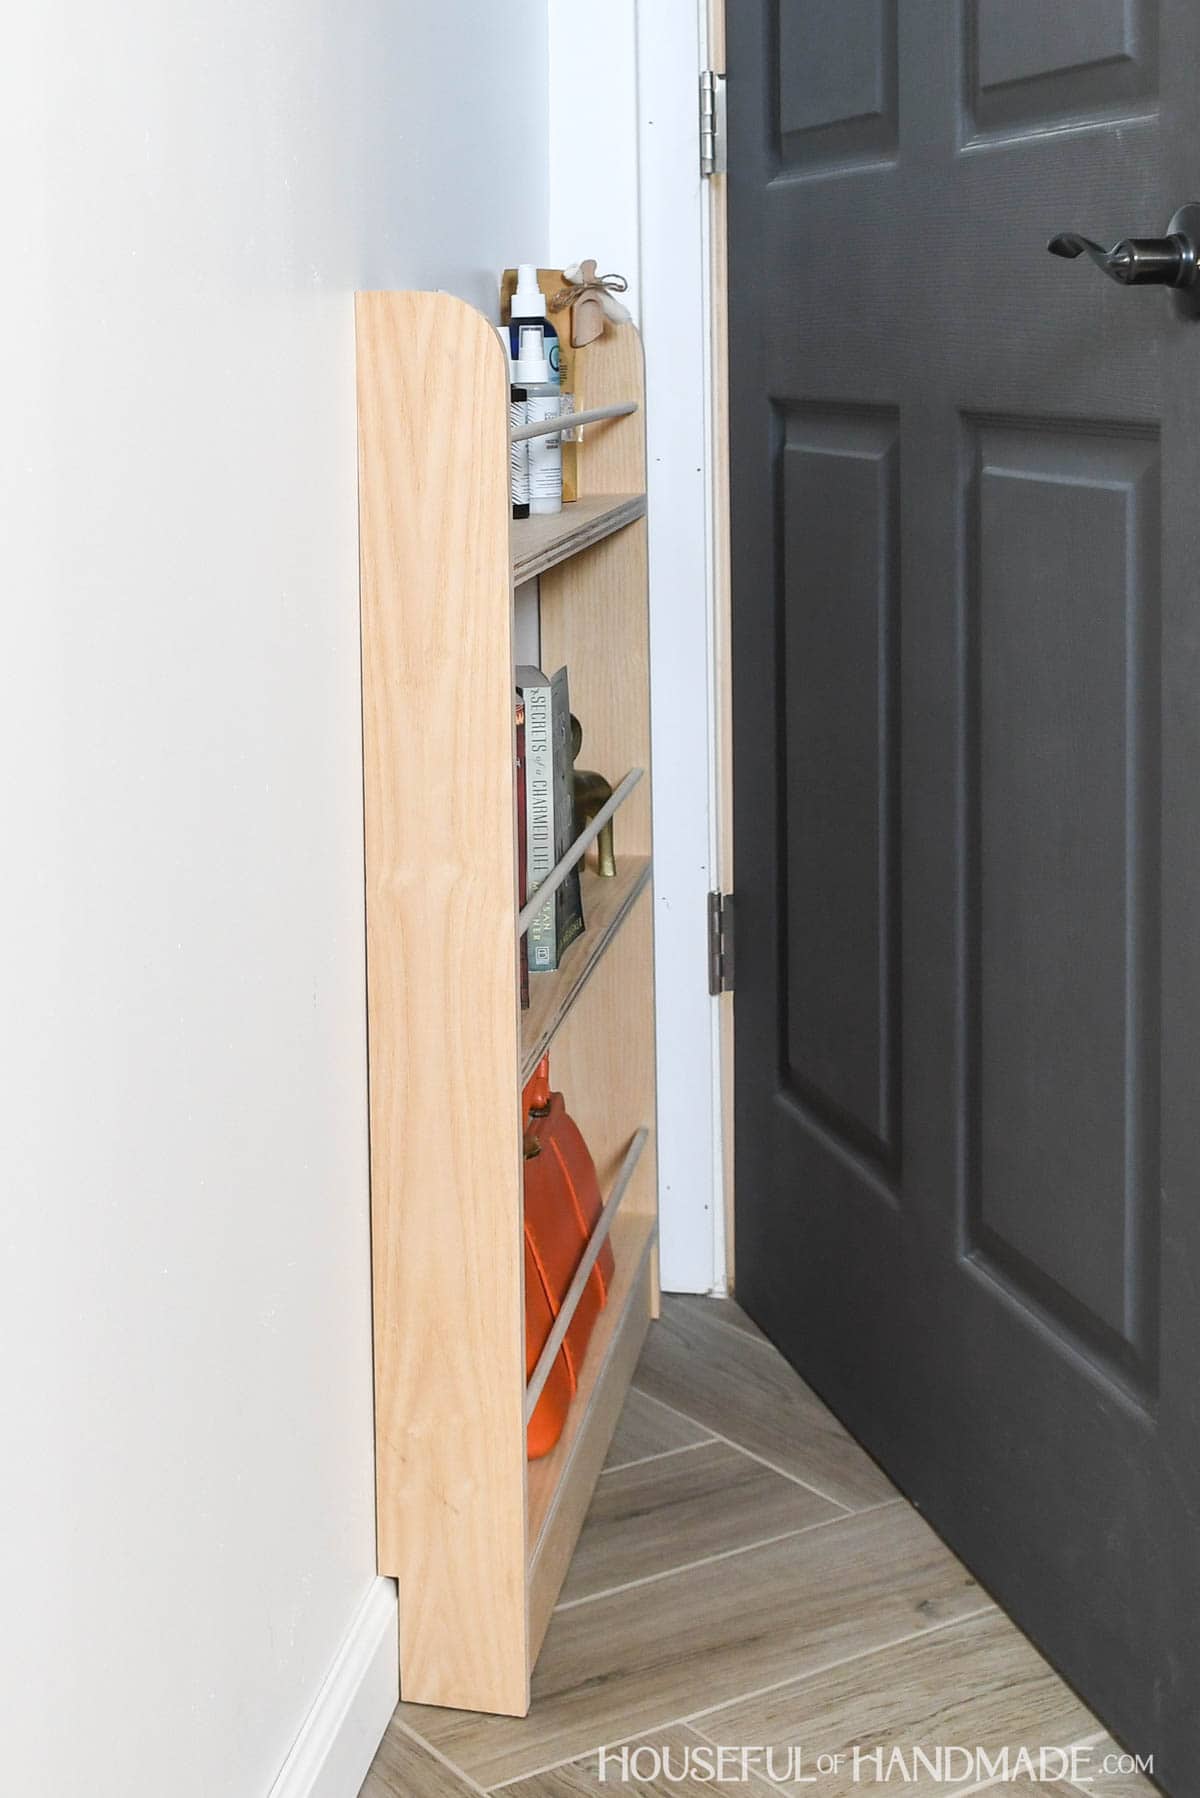
The finished shelf is 28″ wide and 36″ tall. It is only 3 3/4″ deep to fit behind a standard door with 4″ of clearance between the wall and door opening.
Cut List
Cut out the pieces according to the easy-to-read table in the PDF plans.

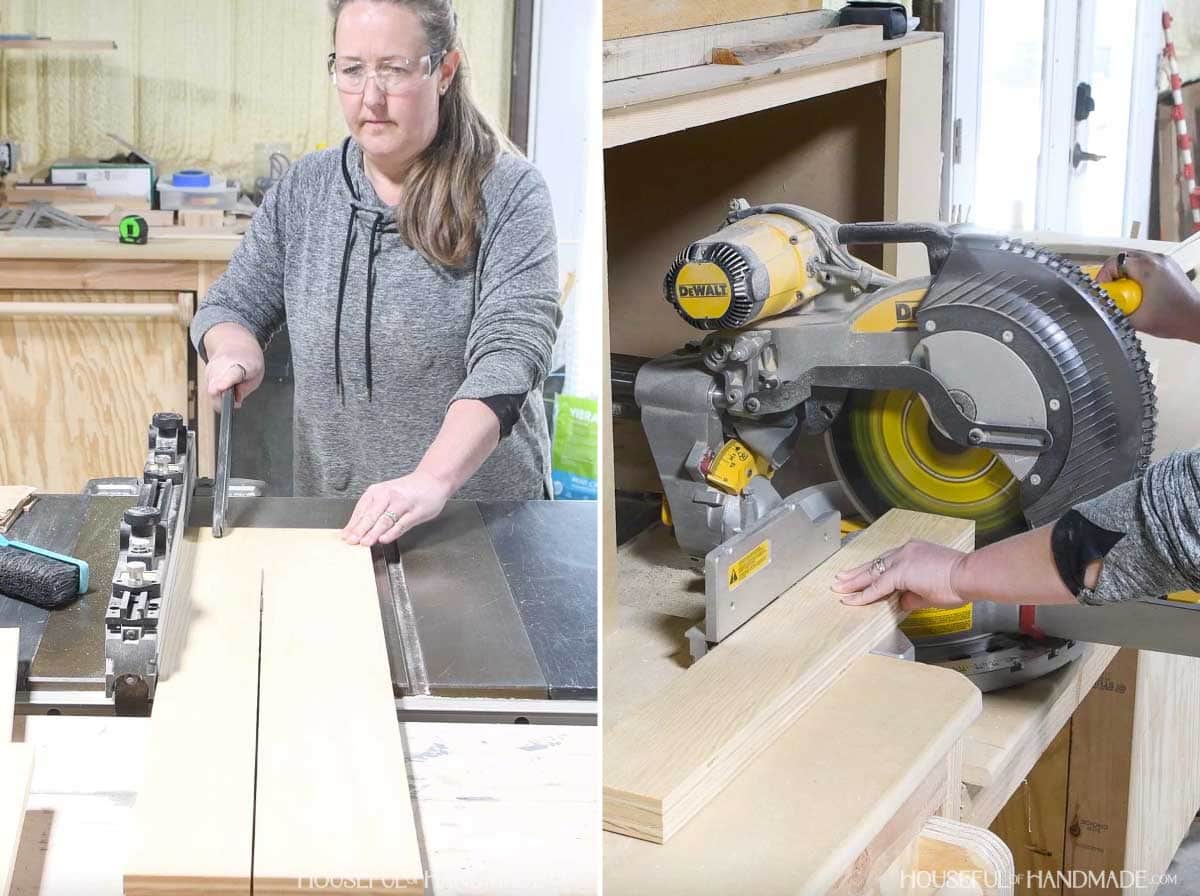
To cut my plywood, I first ripped it into strips. Then I cut it to length on the miter saw.
STEP 1- Prep the pieces
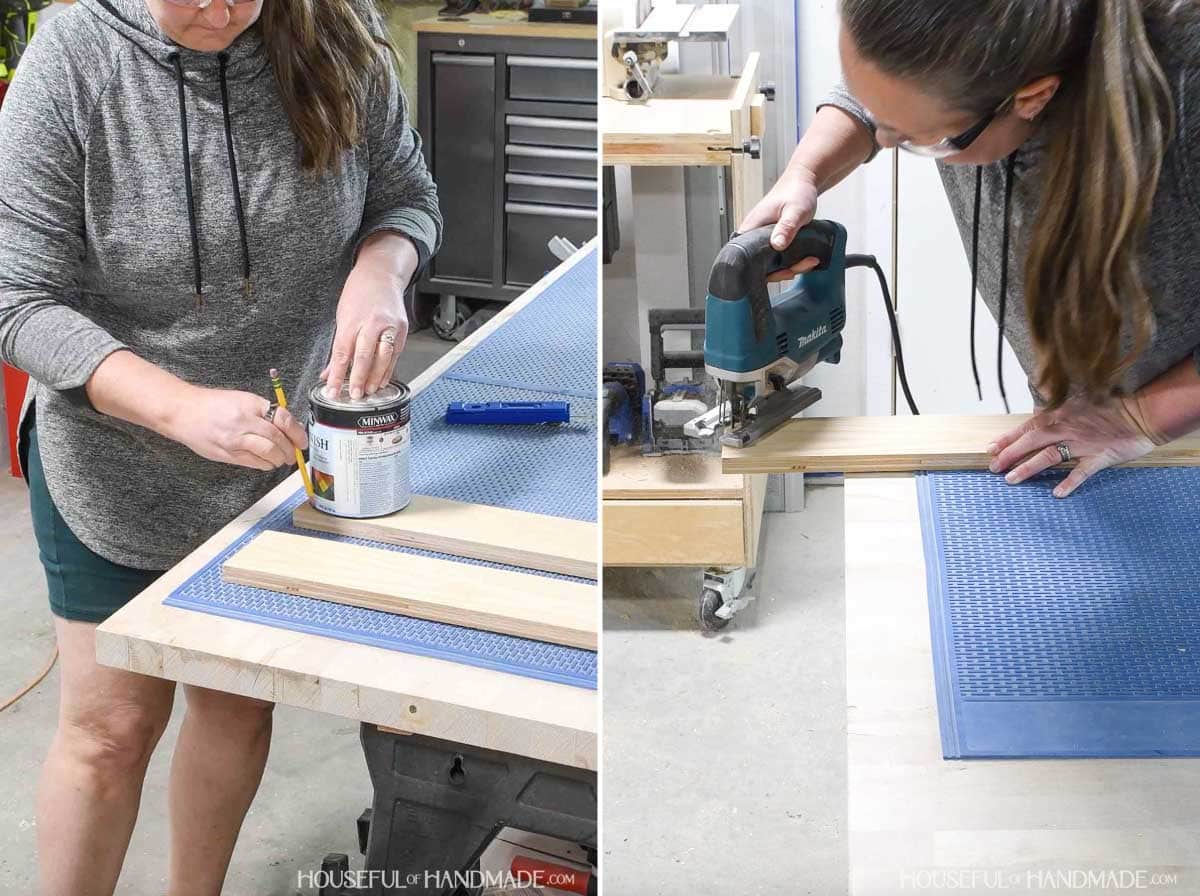
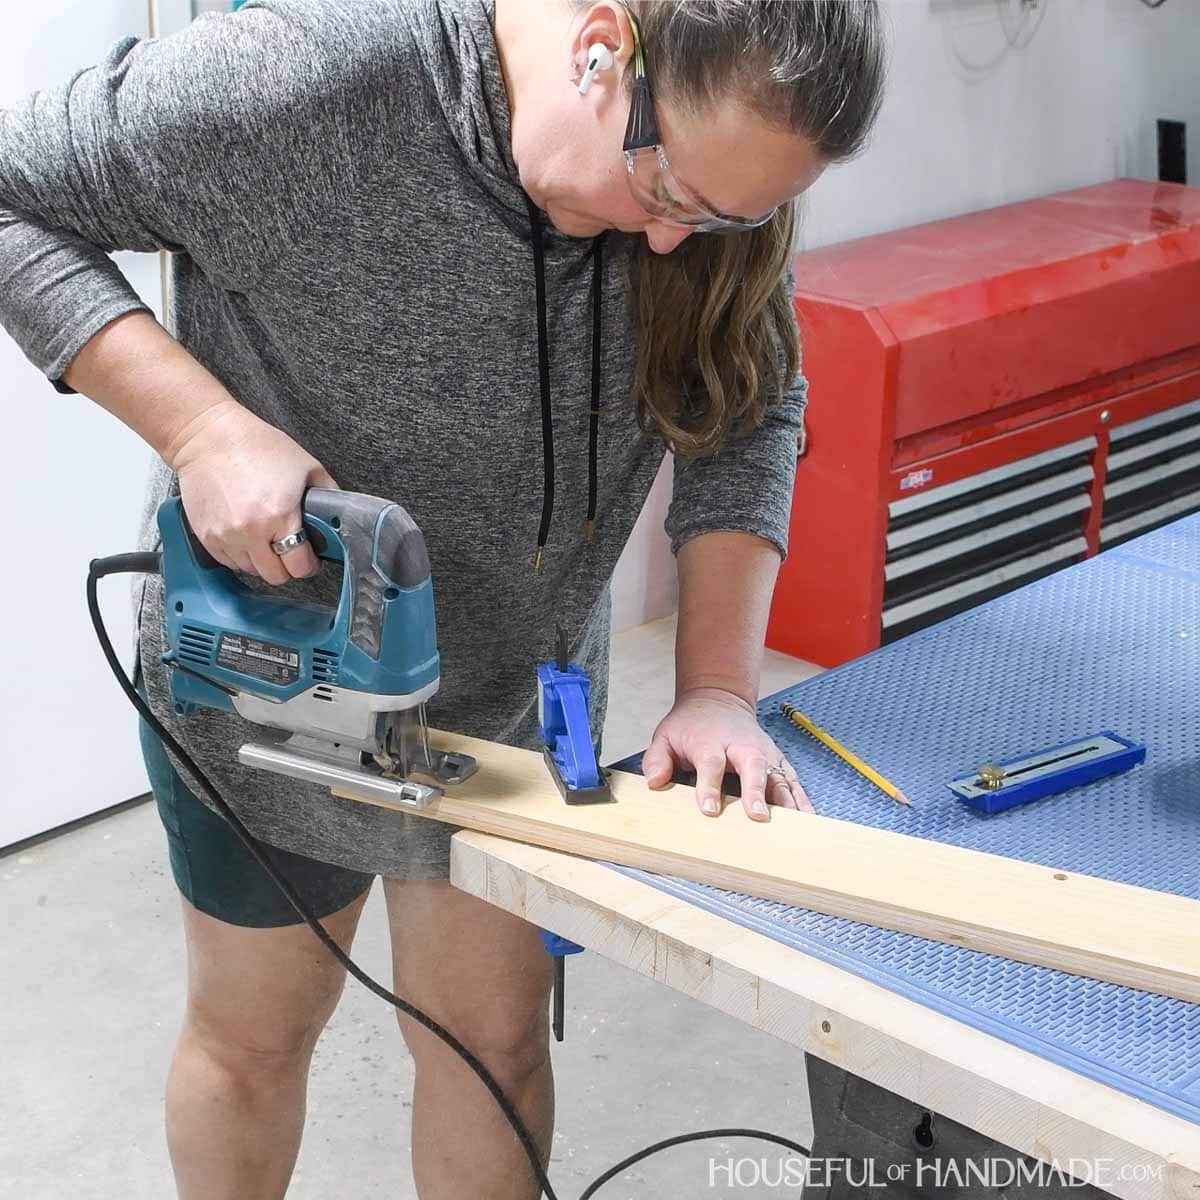
Cut a curve in the top front of the side boards with a jig saw. I used a small can of paint to draw the curved line.
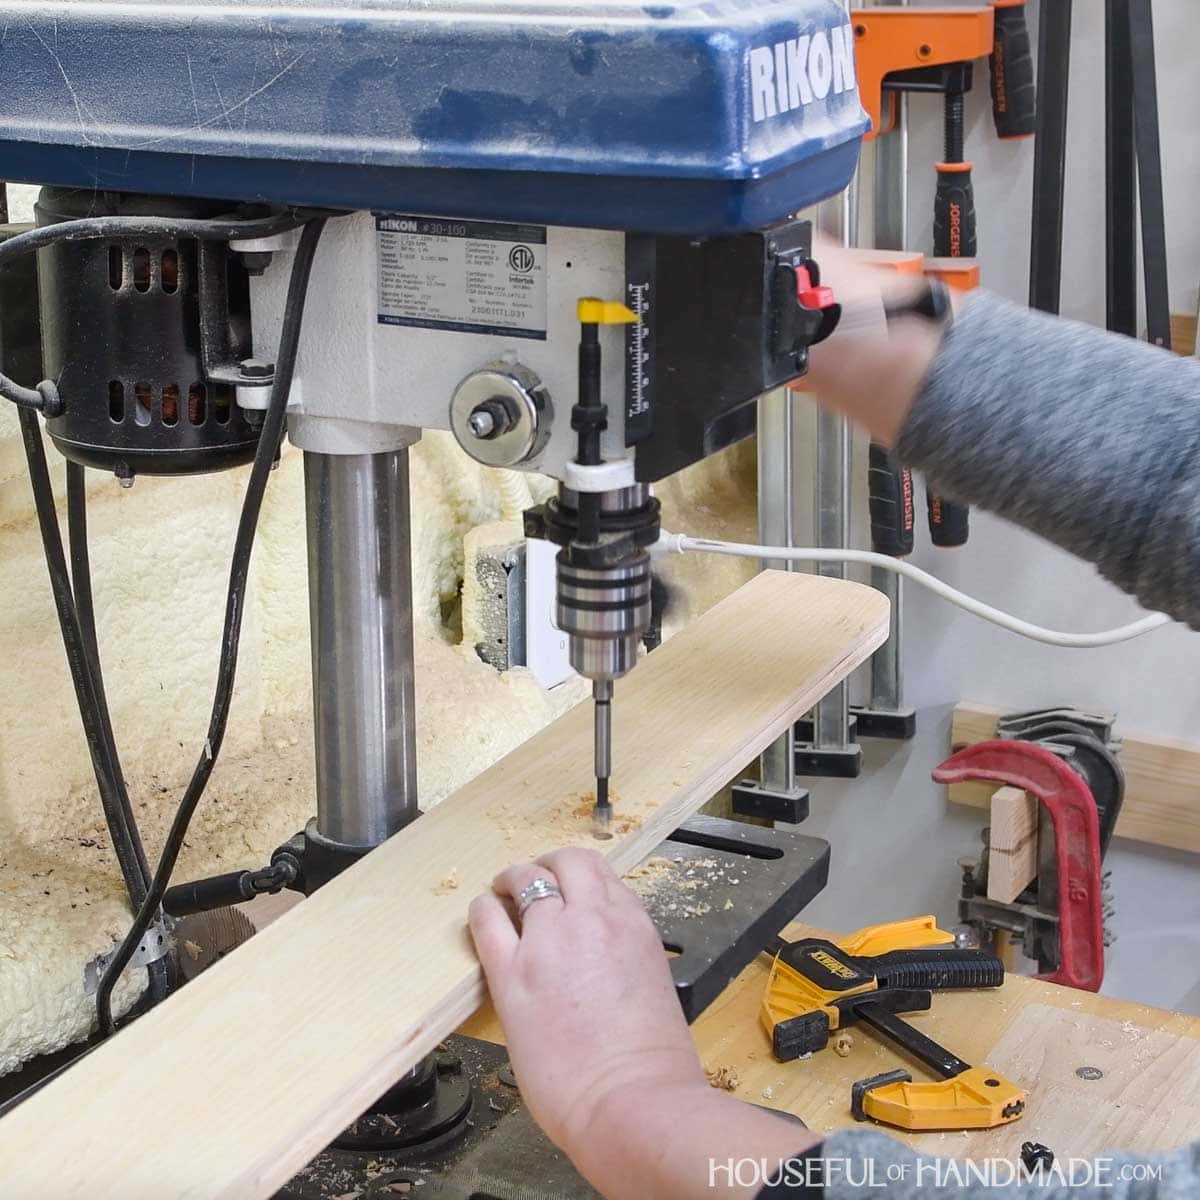
Drill 3/8” wide by 1/4” deep holes in the front of each side board spaced according to the diagram in the plans.
Make sure to mirror the holes on the sides.
If you have baseboards in your room, notch out the back bottom of the side to fit around it.
If your baseboards are taller than 3” you will want to either adjust the lower shelf higher (which will require you to cut the toe kick wider) or cut it narrower so it can fit in front of the baseboard.
If you want to add edge banding to your shelf, I recommend doing it before assembly. I did not use edge banding because I didn’t have any to match the plywood cut off I was using.
Ass edge banding to just the top/front of the side boards and the front of all the shelf boards.
You do not need to add edge banding to the toe-kick. If you are worried about seeing the bottom edge of the back support you can add it there, but it is well hidden.
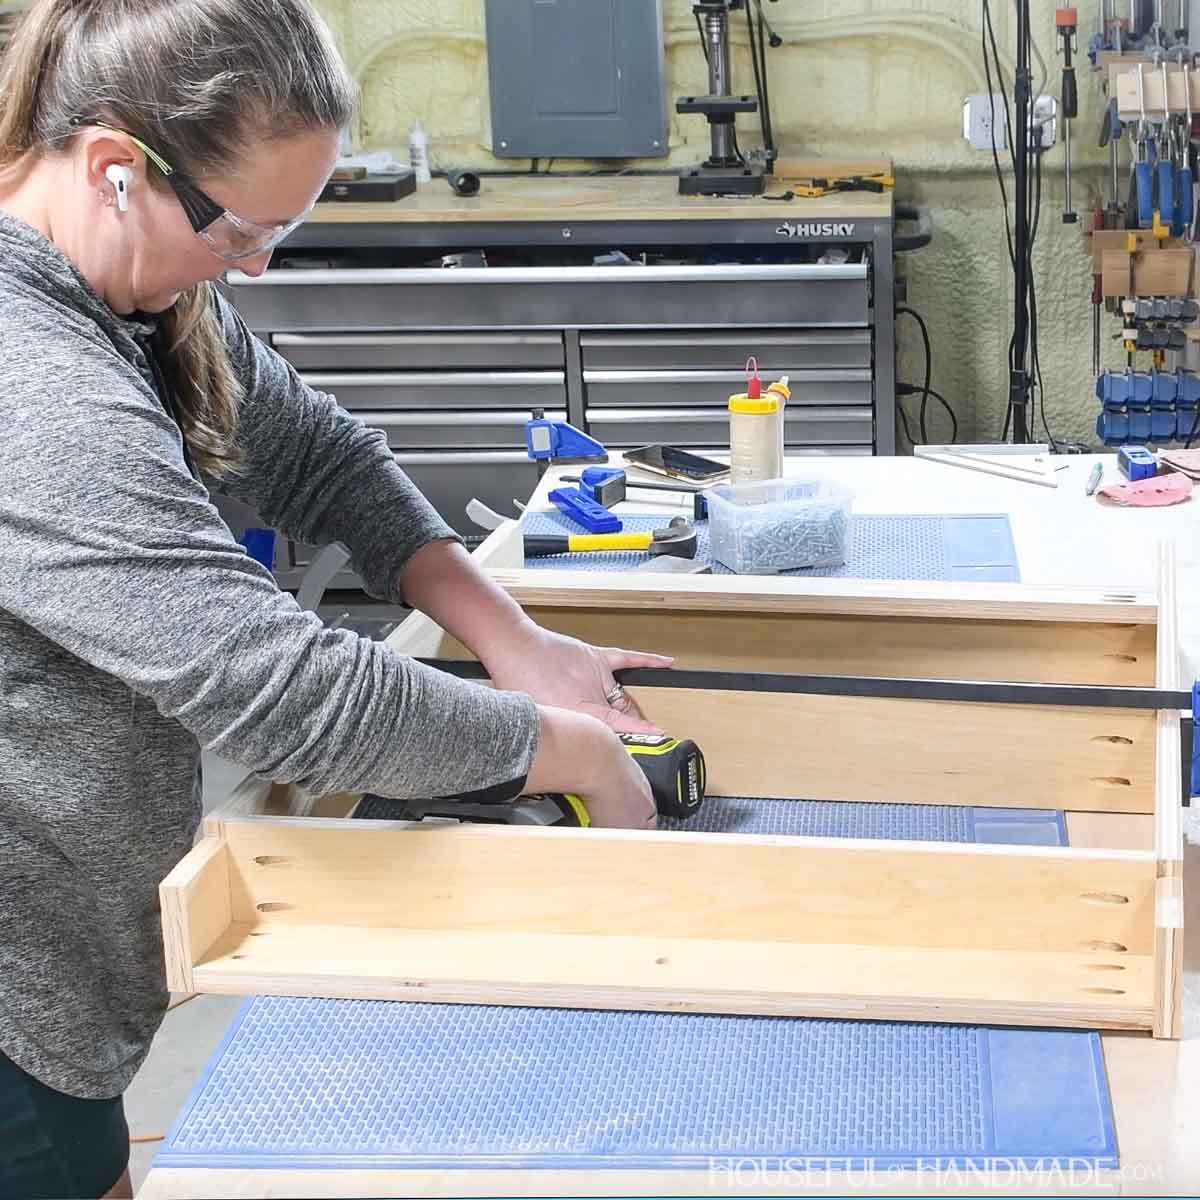
STEP 2- Assemble the shelf
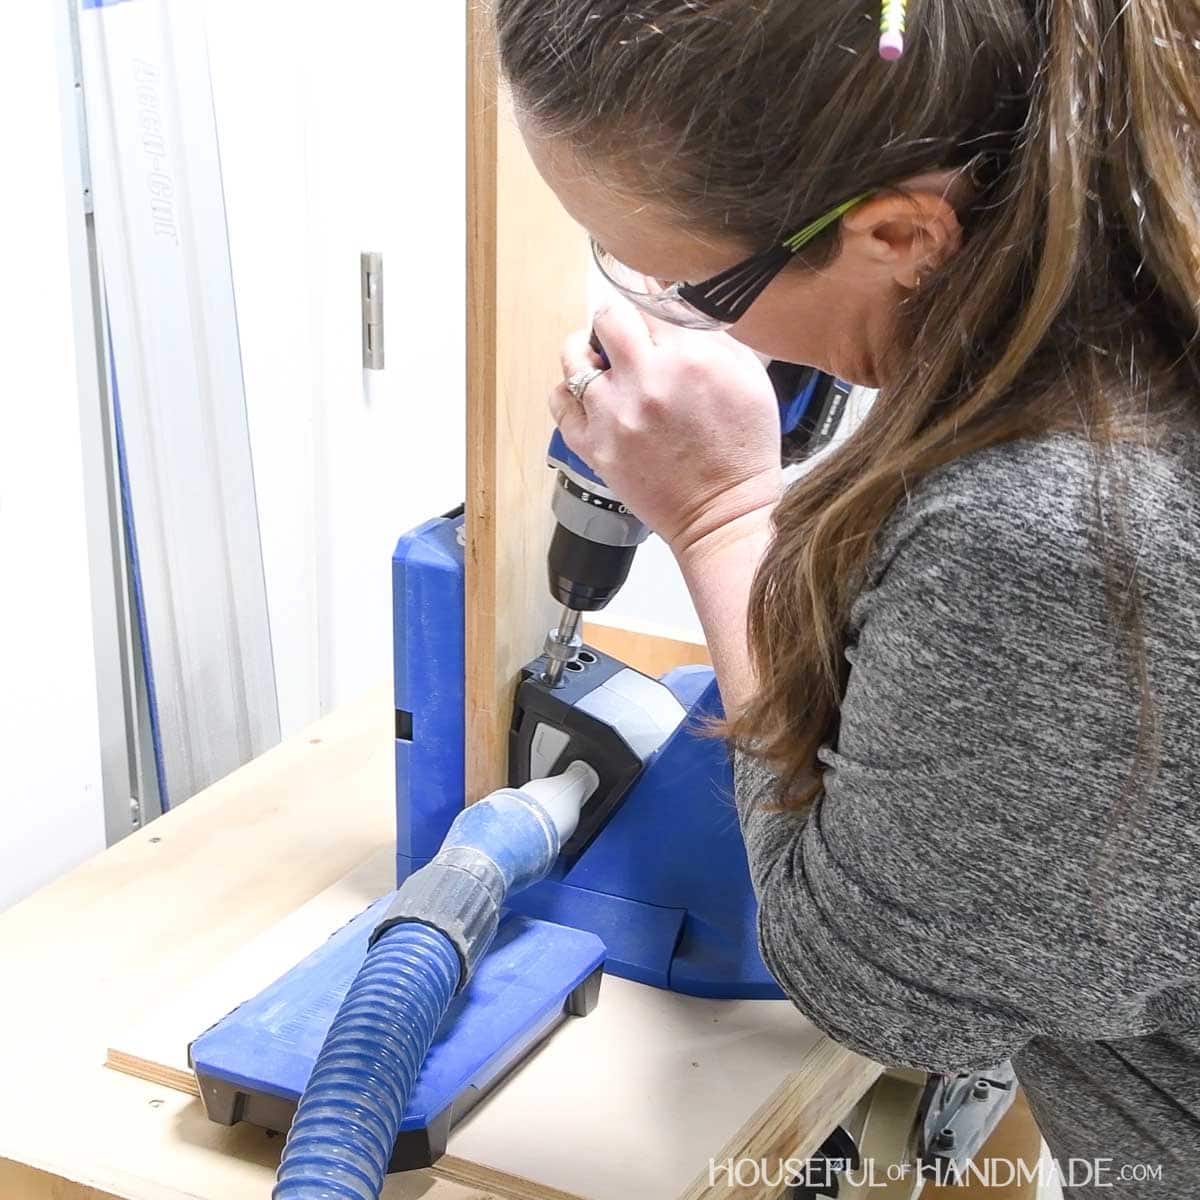
Set your pocket hole jig to drill holes in 3/4” thick material.
Drill (2) pocket holes in both ends of all the shelf boards, toe kick and back support boards.
Attach the shelves to one side so the bottom of each board is spaced according to the diagram in the plans.
Secure with wood glue and 1 1/4” pocket hole screws so the front and back are flush.
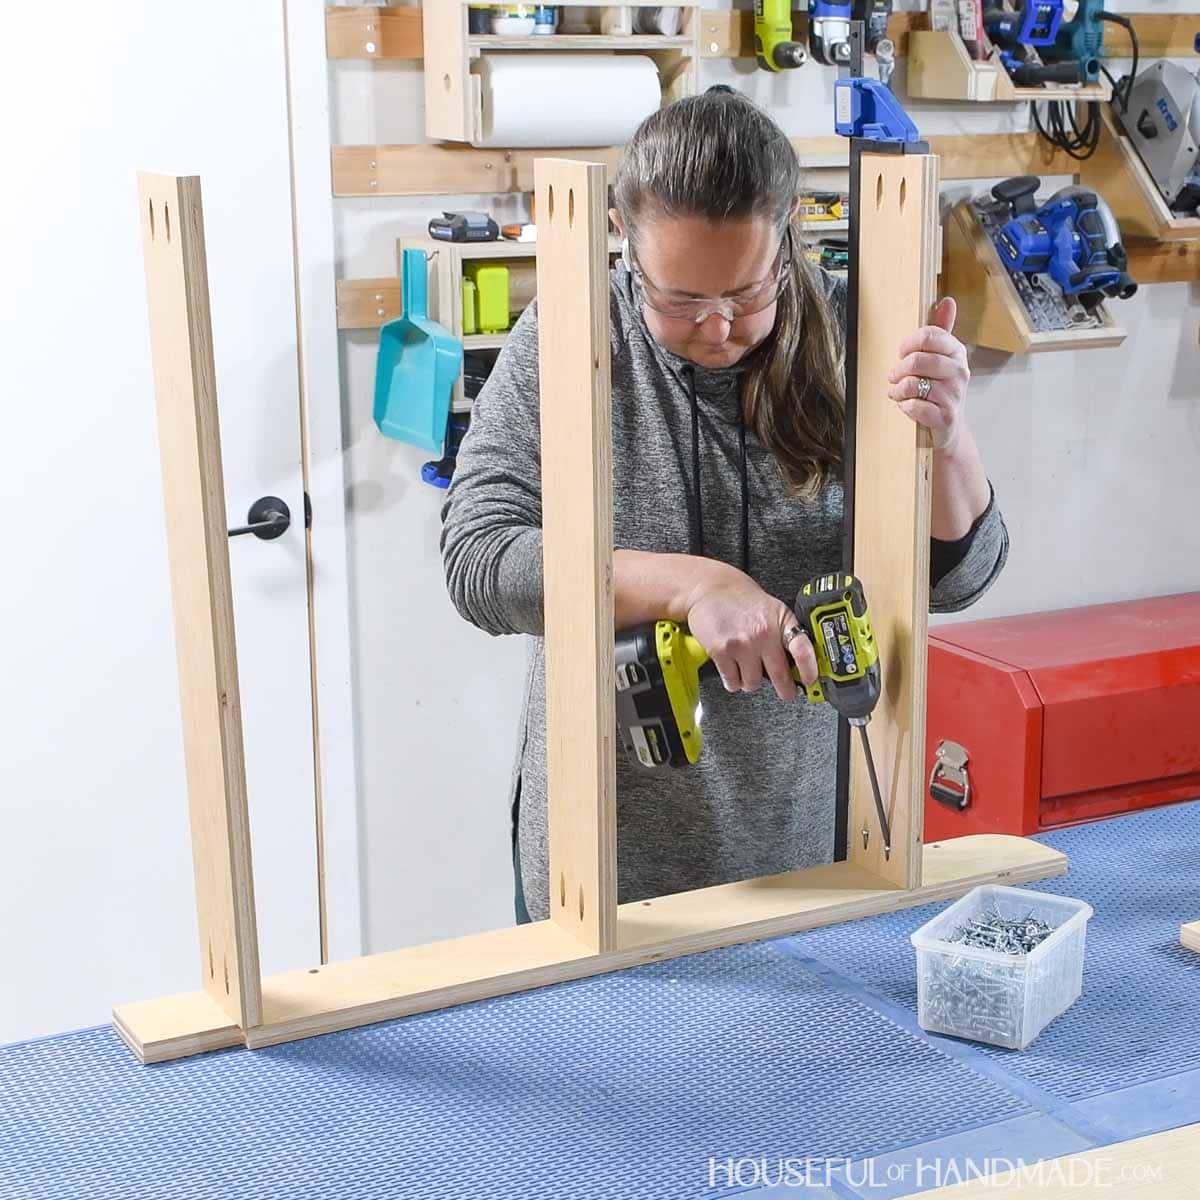
Attach the toe kick so it is set back 1/4” from the front of the of the bookshelf and flush with the bottom.
Attach the back support under the top shelf so it is flush with the back.
Secure with wood glue and 1 1/4” pocket hole screws.
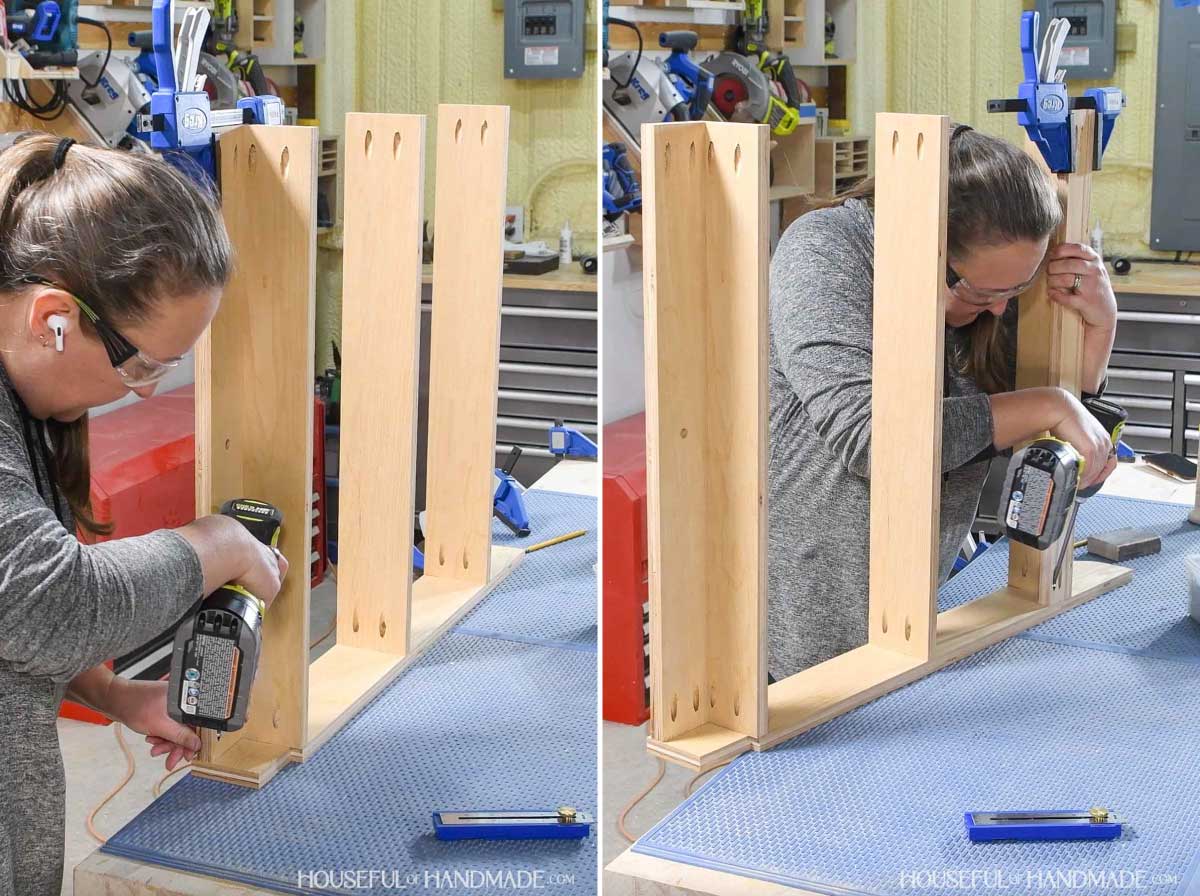
Place the dowels in the holes on the one side board.
If they are too snug, sand the ends and carefully tap them into place.

Line up the other side board so the dowels are in the holes. Tap them into place as needed.
Then line up the shelves, toe kick and back support the same as they were on the first side.
Secure with glue and 1 1/4” pocket hole screws.
STEP 3- Finish and install
Sand and stain/seal/paint your shelf.
To install it behind your door, attach it to the wall with 2” wood screws through the back support into wall studs.
Premium plans include:
- Recommended Tools
- Shopping list
- Easy to read cut list table
- Cut diagrams
- Step-by-step instructions with 3D renderings
- Helpful resources
- BONUS: 3D SketchUp file
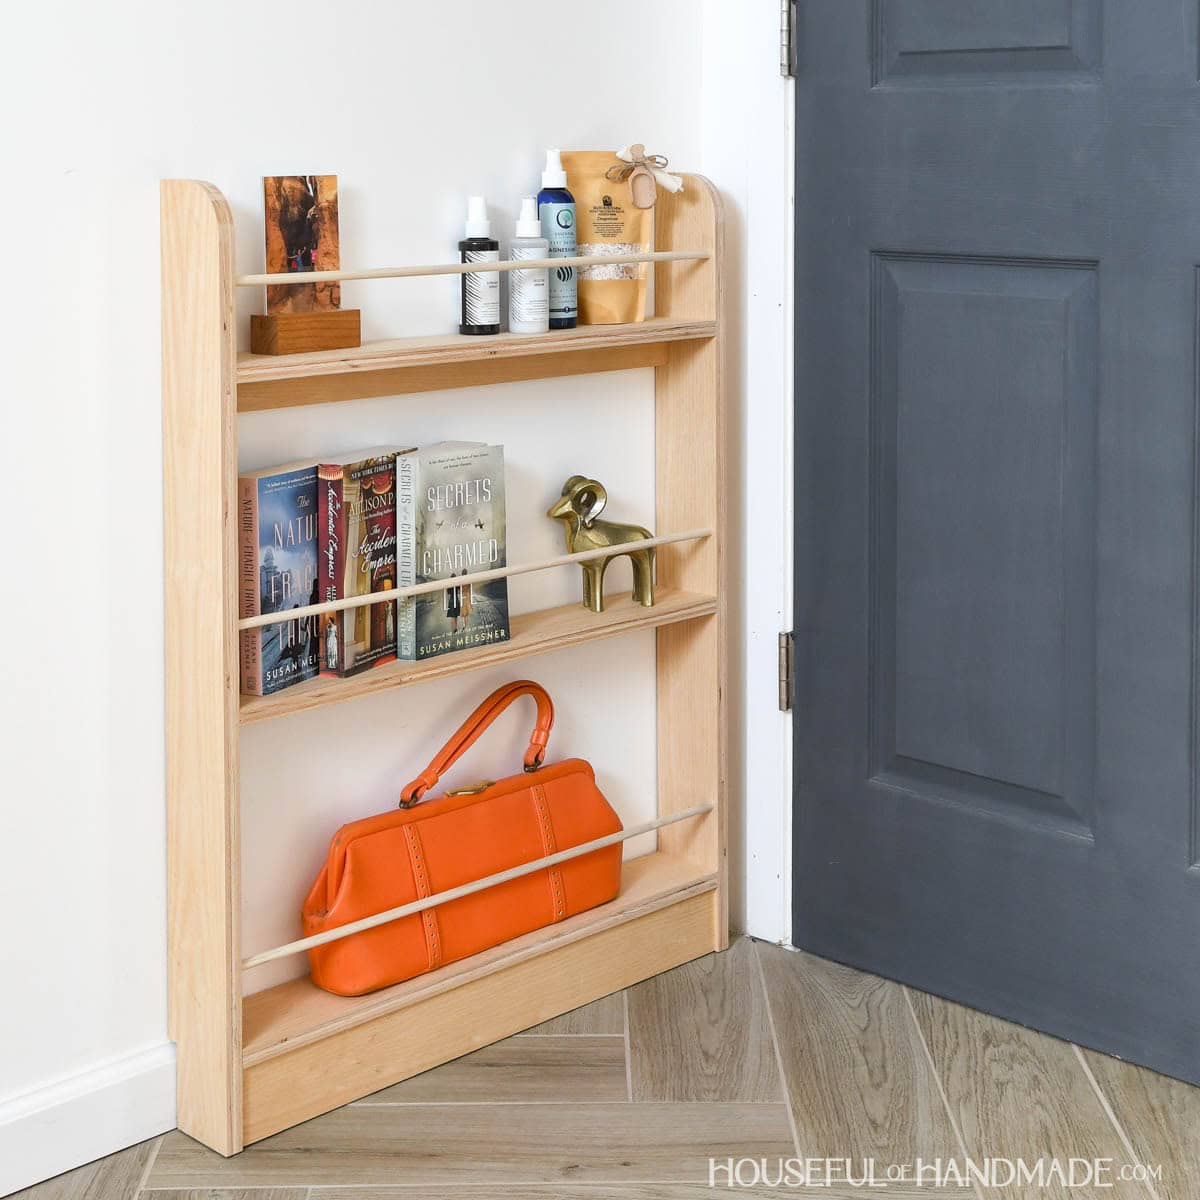
You did it!
Now you can load up your new shelf. Perfect for storing books, magazines, comics, or makeup and hair products.
More Easy Scrap Wood Ideas
This February I am teaming up with my friend Shara from Woodshop Diaries to clean out our plywood cut offs. Every Tuesday we will each share a new plywood scrap project.
I'll share each week's new scrap plywood project below so you can use up your scraps too!


Happy building!
