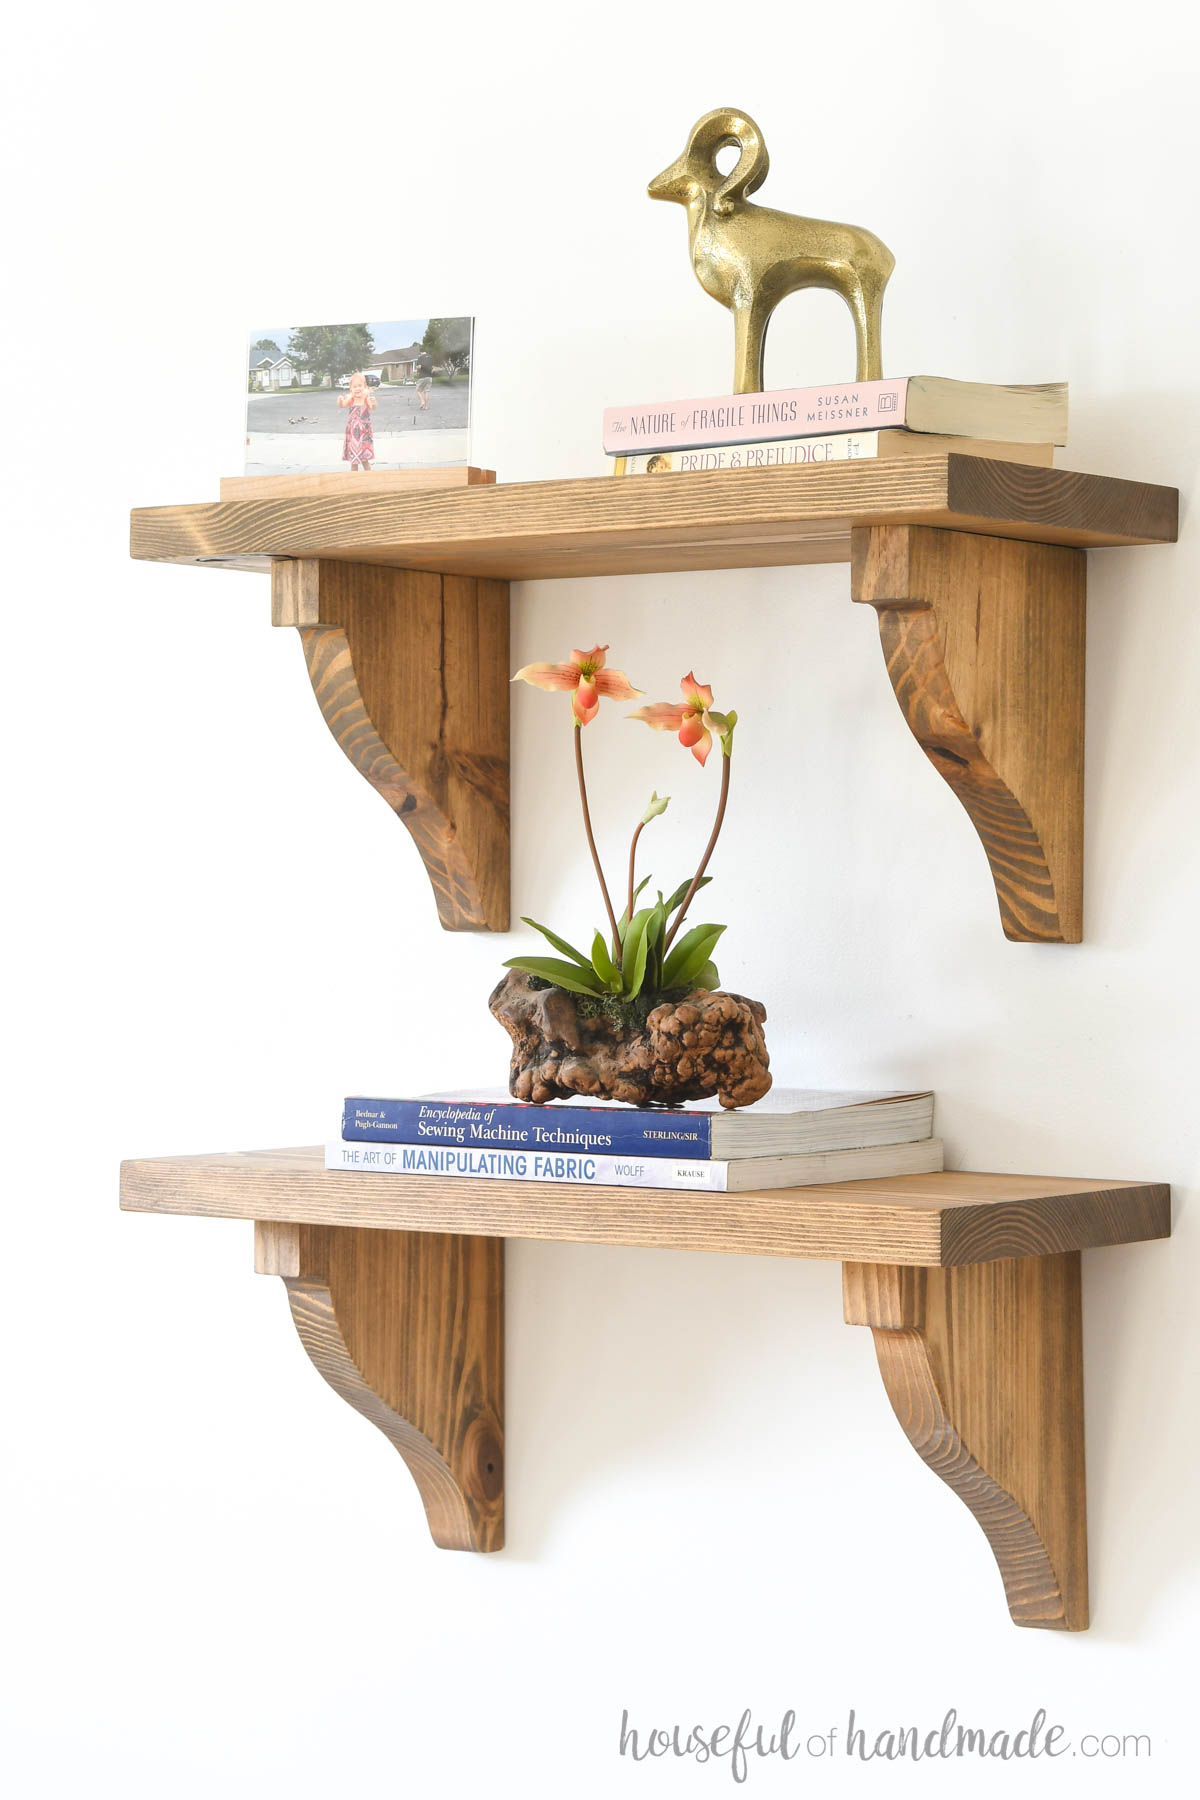
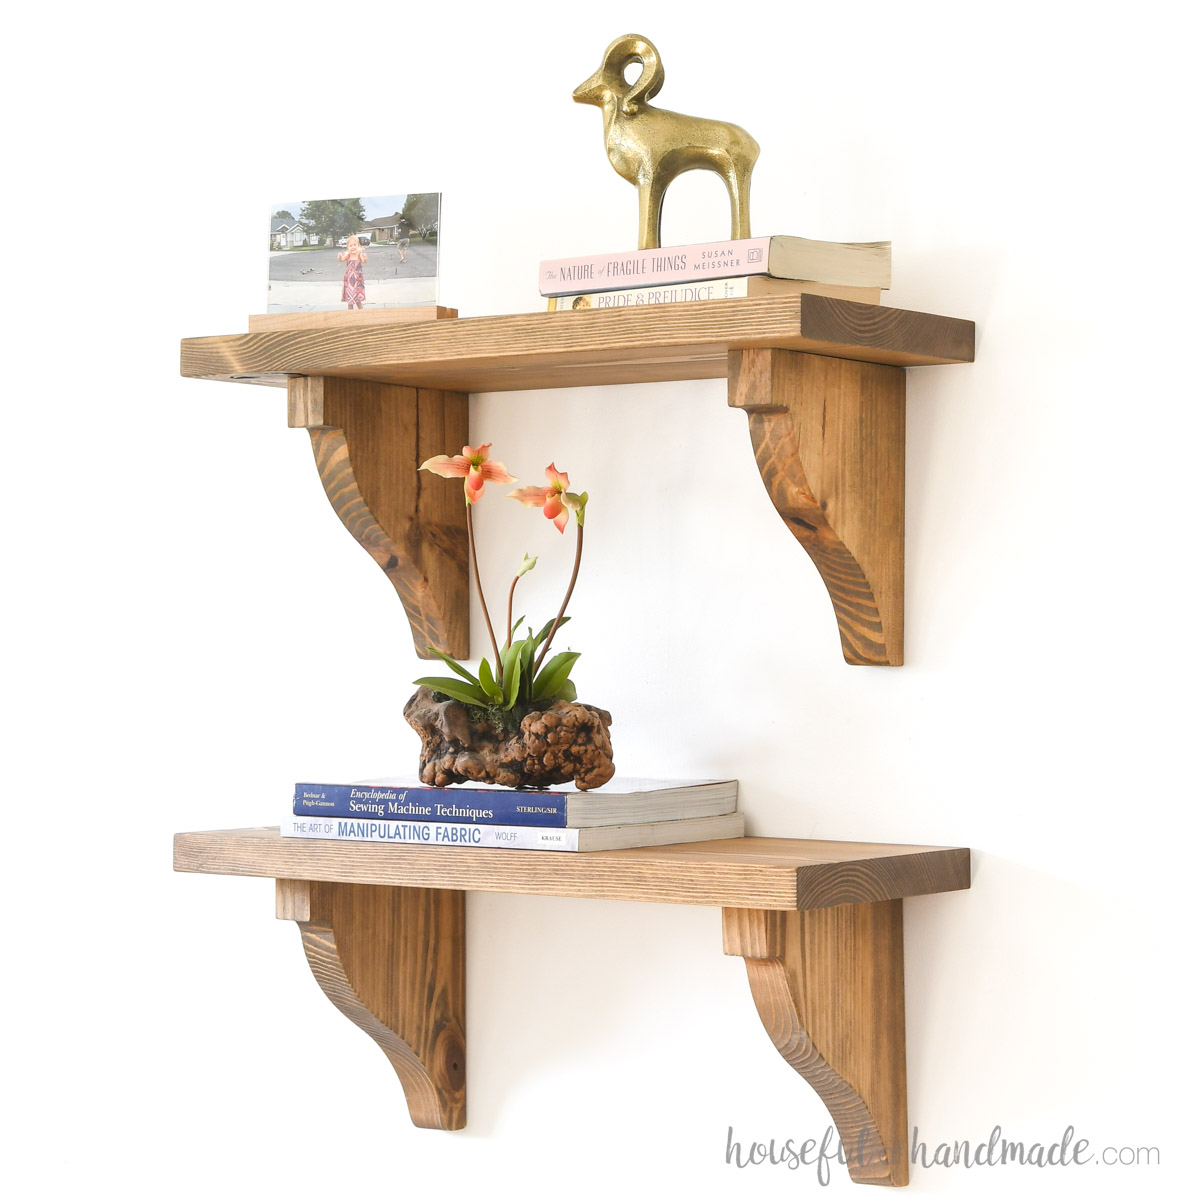
Do you find yourself with small cut off of larger boards? They are such an odd size and not useful for anything, right?
That is what I thought until I had the idea to turn them into shelf brackets. These wood corbels are easy to make and look amazing.
And now I can add simple shelves wherever I need them because I always seem to find myself with some extra cut off of lumber.
This post may contain affiliate links. As an Amazon Associate I earn from qualifying purchases. Click here to read my full disclosure policy.
How to Use Wood Shelf Brackets
If you are use to metal shelf brackets, you might be afraid to try wood brackets. How do you attach them to the wall? Are they as sturdy?
These wood corbels are easy to build and easy to use. Plus they are super strong because they are made from solid wood.
As long as you have a screw into the studs, you will be so happy with how sturdy your new shelves are and how easy they are to install!
All the instructions are below so you can build your own wood shelves too.

How to Build a Wood Corbel
Tools & Materials
Recommended Tools:
- Saw
- I used my table saw, but you could also use a miter saw or circular saw.
- Jig saw
- Drill
- Impact driver (optional, but I love not having to switch bits with the drill)
- Multi-mark measuring tool
- Sander
Supplies:
- Wood products
- (1) 2×8 board, 10″ long per set of brackets
- Keyhole hangers with screws
- 2″ long wood screws
Overall Dimensions
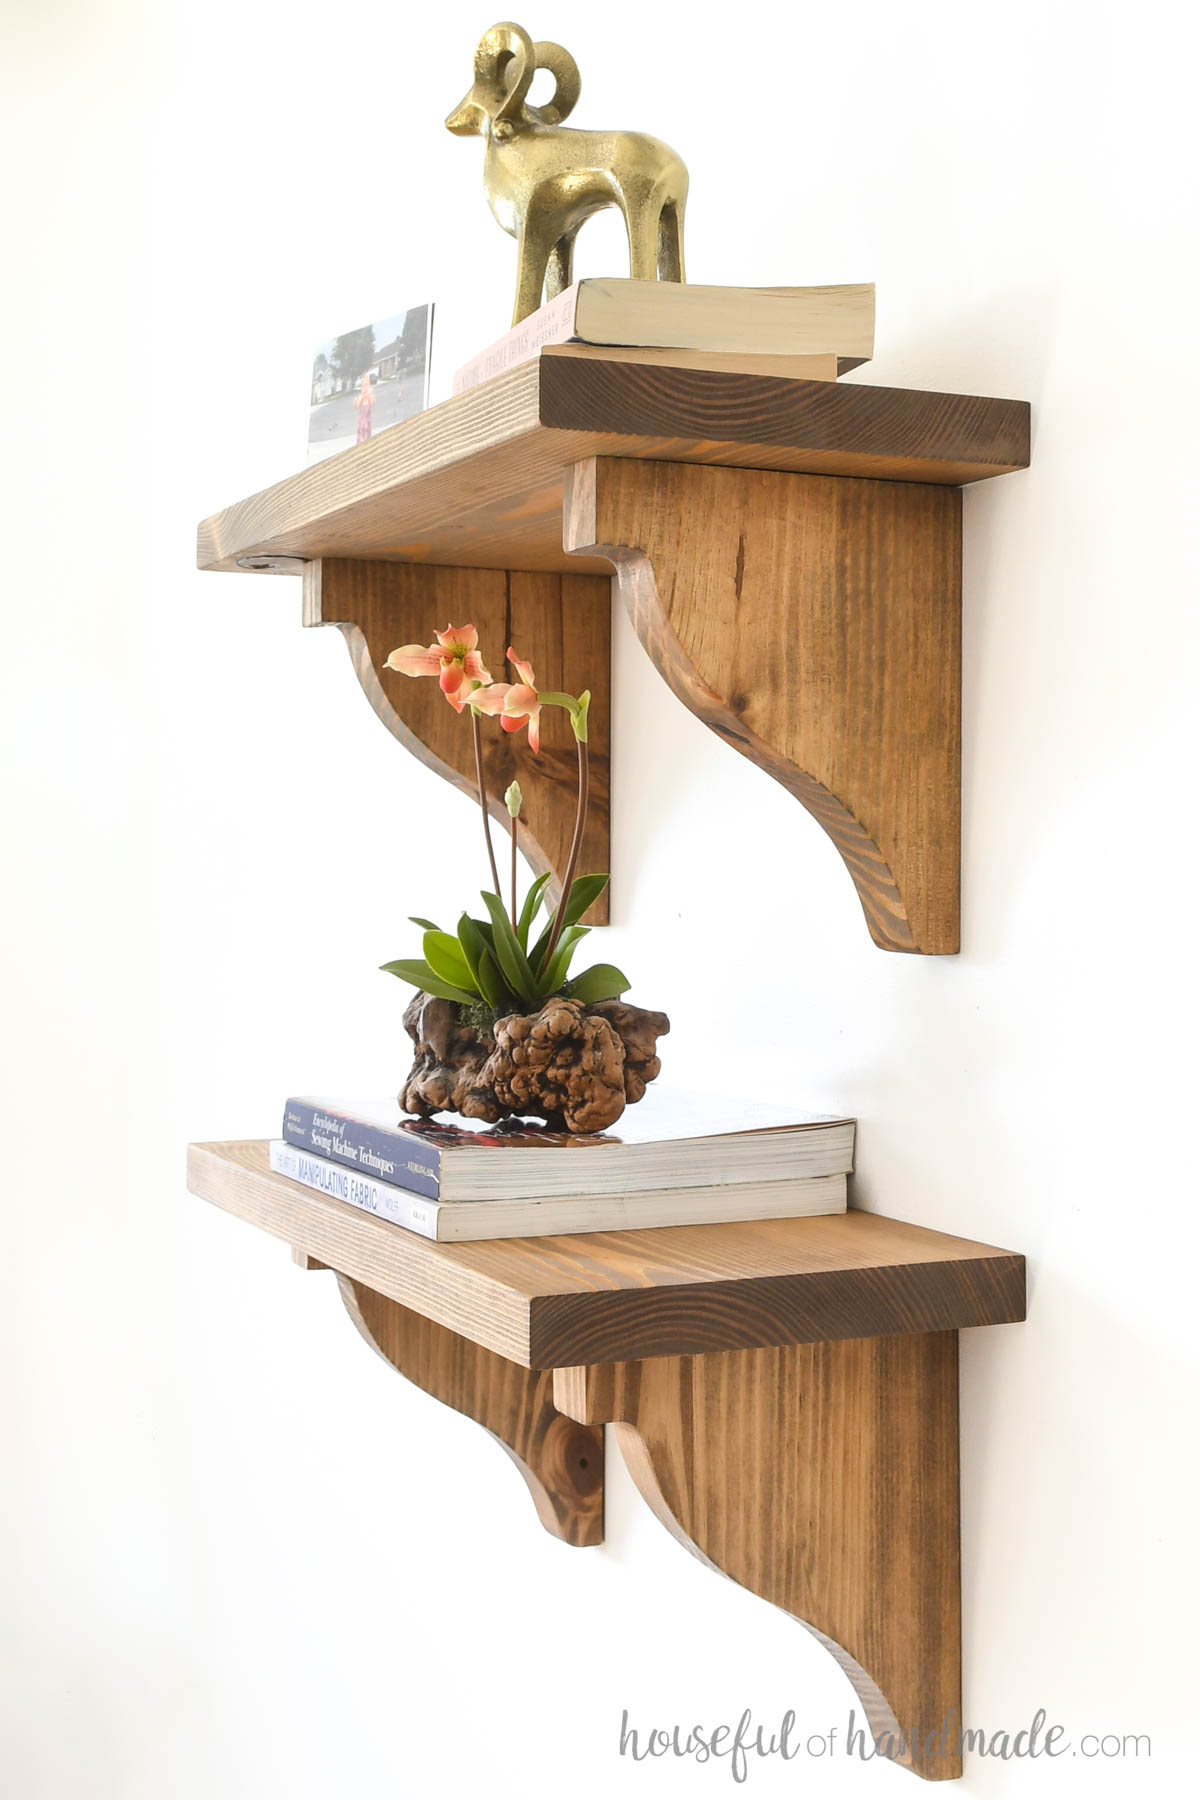
The shelf brackets I made are 7 1/4″ deep and can hold a shelf made from a 1×10 or 2×10 board (actual size is 9 1/4″ wide).
My shelf tops were also made from scraps and are 22″ long.
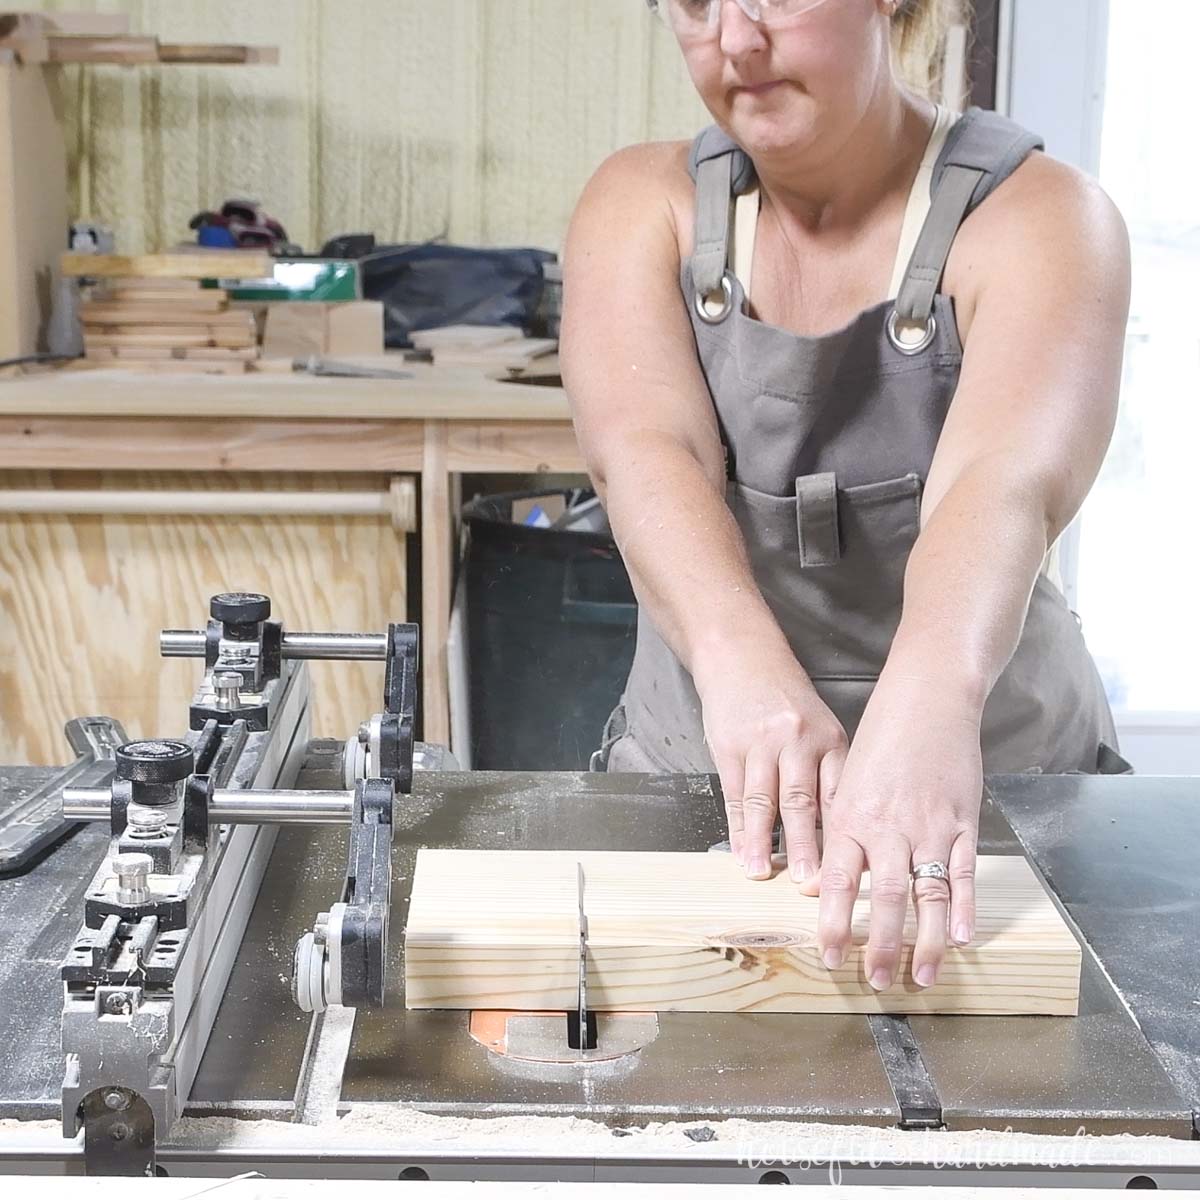
STEP 1- Cut boards to size
Since my scrap pieces were pretty rough and ugly, I gave them a quick pass through the planer to clean up both sides.
This is optional and a similar cleanup can be done with a sander with a course sandpaper.
Also, my scraps were wider than the 2×8 boards, so I ripped them to 7 1/4″ wide on my table saw. If you are starting with 2×8 boards you don’t have to do this.
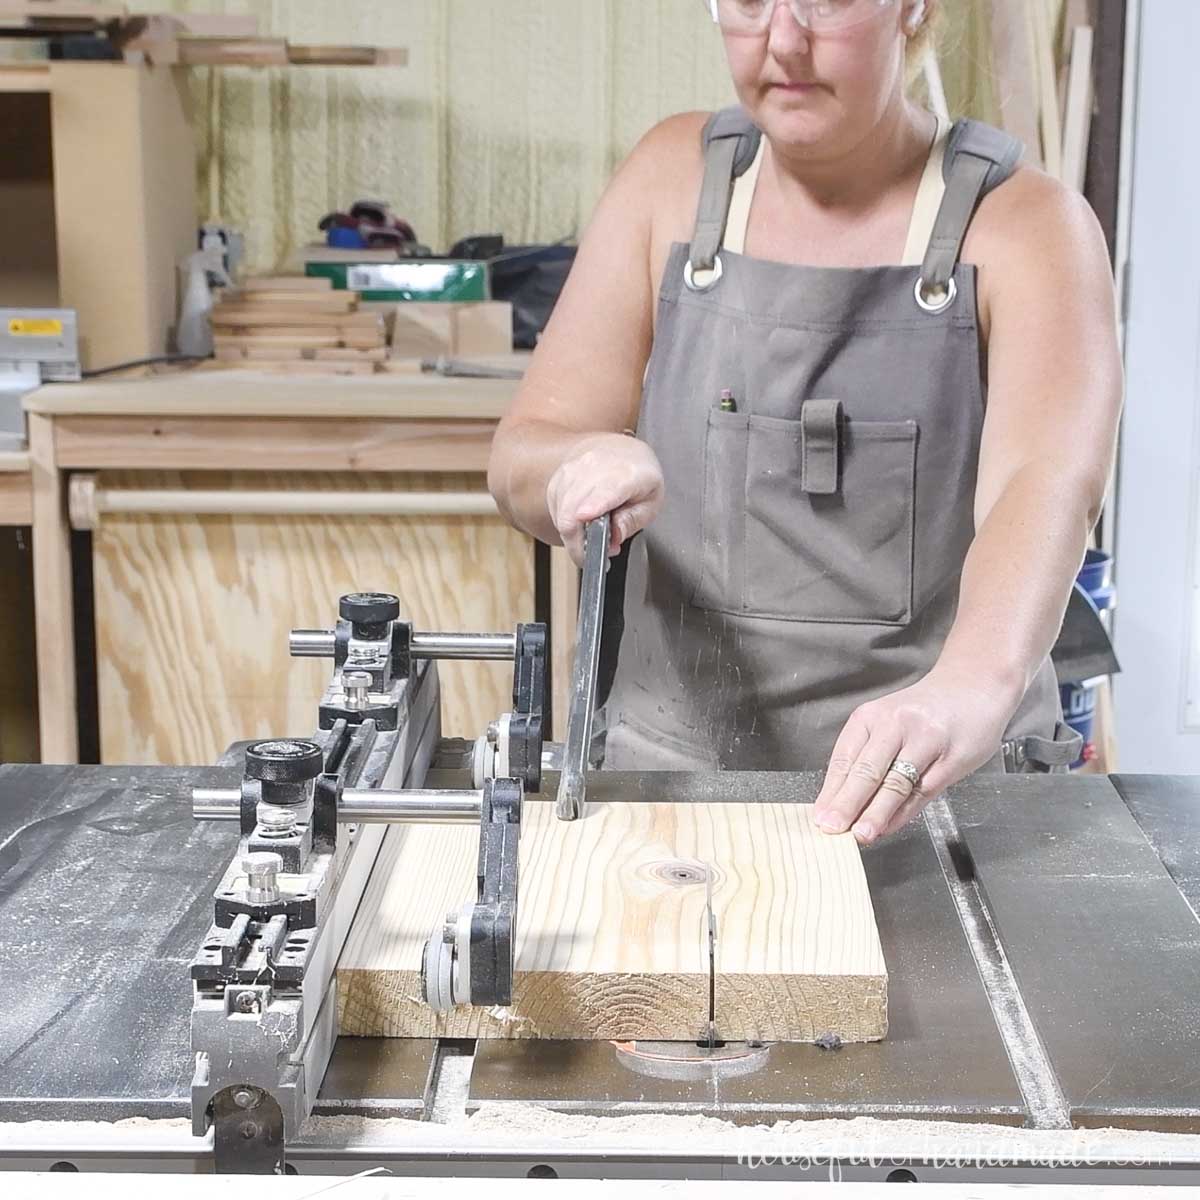
And finally I cross cut the boards to 10″ long. I used my table saw, but you can use any saw you have.
This left me with boards that were ~1 1/2″ thick and 7 1/4″ wide by 10″ long.
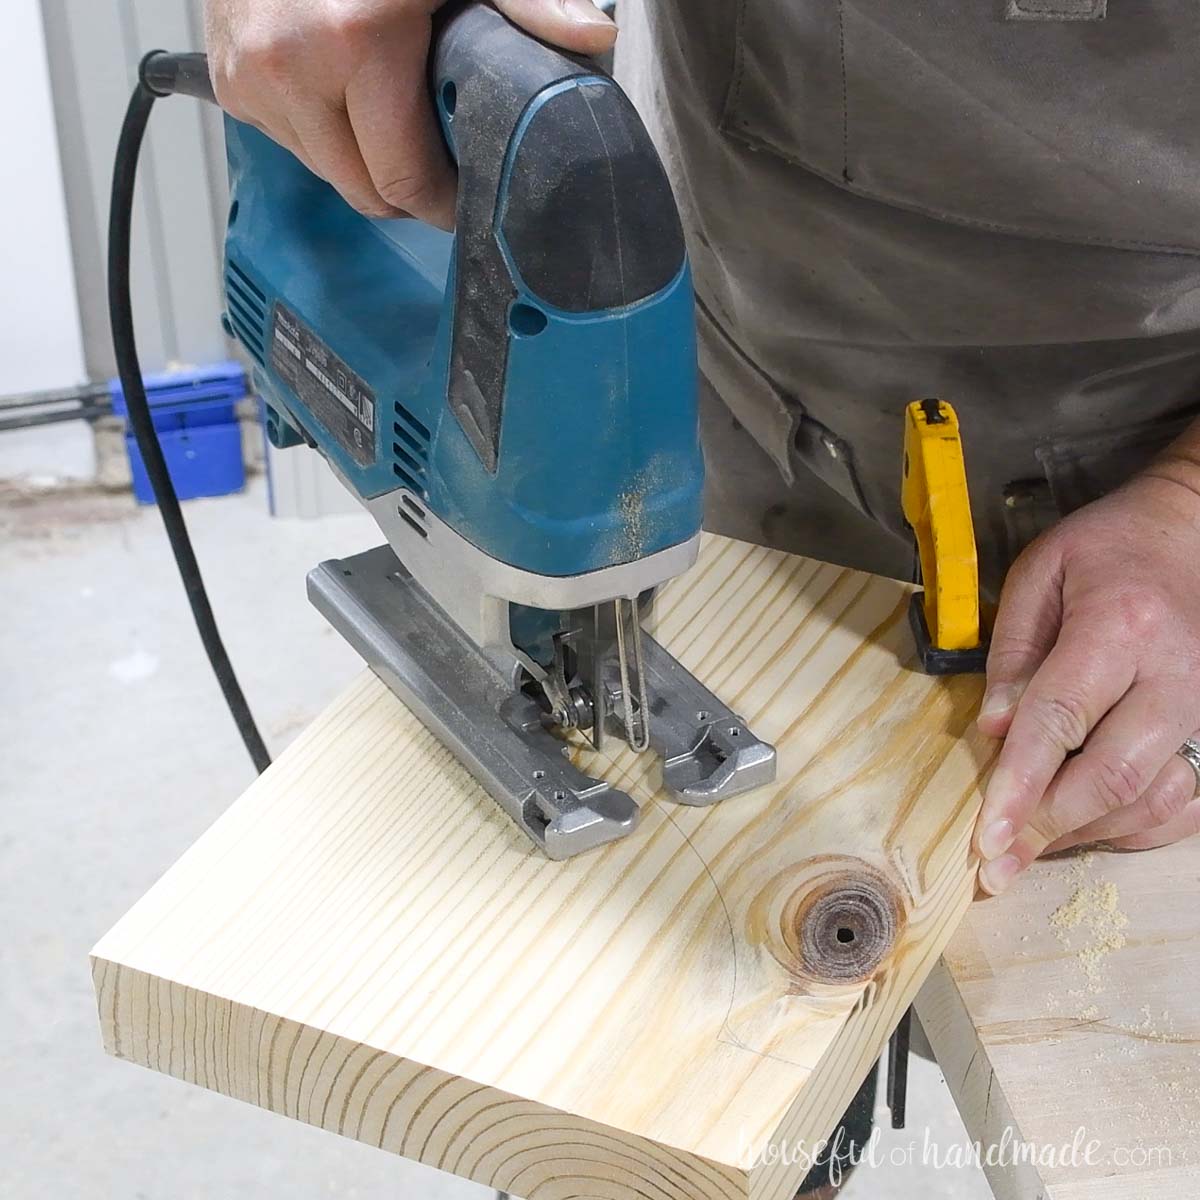
STEP 2- Cut board with jigsaw
Next I drew out a shelf bracket design that mirrored itself so I could cut out 2 pieces at once from one board.
I printed the design and cut it out. Then I traced it on the board so it was flush with one corner.
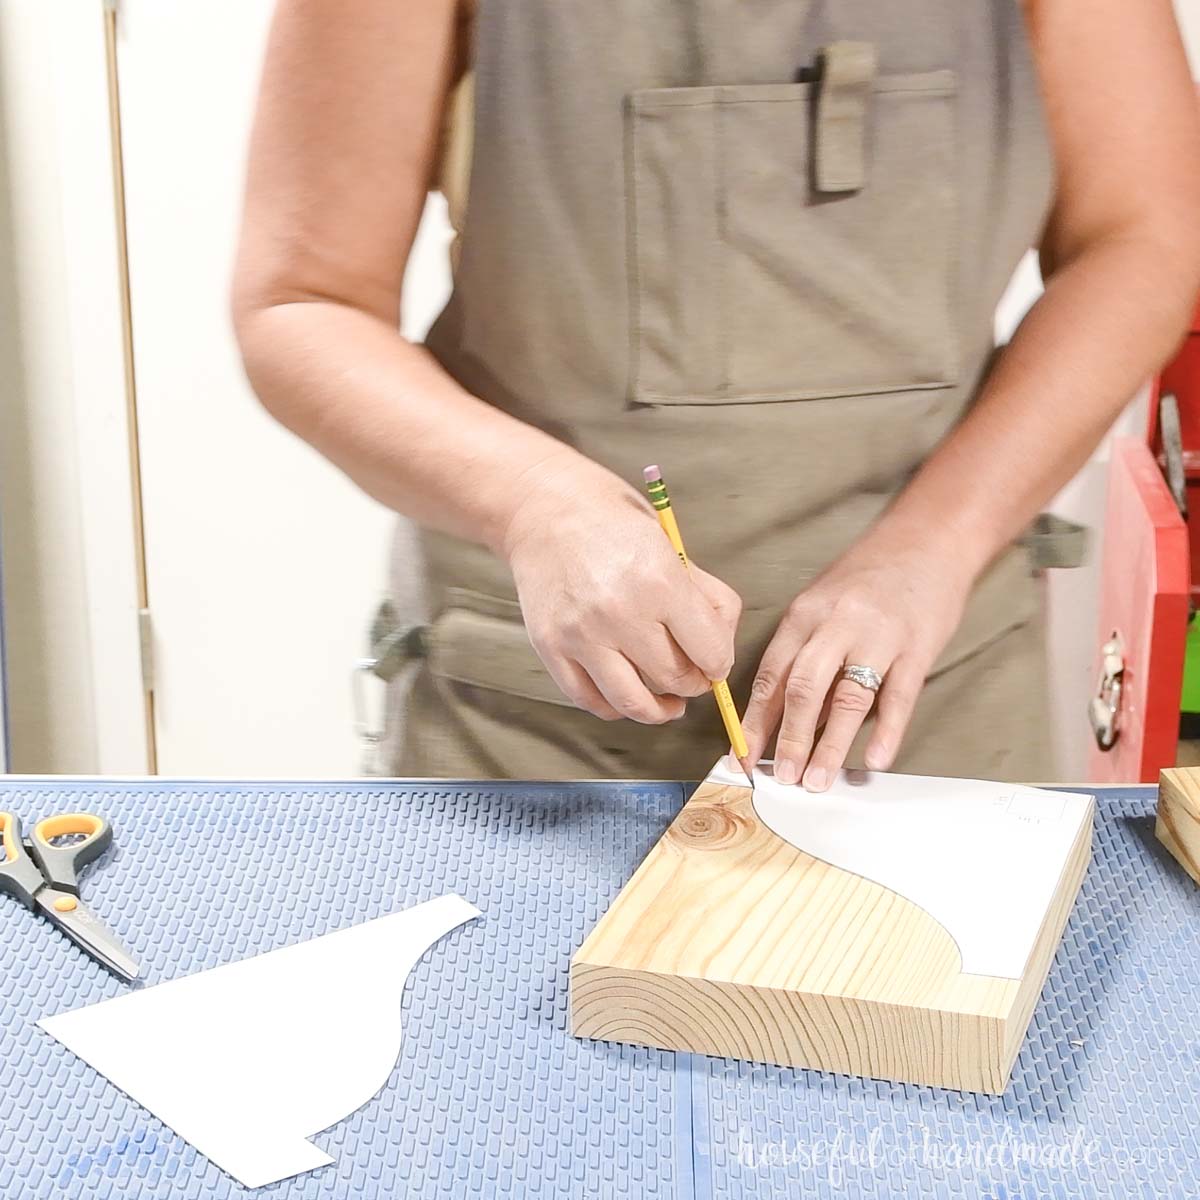
If you want to use my template for the shelf brackets, sign up to my newsletter below and then check your email for a link to download the PDF template.
Using my jigsaw with a scroll/detail blade, I slowly and carefully cut down my line.
Typically when you cut out something you want the line on the side of the blade so the measurement is accurate.
But for this project, I cut it so the blade was centered on the line so the pieces were identical.
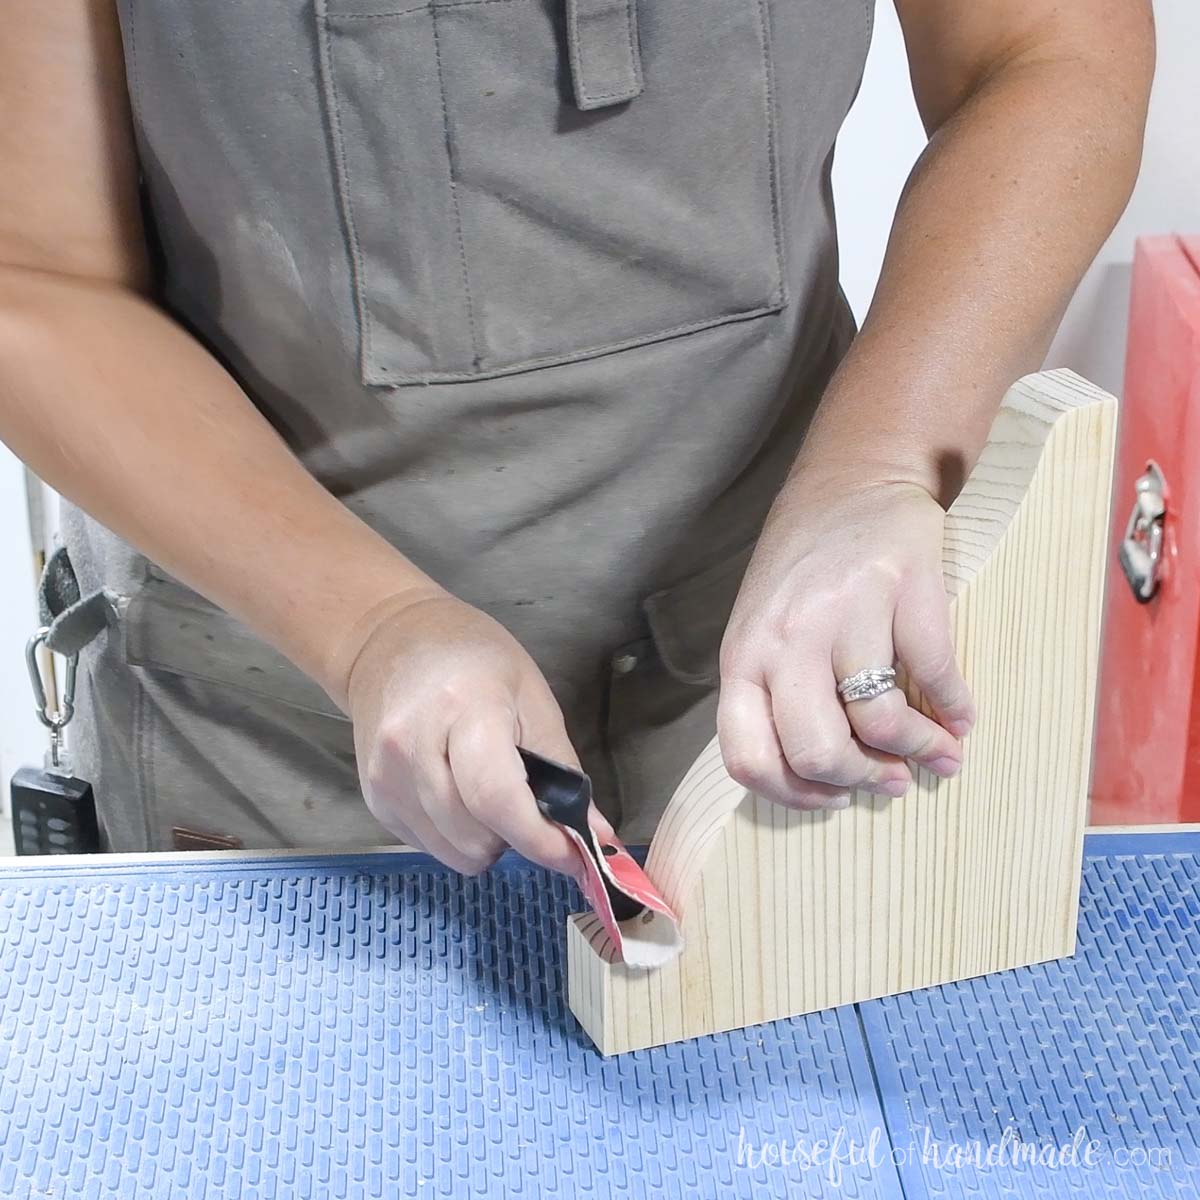
After cutting the piece into 2, sand the corbels.
I had to hand sand the detailed edges, but these contour sanding grips made it easy to get into the curves.
STEP 3- Add brackets to hang
I used these metal keyhole brackets to hang my corbels on the wall.
If you have a router, you could add a keyhole with a keyhole bit like I did for these scrap wood curtain rod brackets.
You can just attach them to the back of the bracket, but it will cause the bracket to stick out from the edge slightly.
So I inset them into the back. I used a forstener bit the same width as the bracket to remove most of the material where I wanted it.
Then used a chisel to clean up the edges.
EXPERT TIP:
Clamp the two corbels together to create a level back for adding the brackets to.
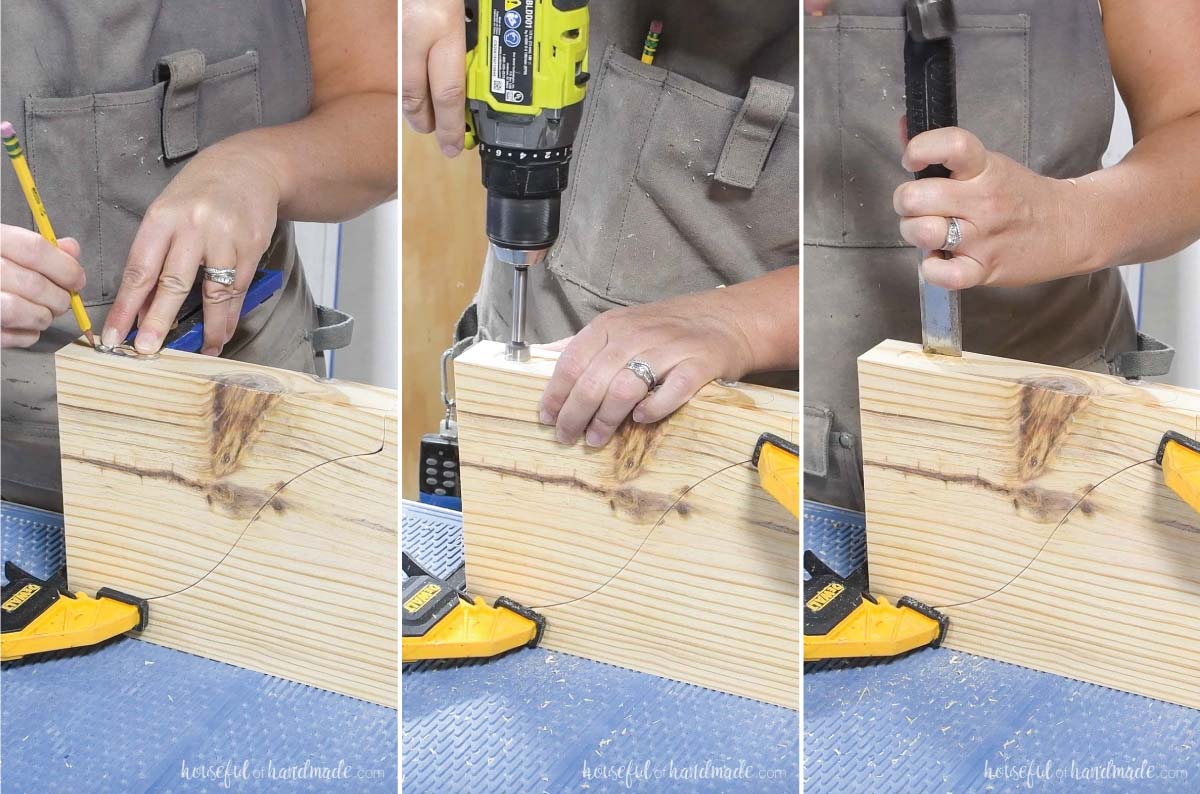
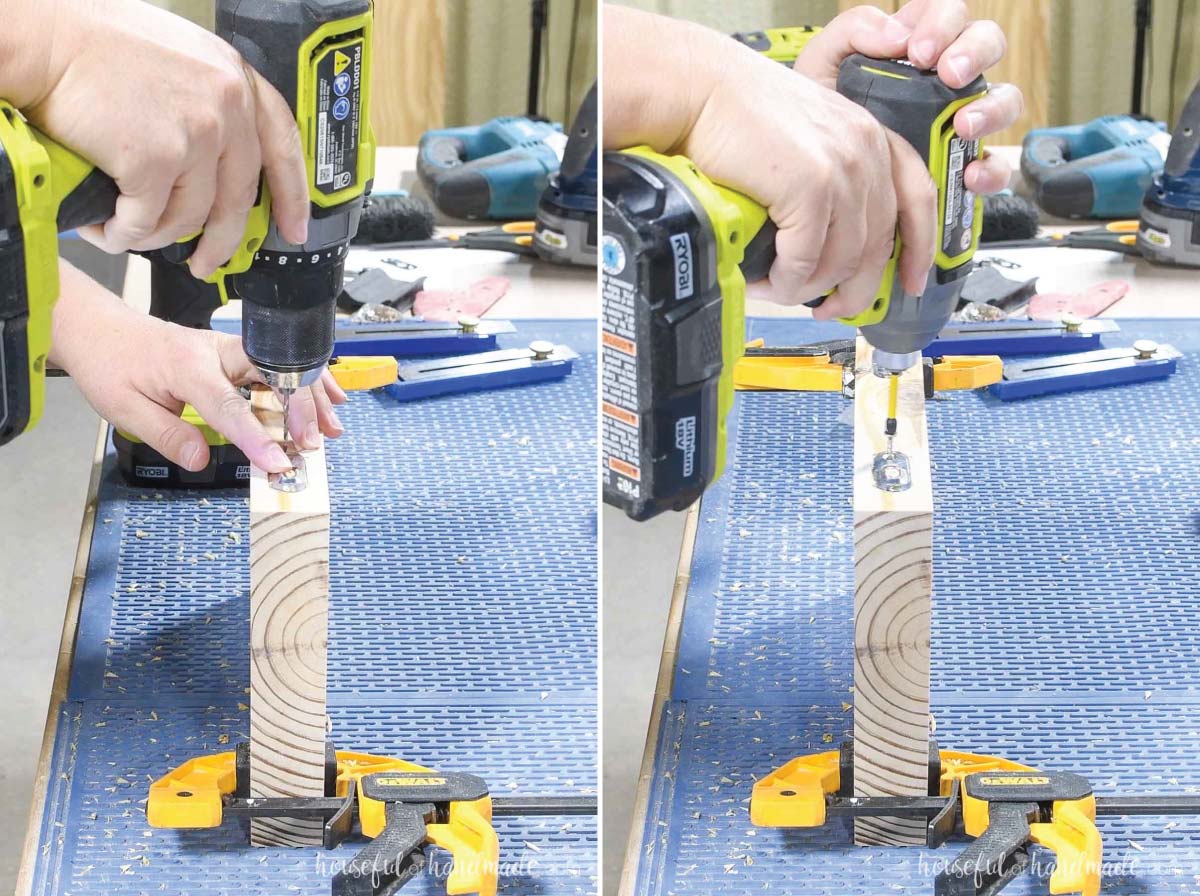
Once I had carved out an area for the bracket, I pre-drilled holes for the screws.
Then attached 2 brackets to the back of each corbel with 1″ long wood screws. You could use longer ones if you have them.
STEP 4- Finish and hang
Stain/seal/paint your new wood shelf brackets.
I used a mixture of stains to get the weathered look I wanted. I started with a coat of Minwax Weathered Oak, then added a layer of Minwax Early American on top.

Hang the corbel shelf brackets on the wall so they are in a wall stud.
Place a piece of painters tape on the back of the bracket and poke a hole where the screws should go. Then remove the tape and place it on the wall.
Drive in 2″ long wood screws into the wall on your marks. But leave them proud just slightly so the hanger will slide over it.
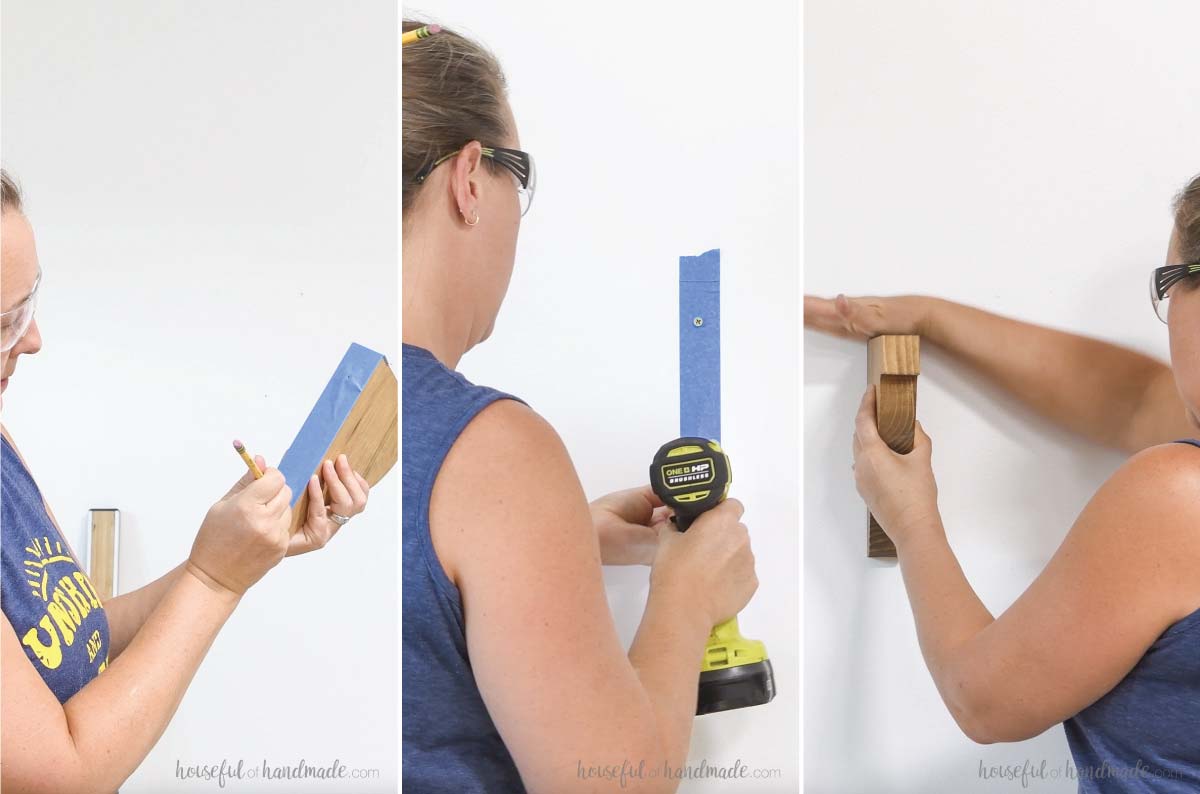
I recommend adding brackets every 16-24″.
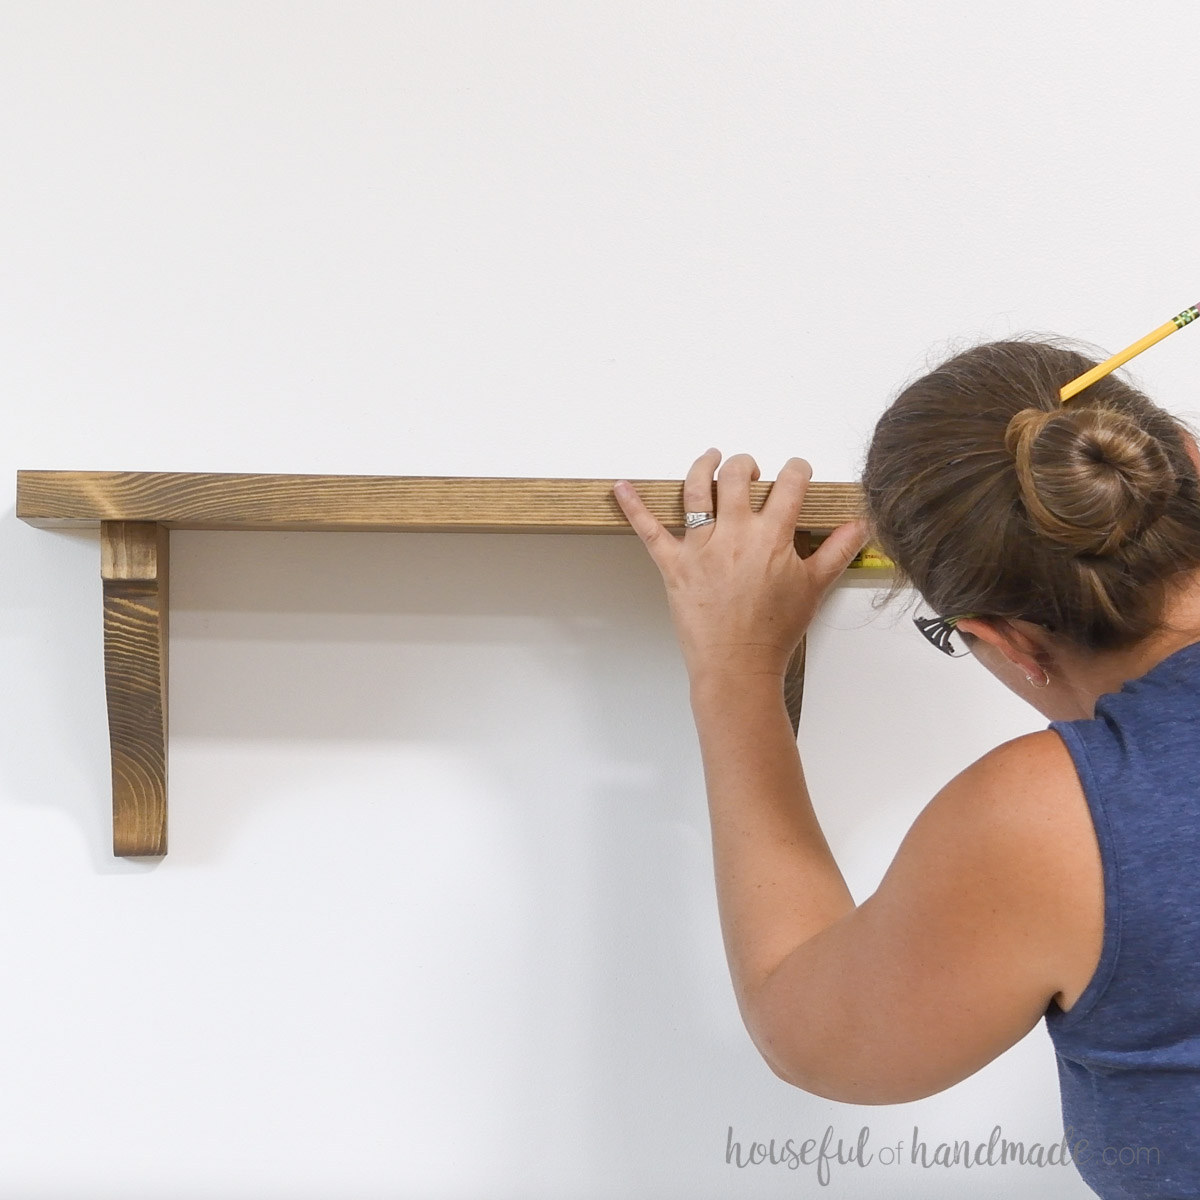
Then place a board on top for you shelf. Attach the board to the corbel with screws or a couple nails to keep if from moving around.
You did it!
Now you have some beautiful new shelves with your own DIY corbels.
I think I’ll use up all my scraps to add shelves to every free wall cause it’s so fast and easy!
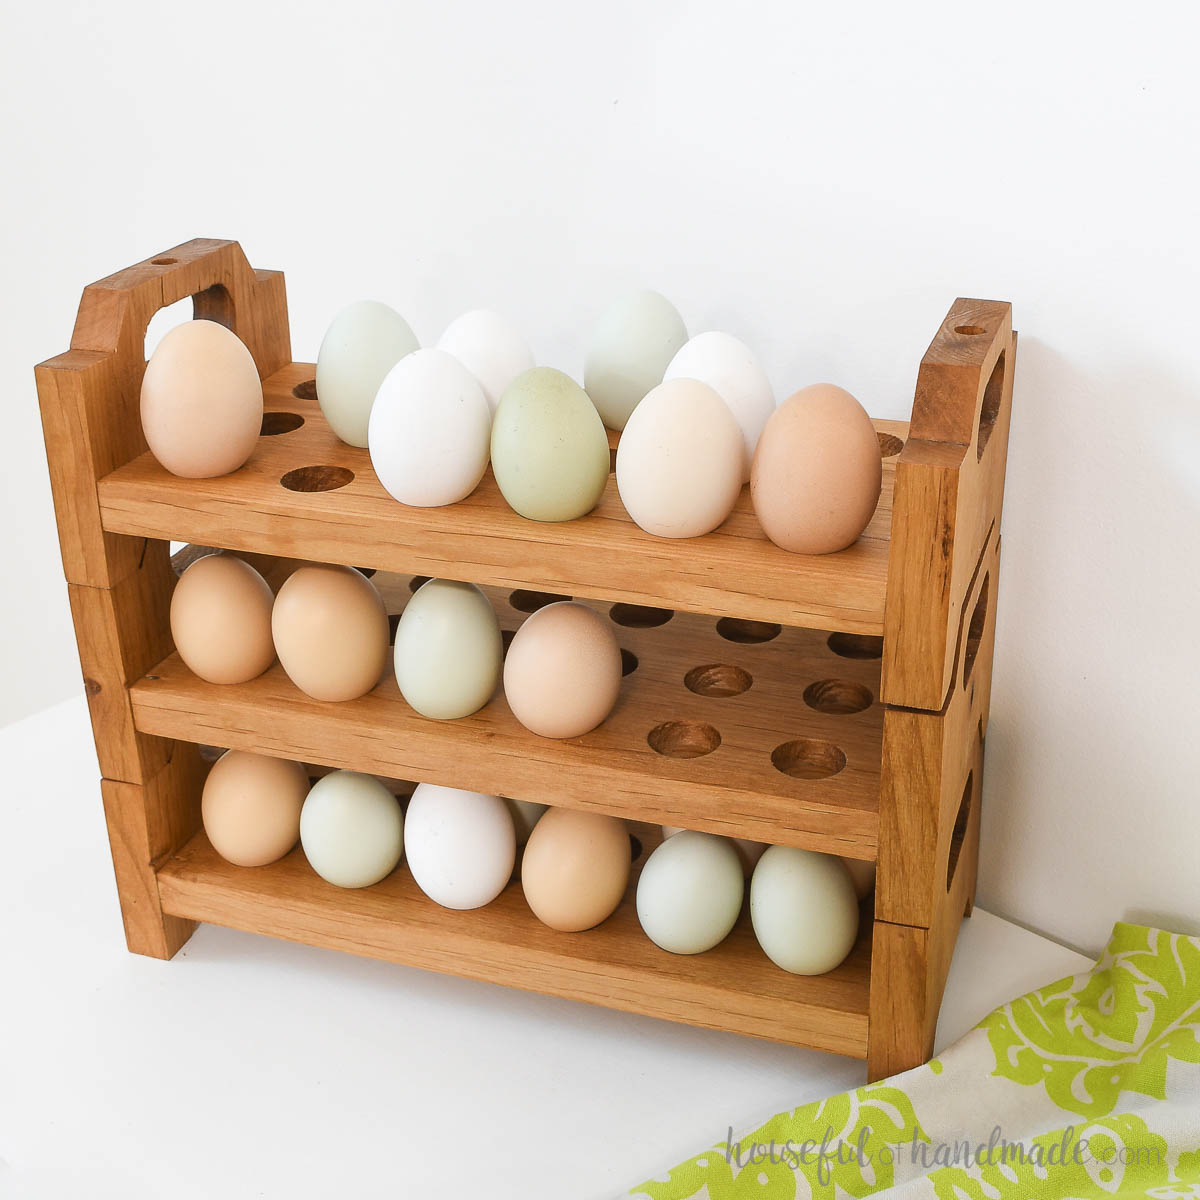
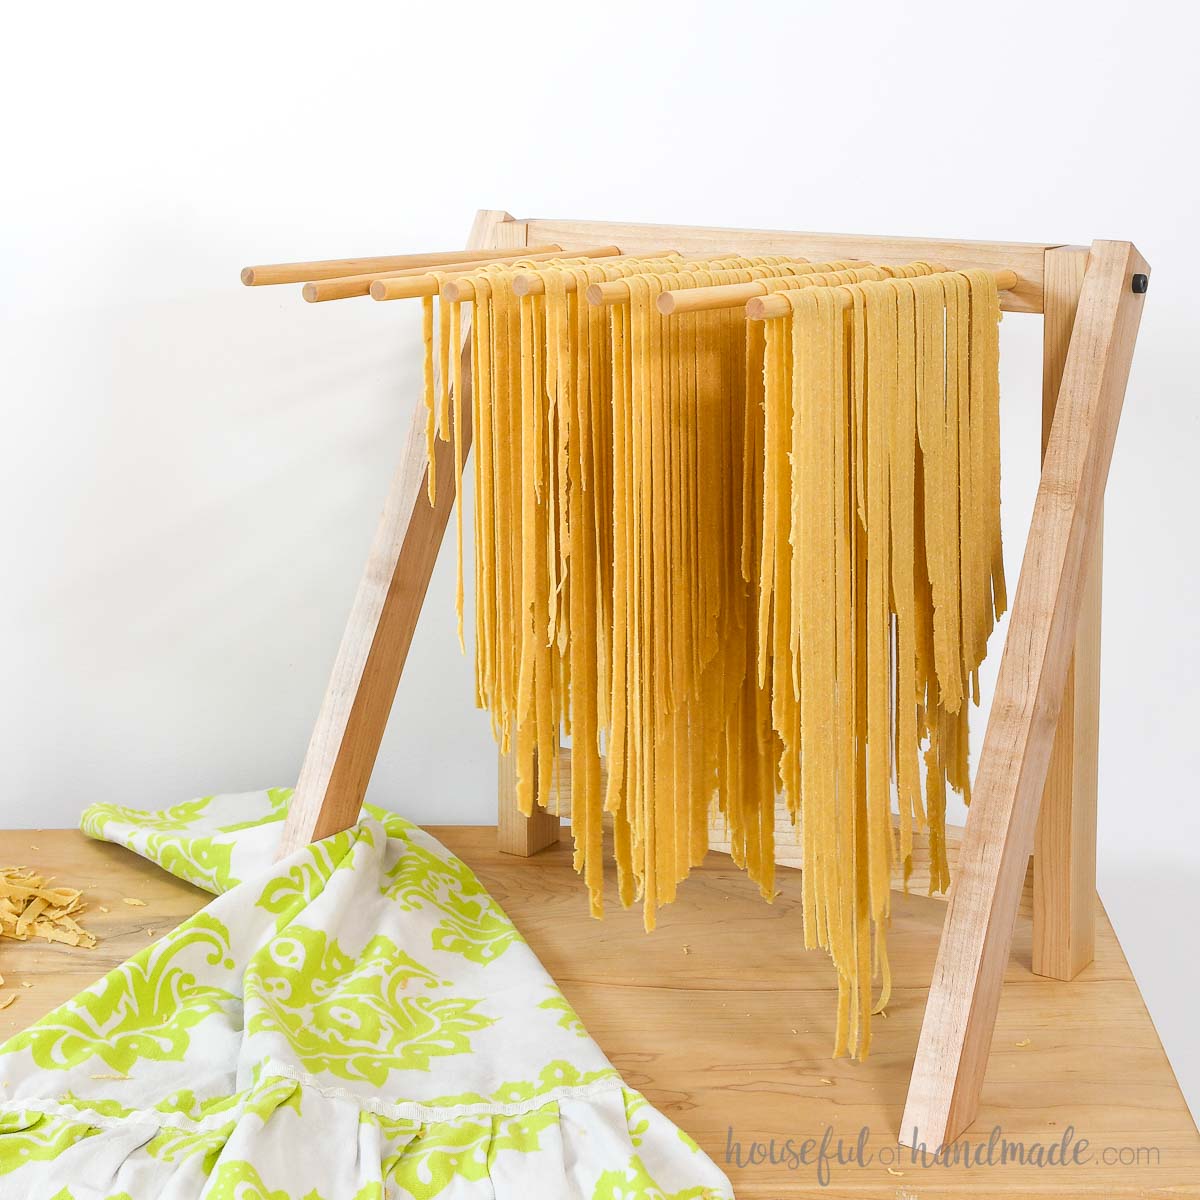
Simple Scrap Wood Projects
This is the last Scrap Wood Summer project for the year! I have had fun being creative and using up the scraps that were piling up.
Check out all the other scrap wood projects below from the month so you can use up all those scraps of wood!


Happy building!
