After building my favorite modern Adirondack chairs I was left with a bunch of 9-12″ cut offs of 1×4 cedar.
I couldn’t imagine throwing them away because cedar can get pricey. When I found them while looking through my scrap pile, I knew it was time to put them to use.
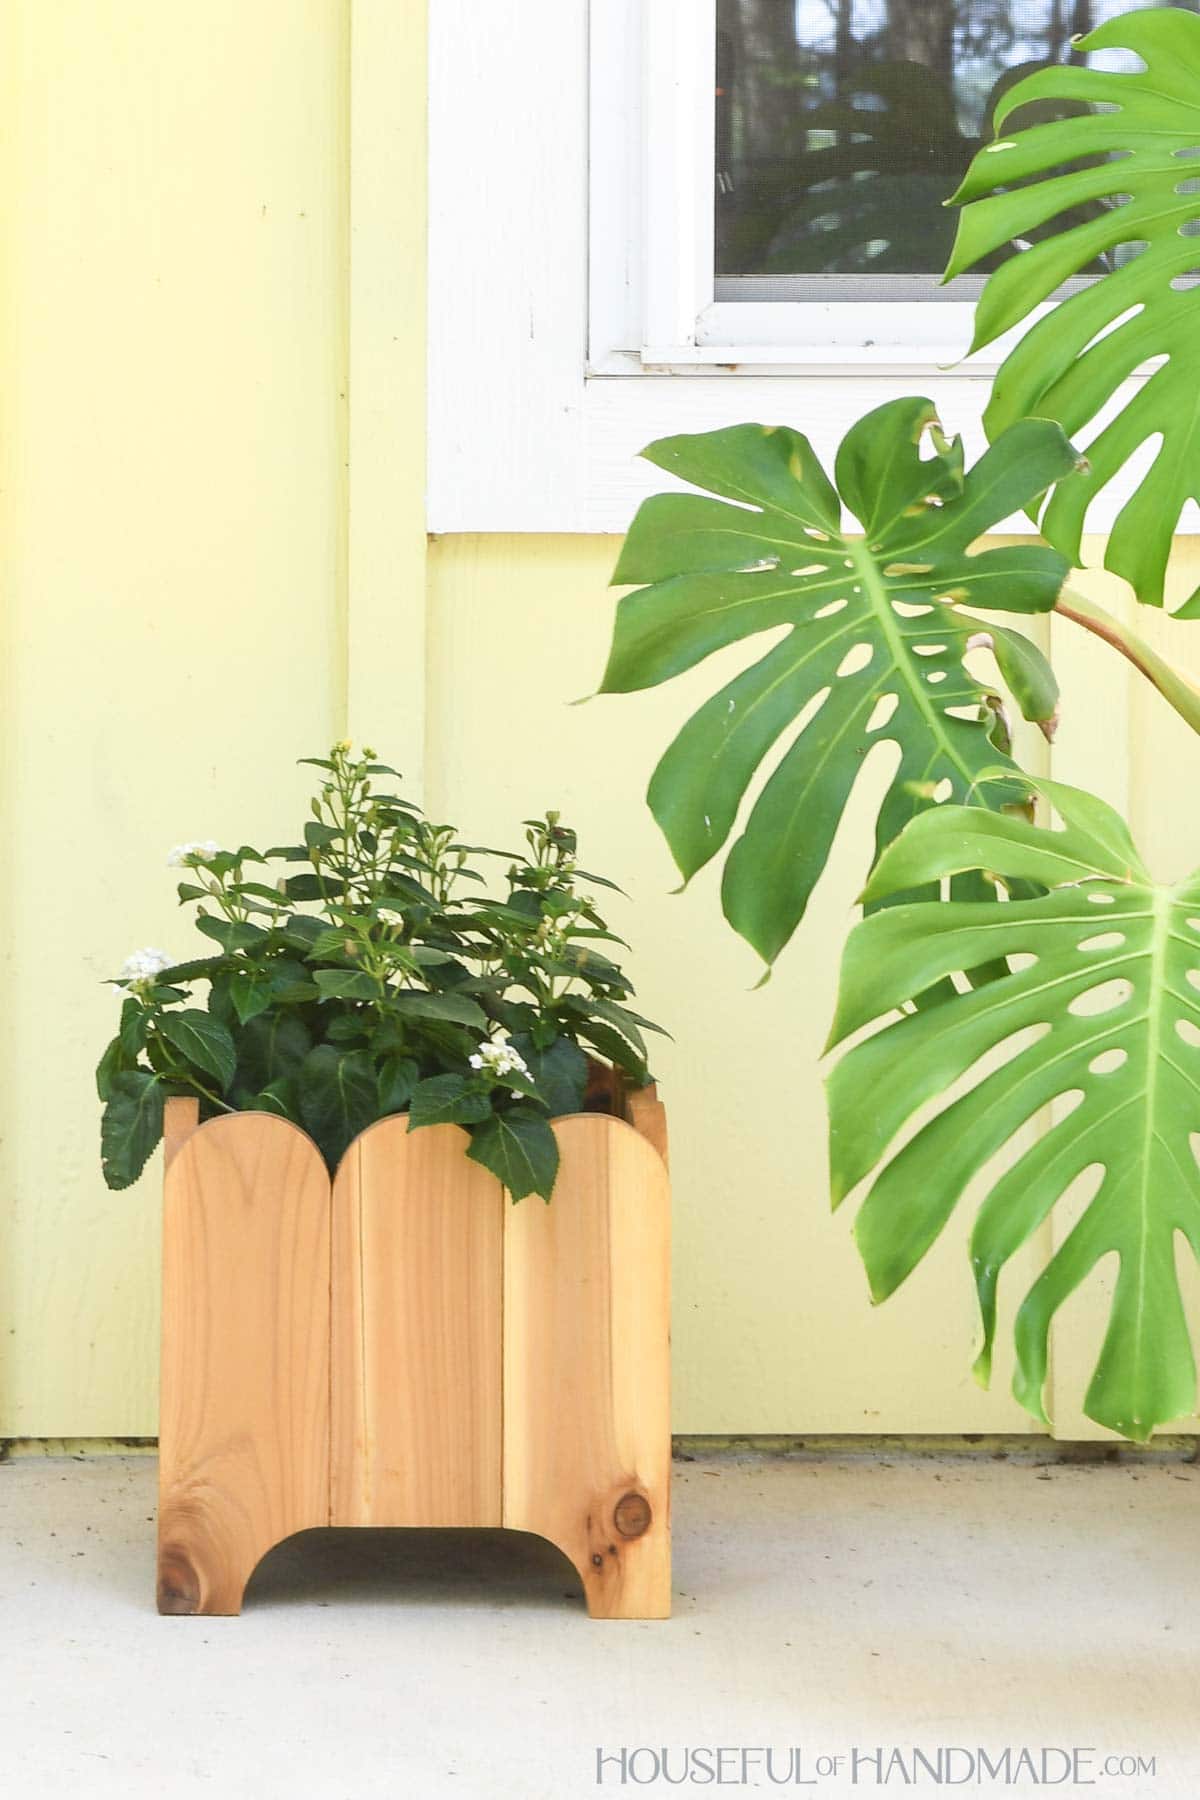
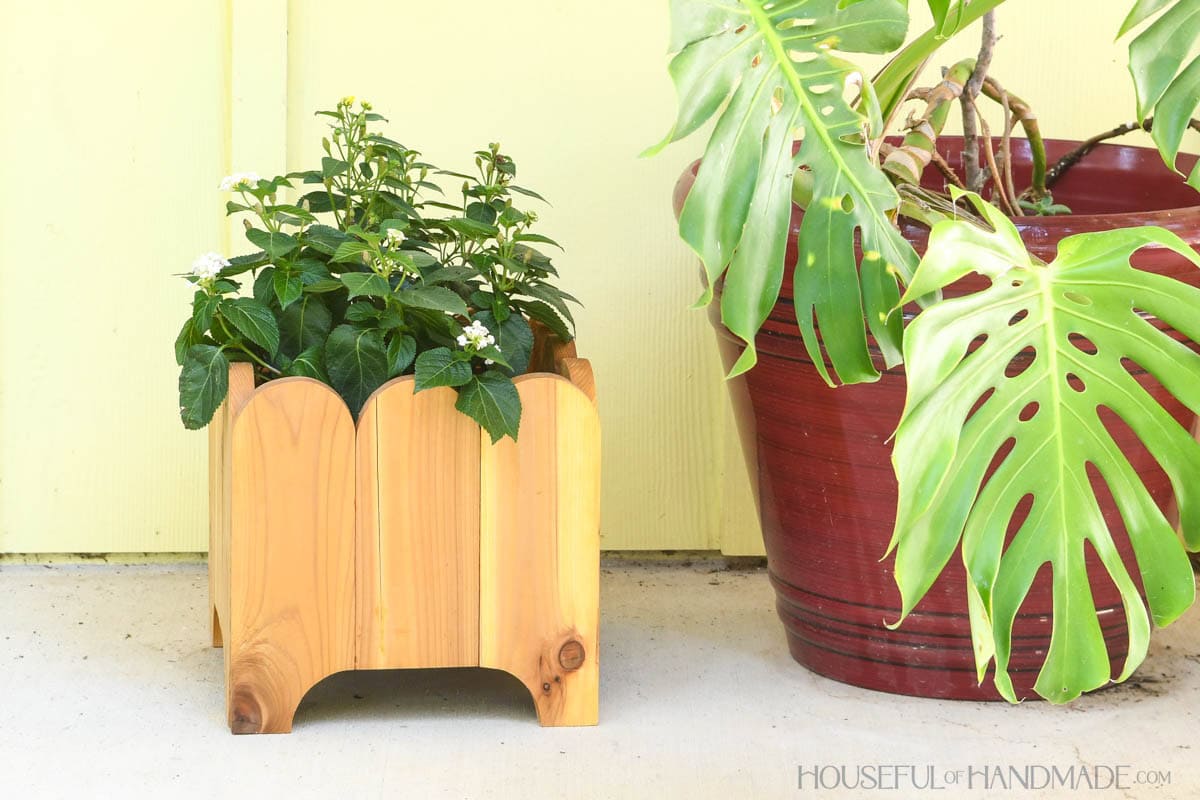
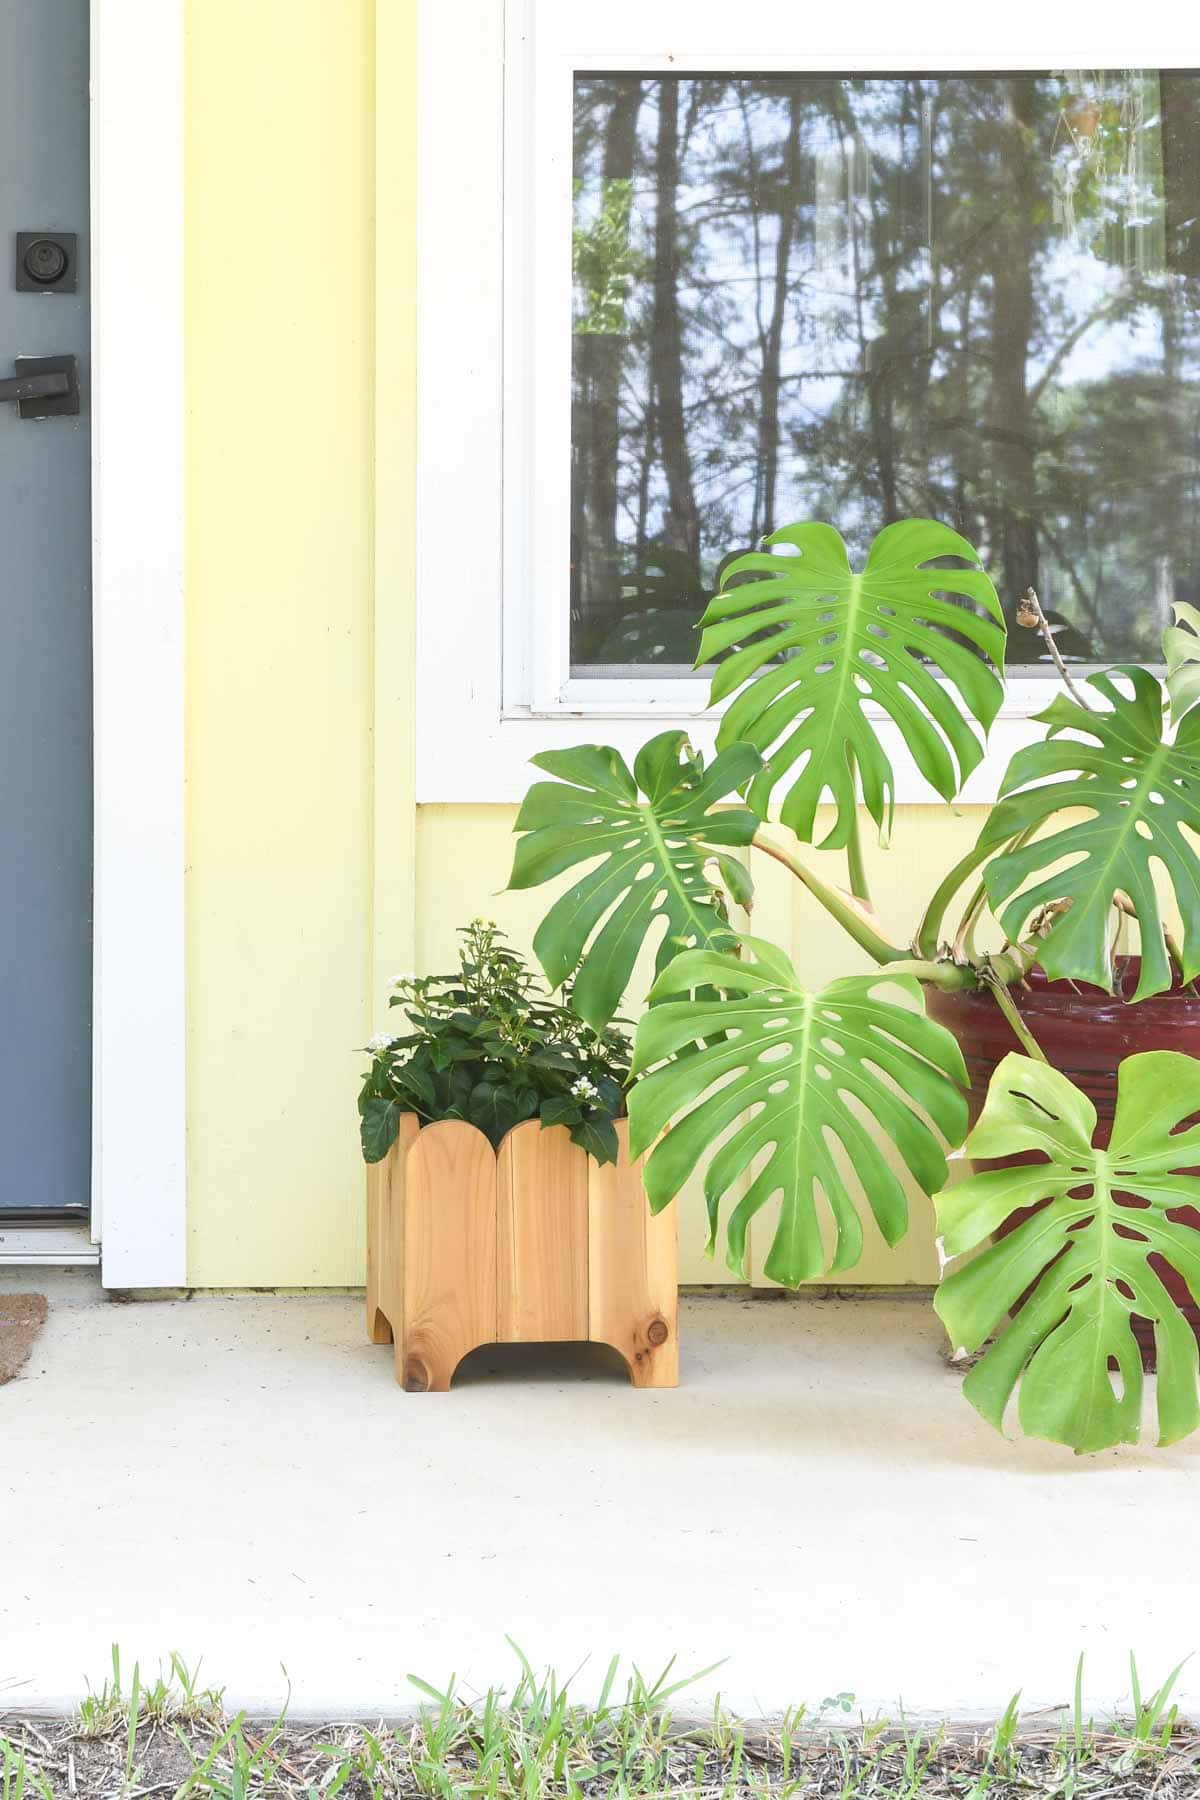
To use them up, I designed this fun scalloped planter box. I believe you can never have enough plants, indoors or out, so a scrap wood planter just made sense!
This post may contain affiliate links. As an Amazon Associate I earn from qualifying purchases. Click here to read my full disclosure policy.
Scrap Wood Planter
You can build this scalloped wood planter out of any wood you want. I used cedar because I love the warm color and had the scraps available.
If you are using your planter outdoors or plan to plant directly inside it, I recommend a wood that can hold up to moisture like cedar or redwood.
Or make sure to seal the wood to protect it from water.

But you can also use this beautiful planter box without filling it with soil.
Instead, place the plant in its nursery pot directly inside the scalloped planter. The wood frame will hide the basic pot beautifully.
And since you will not be directly exposing the wood to moisture (there could be some splashing though), you can feel free to use up any scraps you have laying around!
I built this project as part of Scrap Wood summer. Make sure to check out all the other scrap wood projects shared below and come back every Tuesday in August for more.
How to Build a Wood Planter Box
Tools & Materials
Recommended Tools:
- Miter saw
- I recently upgraded to this sliding miter saw (watch for it to go on sale), but previously used this inexpensive miter saw that I love.
- Jig saw
- Pocket hole jig
- Brad nailer
- Drill
- Impact driver (optional, but I love not having to switch bits with the drill)
- 90 degree drill adapter
- Sander
Supplies:
- Wood products
- (1) 1×4 board, 8′ long
- (1) 1×4 board, 3′ long
- (1) 1×1 board, 4′ long
- 1 1/4″ brad nails
- 1 1/4″ exterior pocket hole screws
- Exterior wood glue
- 3/4″ wood screws
- 3/8″ flat washers
- 1/2″ hardware cloth, 8 1/2″ x 10″ piece
- Wood sealer or paint
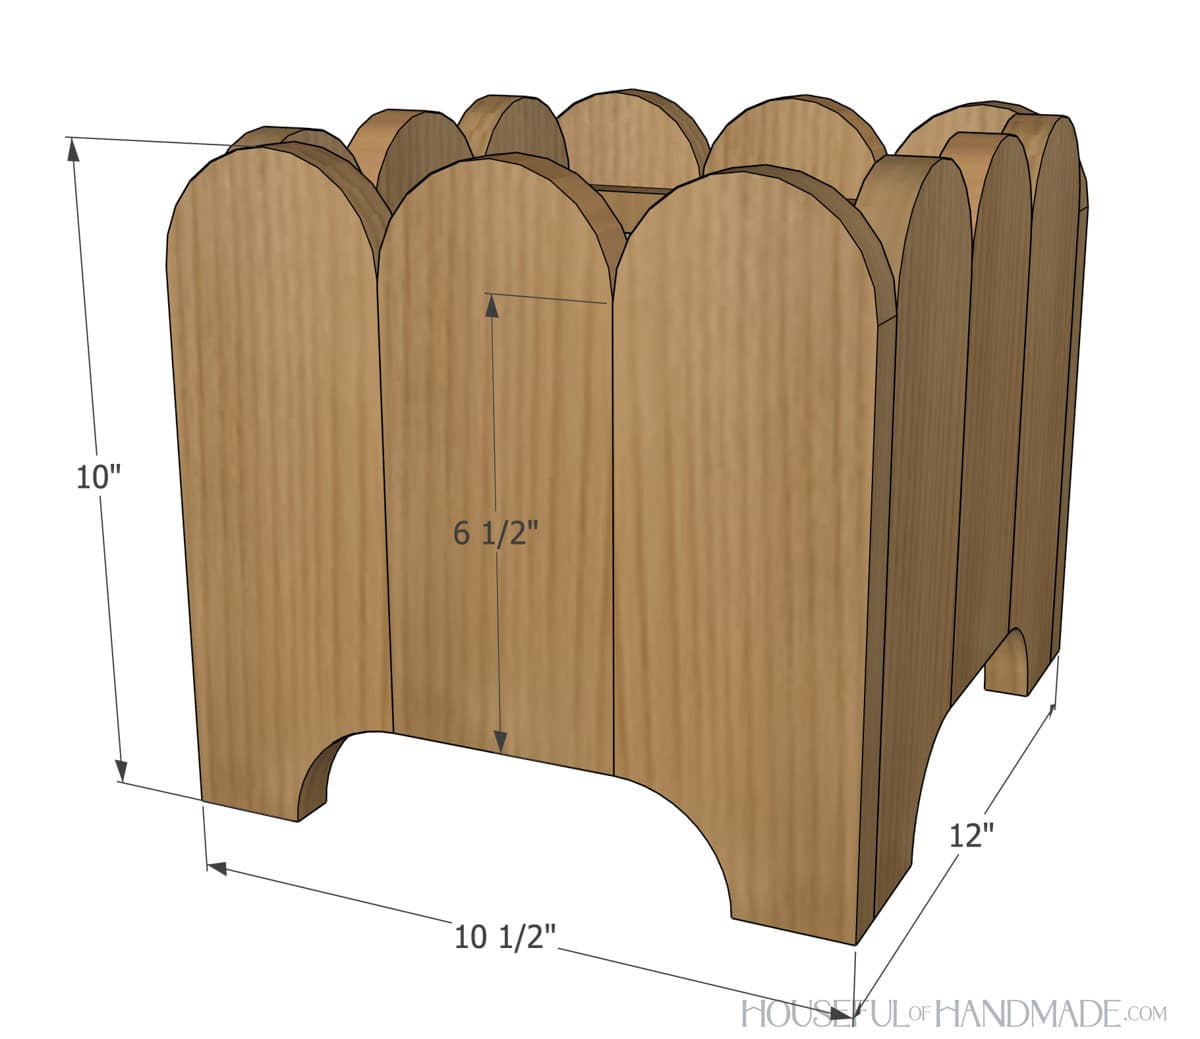
Overall Dimensions
The finished planter is 10 1/2″ wide by 12″ deep. It is 10″ tall with an 6 1/2″ deep planting area.
Cut List
Cut out the pieces according to the easy-to-read table in the PDF plans.

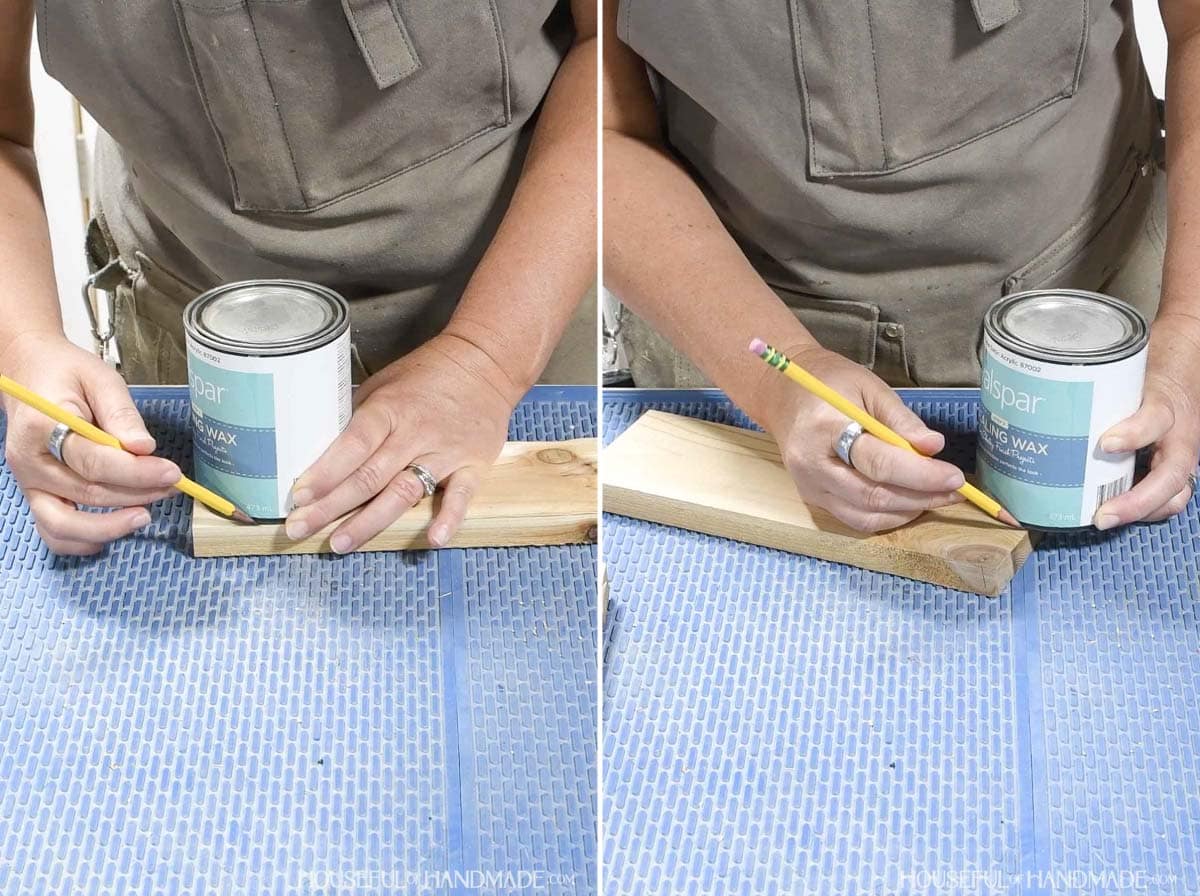
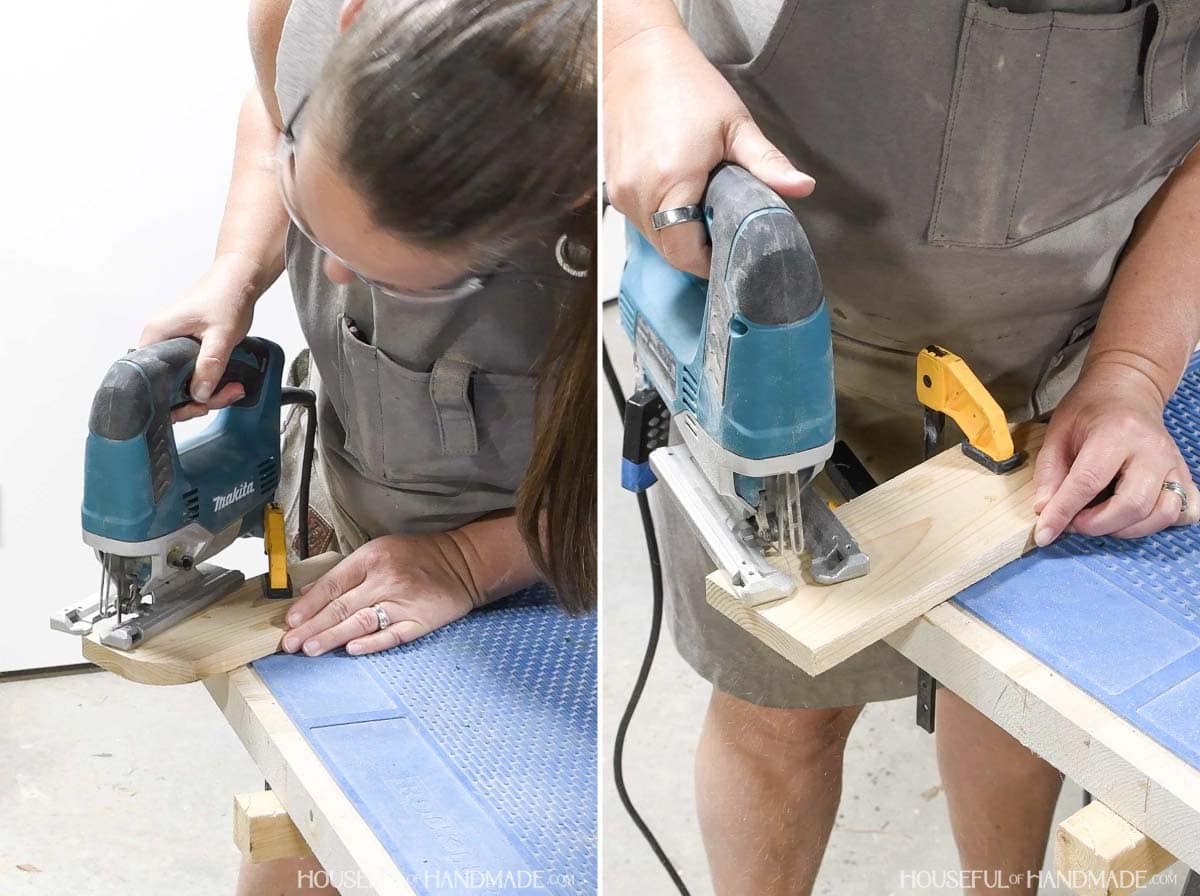
STEP 1- Shape the boards
On all the edge pieces, measure and mark the curve for the legs. And on all the edge and center pieces, draw an arch on the top of the boards.
I found a 16 oz paint can was the perfect size to trace to draw the curves on the boards.
EXPERT TIP:
Make sure you have mirrored sets of the edge pieces. My cedar 1x4s had a smooth and rough side so I made sure to curve the right side of half of the pieces and the left side on the other half.
Cut the curves out with a jig saw.
STEP 2- Build the sides
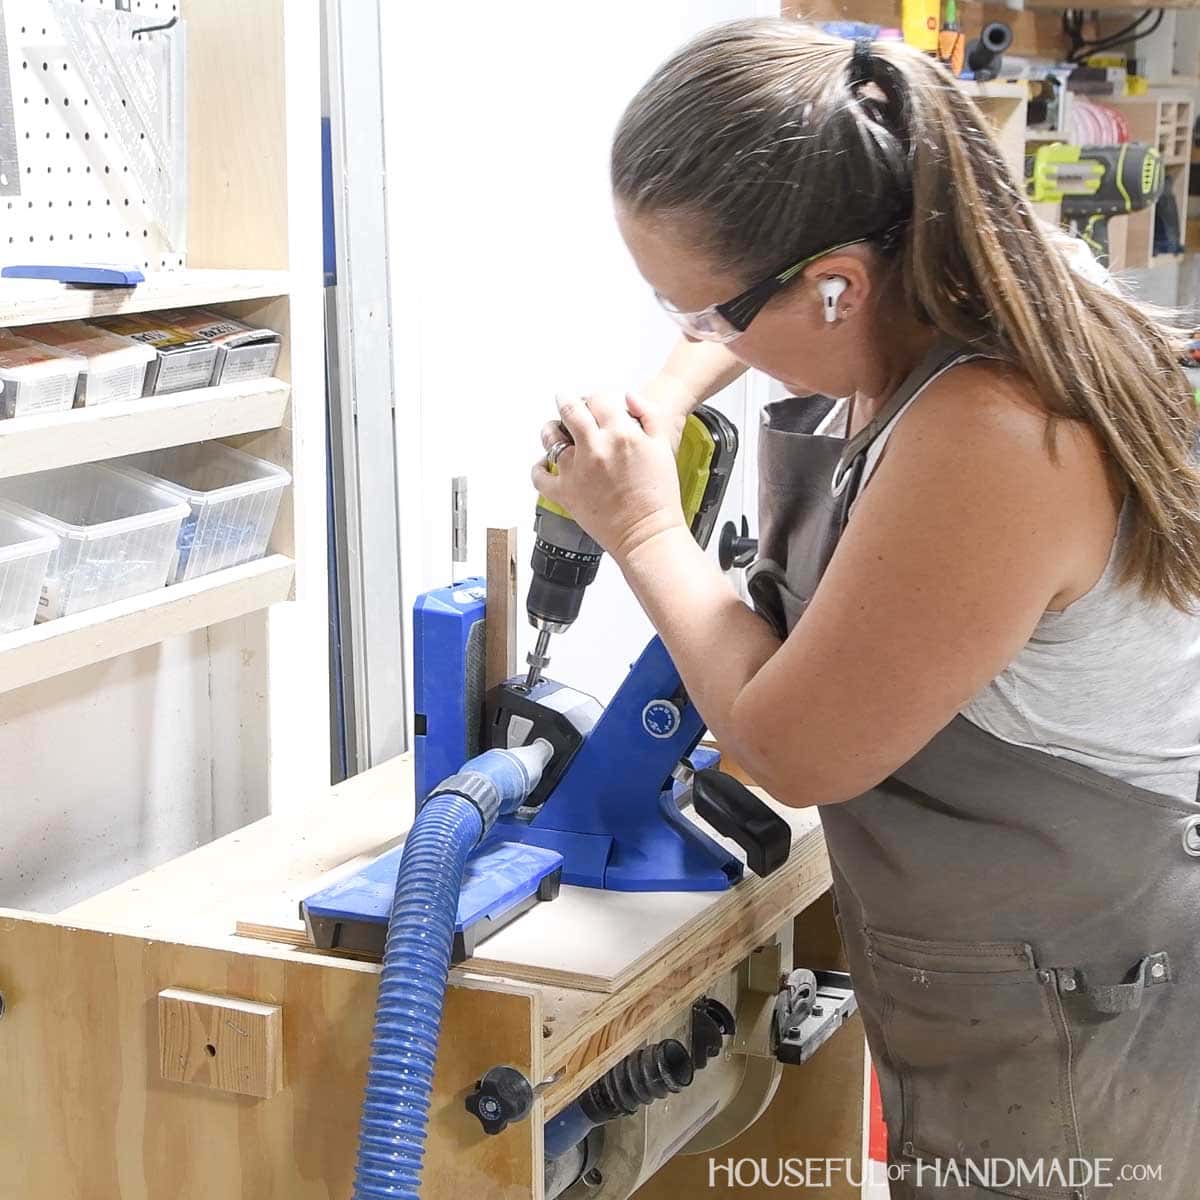
Measure the width of the completed side. Cut your inside supports so they are 1 1/2” short of this measurement (leaving 3/4” on either side).
Drill pocket holes set for 3/4” thick material in both ends of the inside support pieces.
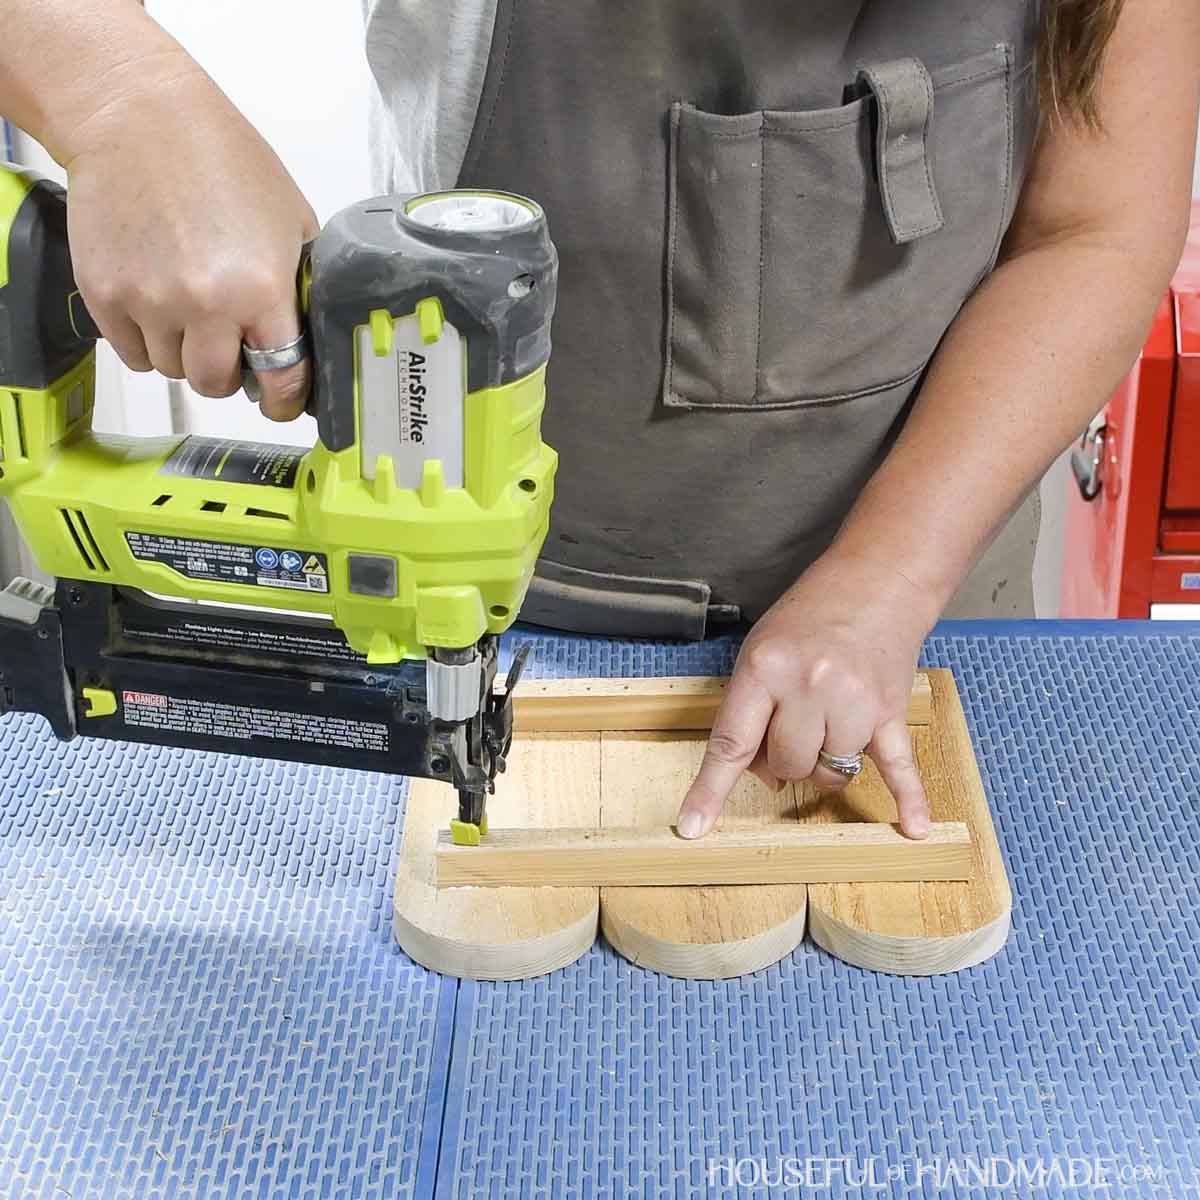
Line up two mirrored edge pieces with one center piece in the middle so the tops are level and the center bottom is flush with the inside of the curve.
Attach the inside support pieces so one is 1 3/4” down from the top and the other is 1 3/4” up from the bottom. They should be set in 3/4” from the sides.
Two sides will have supports with pocket holes and two without. Secure with wood glue and 1 1/4” nails.
Do not place nails in front of the pocket holes or close to the end of the boards with no holes (since you will have a screw attaching them together once assembled).
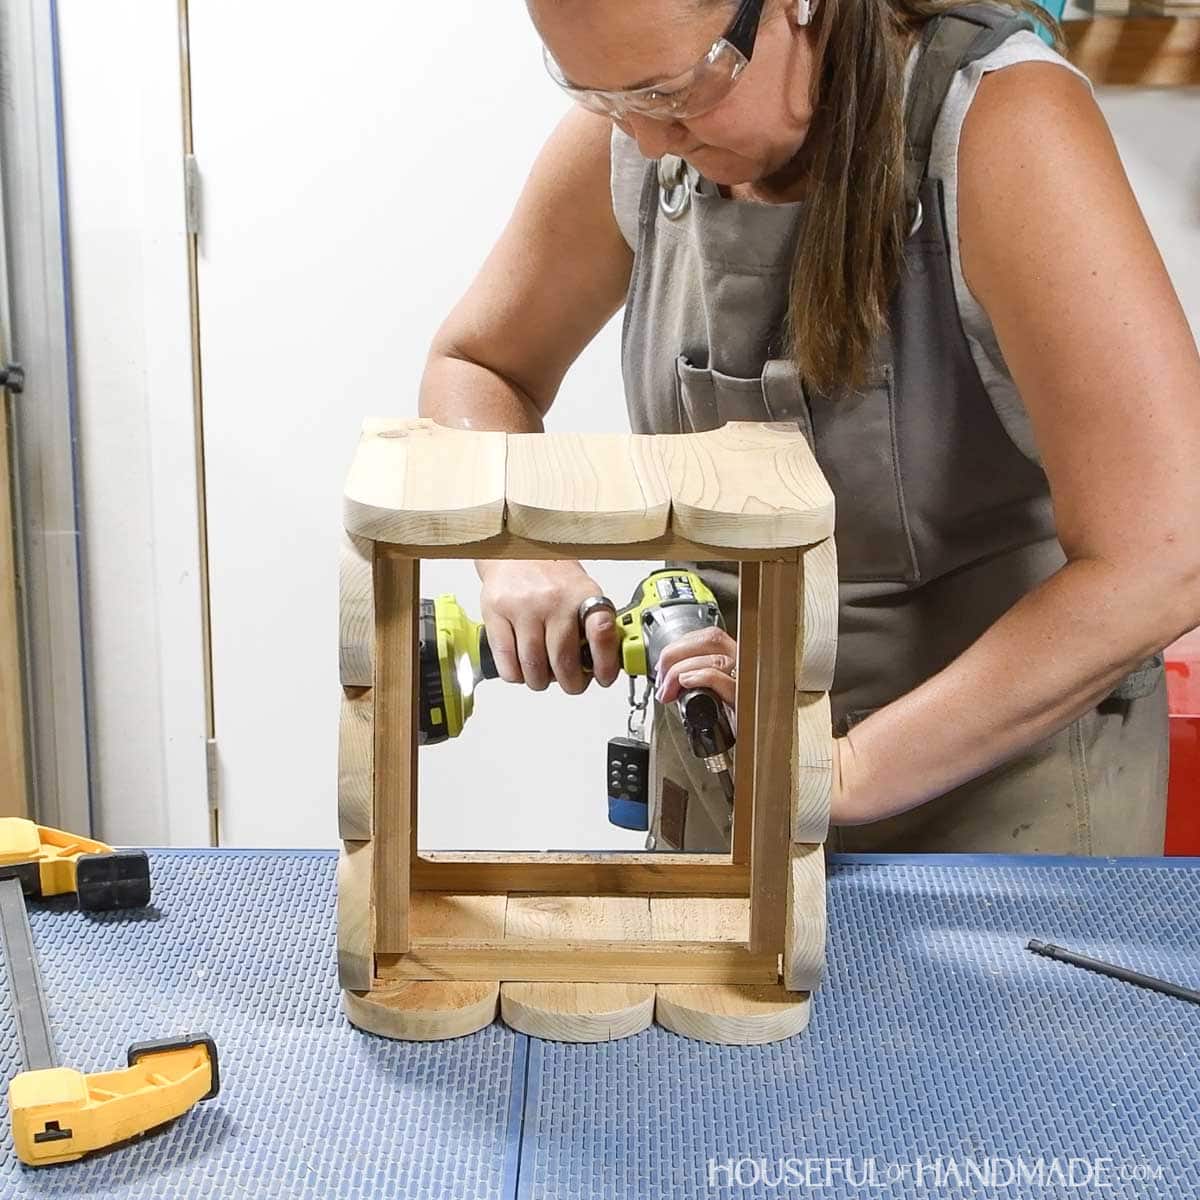
STEP 3- Assemble planter
Attach one assembled side piece with pocket holes to one without. The one with pocket holes should sit inside the back of the one without so the inside supports sit flush with each other.
Secure with wood glue and 1 1/4” pocket hole screws.
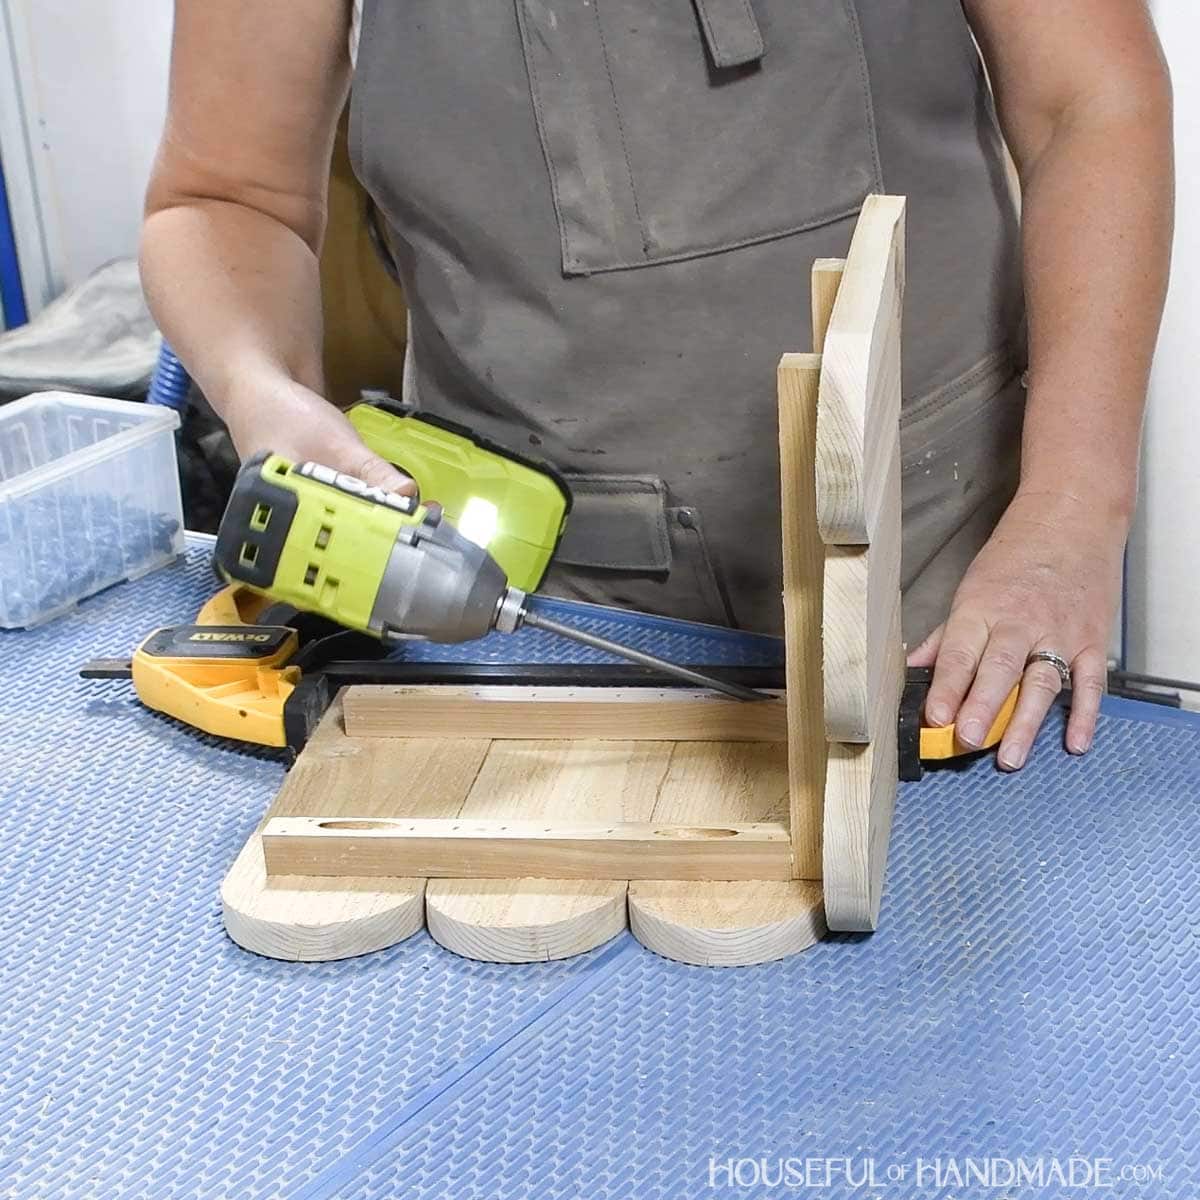
Attach attach the remaining sides so the pocket holes attach to the non-pocket hole inside supports.
Secure with wood glue and 1 1/4” pocket hole screws.
You may need to use a 90 degree adapter on your drill bit to drive the pocket hole screws on the last piece.
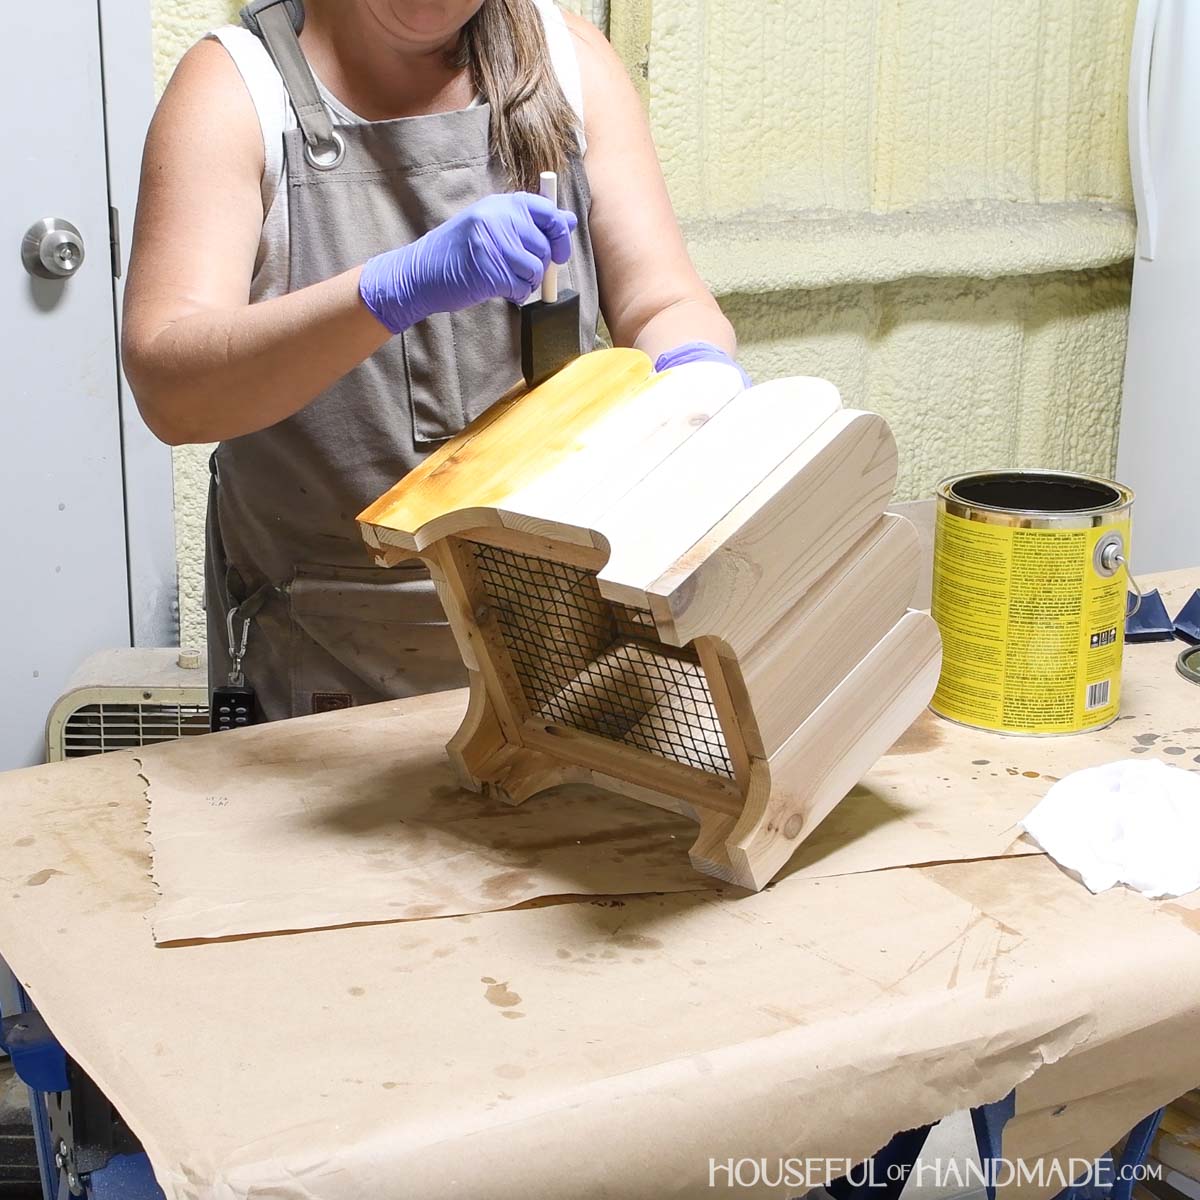
STEP 4- Finish
Sand and seal or paint your new planter.
I forgot to seal mine before adding hardware cloth. But it is way easier to finish it before it is in place.
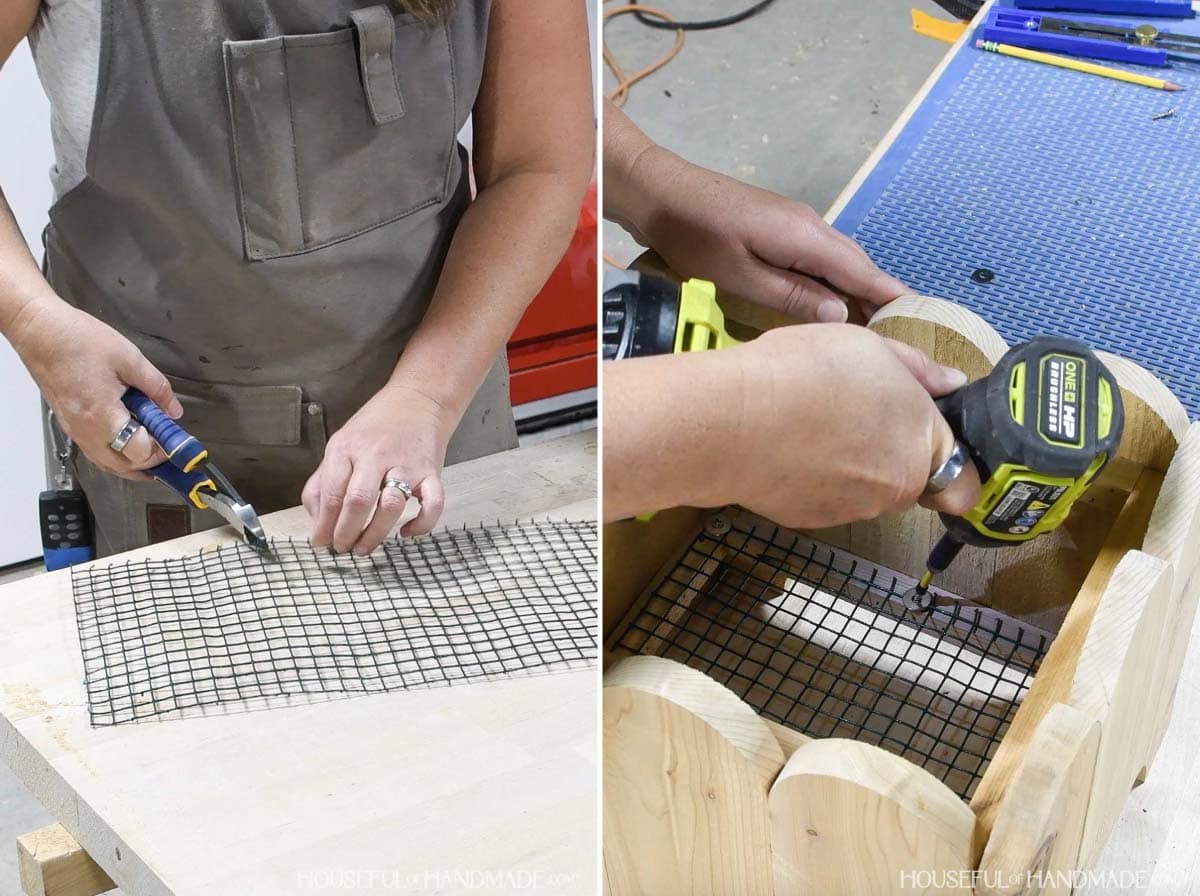
Cut a piece of hardware cloth to fit inside the bottom. I used pliers to cut it to size.
Place it inside on the top of the lower supports. You will have to bend it slightly to fit it inside the upper supports.
Secure it to the lower supports at the corners and in the middle with a 3/4” wood screw and washer.
You can place a nursery pot directly inside the planter. Or add a piece of landscape fabric to the bottom before adding dirt and planting directly in the pot.
Premium plans include:
- Recommended Tools
- Shopping list
- Easy to read cut list table
- Cut diagrams
- Step-by-step instructions with 3D renderings
- Helpful resources
- BONUS: 3D SketchUp file
You did it!
Now enjoy decorating your front porch with you new plants.
More Scrap Wood Ideas
It's already Week 3 of Scrap Wood Summer. All month my friend Shara from Woodshop Diaries and I have been sharing new projects made from scraps.
New projects are shared every Tuesday in August. So don't miss next week's final scrap wood projects.
I'll share each week's new projects below so you can use up your scraps too!


Happy building!
