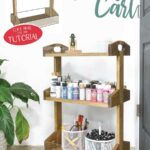
Add storage to any room with this beautiful wood rolling cart.
You can never have too much storage. That is why rolling carts are so popular.
Need more storage in you bathroom: rolling cart! Need more storage in your kitchen: rolling cart! Need storage for your hobby: rolling cart! The possibilities are endless.
So I partnered with Kreg tools to use their newly redesigned Kreg Jig 720Pro to build this easy wood rolling cart. It would make the perfect DIY gift for someone on your Christmas list!
This post may contain affiliate links. As an Amazon Associate I earn from qualifying purchases. Click here to read my full disclosure policy.
And right now you can get the 720Pro pocket hole jig in a bundle with my favorite AutoMaxx face clamp and screws (through Jan 31, 2022 or while supplies last).
Rolling Storage Cart Design
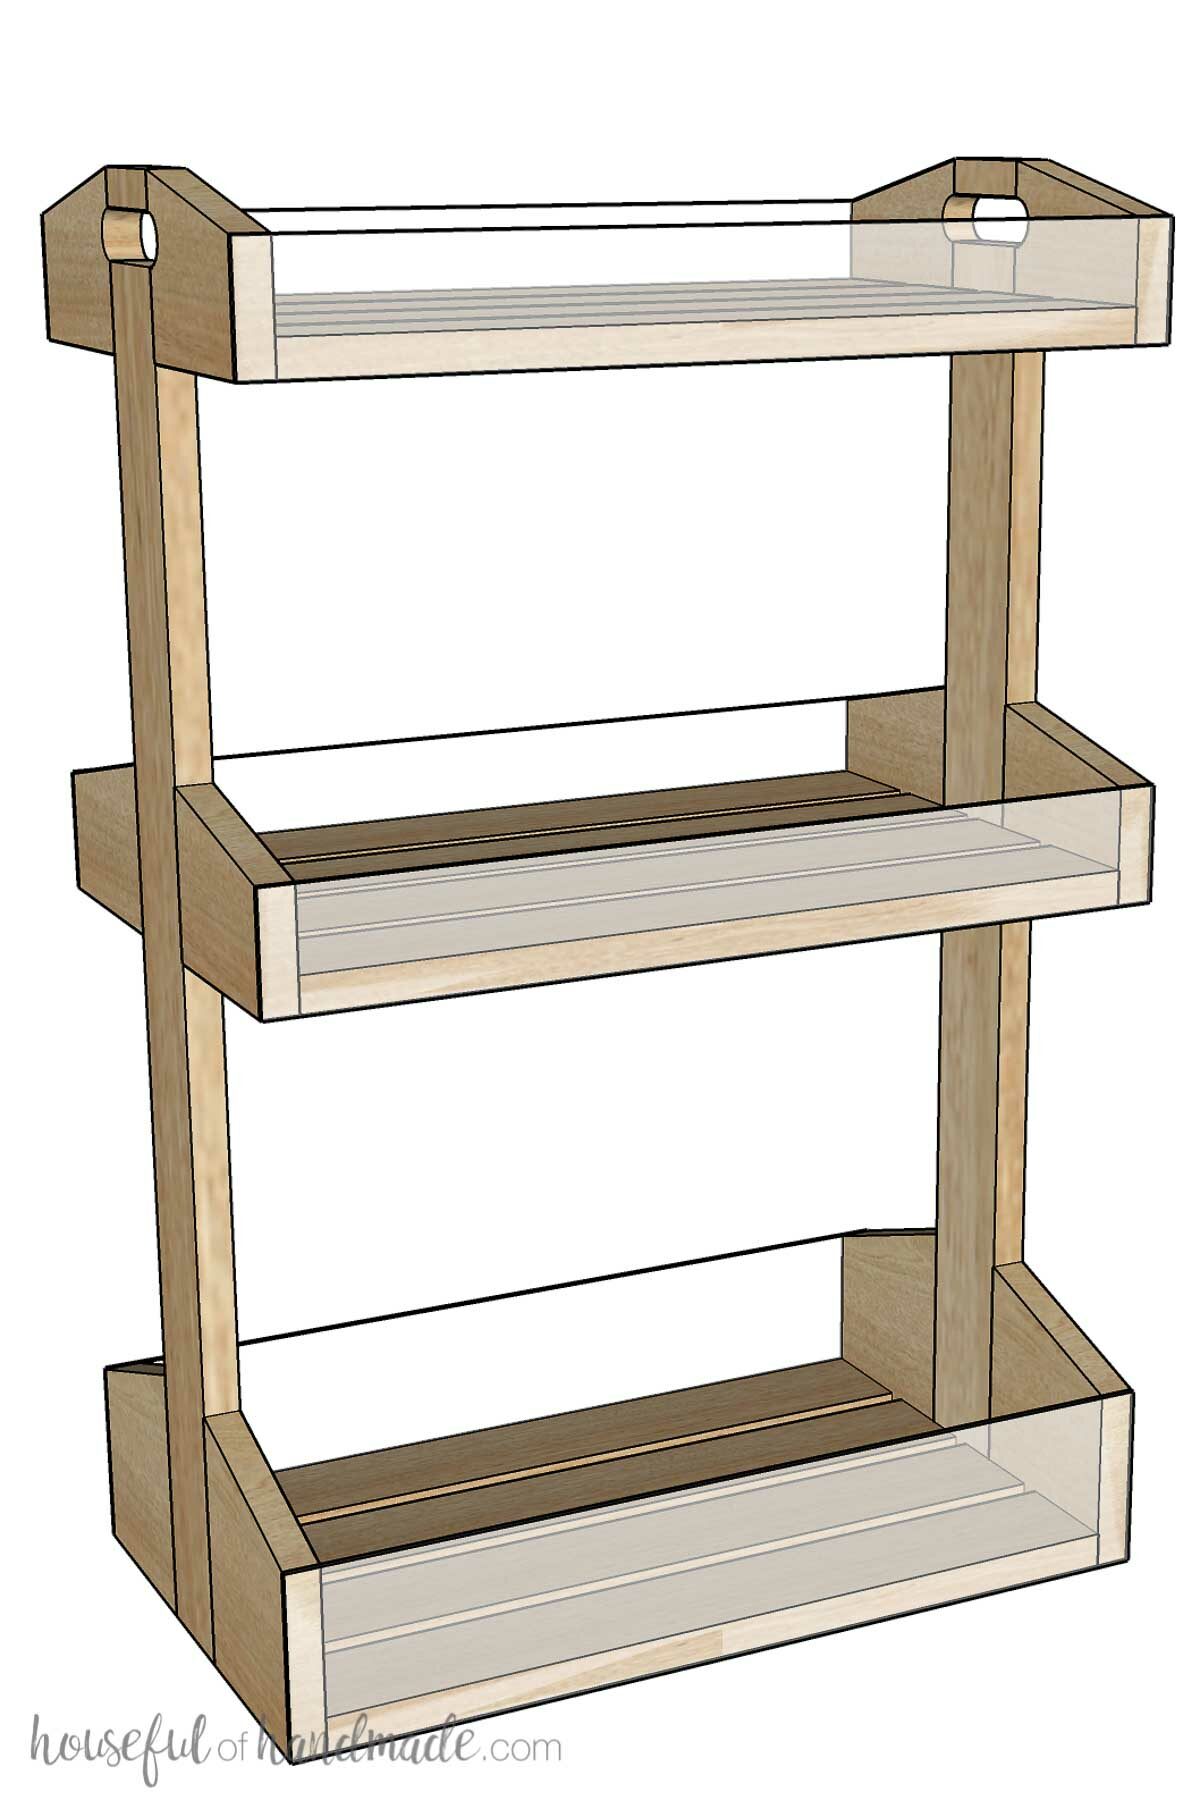
When designing this wood cart, I wanted to make sure it looked beautiful as well as being useful. A task that I think I achieved well!
Instead of adding four corner posts to hold the trays together, the trays are connected in the center on the sides. This leaves the entire storage area open and easily accessible.
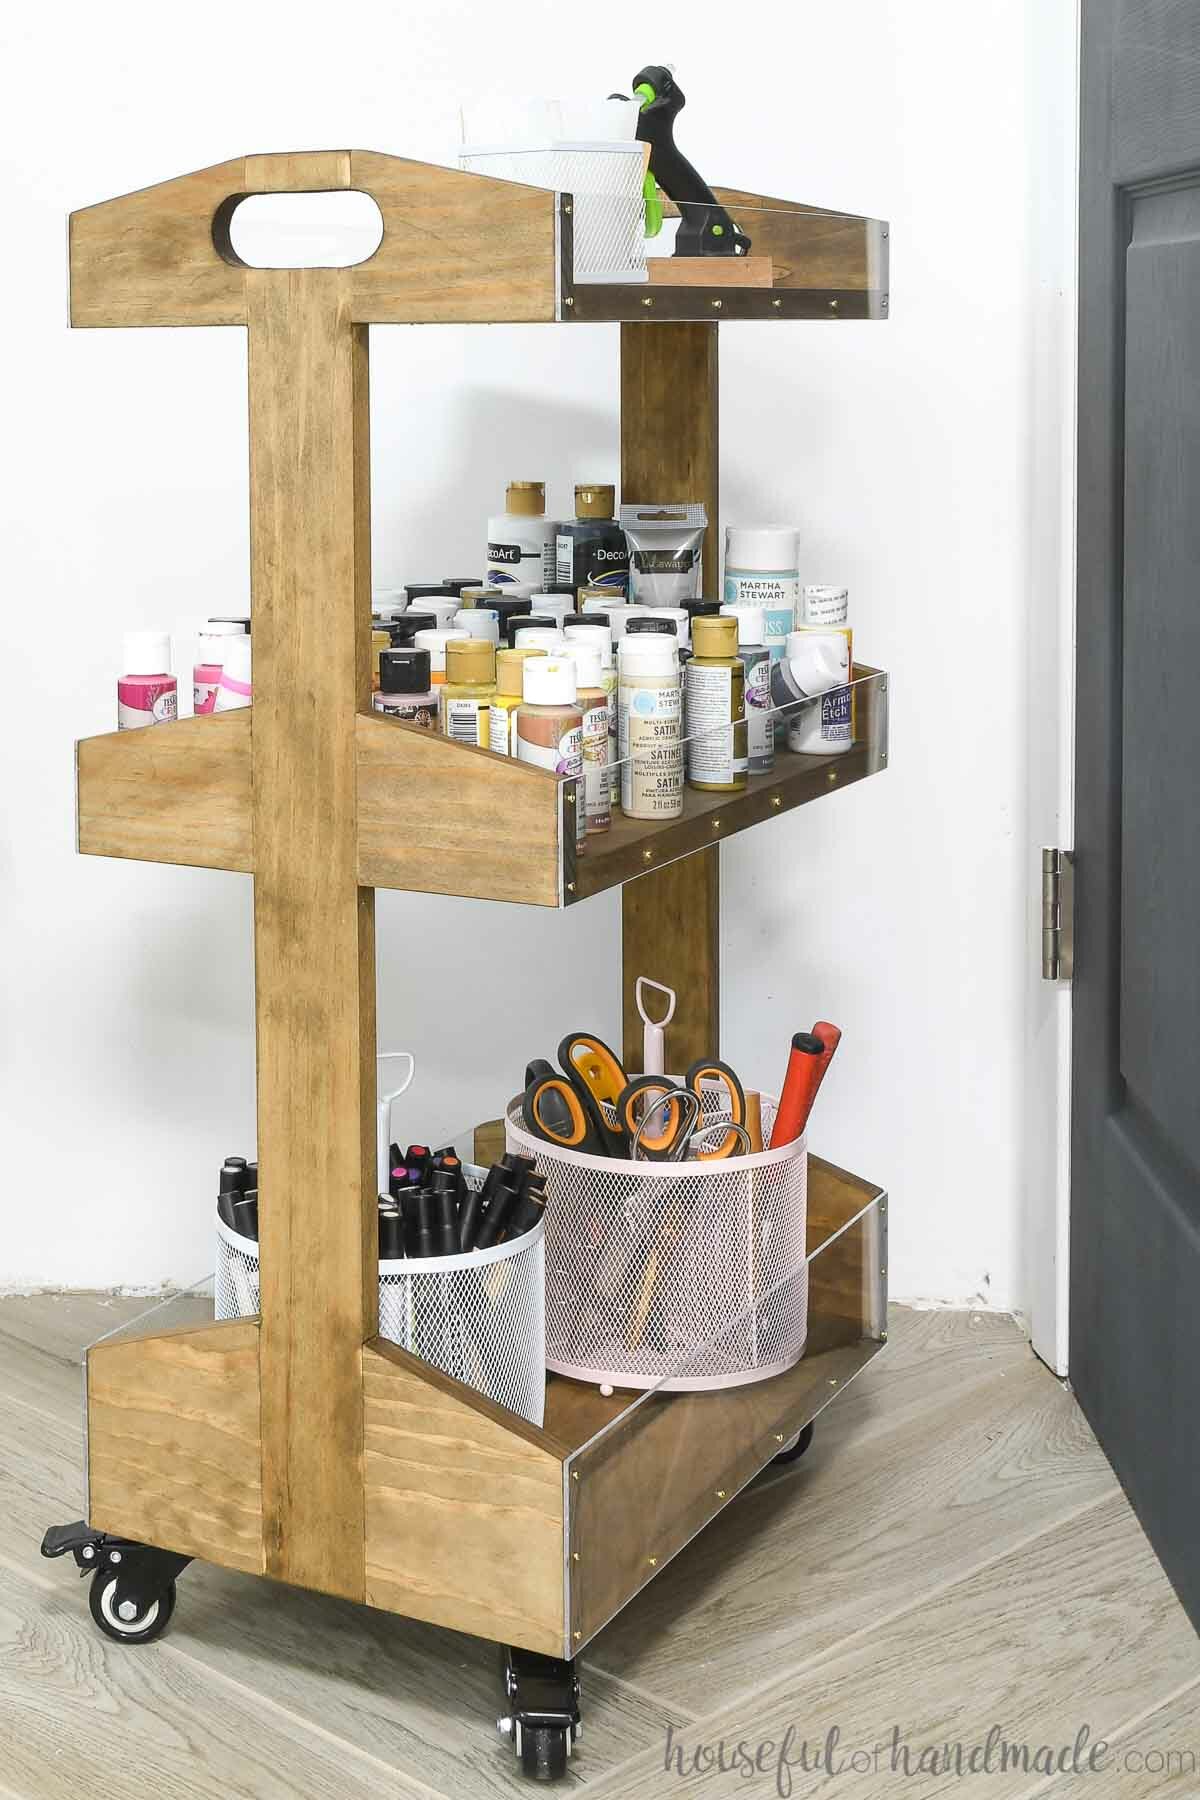
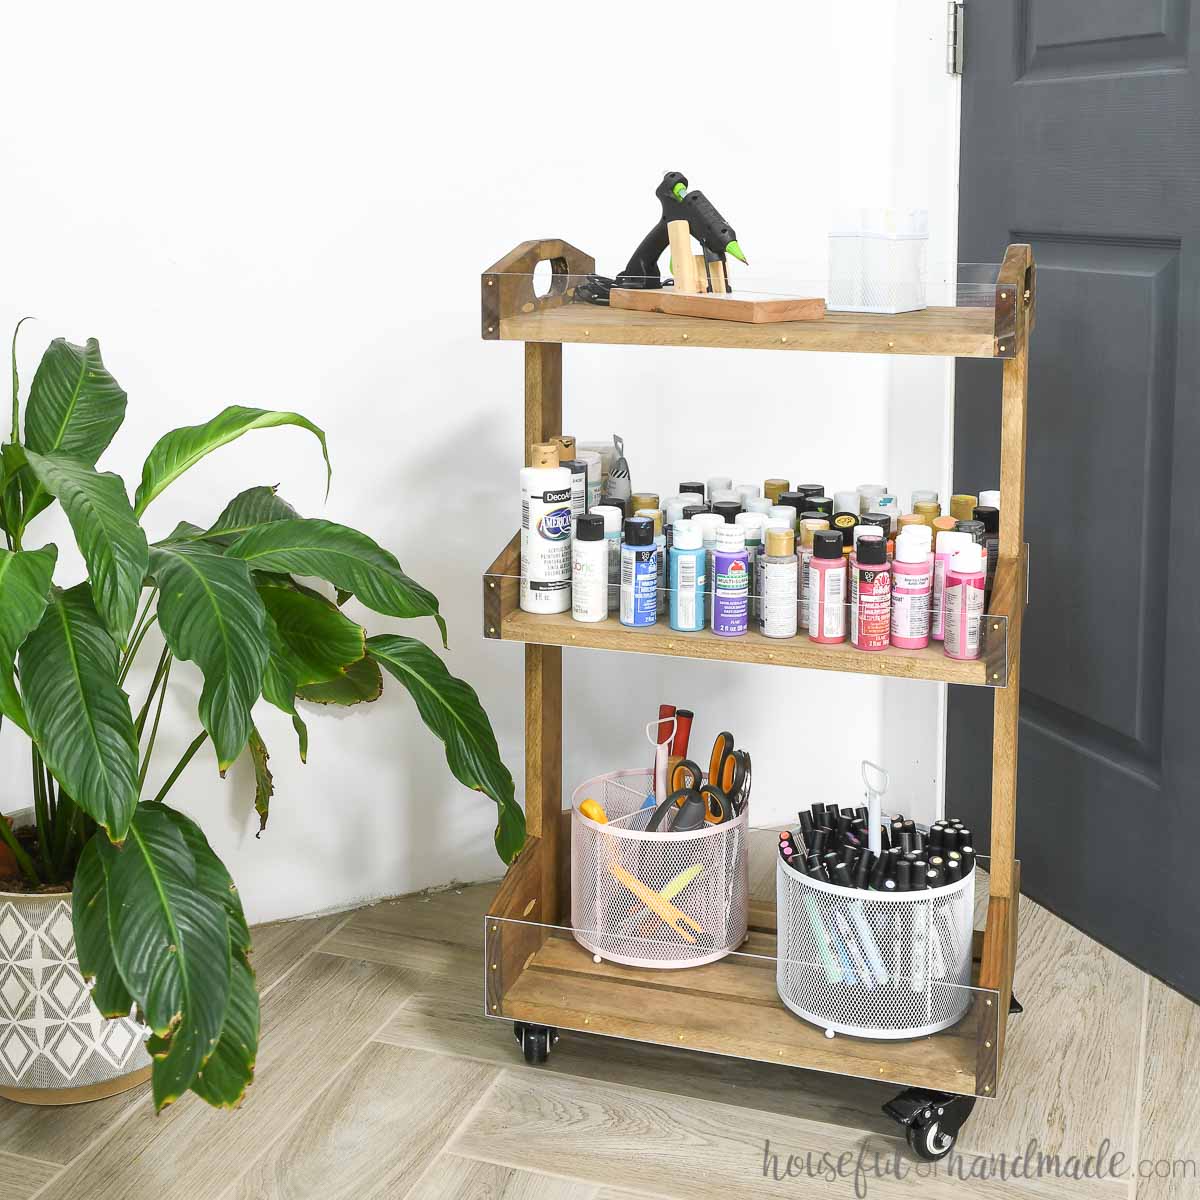
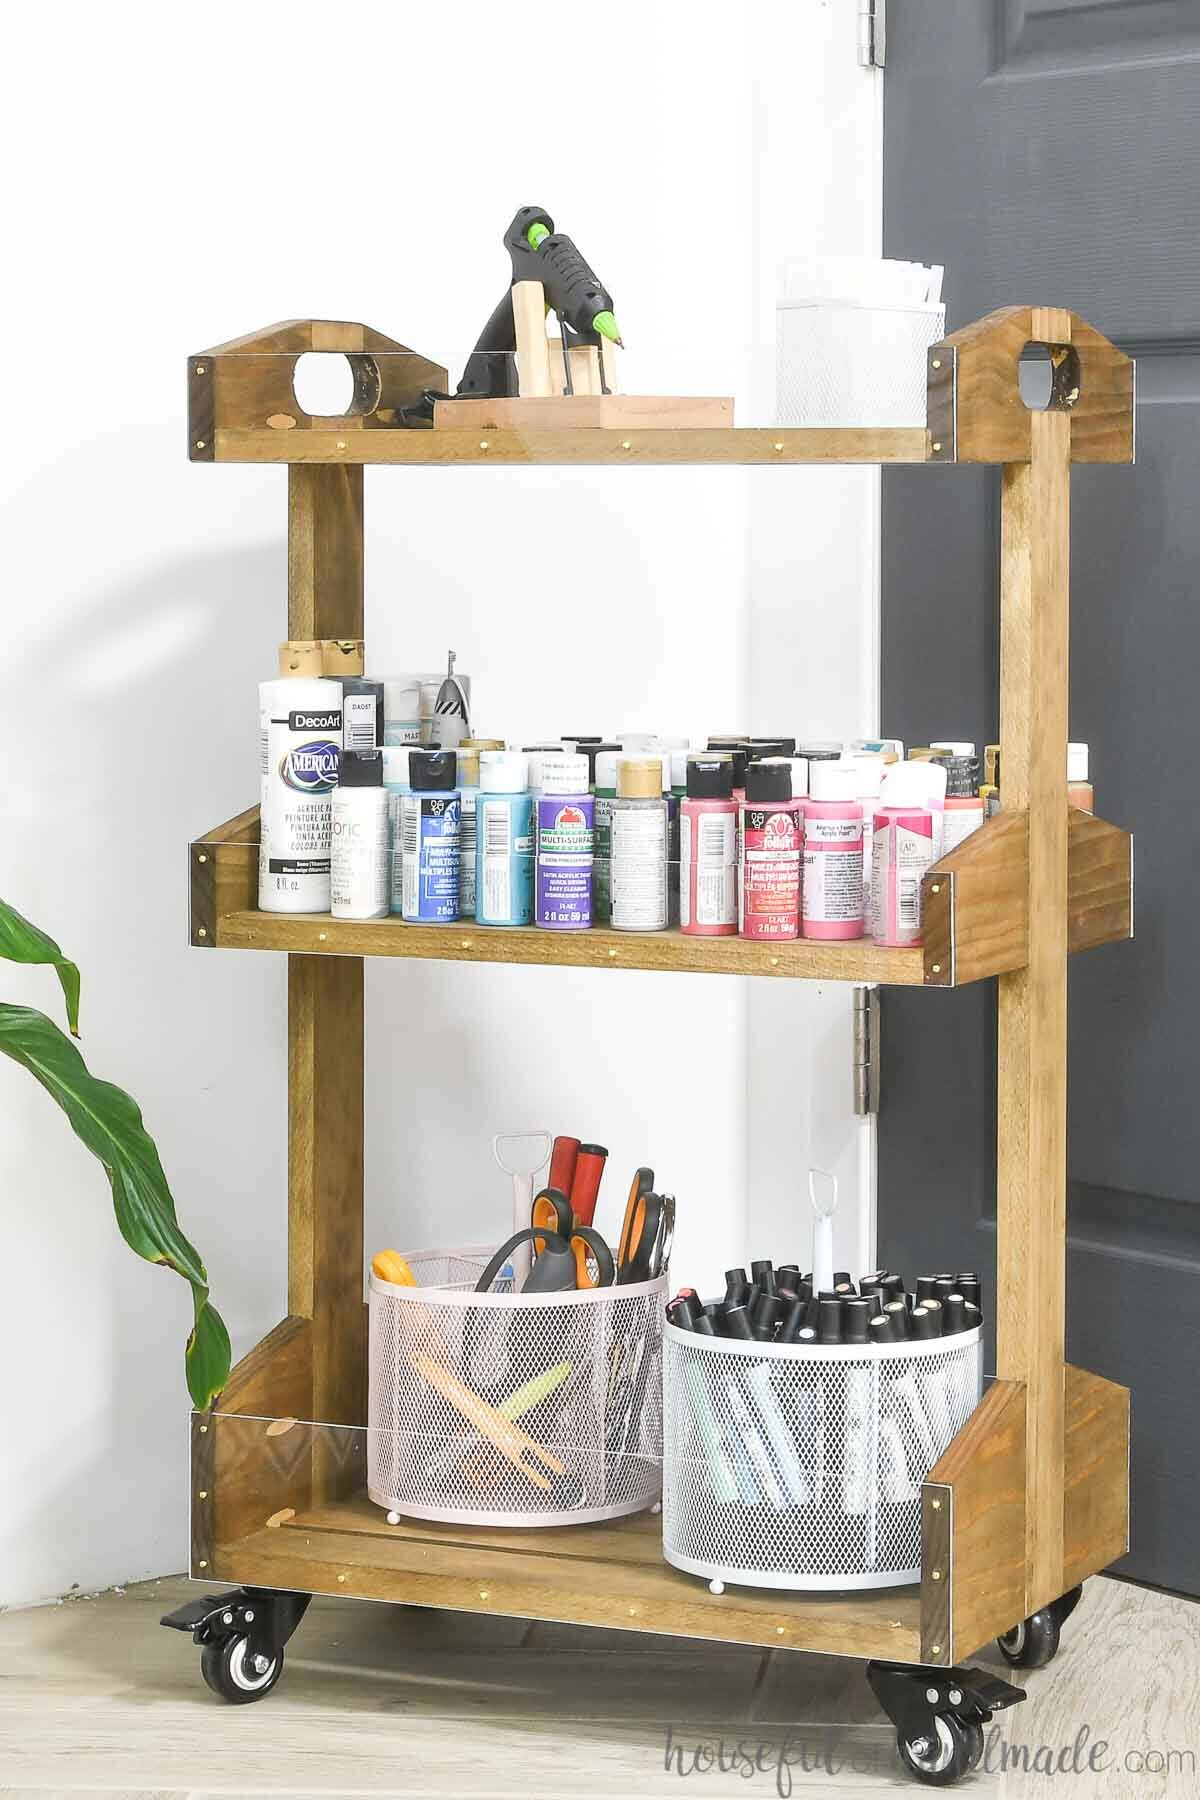
To make the storage area even more open (always good to see what is in your cart), I used plexiglass on the edges of the storage trays. And aside from letting you easily see, it looks sleek and less bulky.
If you want more of a utility cart for your rolling cart, you could always use wood for the edges instead of plexiglass. But for a pretty cart, the plexiglass looks amazing!
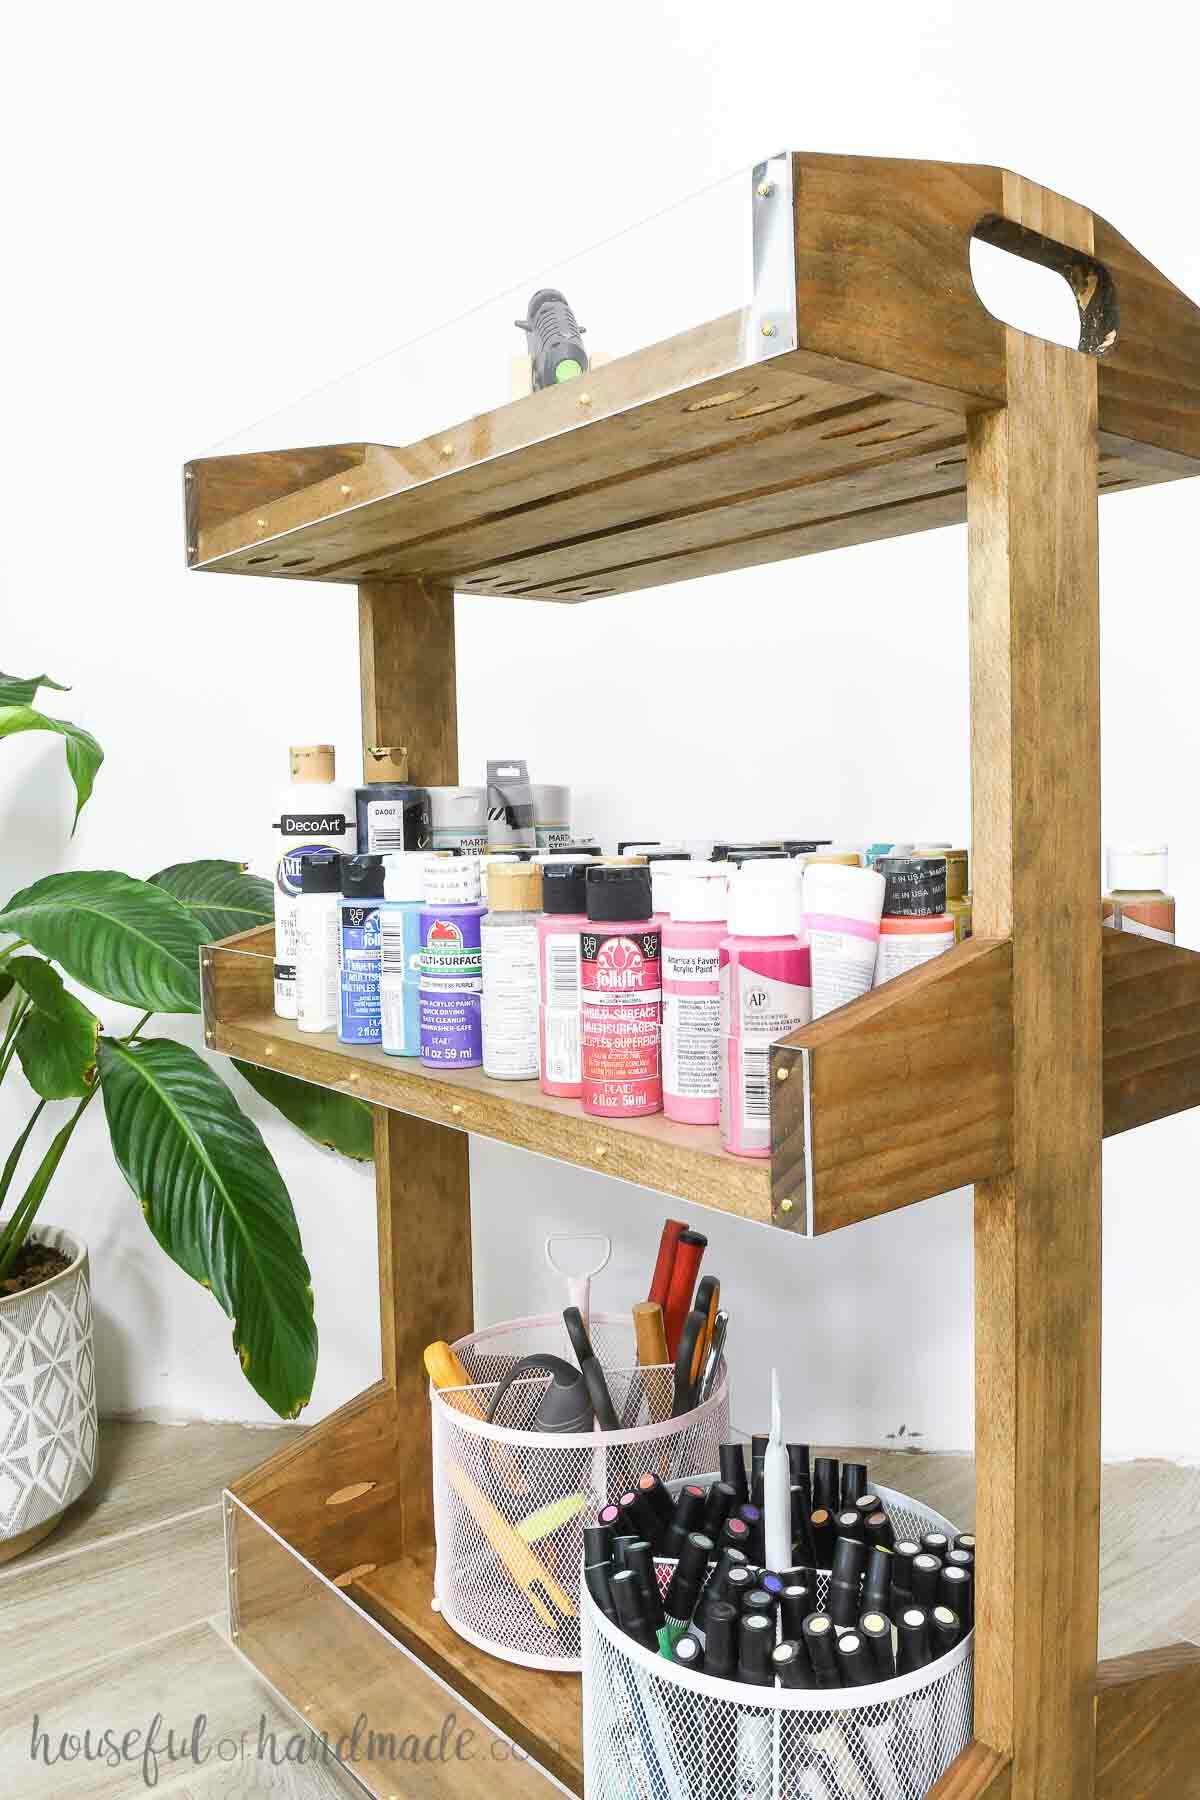
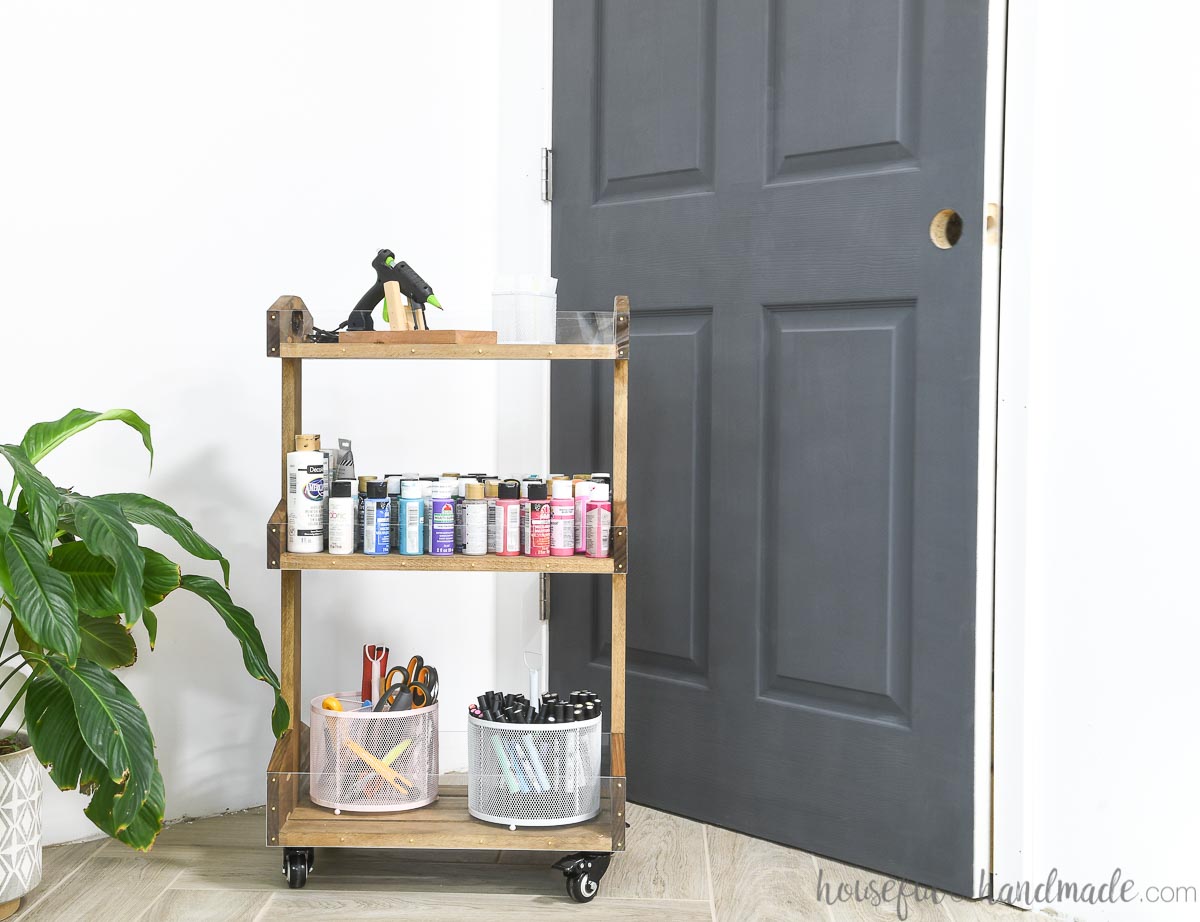
Each side of the cart has a cut out handle to easily grab and move the cart wherever you need it. And with 4 hefty caster wheels, you can easily move it around.
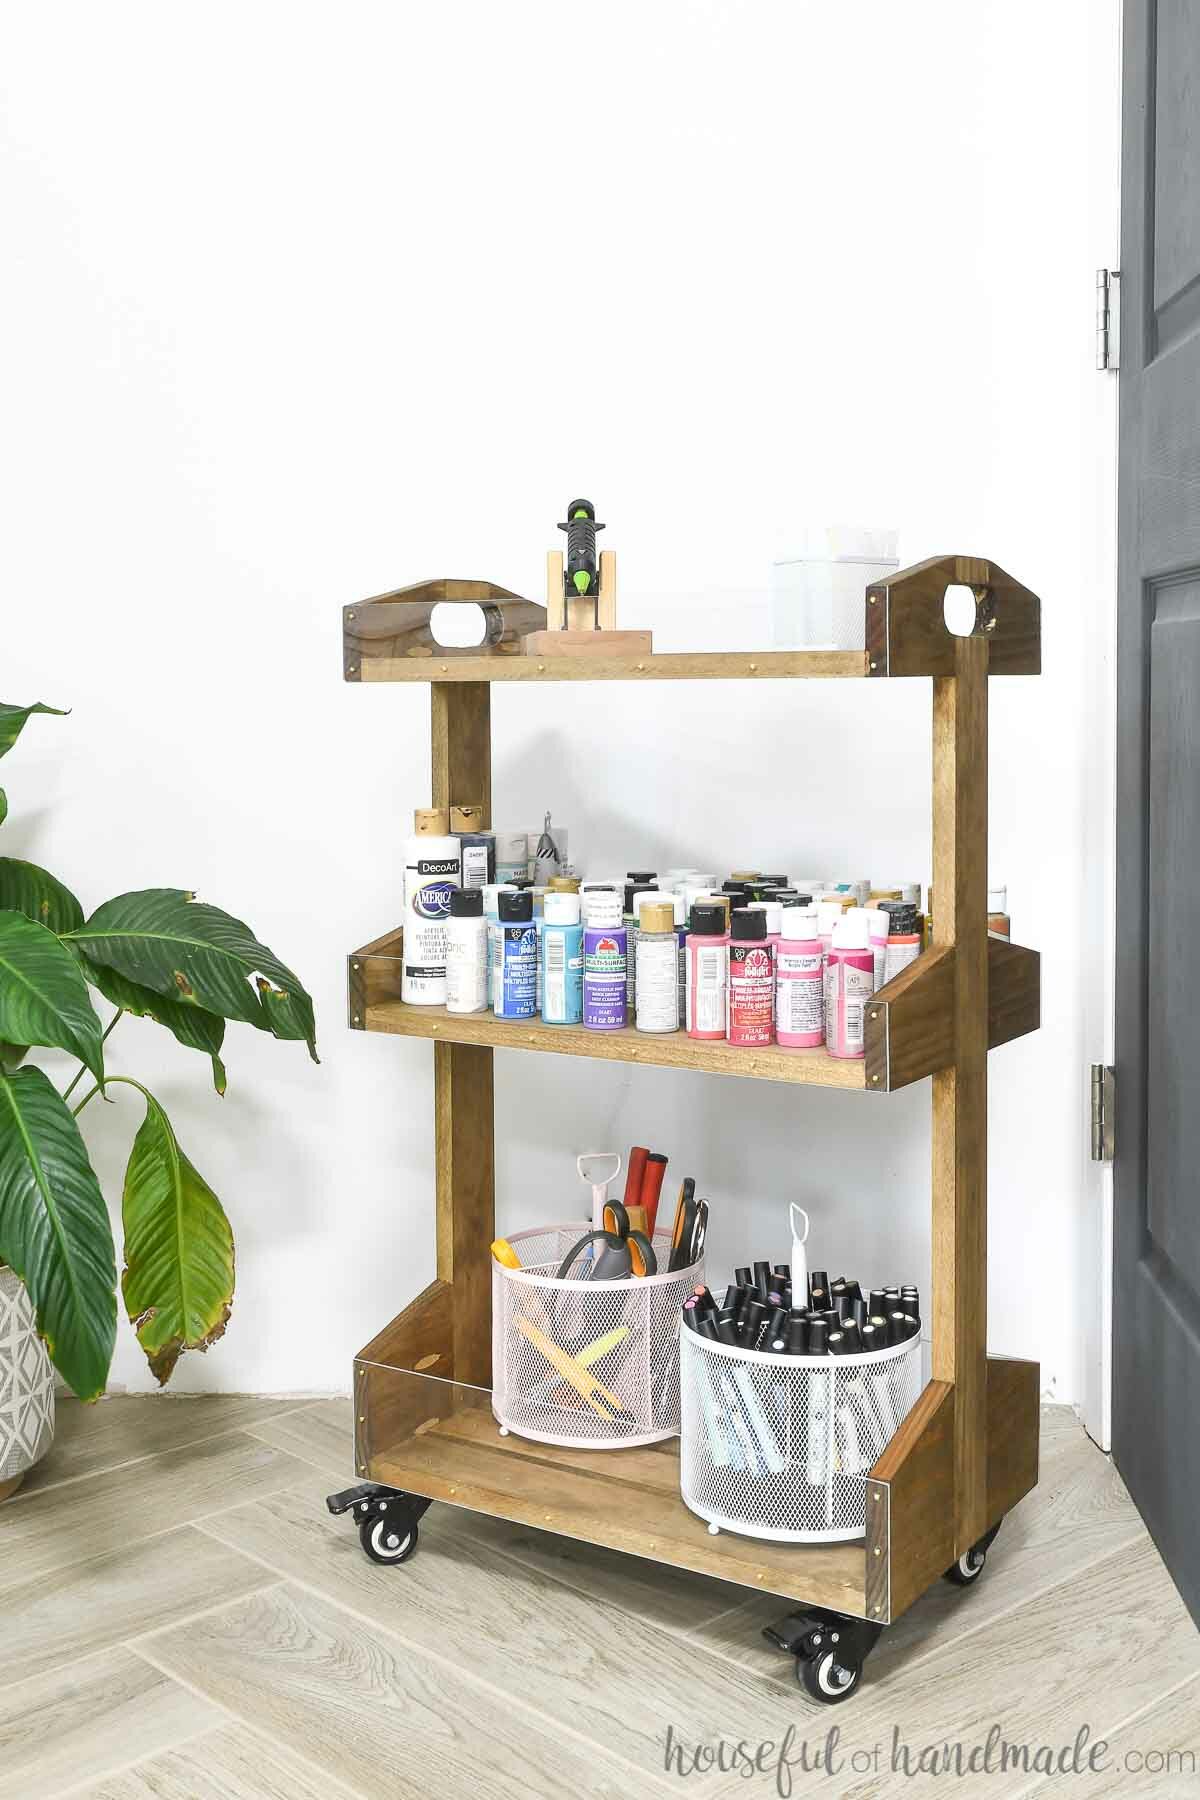
The three tiered cart allows lots of room for storage. The bottom tier has a deeper tray and the upper two are more shallow.
But these are easy to adjust when you are making your own rolling cart. Add more tiers ore make more deep or shallow trays depending on your needs.
Ways to Use a Rolling Cart
Rolling storage carts are so useful! They add storage and organization to any room. And they look good while doing it.
I love that this wood rolling cart is beautiful enough to be a piece of furniture in any room. And with 3 easy to see inside trays, you can store lots of whatever you need storing.
Here are a few ways that you can use you wood storage cart:
- Place next to your sofa to store magazines, books and remotes.
- Use a craft cart that can be tucked away in a closet when not in use.
- Add storage to a kitchen wall or corner.
- Use in a bathroom to give each person their own storage space for personal items.
- Place serving dishes on it to display in a dining room.
- Use as a nightstand in a bedroom.
- Use in a workshop to keep most used tools/materials at hand.
That is just a few ideas of ways you could use a new wood rolling cart. I am using mine as a craft table to store craft supplies below and keep my glue gun handy on top.
How to Build a Rolling Cart
Tools needed:
- Pocket hole jig
- Get the Kreg 720Pro with a free clamp and screw now through January 31, 2022.
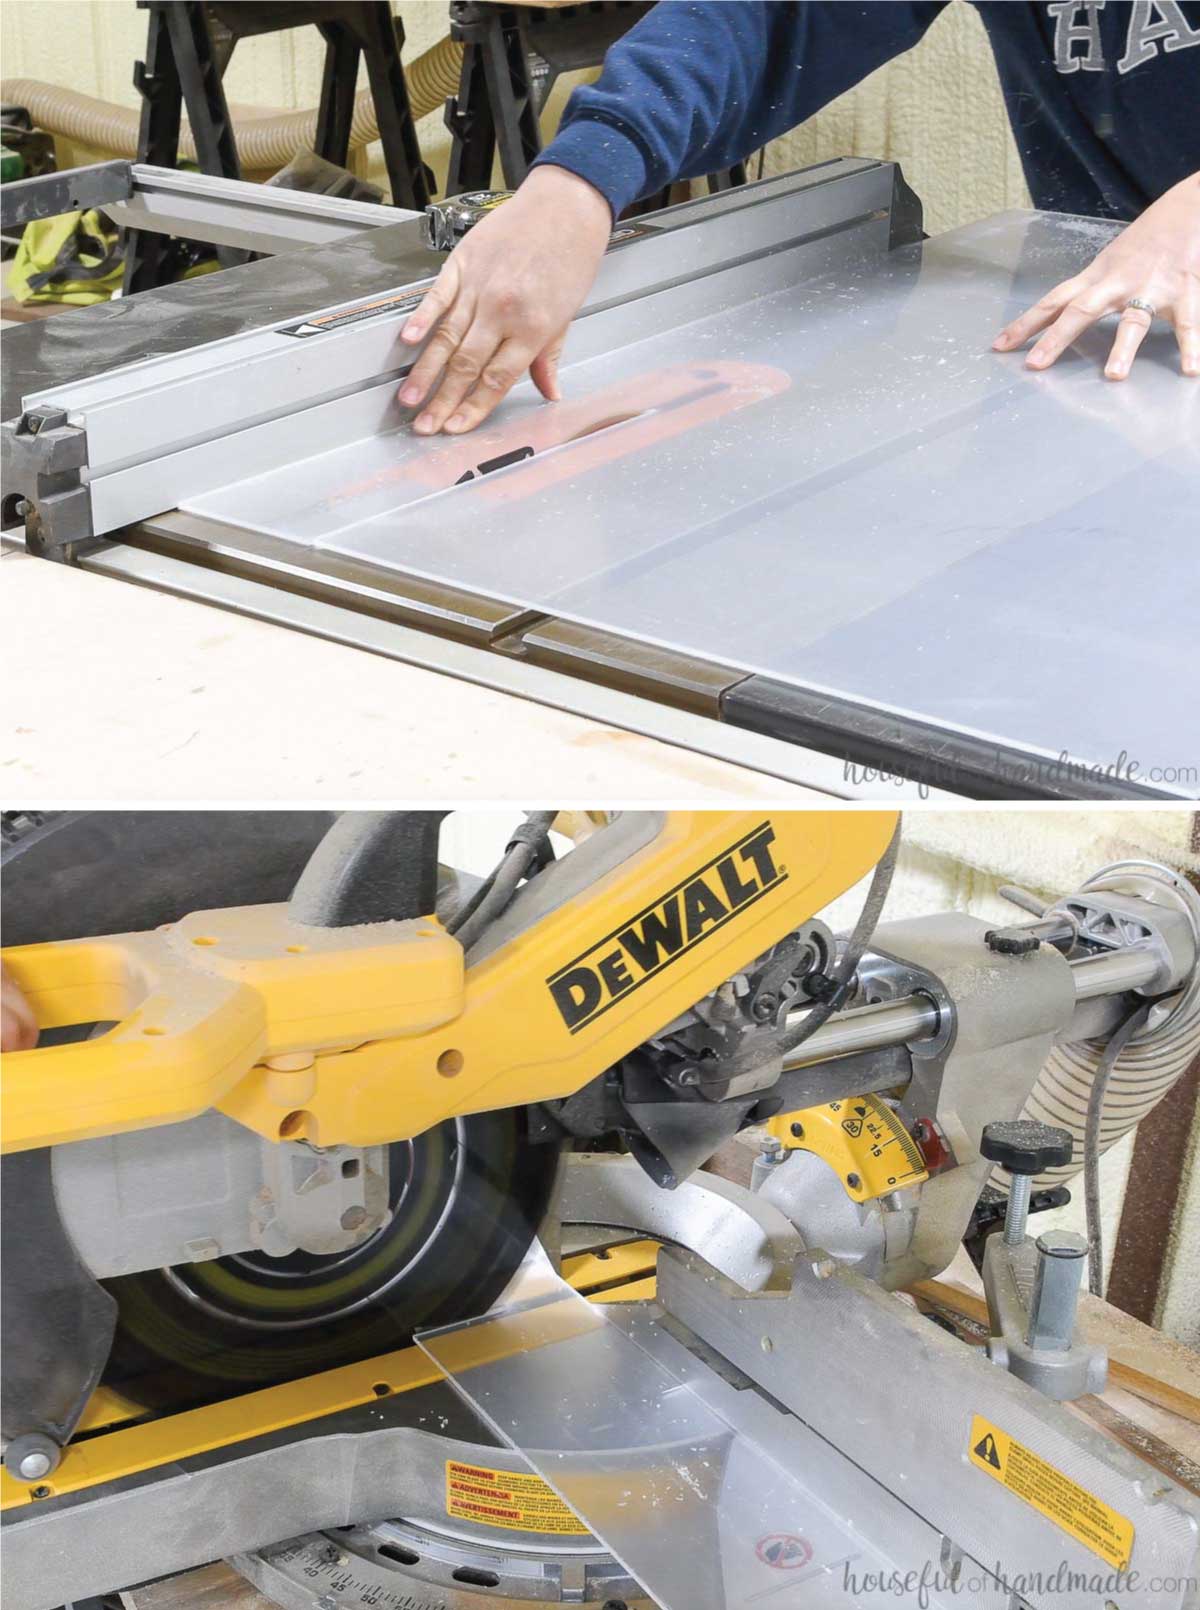
- Miter saw
- I recently upgraded to this larger sliding miter saw (watch for it to go on sale), but all my projects before were built with this inexpensive miter saw that I loved.
- Carpenters square
- Drill
- Impact driver (optional, but I love not having to switch bits with the drill)
- Jig saw
- Sander
- Saw or utility knife to cut plexiglass
Supplies:
- Wood supplies
- (3) 8′ long 1×3 board
- (1) 3′ long 1×4 board
- (1) 20″ long 1×6 board
- (4) 2 1/2″ x 19 1/2″ plexiglass
- (2) 4″ x 19 1/2″ plexiglass
- 1 1/4″ pocket hole screws
- Small pan-head wood screws
- 2″ caster wheels
Cut out the pieces
Use your miter saw to cut all the pieces.
- (2) 30″ 1×3 boards
- (12) 18″ 1×3 boards
- (8) 4″ 1×4 boards
- (4) 4″ 1×6 boards
Normally I do not recommend cutting all the pieces before assembly, but this project is one you can cut all the pieces up front.
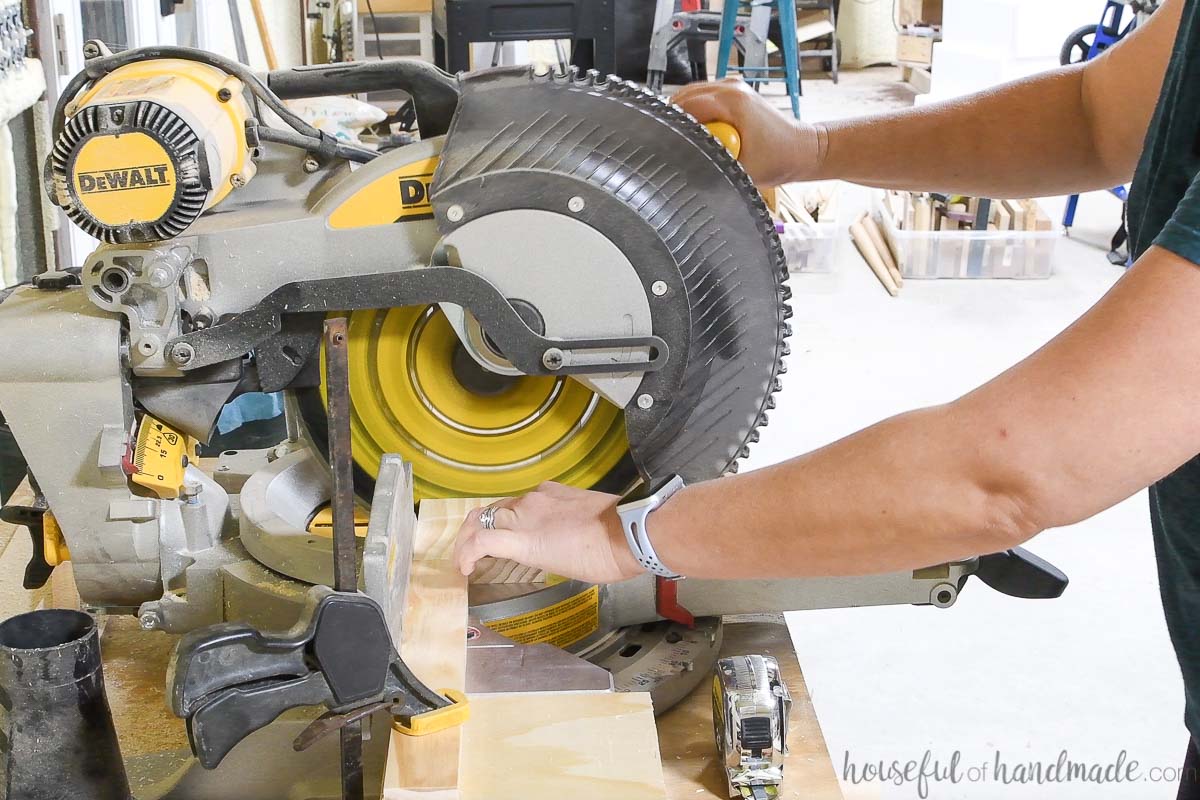
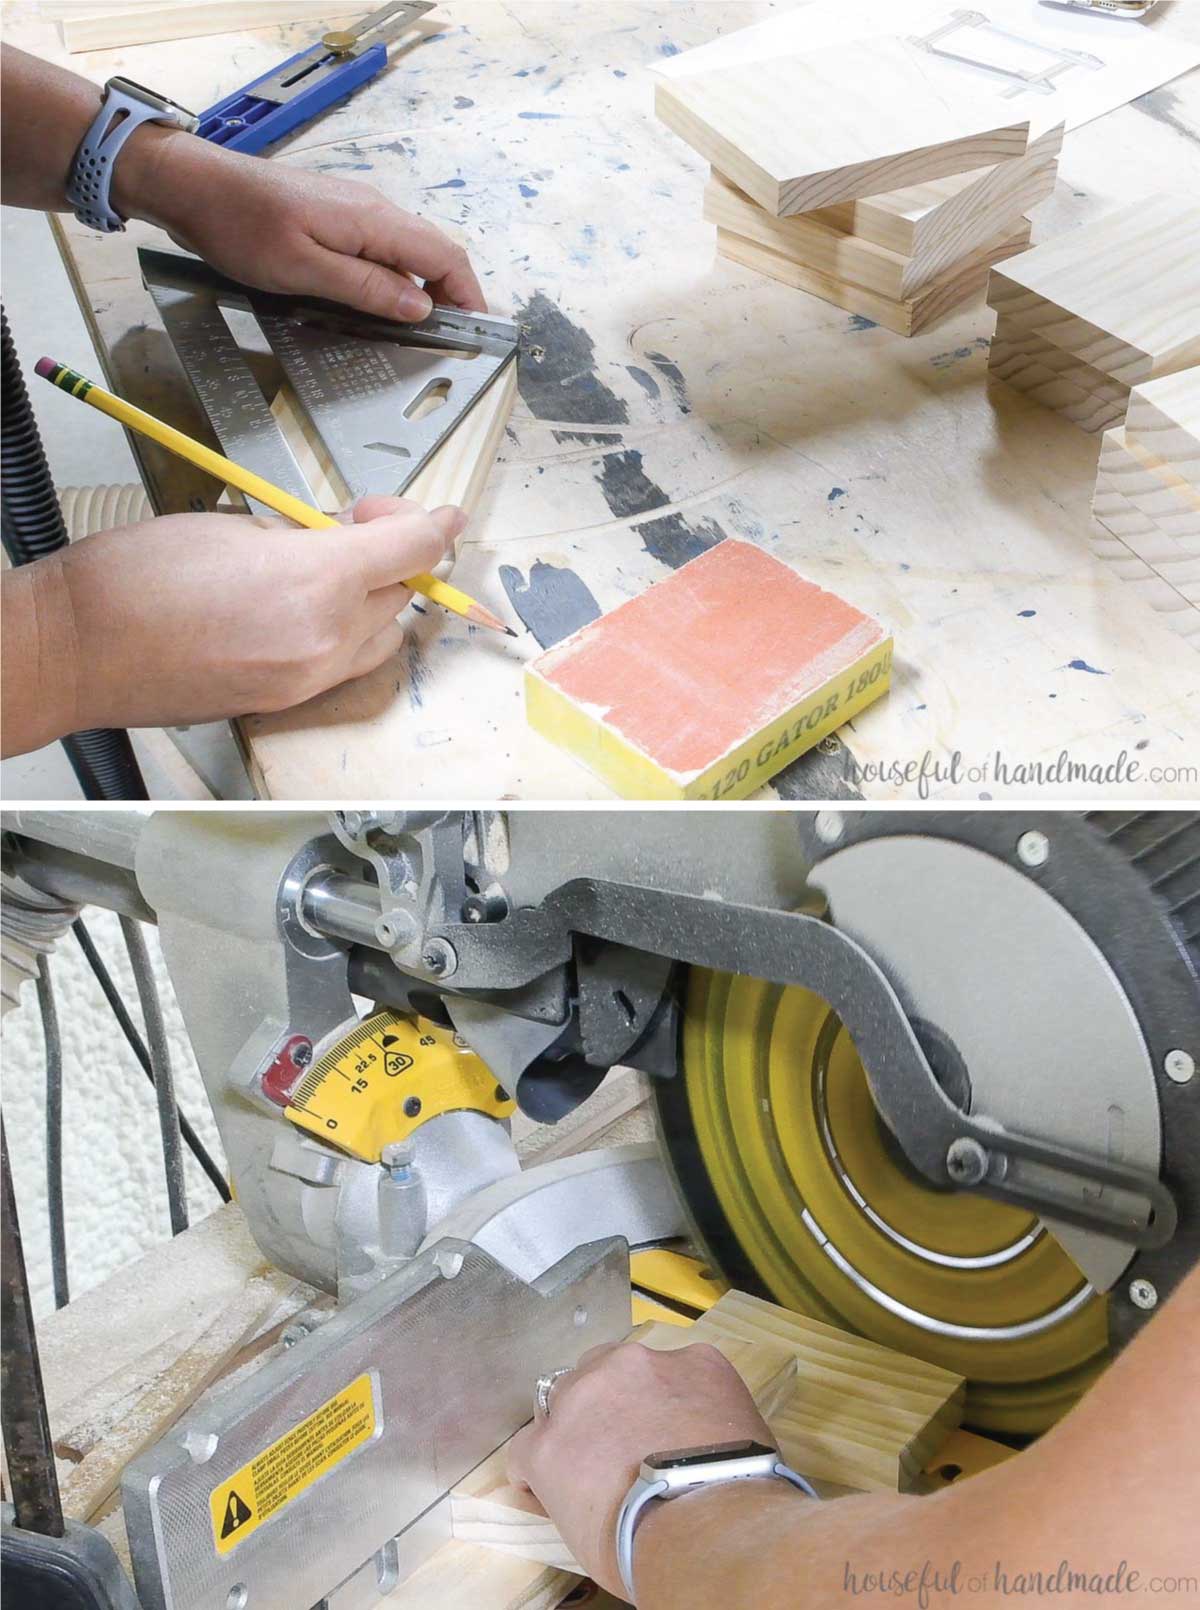
On the 4″ 1×4 boards, measure up from the front bottom 2 1/2″ and make a mark. Draw a line from the top back corner to this mark.
Set your miter saw to cut the angle off the board. Cut the top of all the 4″ 1×4 boards at this angle.
For the 4″ 1×6 boards repeat the process, but measure up from the front bottom corner 4″ to make the mark. The angle will be slightly different from the angle on the smaller boards.
You can cut out the plexiglass with regular wood cutting tools. Or you can score it with a utility knife and snap it across the line.
Do not remove the backing from the plexi while cutting or after. Wait until the very end to protect it from scratches.
Lightly sand the cut sides with 220 grit sandpaper to remove sharp edges.
Assemble the sides of the cart
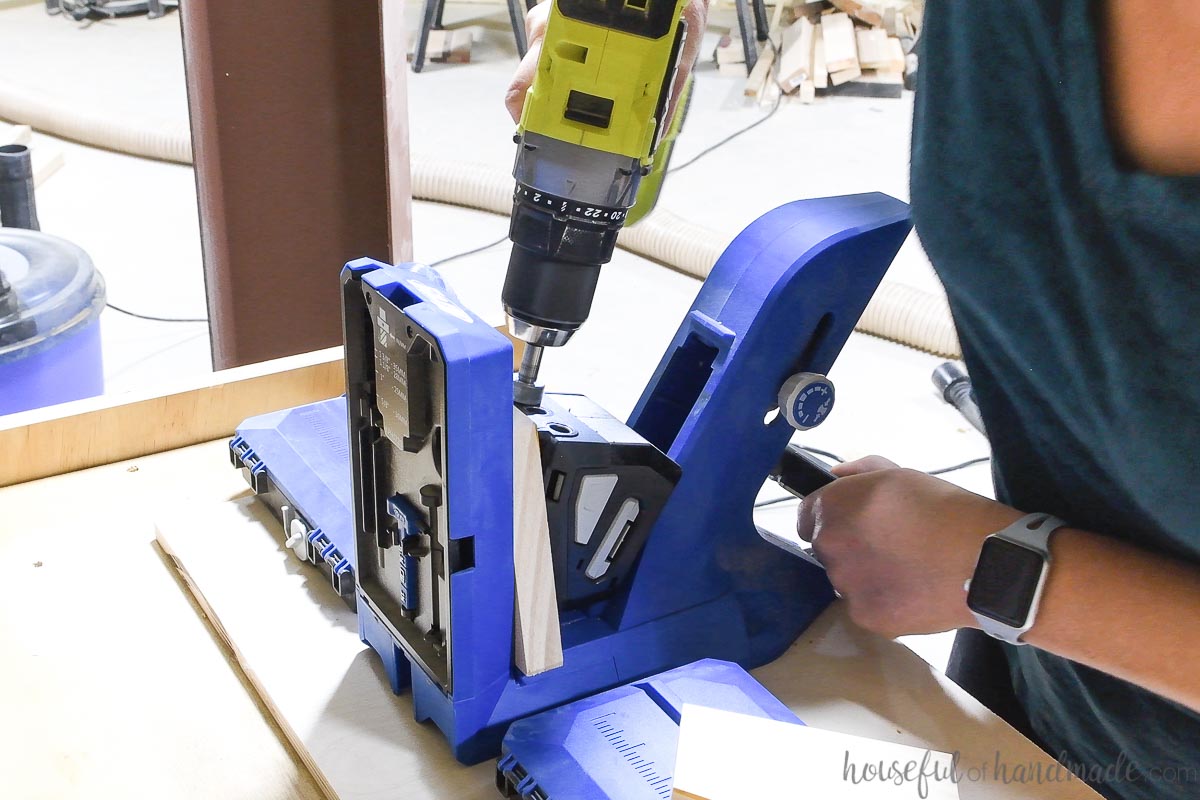
Set the drill bit for the Kreg 720Pro pocket hole jig to 3/4″ thick material. No need to set the jig, just clamp the material in the jig and it will automatically adjust to the material thickness.
Drill two pocket holes in the longer sides of all the angled boards. Make sure you mirror the boards when drilling the pocket holes so all the holes are hidden on the inside of the cart.
For the top tier pieces, place the pocket holes within the bottom 1 1/4″ of the angled pieces. This will ensure they do not get in the way when you cut out the handle later.
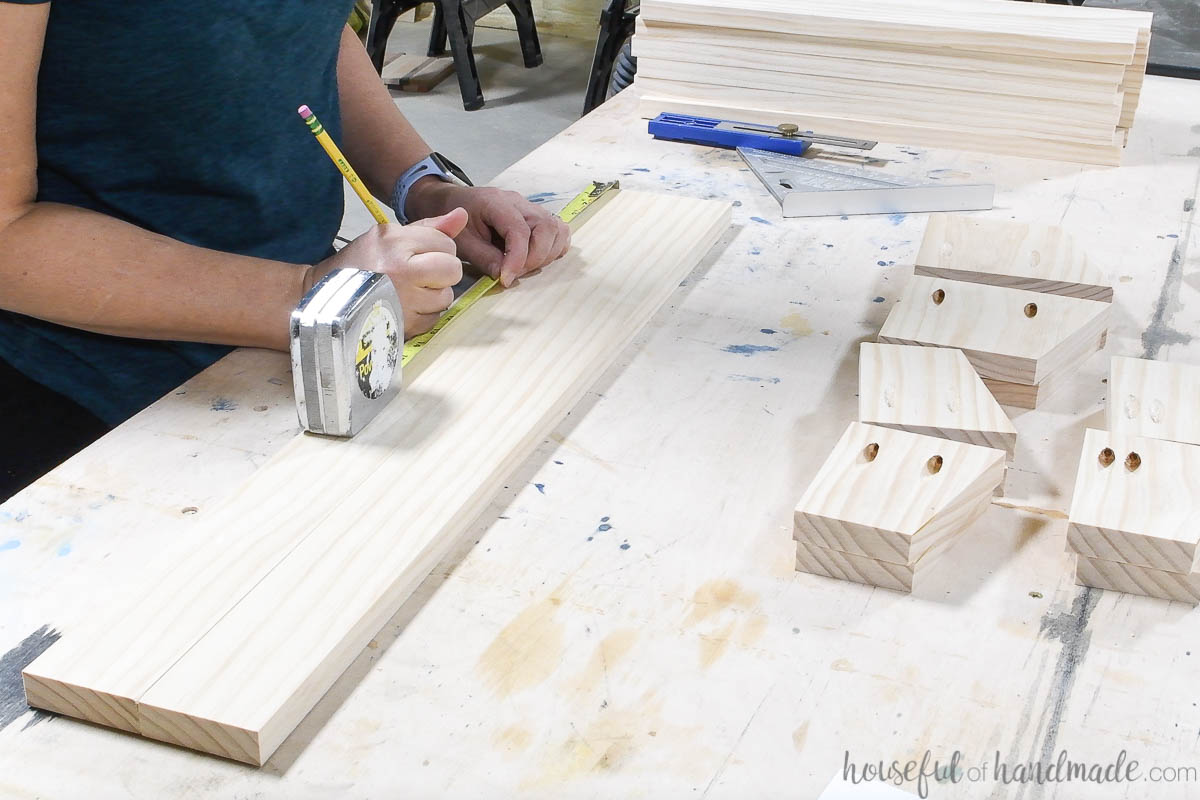
Measure 11 1/2″ down from the top of the 30″ 1×3 boards. Mark both sides of both boards.
This will be where you attach the top of the middle tray. You can adjust this placement if you prefer.
Attach the angled pieces to the center 1×3 with wood glue and 1 1/4″ pocket hole screws.
Line the top of the top tier boards up with the top of the 1×3. Line the bottom of the bottom tier boards up with the bottom of the 1×3. And line the top of the middle tier boards up with your mark.
Use a face clamp to ensure the pieces are flush on the front/back.
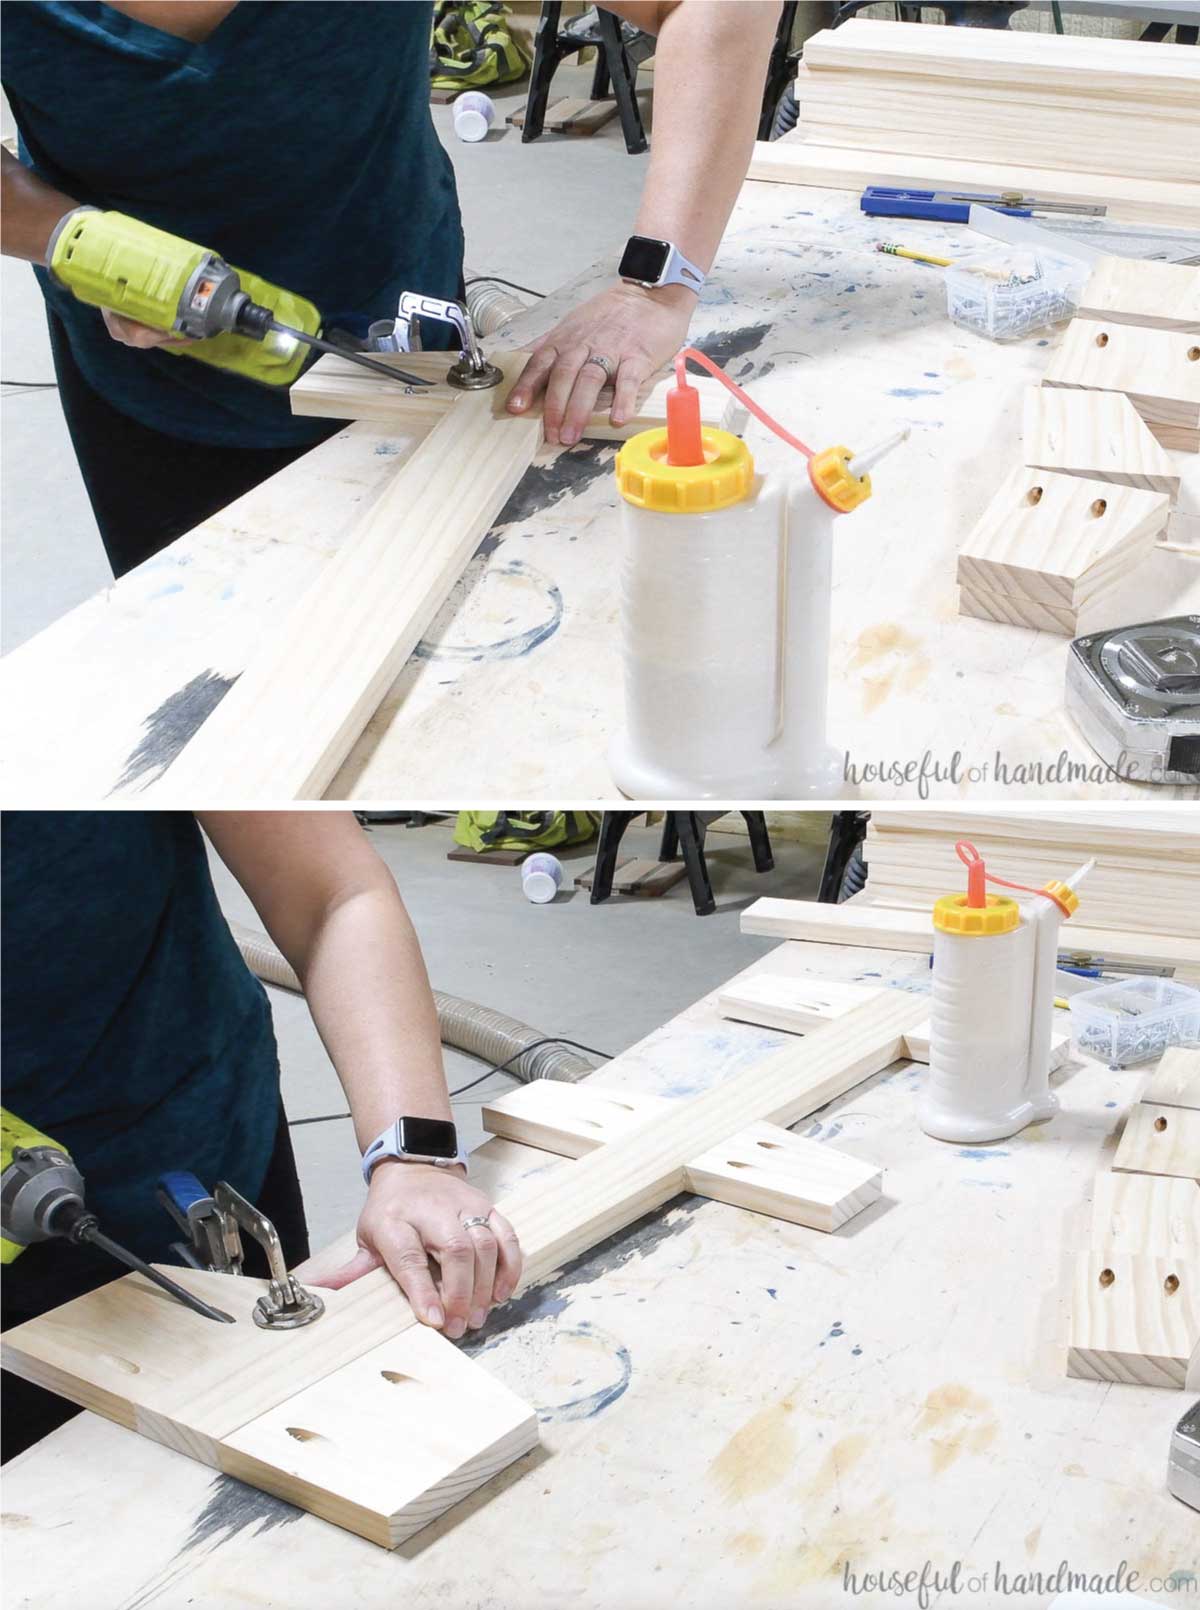
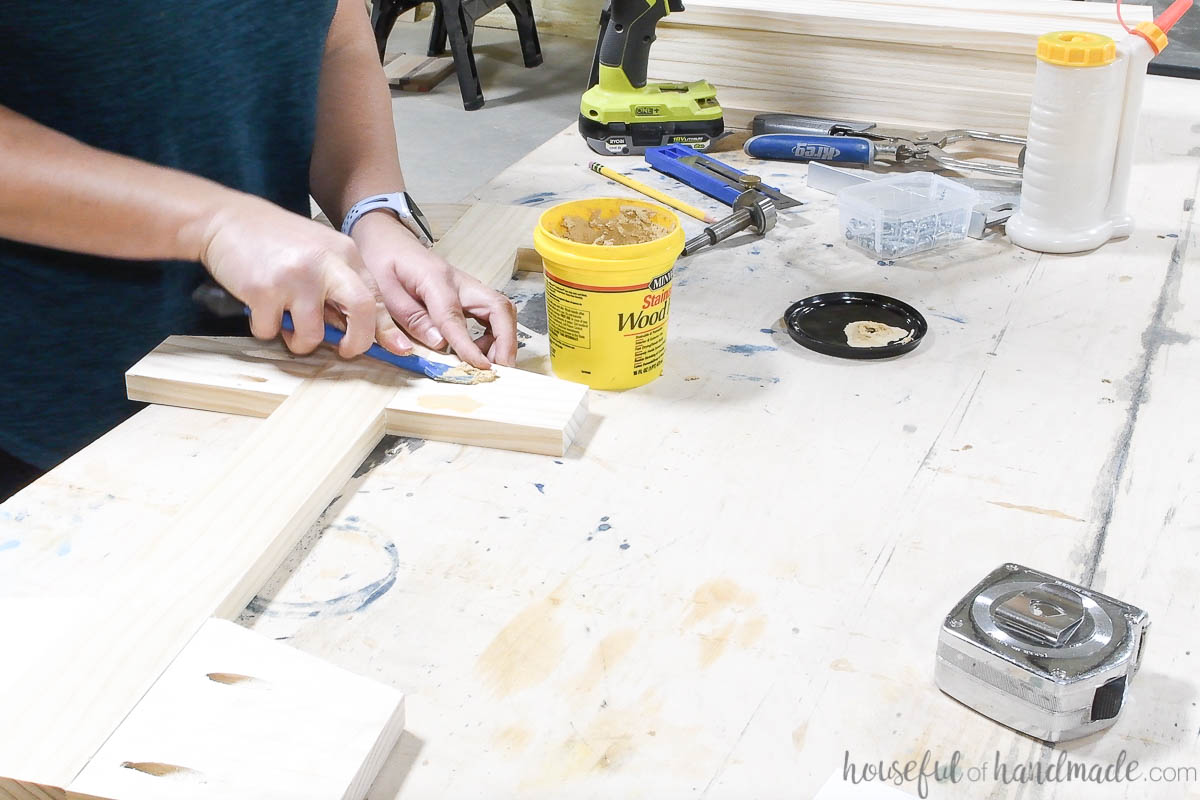
Fill the pocket holes with wood putty or plugs so they are not visible on the inside of your rolling cart. Then sand the sides smooth before moving on.
Measure 3/4″ down from the top of the side pieces and the top tier. Draw a line. Measure 1 1/2″ down from this line and draw another line. This is the top and bottom of the handle.
Make a mark at the center of this area on the seam of the 1×3 center board and side boards.
Clamp the two top pieces together. Use a 1 1/2″ forstner bit to drill holes with the center of the bit at the center mark on the seam.
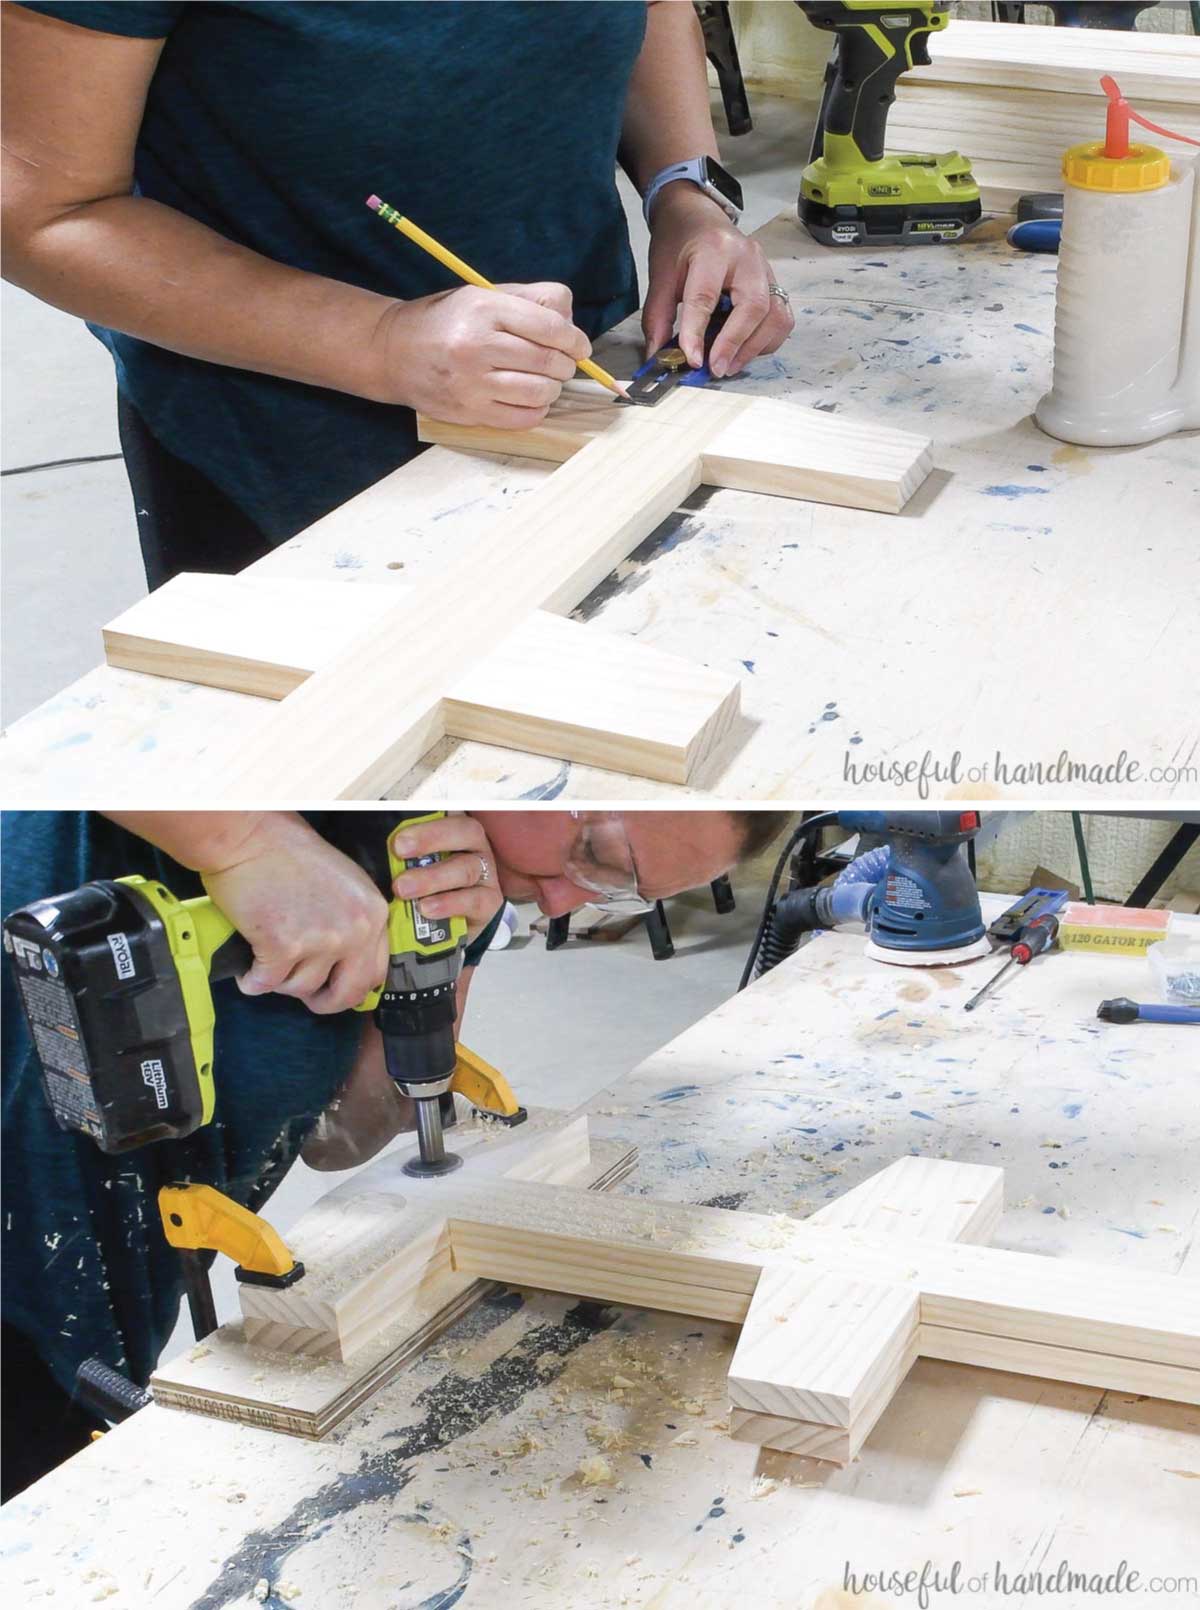
Then use a jig saw to cut along the lines between these holes to create the handle opening.
Sand the handle opening.

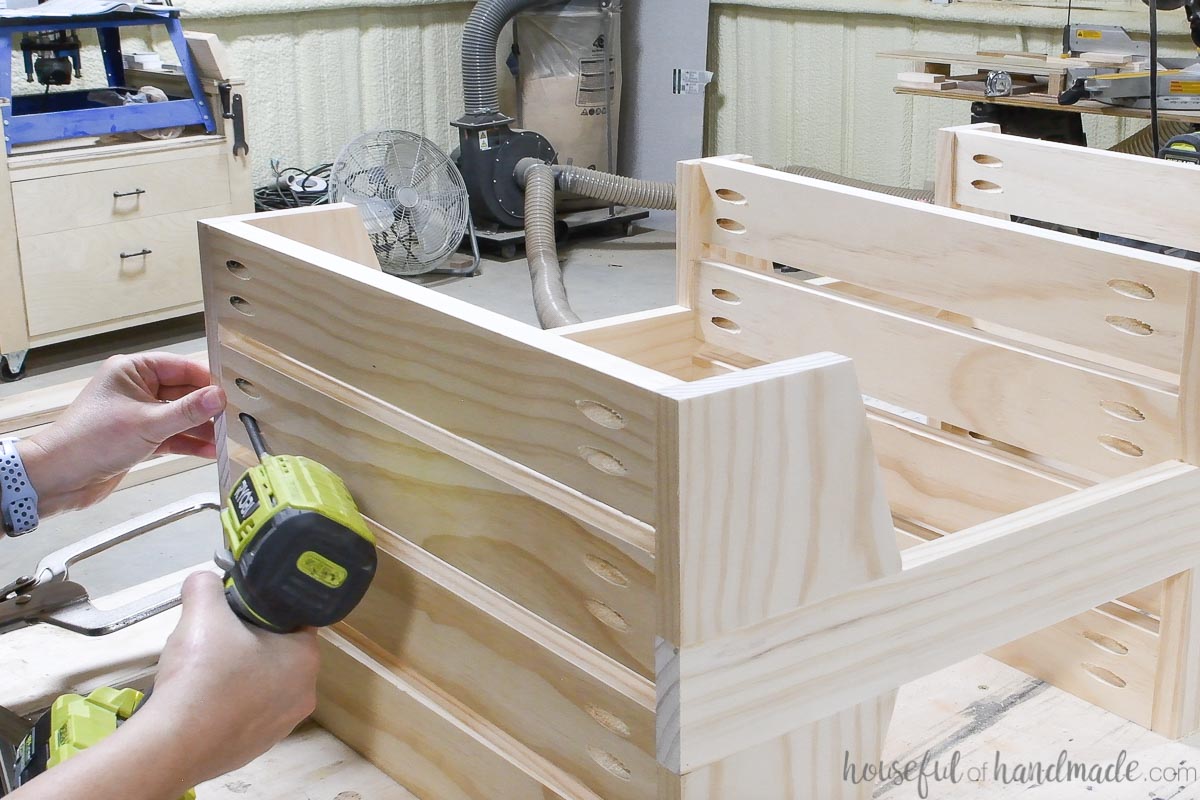
Drill two pocket holes in each end of all the 18″ 1×3 boards.
Attach the 1×3 boards to one of the side pieces. Use 4 boards on each tier.
The outer boards should be flush with the edge of the side boards. Then space the inner boards 1/2″ apart.
Secure with wood glue and 1 1/4″ pocket hole screws.
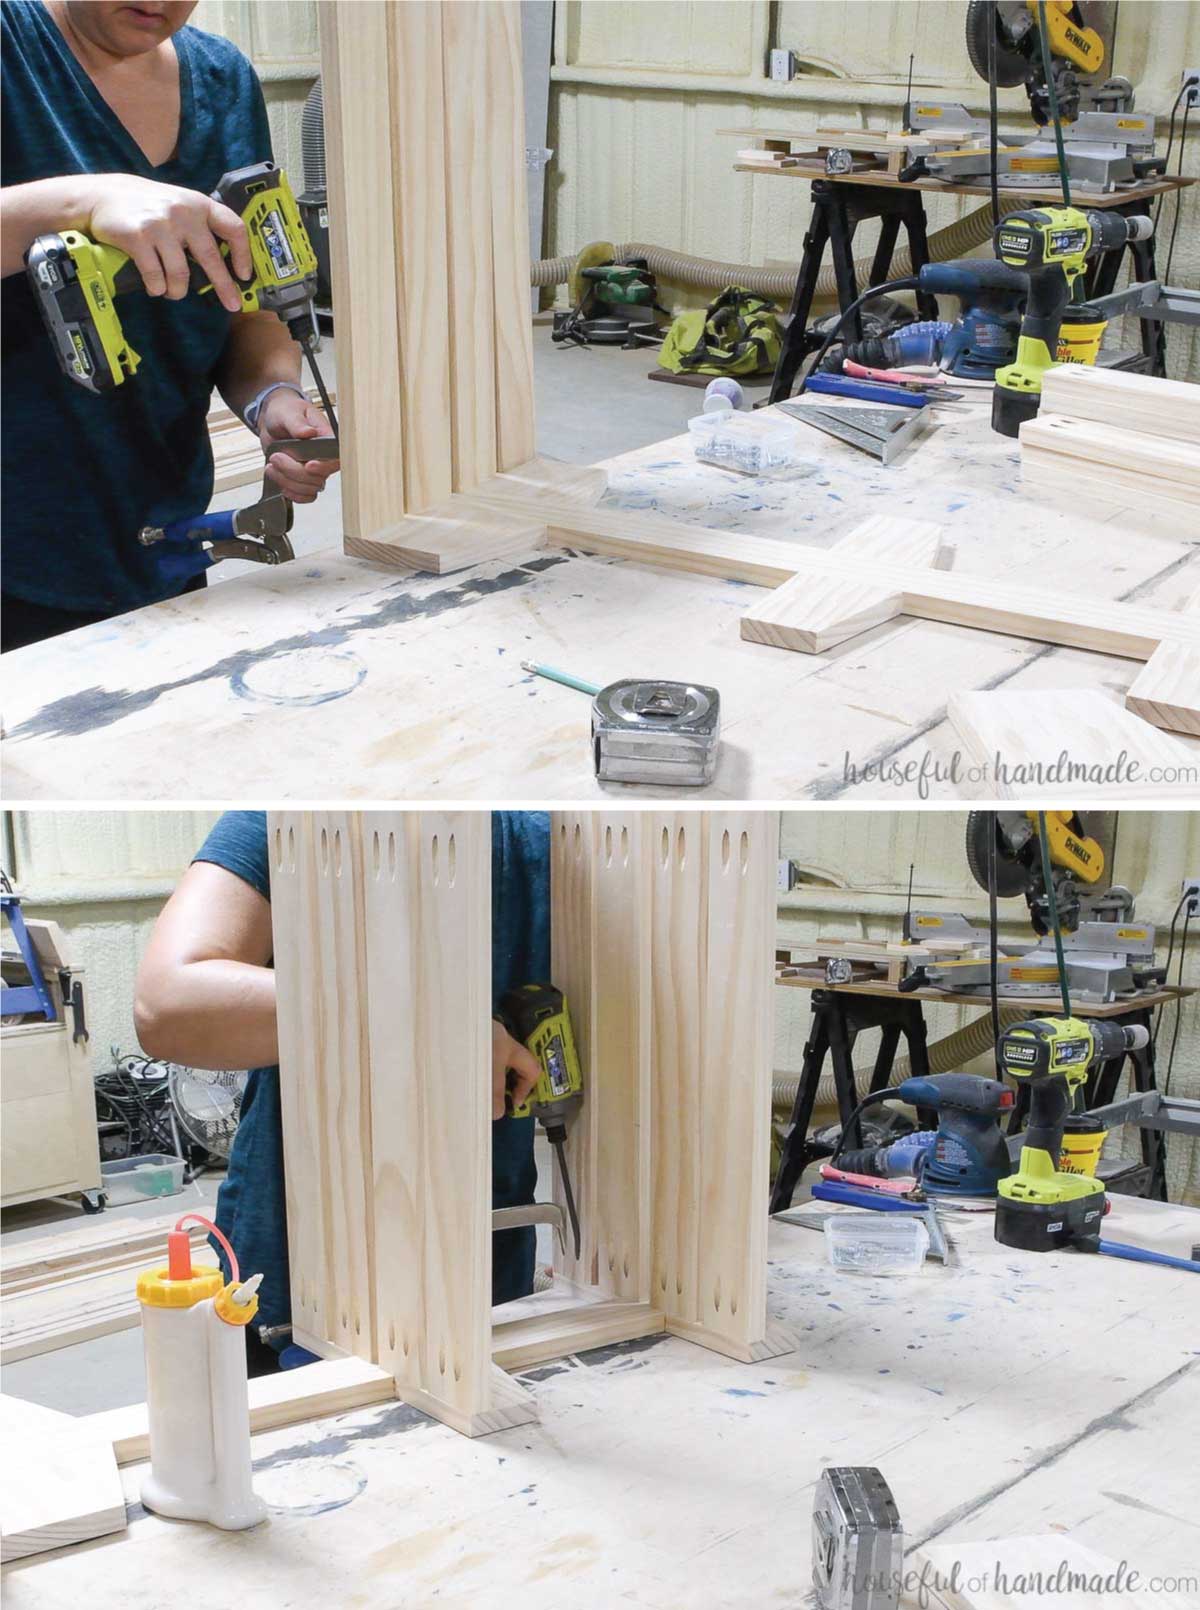
Once all the boards are attached to the one side, start attaching them to the other side the same way.
Finish the wood cart
Sand and stain/paint your assembled rolling cart.
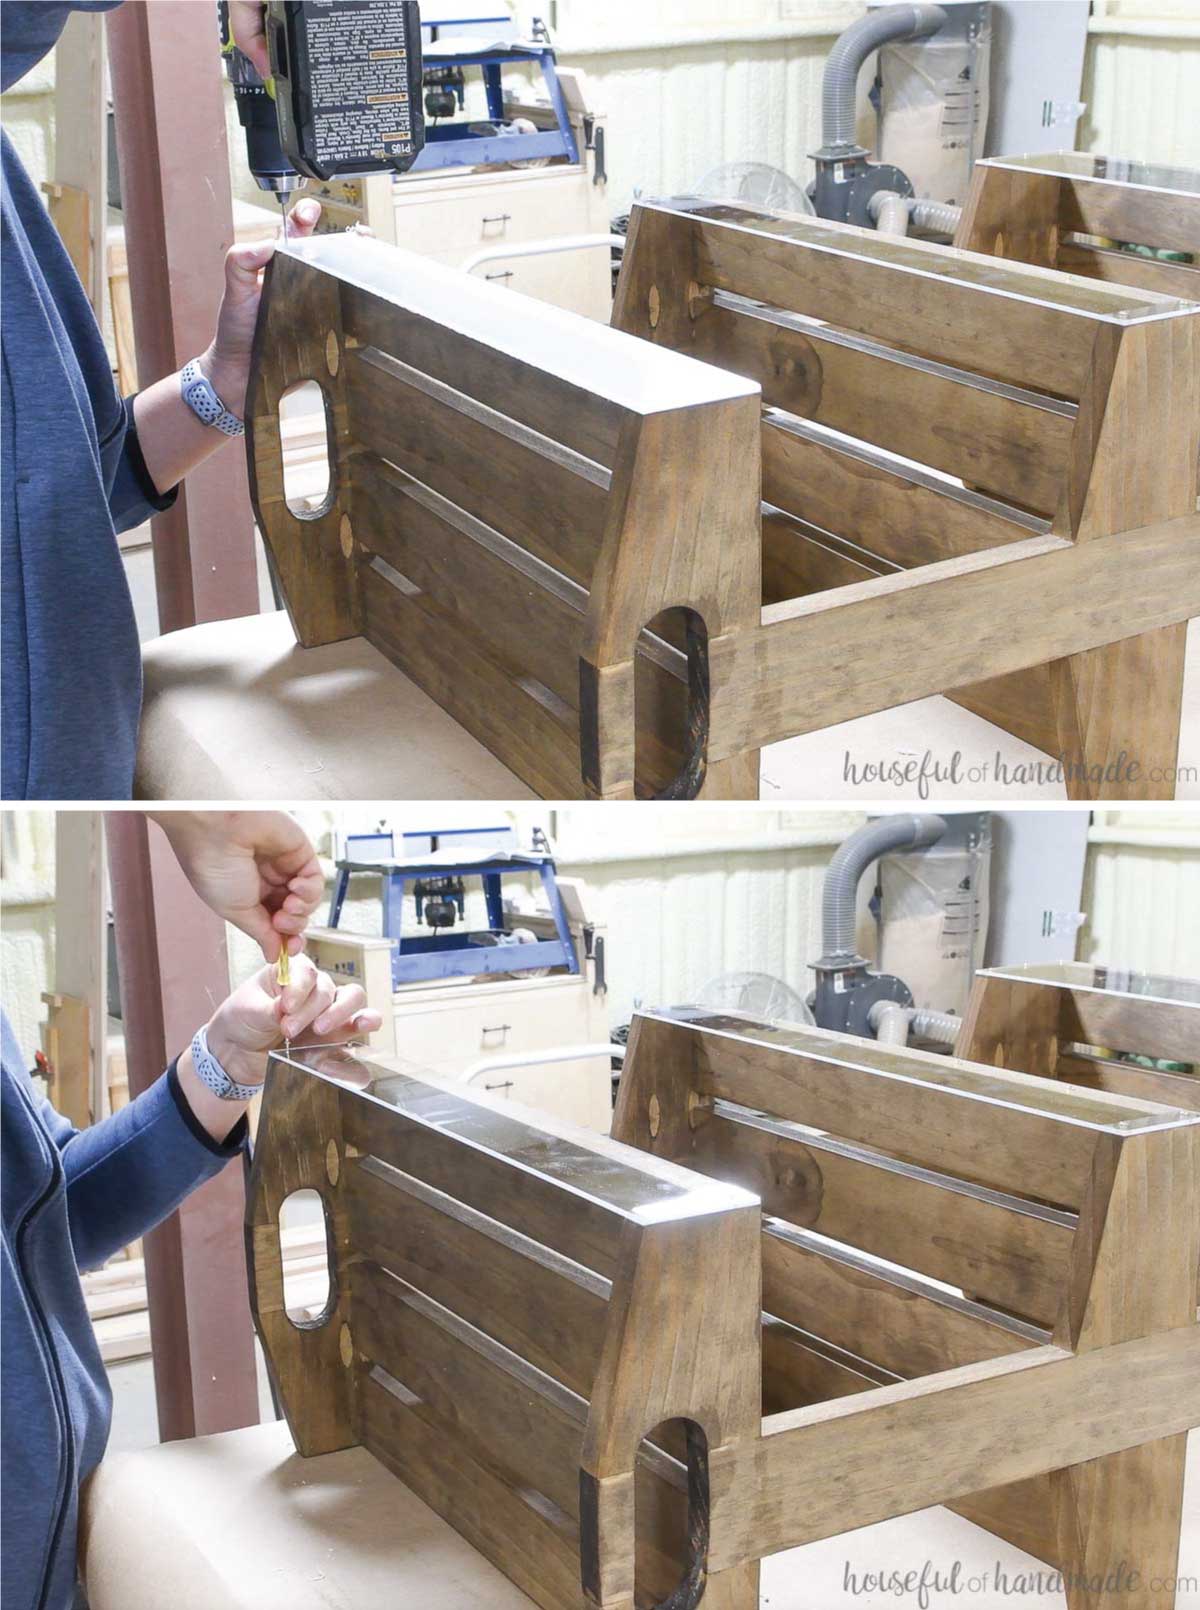
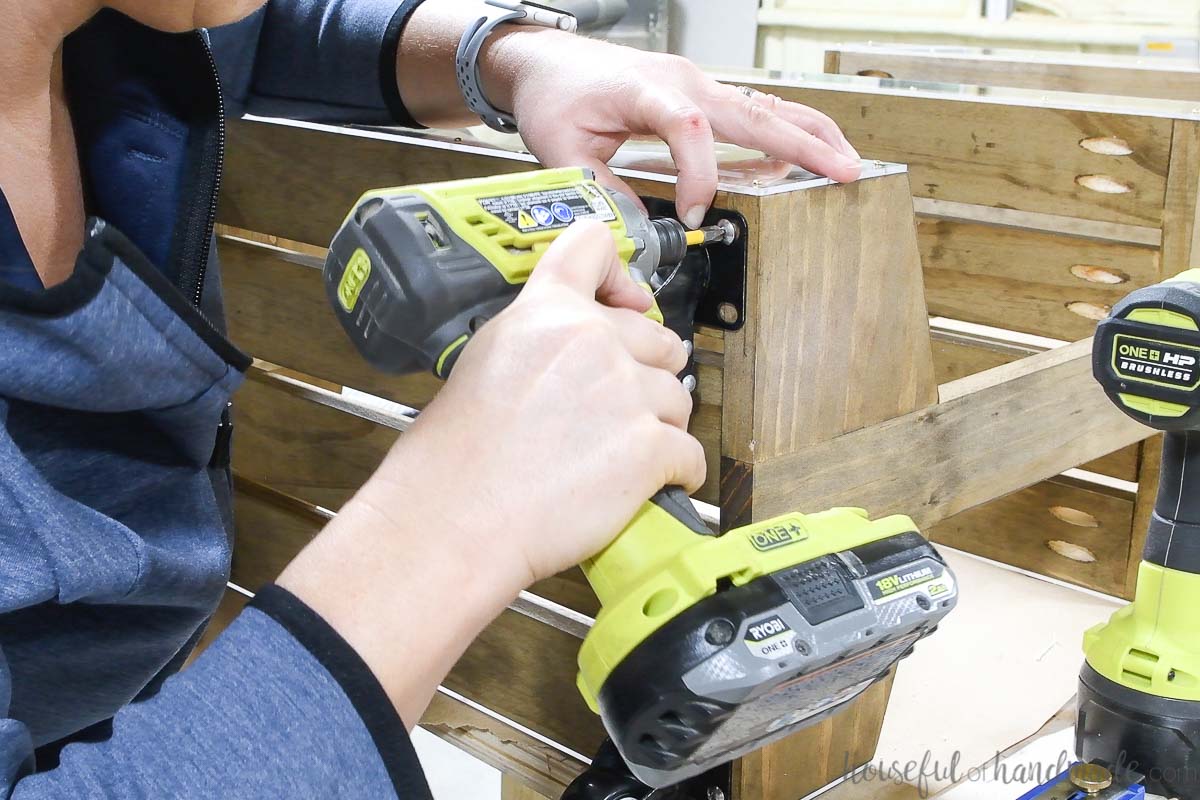
Place the plexiglass pieces on the front of the trays. Mark out the center of the boards it will attach to and pre-drill holes.
Remove the backing on the plexi and then attach it with the small wood screws. Repeat for both sides of each tray.
Attach the wheels to the four corners of the bottom tray.
And now your wood rolling cart is all done! Don’t you feel more organized already?
I couldn’t wait to fill mine up with the craft supplies that have been sitting in boxes for the last year and a half. Now I can easily see what I have to work with!
This rolling cart would be such a fun DIY gift for anyone on your list. And I am sure they will think about you all year while using it.
And now it the perfect time to get your new Kreg 720Pro while it is on sale. It’s the gift that will keep on giving as you use it to finish your to-do list all year!
Happy Building!

Thank you to Kreg Tools for sponsoring this post. I only recommend products that I use and love and all opinions are 100% my own. Click here to read my full disclosure policy.