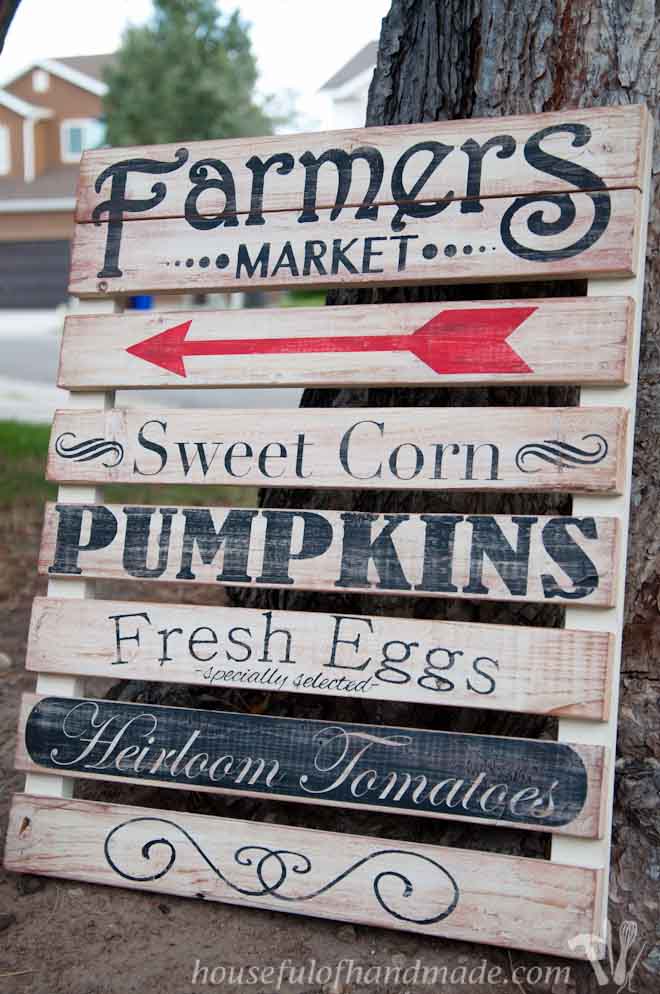
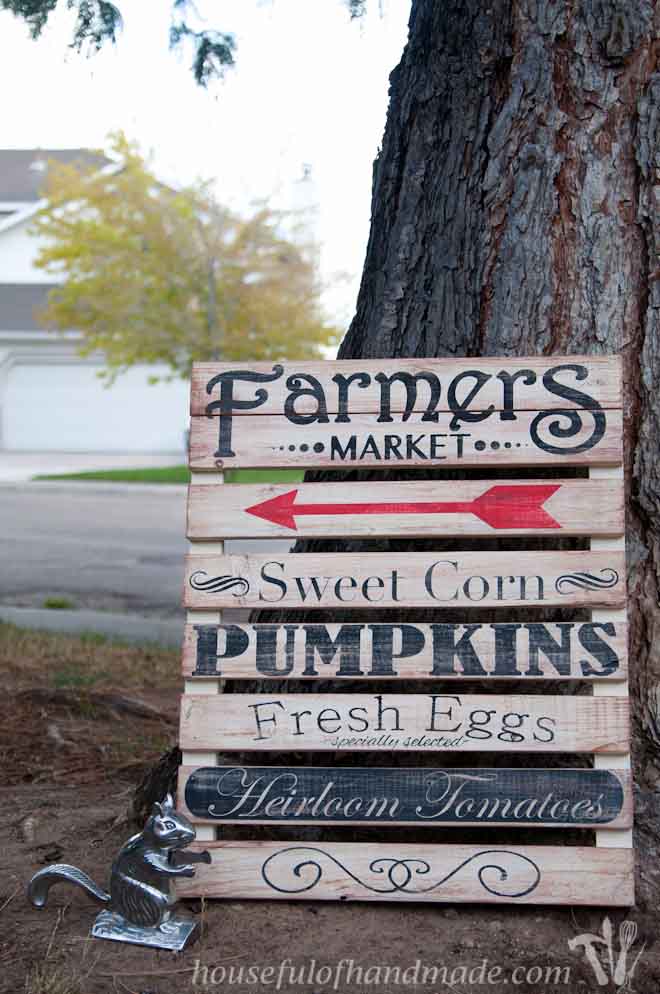
An easy to build farmers market sign is the perfect decor for early fall.
Fall is definitely in the air at my house. Even though it’s still summer outside, I am enjoying making it fall inside.
Last year I finally built a mantle over my fireplace , so now I have the perfect place to decorate for the seasons. Since I finally had someplace to decorate I needed decorations.
And this farmers market mini pallet sign is just what it needs! Build a mini pallet that can be painted to look like a vintage farmers market sign.
This post may contain affiliate links. As an Amazon Associate I earn from qualifying purchases. Click here to read my full disclosure policy.
I wanted some decorations to put up for fall and I wasn’t ready for pumpkins. I use a lot of pumpkins in my Halloween and Thanksgiving decor so I didn’t want to pull them out already and be pumpkined out too early.
So when I though of what August and September meant, I thought farmers markets!
I never miss a week at the market during the early fall. There is so much great produce to find and it’s not too hot to wander for hours.
I also love the look of pallets, but obviously can’t put a big ol’ pallet on my mantle, so I built a mini one! It was so easy.
This whole project can easily be done in a day (maybe two cause you have to wait for paint to dry) and you will be ready for fall!
How to Make a Fall Pallet Sign
Tools & Materials
Recommended Tools:
- Miter saw
- I recently upgraded to this larger sliding miter saw (watch for it to go on sale), but all my projects before were built with this inexpensive miter saw that I loved.
- Brad nailer
- Vinyl cutting machine
Supplies:
- (2) 8′ long 1×3 boards
- (1) 6′ long 1×2 board
- 1 1/4″ brad nails
- Creamy white paint
- Dark stain
- This is a great project to use up left over paint and stain on
- Heavy grit sandpaper
- Black and red craft paint
- Clear top-coat spray
- (4) 12″ x 24″ pieces of non-permanent vinyl
- (4) 12″ x 24″ vinyl transfer paper
- You can also buy vinyl and transfer paper in large rolls
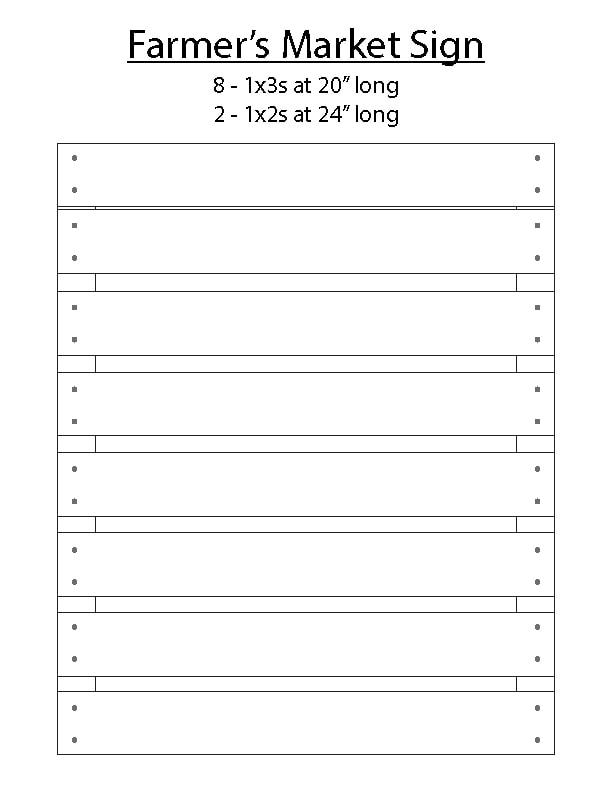
STEP 1- Build the Mini Pallet
Cut (8) 20″ boards from the 1x3s and 2 24″ boards from the 1x2s.
Attach the 1x3s onto the top of the 1x2s according to the diagram below. Ensure they are flush with the outer edge and the top and bottom boards are flush at the top and bottom.
Use a wood glue and a couple 1 1/4″ finishing nails on each 1×3 to secure it to the 1x2s. I didn’t even have a nail gun last year when I built this, so I used a good ol’ hammer and nails.
Let the glue dry, then you are ready for paint. To give it a rustic look, leave the wood unsanded.
STEP 2- Paint and Antique the Pallet
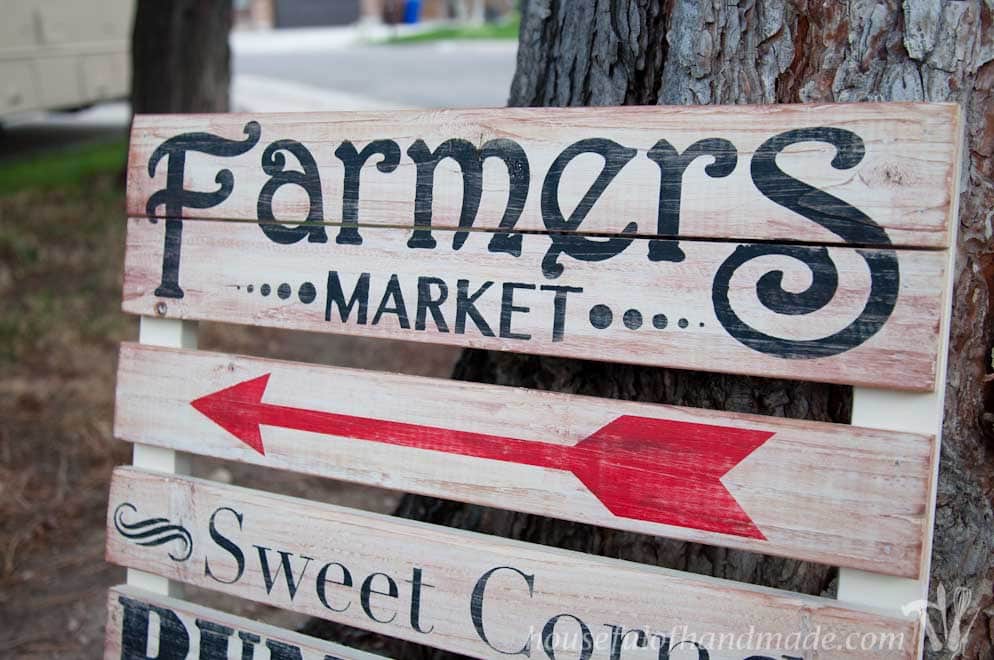
I wanted my farmers market sign to have an aged look, like it had been sitting outside directing people to the market for years.
To do this, start by painting the whole thing with a creamy colored paint, thinned out with a little water so the wood grain will show through (not sure what color I used, just some I had left over from another project).
Then using a heavy grit sand paper, sand around the edges and over the top in places.
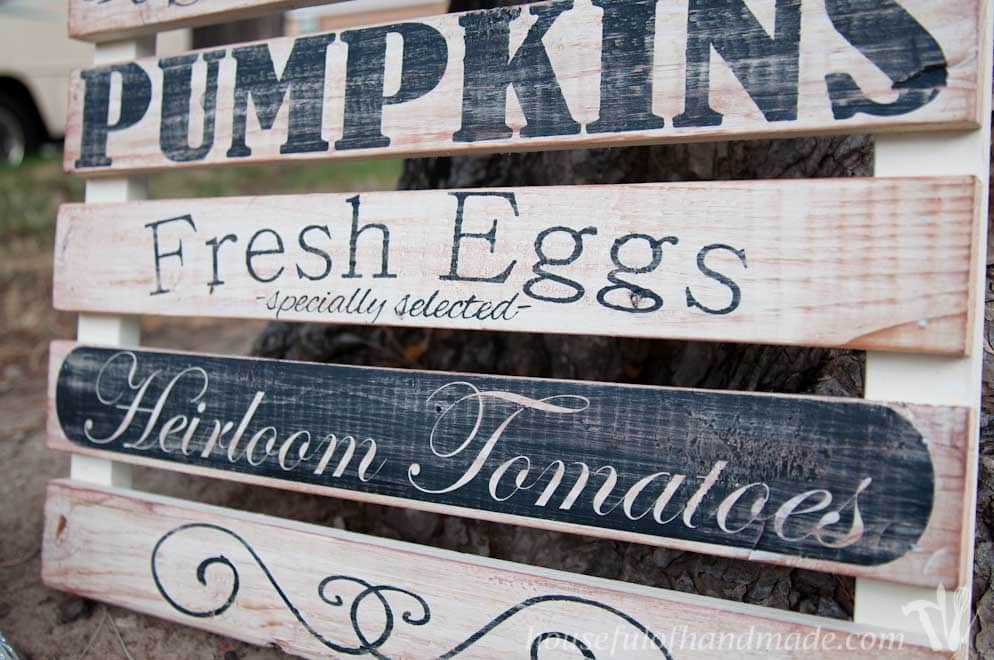
Finally, use a dark stain on a rag and rub it over the white paint in random places. Finish with a little more sanding, and presto, a weathered looking pallet sign.
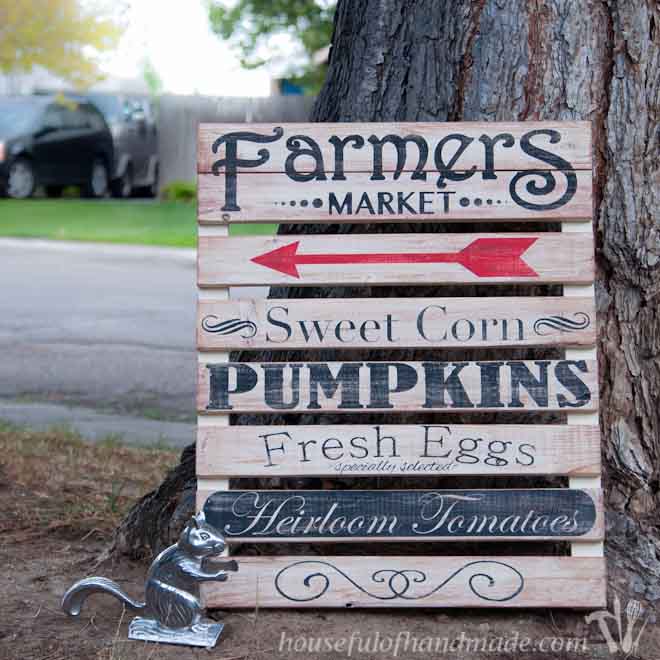
STEP 3- Stencil the Farmers Market Design
Now it was time for the stenciling. I used my much loved Silhouette Cameo. It is seriously one of those DIY tools I never new I couldn’t live without until I had it!
Cut out stencils for the different categories out of vinyl. You should be able to get 2-3 stencils on each sheet of 12×24 vinyl.
Using the transfer sheets, place the vinyl on your mini pallet. Ensure it is pressed down well and paint black or red over the top of the stencil with your craft paint. To get clean lines with your stencils, do not pull the paint across the stencil, but press it down onto the wood.
After the paint is dry, remove the vinyl. Sand again with a heavy grit sand paper to give the words an aged look (or it will look weird).
Then give it a quick spray with a clear top-coat spray to protect all your hard work. Now it is ready for display!
Now I am well on my way to having the perfect fall mantle. Maybe it will encourage me to finish the fireplace.
Just a few more decorations and I will be ready to welcome in fall 🙂
