Hanging drywall is not hard or complicated. And it doesn’t require a lot of specialty tools.
So next time you are working on a home project, you should hang the drywall instead of hiring someone to do it.
Not only installing your own drywall save you money, but you will love that you learned a new skill and did it yourself!
This post may contain affiliate links. As an Amazon Associate I earn from qualifying purchases. Click here to read my full disclosure policy.
What is the difference between drywall and sheetrock?
Sheetrock is a name brand of drywall. But it is so popular that the two words are almost interchangeable when referring to drywall (kind of like Kleenex and tissues).
What kind of drywall should you use?
Drywall comes in different types and thickness. Knowing what drywall you need is important to getting professional results on your DIY project.
- Use 1/2″ thick drywall when studs are 16″ apart.
- Use 5/8″ drywall when studs or ceiling joists are 24″ apart.
- Use green board drywall for bathrooms or places with lots of moisture.
Green board is moisture resistant drywall but not moisture proof. It cannot replace cement board in showers or other applications.
How to DIY Drywall Installation
Tools & Materials
Recommended Tools:
- Drill or Impact driver
- Level
- Drywall screw setter bit
- Utility knife
- Drywall saw or Multi-tool
- You can cut out openings in the drywall with a drywall saw, but a multi-tool is much faster and comes in handy for lots of DIY projects.
Supplies:
- Drywall sheets
- 1 1/4″ drywall screws
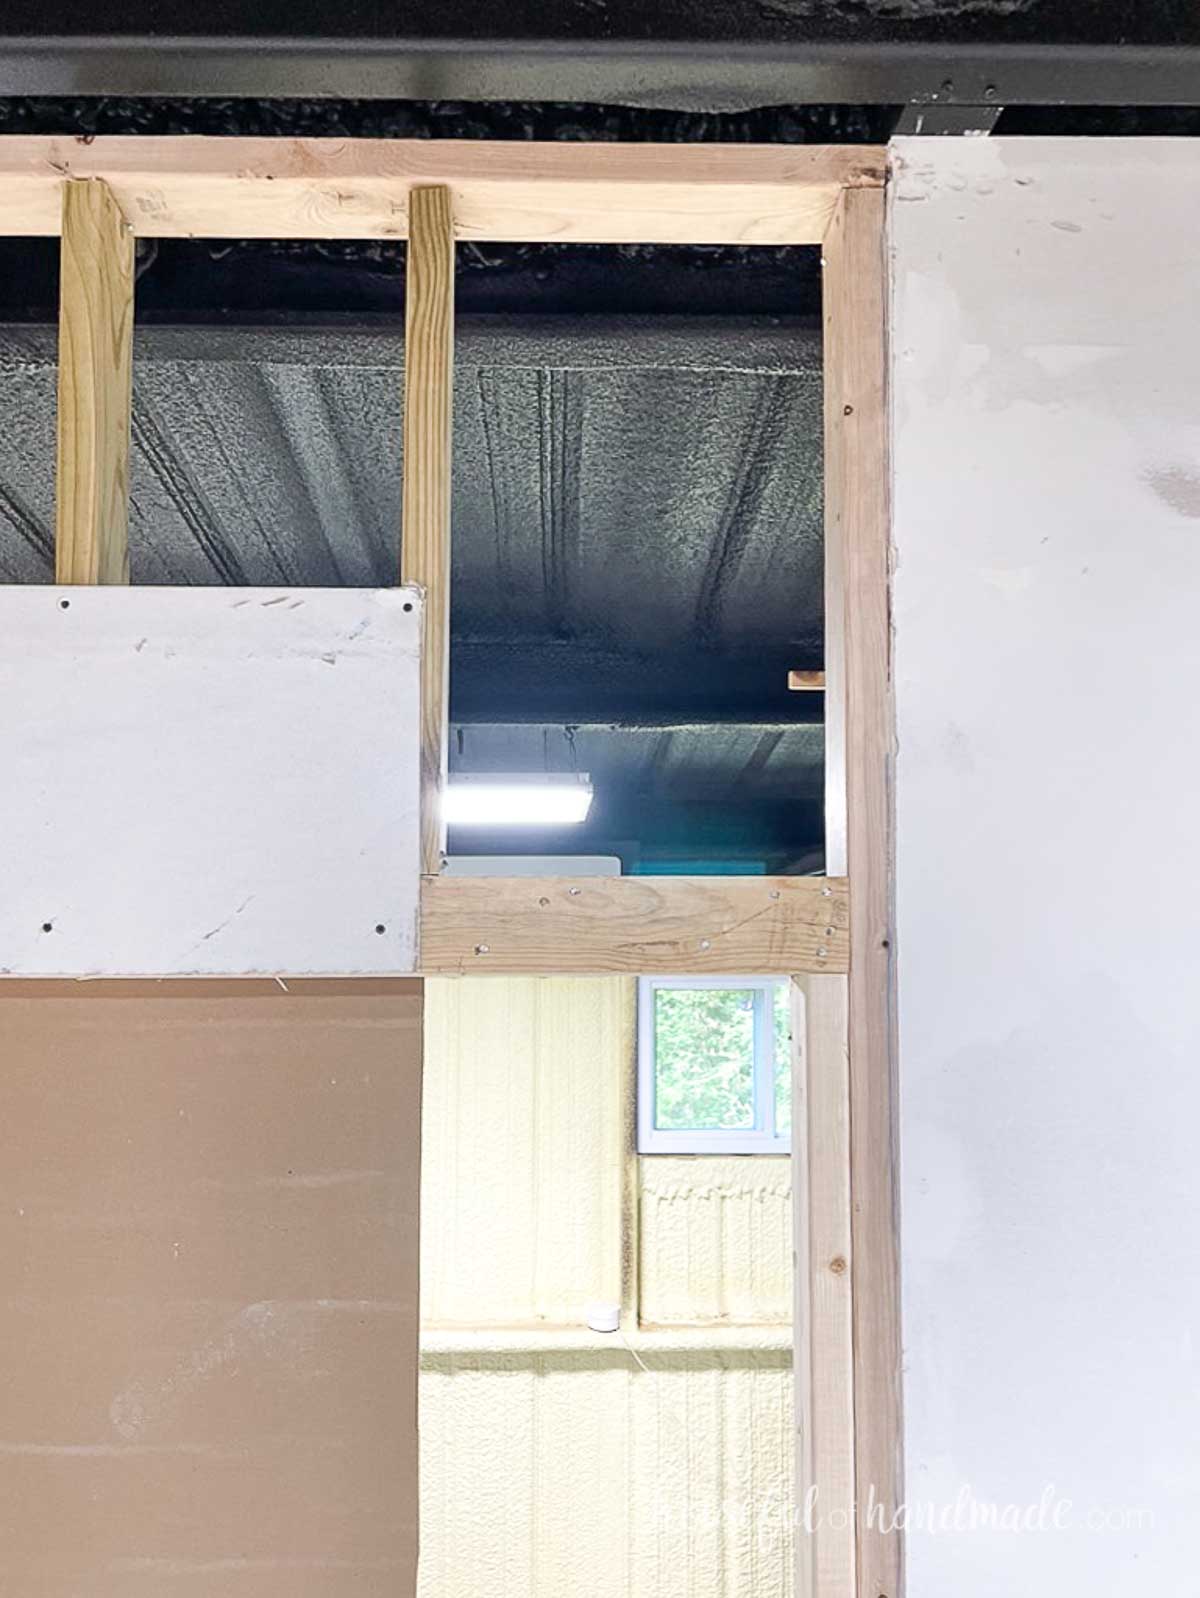
STEP 1- Install additional corner boards if needed
All the edges of your drywall need to be attached within a few inches to a stud. Some corners will have a side that does not have a stud available to attach drywall.
In these corners, attach 2×4 backers so you have something to attach the drywall to.
STEP 2- Measure and cut first sheet
If you are drywalling a ceiling and walls, always hang drywall on the ceiling first.
Typically pros start with the first row of drywall on the upper part of the wall. But I find it way easier for a DIYer to start at the floor and move up.
If you have an 8′ ceiling, you will need to measure the distance from the top of the wall to the bottom and be careful that any extra gaps are on the floor, not the ceiling. These gaps are easily covered with a baseboard.
We have a 9 1/2′ ceiling so I knew I would be adding a third row and could start with the drywall on the floor.
Pros use a drywall lift to help hold sheets in place when attaching. Starting at the floor allows you to balance the upper sheet on the ledge of the first sheet.
Measure where the first sheet will go. I prefer to start where I can put a full sheet on the wall, but if that is not possible, start at the edge of the wall.
You always need to seam your drywall on a stud. If your studs are 16″ apart on center, 8′ pieces will fit properly on the studs. If not, you need to cut the drywall so it covers half the stud on each end.
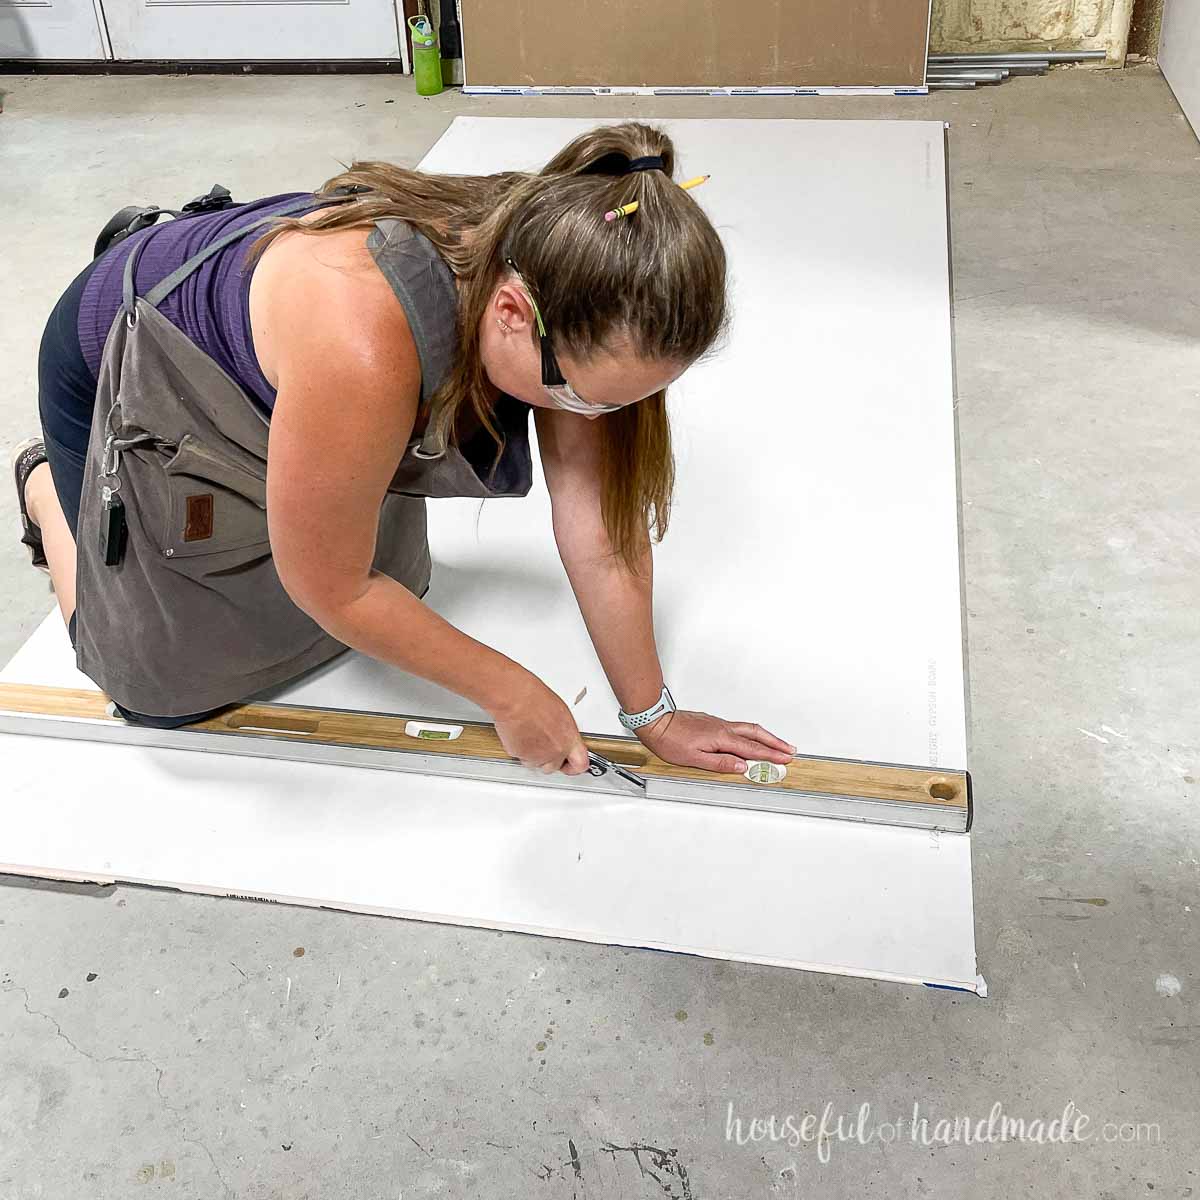
To cut the drywall, measure and mark your line on the board. I like to mark it in 3 places that my 4′ level cover so I know instantly if one of my marks is off.
Draw a line where you need to cut. I do this in case the level moves on the next step. Better safe then sorry!
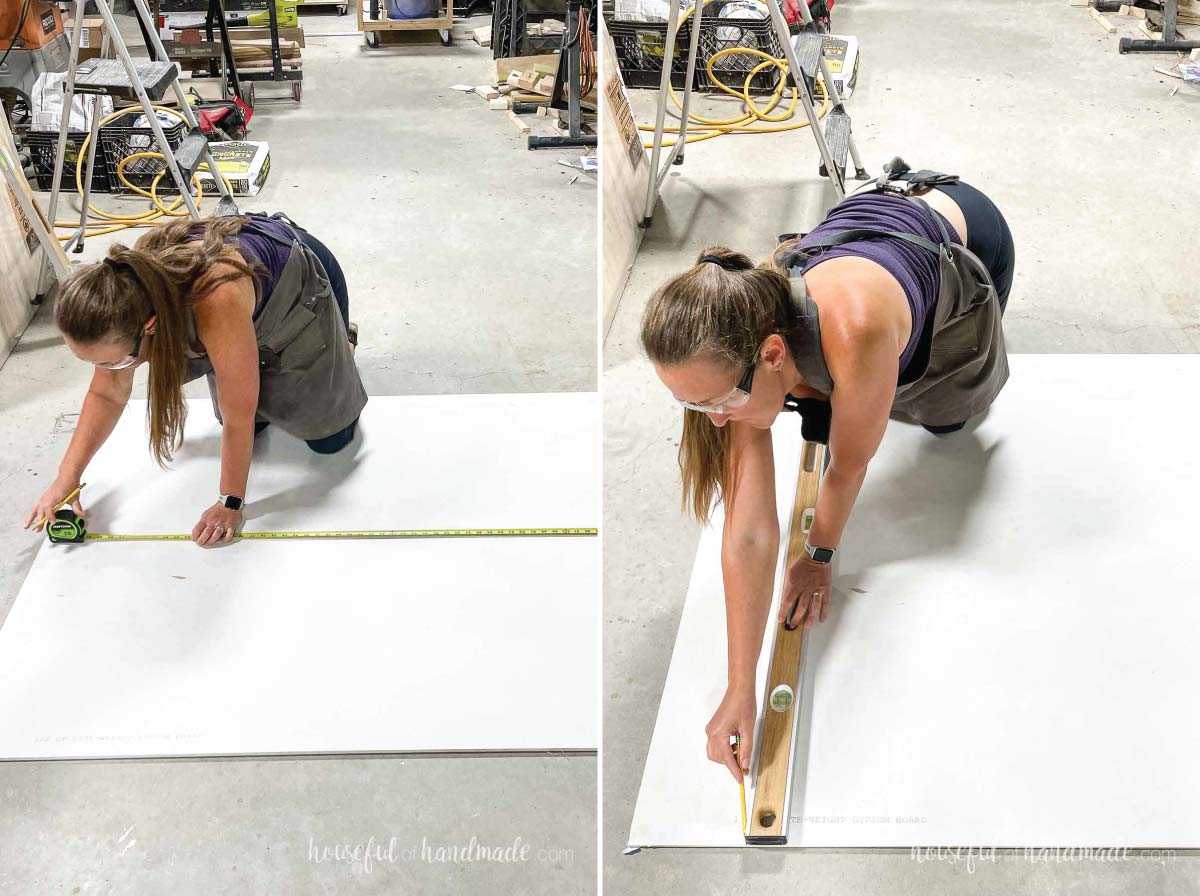
Then use your utility knife to score your line. Score it deeply, I usually do 2-3 passes to get a good score.
Lift your sheet up and pop the board at the cut line, it should break right across your score line if scored.
To pop the board, hold the larger side firmly with the non-scored side closest to you. Then hit the seam area softly with the heal of your hand or knee (or both).
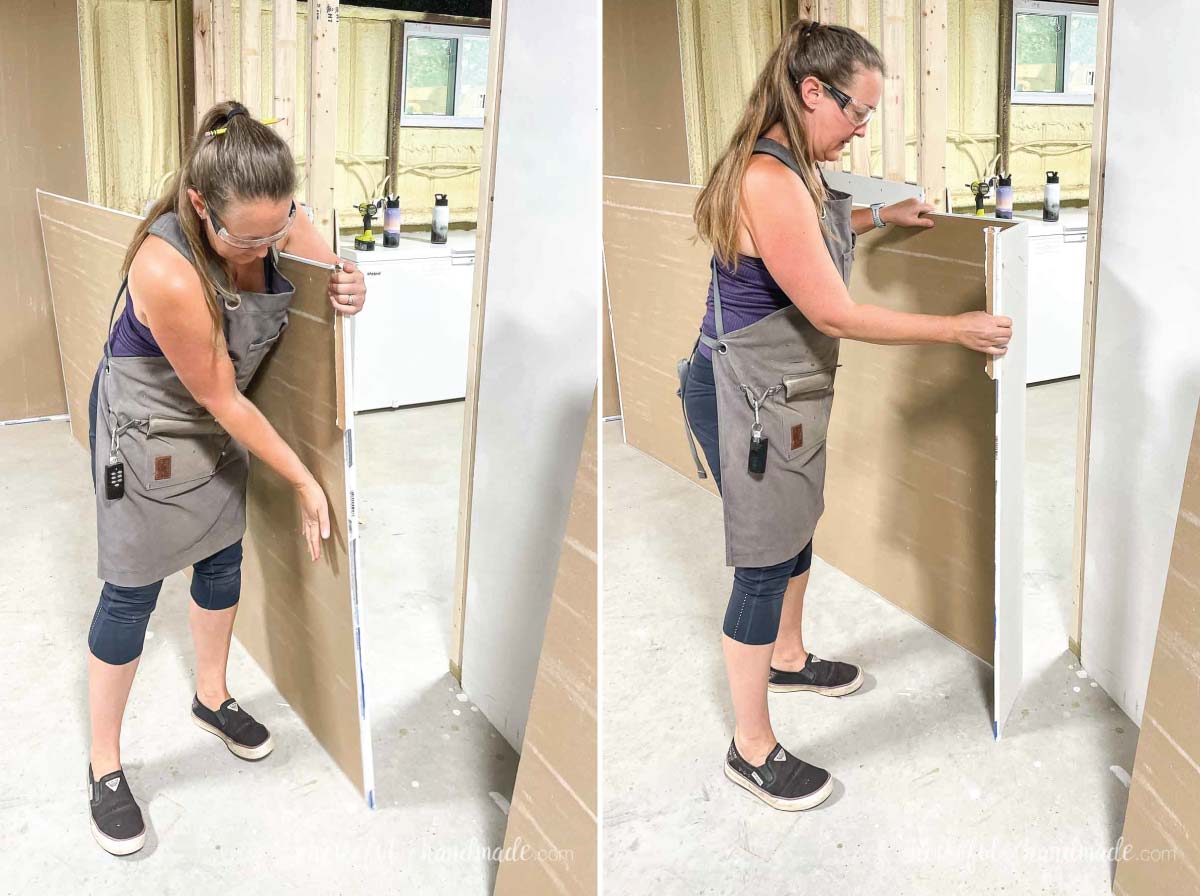
Pull the two pieces together to create a crease at the cut line where the paper on the other side is not cut.
Then using your utility knife, run it down the crease to separate the two pieces.
STEP 3- Attach drywall to the studs
Lay the whole (or cut) sheet up against the studs. Like I said, we like to start at the floor.
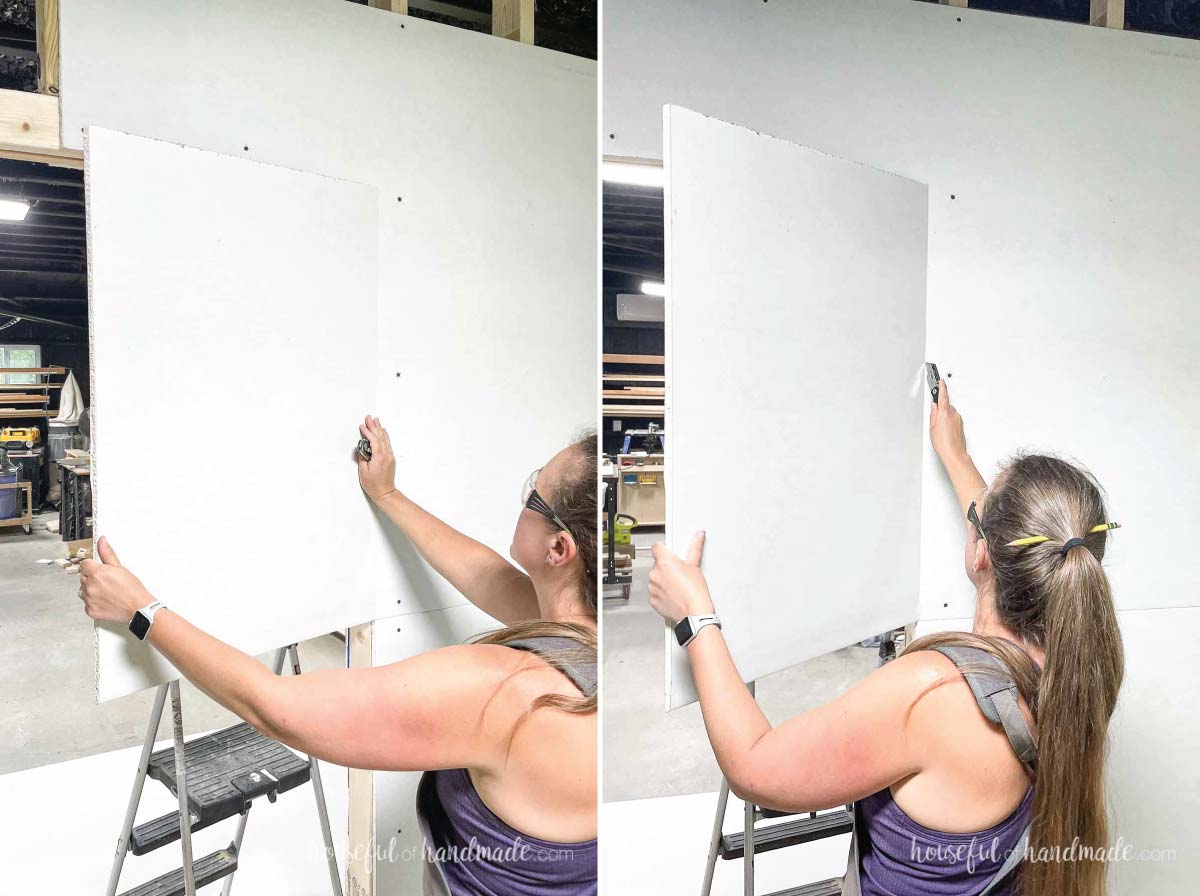
Since your floors might not be perfectly level, it is a good idea to level the drywall before attaching. Two people are helpful when doing this.
Have one person hold the drywall and place a level on the top. Lift a corner to level it and then drive a couple screws in at the top to hold it level.
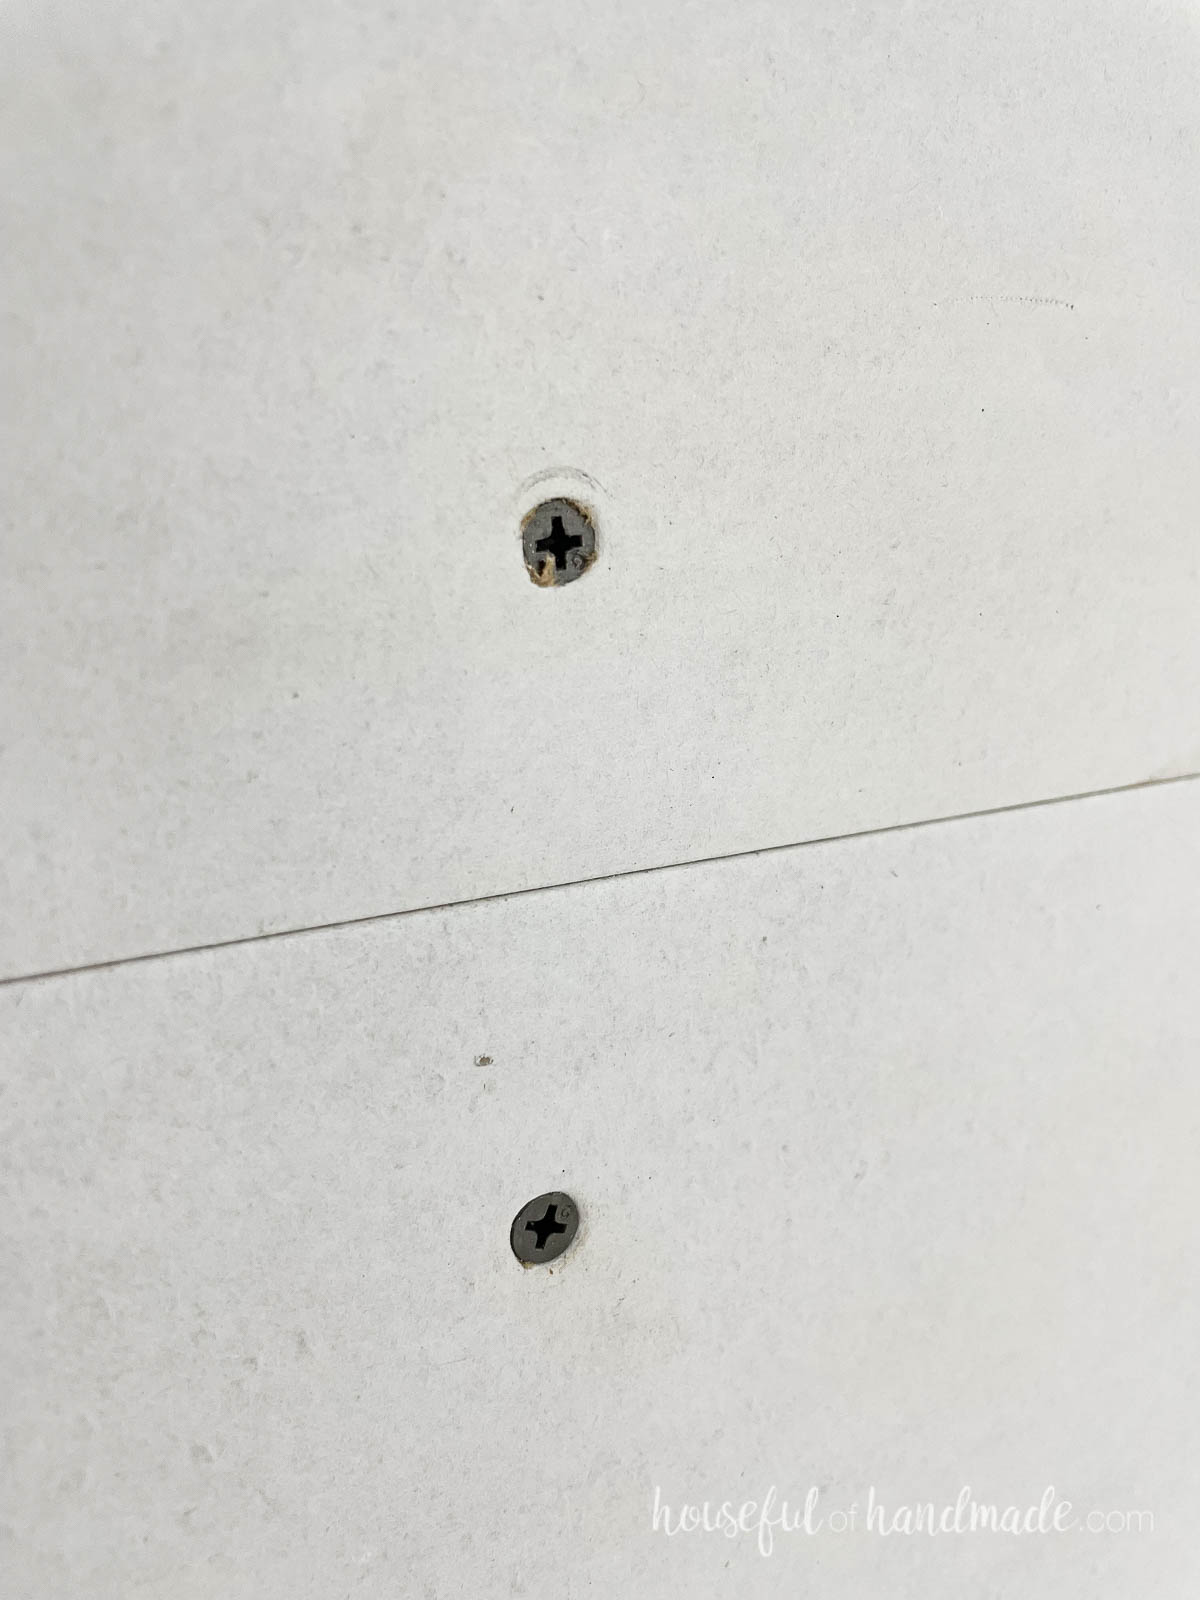
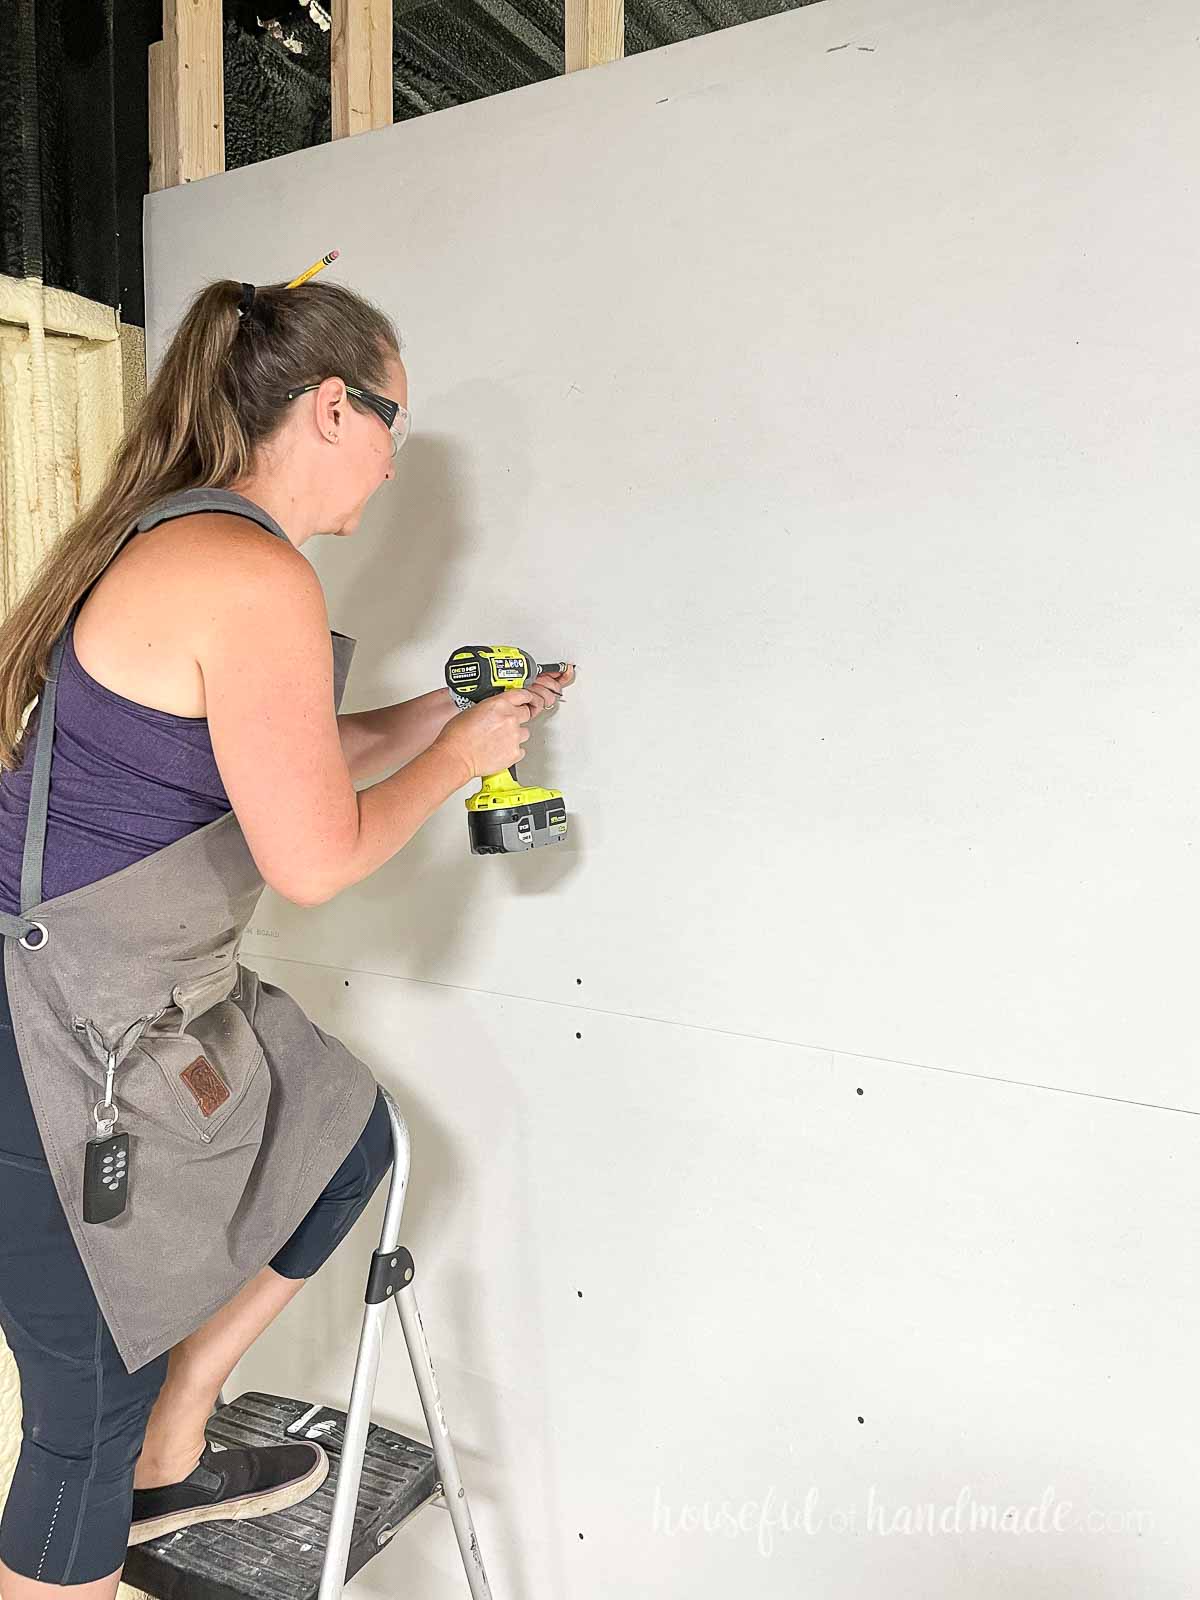
When attaching the drywall, use 1 1/4″ drywall screws and drive the screw in so it is slightly countersunk into the drywall.
Do not over sink it. If you break the paper cover, it can have issues.
My favorite (and the easiest) way to attach drywall is with a drywall screw setter. It is a bit for your drill or impact driver that prevents you from over driving the screws.
And bonus, it is cheap so don’t hang drywall without it!
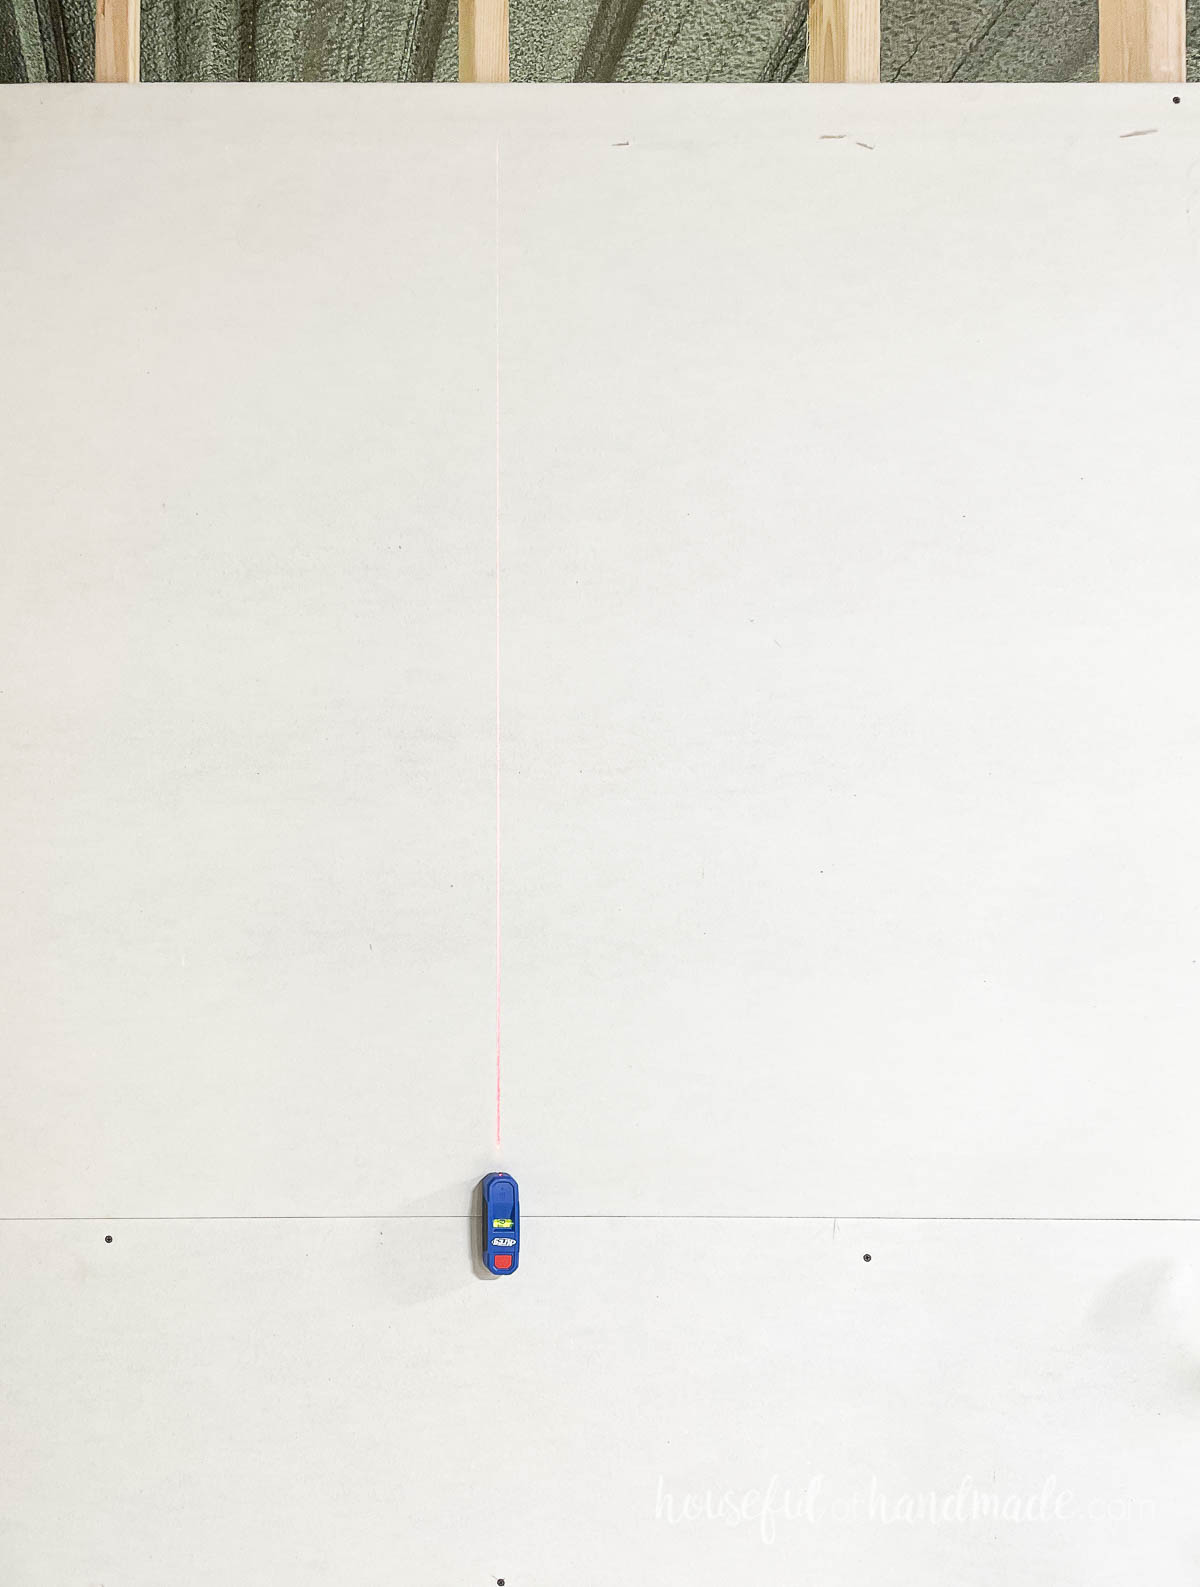
Use a level to draw a line (or a handy laser level so no line is needed) on the drywall at the center of each stud.
Attach the entire sheet of drywall into every stud. I like to use 4-5 screws in each 4′ wide sheet: one on each edge, and the rest split in the center.
This puts the screws every 10-12″ along each studs.
When driving screws at the edge, be careful not to crush the drywall. The drywall is extra delicate in the corners or when you are putting screws really close to the edge where it shares a stud with another sheet.
Continue adding screws to every stud behind the drywall. Then finish the first row of drywall on your entire wall (or ceiling).
STEP 4- Cut around openings
Window and Door Openings
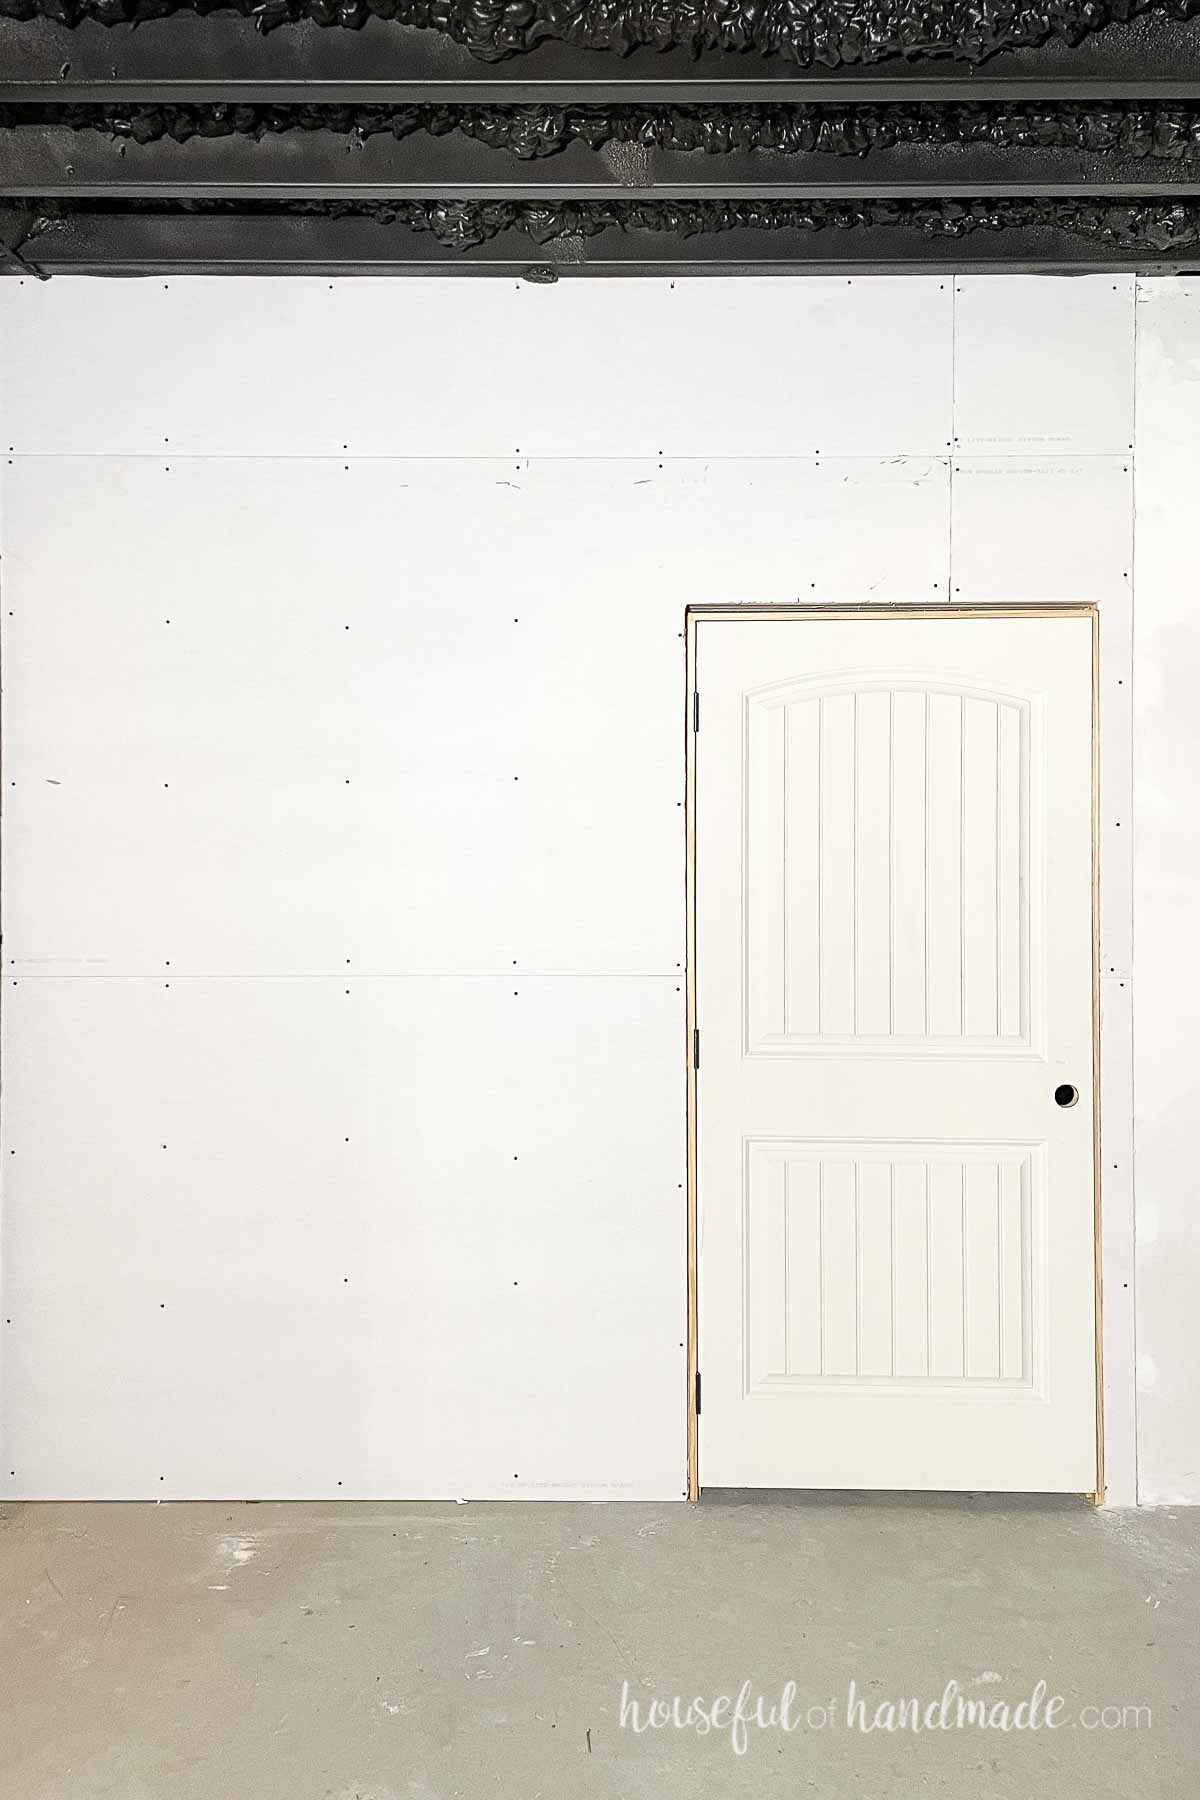
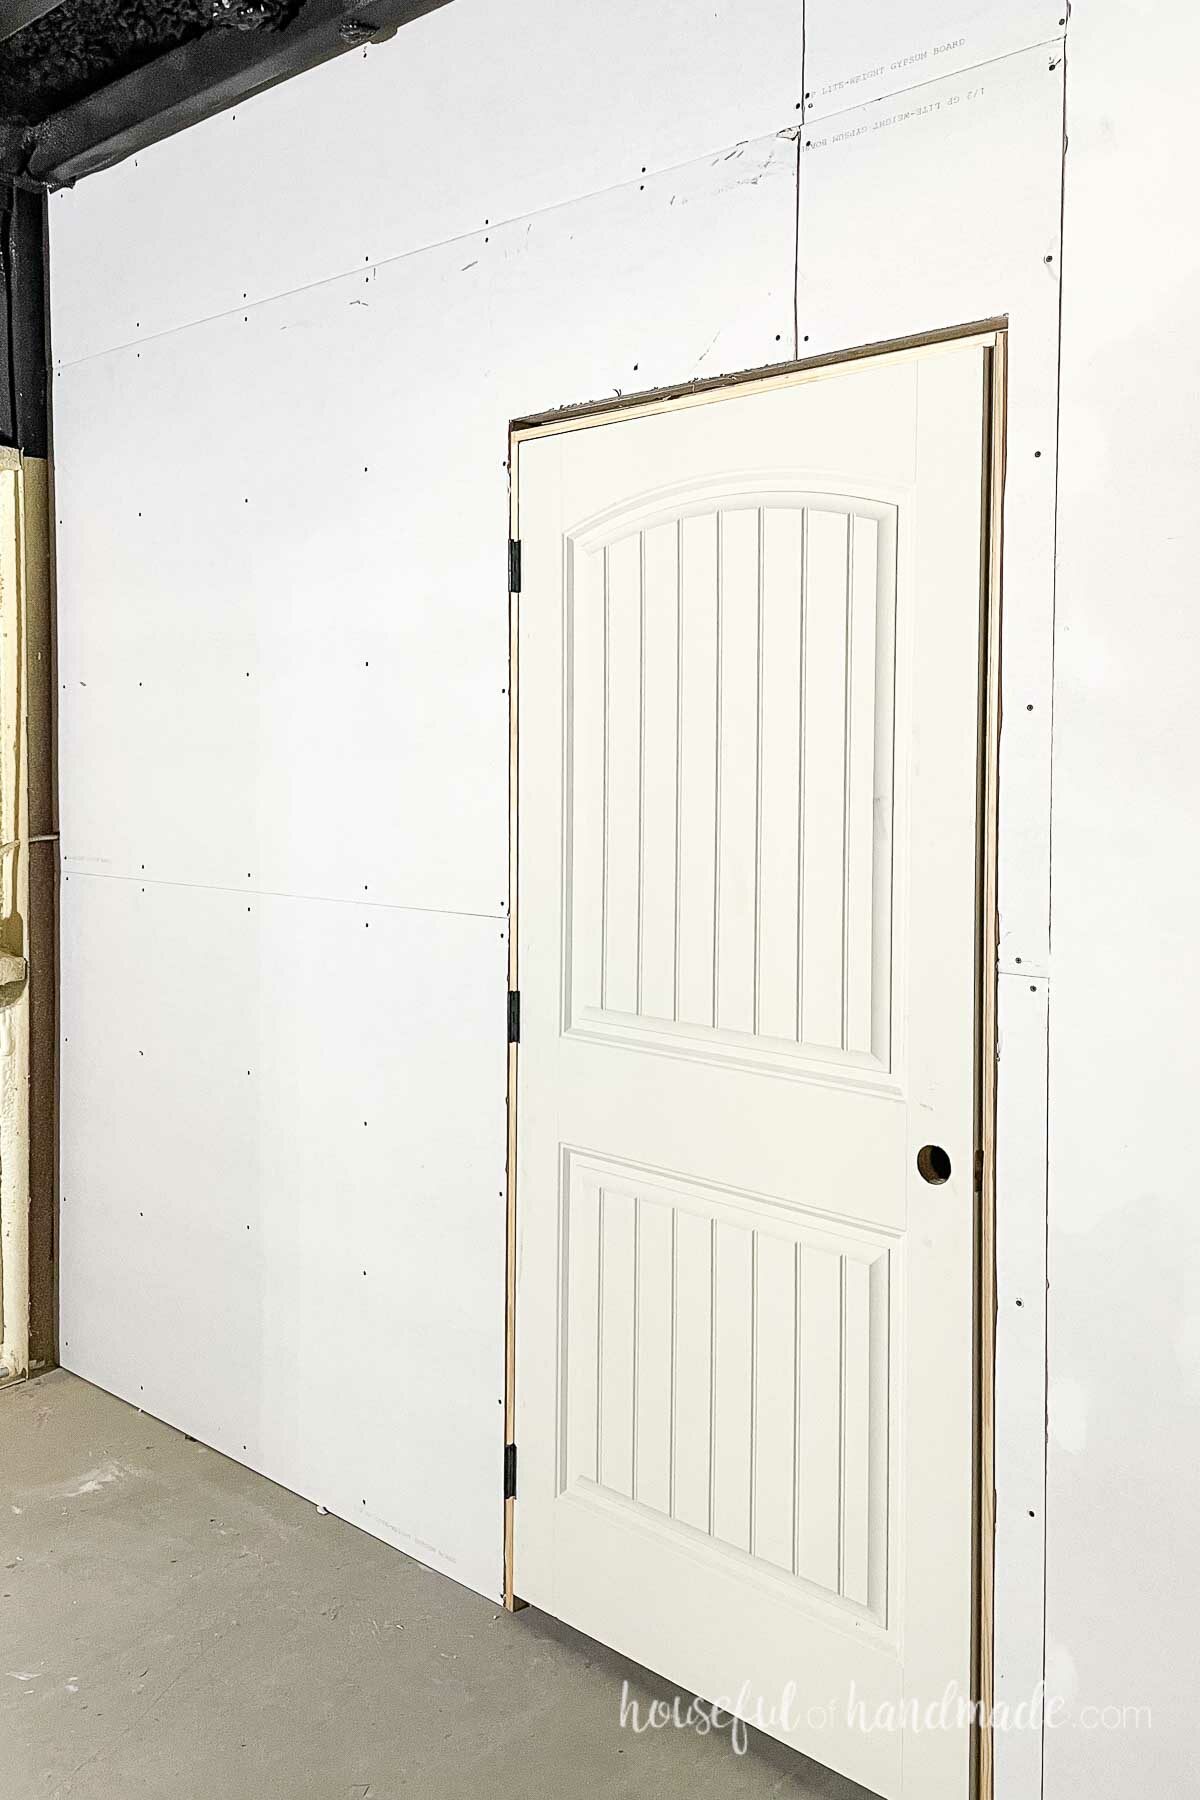
When you have a wall with a door or window opening in it, you need to cut the drywall to fit around the opening.
If the windows or doors are already installed, measure and cut the opening before attaching it to the wall.
But if you have a wall that is framed up only, and have access to if from both sides, you can attach the drywall first, then cut it to fit the opening!
This is way easier to get accurate drywall cuts.
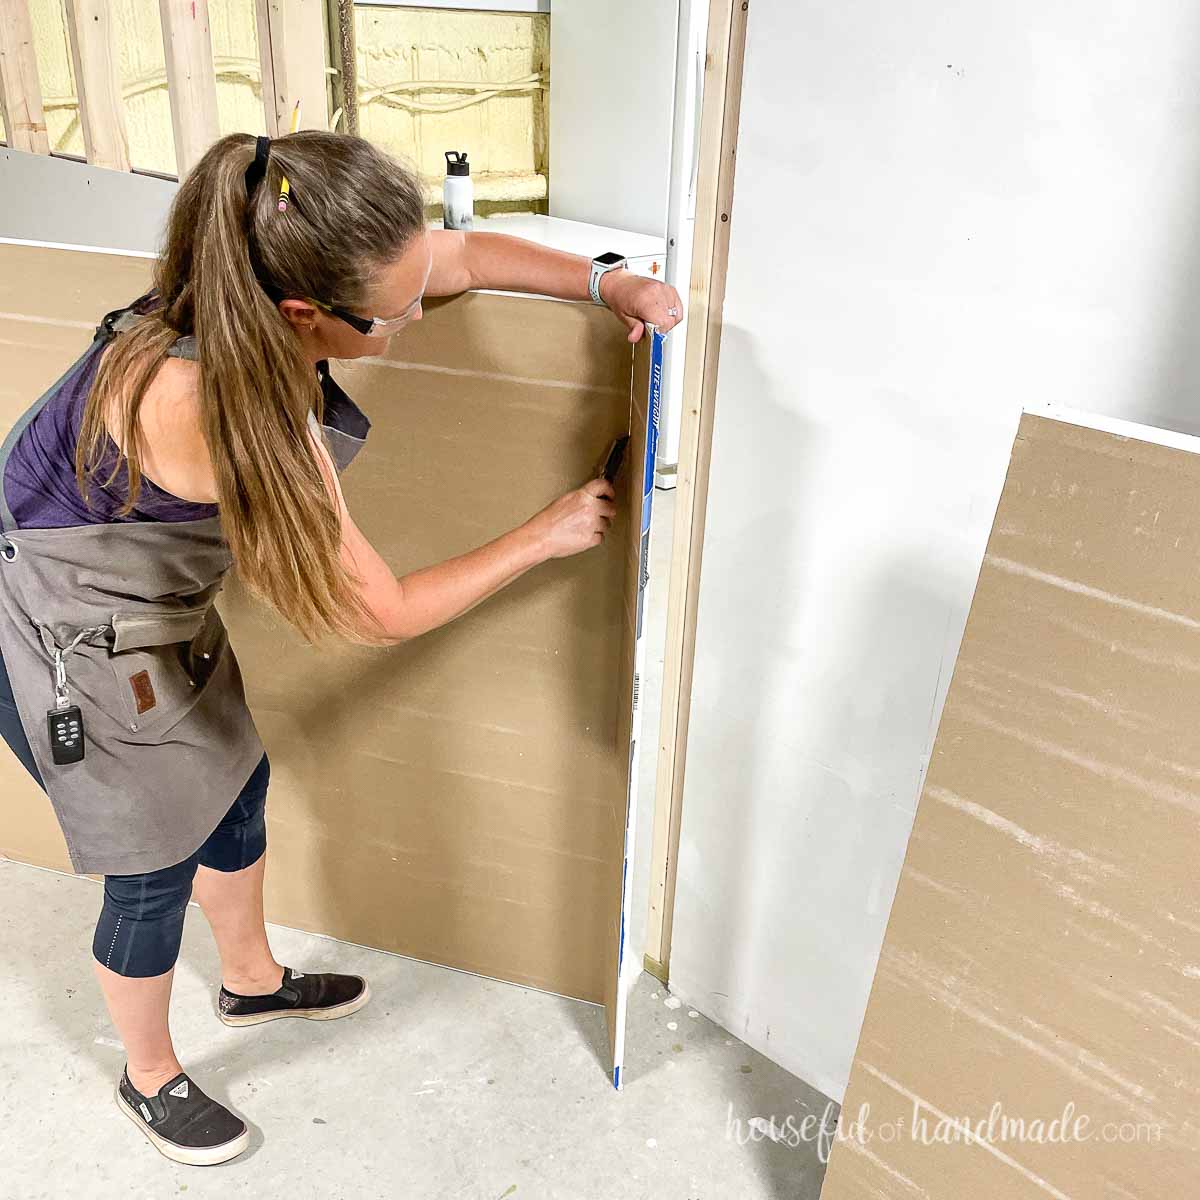
Start by attaching the sheet of drywall to the wall. Cut it to seam over a stud as needed.
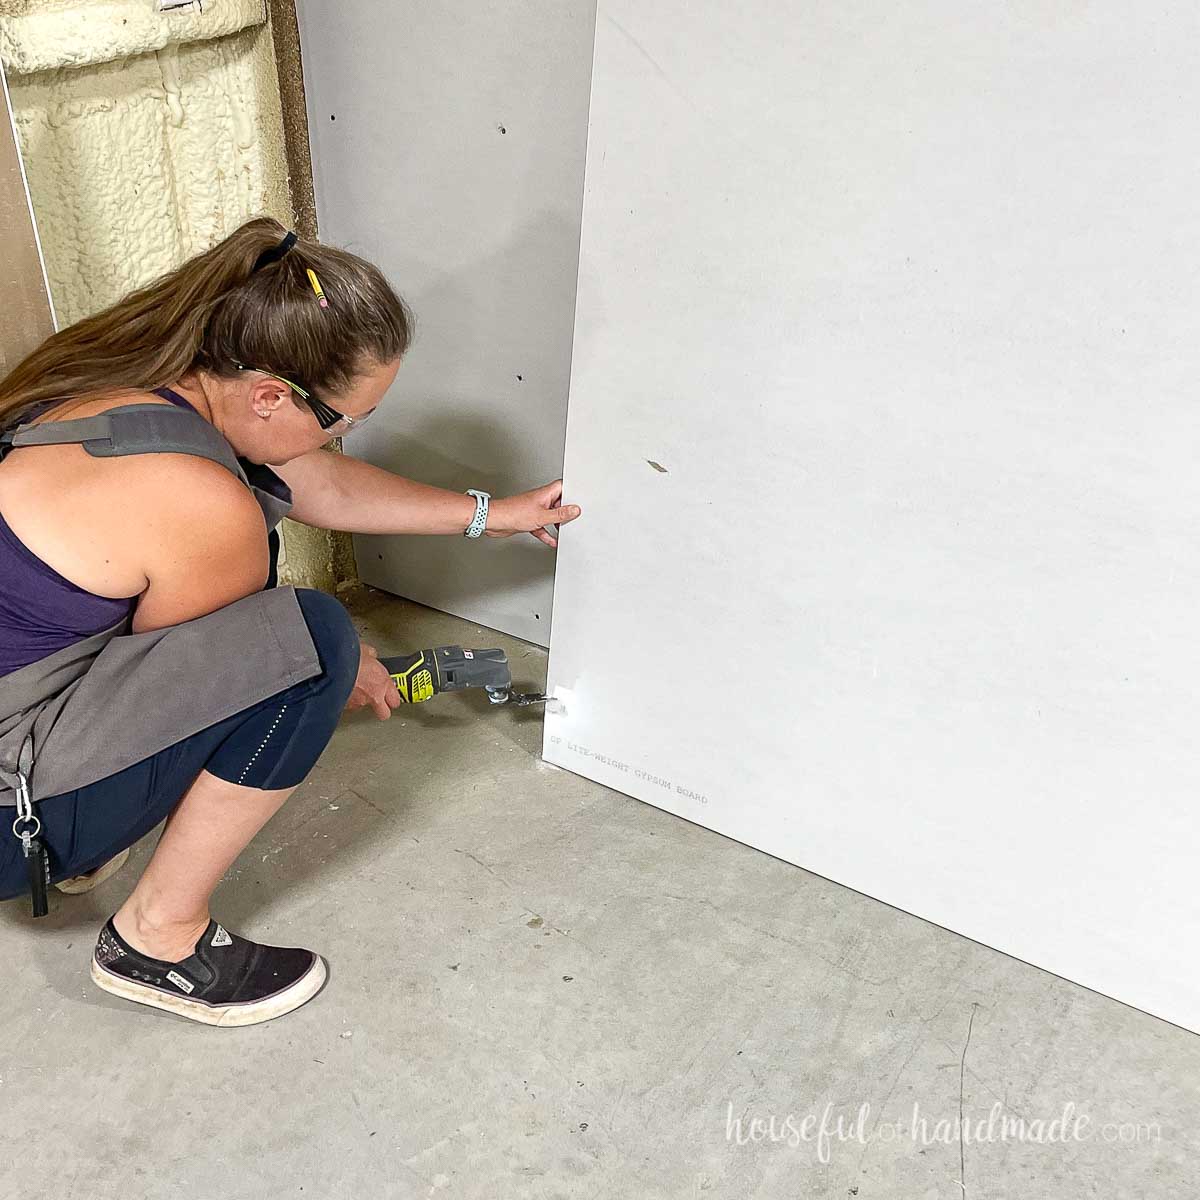
Then from the back of the opening, score along the longer line to be cut. Use the stud in the opening as a straight edge.
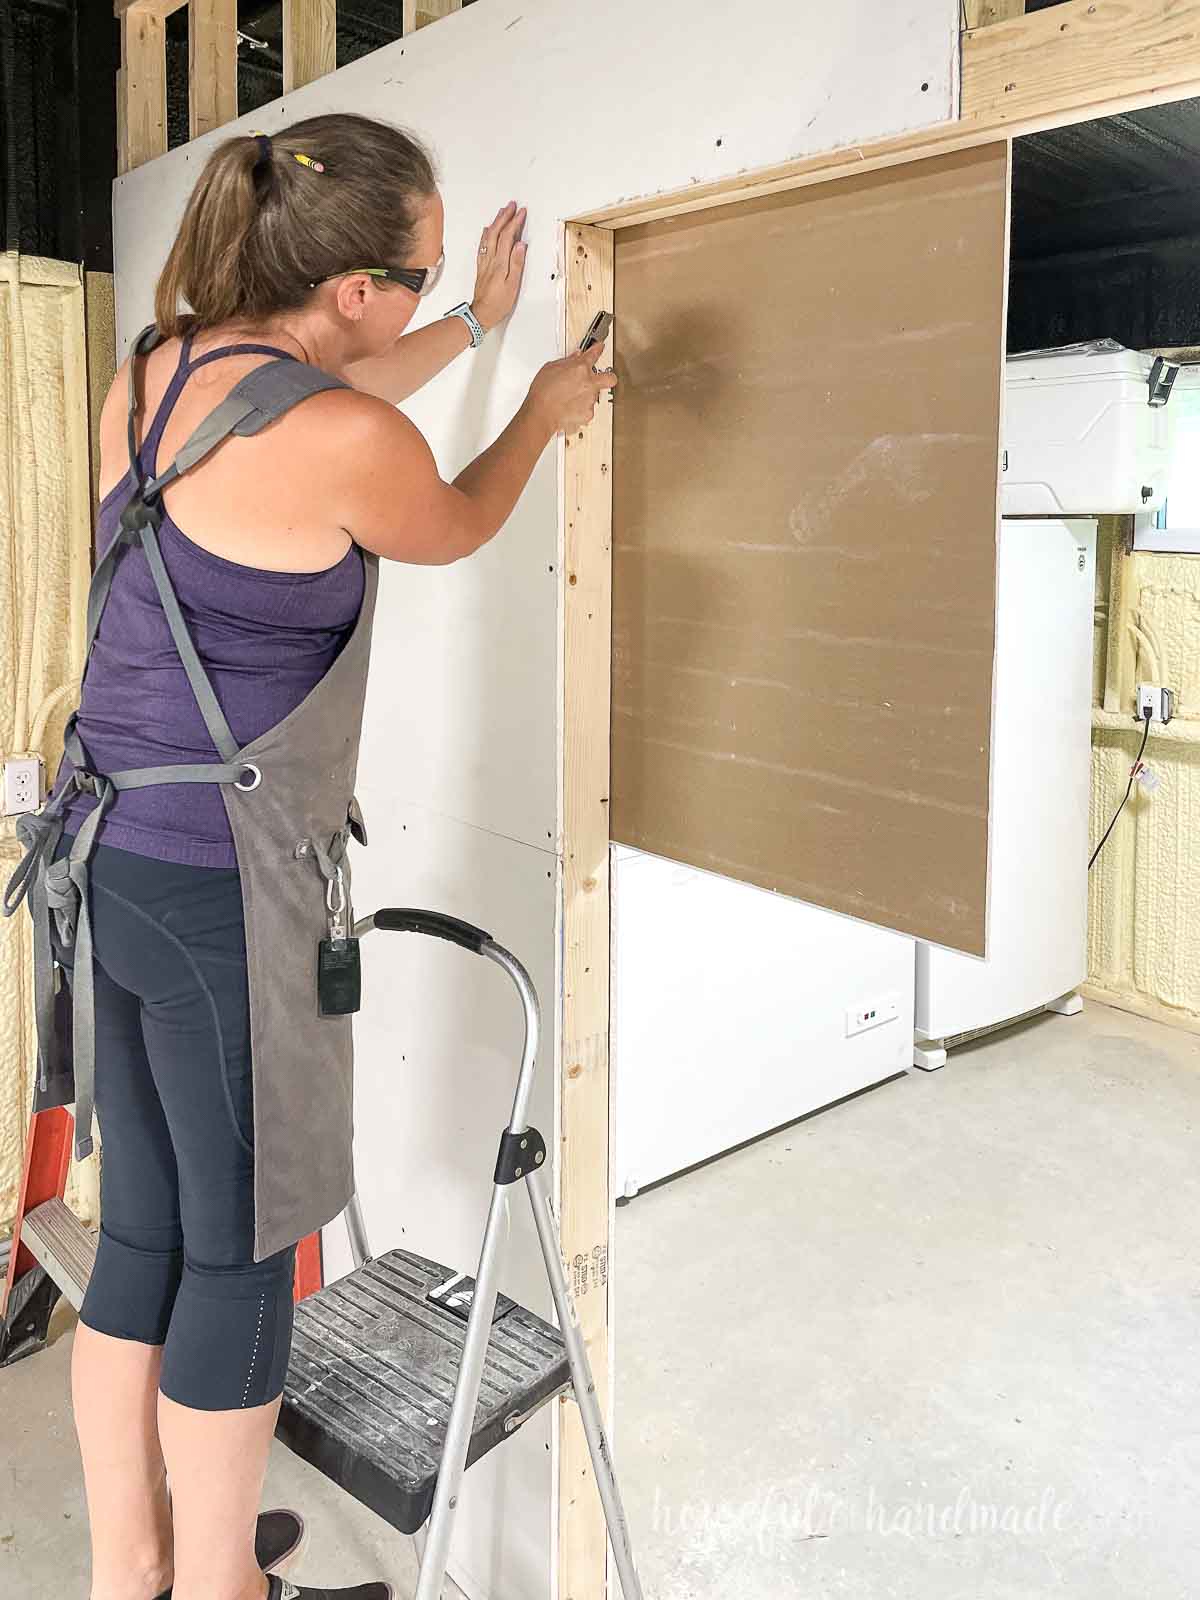
Then cut along the shorter side with either a drywall saw or my favorite, the multi tool.
A multi tool is a simple oscillating tool that can have a variety of attachments (like blade and sanding pads). A plunge cut blade makes quick work of cutting through drywall.
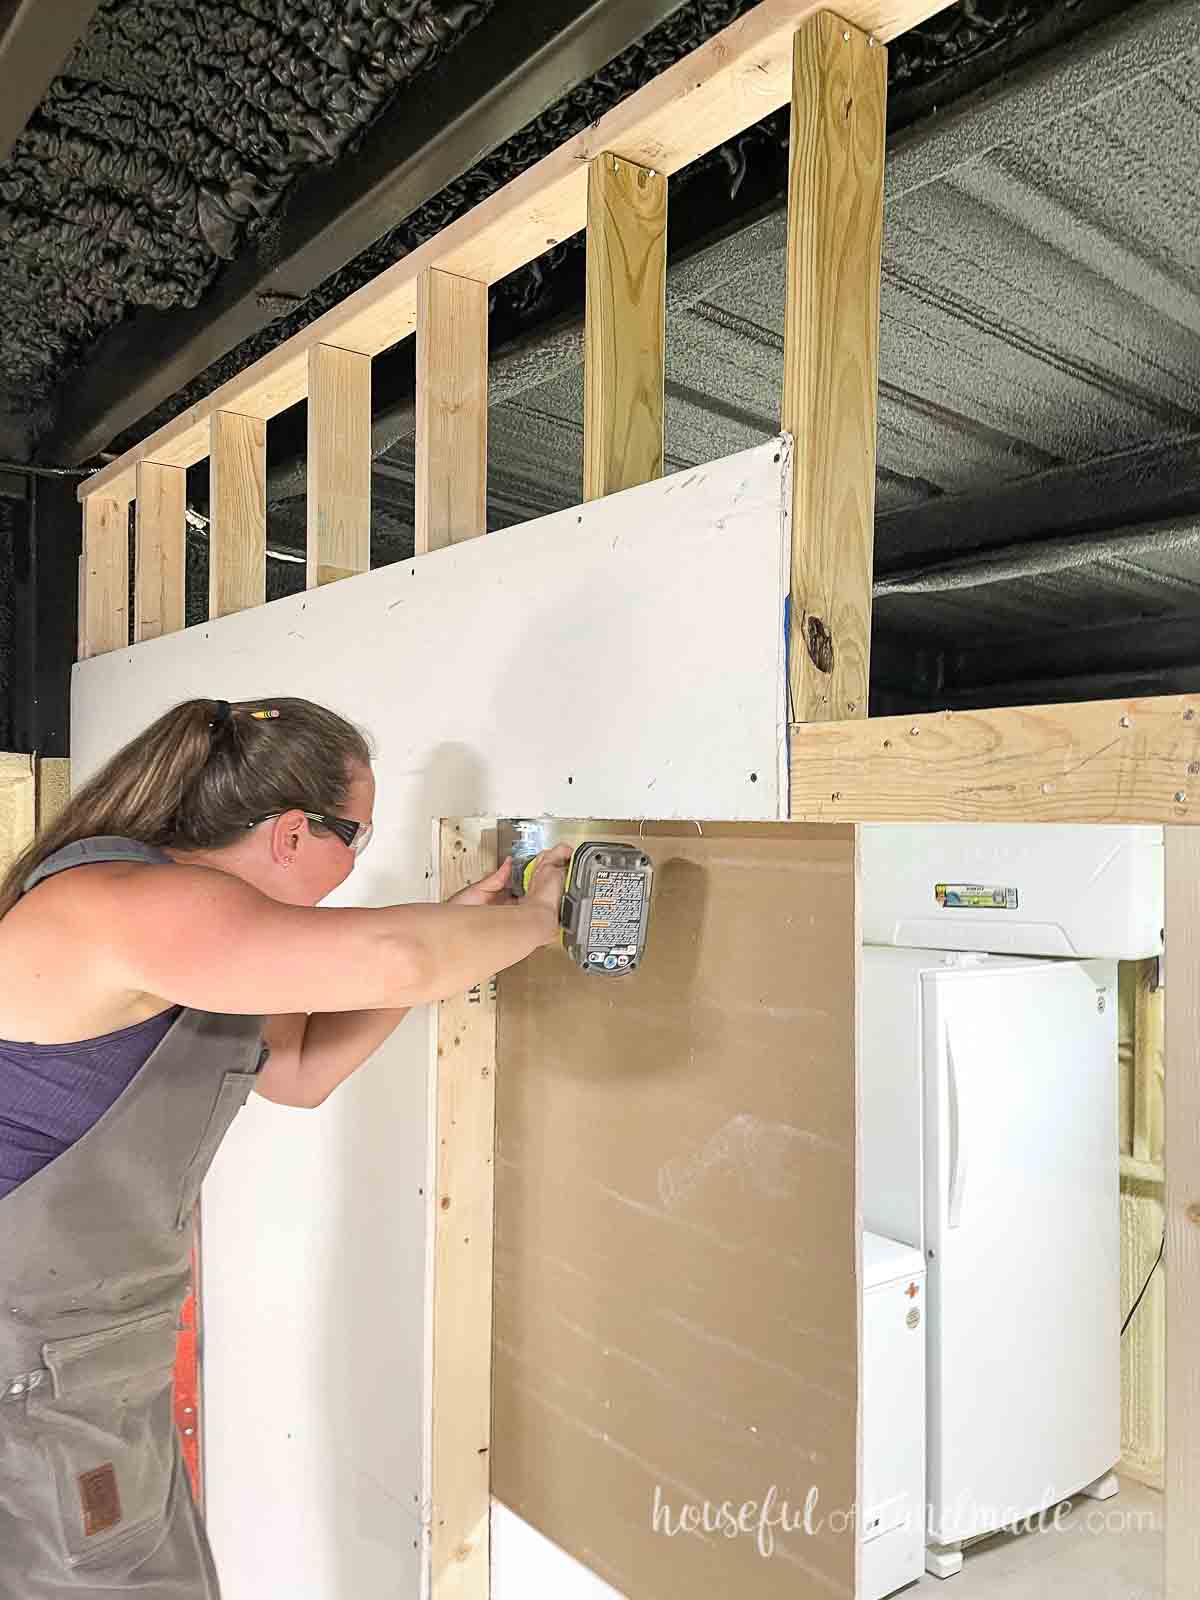
Once the shorter side is cut all the way through, go to the front of the drywall and pop along the scored seam to break the other side.
Use a utility knife to cut in the crease to release the piece.
When cutting around an opening, always cut each piece as you go. Otherwise you might completely cover the opening and limit access to the back to cut it out.
Outlet and Light Boxes
If your drywall is covering an outlet or light box (or similar openings), you also need to cut these out before attaching the drywall.
Measure carefully from the edge to the top, bottom and both sides of the opening. Cut the opening with the multi tool or drywall saw.
Luckily, covers for these boxes have some grace so if your measurements are not perfect, it’s okay. And if you made a much too big hole, look for XL covers (ask me how I know).
Our wall didn’t have any outlets, but I did have some notches that needed to be cut on the sides of the walls. I used the same principals here to cut those notches to get a nice tight fit.
Pros use a drywall router that can plunge into an opening and then it runs along the edges of it. To use this, you only need to mark the center of the outlet or light box.
But it does require a special tool. So unless you are hanging a lot of drywall, you can get good results without one.
STEP 5- Add next row
Once the first row is completely attached and all the openings are cut out, it is time to repeat for the second row.
Cut the piece as needed, then balance it on the ledge of the first row. Attach it to the studs the same way as the first row.
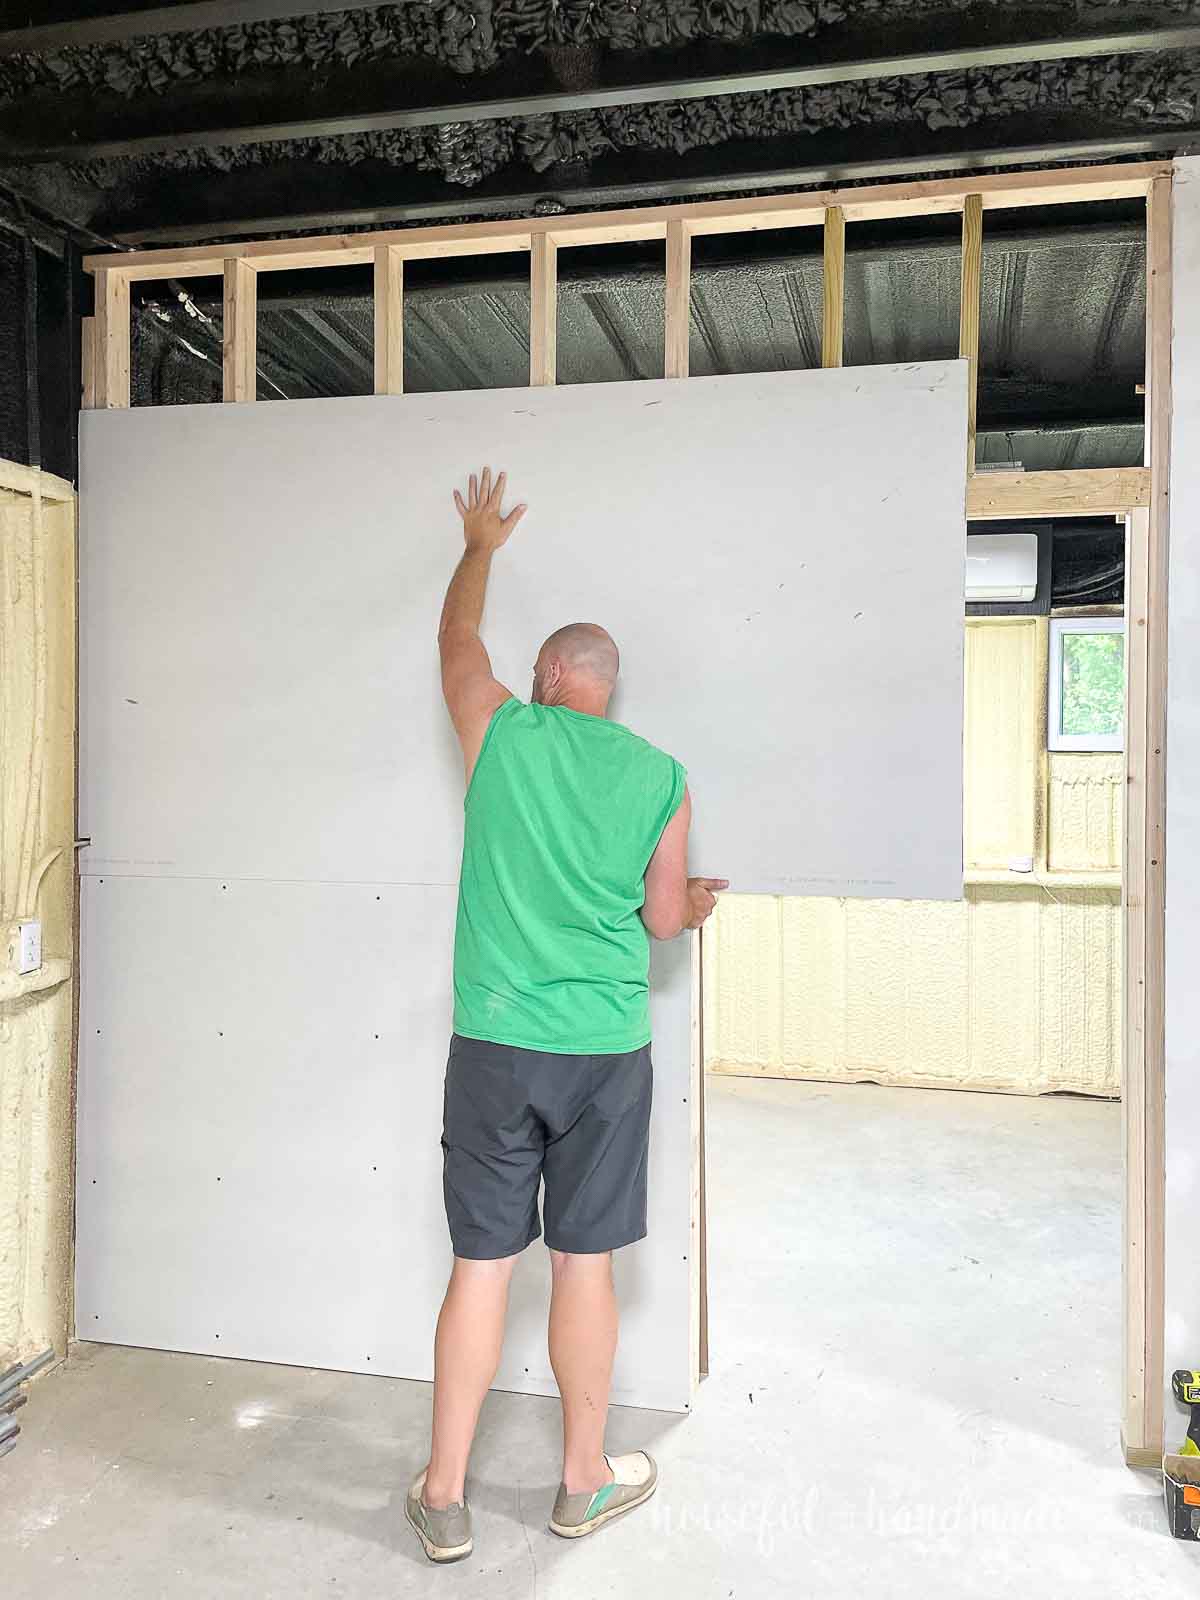
Continue around the room and attach the second row. Then repeat for a third if your ceilings are taller than 8′.
Our third row needed to be cut
Drywall Tips to know:
- Don’t seam your drywall at the corner of a door or window opening (it is more susceptible to cracking).
- Keep the long, non-cut edges in the center, touching each other. They are recessed to allow for drywall tape and mud.
- Drywall is cheap, use large pieces to eliminate seams instead of piecing together lots of scraps (you will thank me later).
- Don’t try to hammer or squish in a piece of drywall that is too tight, you will break it! Instead, cut it back so it fits in easily.
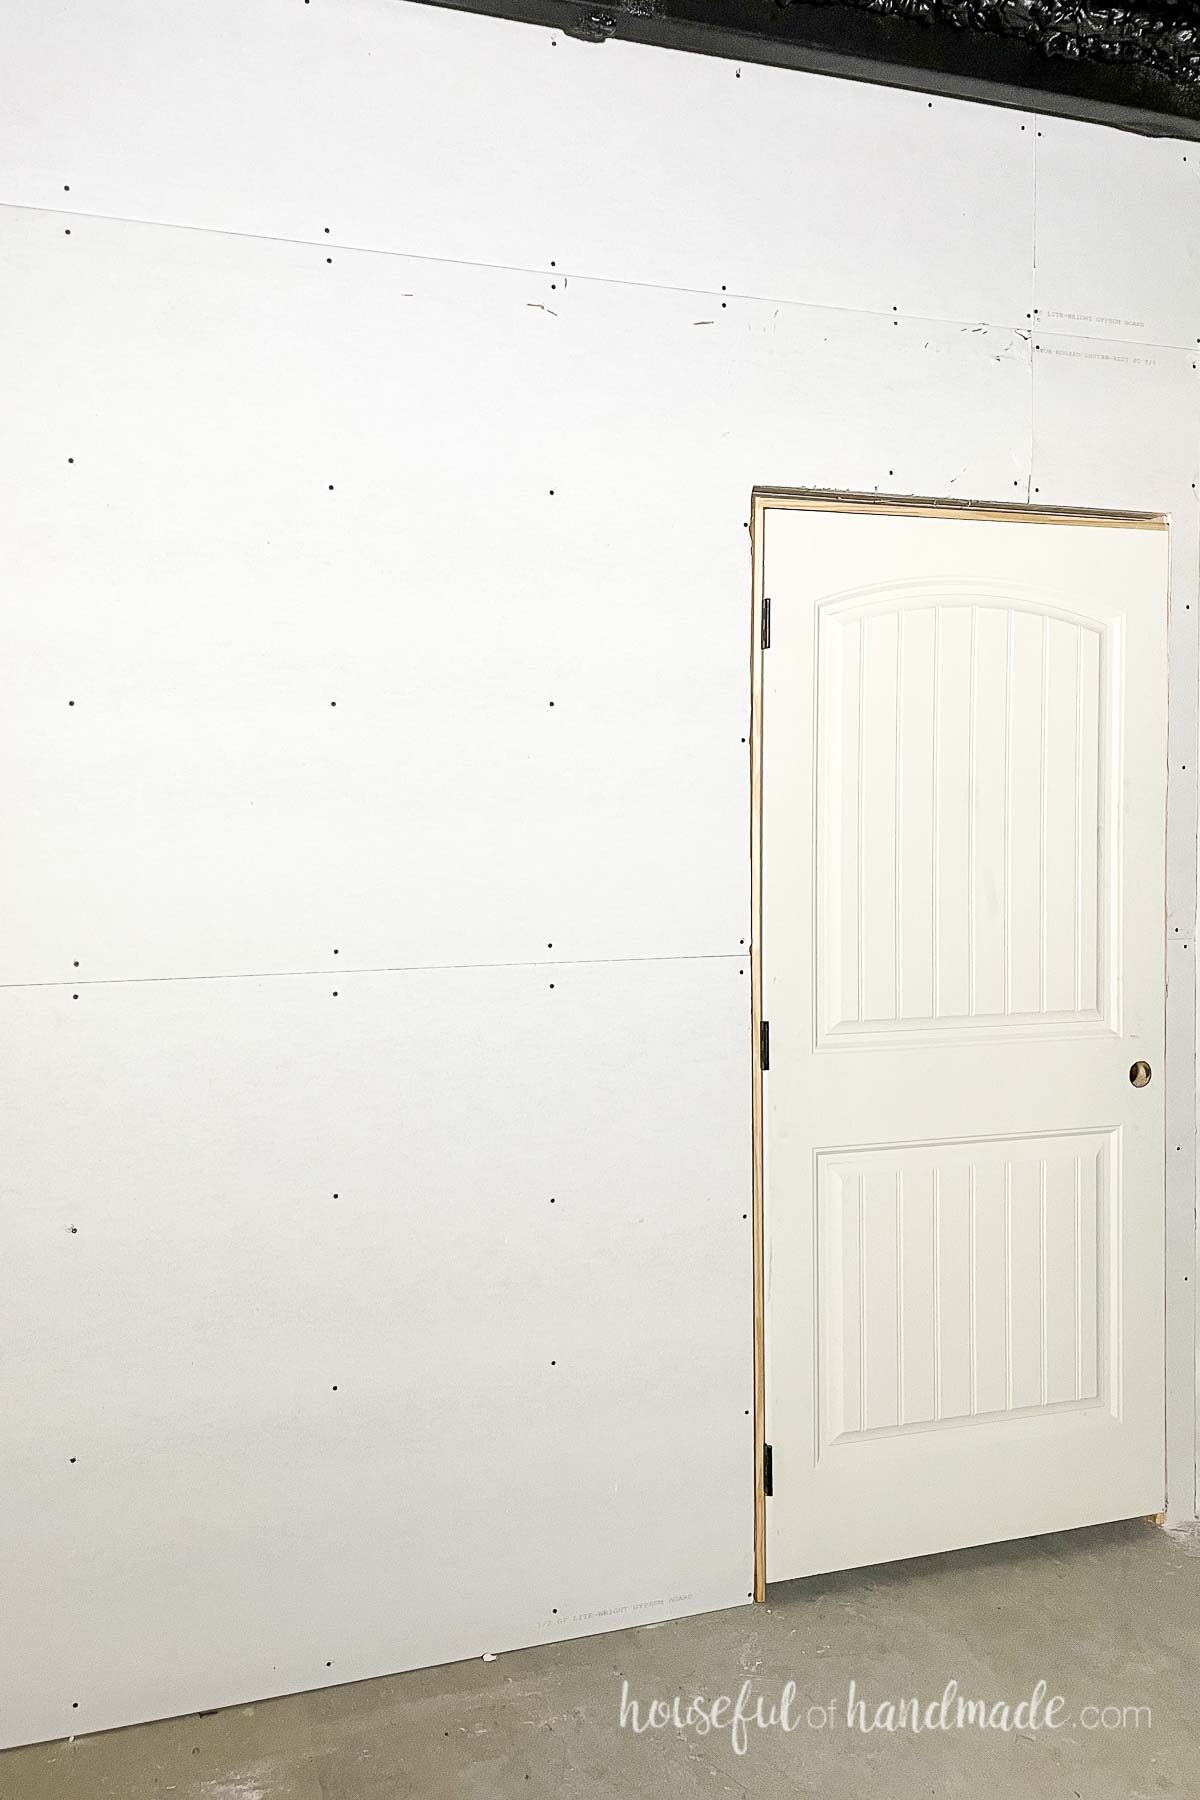
You did it!
You successfully hung drywall. Next up, you will need to tape and mud it to seal those seams and make them disappear.
But for now, appreciate a job well done.
Happy DIYing!
