
A wood Christmas tree stand cover is a beautiful alternative to a Christmas tree skirt.
Whether you are using a faux Christmas tree or a real one, you need something to cover the base of your Christmas tree. The traditional tree skirt is good, but I find it hard to clean around it.
The solution, a beautiful Christmas tree stand made of reclaimed wood! or for a more modern look you could make this DIY Christmas tree collar.

Last year when I was setting up the Christmas tree I really didn’t want to put the tree skirt around it. With kids in the house, the skirt never stayed put. I even caught my kids using it as a blanket.
This post may contain affiliate links. As an Amazon Associate I earn from qualifying purchases. Click here to read my full disclosure policy.
And after too many times getting the edges of the skirt caught up in the vacuum roller, I decided it was time to find a better option to cover the base of our Christmas tree!
Since I still had a box full of reclaimed wood that was given to me a friend was replacing his tomato cages, I knew I could use it to create a wood basket for the Christmas tree!

I love using a wooded tree skirt over a traditional fabric skirt. I can easily vacuum around it. The kids cannot move it around and make it look messy. It’s more modern than a tree skirt.
And it holds the tree up a little higher making it easier for presents to sit underneath. It is my new favorite Christmas tree accessory!
So if you are looking for an alternative to an old fashioned tree skirt, you are going to love this. You can build a wood Christmas tree stand with just a few tools and some old wood.

But even if you don’t have old wood laying around, you can use an aged wood accelerator to make your wood look old. Or paint your wooden tree skirt to match whatever style of Christmas decor you want!
So grab that saw and let’s get building.
How to Make a Christmas Tree Base Cover
Tools:
- Miter saw
- Circular saw or table saw
- Use a guide track to make quickly and accurately cut plywood with a circular saw.
- Nail gun
- Drill
- Impact driver
- Measuring tape
Supplies:
- (7) 8′ long 1×2 sized reclaimed wood
- If you don’t have reclaimed wood to use, you can use 1×2 furring strips and then stain them with an aged wood accelerator to give them a worn look.
- (1) 17″ x 17″ piece of 3/4″ plywood
- (32) 1 1/4″ pocket hole screws
- 1 1/4″ finish nails
- Wood glue
Before beginning, measure the base of your Christmas tree. Mine was about 16″ at the widest part so I made my Christmas tree collar 17″ x 17″. The measurements in these plans will be for that size so adjust as necessary for the base of your own tree.
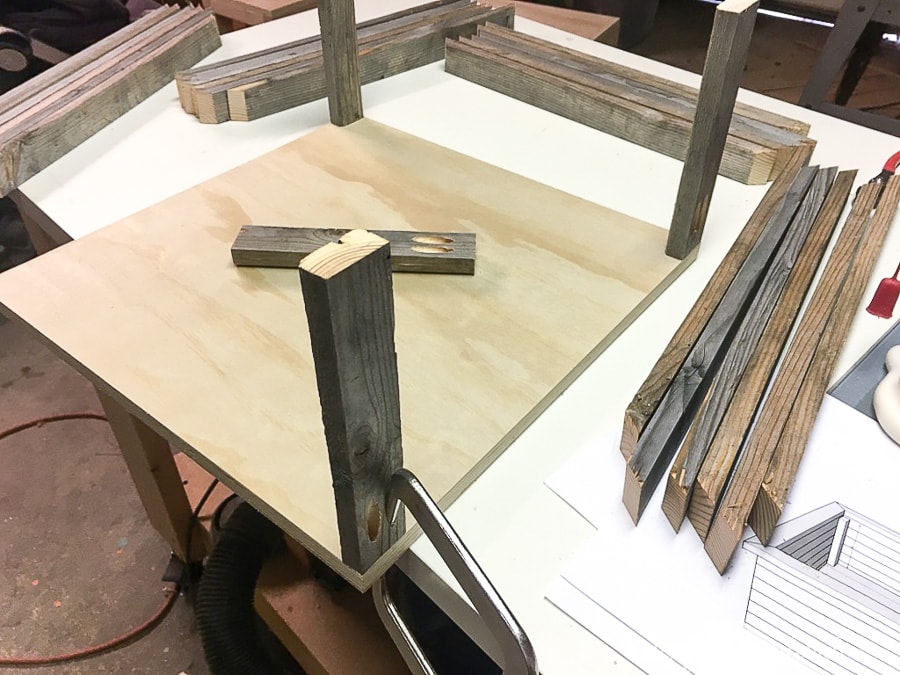
Cut a piece of 3/4″ plywood to 17″ x 17″. No need to use something super nice because it will be completely hidden. Just grab a scrap you may have lying around or something inexpensive.
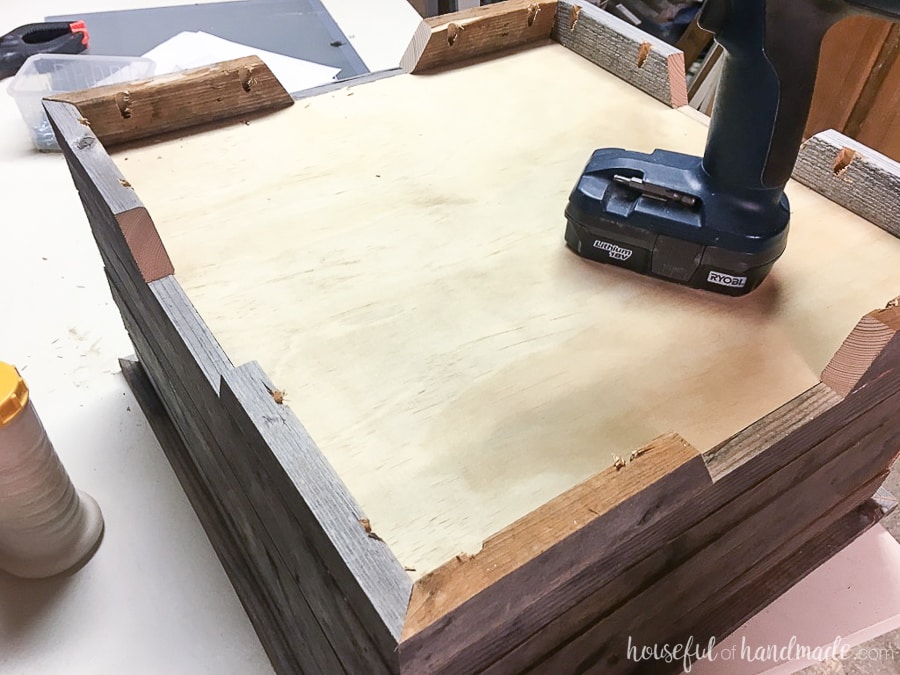
Cut 4 pieces of 1×2 to 8″ long. Drill pocket holes set for 3/4″ material in one end of each piece. Attach the 1×2 pieces to each corner of the plywood with wood glue and 1 1/4″ pocket hole screws.
Cut 24 pieces of 1×2 to 18 1/2″ long with a 45 degree miter on each end. Cut the miter on the long side of the board. And make sure the miters are mirrored on each end so the outside is 18 1/2″ and the inside is 17″.
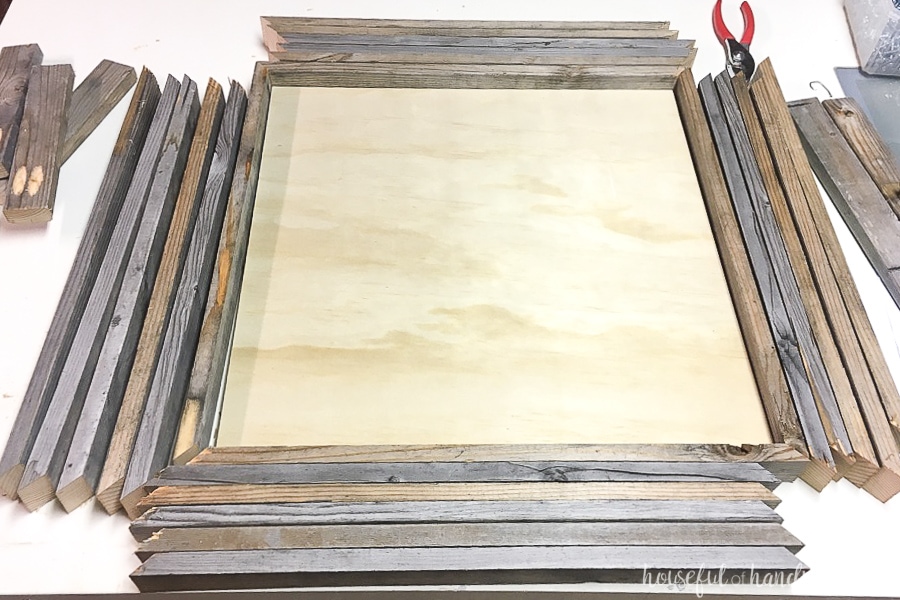
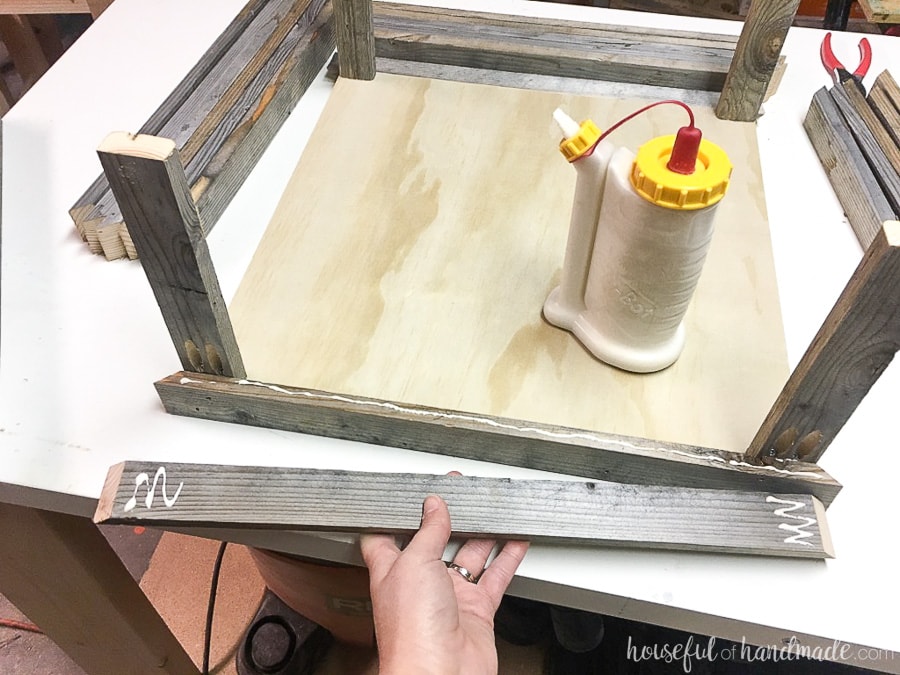
Lay the mitered 1x2s up against the bottom of the plywood to create a frame around it. Using wood glue and 1 1/4″ finish nails, attach them to the 1×2 support posts. I love my Glue Bot to easily apply glue where I need it.
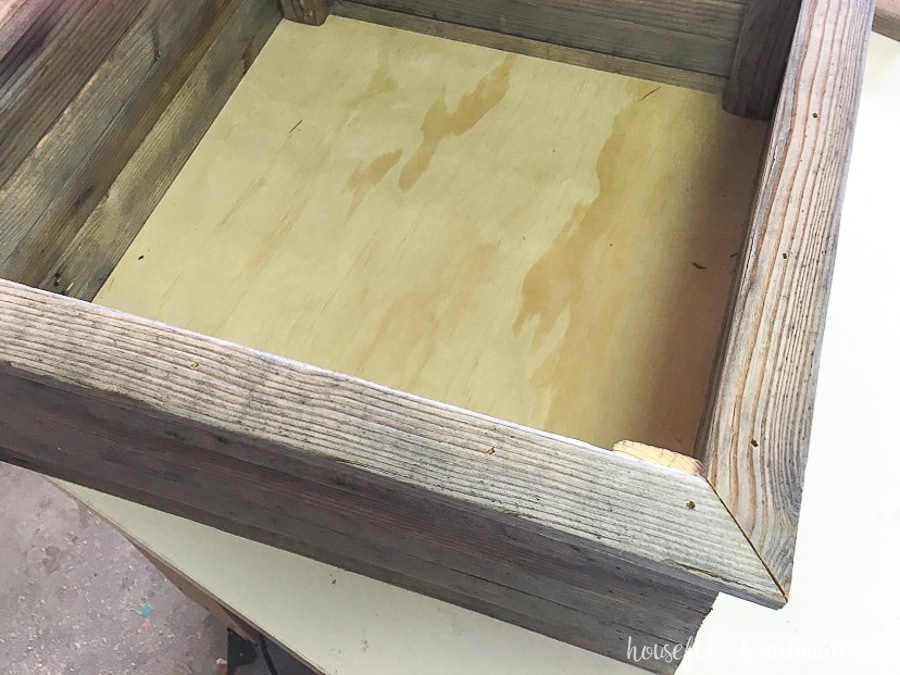
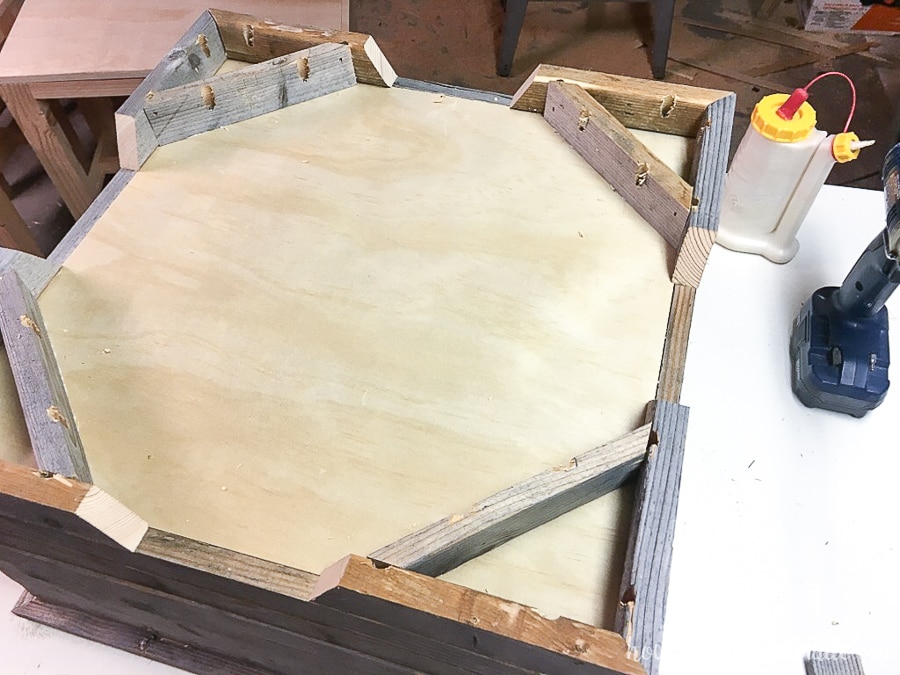
Keep stacking up the mitered 1x2s until you have gone 6 up each side. Completely cover the 8″ support boards.
Cut 4 pieces of 1×2 to 20″ with mitered edges on each side. But this time, miter the shorter side. Attach them to the top of the tree stand sides so they are flush to the inside and hang over on the outside to create a finished edge.
Create feet for the Christmas tree base cover by cutting 8 pieces of 1×2 to 7″ with a 45 degree cut on the short side (for creating a decorative foot) and then a 45 degree miter on the long side.
Make sure the 4 feet pieces are mirrored from the first 4.
Drill pocket holes into the top side of the feet pieces. Using wood glue and 1 1/4″ pocket hole screws, attach two feet on each corner so they come together at the miter.
Cut 4 pieces of 1×2 to 7″ long with 45 degree miters on each long end so they are angled towards each other. Drill pocket holes in the top side of these feet support pieces.
Attach them in between the decorative feet pieces to give more support to the plywood base (in case your tree is extra heavy).
The best part of using reclaimed wood, you don’t have to do anything once your Christmas tree stand cover is built! The beautiful patina of the reclaimed wood is all you need.
But feel free to use new wood and sand or stain to your desired look. That is the beauty of DIY!
Carefully place your wood tree collar in it’s desired spot before placing your Christmas tree inside. It will be quite heavy with the tree inside!

To further cover the tree base, I filled our Christmas tree stand with poly fill (the stuff you put inside pillows) to look like snow. And now the Christmas tree is ready for decorations and presents.
If you want more ideas to replace the classic Christmas tree skirt, here are 5 more ideas to give your tree a modern look.
Beautiful Christmas Tree Skirt Alternatives
- Wicker basket
- Large metal bucket
- Wood box or crate
- Large scarf tucked around the base
- Fabric basket or bin
And now time for more Christmas decorating!

How to make a Wood Christmas Tree Stand
Materials
- *(7) 8′ long 1×2 sized reclaimed wood
- (1) 17″ x 17″ piece of 3/4″ plywood
- (32) 1 1/4″ pocket hole screws
- 1 1/4″ finish nails
- Wood glue
Tools
- Miter saw
- Circular saw or table saw
- Nail gun
- Drill
- Impact driver
- Measuring tape
Instructions
- Cut a piece of 3/4″ plywood to 17″ x 17″. No need to use something super nice because it will be completely hidden. Just grab a scrap you may have lying around or something inexpensive.
- Cut 4 pieces of 1×2 to 8″ long. Drill pocket holes set for 3/4″ material in one end of each piece. Attach the 1×2 pieces to each corner of the plywood with wood glue and 1 1/4″ pocket hole screws.
- Cut 24 pieces of 1×2 to 18 1/2″ long with a 45 degree miter on each end. Cut the miter on the long side of the board. And make sure the miters are mirrored on each end so the outside is 18 1/2″ and the inside is 17″.
- Lay the mitered 1x2s up against the bottom of the plywood to create a frame around it. Using wood glue and 1 1/4″ finish nails, attach them to the 1×2 support posts. I love my Glue Bot to easily apply glue where I need it. Keep stacking up the mitered 1x2s until you have gone 6 up each side. Completely cover the 8″ support boards.
- Cut 4 pieces of 1×2 to 20″ with mitered edges on each side. But this time, miter the shorter side. Attach them to the top of the tree stand sides so they are flush to the inside and hang over on the outside to create a finished edge.
- Create feet for the Christmas tree base cover by cutting 8 pieces of 1×2 to 7″ with a 45 degree cut on the short side (for creating a decorative foot) and then a 45 degree miter on the long side. Make sure the 4 feet pieces are mirrored from the first 4.
- Drill pocket holes into the top side of the feet pieces. Using wood glue and 1 1/4″ pocket hole screws, attach two feet on each corner so they come together at the miter.
- Cut 4 pieces of 1×2 to 7″ long with 45 degree miters on each long end so they are angled towards each other. Drill pocket holes in the top side of these feet support pieces. Attach them in between the decorative feet pieces to give more support to the plywood base (in case your tree is extra heavy).
- The best part of using reclaimed wood, you don’t have to do anything once your Christmas tree stand cover is built! The beautiful patina of the reclaimed wood is all you need. But feel free to use new wood and sand or stain to your desired look. That is the beauty of DIY!
- Carefully place your wood tree collar in it’s desired spot before placing your Christmas tree inside. It will be quite heavy with the tree inside!
Notes
*If you don’t have reclaimed wood to use, you can use 1×2 furring strips and then stain them with an aged wood accelerator to give them a worn look.
