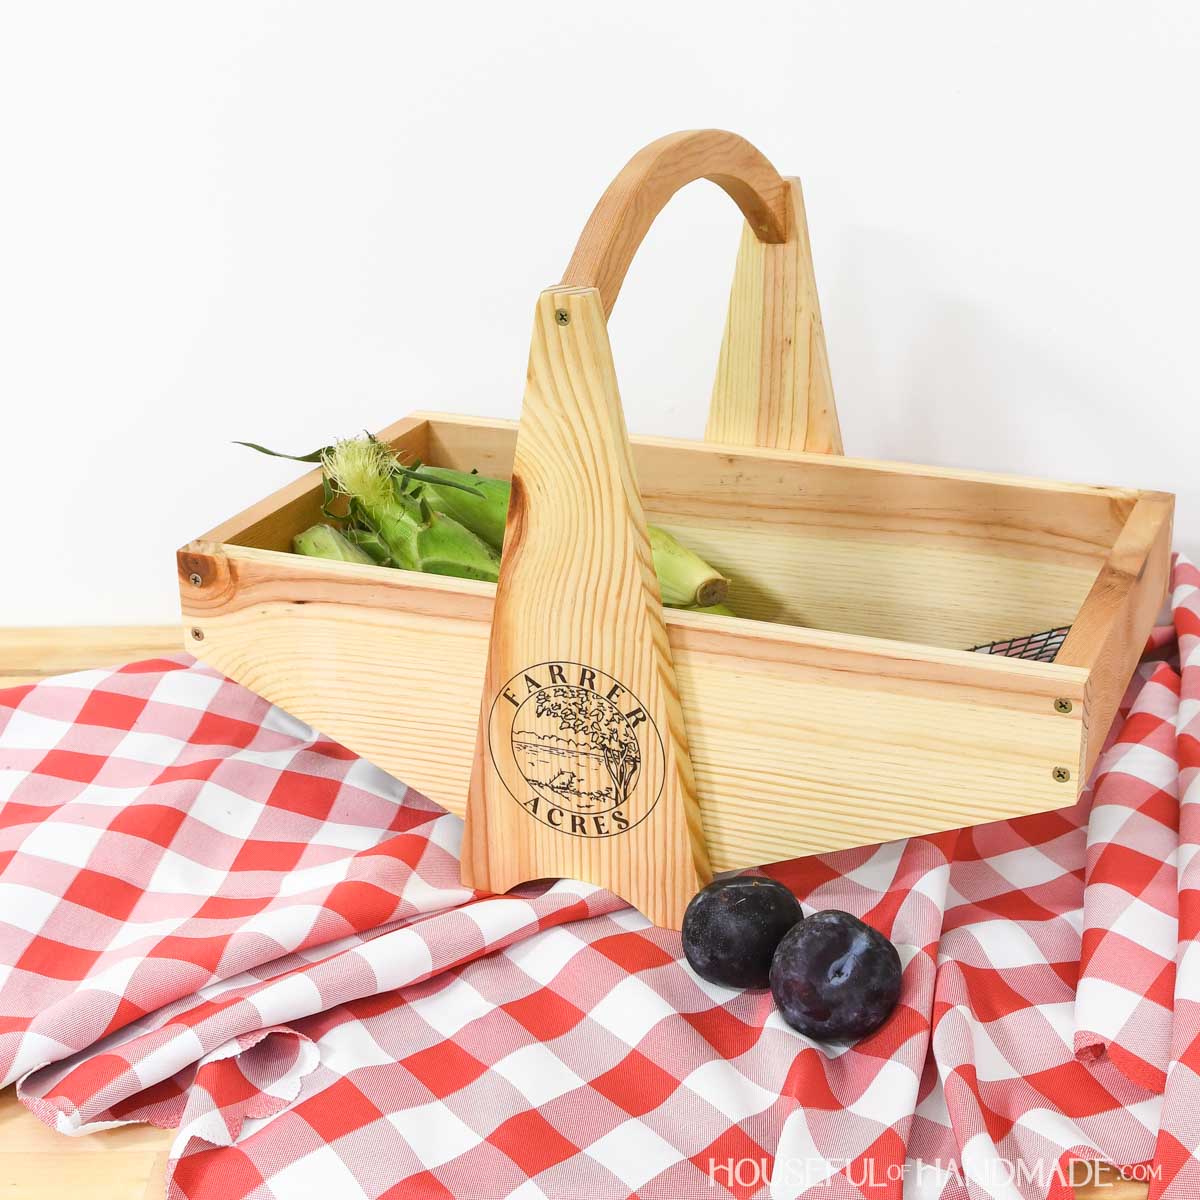
I am getting excited for big garden harvests, but first I needed a way to carry it all!
I have seen may different garden baskets, but they were just too small for my garden. I added my 12th DIY raised garden bed this spring.
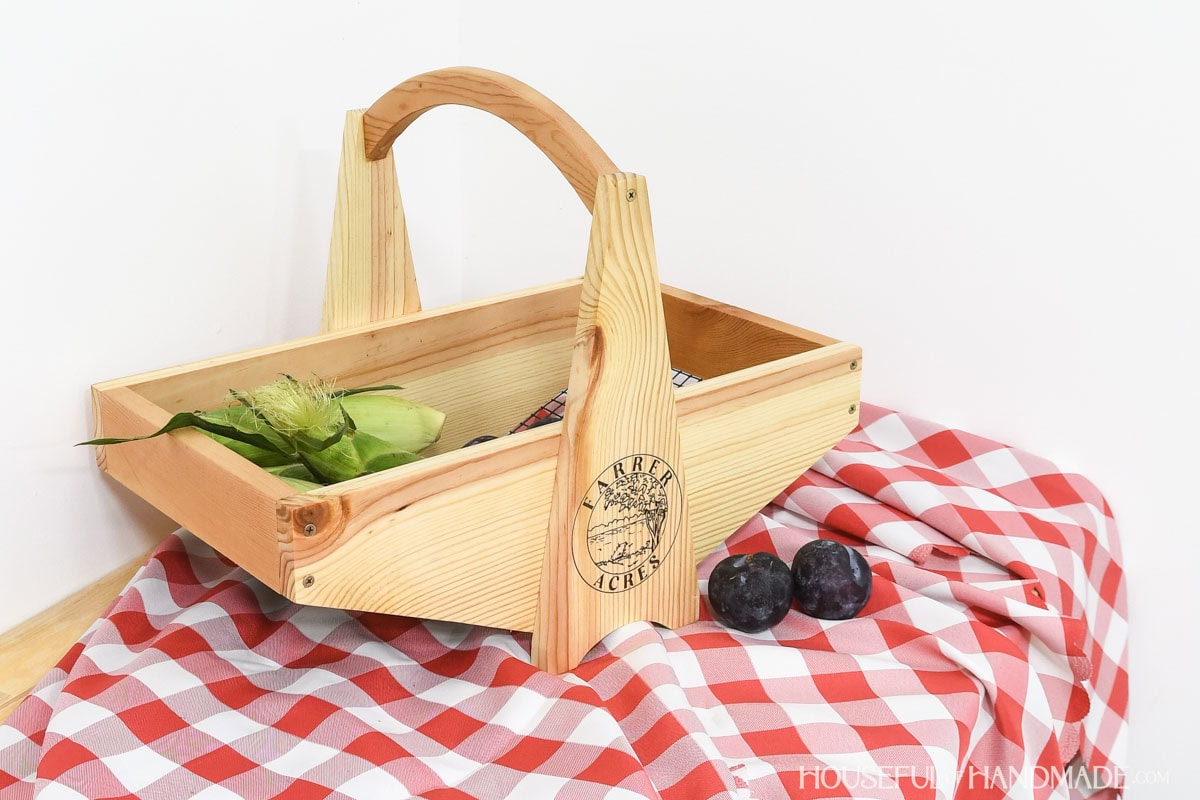
So I set out to design the ultimate harvest basket. This thing is large enough for a big harvest in the garden or orchard.
This post may contain affiliate links. As an Amazon Associate I earn from qualifying purchases. Click here to read my full disclosure policy.
But the best part, it is a fun and simple build that I made completely out of wood scraps!
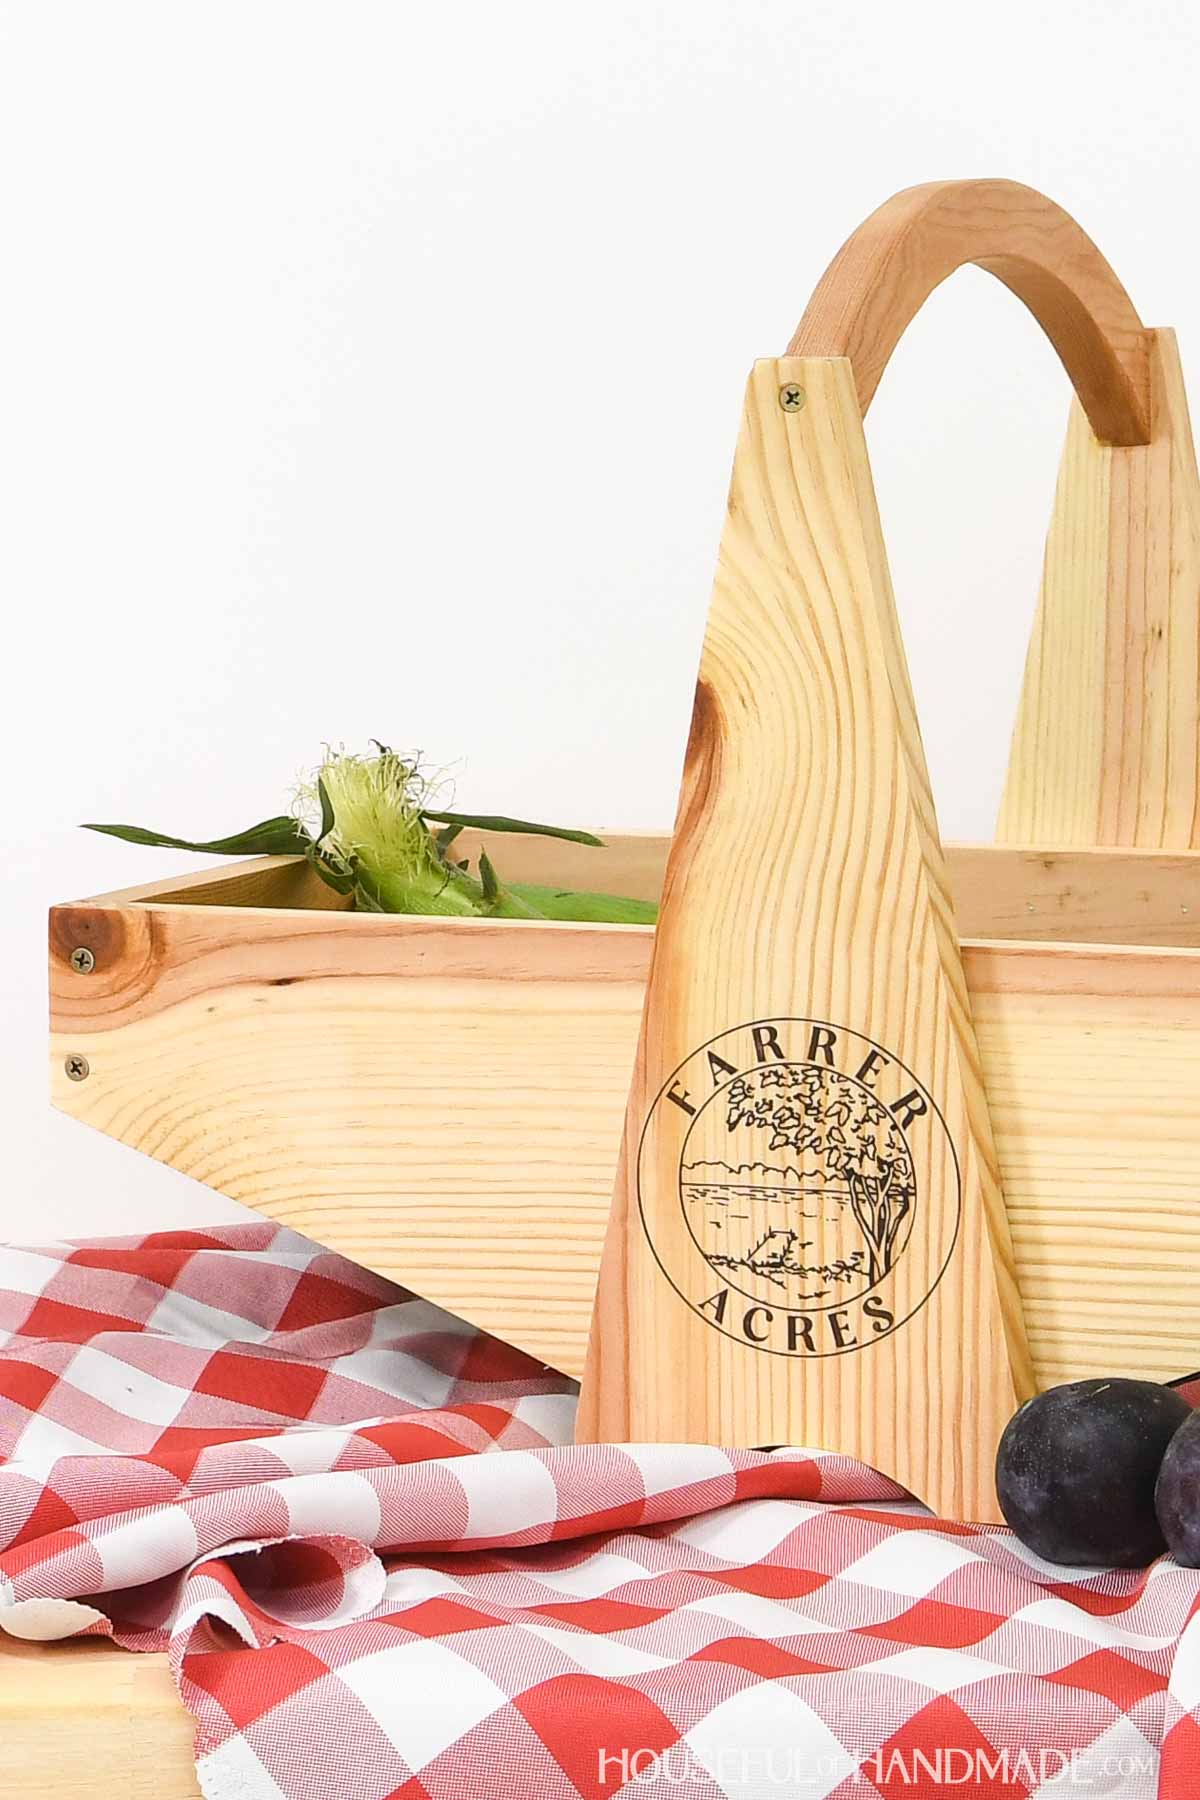
One of the things I hated about other garden baskets is the handle placement. It was in the way when trying to put larger vegetables in the basket.
So I designed my harvest basket with the handle across the short part of the basket instead of in the way across the middle.
The handle is also built up high and out of the way. Now I can easily place a large head of cabbage or melon in the basket once they are ready to harvest.
I built this project as part of Scrap Wood summer. Make sure to check out all the other scrap wood projects shared below and come back every Tuesday in August for more.
How to Build a Garden Basket
Tools & Materials
Recommended Tools:
- Miter saw
- I recently upgraded to this sliding miter saw (watch for it to go on sale), but previously used this inexpensive miter saw that I love.
- Circular saw
- Jig saw
- Drill
- Impact driver (optional, but I love not having to switch bits with the drill)
- Brad nailer
- Sander
- Stapler
- Pliers
Supplies:
- Wood products
- (1) 1×6 board, 6’ long
- (1) 1×3 board, 2’ long
- (1) 1×4 board, 1’ long
- 1 1/4” wood screws
- 1 1/4” brad nails
- Wood glue
- 1/2” hardware cloth or chicken wire
Overall Dimensions
The finished garden basket is 20″ wide by 11 1/2″ deep and approximately 16″ tall. The basket is 5 1/2″ deep in the center.
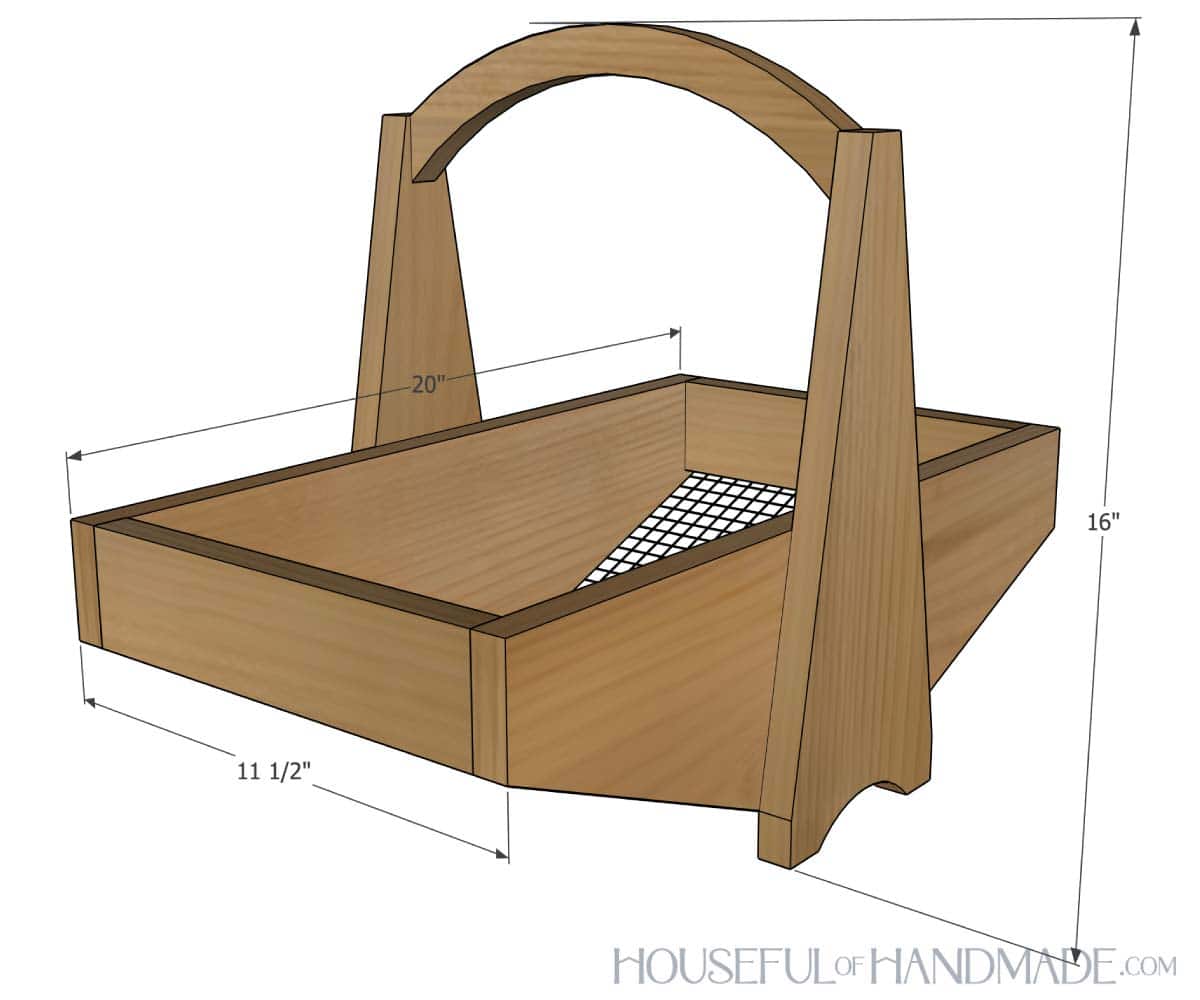
Cut List
Cut out the pieces according to the easy-to-read table in the PDF plans.
STEP 1- Shape the boards
After cutting the boards to length, measure and mark out the angled cuts according to the diagrams in the plans.
On the front/back and handle base I used a straight edge to draw the straight lines.
Then I used a sanding disk from my orbital sander to draw the curve for the feet.

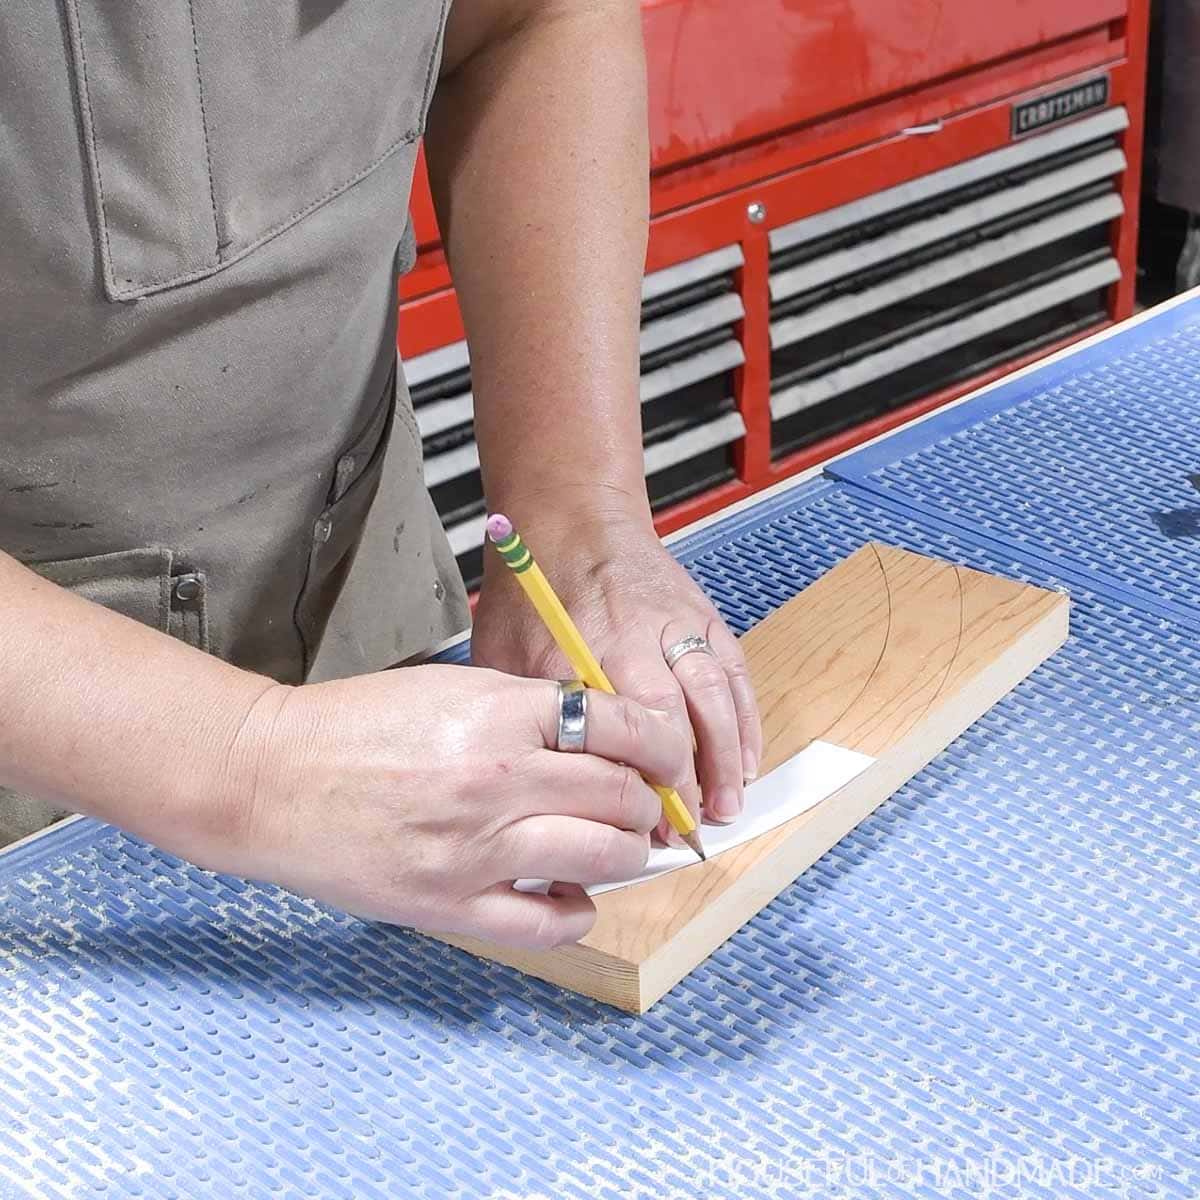
For the curve on the handle, print and cut out the template.
The template is half the curve, so mark the middle of board, then line it up and draw the curves on either side.
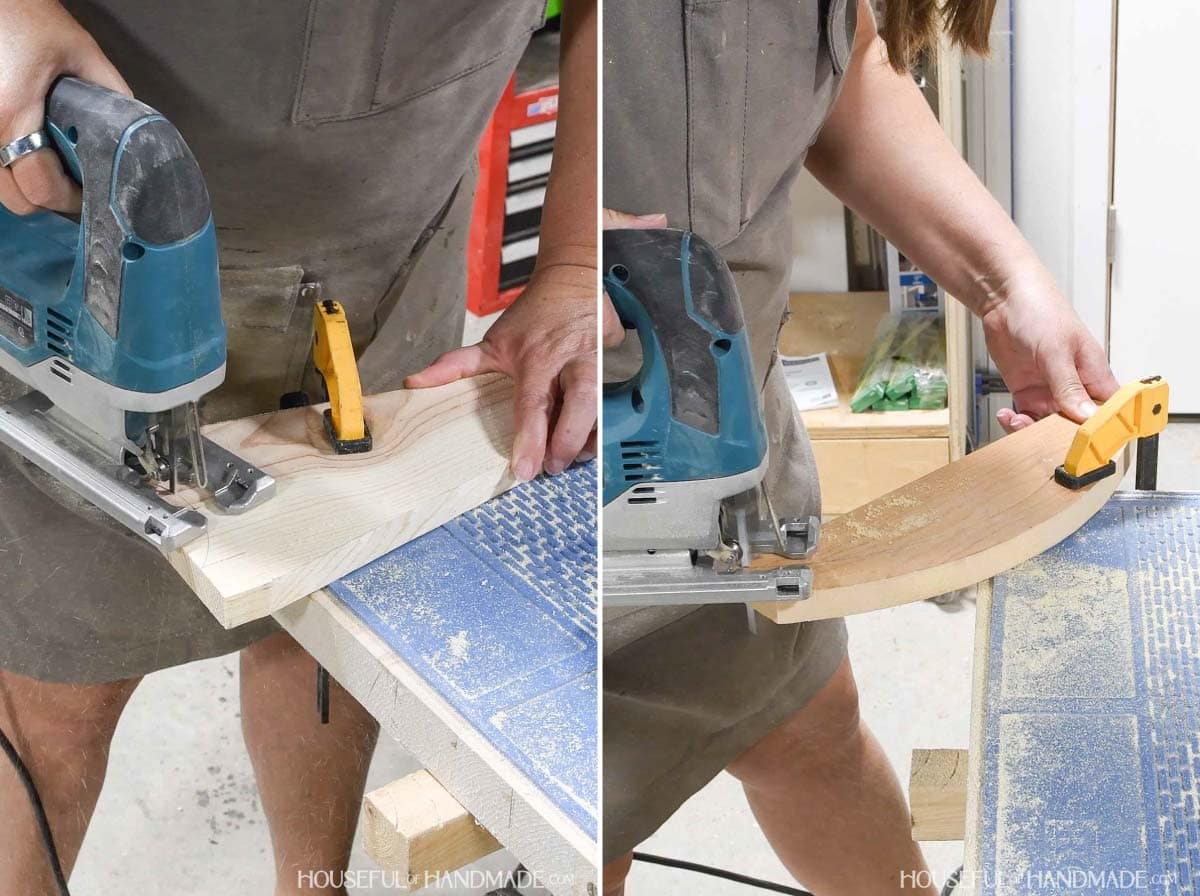
Cut the straight lines for the angles with a circular saw or jig saw.
You can use a straight edge to guide the saw if you want to, but these cuts are mostly decorative and will not affect the build too much if they are slightly imperfect.

Cut the curves out with a jig saw.
EXPERT TIP:
I love using a scroll cut blade in my jig saw when cutting tighter curves to make it easier. It also gives a nice clean cut.
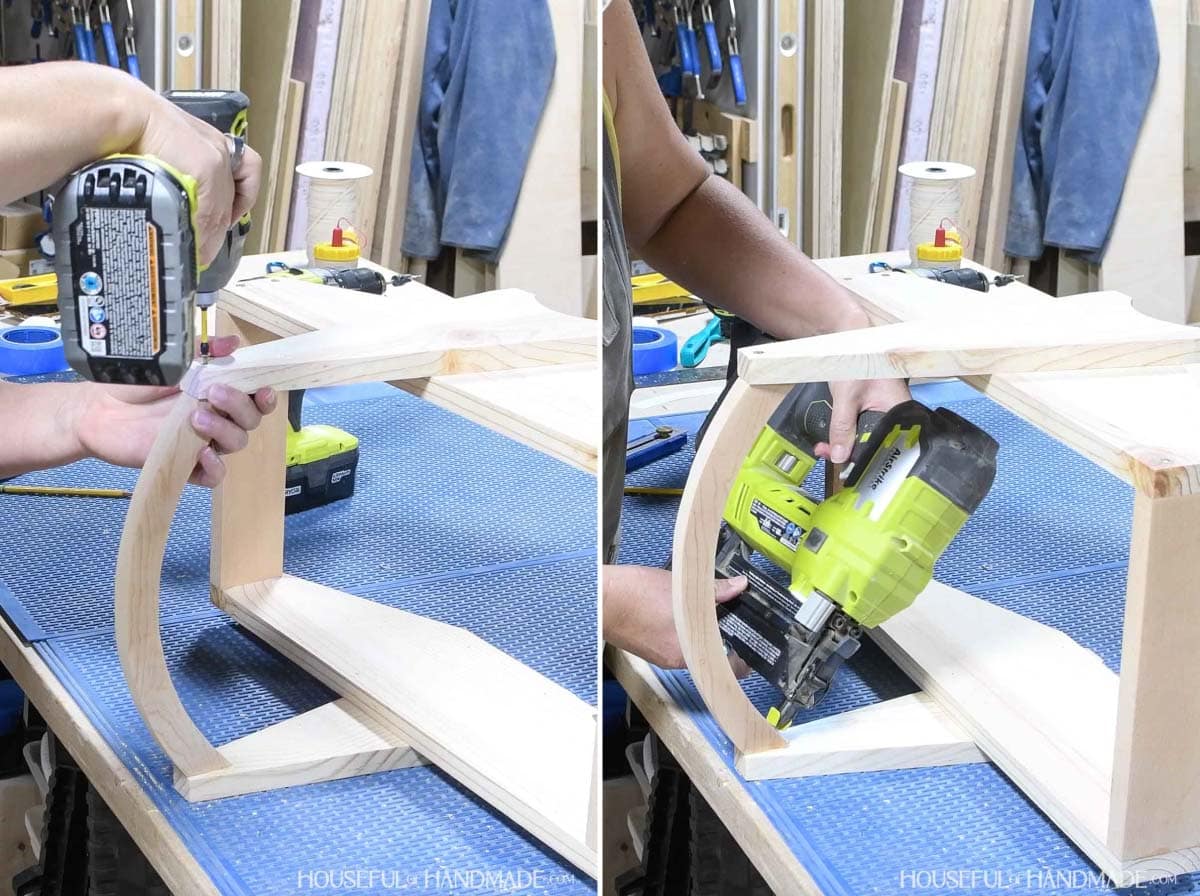
STEP 2- Assemble the frame
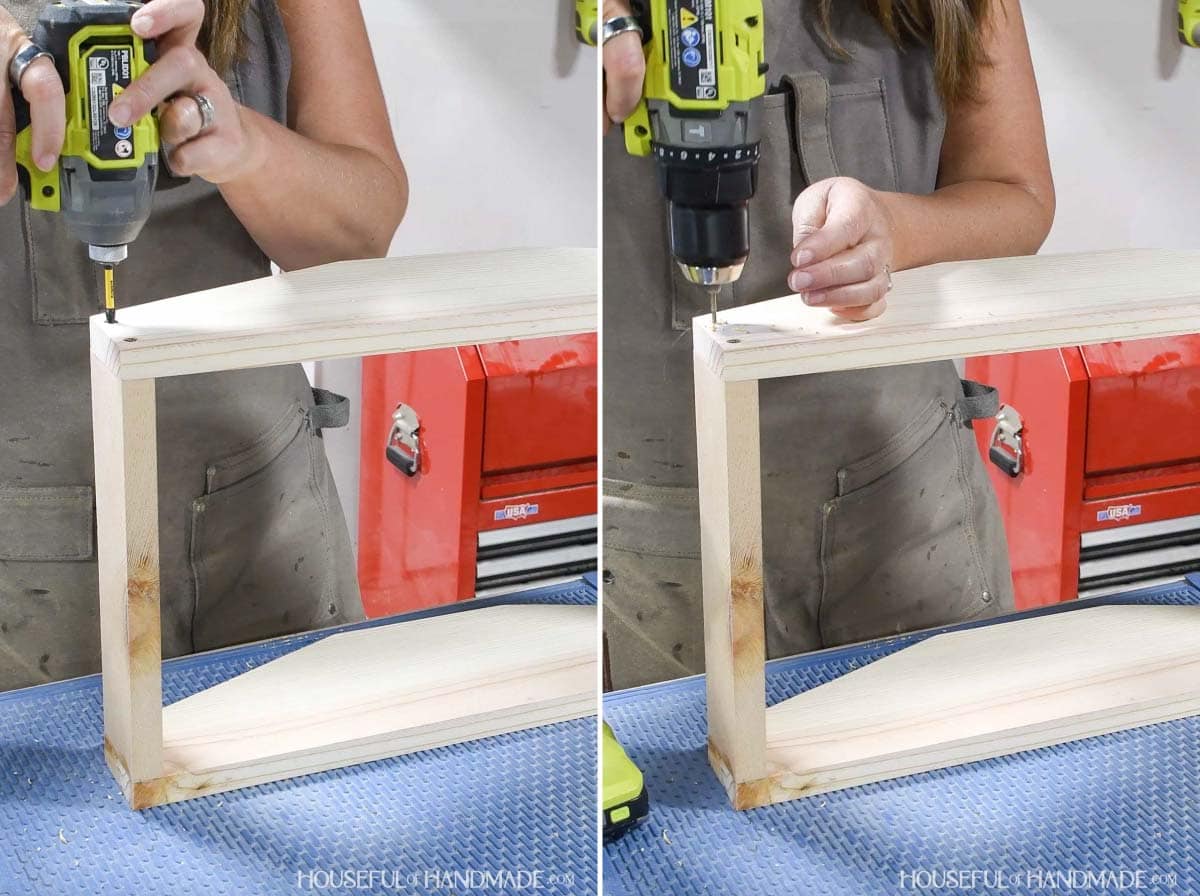
Attach the side boards to the front/back pieces so they are flush with the outer edge and top.
Predrill a hole to prevent wood splitting. Then secure with wood glue and 1 1/4” wood screws through the front into the side board.
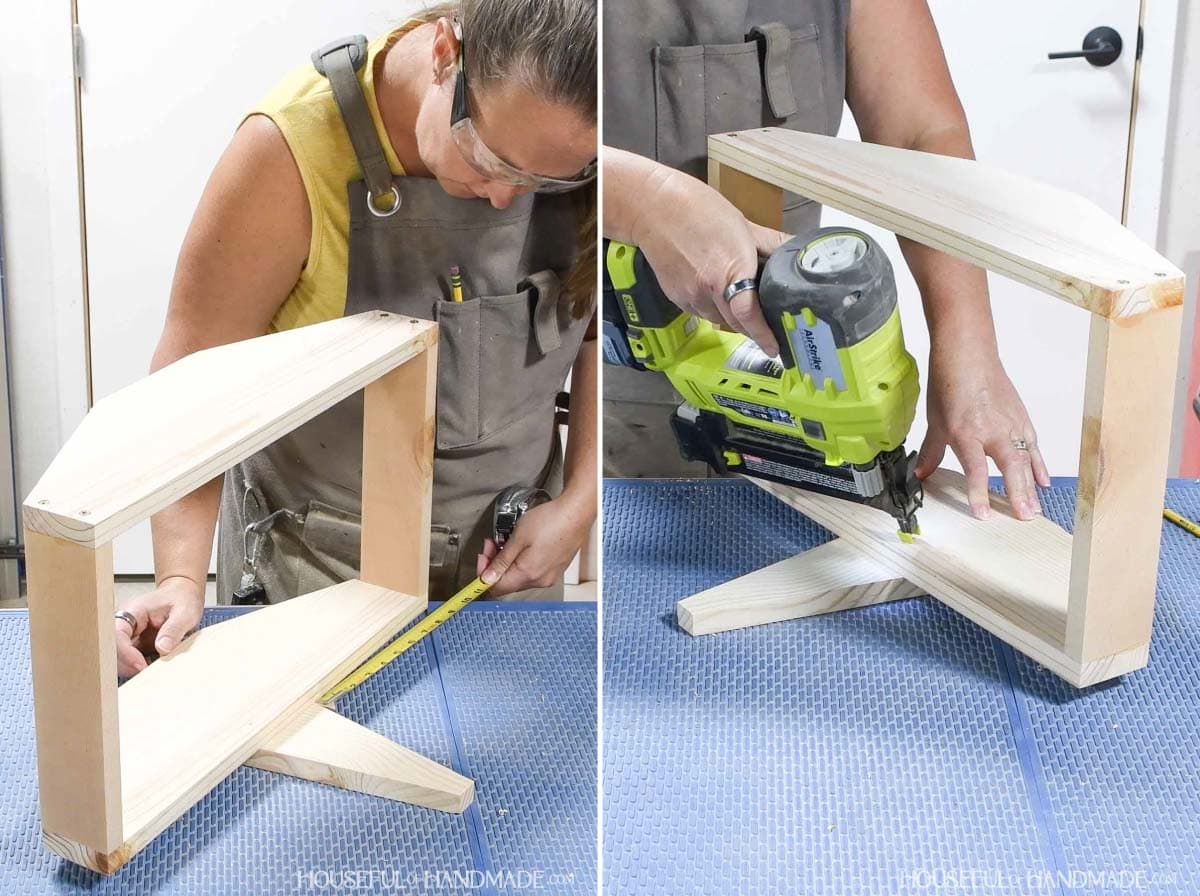
Center the handle base pieces on the front and back so they are 1” below the bottom.
Secure with wood glue and 1 1/4” brad nails through the inside to hide the nails holes.
My nailer could not fit inside the basket so I put the nails toward the top and bottom at a slight angle.
Attach the handle top between the base pieces so the top curve is flush with the top and it is centered.
Predrill a hole through the handle base into the handle. Secure with wood glue a 1 1/4” screw on each side.
Then add a couple 1 1/4” brad nails from the inside of the handle into the base to prevent it from spinning.
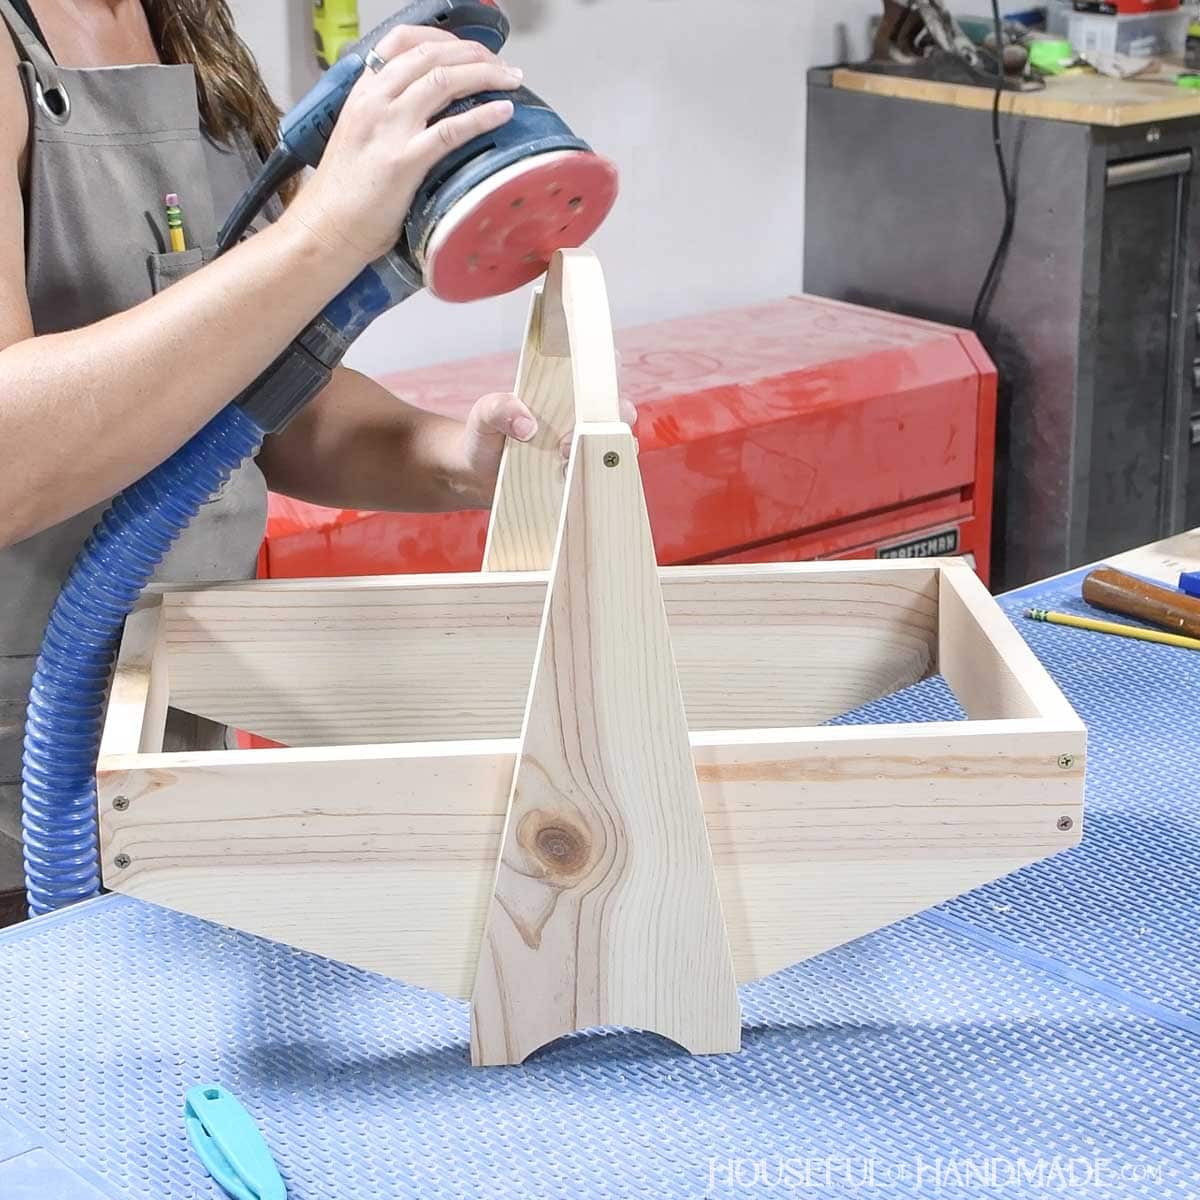
STEP 3- Sand and finish
Sand the finished frame.
EXPERT TIP:
I used my sander to curve over the edges on the handle to make it more comfortable in my hand.
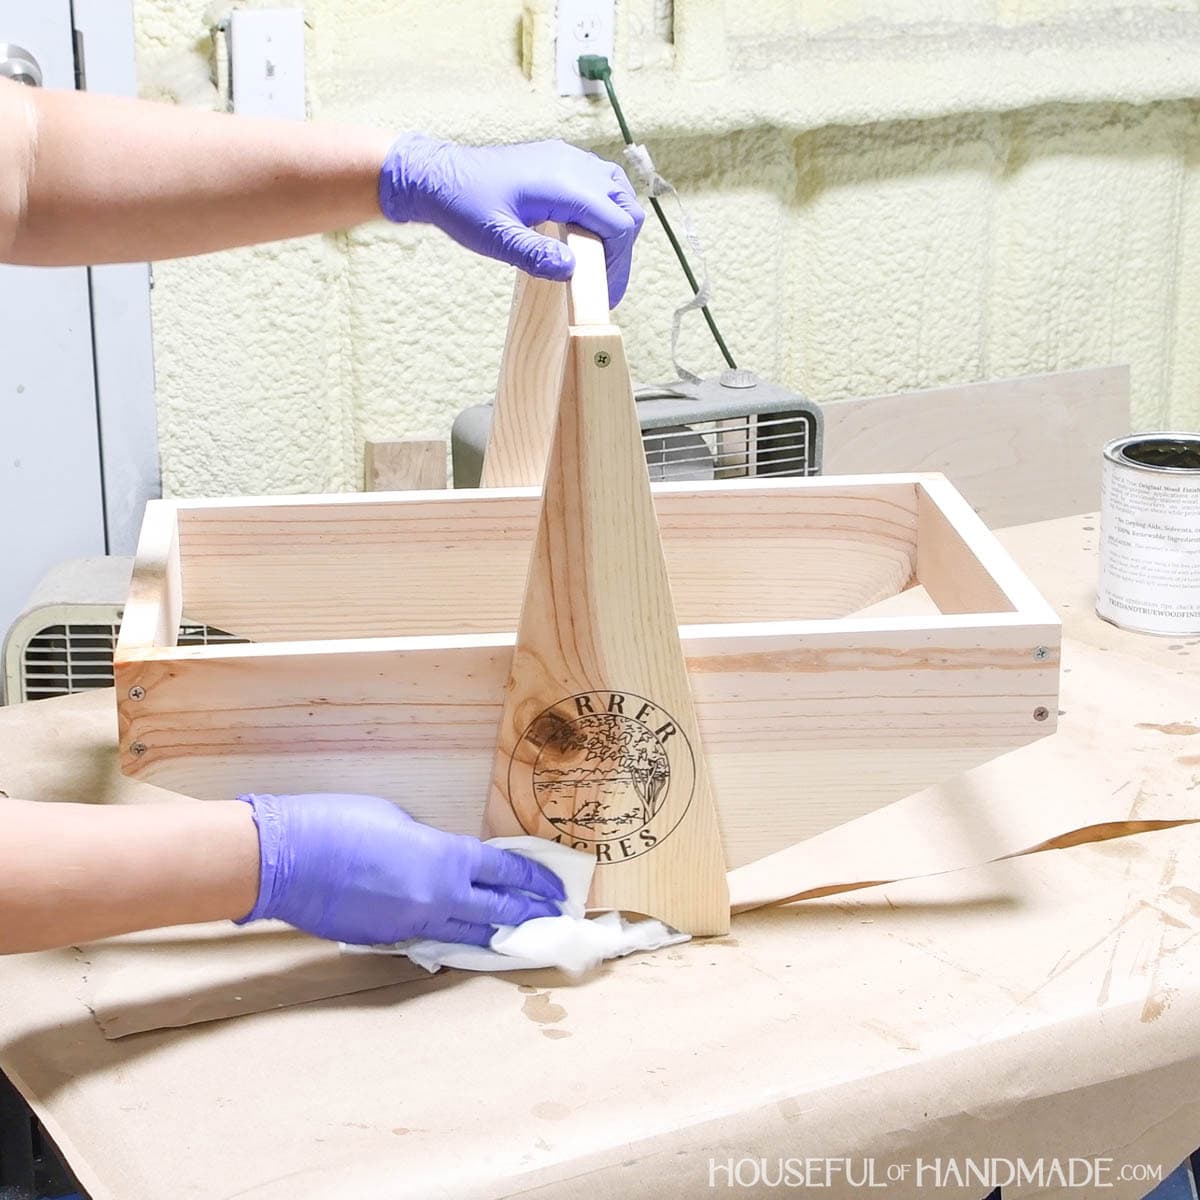
Now it is time to finish the basket frame.
First I added a fake laser engraved design to the handle base on both side. This is a simple trick I like to use to personalize my builds.
Then I sealed it with a food safe sealer. You could also stain or paint your harvest basket.
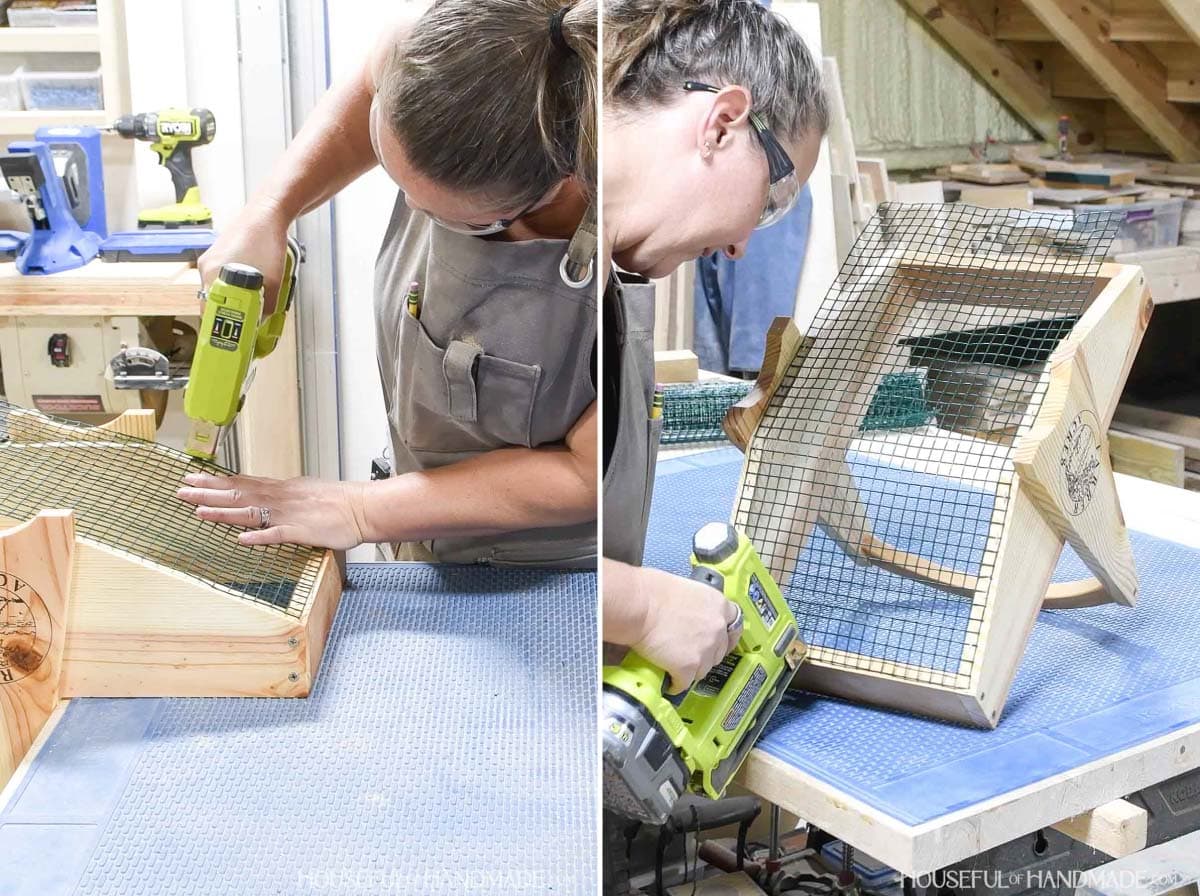
STEP 4- Attach mesh bottom
Cut the piece of hardware cloth or chicken wire with pliers or snips.
Try to get as close to the edge of the square so you do not have pieces of wire poking out the side of the basket.
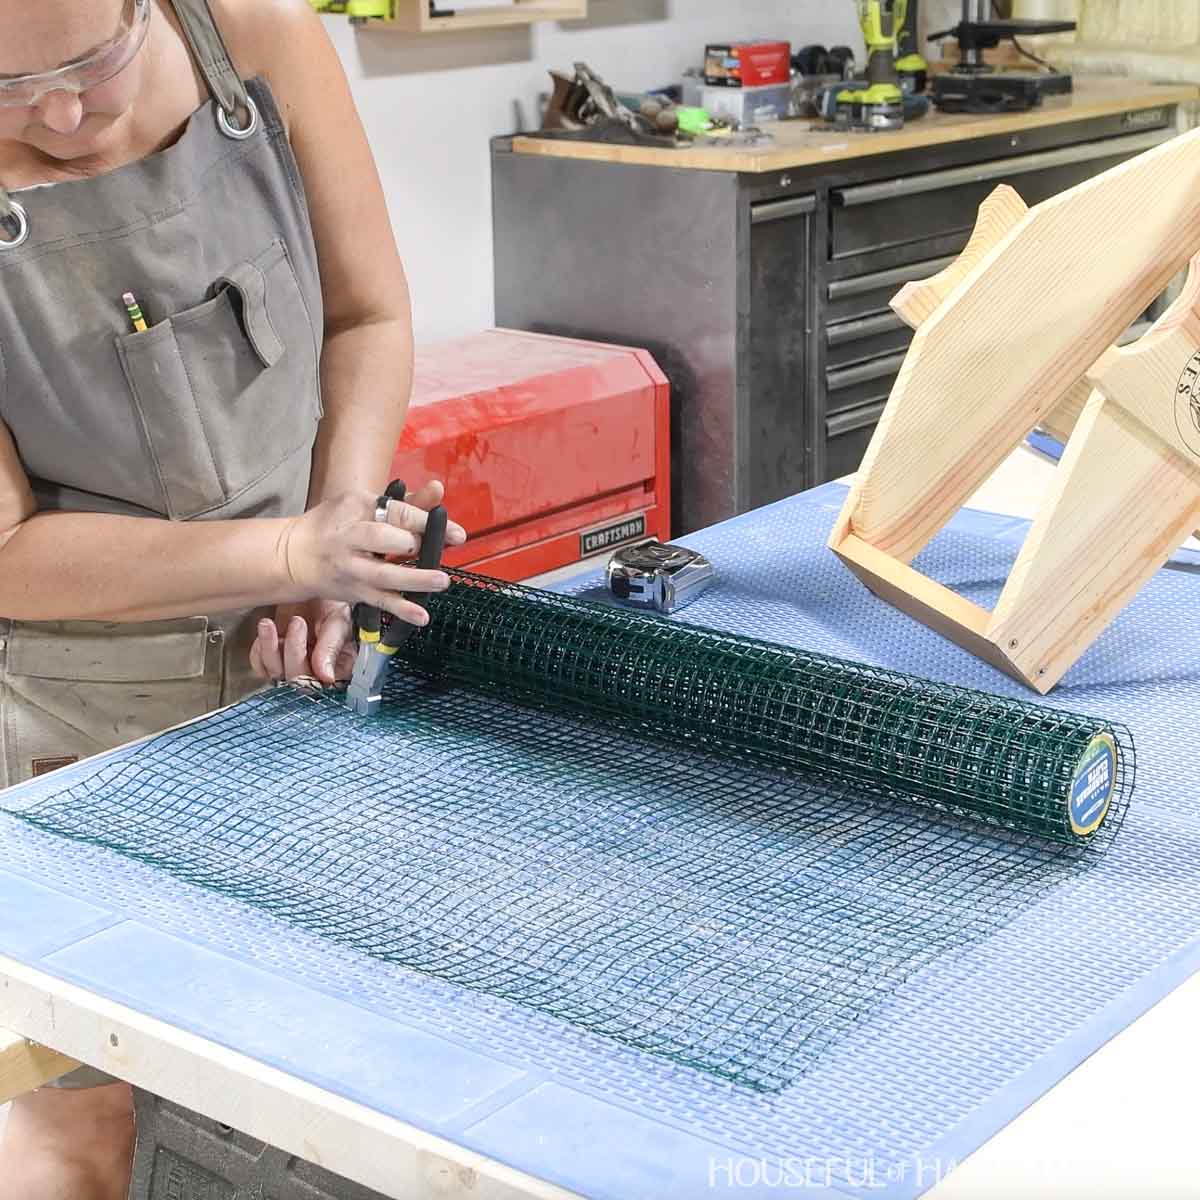
Then flip over the basket frame and center the hardware cloth or chicken wire on the underside. It will not go to the edge of the boards.
Secure with 5/8” nails into the front, back and side pieces. Make sure to pull it tight as you attach.
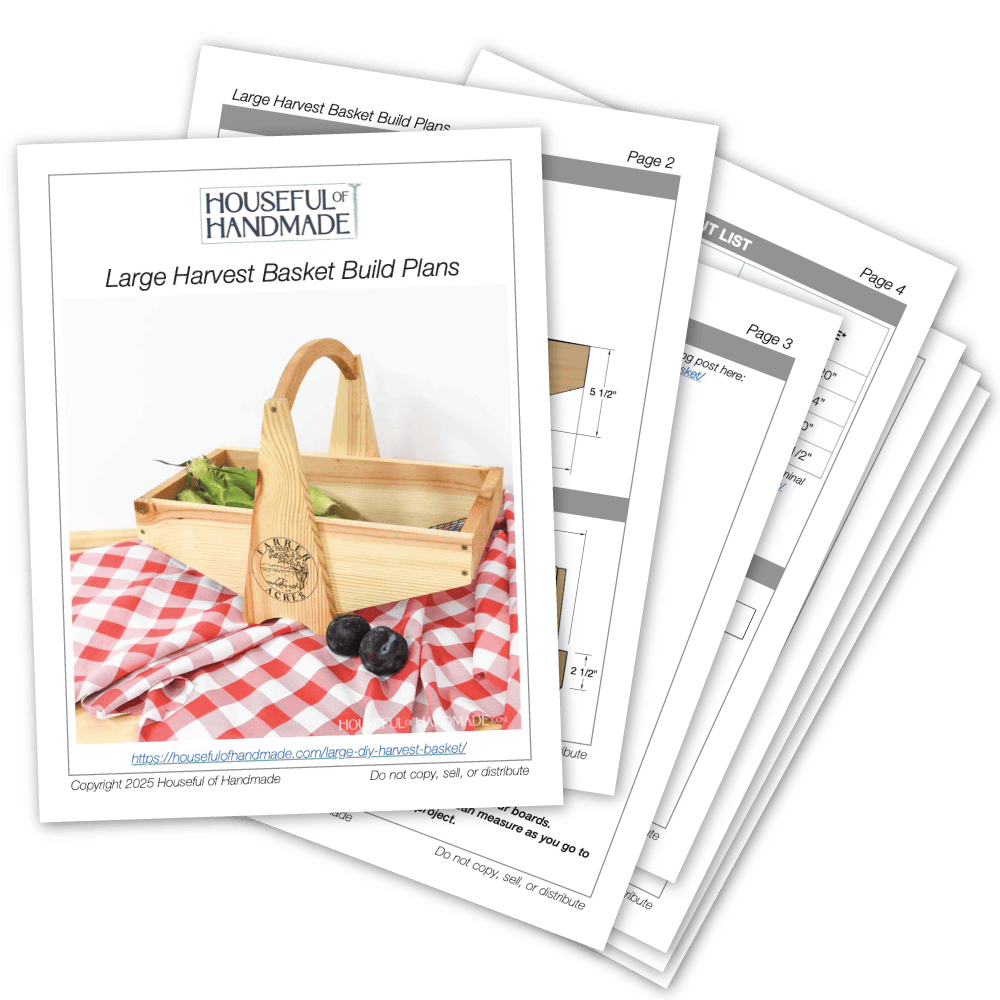
Premium plans include:
- Recommended Tools
- Shopping list
- Easy to read cut list table
- Cut diagrams
- Step-by-step instructions with 3D renderings
- Helpful resources
- BONUS: 3D SketchUp file
You did it!
Now you can take your new basket to the garden and fill it with fresh produce. And the basket is so pretty, you can store your harvest in it on the counter too.
I can't wait for the orchard to be producing enough fruit to overfill my large basket!
More Scrap Wood Projects
I'm having so much fun clearing out my scrap wood pile for this year's Scrap Wood Summer. And we are just getting started.
My friend Shara from Woodshop Diaries and I will share a new project made from scraps every Tuesday in August.
I'll share each week's new projects below so you can use up your scraps too!


Happy building!
