Learn how to make a window valance box for just a few dollars.
This beautiful rustic wood cornice can be made so quickly and makes a huge statement in any room. Plus all the supplies for this easy window valance are super cheap!
This beautiful DIY window cornice box is made out of a 1×6 board and electrical conduit. Electrical conduit is only a couple dollars. It’s my favorite cheap way to DIY a curtain rod.
Plus this valance can easily be made to fit any window. And you can have your new window dressings up in no time.
This post may contain affiliate links. As an Amazon Associate I earn from qualifying purchases. Click here to read my full disclosure policy.
After you know how to make a window cornice box so quickly, you will want to add them to every window in your home!
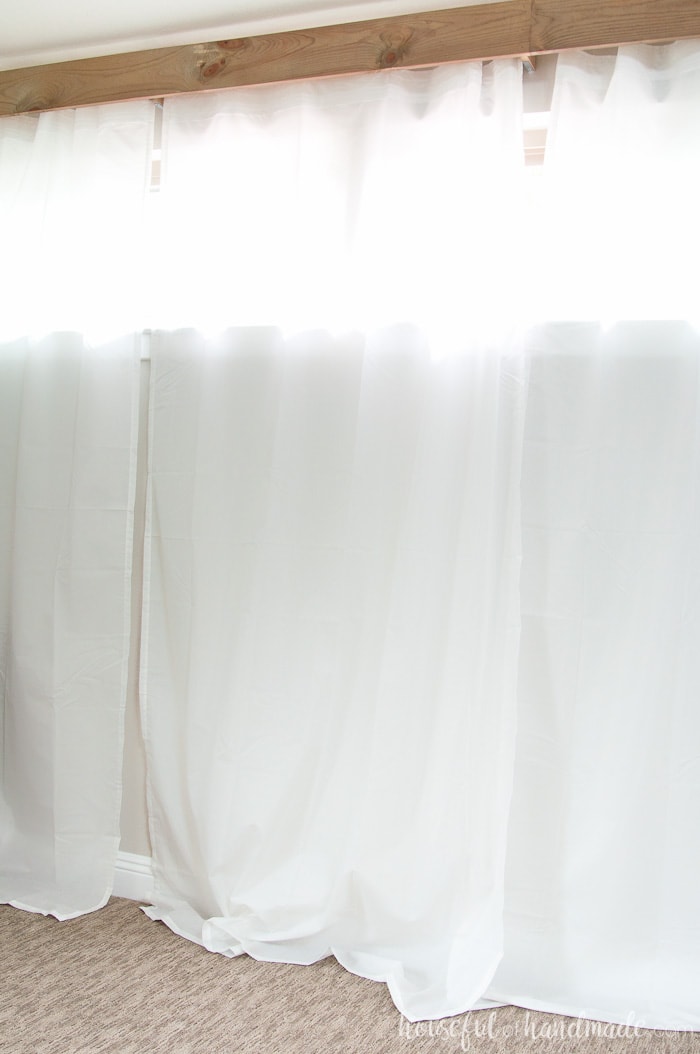
It has been a while since I shared the reveal of our new living room. This room has been through a huge transformation with the vintage inspired farmhouse fireplace makeover, new rustic railings, the perfect greige paint color, and finally new carpet.
And when I shared the pictures of our new room, everyone was in love with the wooden valance over the windows. Now it’s time I share how to make a window cornice box so you can make one (or two).
What is a Valance or Cornice?
Valances or cornices are window treatments that sit around the top of the window. They can be made out of wood, fabric or even fabric covered wood.
Window valances can be installed by themselves, or you can install them over the top of curtains or blinds.
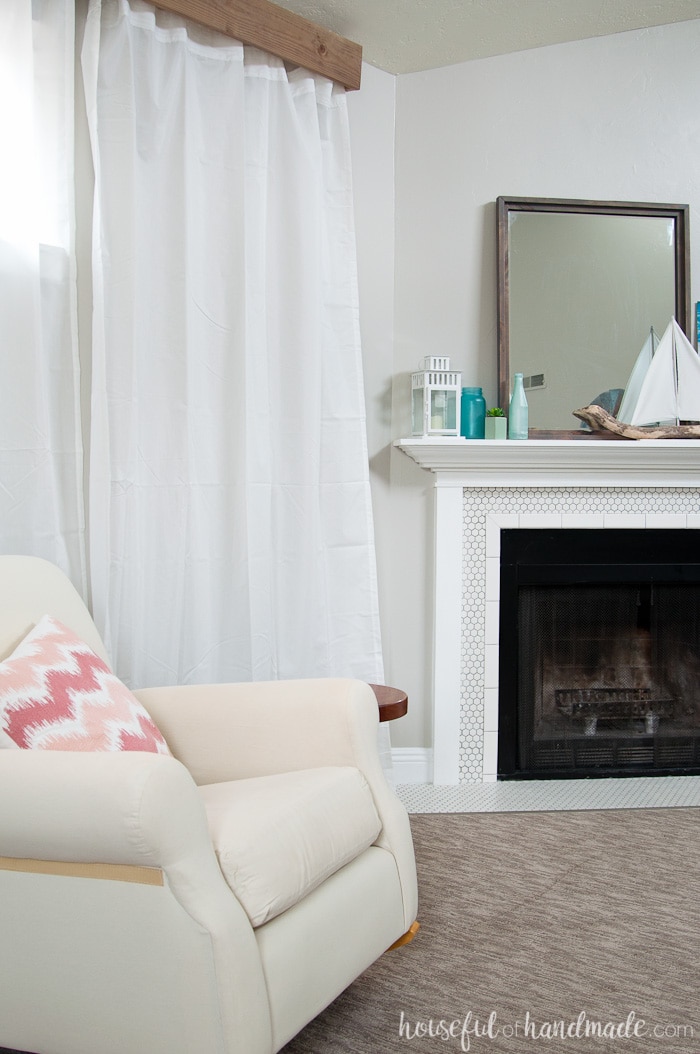
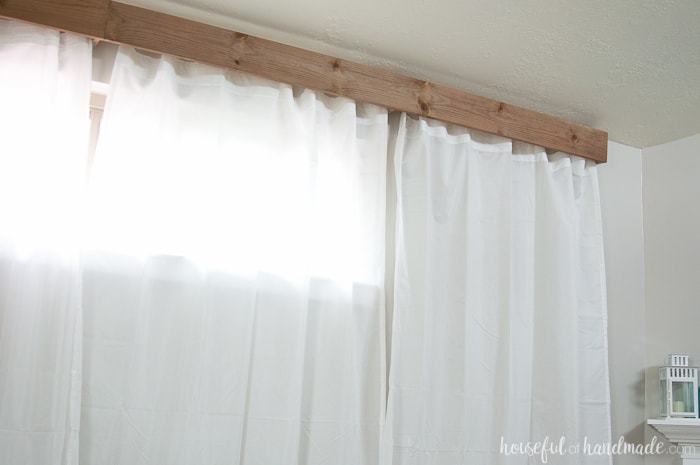
For our windows, I integrated the curtain rod into the large wood valance. But you could also sit your curtain rod inside your window frames or forgo it all together for a naked window treatment.
Are Valances Outdated?
Absolutely not! Valances and cornice boxes are classic, but there are more outdated versions out there. Fabric valances are more outdated, but solid wood cornices will stand the test of time.
Plus this beautiful DIY window treatment is so easy to make. It’s the easiest way to finish off the top of your windows and is way cheaper than even a plain curtain rod.
You are going to want to get yourself some 1×6 boards immediately and transform all your windows this weekend it’s that easy!
Adding Symmetry with Window Treatments
The windows in our living room have been a challenge for me since we moved in. They are not symmetrical on the wall so anytime I hang window treatments they made the room feel lopsided.
In order to solve that problem, I decided to hang curtains so they covered the entire wall, even where there were no windows. This would help solve the balance issue I was having in the space.
But to just hang curtains over a wall seemed weird. I needed a way to make the curtains look like they were suppose to be there.
Even a bold, statement curtain rod didn’t seem like the perfect fit (and they are very expensive). However, this DIY window cornice box worked perfectly! It gives the illusion that the windows continue under the curtains.
The new window cornice is so simple to make too! The only challenge I had was needing a second pair of hands to hang it because it is so large.
If your wood valance is smaller, you can easily hang it without a second set of hands!
How Much Does a Wood Valance Cost?
You can spend a lot of money on window treatments. That is why it is so great to DIY them.
This easy to make wood valance is so inexpensive to make. The wood for our 15′ cornice cost only $10. And the pipe used to hang the curtains only cost $3 a piece (I used 2).
The entire project cost less than $20 for a 15′ valance! Then I added inexpensive Ikea curtains to finish it off. It looks so expensive!
How to Make a Wood Valance
Tools Needed:
- Miter saw
- I love this inexpensive miter saw and use it for all my DIYs, but you could also have them cut at your local home improvement store or use any saw you have.
- Drill
- Pipe cutter
- 16 gauge nail gun
- Optional: Kreg pocket hole jig for joining 1×6 boards to make extra long valance (this beginner jig is a great budget friendly option).
Supplies:
- 1×6 boards
- You will need enough wood to cover the length of your valance box plus 3 1/2″ for each side. If your valance is large, you want 3 1/2″ supports at least every 4 feet.
- 1/2″ electrical conduit
- 2 1/2″ corner braces
- You will need one for each end and each support piece.
- 1 1/4″ wood screws
- 2 1/2″ wood screws
- 1 1/4″ 16 gauge finishing nails
- Wood glue
- Stain or paint
- Optional: Curtain clips and curtains
Cut the boards
Cut your 1×6 board to the desired width of your rustic valance box. I recommend extending your cornice at least 2-3″ past each side of your window. It will make the window look larger and allow the curtains to hang to the sides of the windows.
If your valance is larger than your board (like ours), you can use the Kreg Jig to join two 1×6 boards together to create a long board.
Cut (2) 3 1/2″ pieces from the 1×6 for each end of the cornice box. If you cornice box is larger than 4′, cut 3 1/2″ pieces to use as a center support at least every 4 feet.
My DIY cornice box is 15′ and I used 3 center supports so they are every 3′.
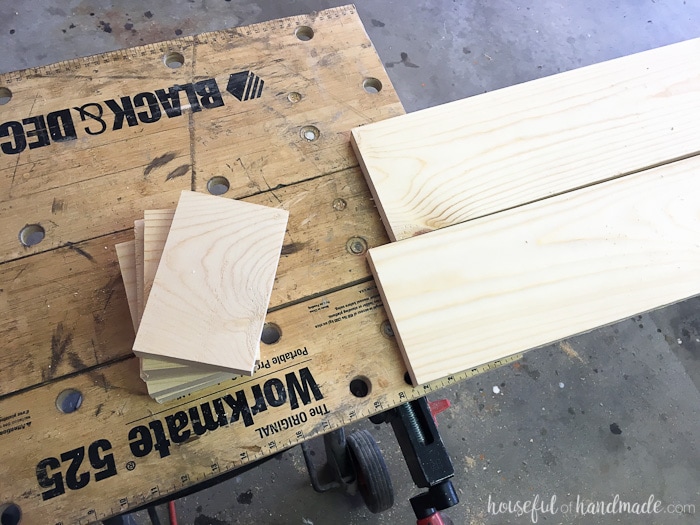
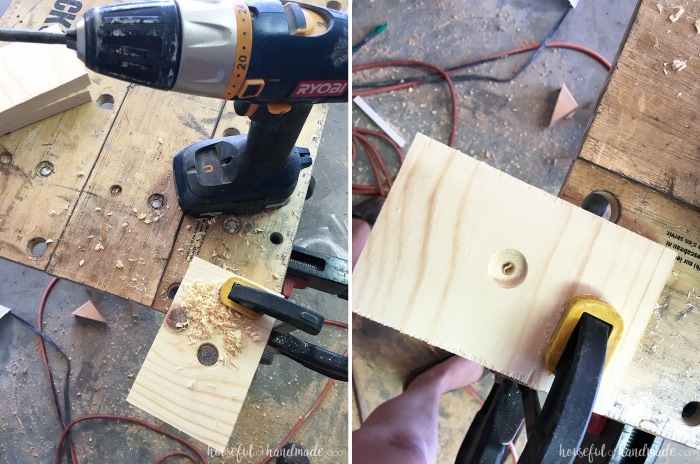
Mark the center of each end board and center support.
Drill a hole all the way through each of the center supports just large enough to slide the electrical conduit through.
Drill a hole the same size only 1/2″ way through each end board.
Assemble the Valance
Sand and stain (or paint) all the pieces of wood before assembly (it is way easier).
Attach the corner braces to the wall where you will be hanging the end pieces and center supports with the 2 1/2″ wood screws.
These will create a little ledge off the wall. Make sure the screws are in the wall studs if possible. If not, use heavy duty sheetrock anchors. These will be holding the weight of the cornice box and the curtains.
Secure one of the end pieces of the box to the outside corner brace with the 1 1/4″ wood screws so it is sitting on top of the L that is coming off the wall. Then you will want to secure any center braces.
If your valance is large, thread all the supports onto the electrical conduit before securing them to the wall.
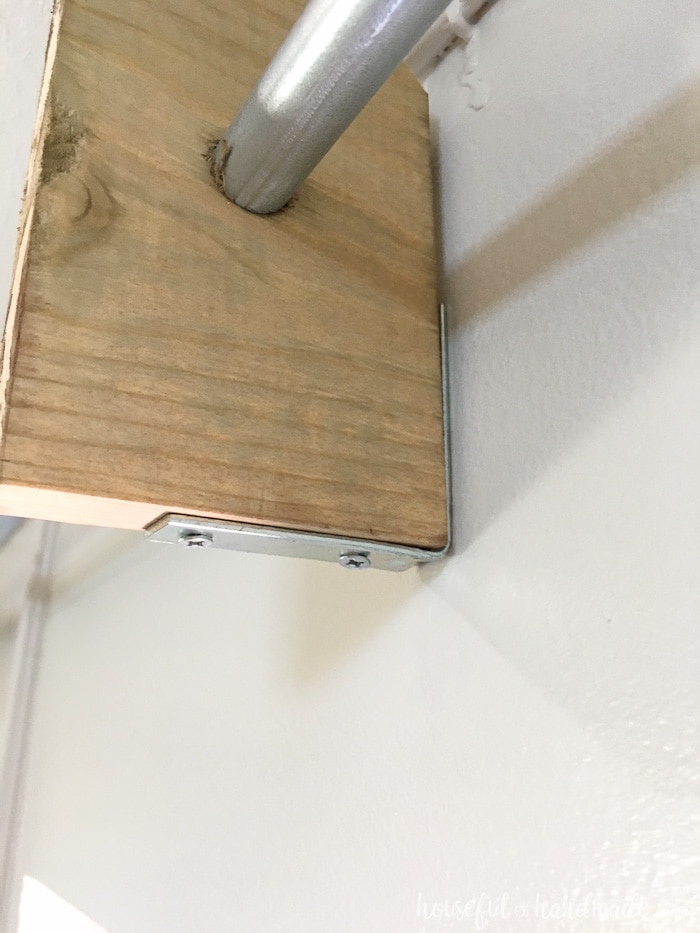
Cut the conduit to the length of your cornice board, minus 3/4″. Because your conduit will only go into the end pieces 1/2 way.
If you are using curtains, you want to add the curtain clips to the conduit before securing it between the ends and center supports (I evenly spaced mine between each center support).
Feed the conduit into the end and any center supports that are already secured to the walls.
Place the second end piece over the other end of the conduit. Then attach it to the remaining corner brace.
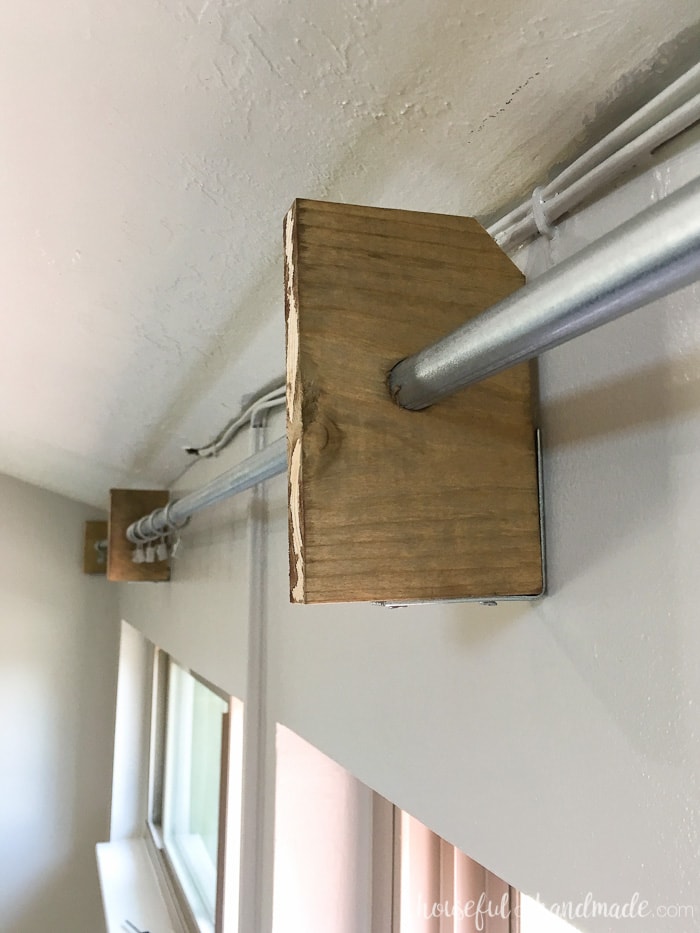
Add wood glue to the front of each end piece and center support piece. Place the front of the cornice box on top of them and attach with 1 1/4″ 16 gauge nails.
You could completely build the cornice box with the conduit inside before attaching it to the L corner braces if you want, but because of the size of ours, it was easier to build it on the wall this way.
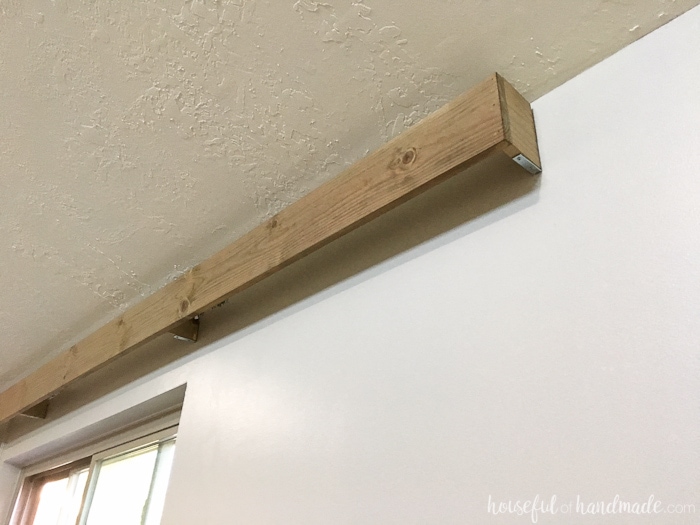
Now that you know how to make a window cornice box, all you need to do is attach your curtains to the curtain clips and admire your work.
Everyone that visits comments on how beautiful our DIY cornice box is and I love the way it is balancing out our problem window area.
If you loved this easy DIY, make sure to check out the rest of my DIY decor tutorials.
DIY Wood Valance
Finish off your windows with beautiful window treatments. This gorgeous wood valance is fast & cheap to make and is perfect for any window.
Materials
- 1x6 boards (You will need enough wood to cover the length of your valance box plus 3 1/2" for each side. If your valance is large, you want 3 1/2" supports at least every 4 feet.)
- 1/2" electrical conduit
- 2 1/2" corner braces (You will need one for each end and each support piece.)
- 1 1/4" wood screws
- 2 1/2" wood screws
- 1 1/4" 16 gauge finishing nails
- Wood glue
- Stain or paint
- Optional: Curtain clips and curtains
Tools
- Miter saw
- Drill
- Pipe cutter
- 16 gauge nail gun
- Optional: Kreg pocket hole jig for joining 1x6 boards to make extra long valance
Instructions
- Cut your 1x6 board to the desired width of your valance. Cut (2) 3 1/2" pieces from the 1x6 for each end of the cornice box. If you cornice box is larger than 4', cut 3 1/2" pieces to use as a center support at least every 4 feet.
- If your valance is larger than your board (like ours), you can use the Kreg Jig to join two 1x6 boards together to create a long board.
- Mark the center of each end board and center support.
- Drill a hole all the way through each of the center supports just large enough to slide the electrical conduit through.
- Drill a hole the same size only 1/2" way through each end board.
- Sand and stain (or paint) all the pieces of wood before assembly.
- Attach the corner braces to the wall where you will be hanging the end pieces and center supports with the 2 1/2" wood screws. Make sure the screws are in the wall studs if possible. If not, use heavy duty sheetrock anchors. These will be holding the weight of the cornice box and the curtains.
- Secure one of the end pieces of the box to the outside corner brace with the 1 1/4" wood screws so it is sitting on top of the L that is coming off the wall.
- Then you will want to secure any center braces. If your valance is large, thread all the supports onto the electrical conduit before securing them to the wall.
- Cut the conduit to the length of your cornice board, minus 3/4".
- If you are using curtains, you want to add the curtain clips to the conduit before securing it between the ends and center supports.
- Feed the conduit into the end and any center supports that are already secured to the walls.
- Place the second end piece over the other end of the conduit. Then attach it to the remaining corner brace.
- Add wood glue to the front of each end piece and center support piece. Place the front of the cornice box on top of them and attach with 1 1/4" 16 gauge nails.
Notes
You could completely build the cornice box with the conduit inside before attaching it to the L corner braces if you want, but because of the size of ours, it was easier to build it on the wall as detailed.
Recommended Products
As an Amazon Associate and member of other affiliate programs, I earn from qualifying purchases.
Happy Building!
good work
Thank you!
Love the wood added to the whole overall décor. Jo and Chip Gaines add little bits of rustic to a room, and the look is WOW! I love your rocking chair, looks so comfy!!
Thanks Linda! I love adding a bit of wood to every room. A little bit or rustic always makes me happy.
Hmmm…you’ve got me thinking about my own living room and curtains. Currently I am using cheapo basic metal rods that I spray painted black to hang white curtains I made from sheets. I sewed ribbons on the backside of the sheet to create a hidden tab. I have four single windows like this (ok, truth be told, I have one window that is still bare because I haven’t bothered to sew one more set of curtains yet!)
There is also a double window in the room that I have a double curtain rod with white curtains (sheets) that can pull close, and a colorful fabric that stays open. Wondering if I install wood cornices at the single windows, would I also need to install one at the double window? Or would it just be way too much wood cornices?!
My father in law cleaned out his garage recently, and delivered a stash of lumber to our house!
I have a second window in our living room that is still bare also! I have been trying to decide what to do with it because the kids use this window to watch outside and I am afraid long curtains will just get destroyed by them. I am leaning toward no cornice on that window too, and I think it is okay not to have all windows totally matching. Try to maintain a balance in the room, but don’t worry about it totally matching. I am jealous about your inherited wood stash! Free wood is always the best. Good luck.
Love it!! This may be the solution to our dining room window treatment dilemma.
That is awesome! It was so easy and was the perfect solution for our living room.