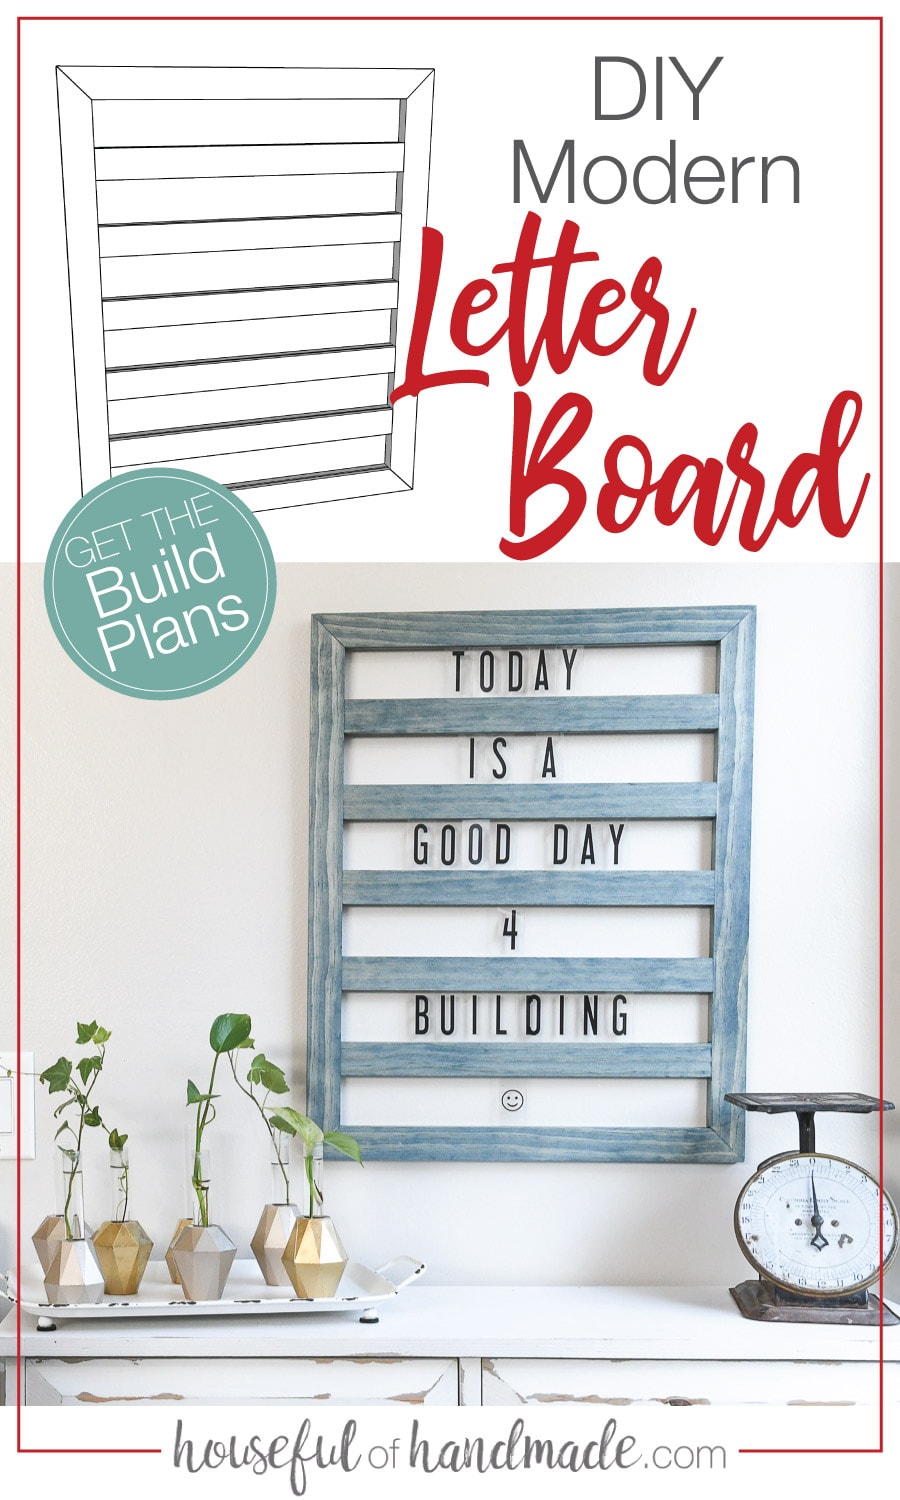
Make this gorgeous sliding letter board in just an hour for an easy wood gift.
With Christmas around the corner, it is time to plan all those DIY gifts! DIY gifts are the best because it shows you really took the time to think about them.
So this week I am partnering with Kreg Tools to share 3 easy DIY wood gifts you can make in just an hour! How is that for helping you get ready for Christmas? Today is the 1st DIY gift idea: a modern sliding letter board.
But even better, right now you can get yourself a pre-Christmas gift. If you purchase that Kreg Jig K4 or K5 system you’ve had your eye on between Nov 1, 2019 and Jan 31, 2020, you get a $15 dollar rebate!
This post may contain affiliate links. As an Amazon Associate I earn from qualifying purchases. Click here to read my full disclosure policy.
And that $15 is plenty to buy the supplies needed to make this sliding letter board for someone on your Christmas list!
It doesn’t matter if you purchase your new Kreg jig from Kreg Tools, Amazon (this is the one I have been using for the last 8 years), Home Depot, Lowe’s or somewhere else. It’s easy to redeem your rebate online, click here to submit your purchase information!
What is a Sliding Letter Board?
This sliding letter board is my DIY take on the classic letter board. Instead of pressing little plastic letters into slots on a board to display your favorite sayings. The sliding letter board uses inexpensive light box letters cards.
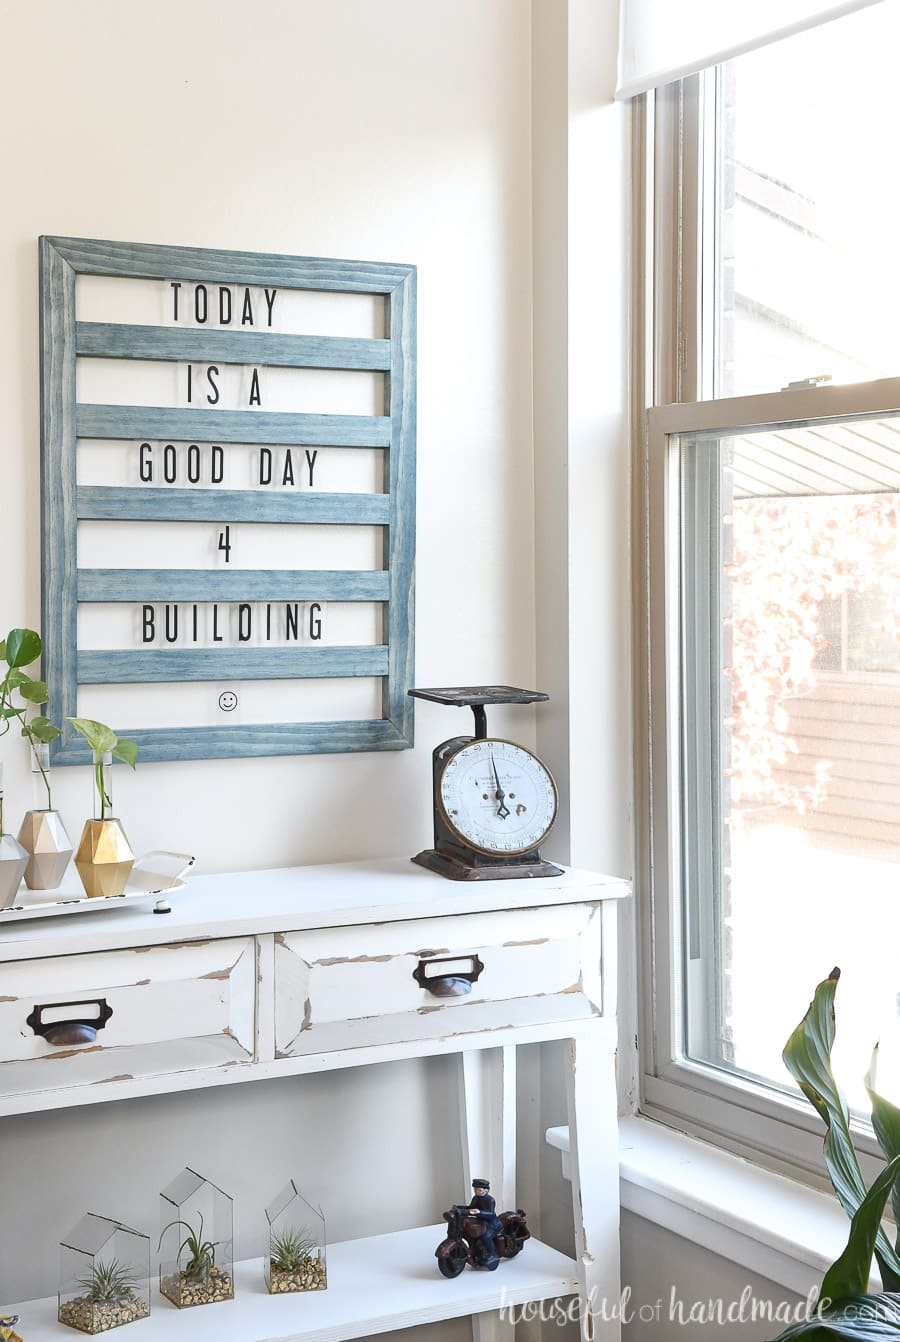
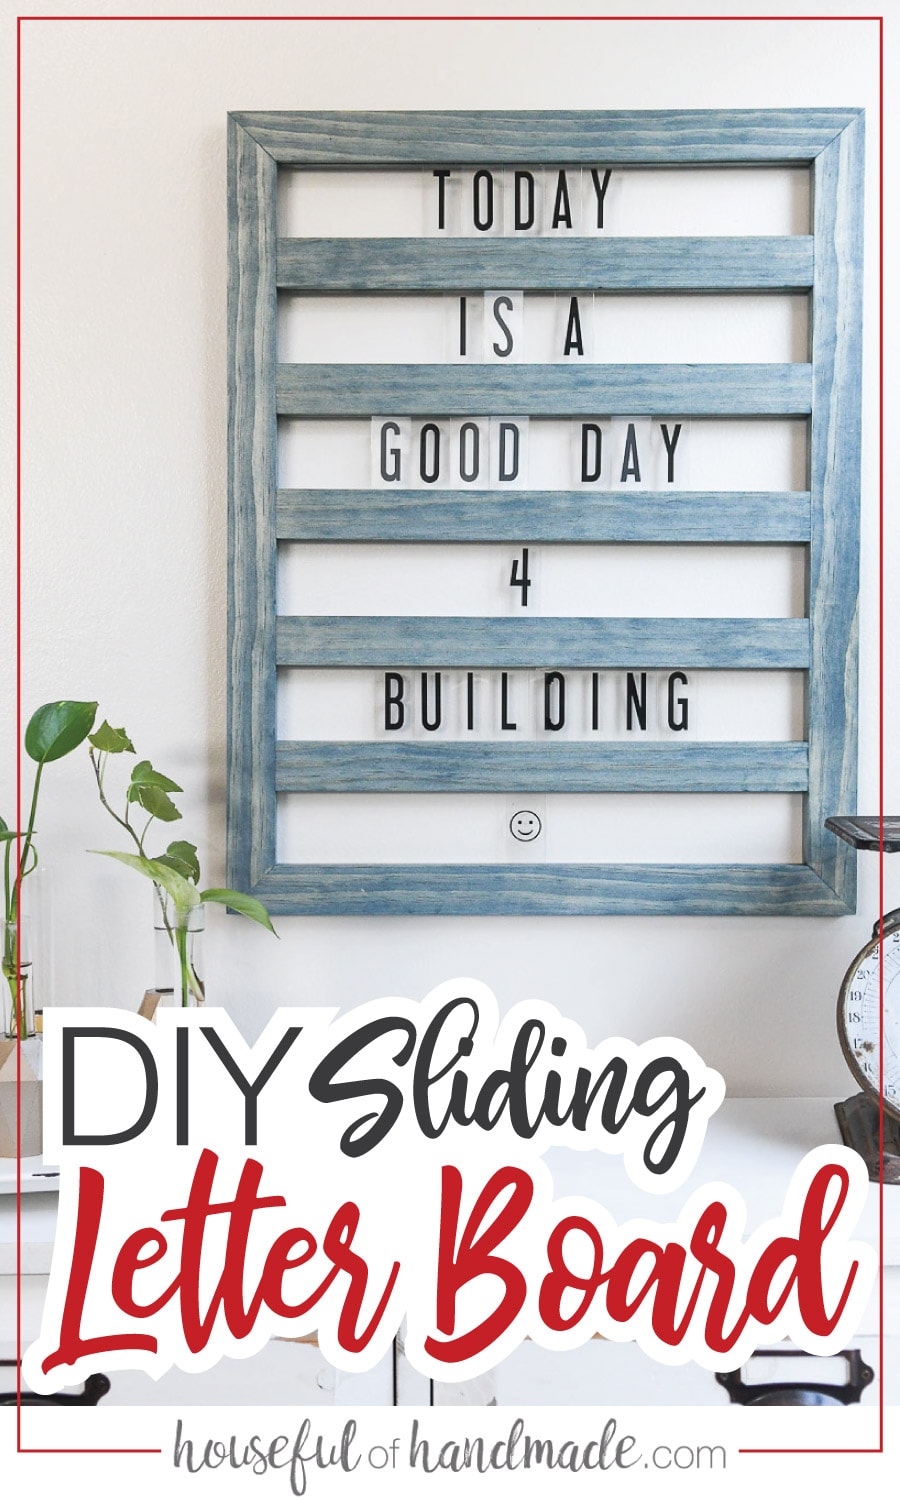
The letter board is made with grooves on the top and bottom of 1×2 slats to slide the Lightbox letters into. Then you can create fun sayings that appear to float between the wood frame.
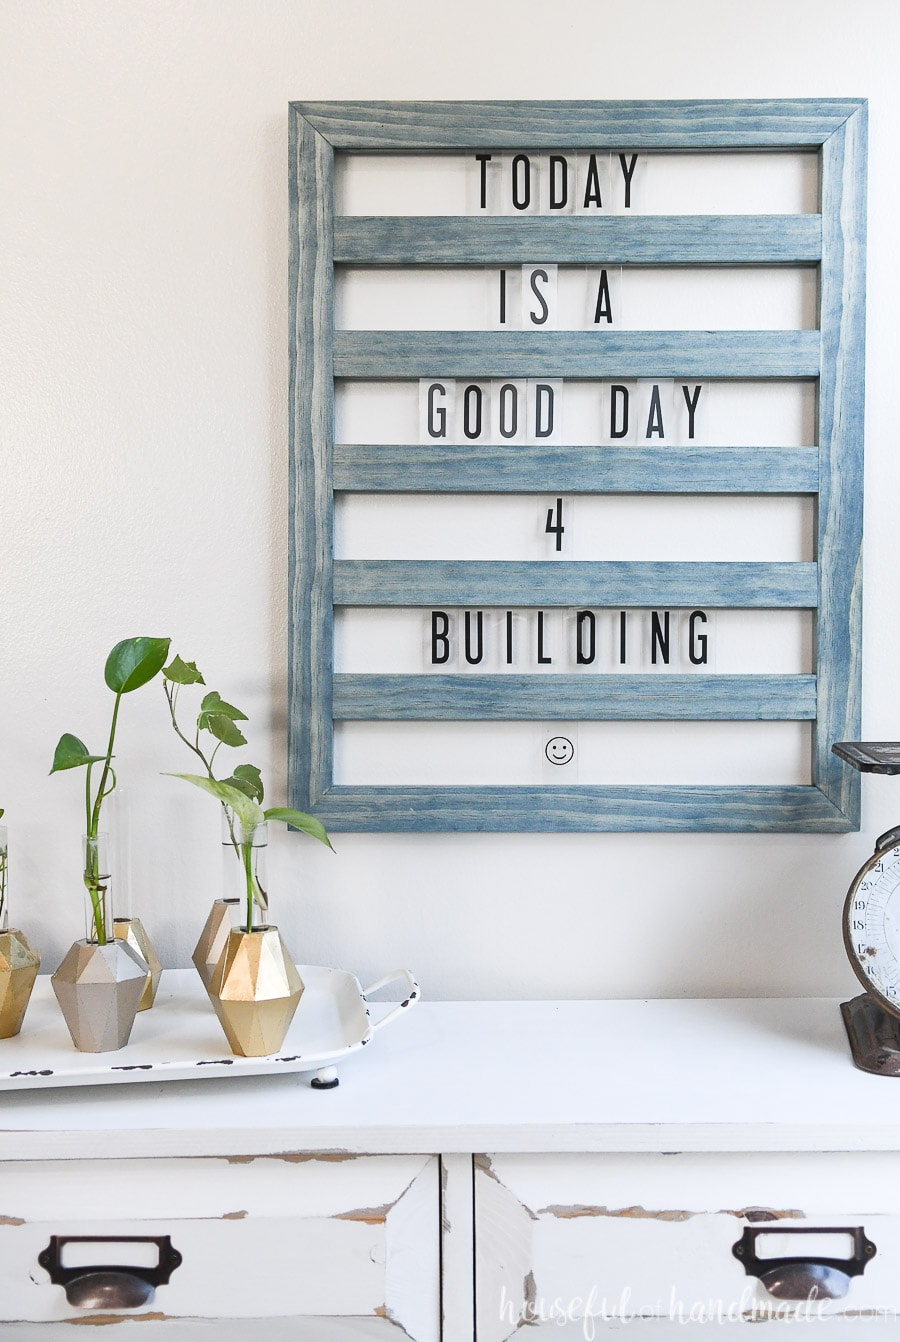
The sliding letter board is inexpensive to build. This 19” x 24” board was made from just two 1×2 boards. I chose select pine boards that cost around $5 each, but you could also use less expensive wood, it might just require a bit more sanding to get a smooth finish.
And the pack of letters with both black and colorful letters was less than $10. You could build 2 letter boards and gift one with the black letters and the other with the colorful ones!
Who Should You Give a Letter Board To?
Letter boards are the perfect gift for anyone who is whitty and loves to speak in quotes and sayings. This way they can express their ideas on the wall too!
Letter boards are also a perfect gift idea for teenagers. It’s a fun way for them to add decor and personality to their rooms.
Letter boards also make a wonderful teacher gift idea. They can use them on the walls in their classrooms for reminders, quotes and more!
How to Build a Sliding Letter Board
Tools Needed:
- Kreg jig
- Miter saw
- Drill
- Router with 1/8” straight cut router bit
- A router table or jig to hold the 1×2 boards is needed to create the groove on the side of the boards.
- Measuring tape
- Kreg face clamp
- Square
- Hammer
Supplies:
- (2) 8’ long 1×2 boards
- (24) 1 1/4” Kreg pocket hole screws
- Wood glue
- Sandpaper
- Stain or paint
- I used Valspar Weathered Navy wood stain for my letter board
- (2) Sawtooth picture hangers
- A4 sized light box letters
Cut the Boards
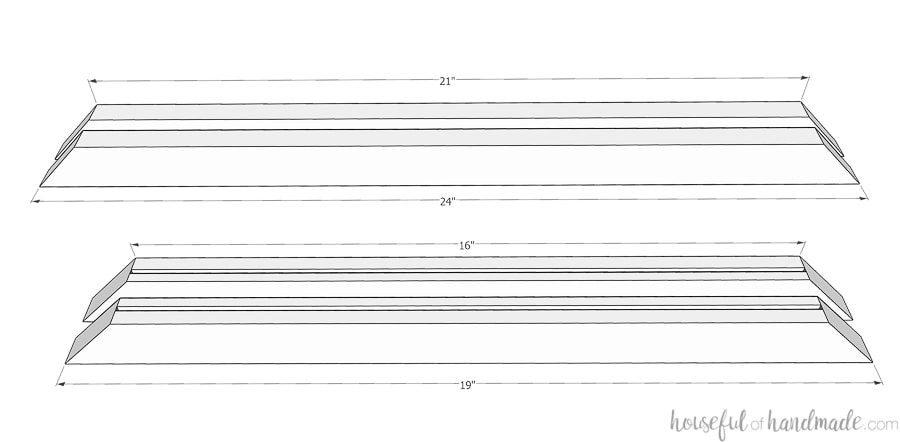
For the frame boards, cut 2 pieces of 1×2 19” long with a 45 degree angle on both ends facing opposite each other. The inside dimension should be 16”.
Then cut 2 more 1×2 pieces with the same 45 degree angle on each end to 24” long. The inside dimension should be 21”.
For the slats, cut 5 pieces of 1×2 to 16” long.
Router the Boards
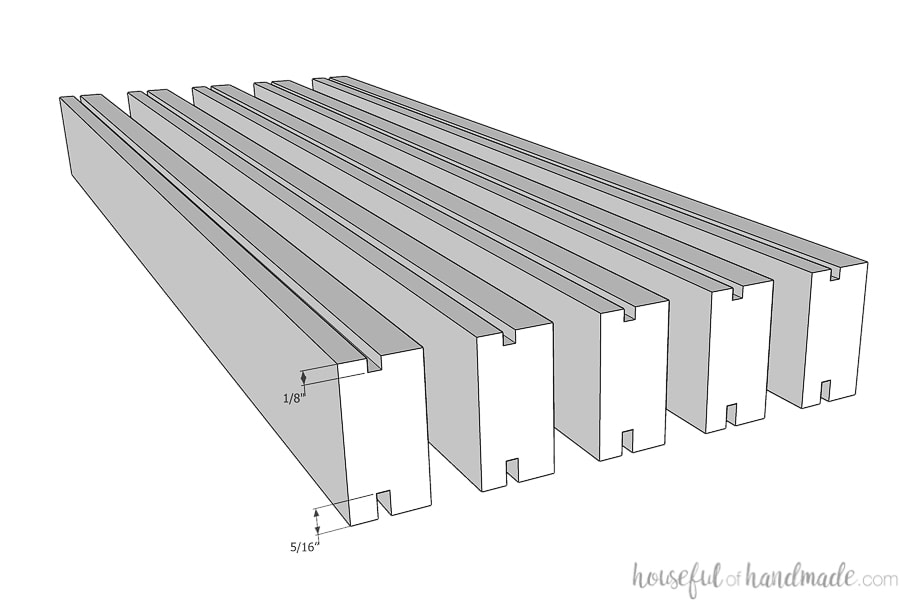
Set the router to cut an 1/8” side x 18” deep slot in one side of the boards. Make the groove slightly toward the front of the board.
You want the groove to be easy to tell visually which is the front and back to make it easier to match the groove on the other side and to assemble the boards.
Router the 1/8” deep groove in both sides of all the slats and the inside of the 19” long frame boards. Making sure the groove is closer to the front on both sides of the boards.
Then lift the bit on the router up to cut a deeper groove on one side of all the boards. The second groove needs to be 3/8” deep, but it is better to take it in 2 more passes to get a cleaner cut and not break the small bit.
Router the deeper groove in one side of all the slat boards and 1 of the frame boards. The side with the deeper groove will be the top of the boards from now on.
Assemble the Letter Board
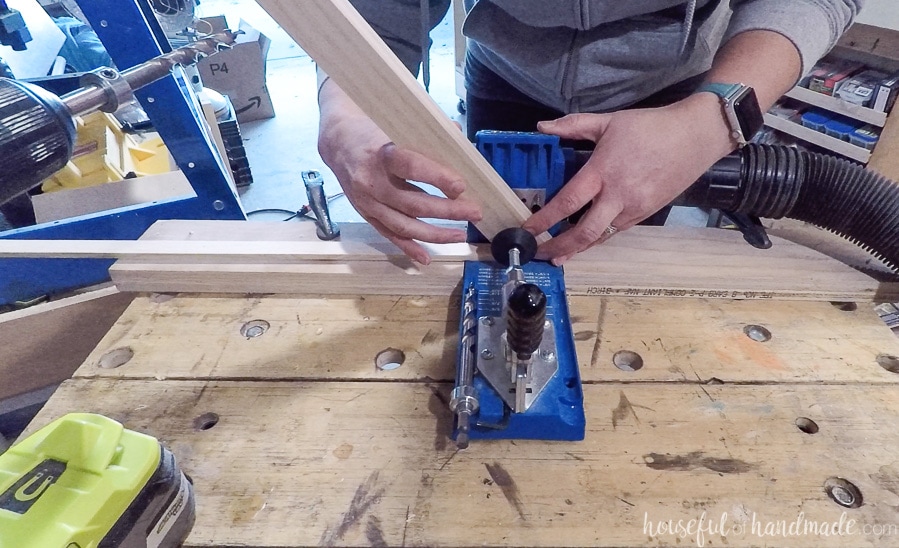
Set the Kreg jig to drill pocket holes for 3/4” thick material. Drill 2 pocket holes on the back side of each of the slat boards (the grooves should be set closer to the front of the boards).
Drill 1 pocket hole in the back of the 19” long angled frame boards.
To drill a pocket hole on the angled boards, use a 1/4” thick scrap or wood to prop the angled side up slightly. Line the wood up on the jig so the metal guide for the drill bit is completely hidden so the pocket hole does not show on the sides of the frame.
When drilling the pocket hole, stop the drill bit slightly before hitting the stop collar or set the stop collar a little bit lower to prevent the drill bit from pocking out into the angled wood too much.
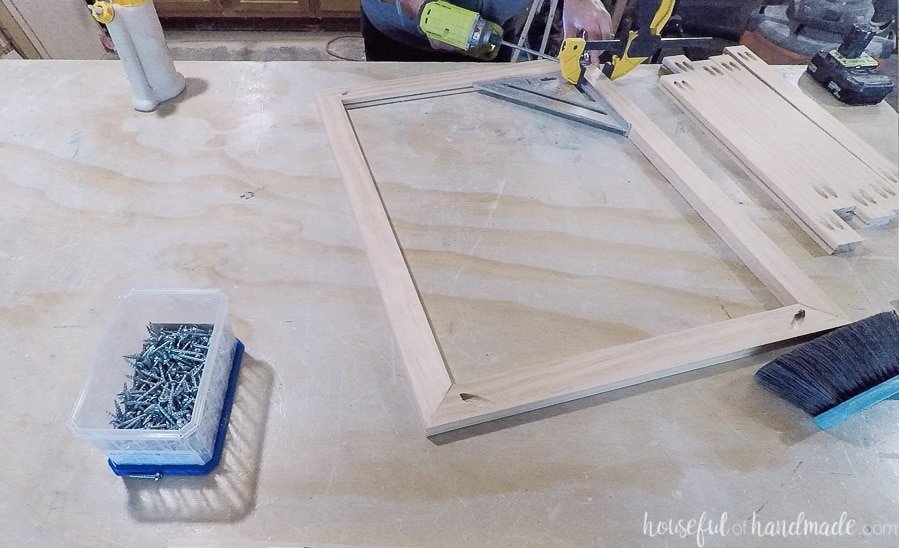
Using wood glue and 1 1/4” pocket hole screws, assemble the frame of the letter board. Clamp the pieces with the Kreg face clamp to securely hold the pieces while driving in the screws.
Use a square to make sure the corners are square as you secure them.
Mark the sides of the frame and slat boards that have the deeper groove so they are assembled in the right direction.
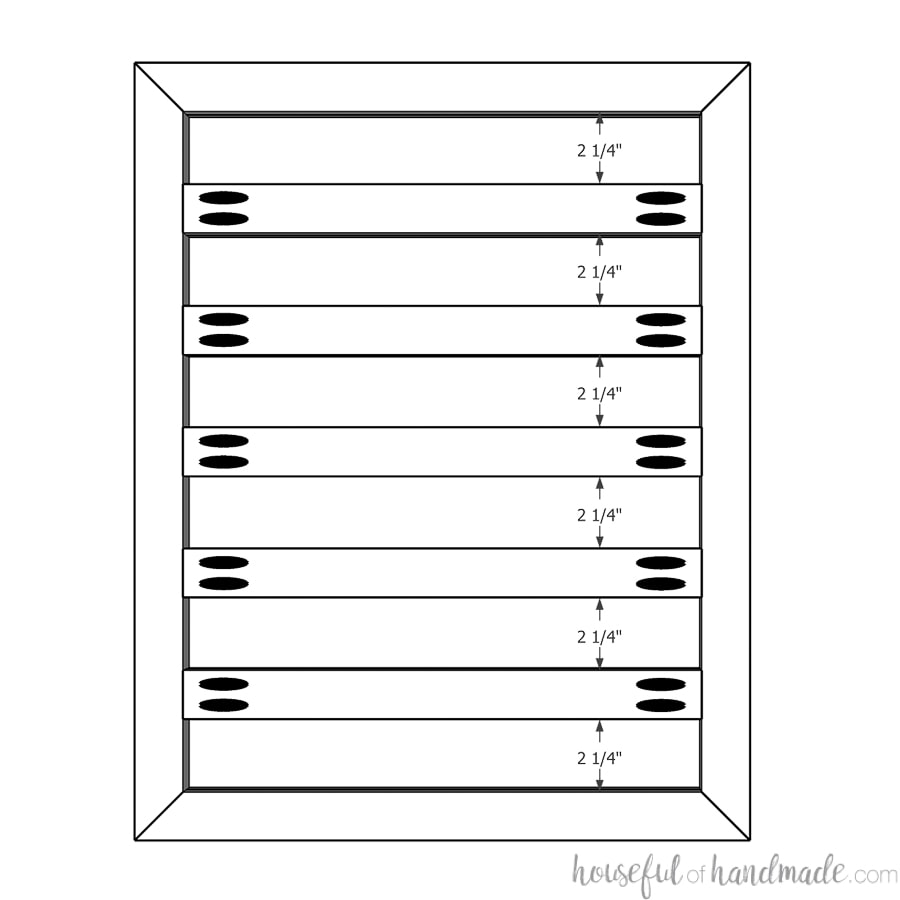
Measure 2 1/4” down from the top of the frame on either side. The top frame board will be the one with the deeper groove.
Attach one of the slat boards at the mark with 1 1/4” pocket hole screws. Make sure the top of the board is the side with the shallower groove and the bottom is the side with the deeper grooves.
Repeat all the way down the frame, leaving 2 1/4” in between the slats.
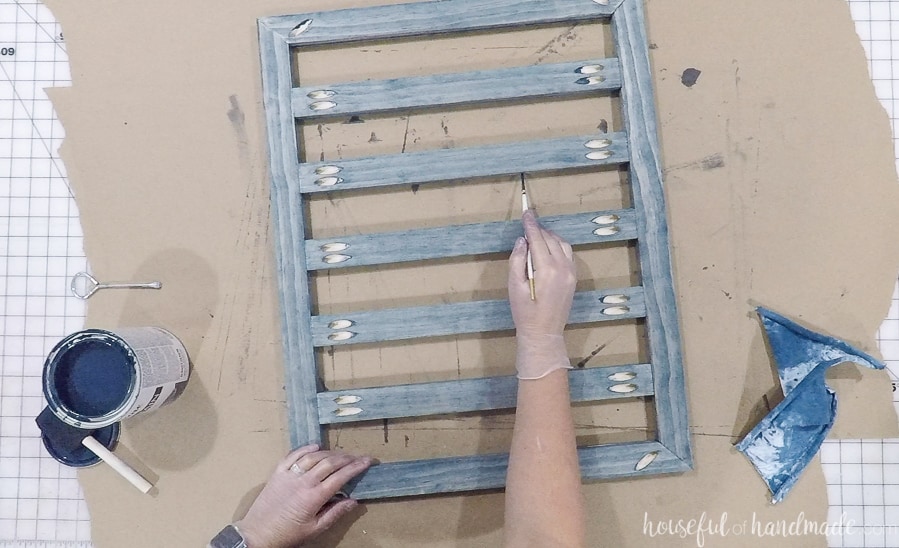
Finishing
Sand the sliding letter board. If you are using rougher wood, start with 100-120 grit sandpaper and finish with 220 grit for a smooth finish. For smooth wood, you can just do one finishing sanding with 220 grit.
Seal or paint the letter board. To get into the grooves, I used a small craft paint brush and brushed stain into the groove then removed the excess with a corner of a lint-free rag.
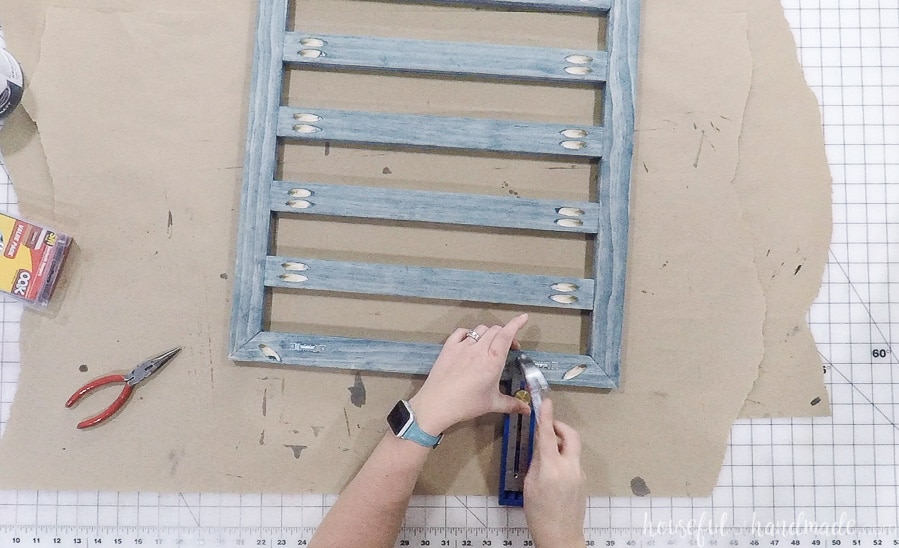
Add 2 sawtooth picture hangers to the top of the letter board for hanging. Using 2 will keep the sliding letter board from tipping when you want to change the saying.
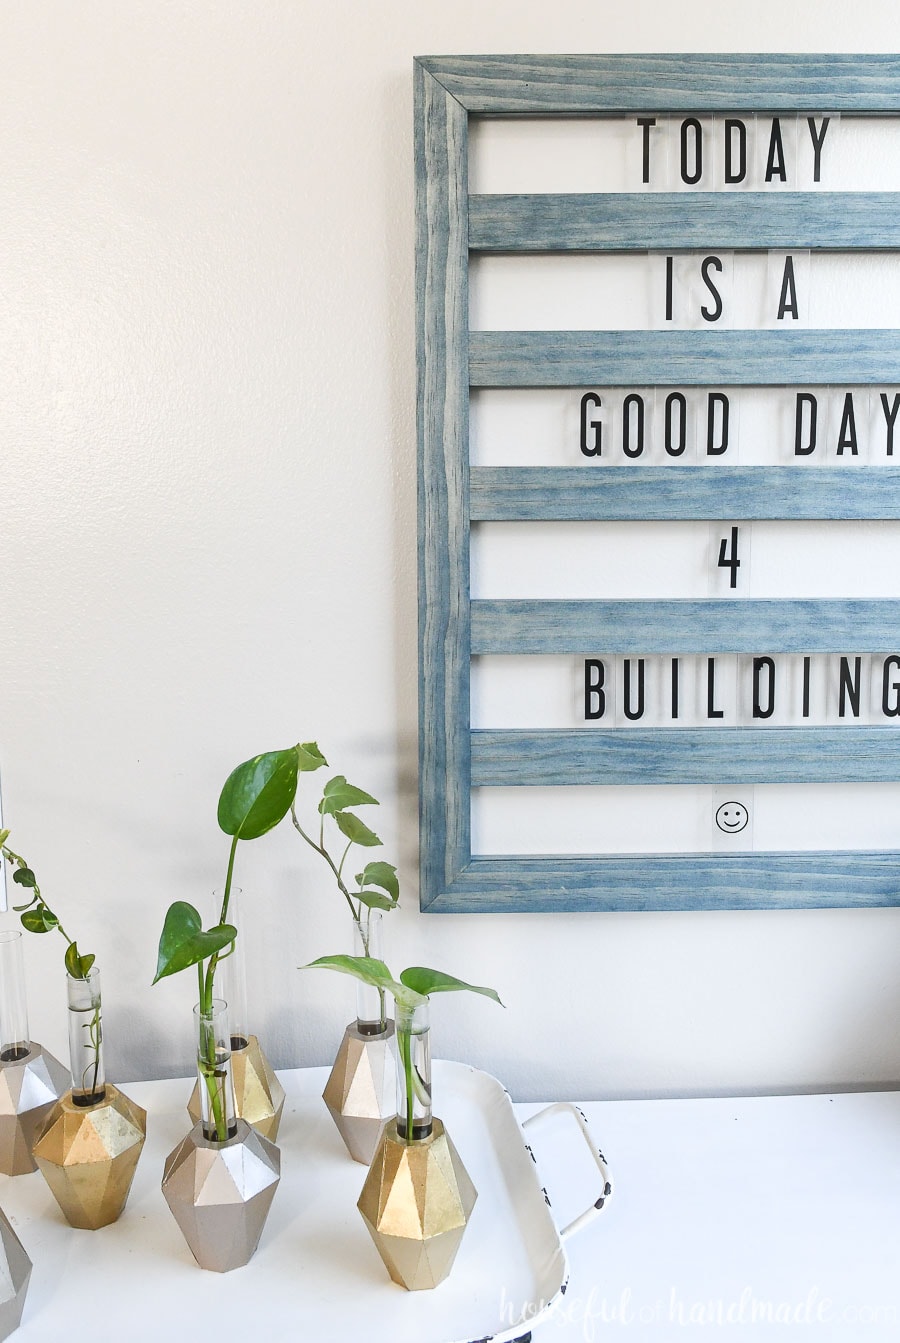
To add the letters to your new sliding letter board, slide the plastic Lightbox letters into the deep groove on the top of the slats. Then line up the bottom with the shallow groove and let it fall into it.
You can easily slide the letter back and forth to change the spacing. I think it is way easier than changing the letters on a standard letter board.

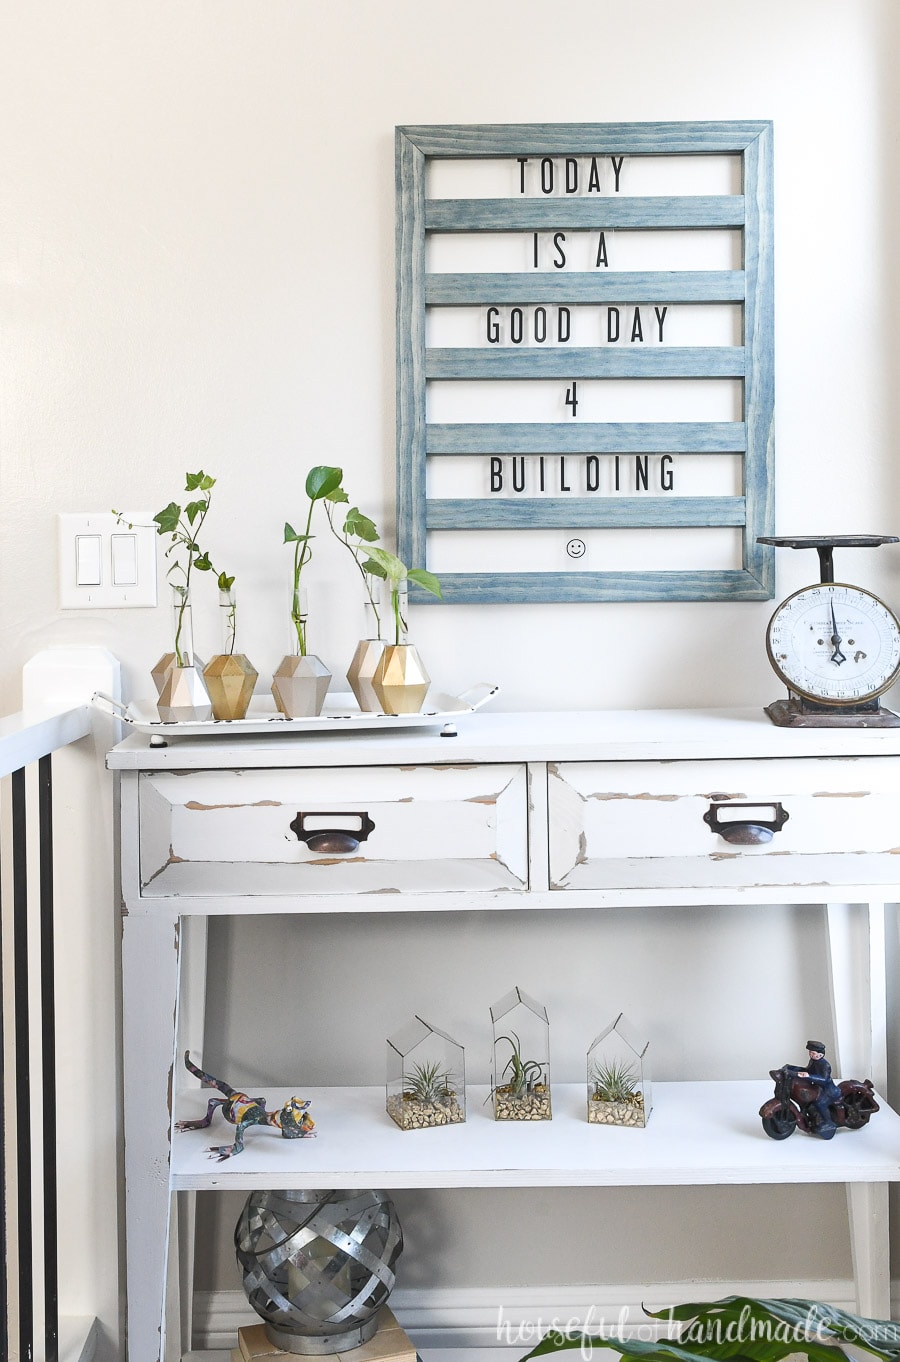
Who wouldn’t want to receive such a fun and unique gift? I know I would!

How to Make a Sliding Letter Board
Make a unique letter board that uses inexpensive light box letters in an hour! This fun DIY gift idea is the perfect gift for teachers, teenagers, or anyone who likes to share fun quotes.
Materials
- (2) 8’ long 1x2 boards
- (24) 1 1/4” Kreg pocket hole screws
- Wood glue
- Sandpaper
- Stain or paint
- (2) Sawtooth picture hangers
- A4 sized light box letters
Tools
- Kreg jig
- Miter saw
- Drill
- Router with 1/8” straight cut router bit
- Measuring tape
- Kreg face clamp
- Square
- Hammer
Instructions
- From the 1x2 boards cut the following forthe frame: (2) 19” long pieces and (2) 24” long pieces. Cut the boards with a 45 degree angle on both ends facing opposite each other.
- From the 1x2 boards cut (5) 6” long pieces.
- Router an 1/8" deep groove on the inside of one of the short frame boards and 1 side of all the slat boards.
- Router a 5/16"-3/8" deep groove on the inside of the other short frame board and the other side of all the slat boards. Make sure the groove is the same distance back from the front as the 1/8" deep groove.
- Drill 1 pocket hole in the back of the 19” long angled frame boards.
- Assemble the frame with wood glue and pocket hole screws. Take care to keep it square.
- Drill 2 pocket holes in the back of all the slat boards.
- Add the slat boards inside the frame, making sure the top grooves of each section are the deeper grooves and the bottom are the shallow grooves.
- Space the slat boards so there is 2 1/4" in between and secure with pocket hole screws.
- Sand and finish the letter board.
- Attach 2 sawtooth picture hangers to the back to hang it on the wall.
- Create your own sayings by sliding the light box letters up into the deeper groove and then letting them drop down into the shallow groove.

Thank you to Kreg Tools for sponsoring this post. I only recommend products that I use and love and all opinions are 100% my own. Click here to read my full disclosure policy.