
This wooden spice rack is the perfect way to organize all your spices, includes free build plans.
The hanging spice rack keeps the spices at your finger tips while you cook and acts as art in your kitchen. You are going to love how easy this DIY spice rack is to build with these free build plans.

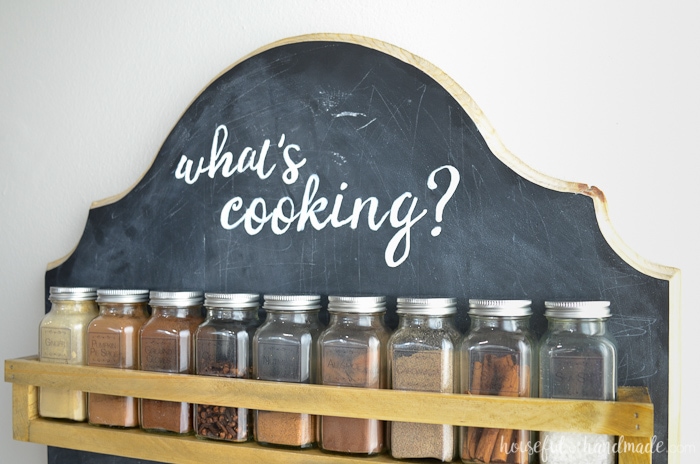
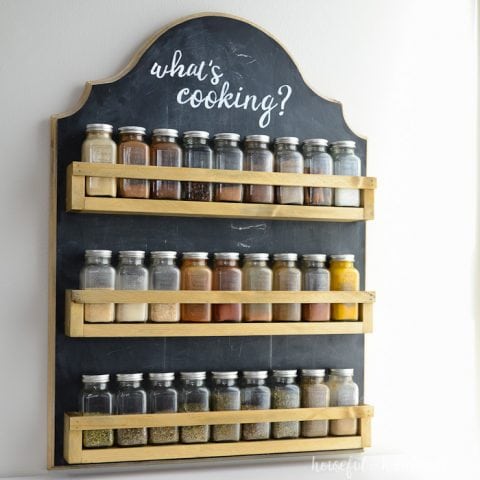
Display your love for cooking with this beautiful wooden spice rack. This wall mounted spice rack is large enough to hold all your favorite spices and keep them organized.
I partnered with Kreg Jig and their new project plan site, BuildSomething.com, to share the free build plans for this hanging spice rack.
This post may contain affiliate links. As an Amazon Associate I earn from qualifying purchases. Click here to read my full disclosure policy.
You will have the perfect spice storage solution in not time thanks to this super easy build.
I love to cook. Seriously, I really do. We eat home cooked dinners at least 4 times a week (and two other nights I serve leftovers). And I love to try all different kinds of foods.
We love to eat Mexican, Italian, Asian, Greek, Indian, American and many more different cuisines. But all that cooking left my cupboards full of lots of different spices.
A few years back I needed to solve our spice storage problem because I could never find the spices I was looking for. So I build the most basic spice shelves and hastily mounted them on the wall of our kitchen.
They were not pretty! In fact they were far from it. But they were so functional and made cooking so much easier. So I let those ugly spice shelves stay for way too long.
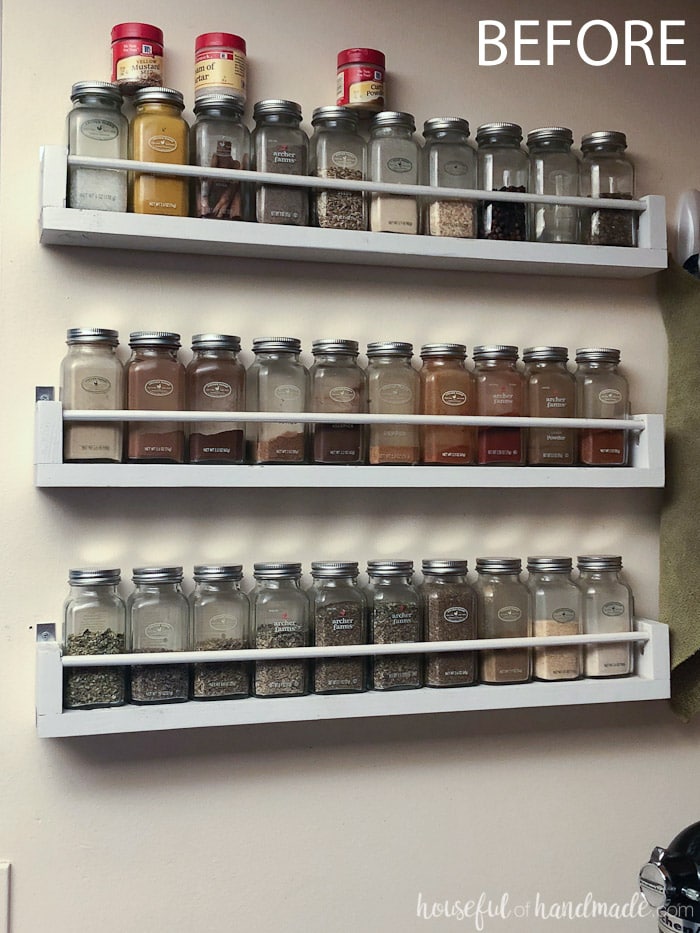
But January is a time for finally getting around to the projects you have been putting off and for getting organized. So this year I tackled the spices and build a new, beautiful wooden spice rack to replace the ugly ones.
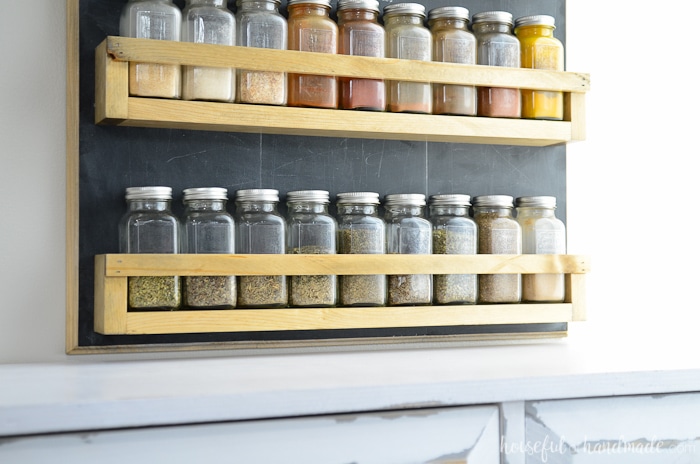
This large spice rack is perfect for holding all those spices we use. It is mounted on the wall so it doesn’t take up precious counter space or cupboard space. And it just looks so awesome!
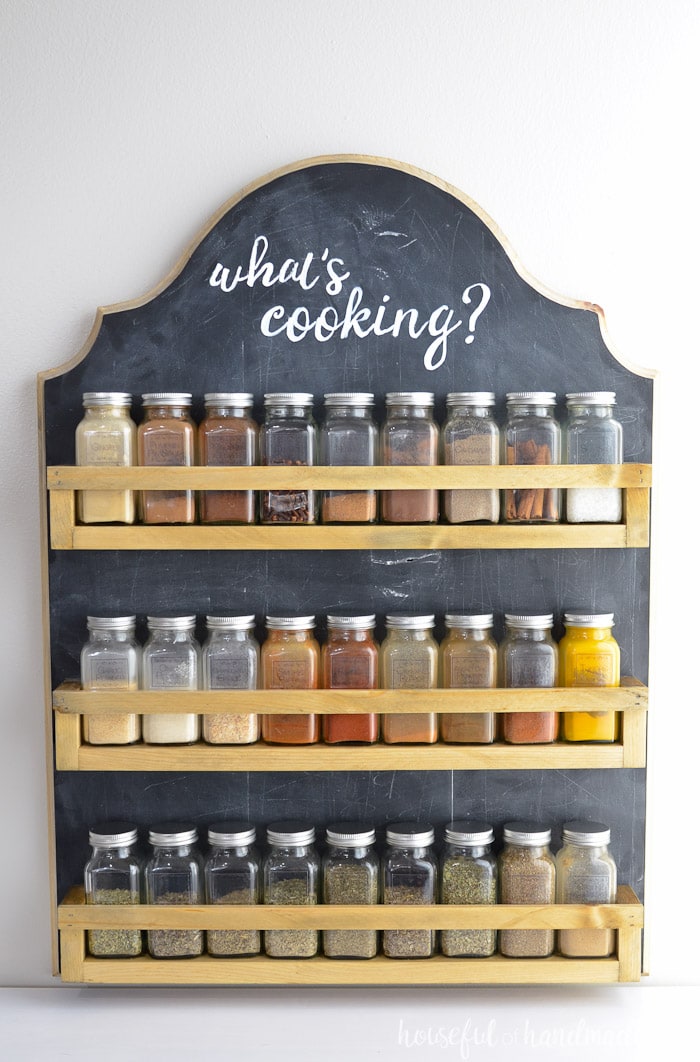
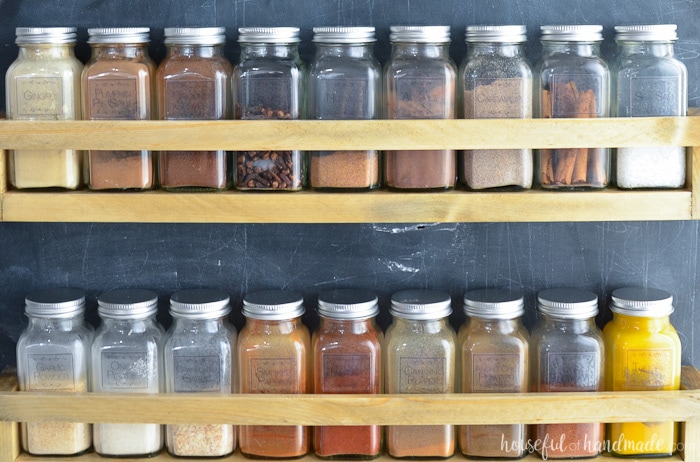
I am sad that our new hanging spice rack is not the first thing people see when they come into our kitchen because it looks so good. All the spices are organized in rows (of course I grouped them together by type of spice because of my type A personality).
And I also finally got around to putting coordinating spice jar labels on them. It’s the spice organizer of my dreams!
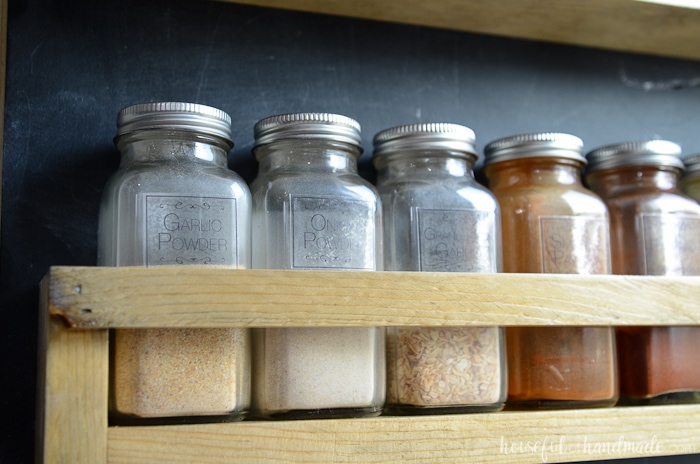
The spice jars I use are actually the jars the Archer Farms brand spices from Target come in. I love their simple square jars. And when a jar is empty, I refill it with bulk spices from the grocery store.
Buying spices in bulk is so much cheaper than buying a new jar. I can refill most of these jars for less than $1.
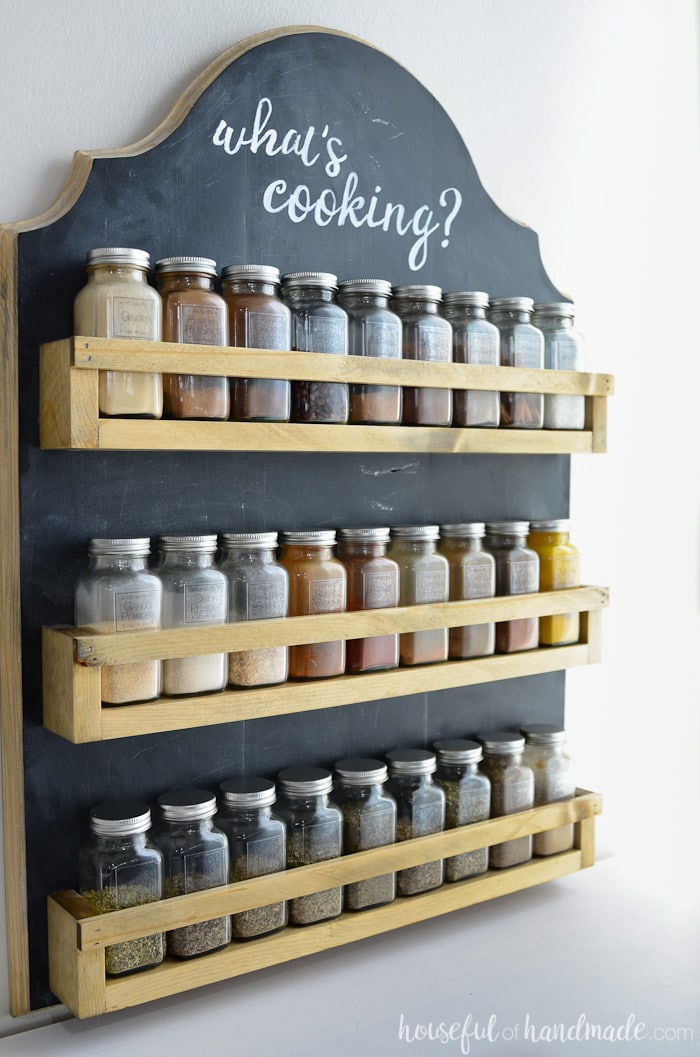
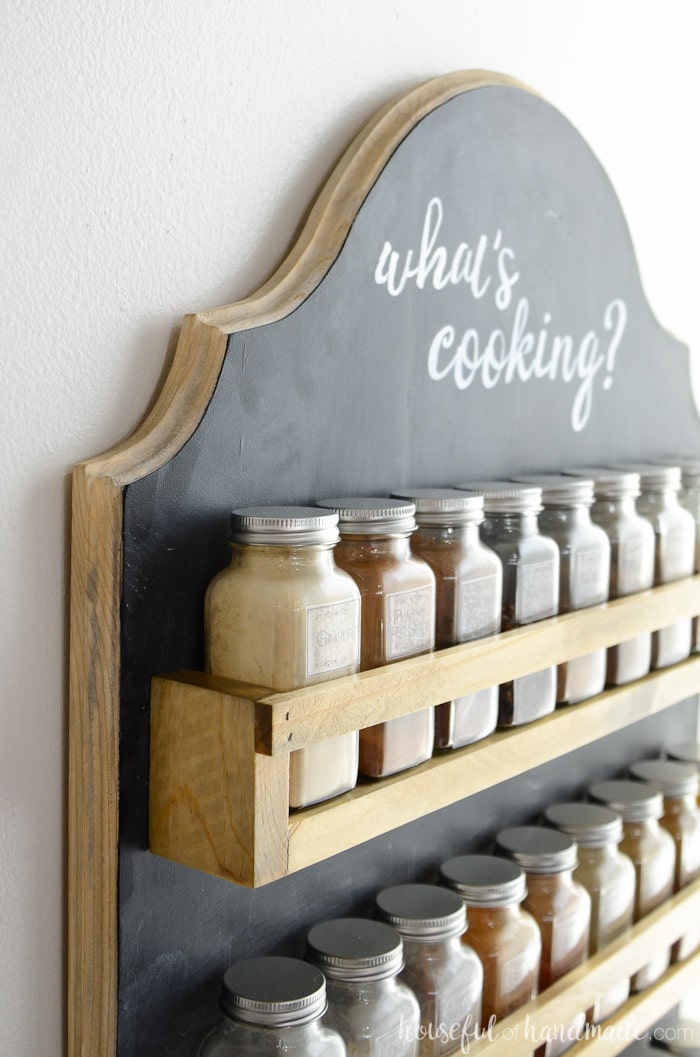
This was such a quick build too! I had things put together in no time so I decided to play with my new(ish) router and add a decorative edge to the DIY spice rack. It looks so fancy and gives it a beautiful, farmhouse feel to it.
And because I absolutely love all things chalkboard, I included a chalkboard back too. Now the wooden spice rack blends in with all our kitchen and dining decor (like this herb drying rack and our hallway command center).
Thanks to Kreg Jig’s project plan site, BuildSomething.com, I am sharing the tutorial for the wooden spice rack with you.
Click here to get the free build plans.
Wooden Spice Rack Build Plans
Free up counter space and cabinet space by displaying your spice collection on the wall of your kitchen. This quick project will help you organize your kitchen, and acts as beautiful wall decor too.
Materials
- (1) 1x8 96" Board
- (1) 1x3 96" Board
- (25) 1 1/4" pocket hole screws
- (15) 1 1/4" wood screws
- (1) chalkboard paint
- (1) wood glue
- (1) wood sealer
- (1) wood stain
Tools
- (1) Kreg Circular Saw Guide Track
- (1) Kreg Clamps
- (1) Kreg Pocket-Hole Jig
- (1) Skil Circular Saw
- (1) Ryobi Cordless Drill
- (1) Ryobi Impact Driver
- (1) Ryobi Jigsaw
- Ryobi Nail Gun
- Ryobi Router
- Black & Decker Sander
- Stanley Tape Measure
Instructions
- Cut 1x8 into 3 30" pieces. Join the boards along the edges by drilling pocket holes in the sides of the center board about 5-6" apart.
- Apply wood glue to the edges of the boards, clamp them together and secure with 1 1/4" pocket hole screws.
- Sketch out the decorative top you want, or download the one I used in the extras tab. Cut out the template and trace it on one half of the top of your connected boards. Then flip and trace the other side. Cut along the lines with a jig saw.
- To add a farmhouse look to my spice rack, I used my router to apply a decorative edge to the front edges of the spice rack back.
- Measure your spice jars and adjust as necessary. Cut the 1x3 board into (3) 25" pieces and then rip those pieces into 2 1/4" wide boards. Do not discard the ~1/4" wide piece that is remaining. If you do not have a table saw, you can easily rip boards with the Kreg AccuCut and a circular saw by using a second piece of wood to balance the AccuCut. Cut each of the 2 1/4" wide boards into (1) 18 1/2" piece and (2) 2 3/4" pieces.
- Drill pocket holes into both ends of the top of the 18 1/2" pieces. Line the 2 3/4" pieces up on the edges to create a U and secure with wood glue and pocket hole screws. Cut the ~1/4" piece to 20" and attach to the top front of the spice shelves with wood glue and finishing nails.
- To add a chalkboard back like I did, sand, stain or paint, and seal all the spice shelves and the back piece before attaching the shelves. Apply 3 coats of chalkboard paint. Then prime the chalkboard by rubbing the side of a piece of chalk over the entire surface then wiping it off with a cloth or eraser before attaching the spice shelves.
- Measure and mark where you want to attach your spice shelves. Make sure you have enough room between shelves to easily remove your spice jars. My jars are 4 1/2" tall so I spaced my shelves 4 3/4" apart. Drill holes through the back of the spice rack where you will attach the shelves. Then attach the shelves with wood glue and 1 1/4" wood screws from the back of the spice rack.
So now that I have the hanging wooden spice rack to display my collection of spices, I guess I really should get around to updating the rest of our kitchen so it can be this pretty too.
