Transform your floor on a budget with a floor stencil.
You can create a beautiful patterned tile design for a huge impact in any room. See how easy it is to paint a floor stencil with this easy tutorial.
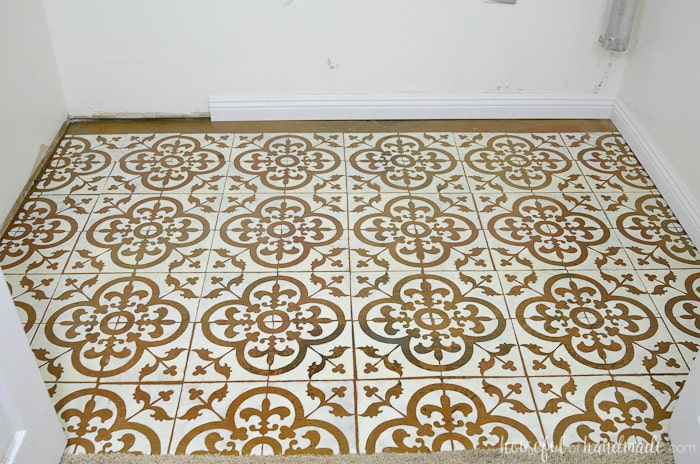
A floor stencil is the perfect way to add style to a boring floor. You can turn a plain floor into a patterned tile showpiece for just a few dollars and a few hours of work. The boring concrete floor in our laundry room is now a floor I want to show off.
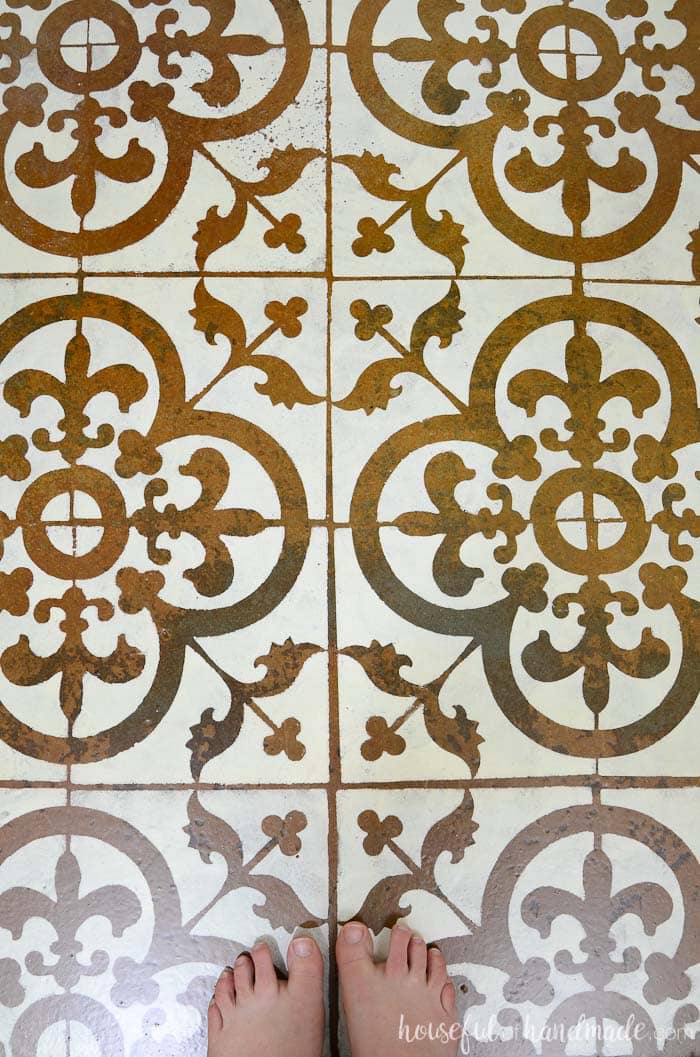
It’s been a whole week since we started the $100 Room Challenge and I am already loving my laundry room more. It doesn’t look a whole lot different, except the floor!
This post may contain affiliate links. As an Amazon Associate I earn from qualifying purchases. Click here to read my full disclosure policy.
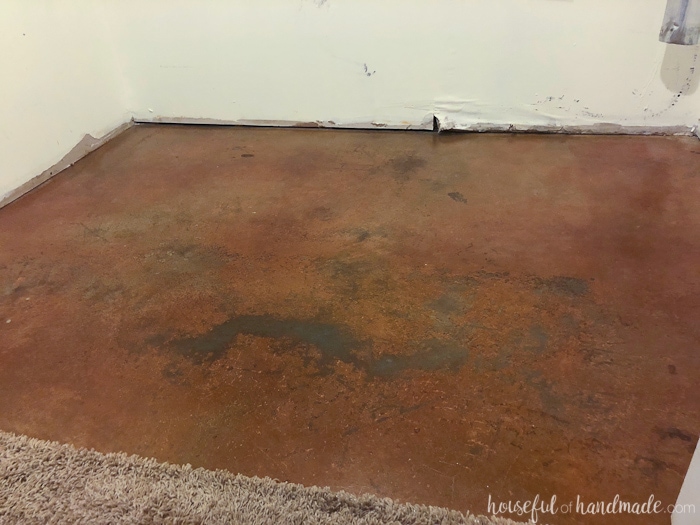
I knew I needed to do something special to the boring stained concrete floor. But replacing a floor would have killed my $100 budget.
So I used a budget friendly option and decided to paint a floor stencil on it instead. Now it has been transformed into the beautiful patterned tile floor of my dreams.
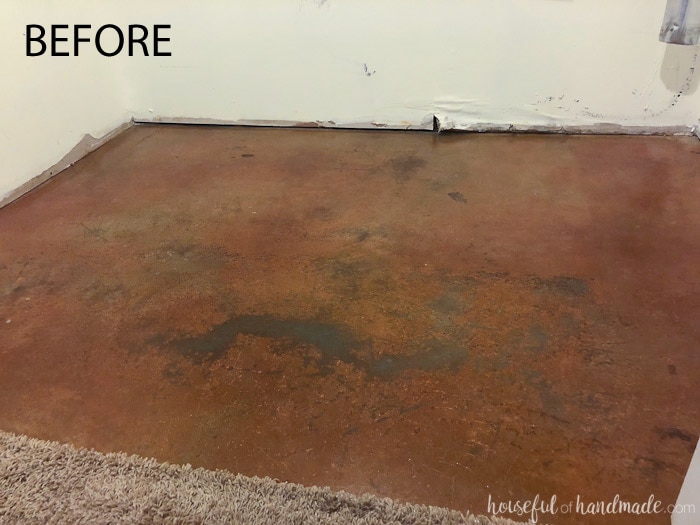
I have been obsessing over patterned tile lately. And ever since I used a homemade wall stencil to add a faux patterned tile wall to my office, I knew I wanted to try the same technique on the floor.
I love how the patterned tile stencil makes such a dramatic change to the floor. Sometimes I find myself standing at the doors to our laundry room closet just staring at the beautiful pattern and texture. I couldn’t be happier!
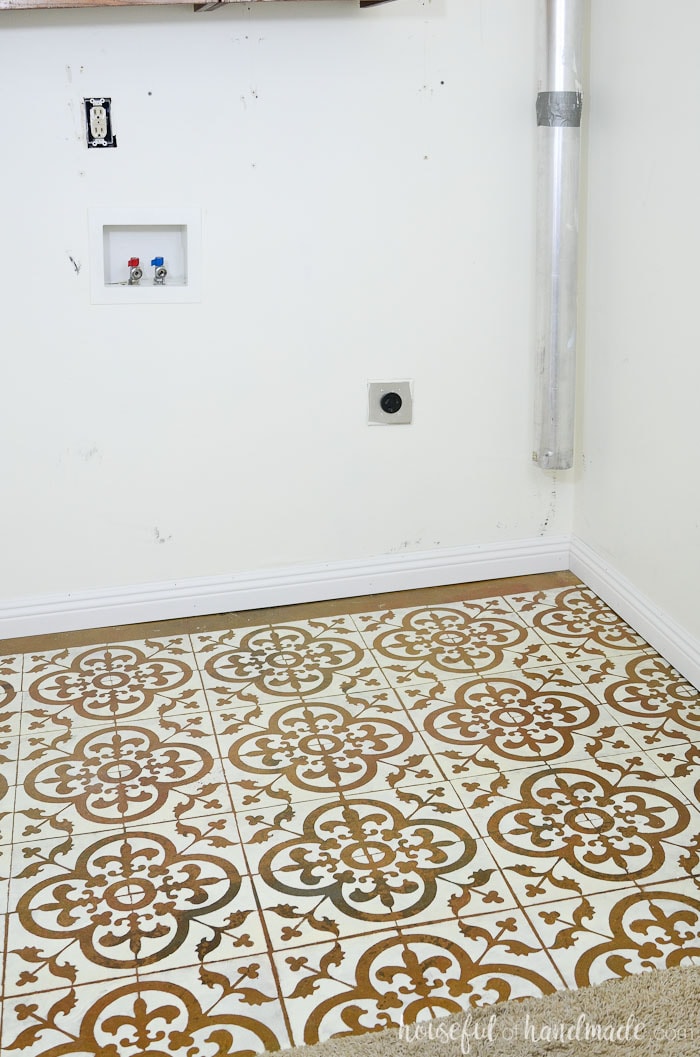
You may be thinking that the floor is beautiful, but it had to have taken so much work. Well I am here to ensure you that it did not.
Our laundry room closet is 8′ wide and 5′ deep. The patterned tile floor stencil was painted in one afternoon and then the next day I added 4 coats of sealer that only tool 15 minutes each coat. This floor was transformed in less than 6 hours of work.
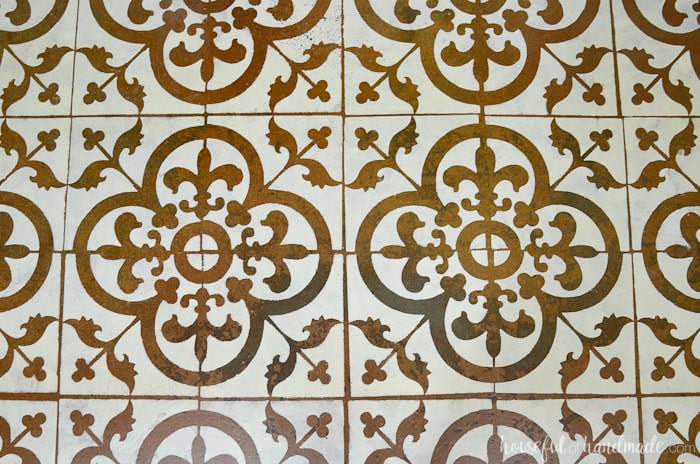
So now you know how quick and easy it was to paint a floor stencil on our laundry room floor, but of course, it’s also about budget!
How much did this cost? By using paint that I already had on hand and making my own stencil, I was able to transform the floor of our laundry room with less than a 20% of our $100 budget!
Floor Stencil Cost:
- Paint $0 (had on hand)
- Stencil $0 (cut with Silhouette and plastic I had on hand)
- Stenciling sponges $5
- Sealer $12
- Paint tray $2
- Foam paint roller $0 (had on hand)
GRAND TOTAL $19
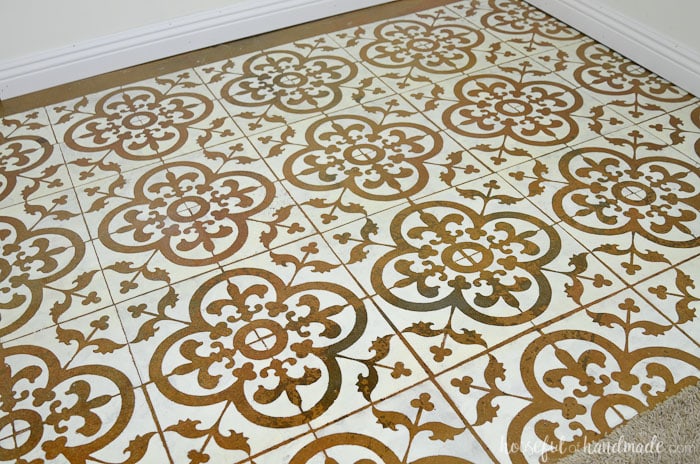
Not bad for adding tons of style to the old laundry room floor!
How to Paint a Floor Stencil
Supplies:
- Floor stencil
- I am sharing the cut file for the floor stencil in my subscriber library. Click here to subscribe to my weekly newsletter and gain access to all the freebies. If you already have your password, click here to download them.
- Repositionable spray adhesive
- Paint
- I used leftover Behr Ultra Pure White wall paint.
- Stenciling sponge
- Measuring tape
- Optional: use a chalk line to make quick work of measuring out the pattern.
- Polyurethane sealer
- Foam roller
- Paint tray
If you are making your own floor stencil, cut out the stencil with your Silhouette onto thin a plastic sheet (I like this one).
Use the following settings:
- Blade 10
- Speed 3
- Thickness 33
- Double Cut On
The plastic can be harder to cut if your blade is dull. If the plastic is not cut completely through after the first try, send the design to the Silhouette again before unloading the cutting mat and it will cut a second time in the exact same spot to create a clean cut.
Before painting, you need to clean the floor well. I used a bucket of hot water with dish soap and a microfiber rag. The microfiber is great for not leaving lint on the surface. Let it dry.
Plan out where you want the stencil to start in your room. I used a chalk line to draw a center line down the center of the room where the stencils would start.
I also drew a line one stencil away from the front of the room to help me stay straight.
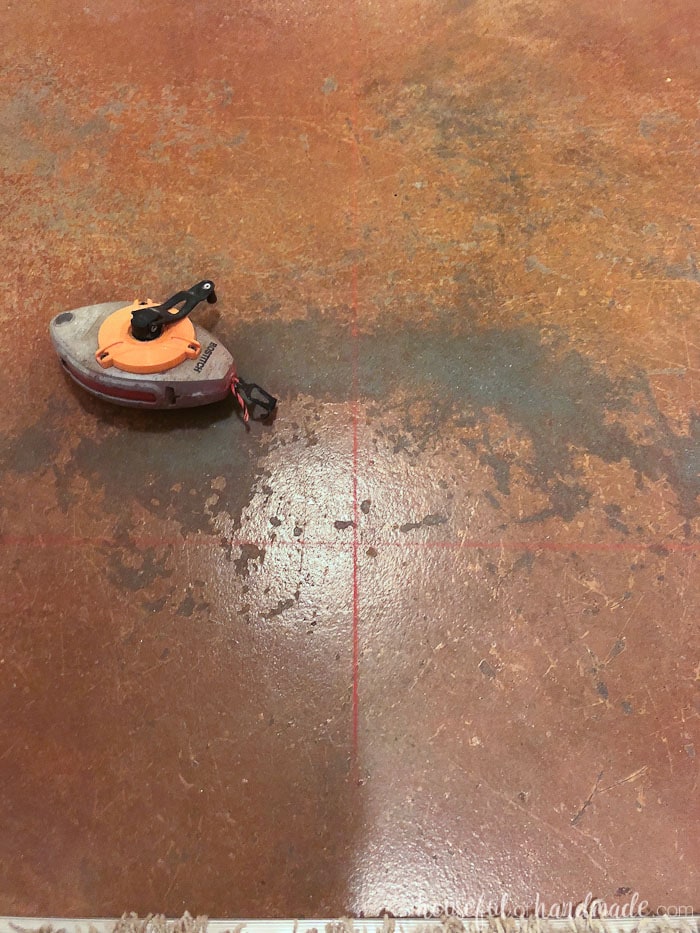
Spray the back of the stencil with repositionable spray adhesive and then lay it down on the floor lined up with the chalk lines.
Add paint to your tray and then using a foam sponge, dip it into the paint and wipe the excess off. Then stipple it onto the open spots of the stencil to paint it.
I love this new sponge I bought for the floor. It made quick work of the painting process, gave me consistent coverage and held up great to lots of stippling (still looks like new after finishing the entire floor).
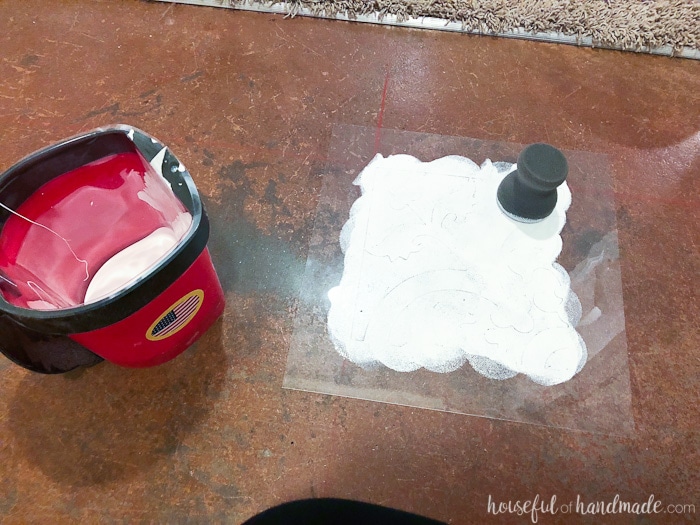
Once the paint is applied, carefully lift off the stencil and reposition in a new area. For this tile pattern, the tile needs to be rotated 1/4 turn also.
I like to jump around so the edges of the stencil are not laying over a freshly painted area. This prevents the underside of the stencil from getting paint on it and smearing the already painted areas.
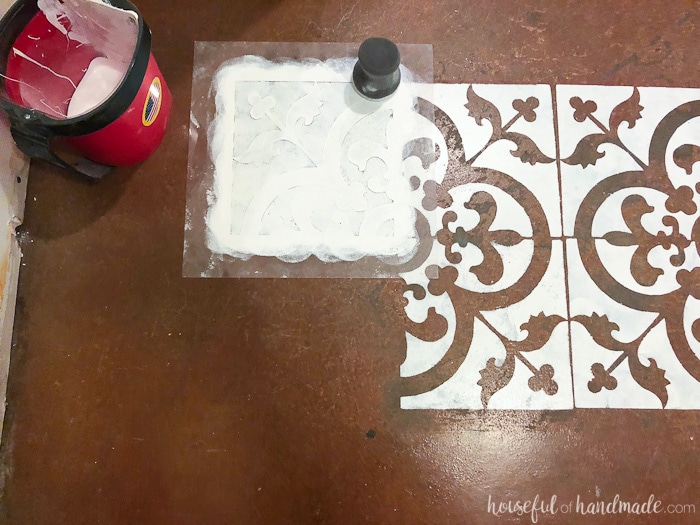
Continue this process of painting and moving and painting and moving until the entire floor is done.
I washed off the stencil and sponge about every 10 tiles to keep the paint from building up on it. Also, after washing it off, I added more spray adhesive to the back to help it stick to the floor.
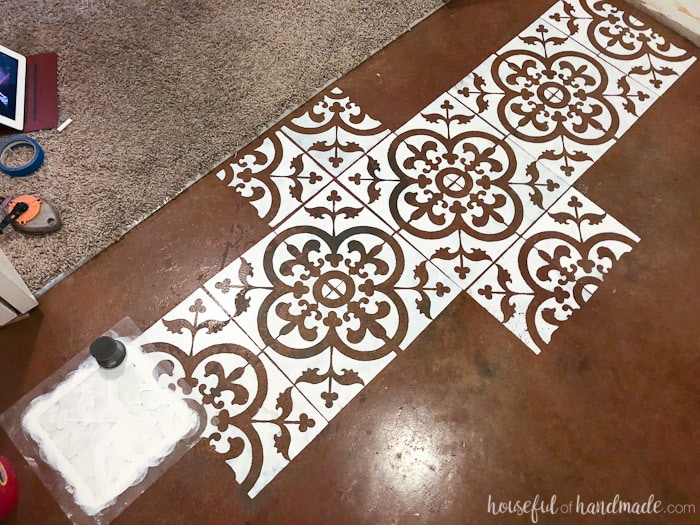
You can see I didn’t finish the stencil all the way into the back because it will be totally hidden by the new laundry basket shelf and washer & dryer.
But for the small sections of the stencil on the edges, I cut the stencil after the center was all done. Used a bit of painters tape to secure the cut edge.
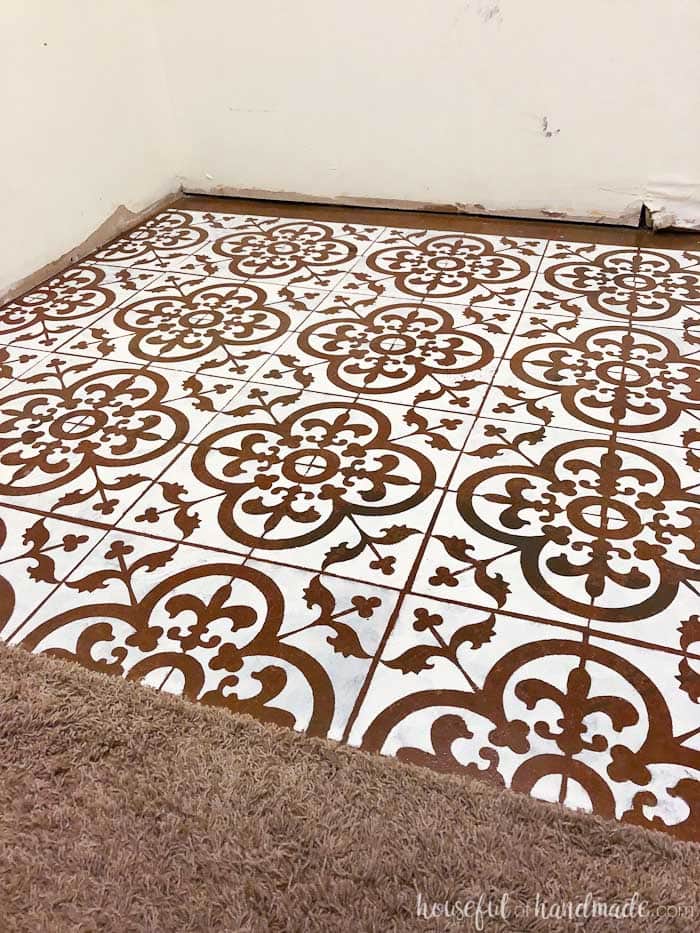
Let the paint dry overnight, then it’s time to seal it. I used 4 coats of polyurethane to cover the entire floor. I was worried that the expensive polyurethane would break my budget, but I was able to add 4 coats to the entire floor with only 1 quart of sealer.
Use a foam roller and start in the back of the room, quickly roll a layer of polyurethane over the entire floor. Make sure not to let the edges of the dry (luckily this small floor was easy and quick to do).
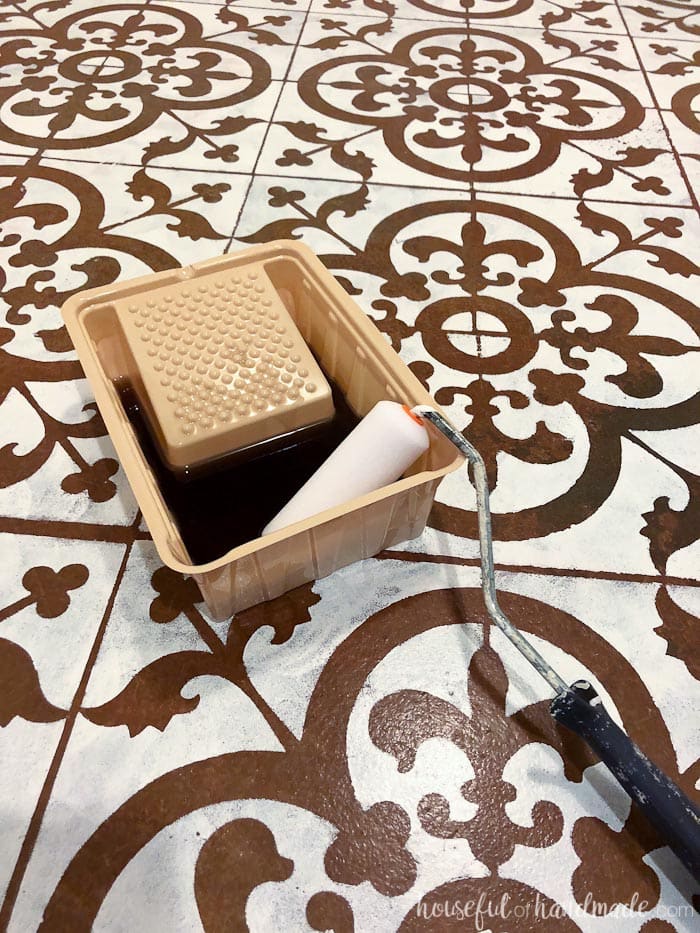
Let the sealer dry for about 2-3 hours and then reapply. The polyurethane I bought says if you apply the next coat within 4 hours, there is no need to sand between coats (bonus)! So I made sure to get all 4 coats done in one day.
The hardest part is letting the polyurethane cure for 72 hours before putting things back on the floor.
You can walk on it after a day, but I waited the full 72 hours before putting the heavy washer and dryer on it. I was terrified it would scratch the floor, but even sliding the heavy appliances over it to put them back, it looks perfect!
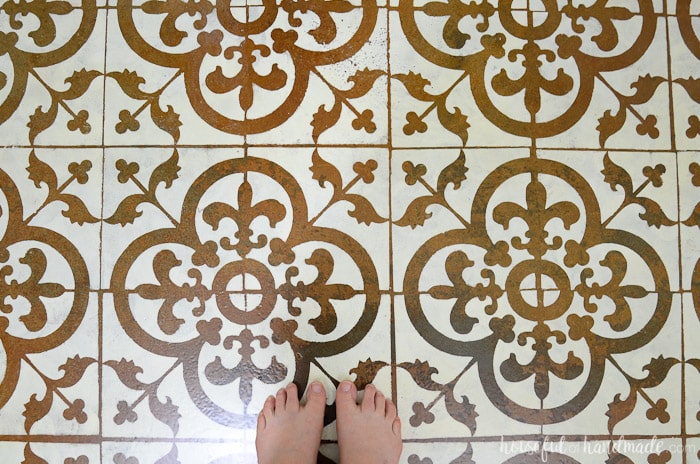
Now we are ready to continue the rest of the makeover. Don’t forget to check out the complete $100 laundry room makeover plan.
And don’t forget to check out the rest of the Week 2 updates for the $100 Room Challenge.


This floor!!! It look amazing! Thanks for the wonderful tutorial. I totally want to try this method. What an quick and easy fix to floors you may not love!
It was so easy. Way easier than stenciling a wall because the stencil was so much larger. I would definitely do it again!
I love how it turned out. I have been toying with the idea of doing this to my ugly master bath tile. I think I should give it a try!
Definitely give it a try! It sure couldn’t make the ugly tile any uglier 😉
This looks amazing! Now I really want to try it in our laundry room!
Hello, Katie. What a beautiful and affordable way to transform a room. I am curious about a few things as I have painted a floor and it didn’t work out. First, what kind of paint did you use. Second, what sealer did you apply. And last, did you make this stencil too? Love it, by the way.
Hello Kelli, I did make the stencil. I used my Silhouette to cut out the thin plastic material. I used leftover Behr wall paint to paint it and sealed it with polyurethane sealer. I used 4 coats of sealer to give it a good finish. Let it sit for at least 72 hours for the sealer to cure before putting heavy stuff back on top of it. This made it so not even sliding the washer and dryer over the floor scratched it!
Wow that looks great. Did you use chalk paint? And what kind of sealer? Do you think would polyurethane work?
I used left over Behr Premium wall paint in white and sealed it with 4 coats of polyurethane. Super easy and inexpensive!
Looks amazing and you made it look so easy! Looking forward to seeing your progress!
The floor turned out great! I love a good stenciled floor. 🙂
Looks so great!! I’m stenciling my bathroom floor for this challenge. Thanks for the tips!
I can’t wait to see how your floor turns out!
Wow! This looks so great!! Cant wait to see the final!
Kati, this is amazing! I love how it turned out – what a great idea for a laundry room especially. I can’t wait to see the rest of the room come together!
Thanks so much Kim!
The floor looks great. We have an ugly brick linoleum in our laundry room. And, we’re getting ready to put in new flooring in the kitchen which is adjacent. We asked for a quote to do the laundry room too but now I’m wondering if I could stencil it. Thanks for the inspiration.
I am loving our stenciled floor. It looks amazing and was pretty easy and cheap to do!
I’m so glad you did this because I’m about to try it on tile in a couple of weeks! I’ve been trying to decide whether to buy a stencil or make my own. I tried clicking on your link to the plastic you used but it didn’t work on my phone?
You should definitely try it! Apparently I shouldn’t type up posts when I am in a head-cold fog, I fixed the link so it should be working now!
I can totally relate! And it does work, thanks!