Small rooms make laying floor tiles more challenging, but you can get perfect tile layout with this easy tutorial.
One of the biggest struggles I have had when it comes to tiling the floor is laying out the tiles. Especially in a small bathroom with only 1 door.
You want the tiles to line up perfectly at the door, but you cannot start tiling there. You need to start far away from the door so you do not tile yourself into a corner! It’s a big struggle.
In our master bathroom I was left with a 1″ sliver of a tile to finish off a row. It was at the bathtub, which is right inside the door. Luckily it was not the closest to the door so it isn’t super visible.
This post may contain affiliate links. As an Amazon Associate I earn from qualifying purchases. Click here to read my full disclosure policy.
But with the patterned tiles in our guest bathroom, I knew I needed the floor tiles to line up perfectly at the bathtub. Otherwise it would look awful, and awful was not on my bathroom mood board.
Instead of just starting the tiles on the back wall, I figured out how to layout the floor tiles easily to get the result I wanted. Then I was able to tile from the back to the front and end up with perfectly spaced tiles!
And it wasn’t that hard to do. It just took a little bit of planning before starting to install the tiles. When it comes to tiling, getting the first tiles set perfectly is going to make the rest of the project a breeze.

So if you have ever struggled with how to layout floor tile in a small bathroom when you don’t want to tile yourself into a corner, check out my tips below.
Laying Floor Tiles
Supplies:
- Tiles
- I used these patterned porcelain floor tiles
- Tile spacers
- Measuring tape
- Framing square
- Long level or other straight edge
- Thinset and trowel
- The type of thinset and trowel you need will be dependent on the specific type and size of tile you are using.
Setting Out Floor Tiles
Before even mixing your thinset, you need to take the extra time to lay everything out. So grab your supplies and step back for a good look at your space to answer these three questions:
- What is your desired tile layout? Think about shape, pattern, angles, etc.
- Where is the most visible part of the tiles?
- How do you want the tiles to lay out in this area? Do you want any cut tiles or all whole tiles?
For our bathroom, I wanted the tiles to be whole right at the entrance and along the tub. The tiles laid out in a simple square pattern, but the tiles were rotated so that the corners came together to form a complete pattern.
Fell free to pull out a bunch of tiles and lay them out on the floor. Play with your spacers to see how they look with different amounts of grout between them.
Once you have your desired layout, take a picture. That way you can refer to it when you are laying tiles if you ever get confused.
Planning the Bathroom Tile Installation
Now you need to decide where you need to start tiling. Remember, we do not want to tile ourselves into a corner. The thinset needs to set for at least 24 hours before any walking on it or you can mess up all your hard work.
You typically want to start your bathroom tile installation in the back corner. But if you just start tiling from the back corner, your most visible areas will not line up as planned.
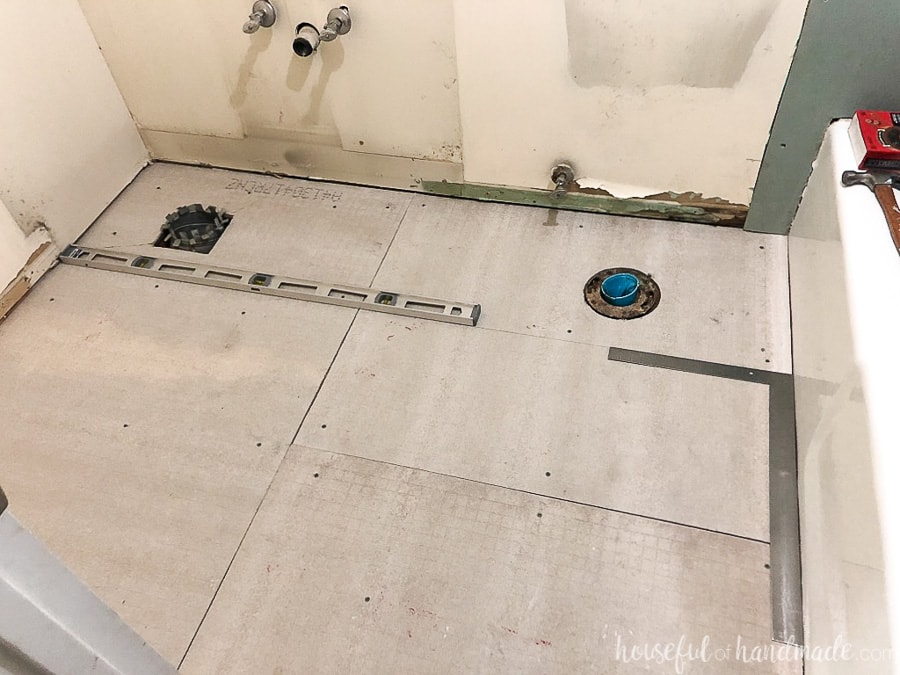
Instead, carefully layout the floor tiles with the tile spacers in between them. Make sure the tiles are tight against the tile spacers to give you an accurate measurement. Then take a measurement of the completed laid out tiles.
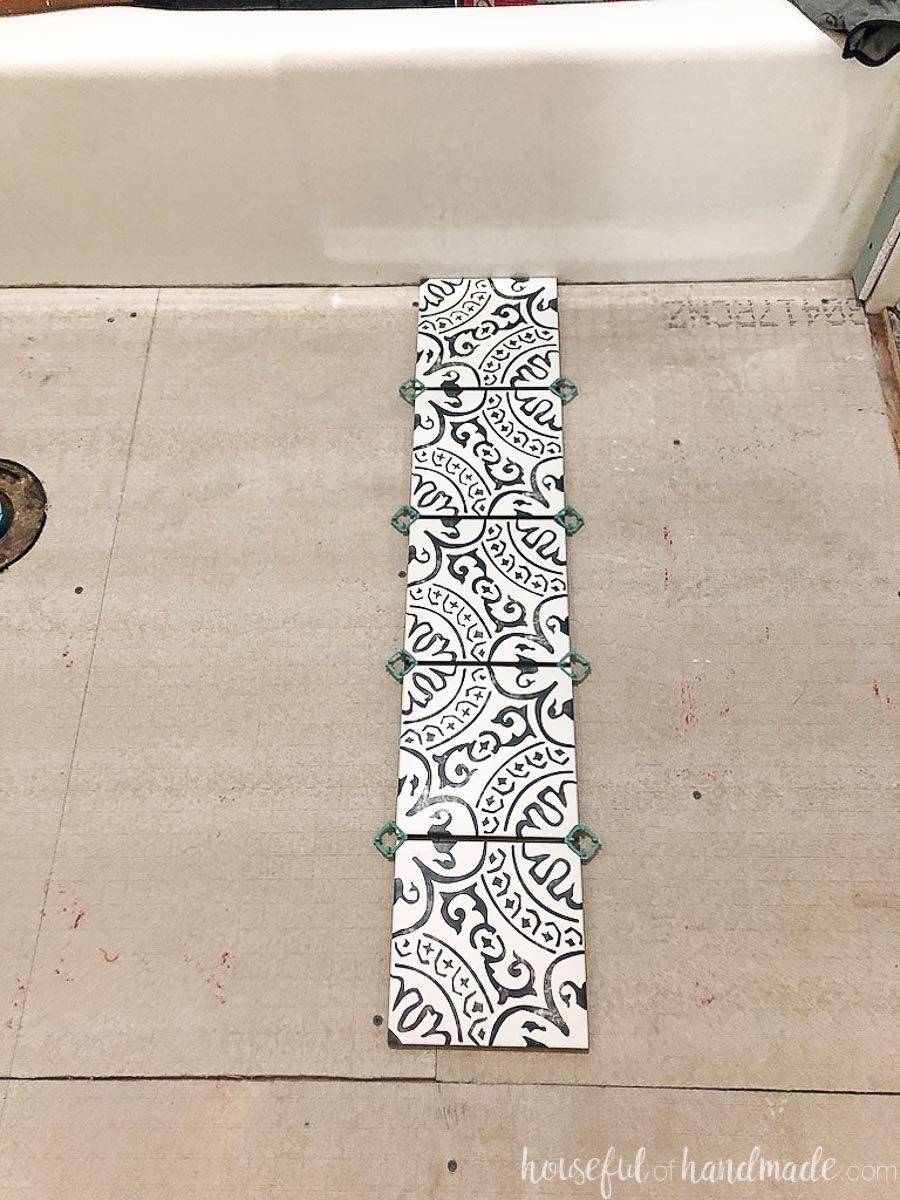
I planned to start my tile installation with about 2 rows of tiles along the back wall of my bathroom. So I added tiles to my tile layout until I got to about that area. This let me know how far back to start my line so that when I got to the front, the tiles lined up perfectly with the most visible wall.
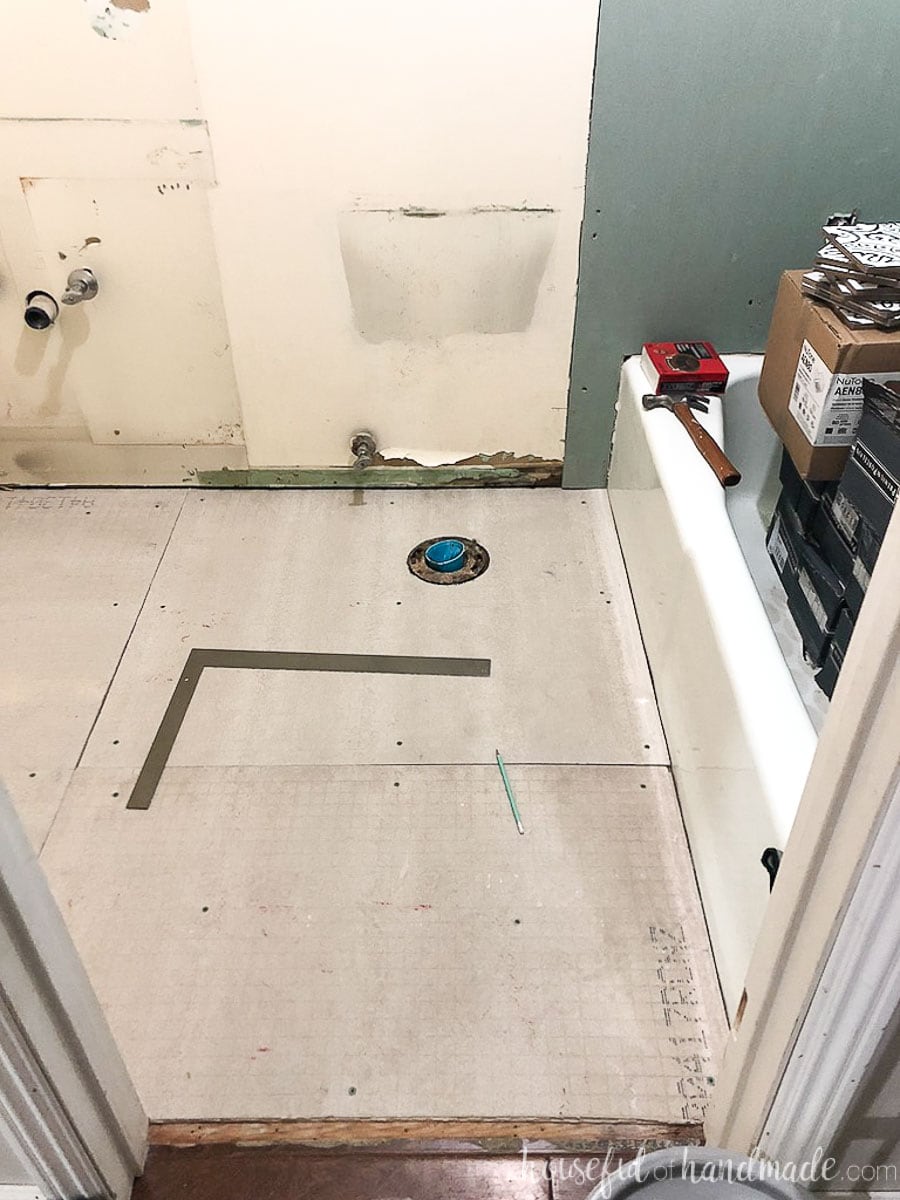
Then I transferred this measurement to my floor. Using the framing square, I drew a line so it was square with the bathtub, since I also wanted the tiles to come flush with it.
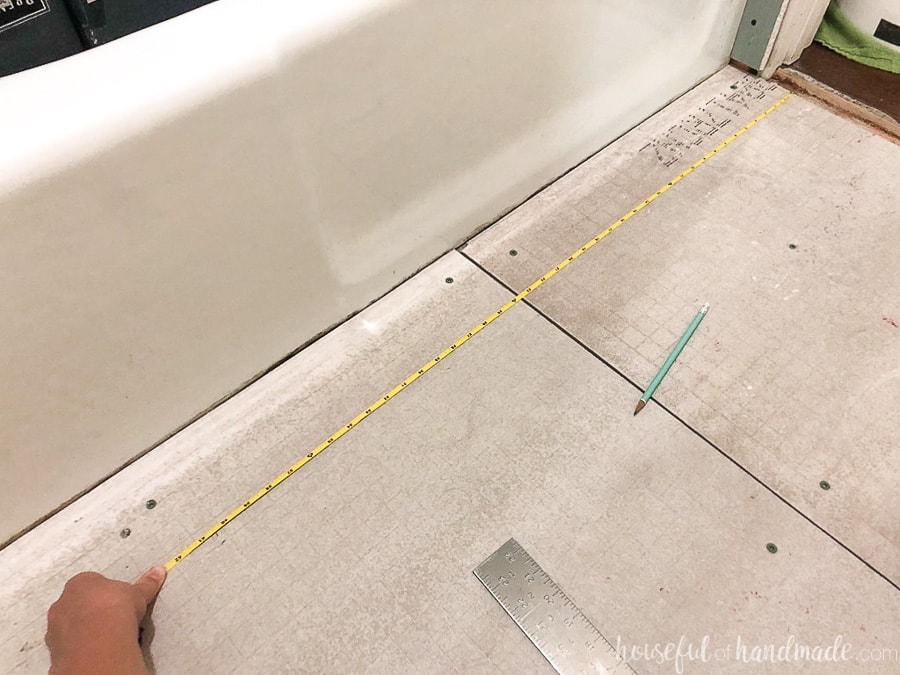
Use a level (or straight line) to continue this line across the entire bathroom floor. Do not fully rely on all your walls being square, that is why I prefer the framing square and level instead.
Installing the Floor Tile
Now it is time to start the tile installation. If you are new to tiling, check out this post detailing what I learned about tiling during our first DIY tiling projects.
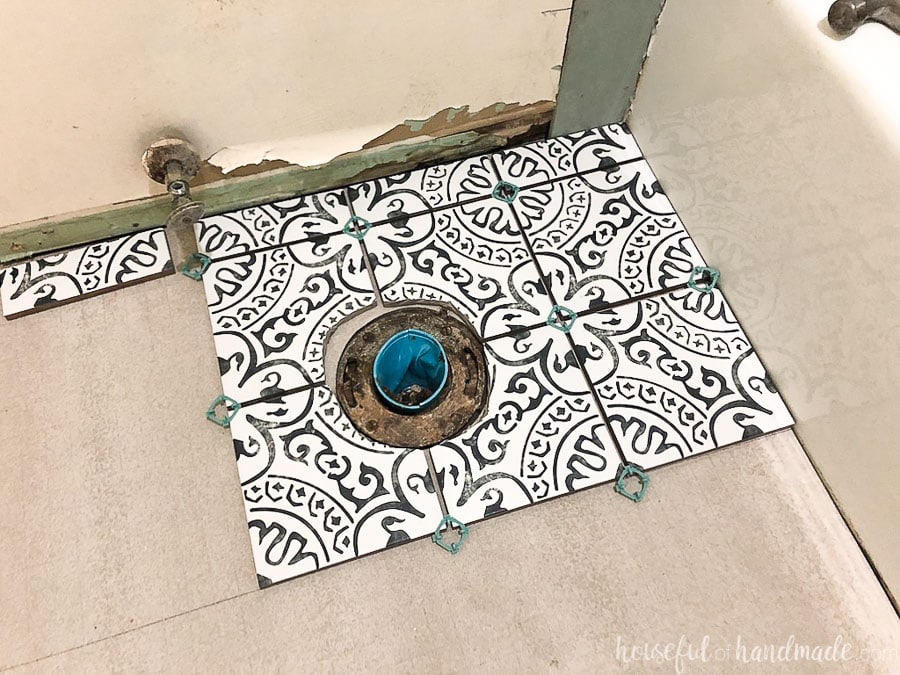
I cut a few tiles and dry fit them around the bathtub and toilet opening to double check my layout before starting to tile. You can see how the front line of tiles carefully lines up with my layout line.
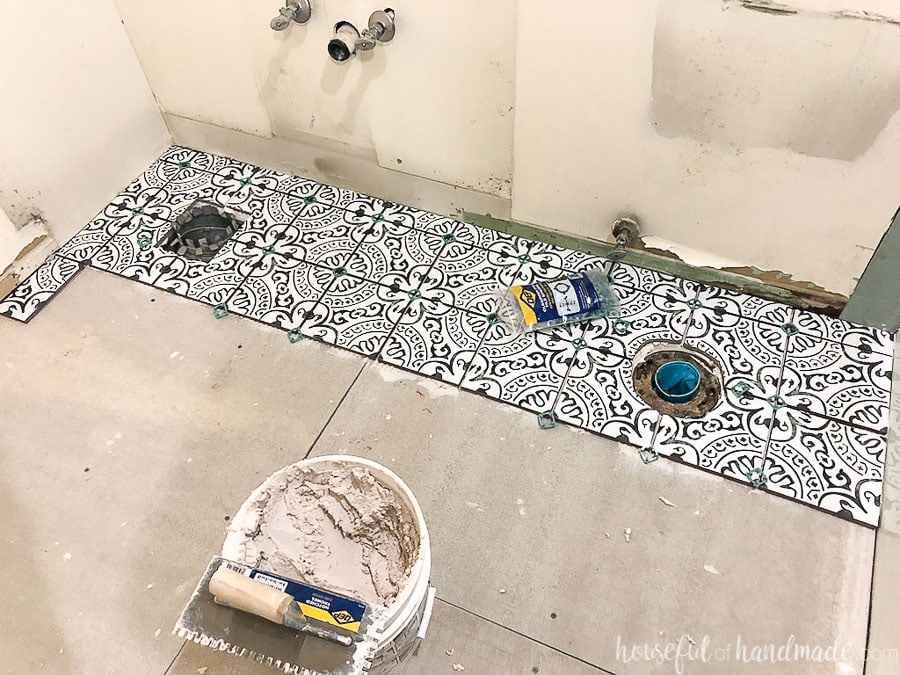
As you install your bathroom tiles, you want to pay careful attention to your layout line. To make sure I didn’t obscure the line, I used the trowel to lay the thinset going from the line toward the back wall.
I started with whole tiles at the tub so when I can back to that edge later, they would end up as whole tiles. You can see that the small pieces of cut tile are across the back of the bathroom wall, ensuring the tiles at the entry to the bathroom are not cut.
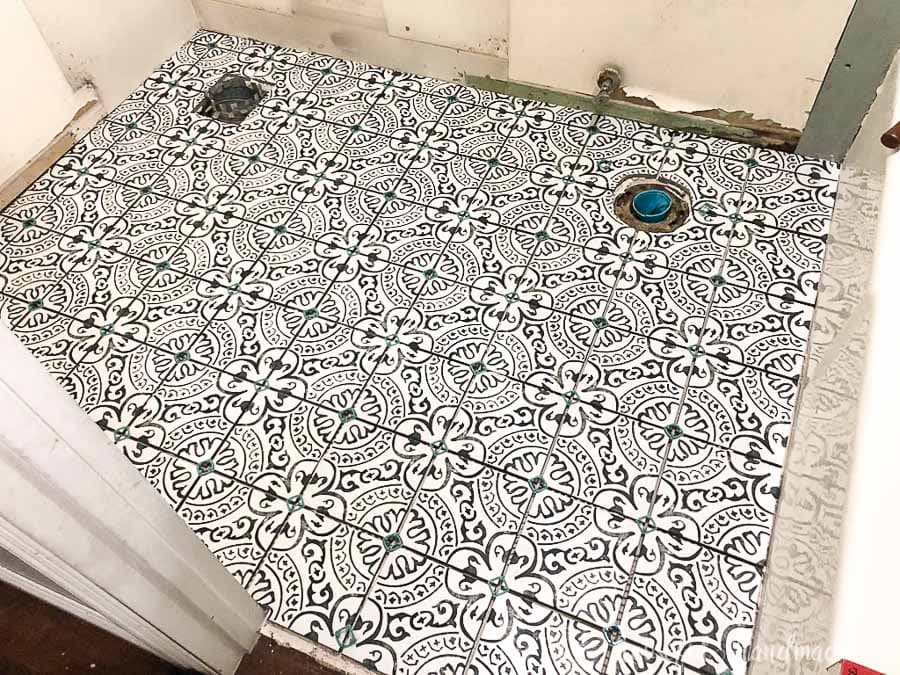
Continue installing tiles along the entire line and to the back of the room. Then you can proceed to tile from the back to the front. Make sure you tile yourself towards the door.
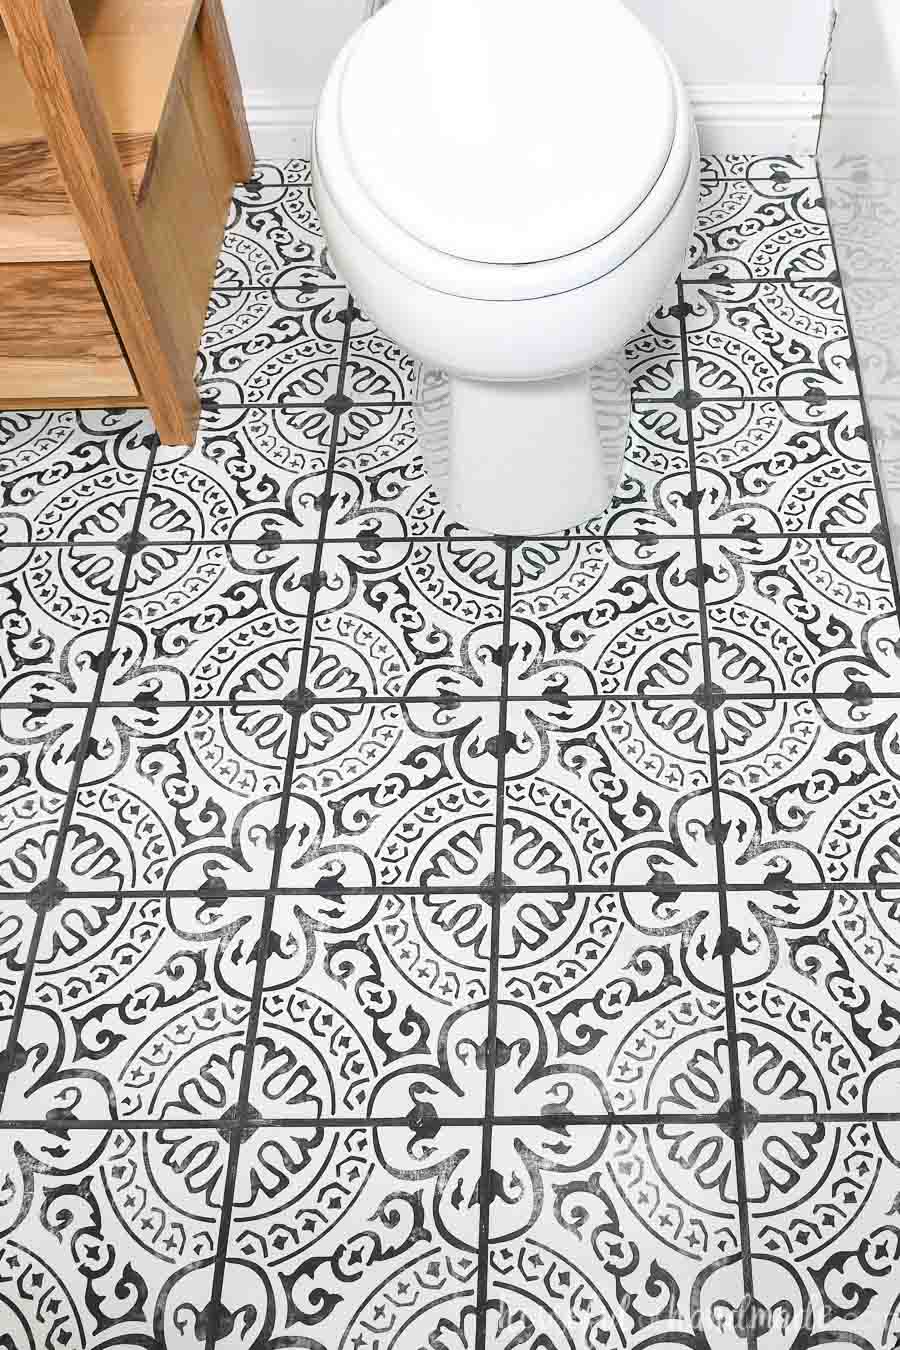
And there you have it, perfectly laid out bathroom floor tiles! I gave myself a huge pat on the back for making sure the tiles came out in the correct layout and correct pattern.
Details on Our Patterned Tile Floor
For our floor we used these Paloma Encaustic 8 x 8″ Glazed Porcelain Tiles. I absolutely love how they turned out!
We tiled them with 1/4″ spacers and used Polyblend Sanded Grout in Charcoal to finish it off. The dark grout makes the tiles really pop and it should be much easier to keep clean. But I always use a grout sealer to seal the grout and protect it from stains.

And now the bathroom remodel is really coming together. If you missed any of the other bathroom projects, make sure to check out the DIY bathroom vanity with bottom drawers and the easy way to paint a ceiling to add a pop of color to our small room.
