Don’t put off giving your ceiling a fresh coat of paint, instead use the easy way to paint a ceiling!
It might be hard to believe, but I am not a fan of painting! I do it because I love the way a fresh coat of paint makes a room feel, but when it comes to the actual work, I could think of many things I’d rather be doing.
But every room in our home has needed to be painted, at least once. And that includes the ceilings.
When we moved in, the ceilings in our house were the same old color as the walls. So we partnered with HomeRight to show you how we use the PaintStick EZ-Twist for the easy way to paint a ceiling. Now you can get back to the fun stuff faster.
This post may contain affiliate links. As an Amazon Associate I earn from qualifying purchases. Click here to read my full disclosure policy.
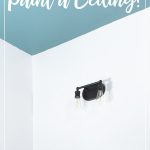
Since we are in the middle of our bathroom remodel, I thought this was the perfect time to share our tips & tricks for painting the ceiling. Not only because the ceiling needs to be painted… but because we are painting it BOLD!
Adding Bold Color to a Small Room
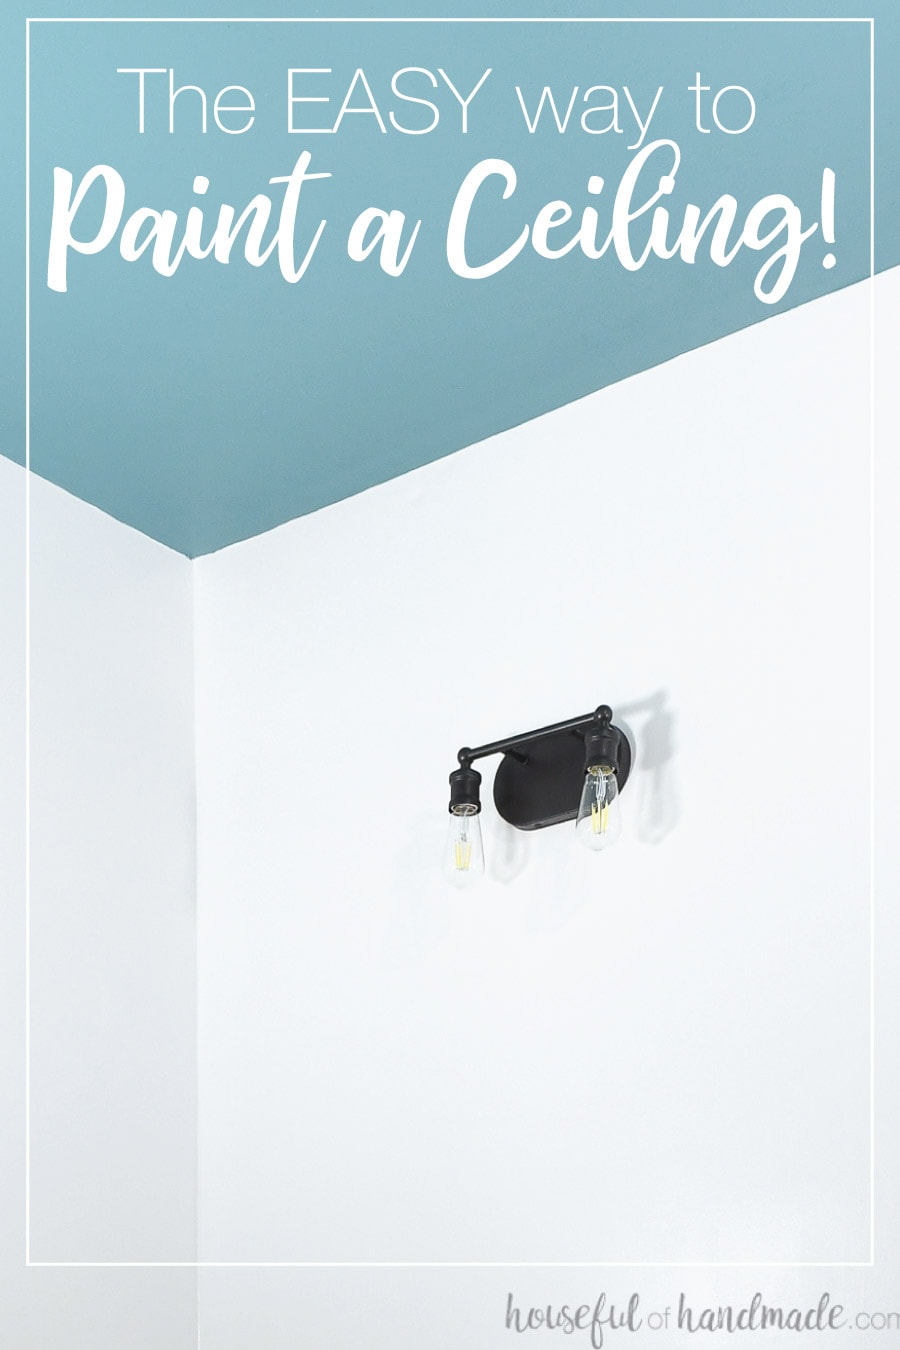
I love adding color to a room, but was really struggling with how to add it to our small guest bathroom. We have no windows or natural light to give the room brightness. So adding darker color to the walls could really make the room feel smaller.
I considered just going with colorful accents in the room, but wasn’t really sold on that idea either. A room needs a little color to make it pop!
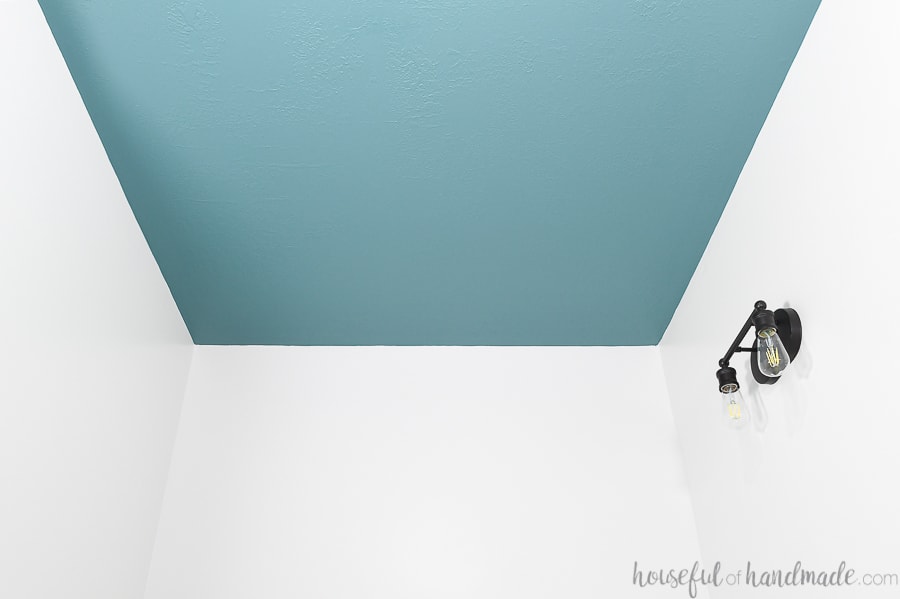
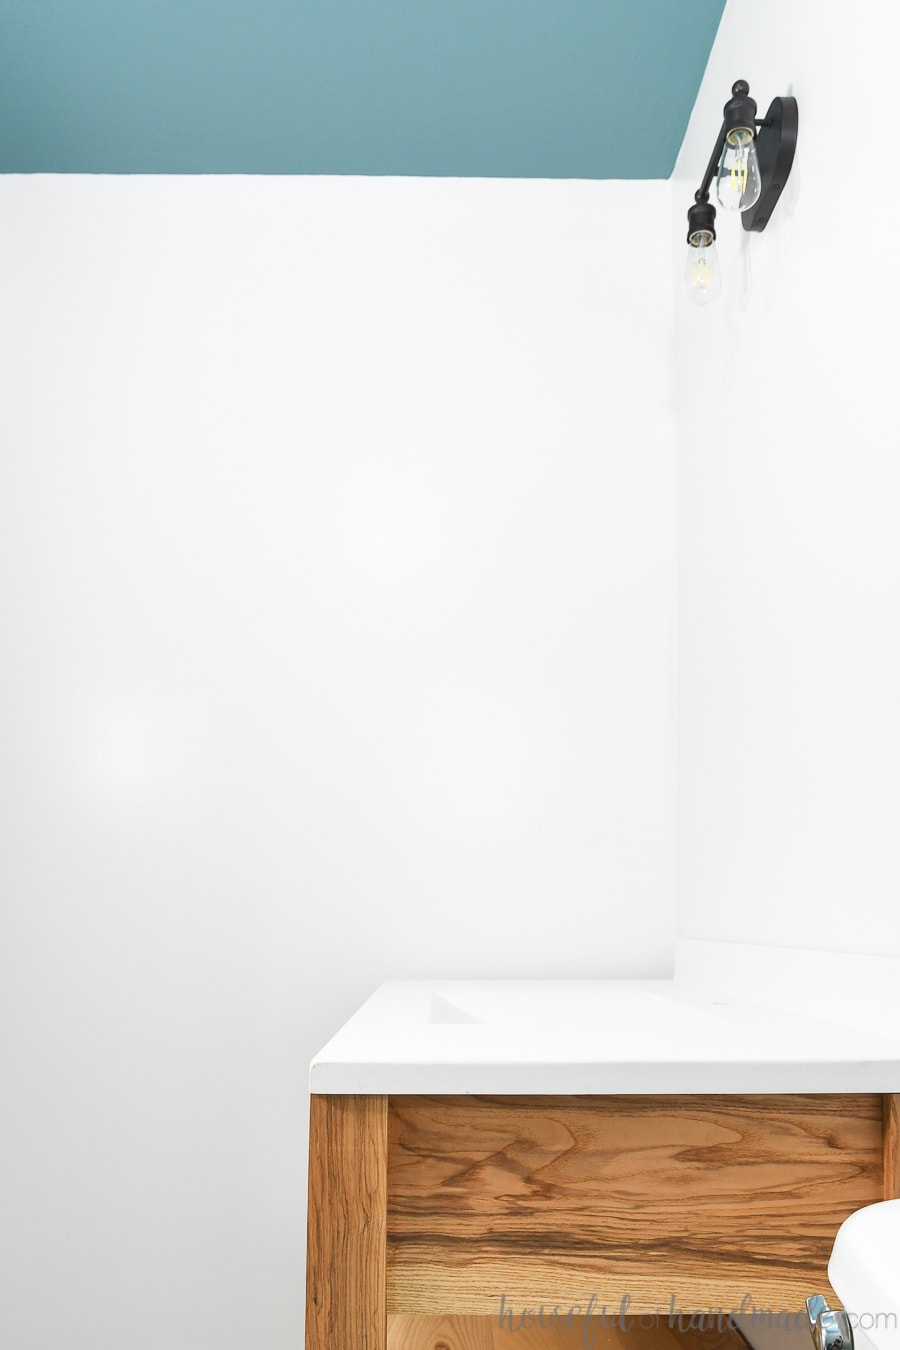
So instead we decided to add the color to the ceiling! Bold move????
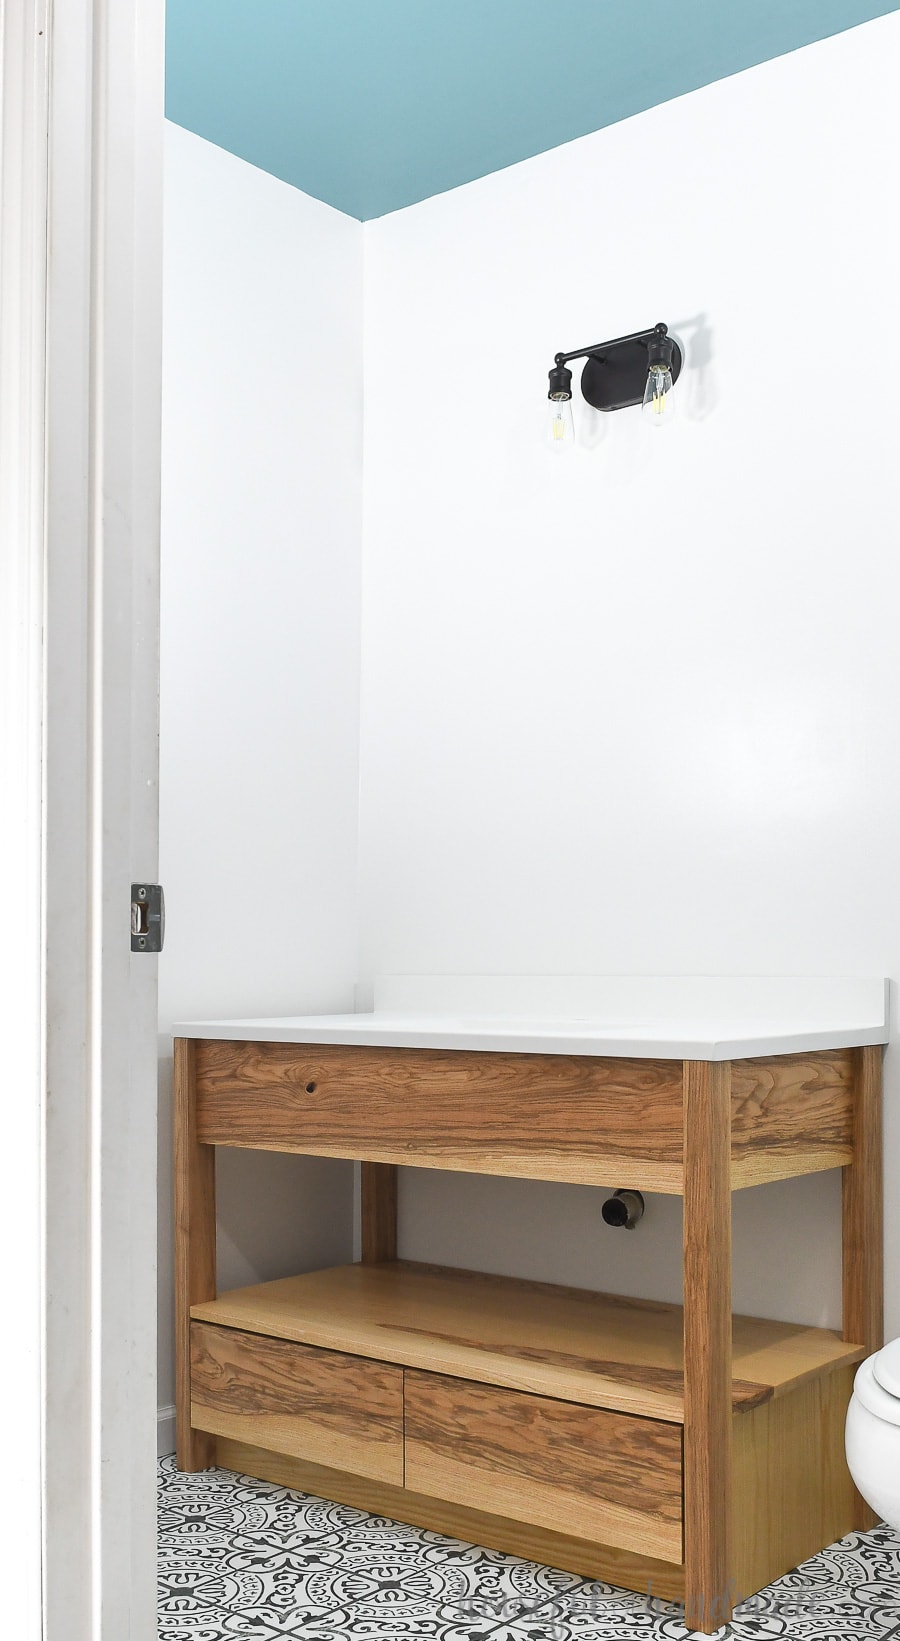
I am happy to report that the bold color on our ceiling was the perfect solution to giving our guest bathroom some pop and style!
Colorful ceilings are a great solution in a small room because the walls stay light and bright. And if you change your mind later, you can always paint again with these easy ceiling painting tips!
Would you go bold on a ceiling?
How to Paint the Ceiling the Easy Way
Supplies:
- HomeRight PaintStick EZ-Twist
- Paint
- I like to buy the paint with primer in one so I can skip the added step of priming the ceiling.
- Quick Painter and/or angled paint brush
- Drop cloth
- Soapy water
If you are going to paint your ceiling and walls, you want to paint the lighter color first. Paint the walls first if your ceiling will be a darker paint color than the walls. Paint your ceiling first if you plan to have darker walls.
Make sure the lighter color bleeds over onto the other surface. This will make it easier for you to cut in the darker color.
Prepping the Ceiling for Paint
Before you can start paining, you have to prep the ceiling. Give the ceiling a good wipe down with soapy water.
A couple squirts of dish soap in a bucket of warm water is great for this. If you have excess grease (from cooking or from hair products), you may need a degreaser to remove it.
Remove all ceiling fixtures (lights, fans, etc.). If you leave them attached and paint around them you may notice a line around the fixture later when things adjust or shift. Or you will have a thicker line of paint when you replace a fixture later.
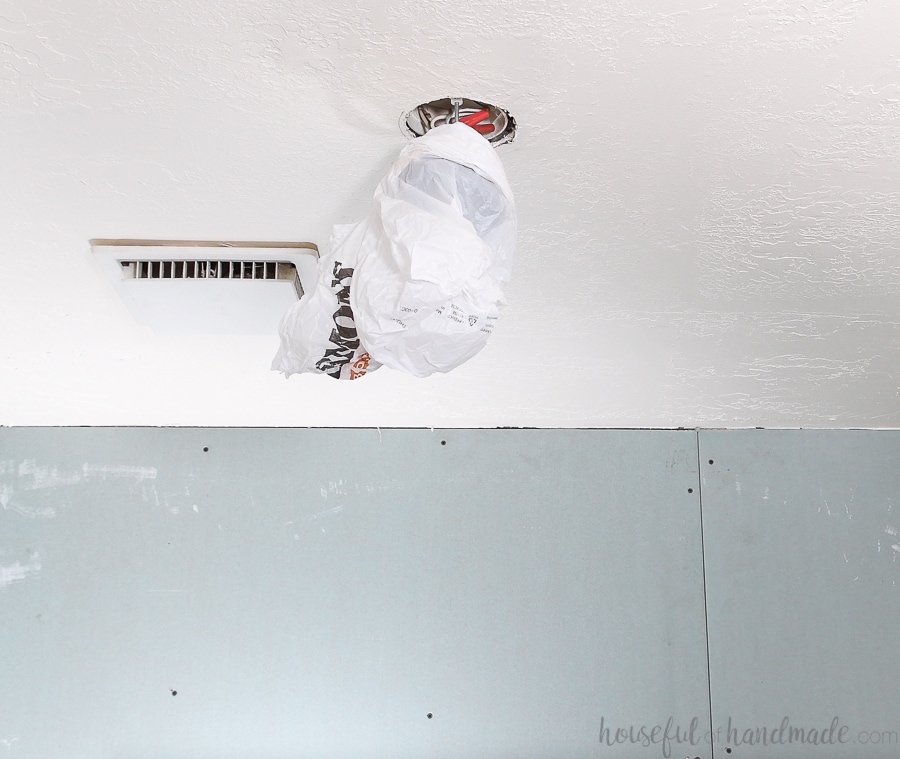
So don’t be lazy and take a few extra minutes to do this before painting! You can loosely wrap a bag around the fixtures to protect them from paint drips.
Lastly, protect your floors/furniture/etc. by covering it with a drop cloth or even plastic dollar store tablecloths.
Cutting In Versus Taping Off
I prefer to cut in the edge of my paint instead of taping it off. Why? Here are my top 5 reasons why it’s easier to cut in your ceiling when painting.
- Cutting in takes less time than taping because you still have to use a paint brush to get to the tape line. So cutting in eliminates the extra step of taping.
- You can reuse a good cutting in paint brush over and over and over. But the tape is a one time use. The cost can add up if you have a lot of painting to do.
- You get cleaner lines with cutting in. No worries about it leaking under the tape or pulling paint or pieces of the wall off when you remove the tape.
- You can instantly correct a cut in mistake with a damp paper towel while painting. If you have a mistake under the tape, you have to touch it up with a paint brush later.
- Cutting in gives you instant gratification. You can immediately see how the paint on the ceiling matches the paint on the walls. No colorful tape gets in the way!
Painting the Ceiling
If possible, having two people to paint will make this the easiest ceiling painting ever! One person can cut in the boarders and around fixtures while the other one rolls with the PaintStick.
Cutting in the Edges
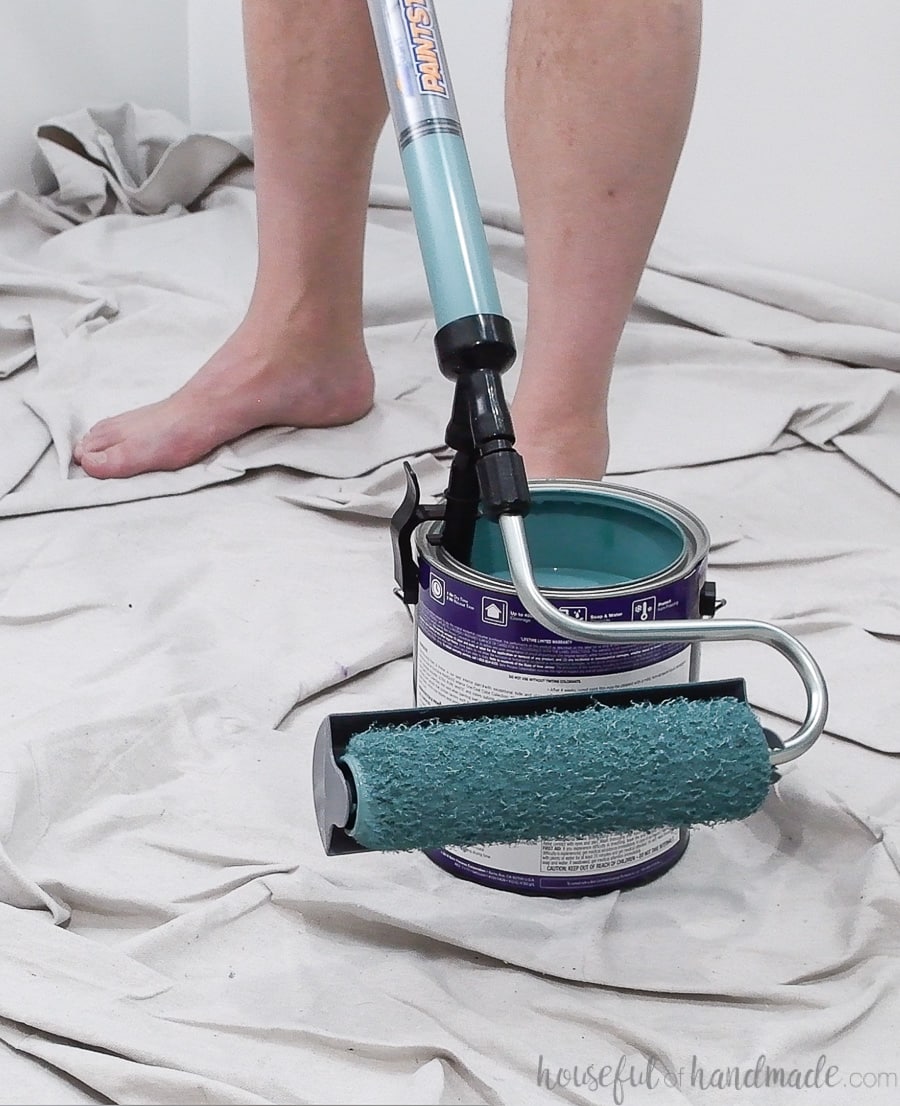
To cut in I used the HomeRight Quick Painter which is kinda like the paint stick, but smaller. You can load it up with paint just like the PaintStick so you do not have to carry a bucket on a ladder while cutting in.
To prime the pad on the Quick Painter, place the pad on a paper towel and squeeze the trigger. The paint will squirt out. Make sure to cover the pad with paint.
Slide the pad back and forth on the wall. I found there was a little learning curve with the Quick Painter (just like there is with a paint brush). The first couple spots didn’t turn out the best, but I was able to fix them with the second coat!
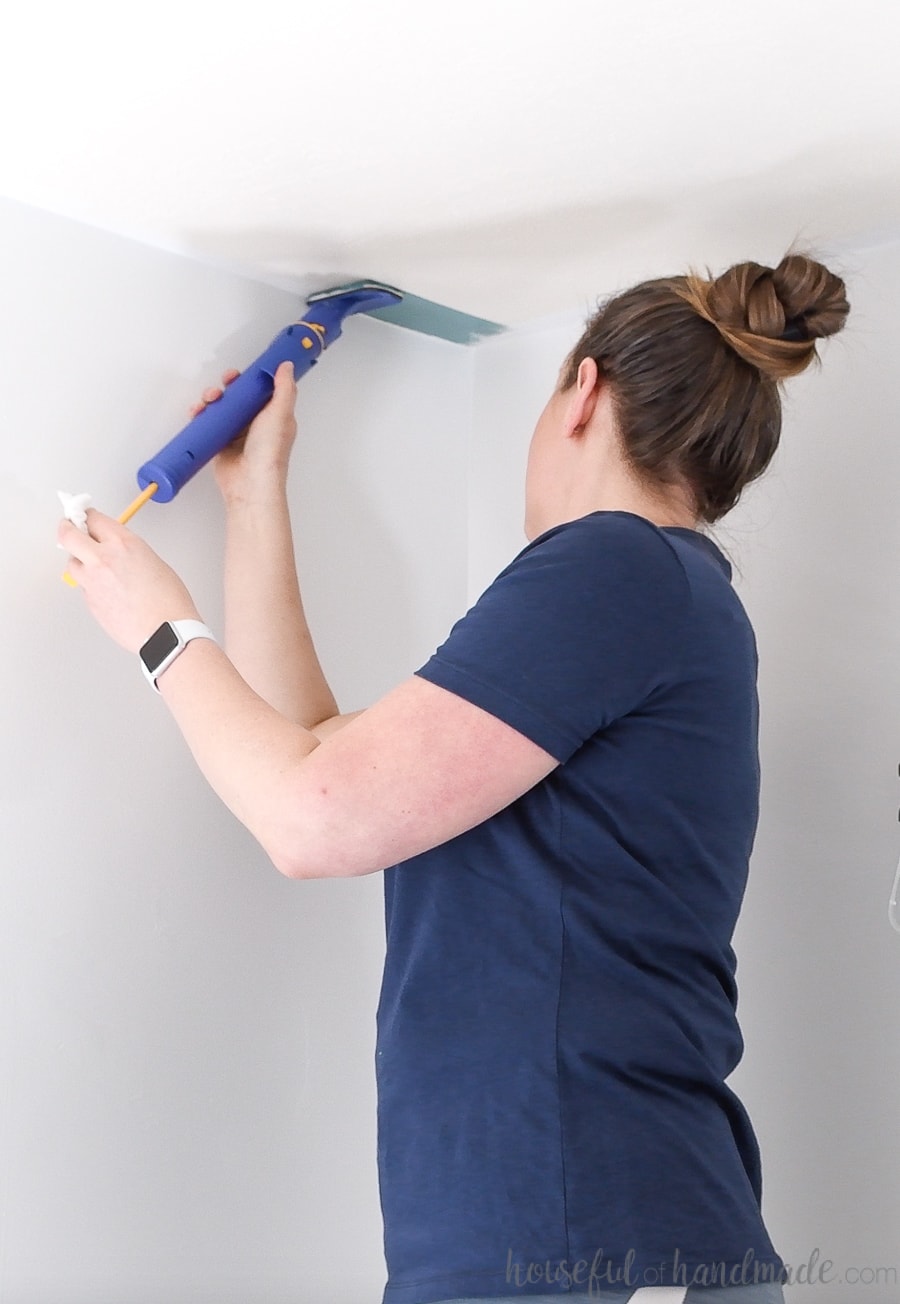
TIP: Keep a damp paper towel in you pocket when cutting in so you can immediately wipe away any mistakes.
Try to cut in from the edge of the ceiling in about 3-4 inches. That way the roller has enough room to roll to the edge of the paint without touching the wall.
Make sure to cut in around fixture openings to protect them from the roller getting too close too.
Painting with the PaintStick
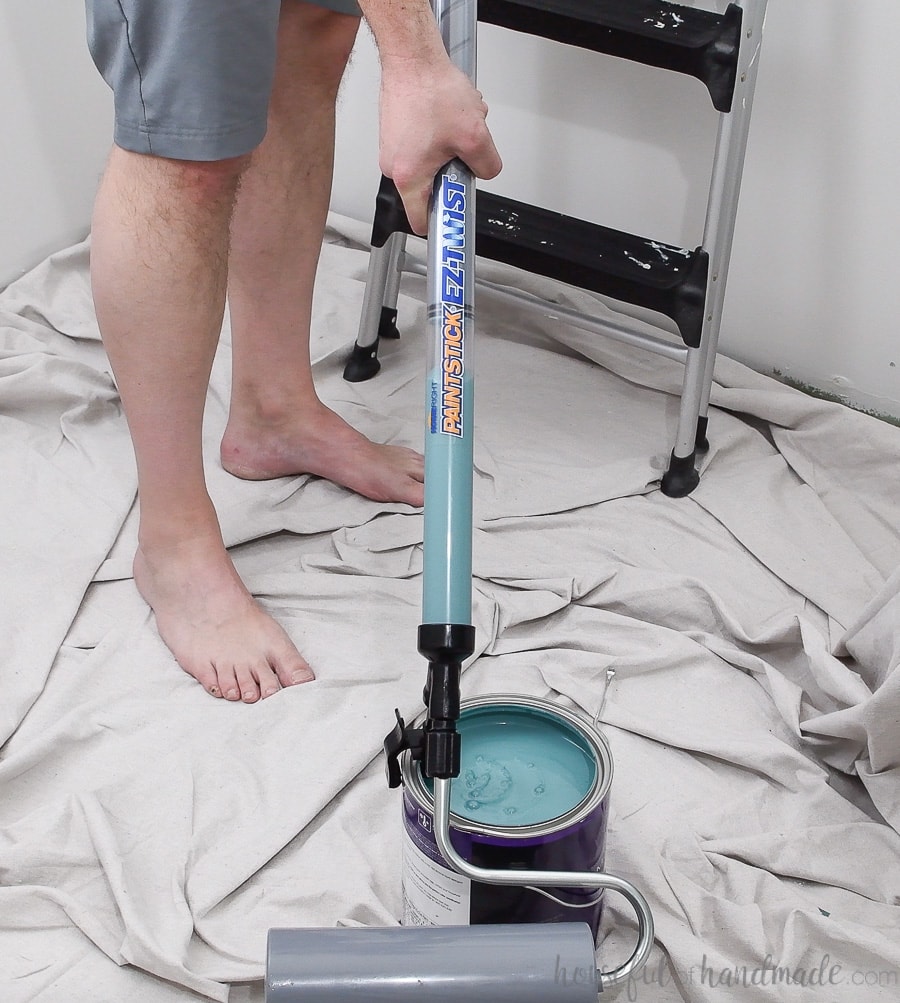
To fill the PaintStick EZ-Twist with paint, clip the fill tube on the side of your paint can. Make sure the bottom of it is fully covered by paint. When you get to the bottom of your can, you may have to have one person tilt the can while the other person fills the PaintStick.
Hold the PaintStick at a 45 degree angle to the fill tube. Unlock the toggle on the handle and slowly pull it back. Watch the inside of the PaintStick fill up with your new paint color!
Now you need to prime the roller. This will take up most of the first fill of paint. Start twisting the handle as you roll the paint on the ceiling. Slowly push and keep rolling until you see the paint coming out of the roller.
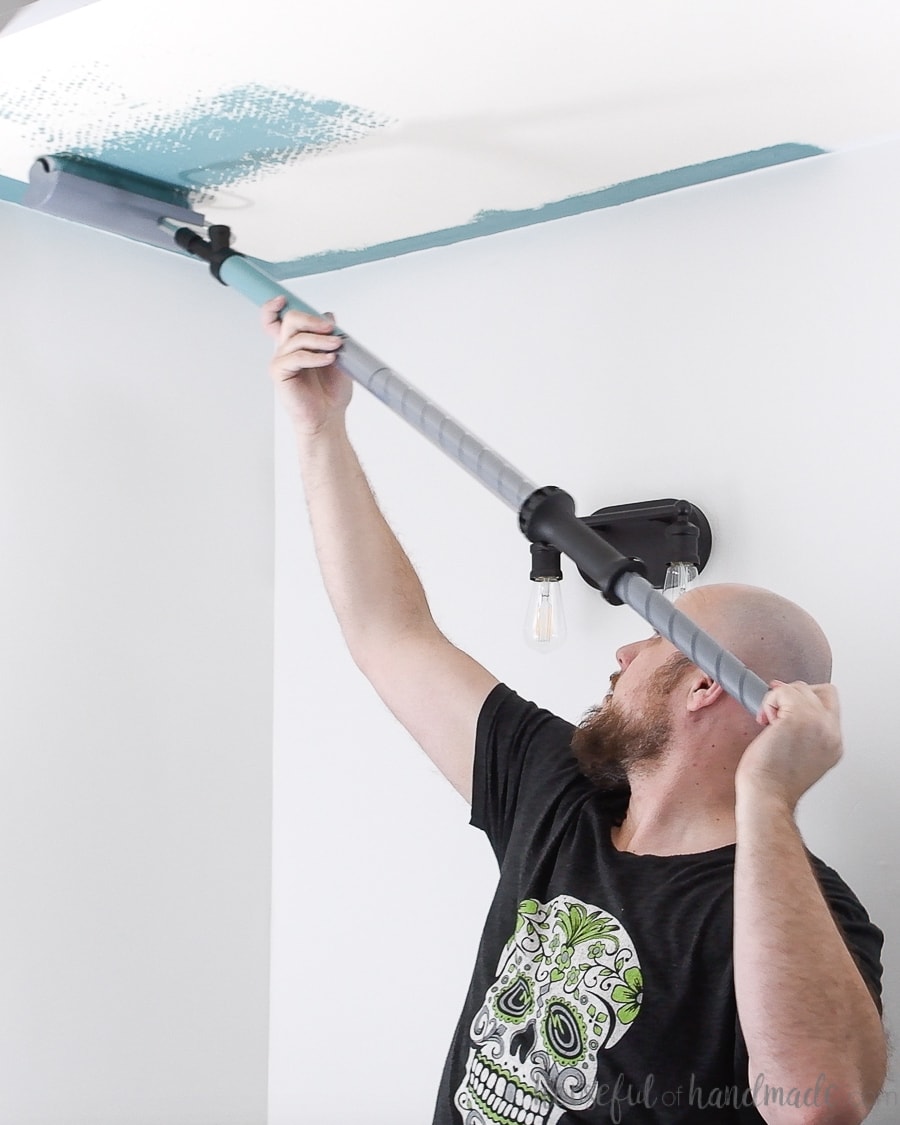
As you are painting you only need to push out paint every so often. Think of it like bending over to refill the roller in a paint tray. You’ll refill the roller while pushing, then roll over the ceiling until it feels like you need more paint.
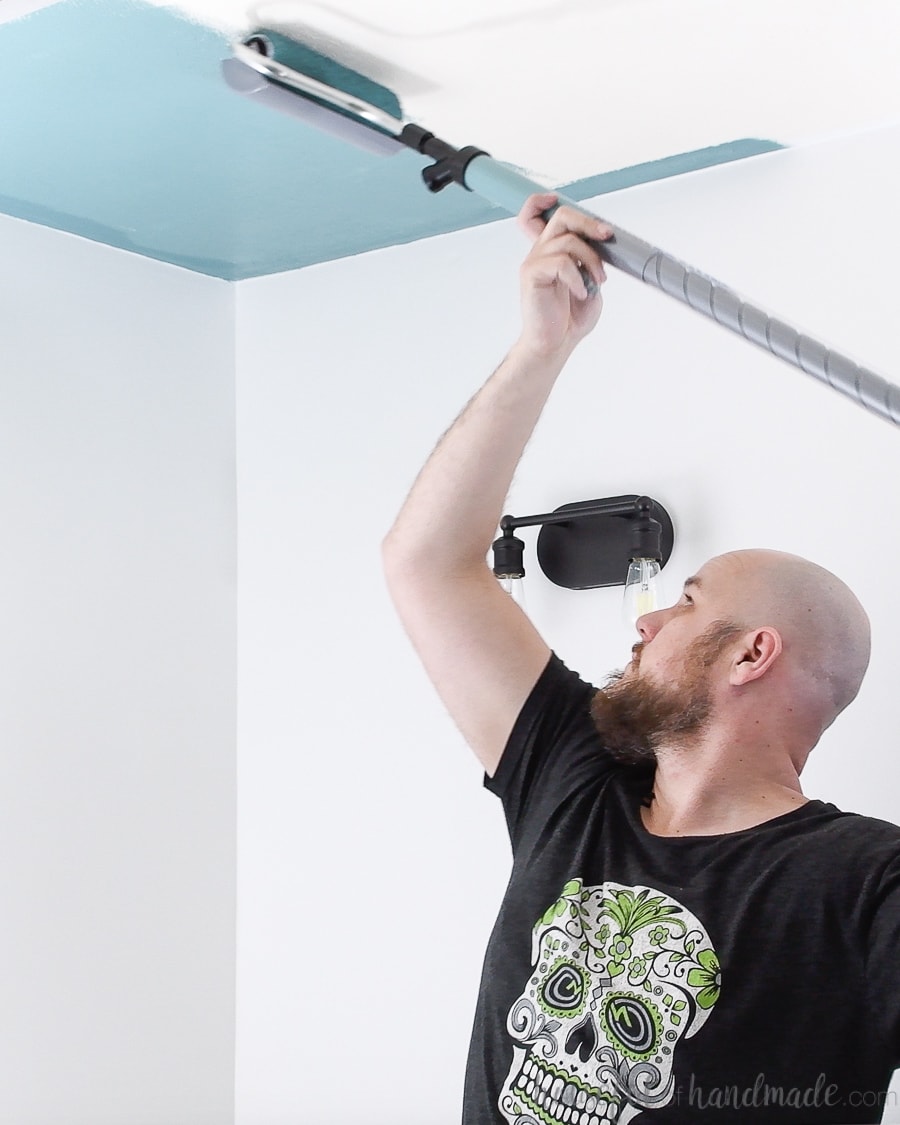
Continue until your ceiling is completely covered. Remember, this is the first coat. As things dry, you will notice bits that didn’t get as much coverage as others. Just let it dry fully, the second coat will fix it!
Finishing the First Coat of Paint
When you are done with the first coat, put the PaintStick back on the fill tube (still in the paint can) and press all the remaining paint in the handle back into the can.
Instead of cleaning the entire PaintStick between coats, I like to remove the spatter shield and cover the roller in plastic bag. This works to keep the paint from drying out overnight. If you are waiting longer than 24 hours between coats, you will want to clean the PaintStick fully.
The Second Coat of Paint
Because there is a significant amount of paint in the roller and frame inside it, it can fill up the roller as it sits overnight. When you remove the plastic bag, use your hand like a squeegee to scrape some of that excess paint off the roller.
You will not need to prime the PaintStick the next day, the amount of paint still in the roller will be plenty to get you started. Roll it over the ceiling to empty the roller before refilling the handle for the first time.
Repeat the cutting in and painting all over the ceiling. I used a paintbrush with the Quick Painter to cut in the second day. This allowed me a little extra control to clean up any cut in lines that were lighter from the first coat.
Cleaning the PaintStick EZ Twist
When you are done painting, make sure to squeeze out any excess paint back in to the can with the fill tube.
We prefer to clean the PaintStick EZ-Twist in a bathtub or outside (it can be too large for a sink).
Take the spatter shield off. Pop the outer end caps off the sides of the roller and remove the roller. If you want to clean it, try to scrape off some of the excess paint first.
Remove the spacer and frame from inside the roller. Twist the frame off from the handle. Run them under warm water until water runs clear.
Insert the open end of the handle and valve into a tub of water. Then squirt it out. Repeat until the water runs clear.
Check the valve for paint and clean it off.
Let everything dry. Use a little petroleum jelly on the rings and valve to keep them from drying out during storage.
Now you are ready to show off your newly painted ceiling! The HomeRight PaintStick EZ Twist will be your new favorite paint roller, especially for painting ceilings and tall walls.

Thank you to HomeRight for sponsoring this post. I only recommend products that I use and love and all opinions are 100% my own. Click here to read my full disclosure policy.