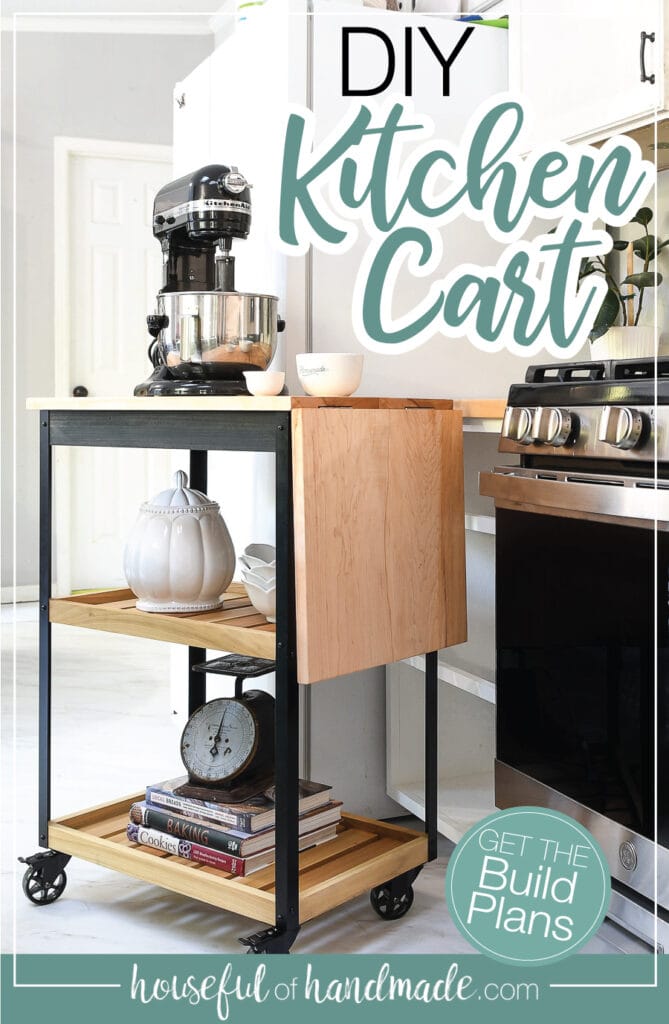
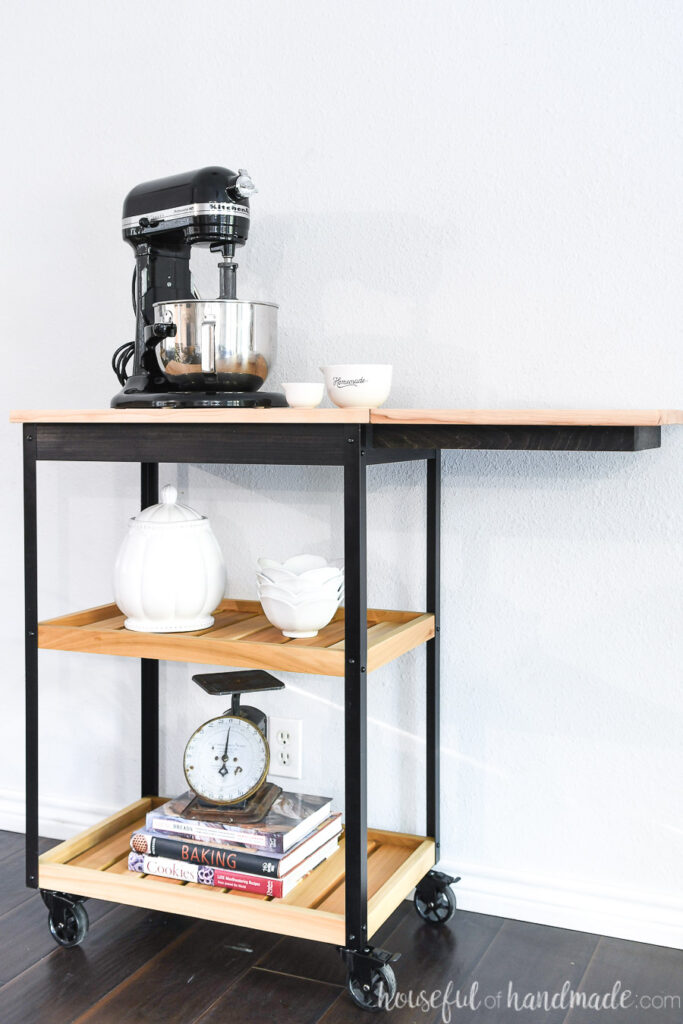
Add more storage and counter space to your kitchen with this beautiful DIY rolling kitchen cart.
The weather is cooling off and that means baking season!!!! It’ my favorite season of the year. But in our new house, I didn’t have the perfect place to store my stand mixer.
So I partnered with Kreg Tools to make a rolling kitchen cart just in time for all that holiday baking.
Kitchen Cart with Fold-Down Leaf
Having too much counter space is never something I have heard someone complain about. And this modern kitchen cart is perfect for adding a bit more counter space to any kitchen.
This post may contain affiliate links. As an Amazon Associate I earn from qualifying purchases. Click here to read my full disclosure policy.
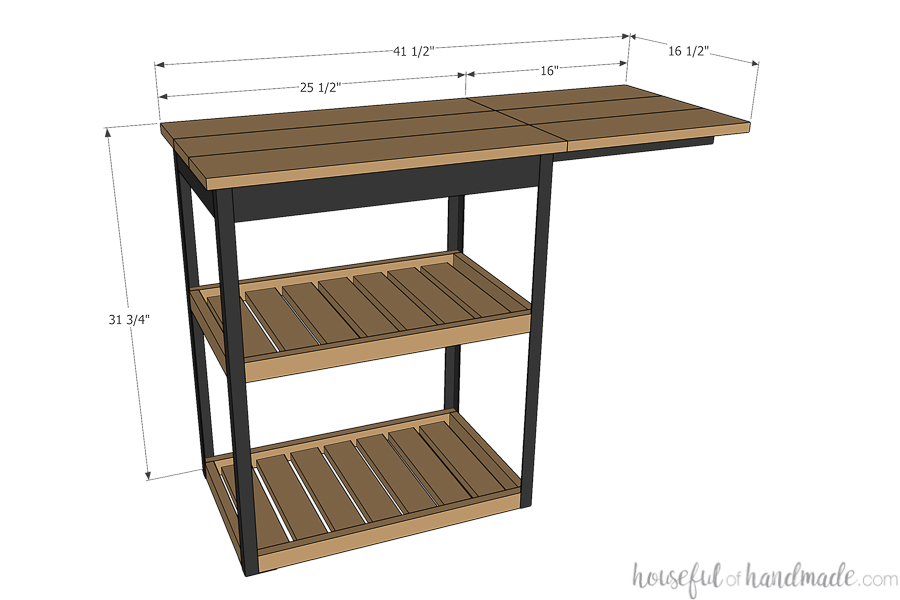
The 26″ x 16 1/2″ cart can easily tuck away into an unused corner, then be rolled out when you need it. And the fold-down leaf add even more workspace.
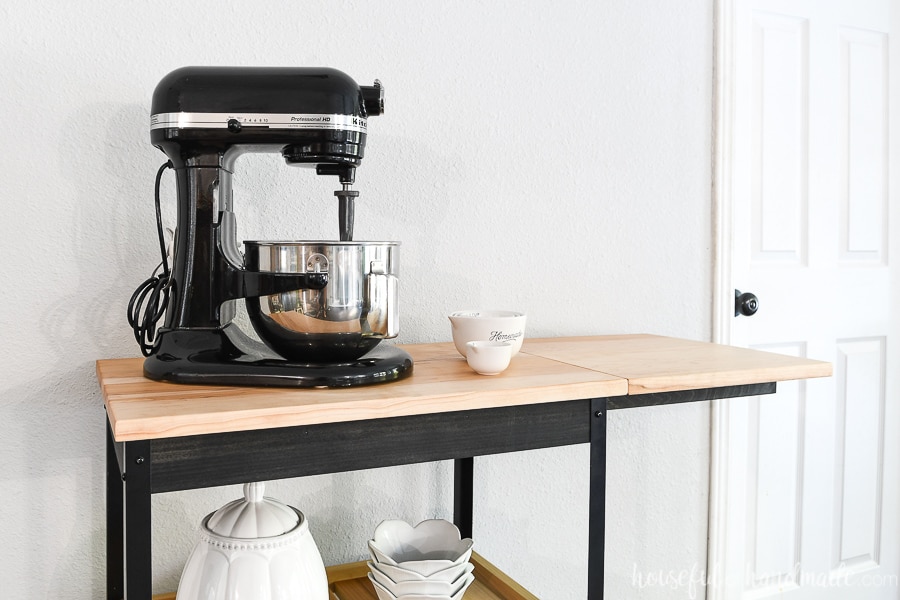
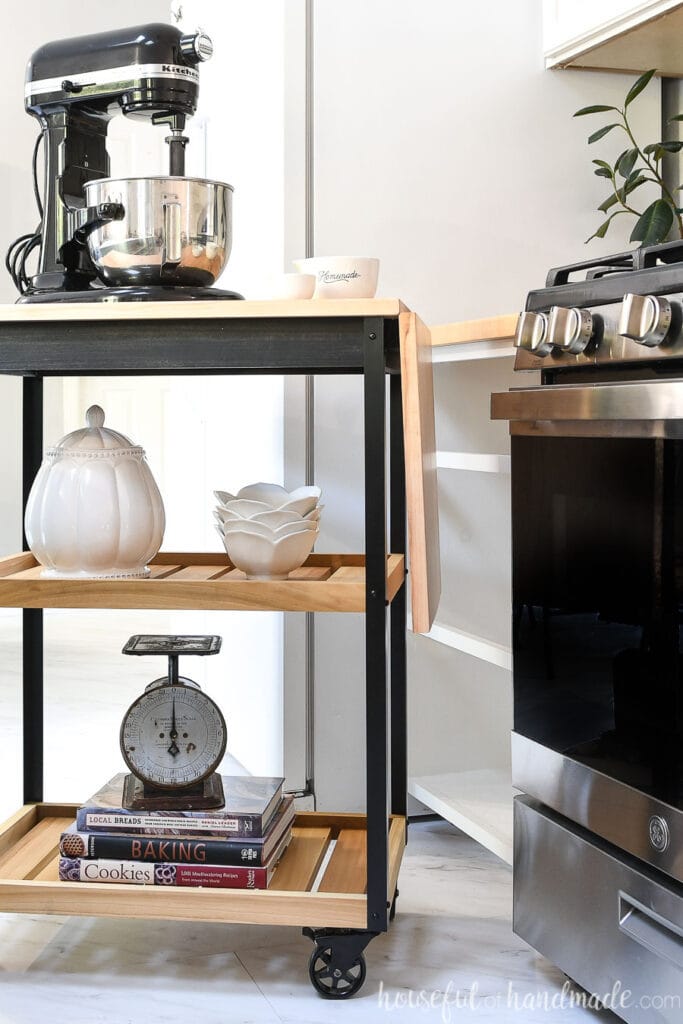
The leaf is easy to fold up or down with the hidden leaf support that pulls out from under the kitchen cart. The 2×2 supports add strength to the leaf so you can use it as additional prep space.
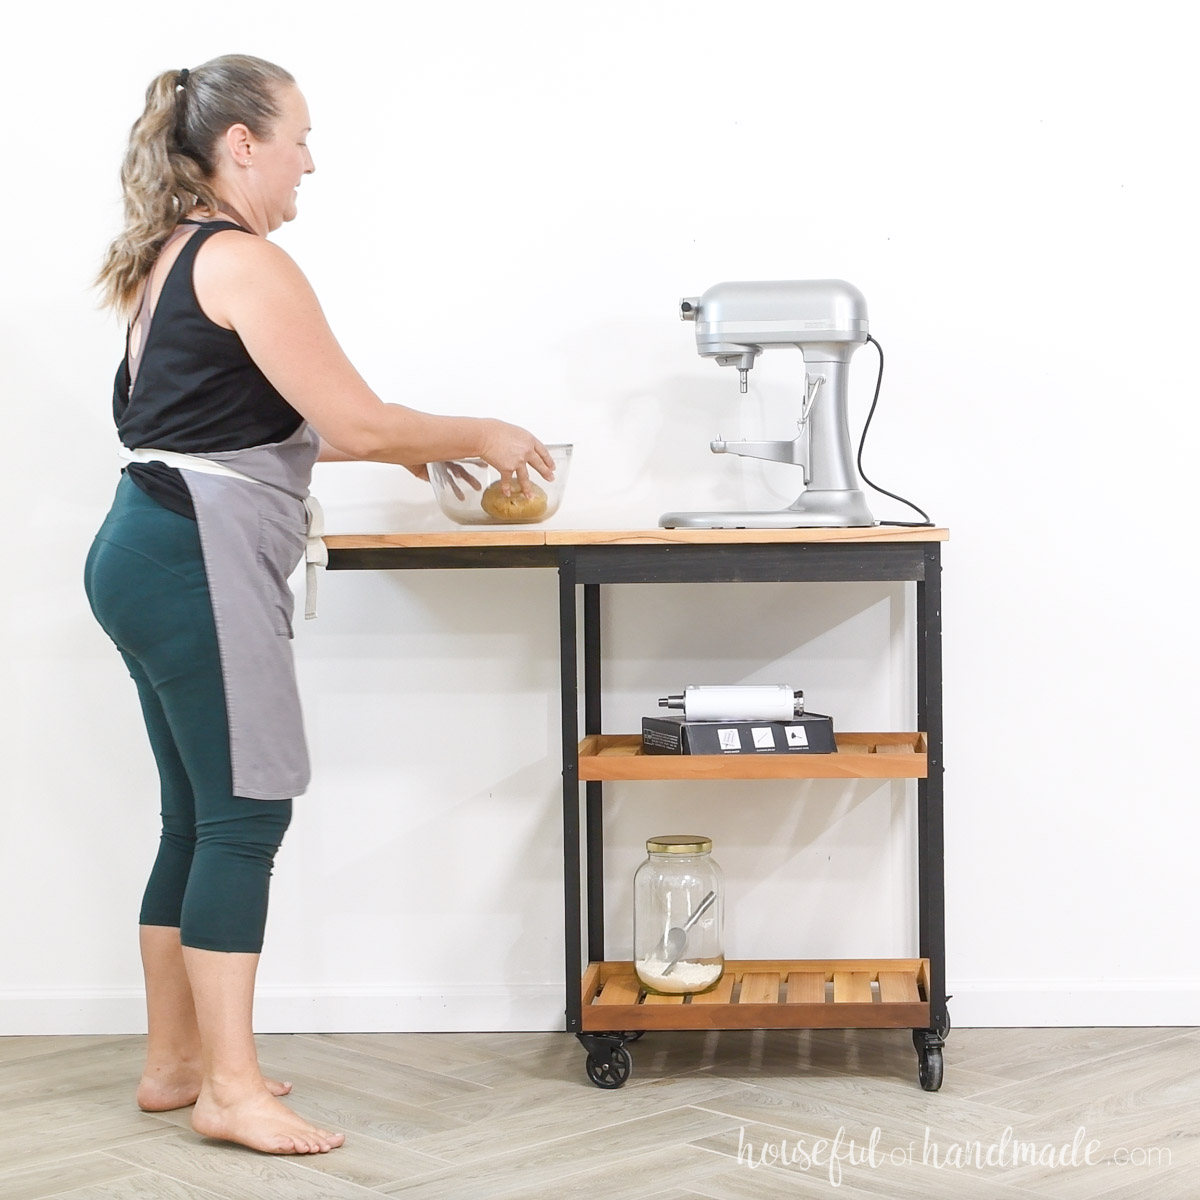
Since I am using my DIY kitchen cart as a baking cart, the top is the permanent home for my stand mixer. And when it’s time to bake, I can pop-up the leaf and it makes the perfect place for measuring and prepping my delicious treats.
Extra Kitchen Storage
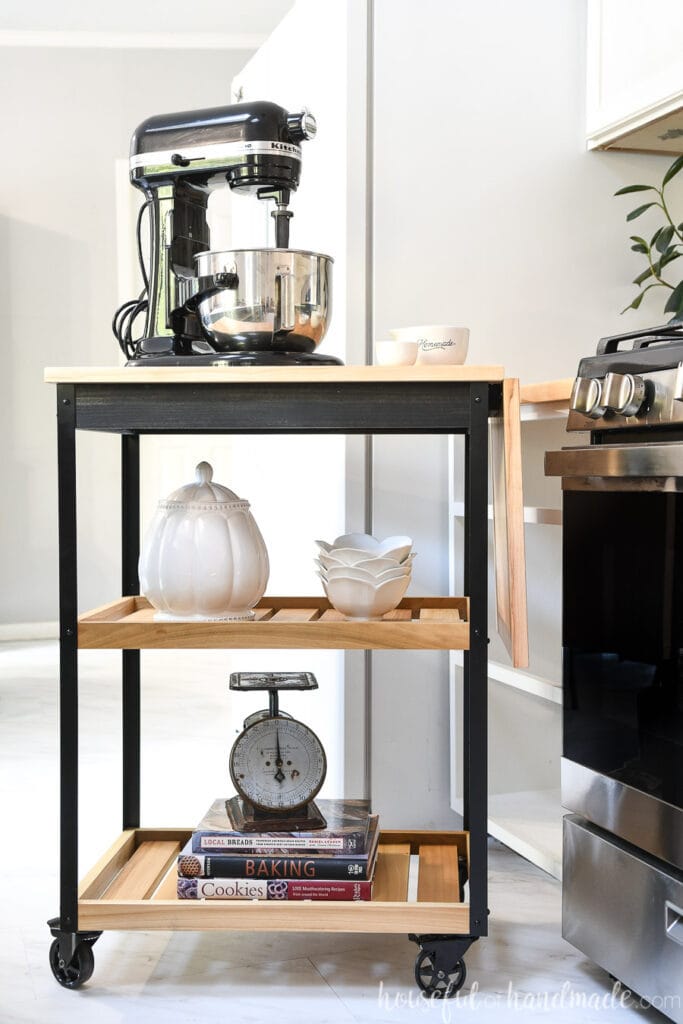
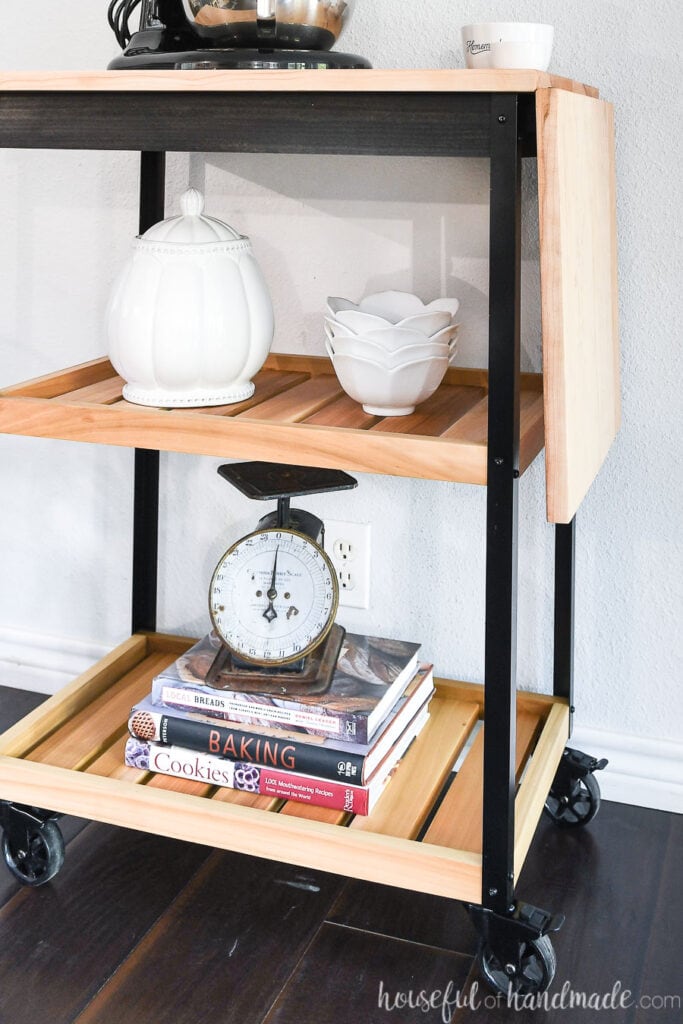
Storage is another thing that you can never have enough of. This modern rolling cart has two large shelves that are perfect for storing more kitchen wares.
The two shelves are made with a slight lip to them to help keep things from falling off when moving the cart around the kitchen. Since I am using my cart for baking, it’s the perfect place to store my baking cookbooks and the cookie jar!
And since the kitchen cart is on wheels, you can roll your items away when not in use. Making this the most versatile storage for your kitchen!
Easy Modern Design
To keep the lines of the kitchen cart modern and minimal, I used a fun new material for the corners: aluminum angle.
This inexpensive metal corner material is lightweight and easy to cut with regular woodworking tools. You can cut with a metal blade in your jigsaw or on your miter saw.
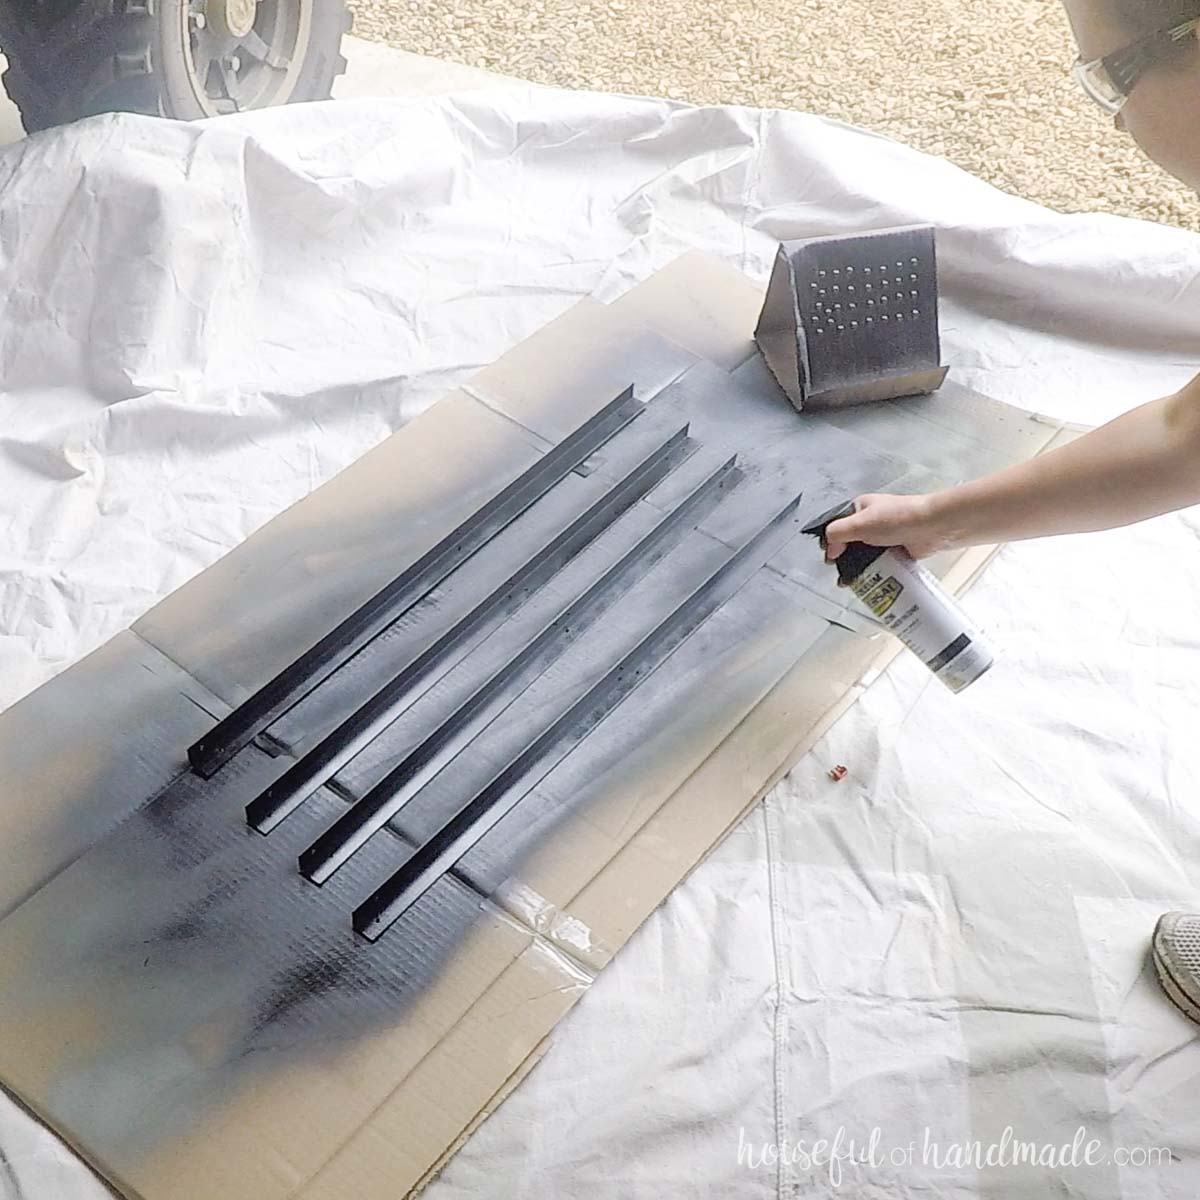
The aluminum can also be spray painted to any color you want. Just make sure to start with an aluminum primer (I used Rustoleum Self Etching Primer).
To keep my cart clean and modern, I used a satin black spray paint and stained the top frame (with the leaf support) with Minwax True Black wood stain. I love the way the natural wood pops next to the black and it matches the beautiful black vintage inspired castors I found here so well.
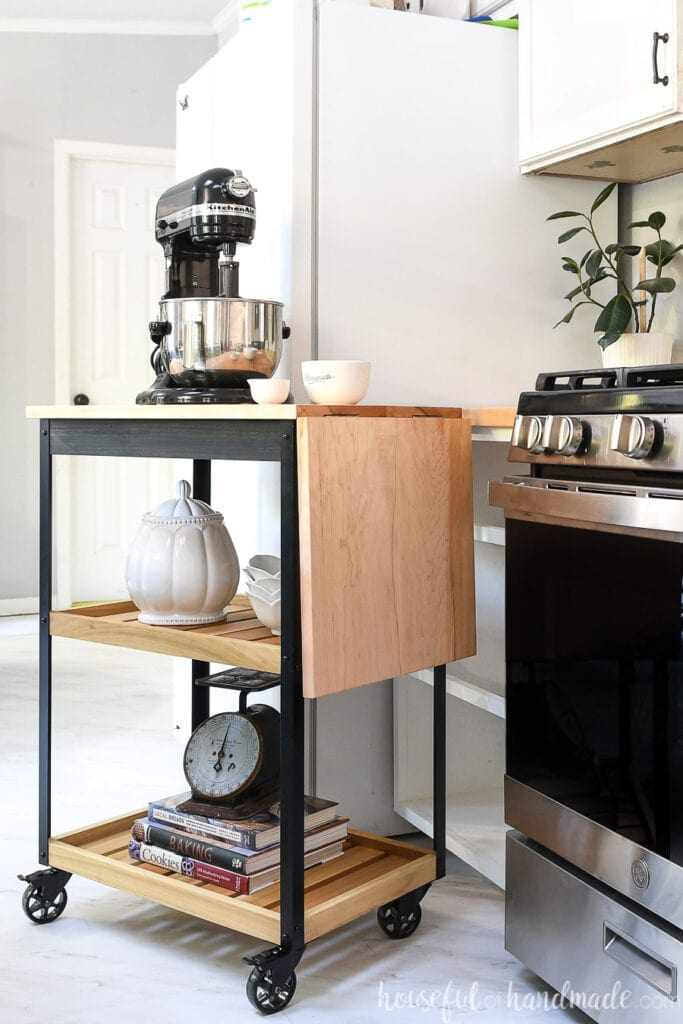
To build our kitchen cart, I used poplar wood for the base of the cart and shelves. Then for the top I used maple.
The poplar took the black stain beautifully. It really makes the black aluminum angle blend in so well.
And the poplar closely resembles the maple once finished, with just a hint of it’s tell-tale yellow/green. It was a great budget solution to using maple for all the natural colored parts.
And the maple for the top of the cart adds one more use for the kitchen cart. It is basically a rolling maple cutting board. So you could turn your cart into the perfect prep space too if you want.
How to Build a Mobile Baking Cart
Tools & Materials
Recommended Tools:
- Miter saw
- I recently upgraded to this larger sliding miter saw (watch for it to go on sale), but all my projects before were built with this inexpensive miter saw that I loved.
- Jig saw
- Pocket hole jig
- Drill
- Impact driver (optional, but I love not having to switch bits with the drill)
- Right angle clamp
- Finish nailer
- Trim router
- Sander
- Optional: Biscuit joiner
Supplies:
- Wood products
- (2) 2×2 boards, 6′ long
- (3) 1×3 boards, 8′ long
- (2) 1×2 boards, 8′ long
- (2) 1×6 boards, 6′ long
- (1) 7/16″ dowel , 1′ long
- (2) 6′ long 1″ wide 1/16″ thick aluminum angle
- (125) 1 1/4″ pocket hole screws
- (10) 1 1/4″ finishing nails
- (4) 3″ castors (4″ from floor to top)
- (4) Figure 8 fasteners
- (2) Hinges
Overall Dimensions
The finished kitchen cart is 16 1/2″ deep by 25 1/2″ wide with the leaf down and 41 1/2″ wide with the leaf raised. The cart is 31 3/4″ tall without castors and 34 3/4″ tall with castors.
Cut List
Cut out the pieces according to the cut list in the plans on Kregtool.com.
STEP 1- Build leaf support
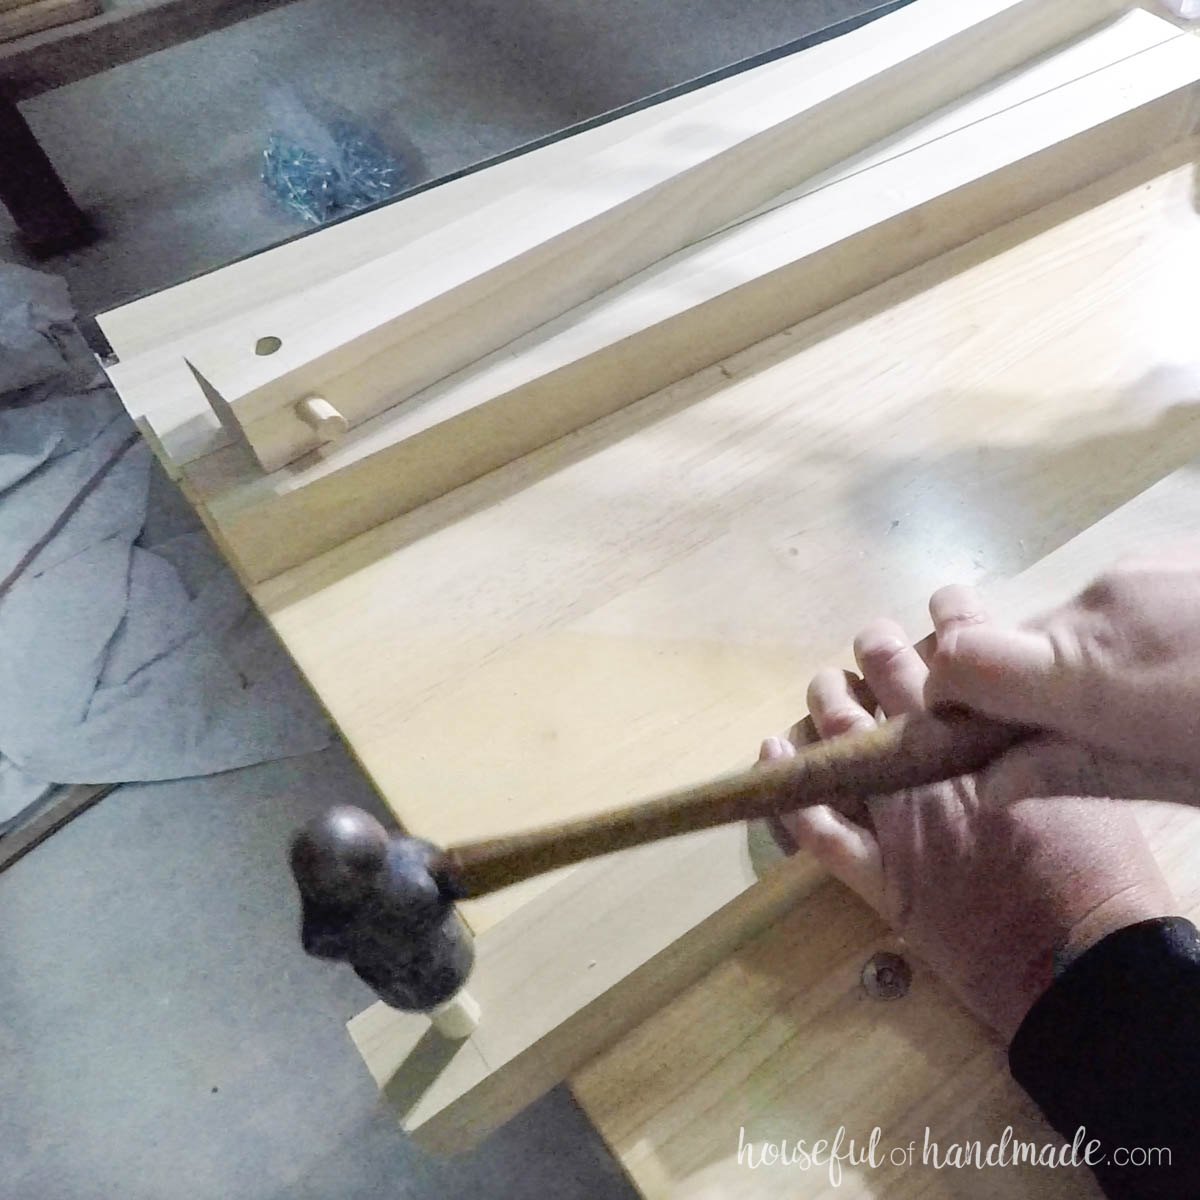
Start by drilling a 7/16″ hole in the back of two of the top support boards.
The center of the hole should be 1″ in from the back and centered on the 2×2. Make sure the hole is straight through the board.
Tap the piece of 7/16″ dowel into the hole and center it so 5/8″ is sticking out on each side.
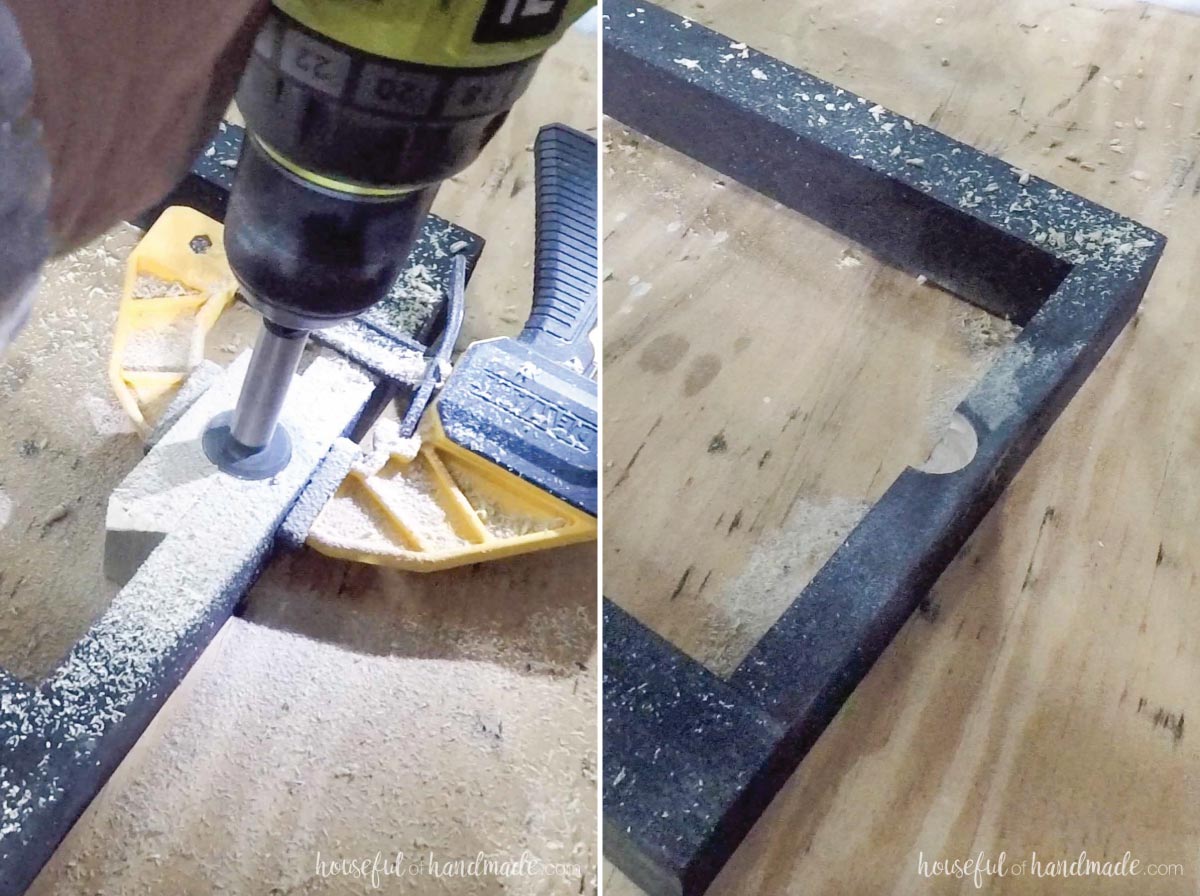
To make it easier to pull out the leaf support, drill a 3/4″ half circle on the center edge of the top support handle with a 1 1/2″ Forstner bit.
I did this after assembly, but it is easier to do before. Clamp a scrap of wood next to the leaf handle when drilling to get a clean cut.
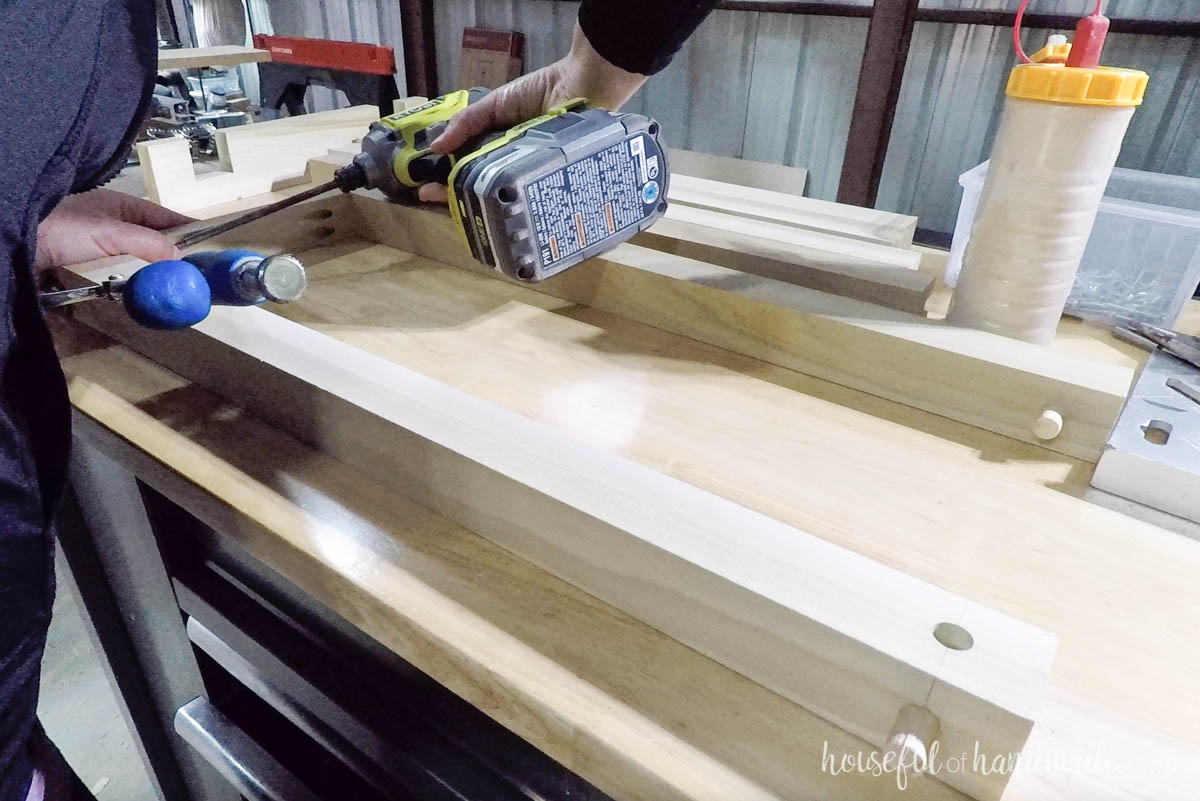
With your Kreg Jig set for 3/4″ thick material, drill pocket holes in each end of the top support handle.
Attach the handle between the two support boards with 1 1/4″ pocket holes and wood glue.
Make sure the dowels are sticking out on the sides of the boards, not the top/bottom.
STEP 2- Build top frame
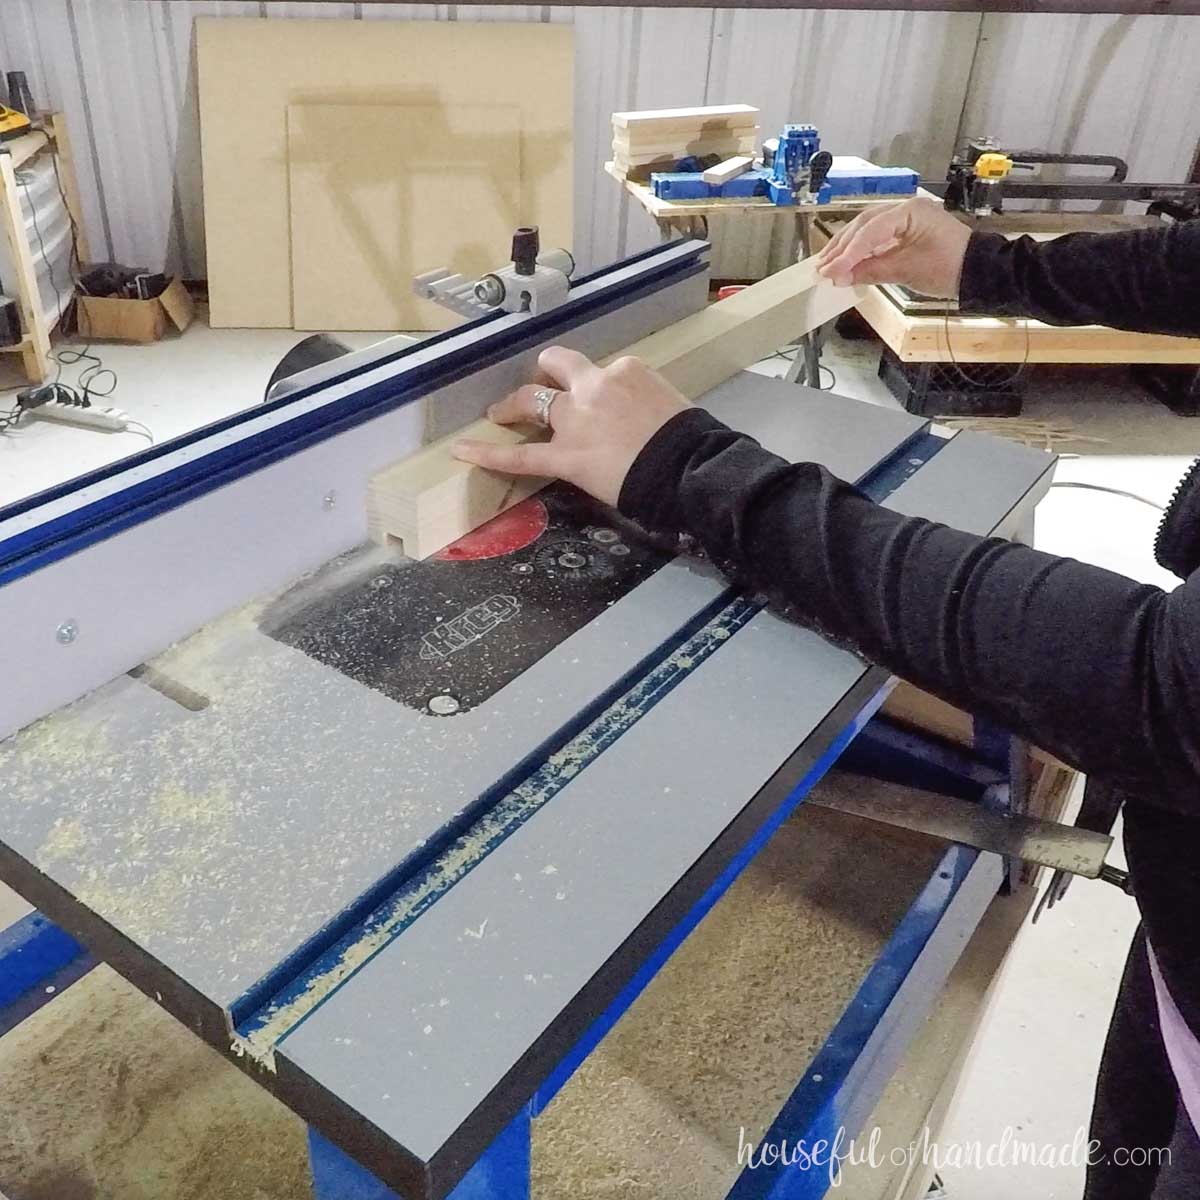
For the rest of the top support boards, router a 3/4″ deep by 1/2″ wide groove in the center of one side. Stop the groove 5 1/4″ before the end of the board.
Router the groove out in passes taking a small amount of wood out with each pass to prevent chipping.
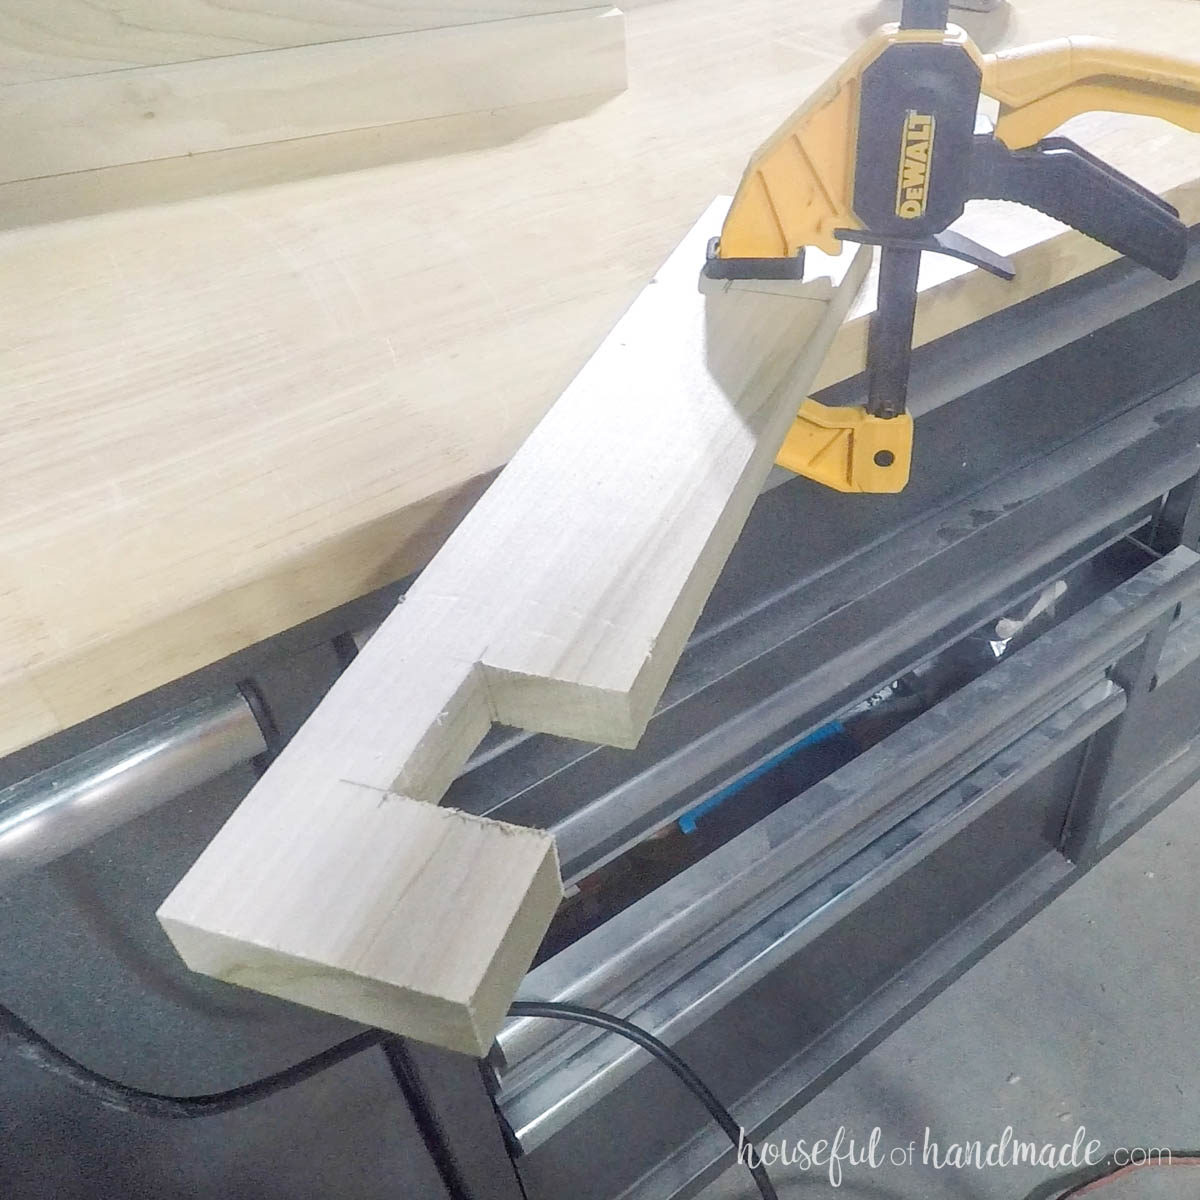
On one of the top frame side boards, measure out a 1 1/2″ x 1 1/2″ notch 1 1/2″ in from each end and cut out with a jigsaw.
Place the completed leaf support in the notches and make sure it fits and has room to slide easily.
Make sure the top of the notches are flush with the top of the leaf supports.
With your Kreg Jig still set for 3/4″ thick material, drill 2 pocket holes each end of the top support boards on the opposite side from the groove.
Only drill a pocket hole for 3/4″ thick material to prevent drilling through the grooves.
Attach two of the support boards to the outside of the side frame board with the notches so they are flush with the top and the outside edge.
Secure with 1 1/4″ pocket hole screws and wood glue.
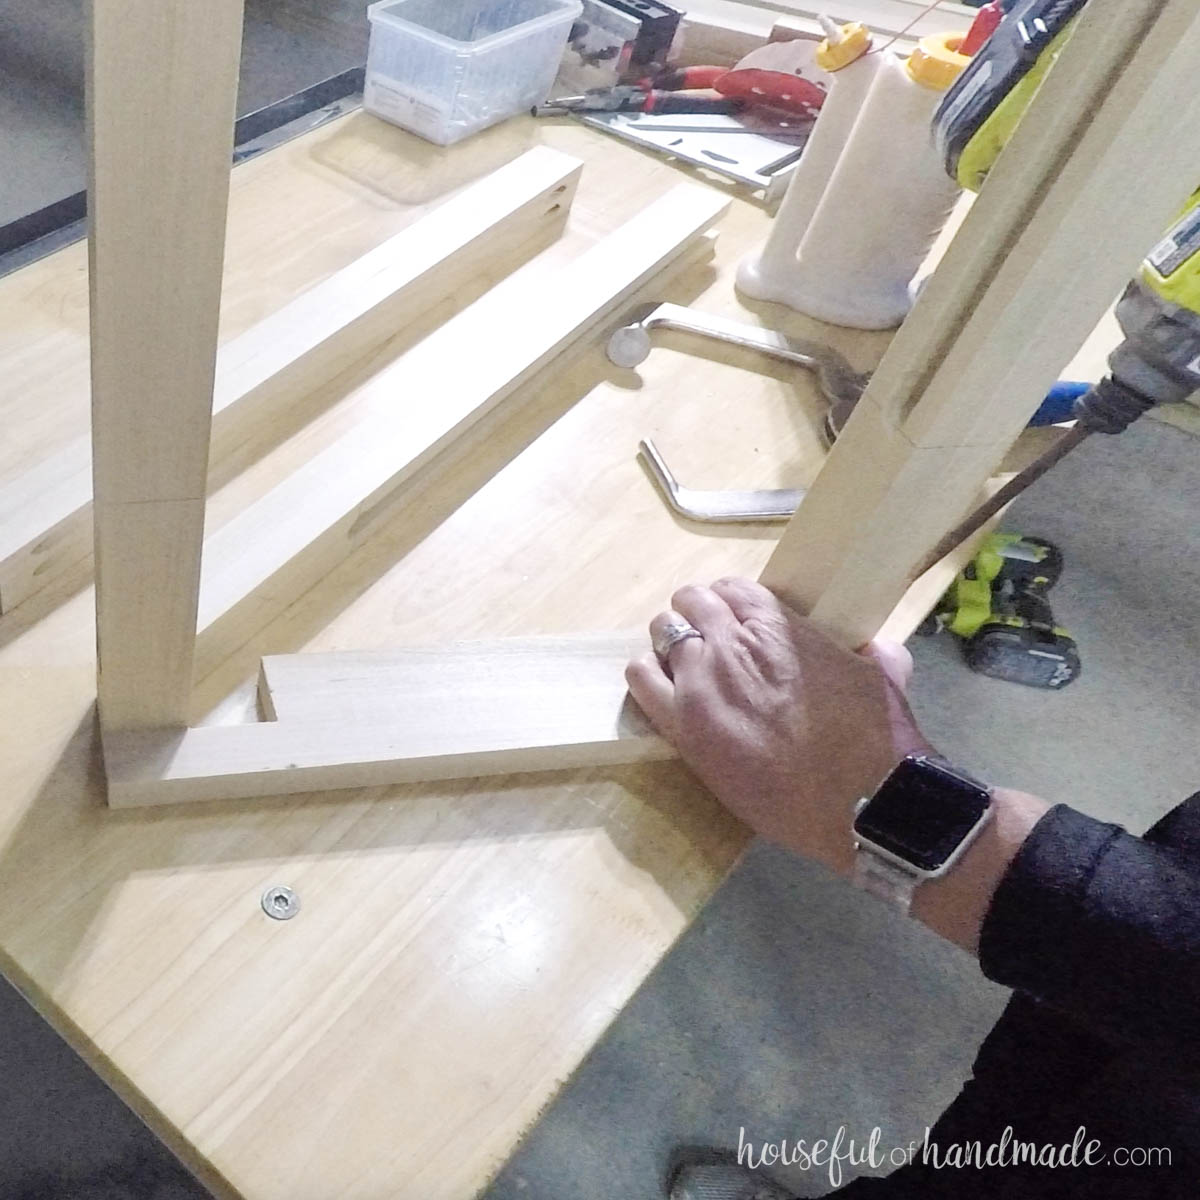
If you want to stain/seal/paint the leaf support, you need to do it before inserting it into the frame. The rest of the frame can be stained later if you want.
Slide the dowels on the leaf support into the groves on the back of the frame and lay the handle on the outside of the side frame so the boards sit into the notches.
Attach the other top support boards with the grooves so the side with no groove is attached to the board with the notches.
Slide the dowels into the groves and hold the support boards together, but not too snugly so the leaf support can slide in and out.
Secure with wood glue and 1 1/4″ pocket holes.
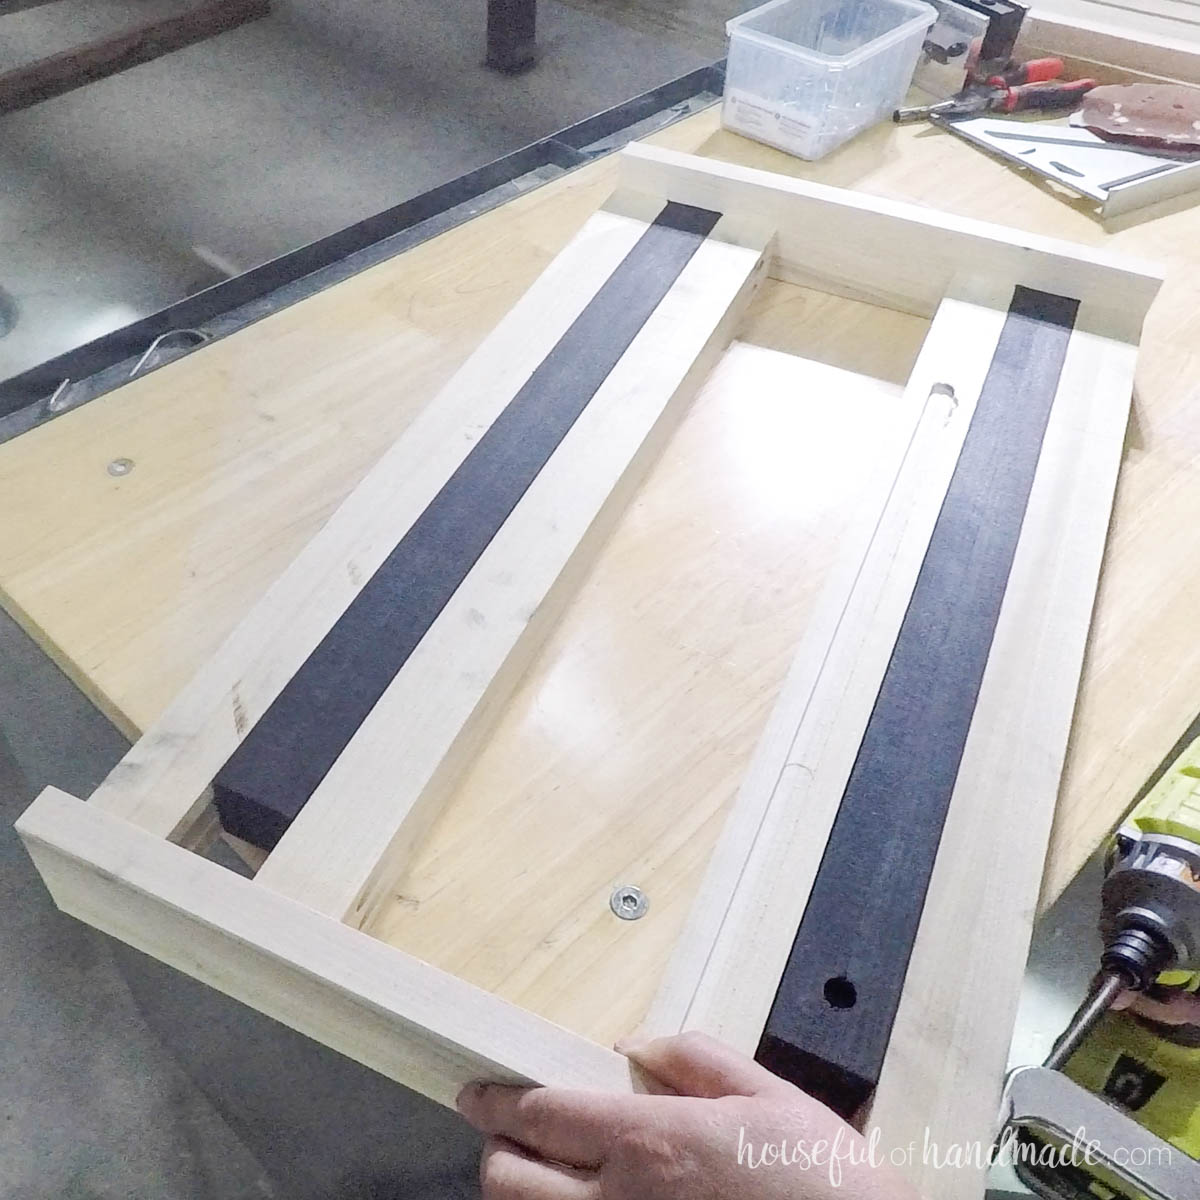
Attach the other frame side board to the end of the top support boards so the outer boards are flush with the edges and the top is flush.
Secure with wood glue and 1 1/4″ pocket hole screws. Double check that the leaf support still slides easily and adjust if necessary.
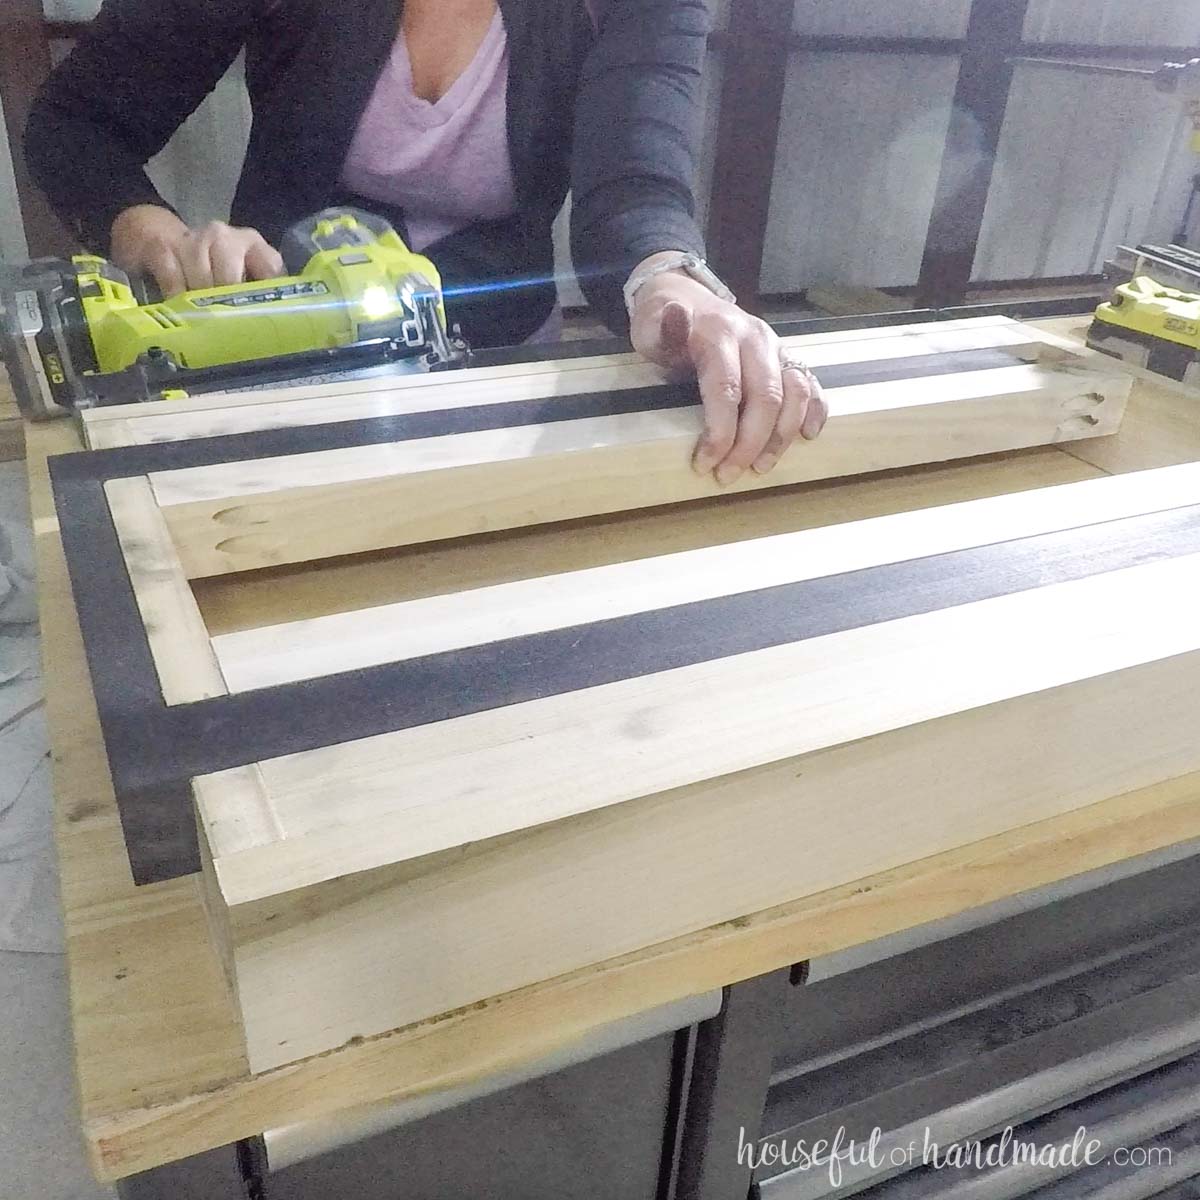
Then finish the top by attaching the top frame front/back boards to the sides of the top supports with wood glue and 1 1/4″ finish nails.
STEP 3- Build shelves
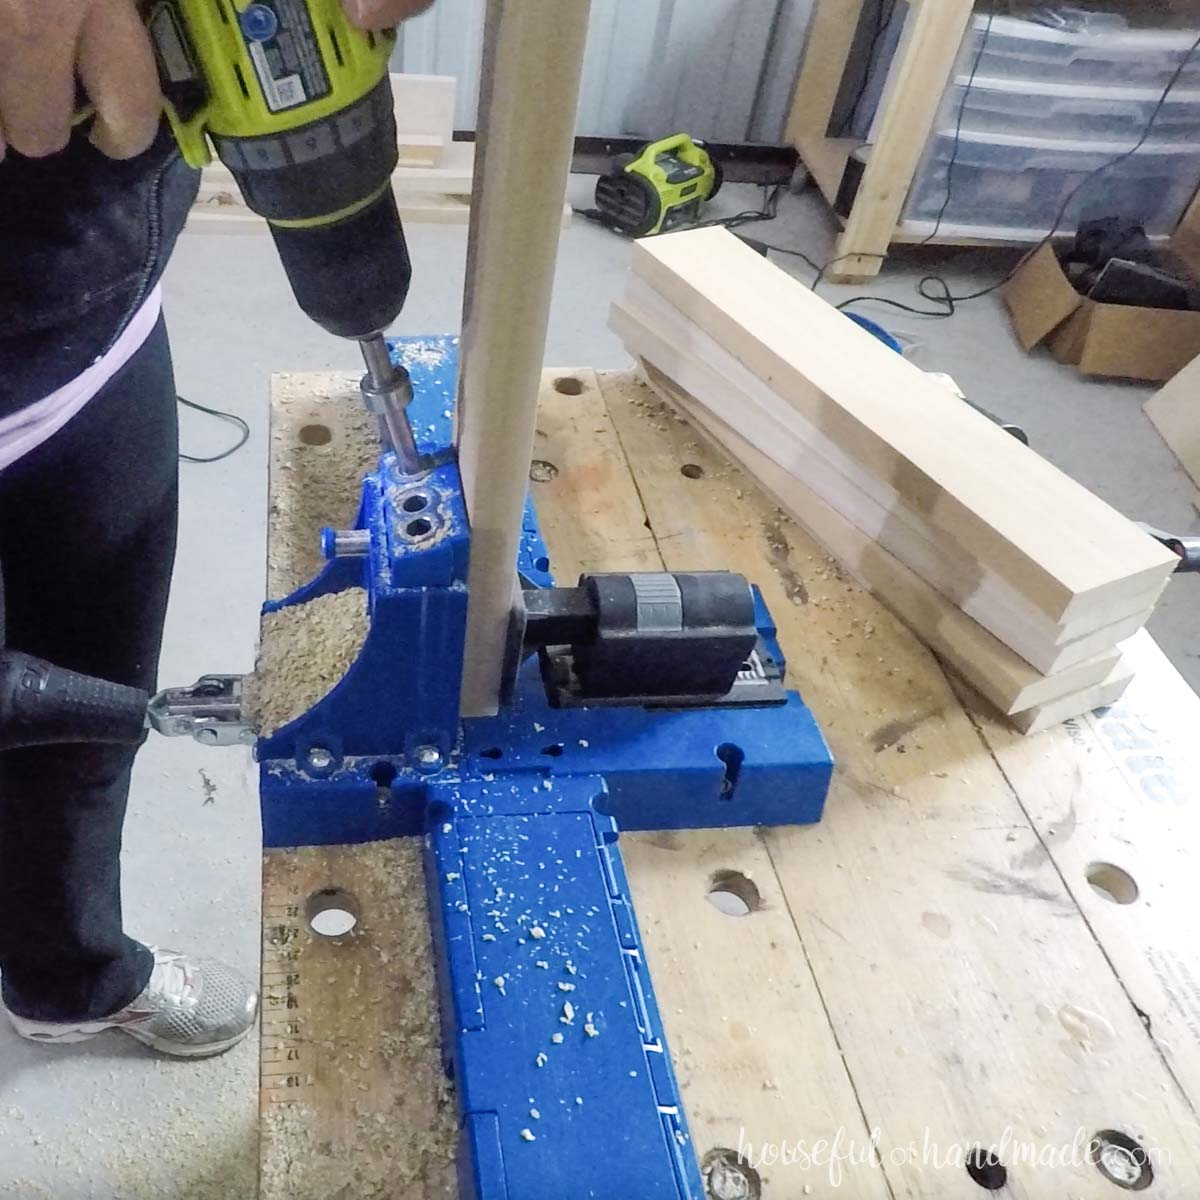
Drill pocket holes set for 3/4″ thick material in each end of the shelf slat boards.
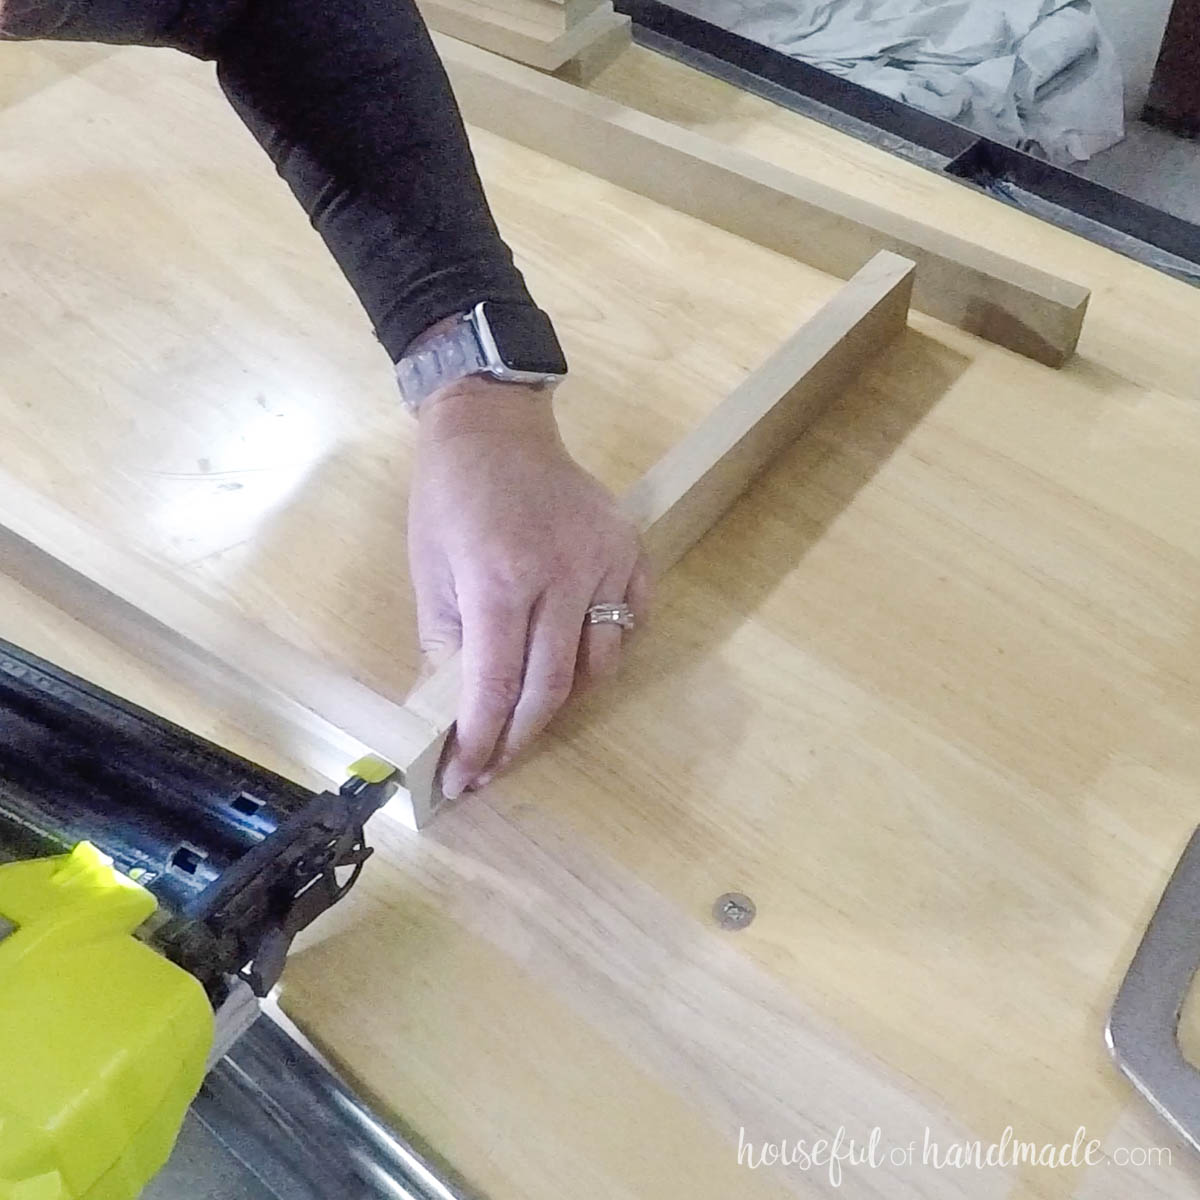
Attach the ends of the shelf sides with wood glue and 1 1/4″ finish nails.
They should be flush with the outer edge of the front/back boards.
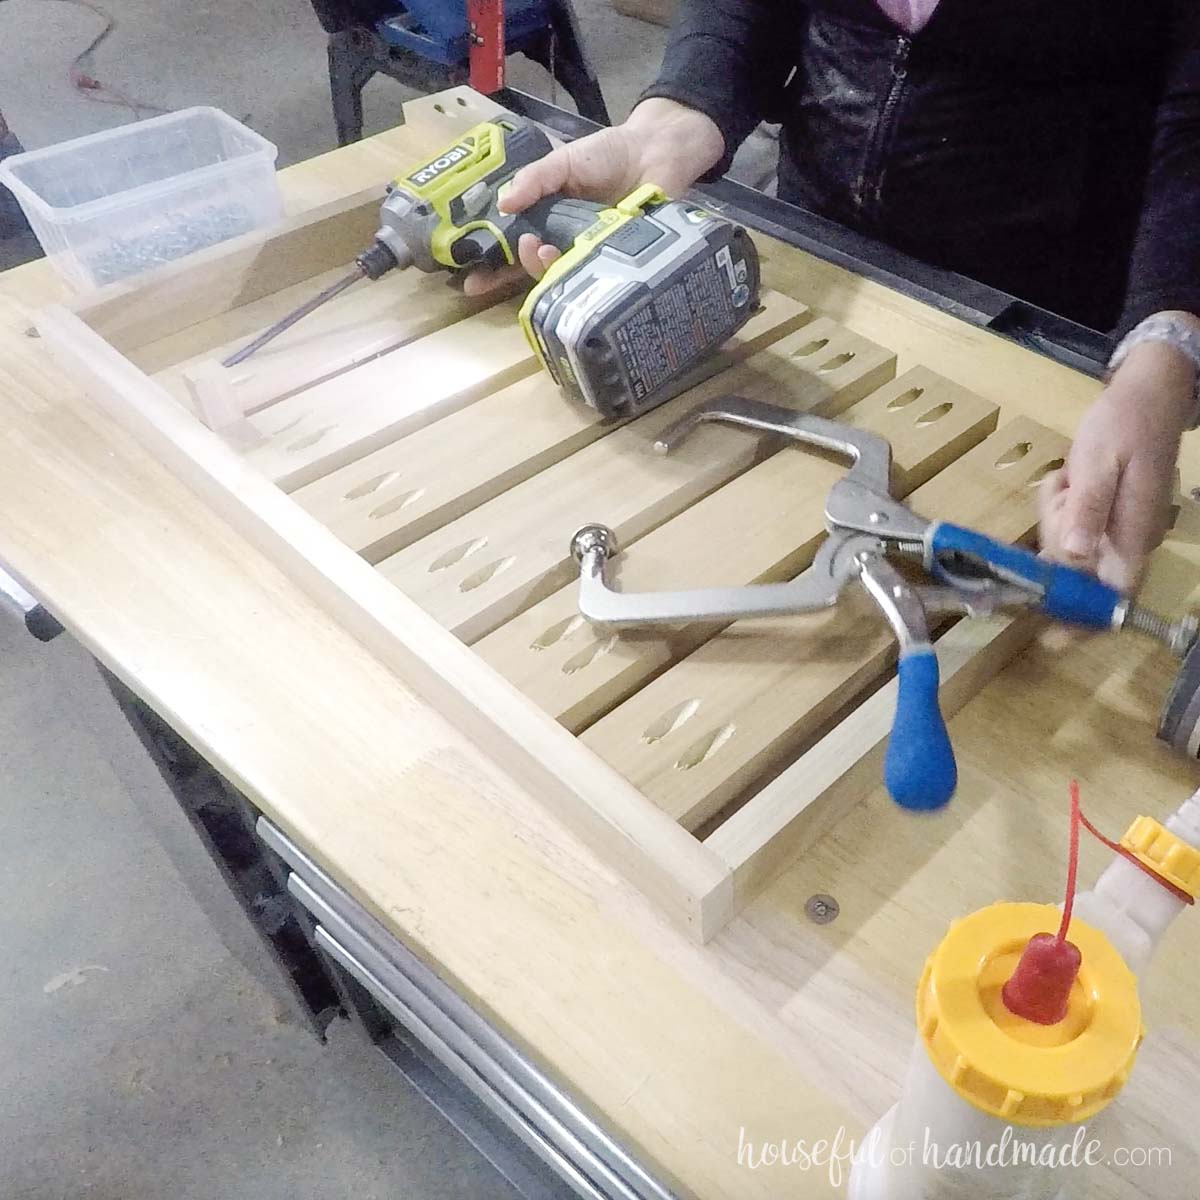
Then attach one end of the slat boards to the shelf front/back so they are flush with the bottom with a 5/8″ gap between them.
Attach the other shelf front/back board to the other end of the shelf.
Secure with wood glue and use finish nails on the side boards and 1 1/4″ pocket hole screws on the slat boards.
Repeat for the second shelf.
STEP 4- Assemble the cart
Cut the aluminum angle with a metal blade on a jigsaw or miter saw.
If you want to paint the aluminum angle, use an Etching Primer spray first then finish with any color spray paint you want.
Also, spray paint the heads of (24) 1 1/4″ pocket hole screws to match.
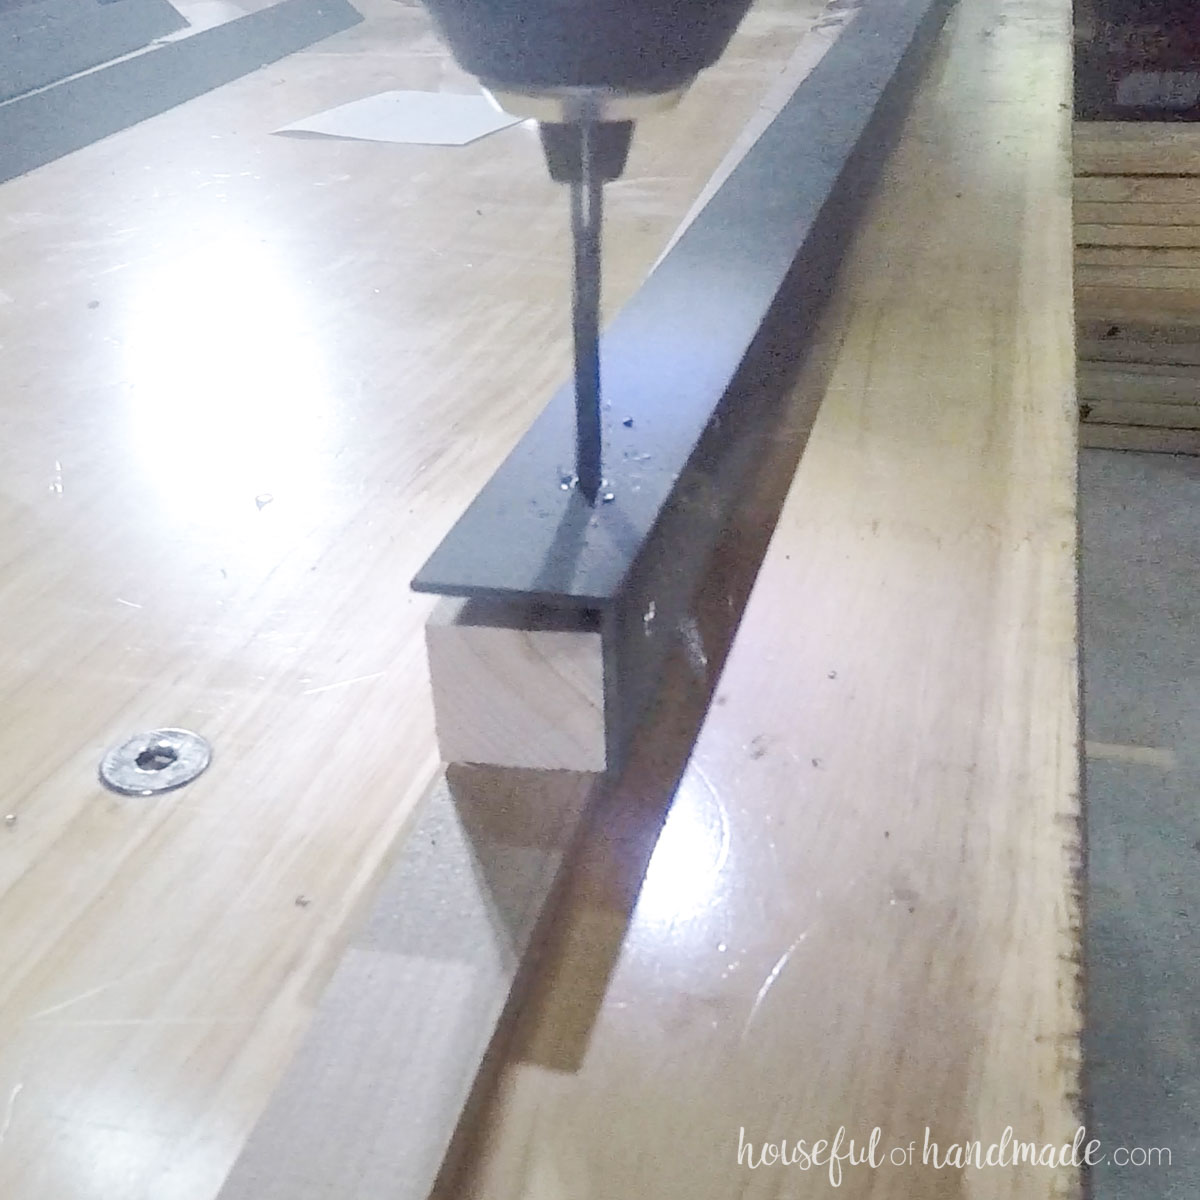
Drill holes in the angle iron where you will be attaching your top and shelves.
Use 1 screw on each side of the angle iron, making sure to offset them at least 1/2″ so the screws do not collide.
Attach the top frame so it is flush with the top of the angle iron.
Secure with the painted screws.
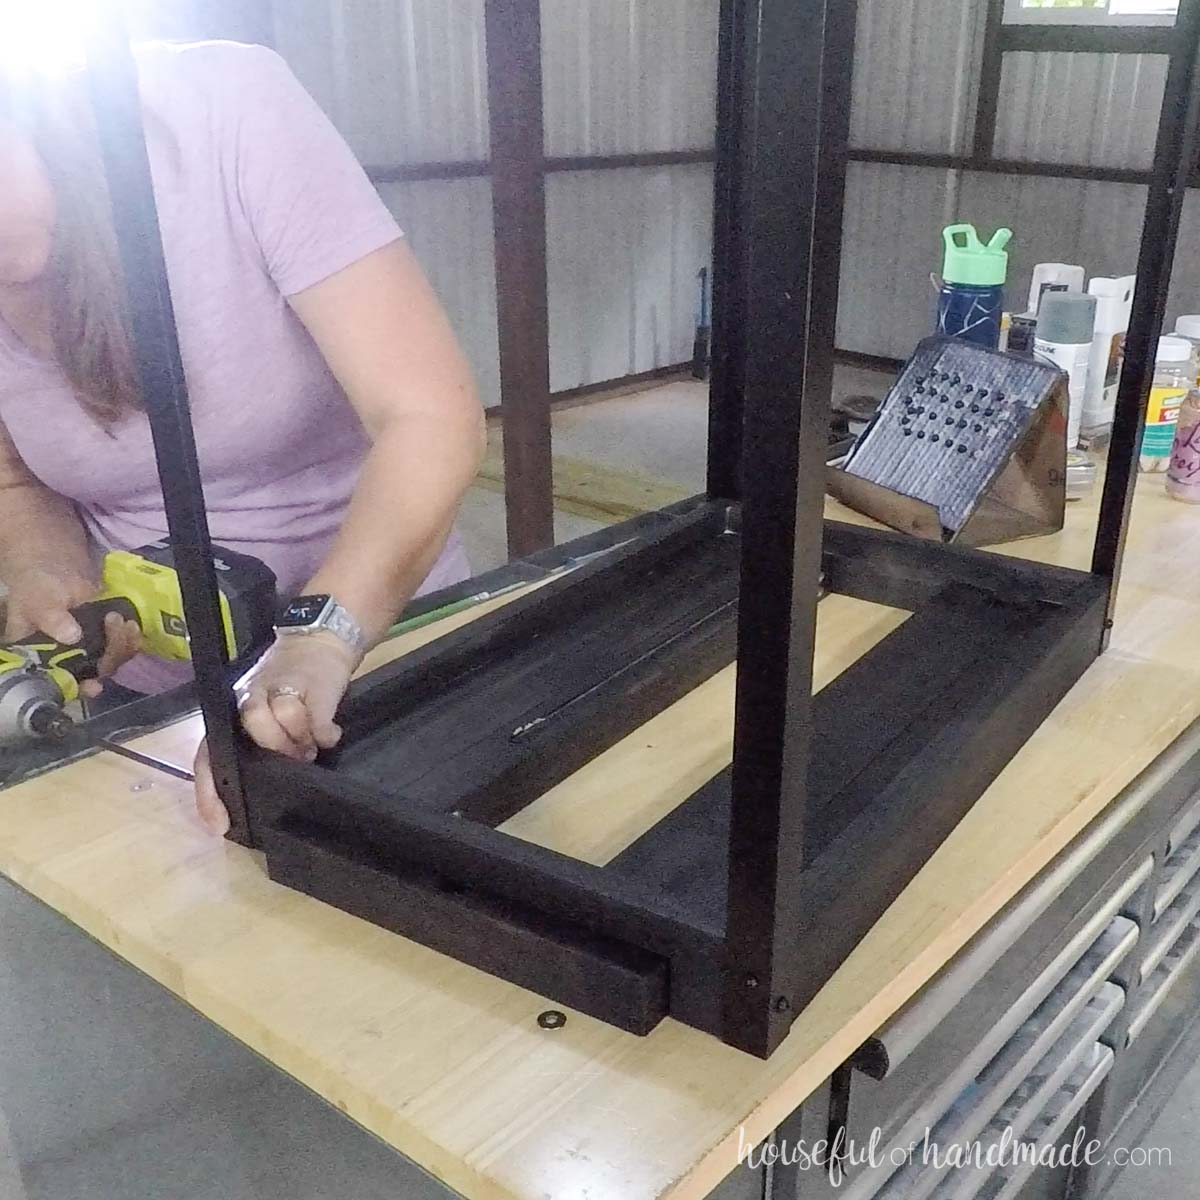
Then attach the bottom shelf so it is flush with the bottom.
The center shelf can be adjusted to whatever height works best for you. Secure with the painted screws.
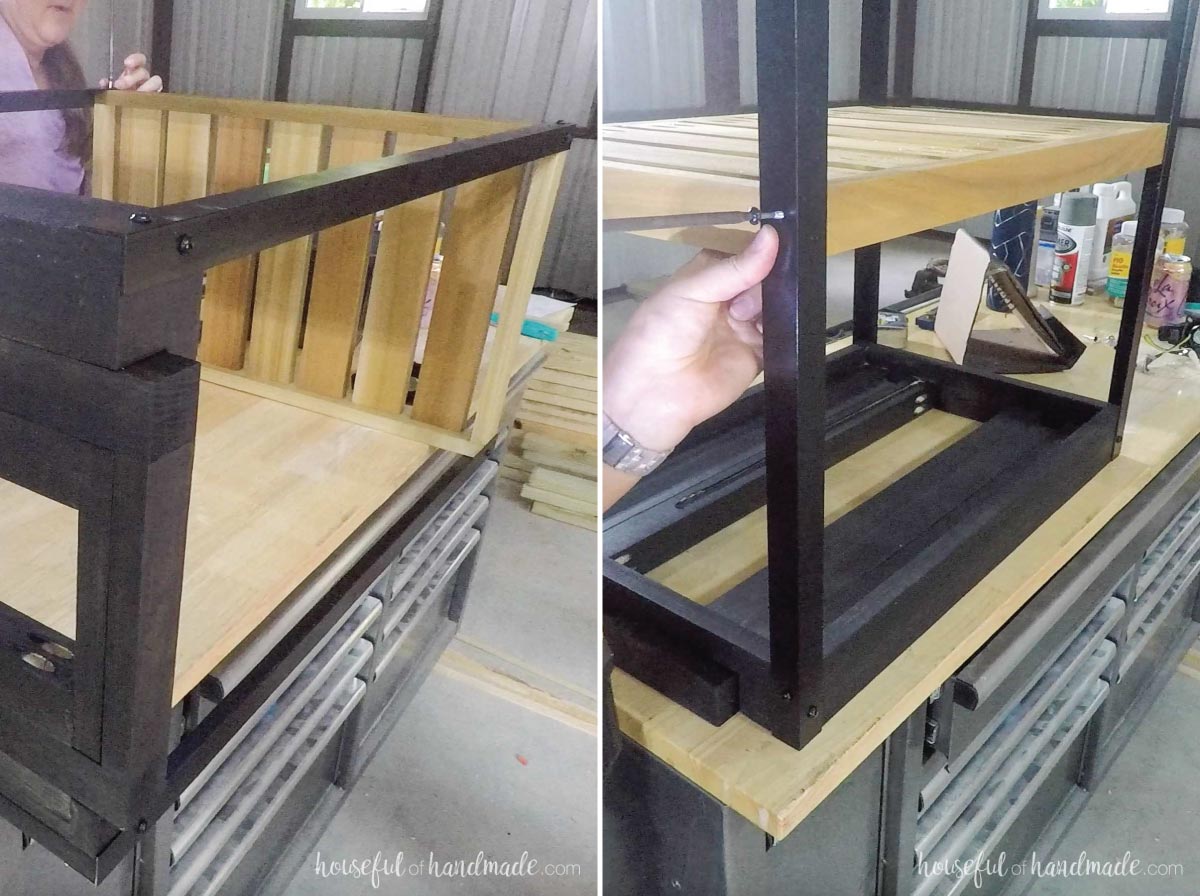
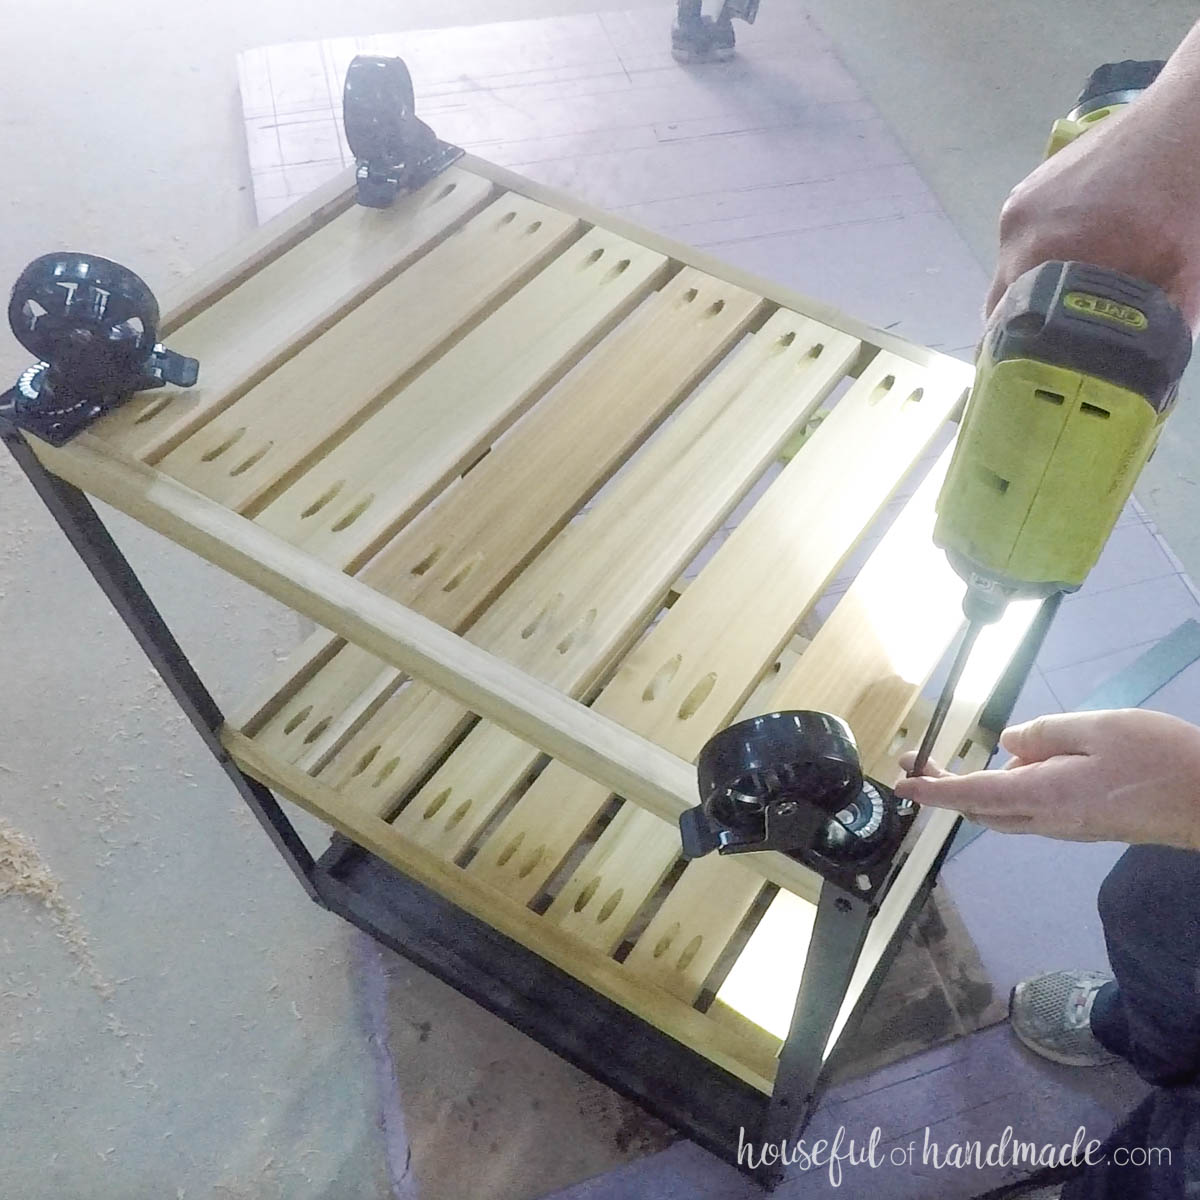
Finish the cart base by adding the castors to the bottom corners of the lower shelf.
Make sure to use locking castors so your cart will not move around while you are baking.
STEP 5- Build and attach top
Glue up the 3 pieces of the table top and leaf top boards together to create a 16 1/2″ wide board.
You can use pocket holes set for 3/4″ thick material in the sides of 2 of the boards to secure them like I did for this DIY nightstand top.
I used some wider scrap maple boards to build my table top and held it together with biscuit joints and wood glue to avoid visible pocket holes on the leaf.
But you can also use the pocket hole method and fill the holes with plugs.
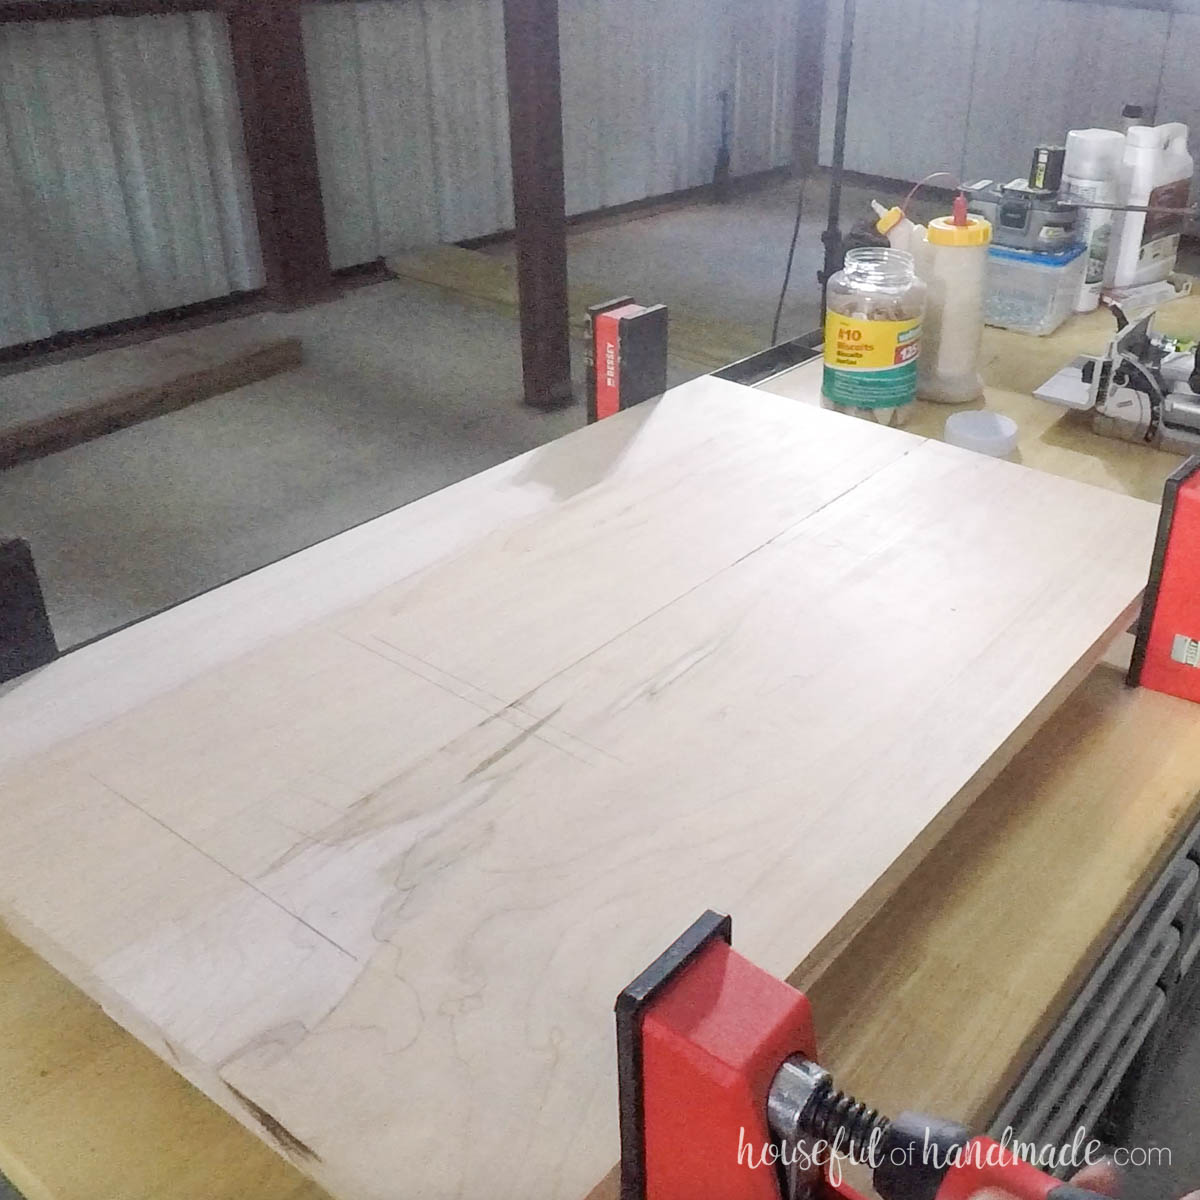
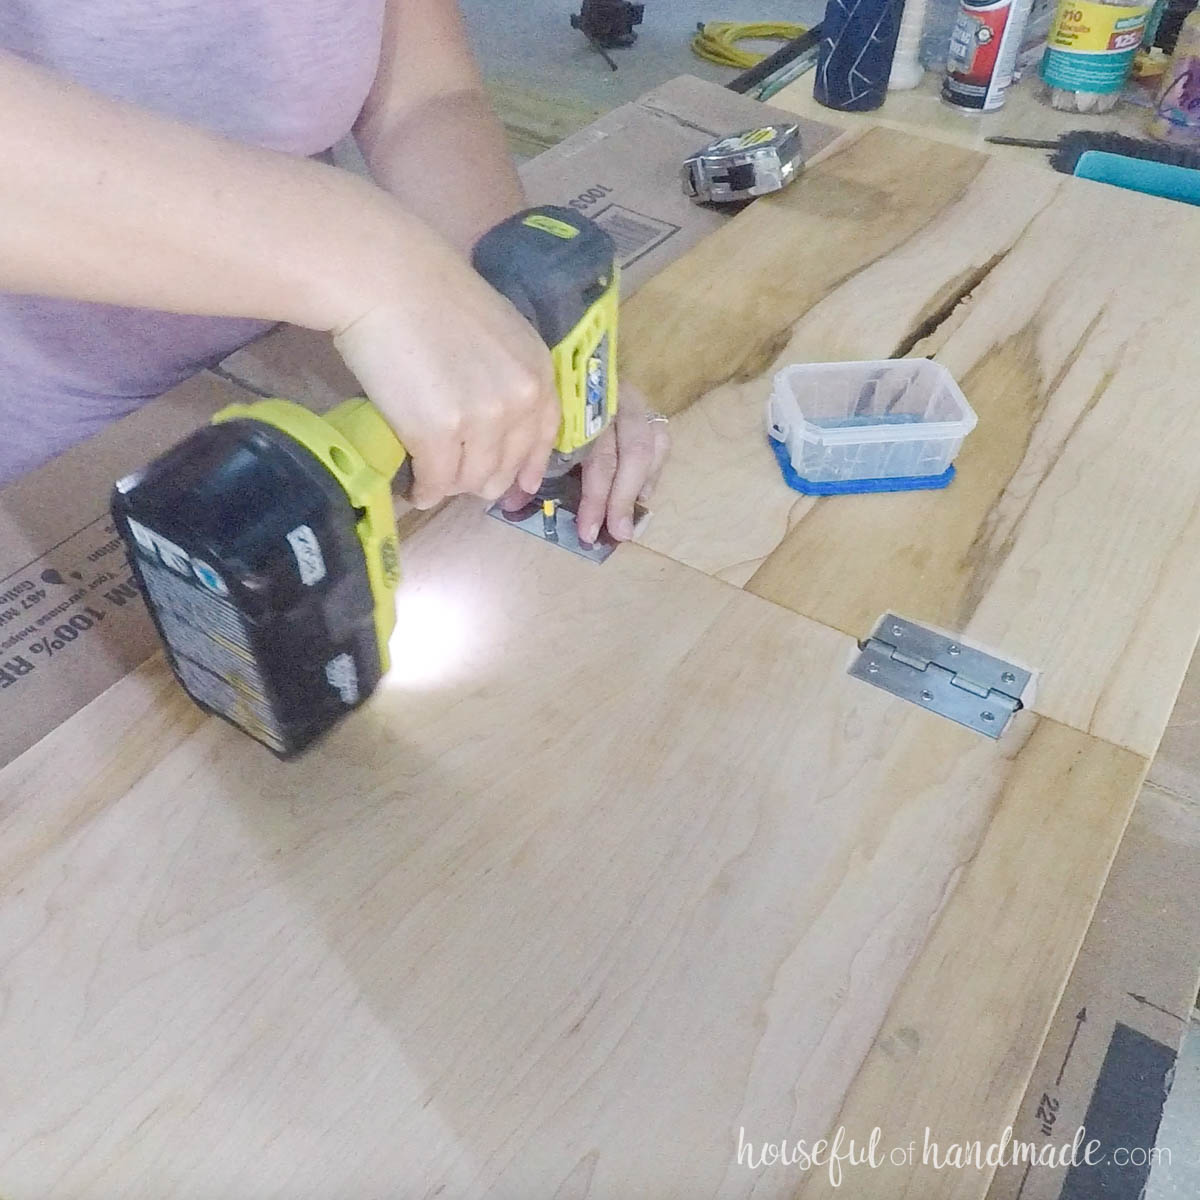
To be able to fold down the leaf, you will need to attach 2 hinges to the underside of the assembled table top and leaf pieces.
These pieces will need to be routed out to fit the hinges flush with the bottom of the boards. Measure where the hinges will be and first router a space the thickness of the hinges.
Then mark where the center of the hinge is and router a deeper groove for it to sit inside.
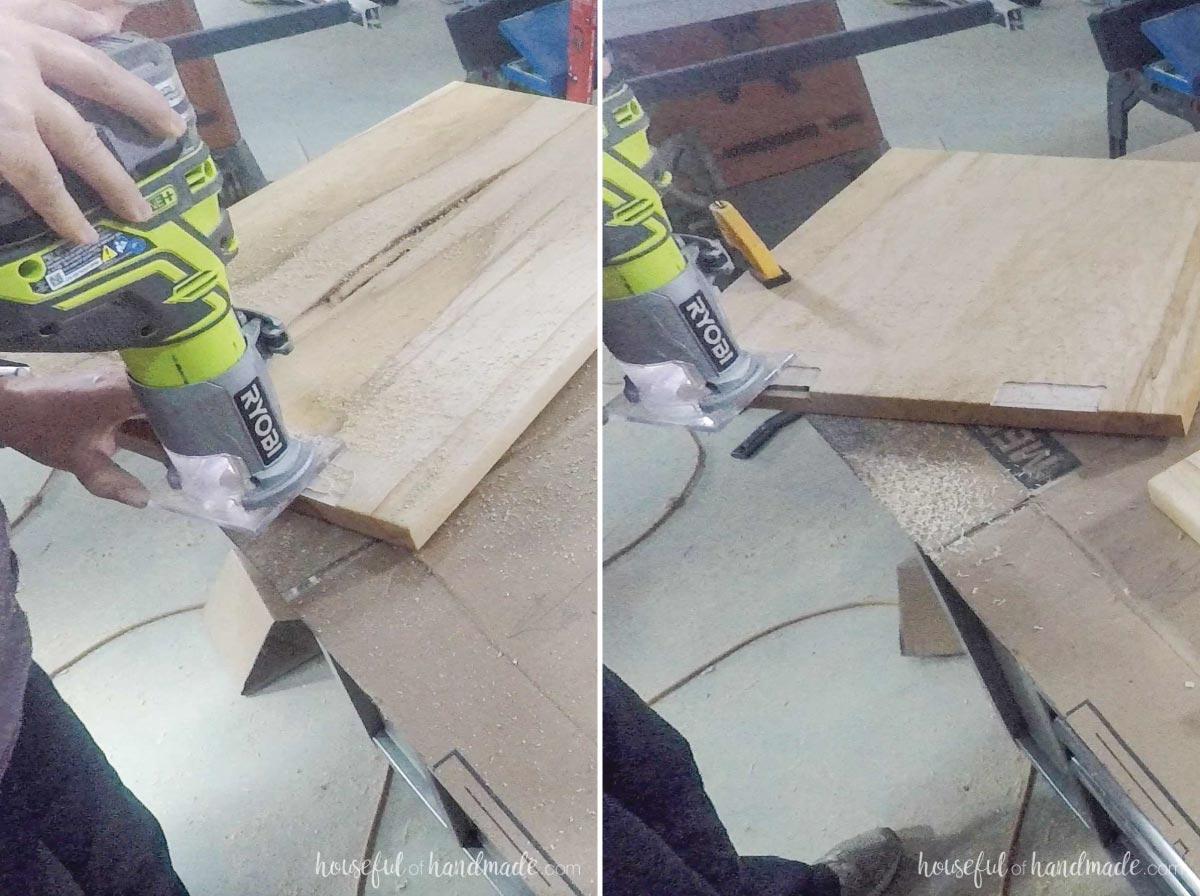
Also, to ensure the top pieces open properly, router a chamfer on the bottom edge where they meet to allow them to pivot.
Then attach the hinges with screws.
Drill holes to attach 4 figure 8 fasteners in the inside of the top frame and support boards.
I added the fasteners in the inside toward the leaf side and behind the leaf support on the other side.
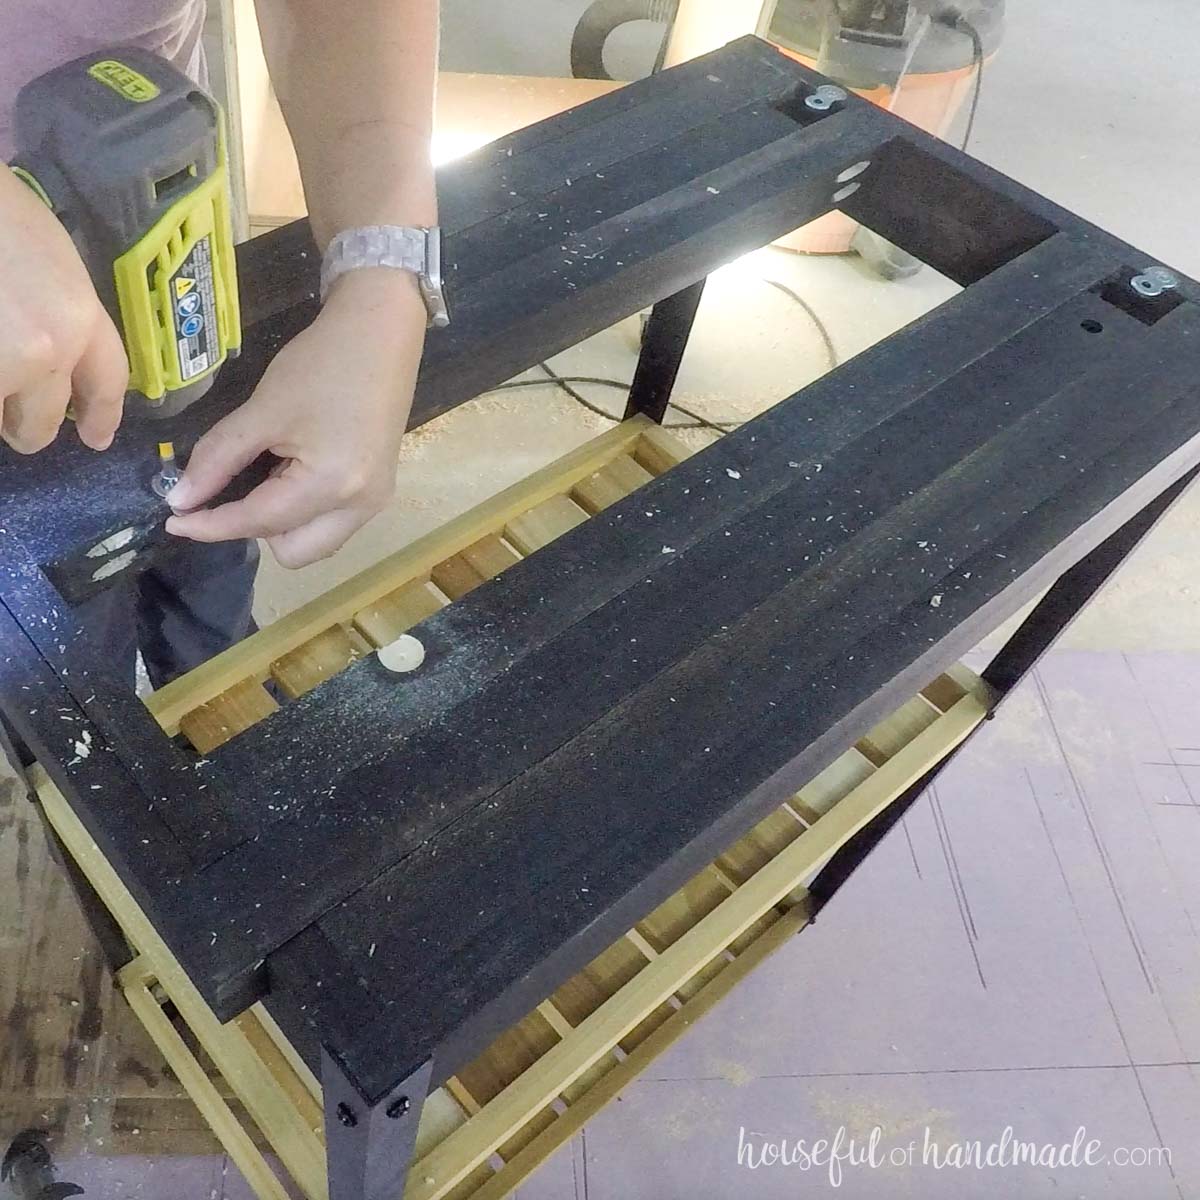
Attach the table top/leaf to the top of the baking cart so the non-leaf side has a 1/2″ overhang and the front and back have a 3/4″ overhang.
Be careful not to tighten them too tight or the leaf support will not slide easily.
Test the leaf lifting and sliding and adjust the hinges or leaf support if necessary.
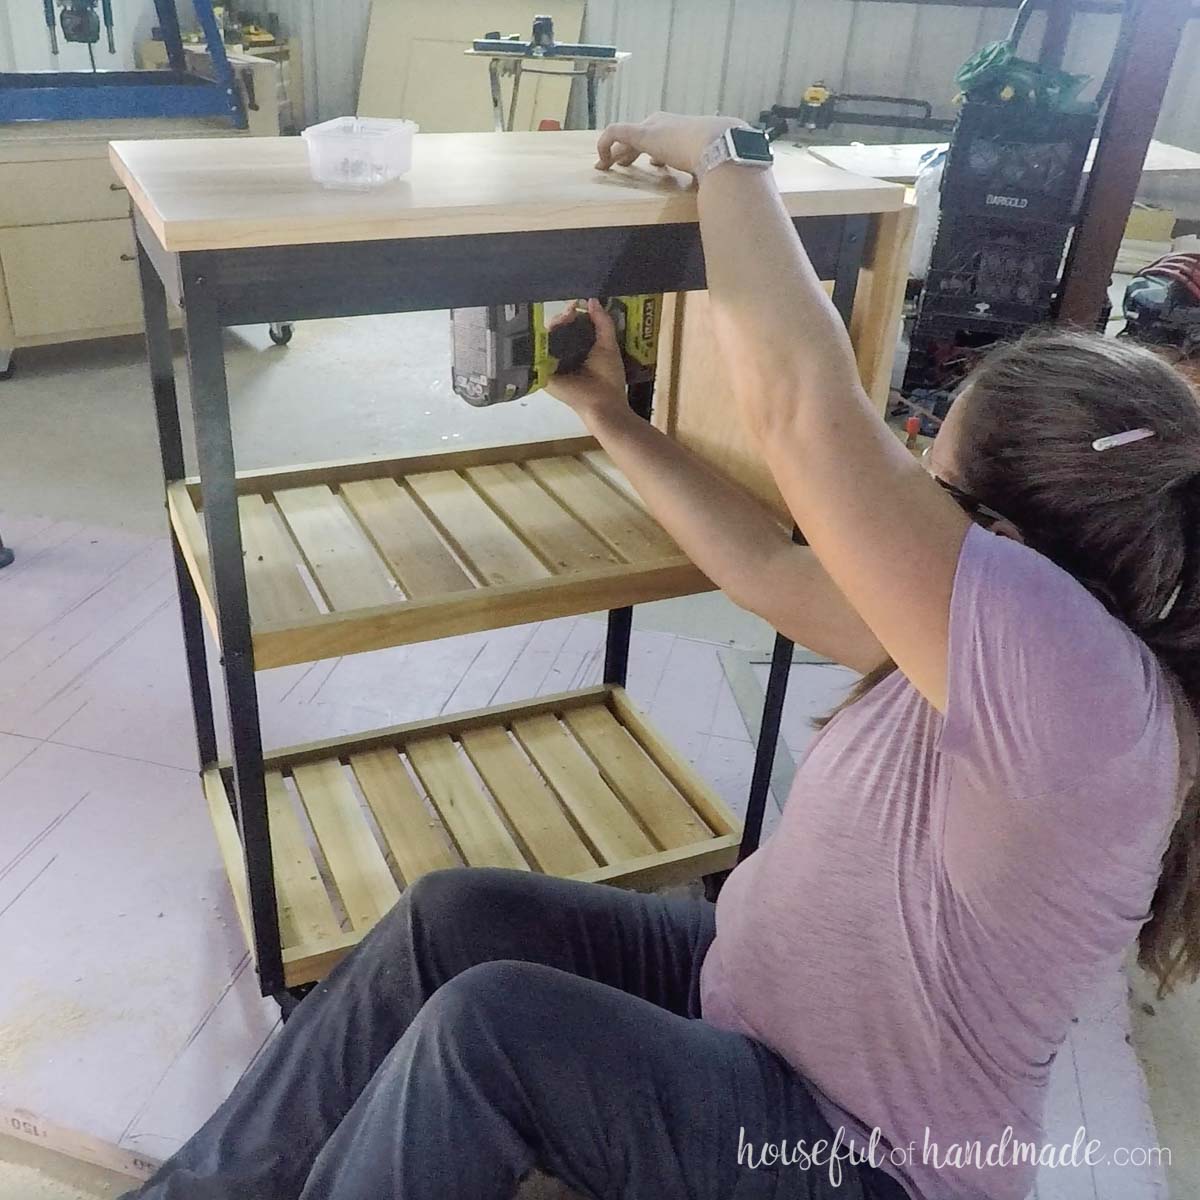
And you did it!
Now you can load your new baking cart. I love that my mixer can be left on here and rolled out of the way when not in use.
Pull the leaf support out to hold the leaf while using it for lots of extra space.
Happy Building!

Thank you to Kreg Tools for sponsoring this post. I only recommend products that I use and love and all opinions are 100% my own. Click here to read my full disclosure policy.
