Build an art easel for kids for hours of creative play this summer!
My daughter is an artist! She draws and paints on every piece of paper she can get her hands on. But I needed a way to contain her art a little bit, and make the perfect creative space for her.
So I partnered with Kreg Jig and their new project plan site, BuildSomething.com, to bring you the plans for the perfect art easel for kids. Why is it so perfect? Well, for starters, it is and easy build made from just 1 sheet of plywood.
Features of the Art Easel for Kids
Let’s take a minute to highlight all the amazing things that are included in this easy DIY easel!
This post may contain affiliate links. As an Amazon Associate I earn from qualifying purchases. Click here to read my full disclosure policy.
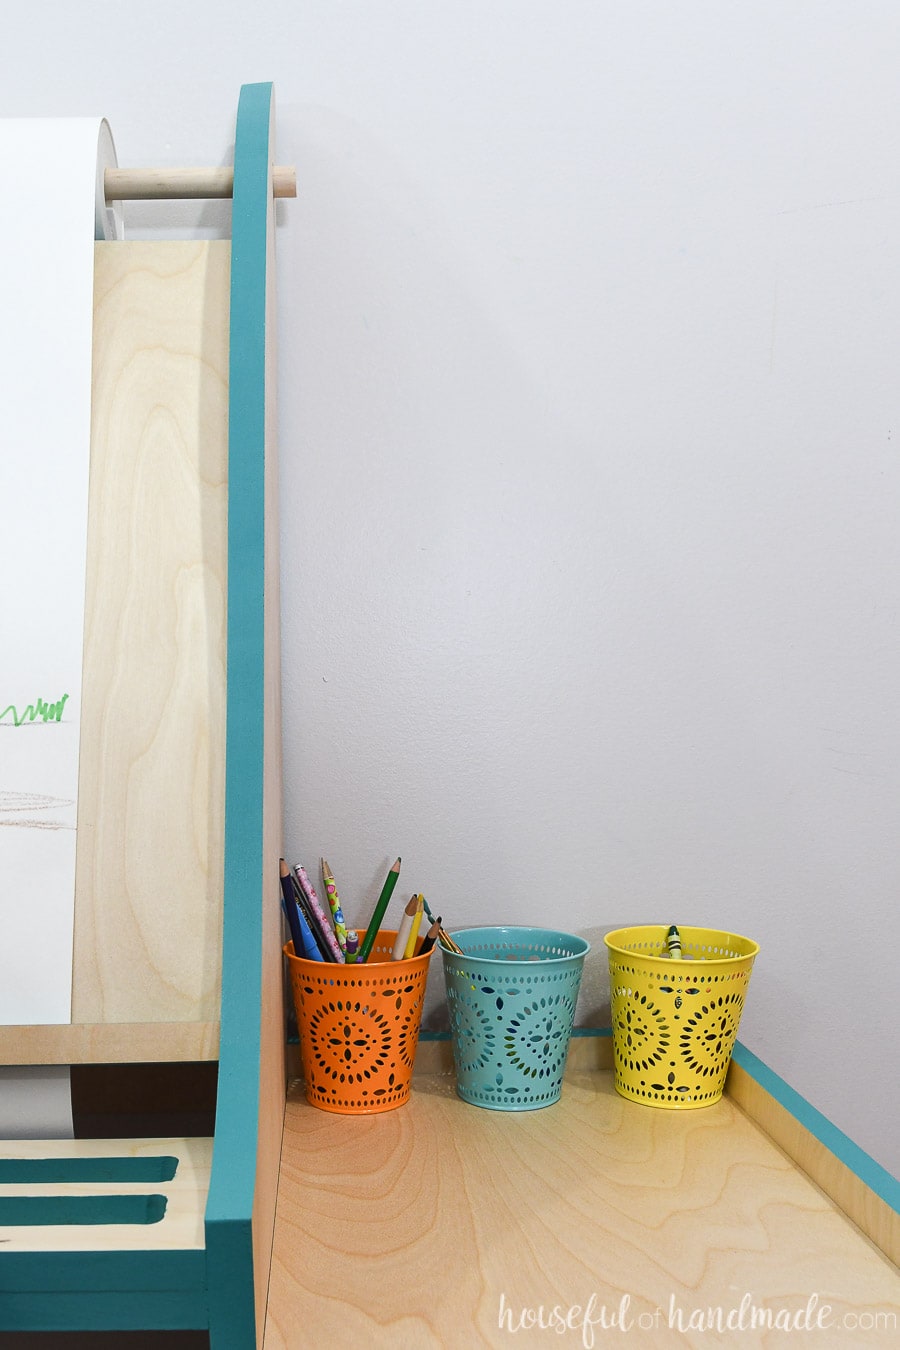
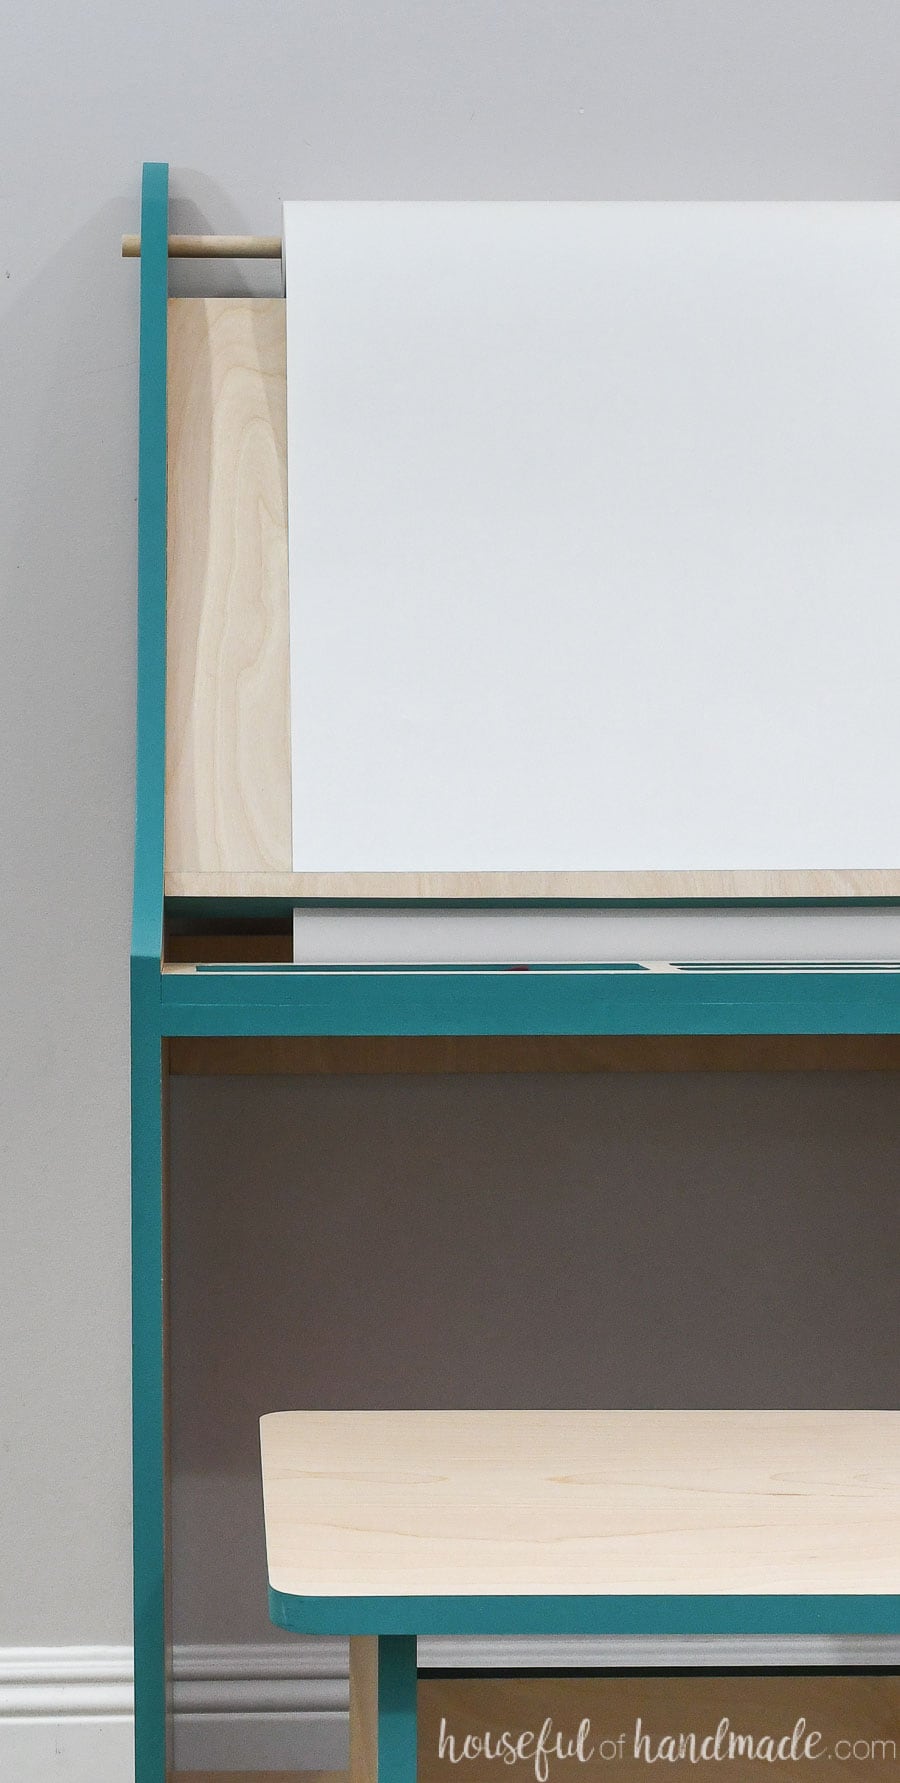
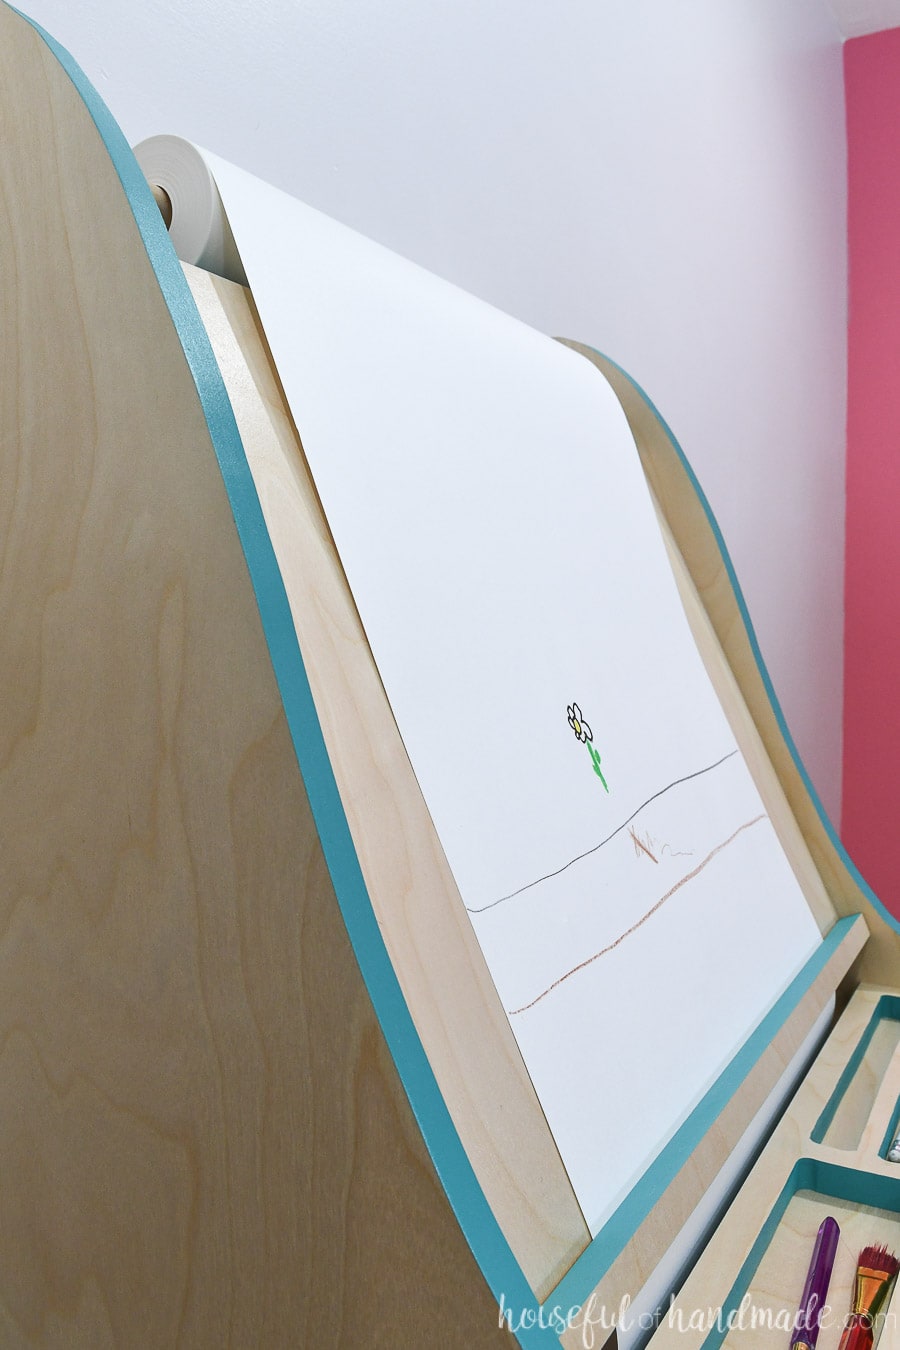
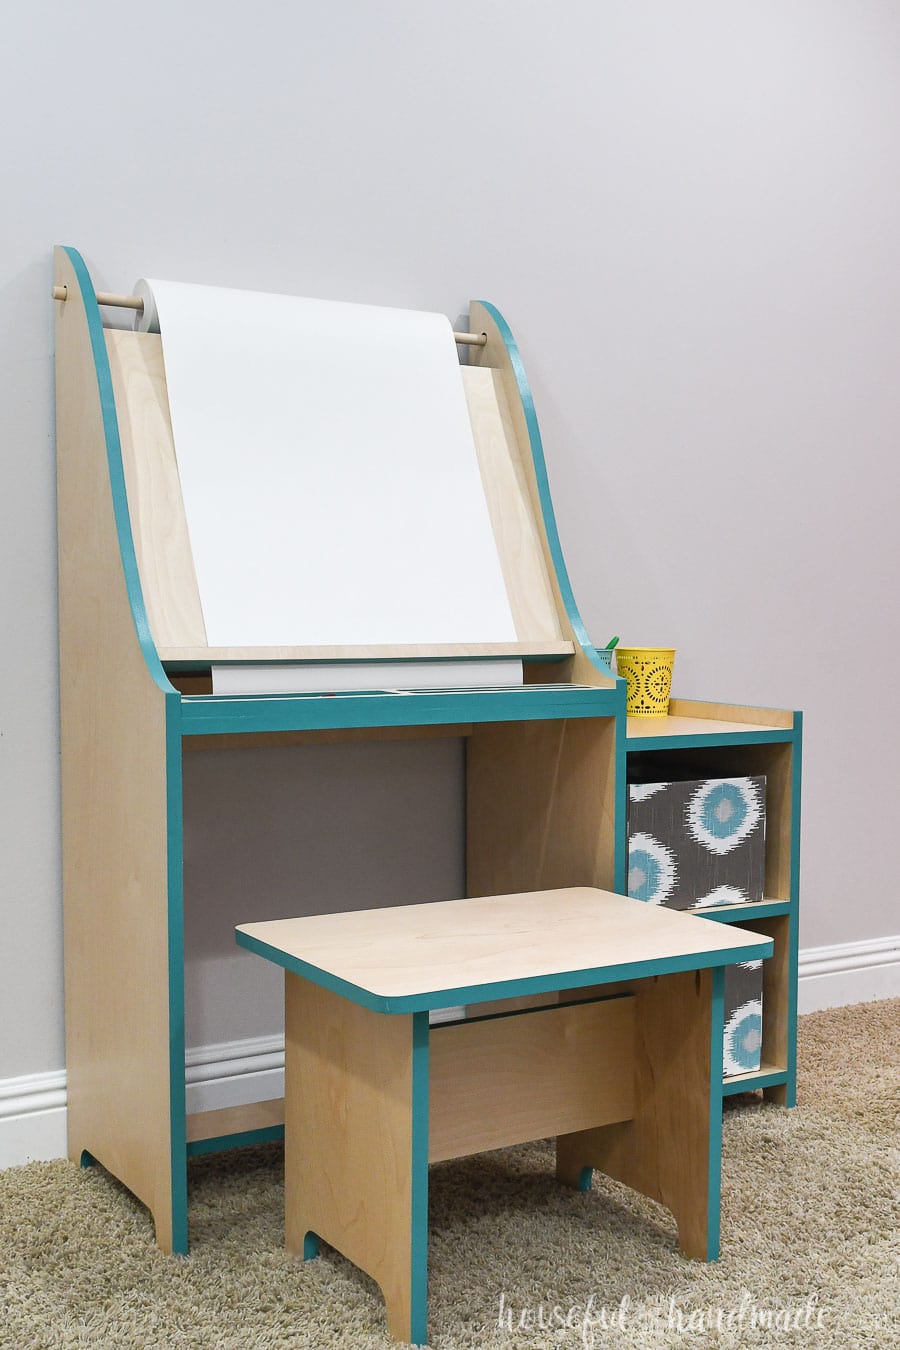
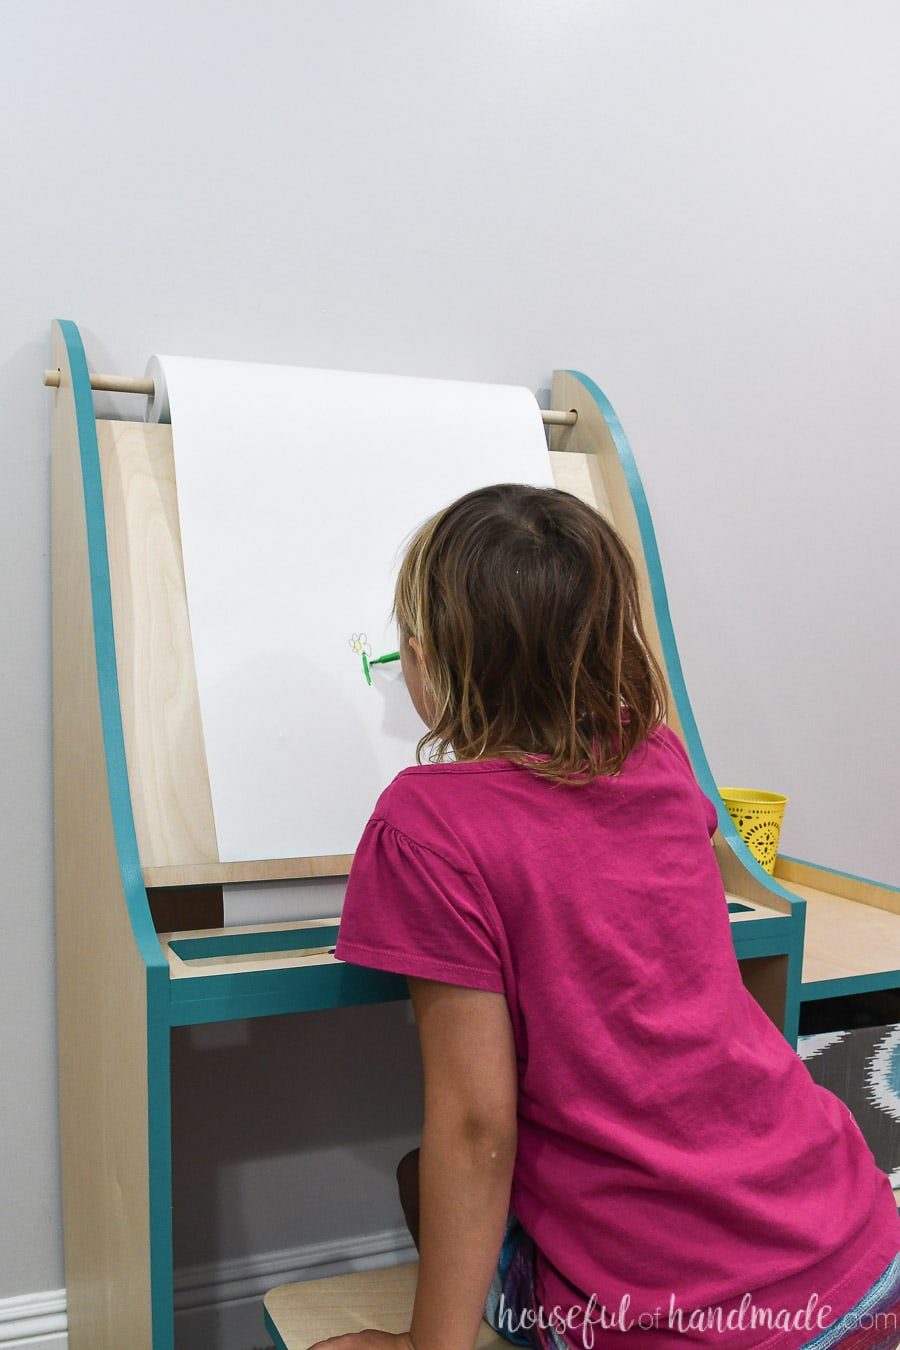
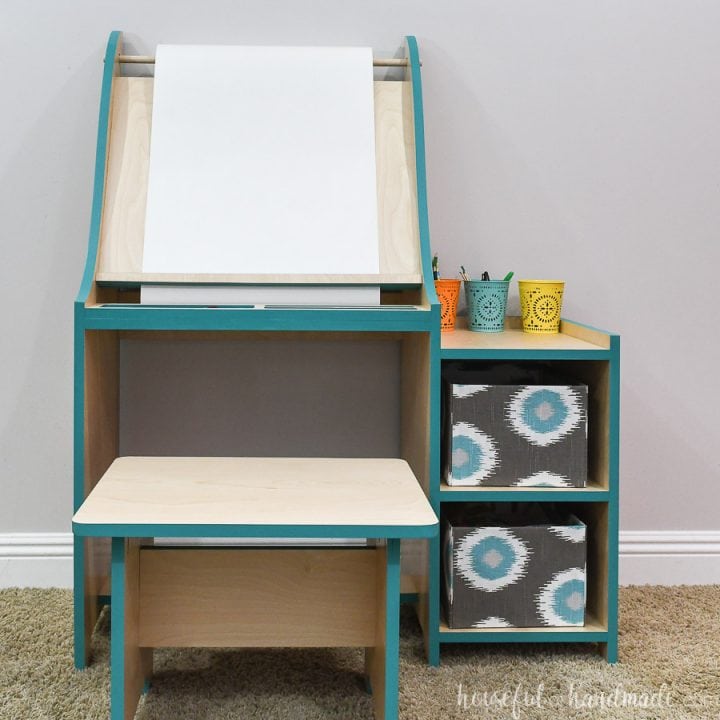
The top of the easel has a place to store a roll of paper allowing for endless art projects. And the bottom of the easel has a lip with a tiny gap behind it. The paper can slide right behind the lip to hold it in place.
Then when you are ready to remove your new art, use the lip as an easy way to tear the paper from the roll!
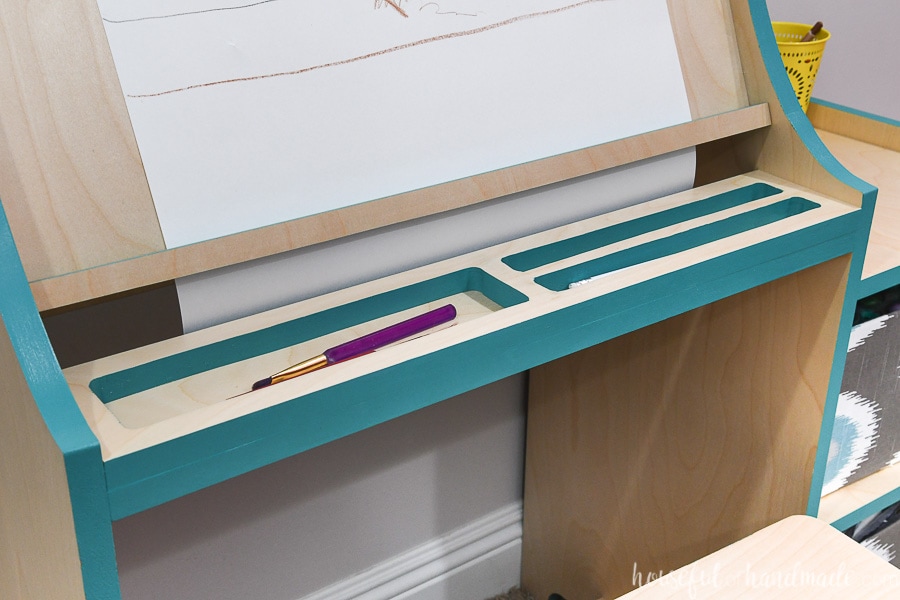
Under the easel is a cute little pencil tray. You can store all the pencils, paint brushes, crayons, etc. you are using for your art right in front of you making art even easier.
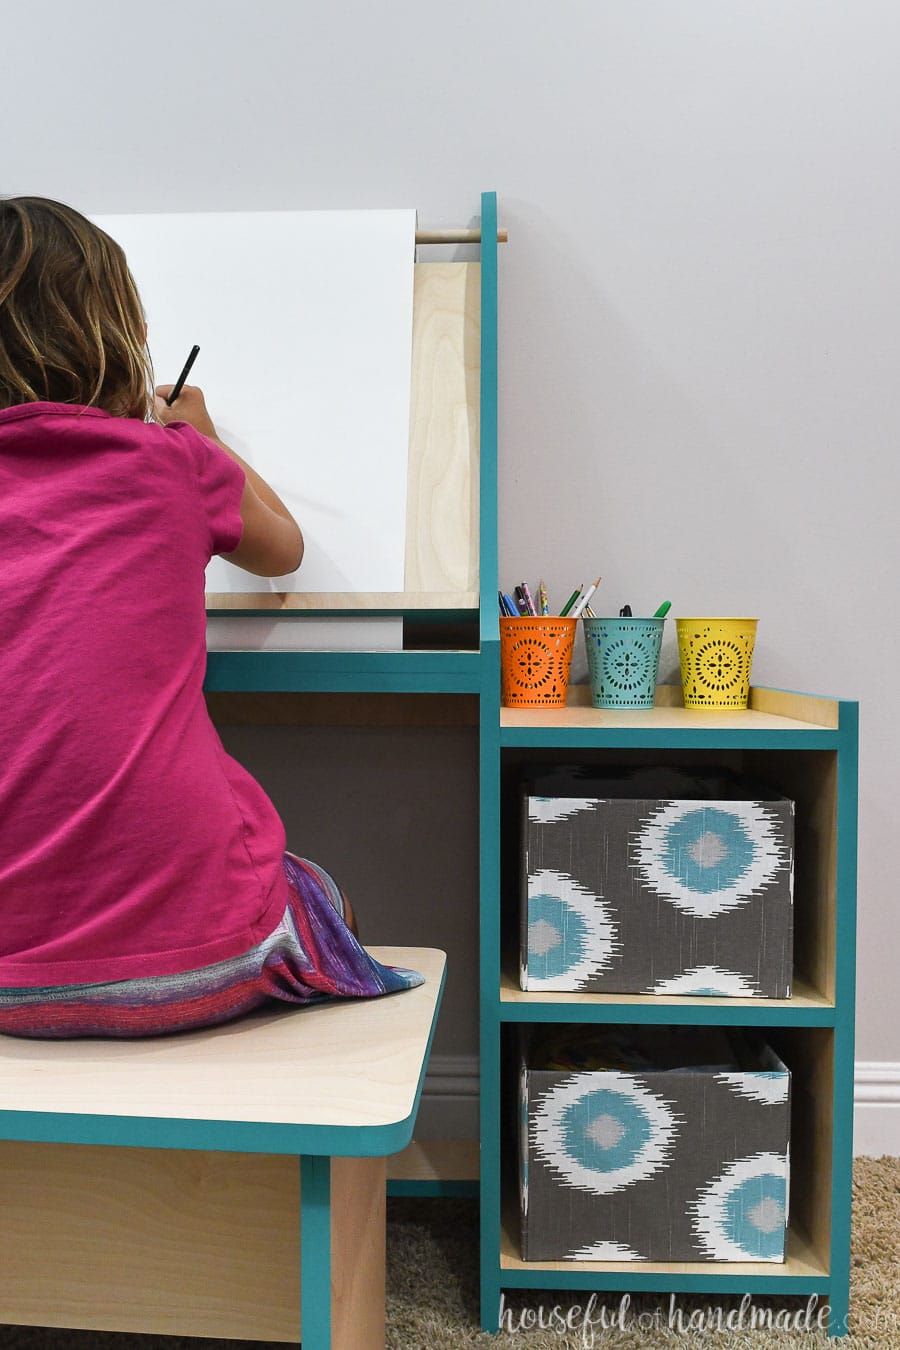
On the side of the art easel is a shelf cubby. Two large cubbies can hold baskets full of art supplies. I made these easy DIY fabric storage boxes from empty cardboard boxes.
The top of the shelf cubby has a little lip to it, making it the perfect place to store other art supplies in trays or cups. The lip will keep little fingers from accidentally knocking them off while being creative.
One Sheet Plywood Project
When I set out to design the easel for my daughter, I knew I wanted to make it easy. I wanted to make it easy enough for anyone to build. So I started by designing the entire art easel, including the bench, to fit on just 1 sheet of plywood.
There are many different options when it comes to plywood. I did not want to worry about edge banding the plywood, so instead of a typical plywood sheet which is 3 or more thin layers of wood bonded together with glue, we used an MDF (medium density fiberboard) plywood.
The MDF plywood is a core of MDF with a thin layer of hardwood on both sides.
The MDF cuts very cleanly. And unlike regular plywood that can have voids in the layers, resulting in holes in the cut edges, the MDF plywood has no voids and give you very clean edges.
But the MDF is not very pretty too look at. It is a cardboard brown color with no variation or grain to it.
I used this to my advantage! All the exposed edges of the project were painted a beautiful teal to really make the kids easel a piece of art of its own.
How to Easily Paint the Edges of the Plywood
Wanting to just paint the edges of your plywood project can seem like a daunting task. How do you keep the paint from the top and bottom of the plywood? Well, I have the perfect solution! Just follow these steps for you next plywood project to give your edges a pop of color.
- Measure out where your cuts will be, and before cutting them, place a piece of painters tape over the entire cut line so it will be split in half when cut.
- Measure again and mark you actual cut on top of the painters tape.
- Cut the plywood along the lines with a circular saw and guide track like the Kreg Accucut, table saw, or jig saw. Make sure to use a high tooth blade made specifically for cutting plywood.
- Repeat for any crosscuts in your plywood leaving all painters tape on the edges of the plywood.
- Fill any voids in the plywood edges with wood filler before painting, or use an MDF core plywood to eliminate voids.
- Gently sand the edges of the plywood. I like to use a sanding block for this.
- Before removing the painters tape, use a brush to paint the edges of the plywood.
- Let the paint dry and remove the tape.
- Sand the top and bottom of the plywood pieces with a 220 grit sandpaper to smooth the surface and remove any paint that may have bled under the paint.
- Build your project and then seal with your favorite sealer.
The painters tape will not only be cut perfectly to give the top and bottom of your plywood a precise line with the painters tape, but it will also help protection the thin veneer from chip out while cutting.
Of course, always use a blade specifically made for cross-cutting plywood to also reduce chipping.
DIY Easel
Besides making the art easel for kids from just 1 sheet of plywood, it is also made with very limited tools, making it a great project for any woodworker. Whether you are beginning to build, or have limited space for storing tools, this is a great project for you.
Even though I have a table saw, I always use a circular saw with the Kreg Rip-Cut and Kreg Accucut to break down sheets of plywood.
I just cannot easily and safely maneuver a large sheet of plywood on the table saw by myself. The Rip-cut and Accucut give me precise cuts, but then are easily stored away.
How to easily to break down a sheet of plywood without a table saw:
- Place a 2″ piece of rigid foam (purchased for about $20 at the home improvement store) on your large worktable or on the floor.
- Place the plywood sheet on top of it. Make sure the “top” of the plywood is facing the foam and the “bottom” is facing up. The cleaner cut will be the side of the plywood that is facing the foam because of how a circular saw blade cuts.
- For long rip cuts up to 24″ wide, place your circular saw in the Kreg Rip-cut. With the edge guide on the side of the plywood, slowly move the guide along the side of the plywood while cutting. If you are cutting thin plywood, let the plywood hang slightly off the side of the rigid foam so the guide follows the edge of the plywood not the foam.
- For wide cross-cuts of the plywood, measure out the cut line and make several marks along it. Line the edge of the Kreg Accucut up with the marks making sure the guide on the bottom catches the edge of the plywood. Place the circular saw in the Accucut cradle and then guide it along the guide track to cut.
- Continue to make rip cuts and cross cuts as needed until you cut out all the pieces of your project.
I have made many plywood projects using these steps to break down the sheet. My daughters handmade dollhouse for Barbies was made with just these tools to break down the plywood and a jig saw for small cut-outs.
Tools needed to Build the DIY Art Easel
Along with the circular saw with guide tracks for breaking down the sheet of plywood, there are just a few other tools needed to make your own easel. All of these tools are inexpensive and can easily be stored in a small space.
- Circular saw with guide tracks
- Kreg Jig- one of my favorite tools for easily making furniture with strong joints!
- Jig saw
- Drill (optional you can use an impact driver too so you don’t have to switch bits between drilling and driving screws)
- Measuring tape
- Clamps (not necessary but they sure do make building so much easier)
- Sander
And that is it! You can use other tools to make things quicker.
I like to use my table saw to break down the smaller pieces of plywood because I can set my fence once and then cut many pieces that need to be the same size. I also used my paint sprayer to quickly add the sealer to the finished easel.
These are definitely not necessary and you can easily make your own art easel for kids without it.

Kids Easel Plans
I hope I have convinced you to grab up some tools and get to building!
This fun kids easel is the perfect handmade gift or weekend project to give your kids something to entertain them that doesn’t have a power cord. My daughter has been holed up in her room for days creating lots of art.
Thanks to Kreg Jig, I am sharing the plans for this kids art easel for free on their new project plan site, BuildSomething.com.
Click here for the complete build plans.
How to Break Down Plywood without a Table Saw
You don't need an expensive table saw to break down plywood. Instead, use a circular with guide tracks to get fast and accurate plywood cuts.
Materials
- Sheet of Plywood
Tools
- Circular saw
- Kreg Accucut guide track
- Kreg Rip Cut guide track
Instructions
How To Break Down Plywood Without A Table Saw
- Place a 2″ piece of rigid foam on your large worktable or on the floor.
- Place the plywood sheet on top of it.
- For long rip cuts up to 24″ wide, place your circular saw in the Kreg Rip-cut.
- With the edge guide on the side of the plywood, slowly move the guide along the side of the plywood while cutting.
- For wide cross-cuts of the plywood, measure out the cut line and make several marks along it.
- Line the edge of the Kreg Accucut up with the marks making sure the guide on the bottom catches the edge of the plywood.
- Place the circular saw in the Accucut cradle and then guide it along the guide track to cut.
- Continue to make rip cuts and cross cuts as needed until you cut out all the pieces of your project.
Recommended Products
As an Amazon Associate and member of other affiliate programs, I earn from qualifying purchases.


And happy building!

Thank you to Kreg Jig for sponsoring this post. I only recommend products that I use and love and all opinions are 100% my own. Click here to read my full disclosure policy.