The hardest people in my life to make DIY gifts for are my teenage son and husband. They prefer video games and tech, which I cannot make.
So this year I decided to build something to help keep my son’s game controllers off the coffee table!
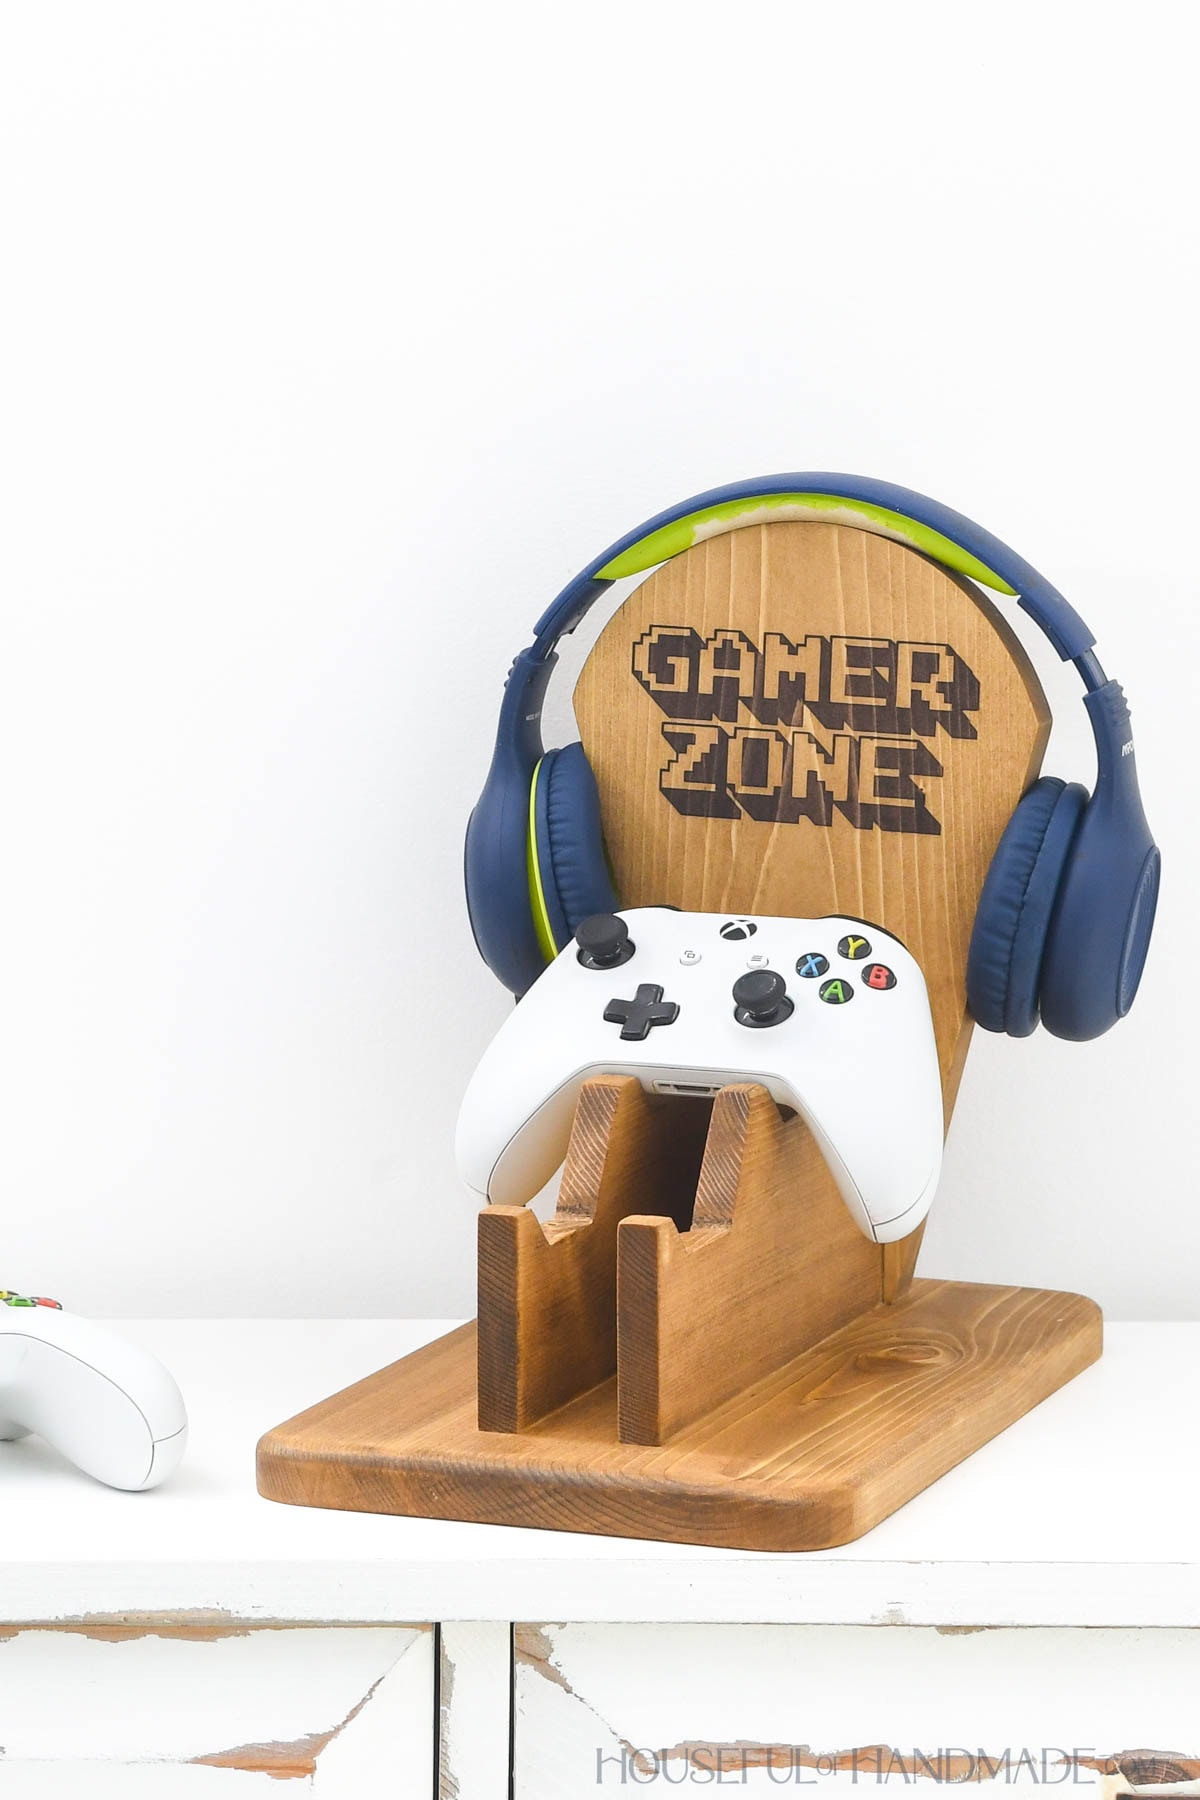
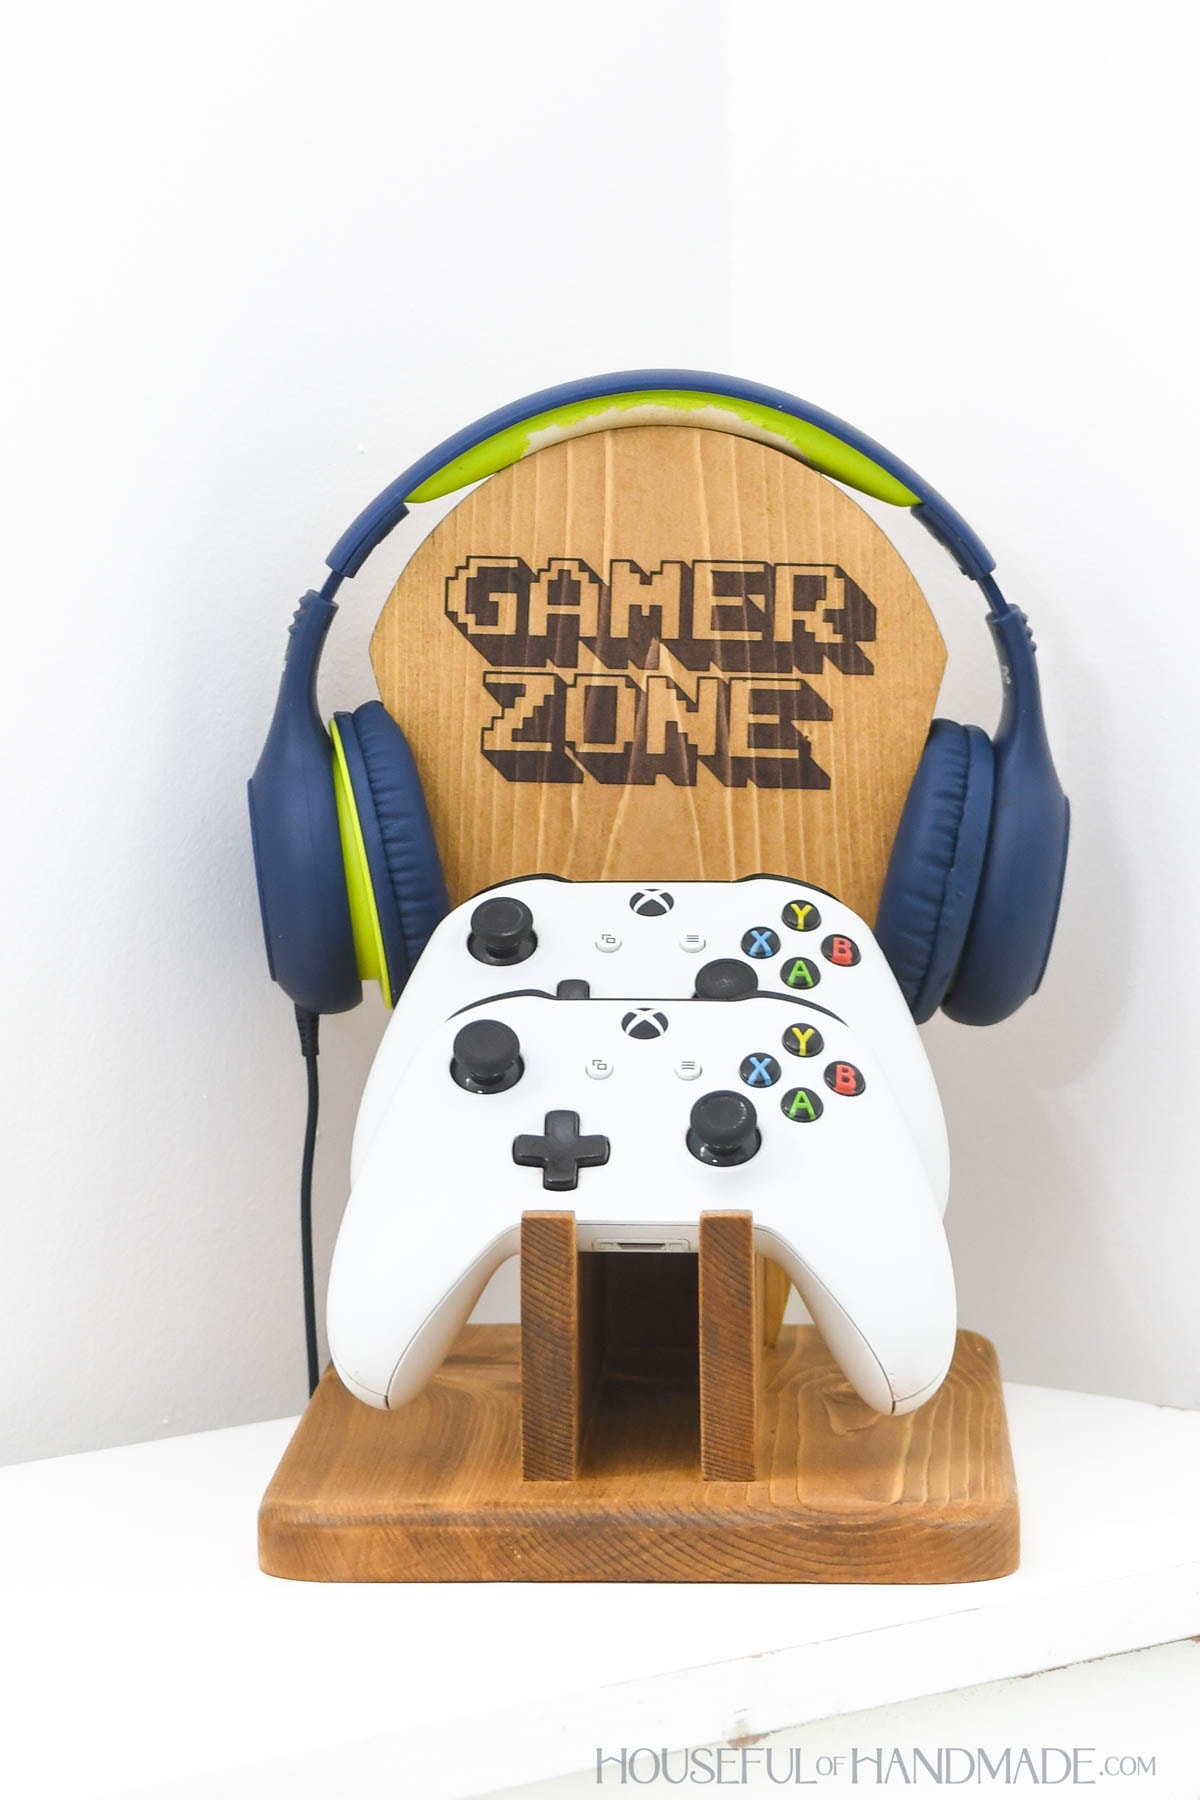
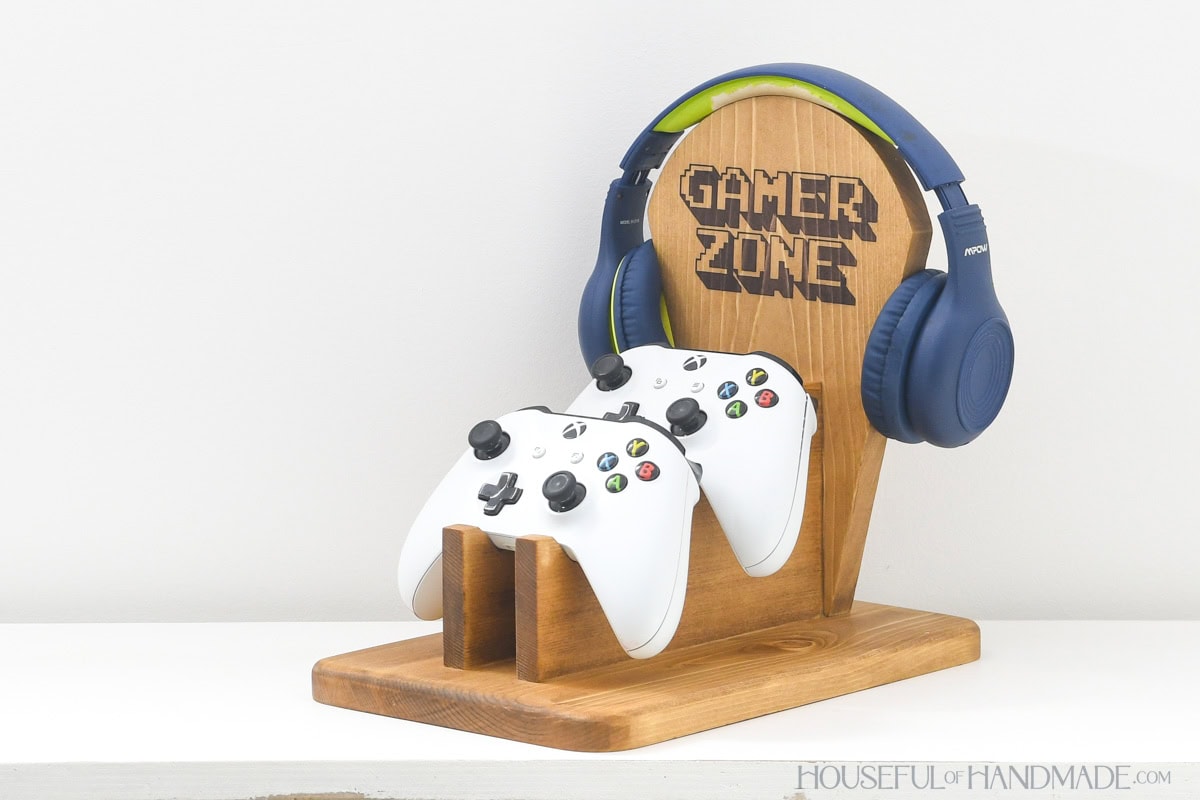
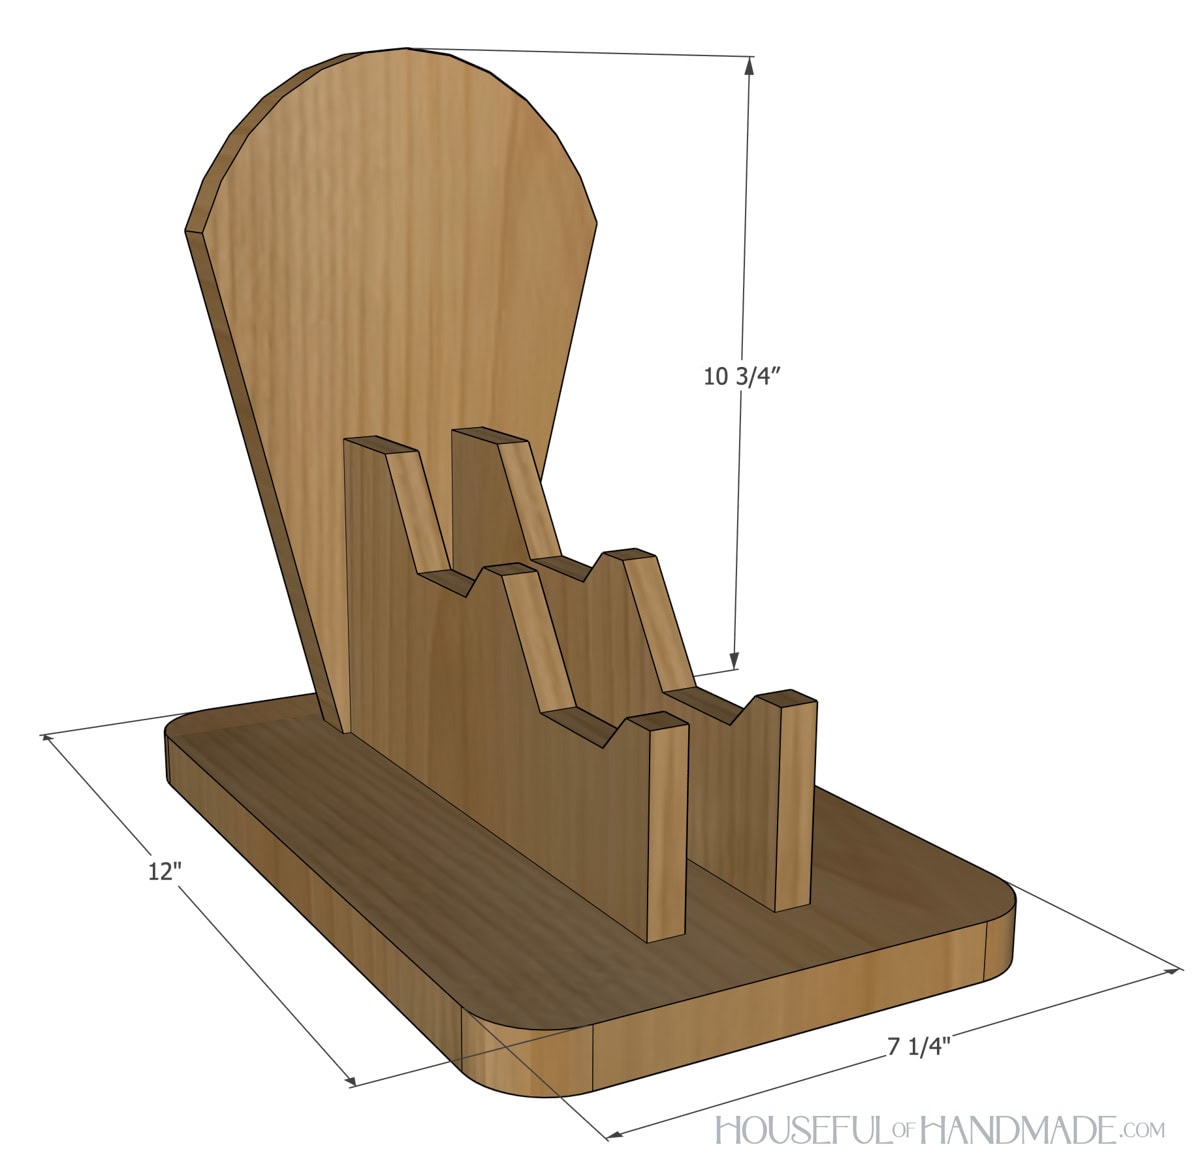
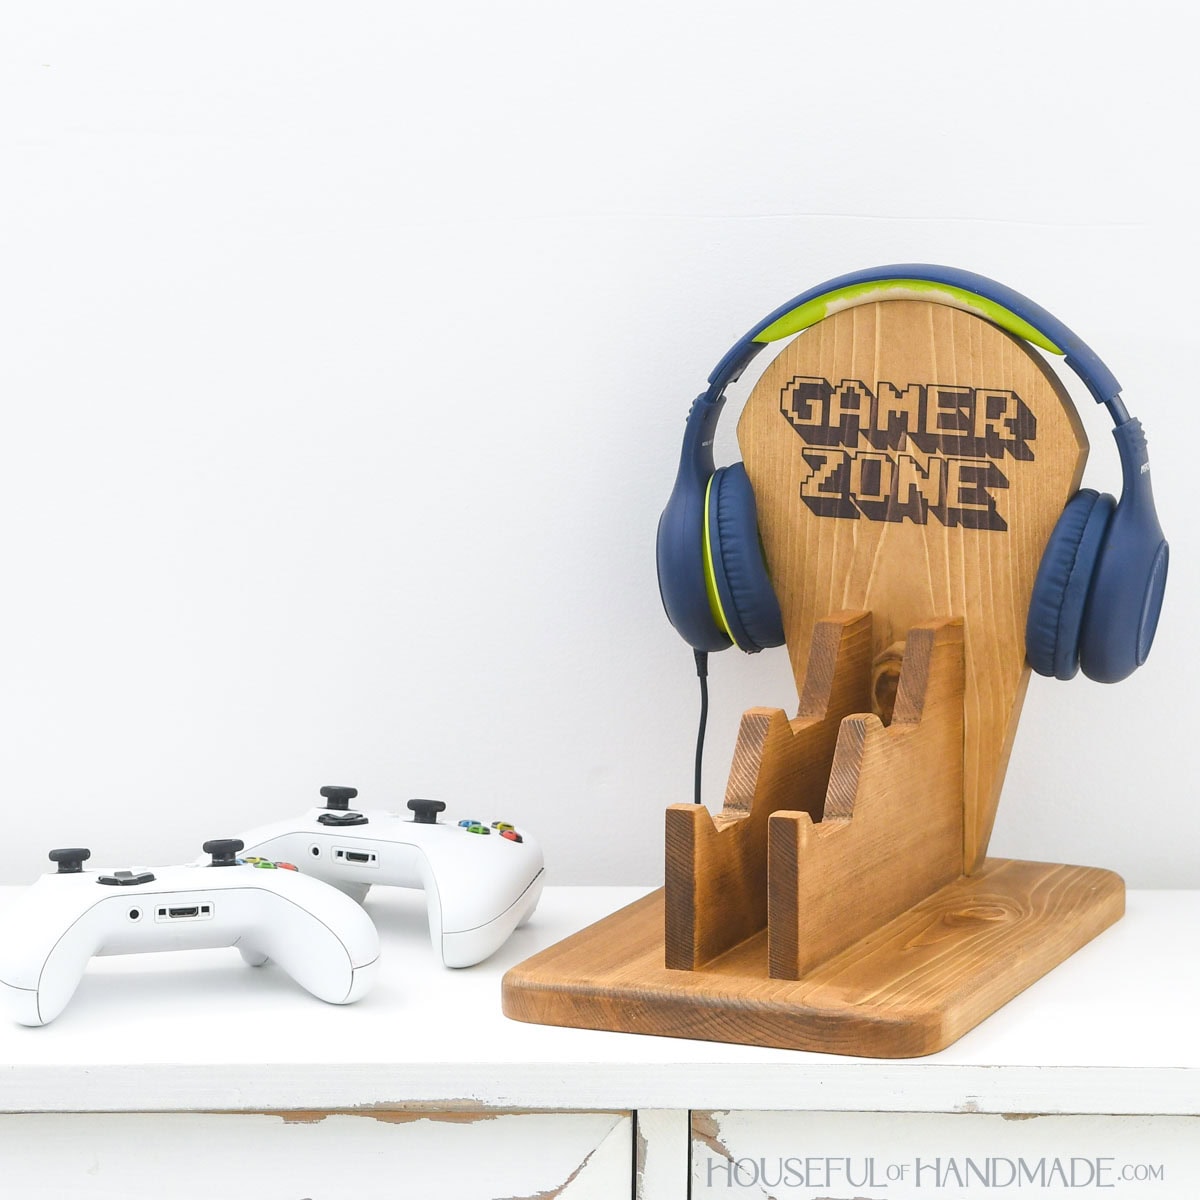
This game controller stand is perfect for holding 2 video game controllers as well as a pair of headphones.
This post may contain affiliate links. As an Amazon Associate I earn from qualifying purchases. Click here to read my full disclosure policy.
Now he can easily find everything he needs to be ready to play games… as soon as his chores are done.
Today is the last day of DIY Gift week. This week I have shared 5 new easy DIY gifts ideas along with 2 other amazing builders. Find lots of DIY gift ideas here.
Check out the gift ideas from Anika’s DIY Life and Woodshop Diaries below.
Wood Game Controller Holder
The design on this stand perfect cradles the video game controllers. They are offset so the back one sits slightly higher than the front.
And the back is shape is designed to hold a pair of headphones.
In just a small space, you have everything you need to be ready to play video games whenever you want (or mom lets you)!
This game controller stand is an easy build too. It only uses 2 small pieces of wood, you might even have enough scraps to built it.
The controller holders were built from 1/2″ boards (sometimes called “Project Boards”). You can find them at most home improvement stores.
Or if you have a planer available, you can make them yourself from scraps.
You could also build them from standard 3/4″ boards. This will leave you with a smaller area between them that may be harder to stain/seal.
More DIY Gift Ideas
For DIY Gift week this week, I have shared 5 new DIY gift ideas along with my friends from WoodShop Diaries and Anika’s DIY Life.
Check out their DIY gift ideas below along with a couple more ideas from me.


How to Build a Game Controller Stand
Tools & Materials
Recommended Tools:
- Miter saw
- I recently upgraded to this sliding miter saw (watch for it to go on sale), but previously used this inexpensive miter saw that I love.
- Jig saw
- Brad nailer
- Drill
- Impact driver (optional, but I love not having to switch bits with the drill)
- Multi-mark measuring tool
- Sander
- Optional: Trim router
Supplies:
- Wood products
- (1) 1×8 board, 2’ long
- (1) 1/2 x 6 board, 2’ long
- 1 1/4” brad nails
- #6 x 1 1/4” wood screws
- Wood glue
- Optional: vinyl stencil
Overall Dimensions
The finished game controller stand is 7 1/4″ wide by 12″ deep and 10 3/4″ tall. It holds 2 controllers and 1 pair of headphones.
Cut List
Cut out the pieces according to the easy-to-read table in the PDF plans.

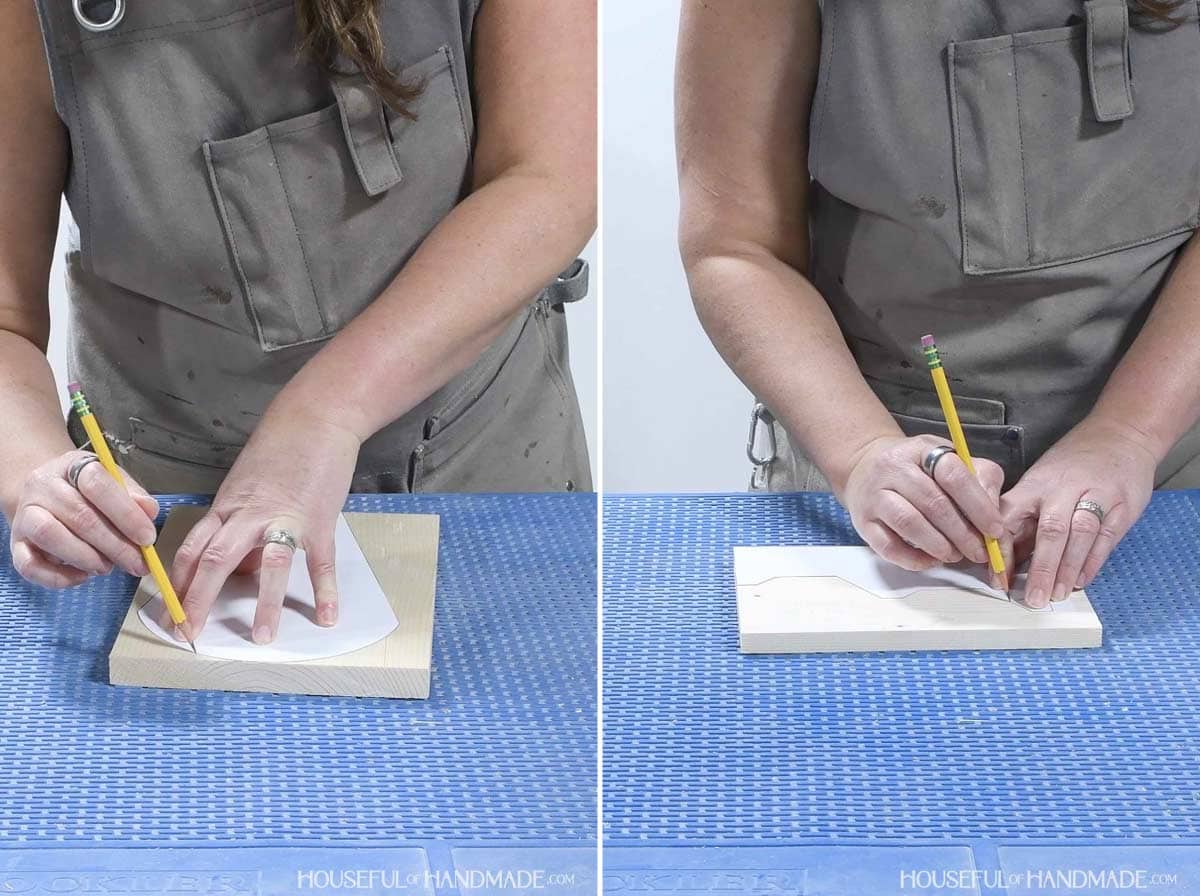
STEP 1- Shape holder pieces
Print and cut out the templates included in the plans.
Trace them onto the boards.
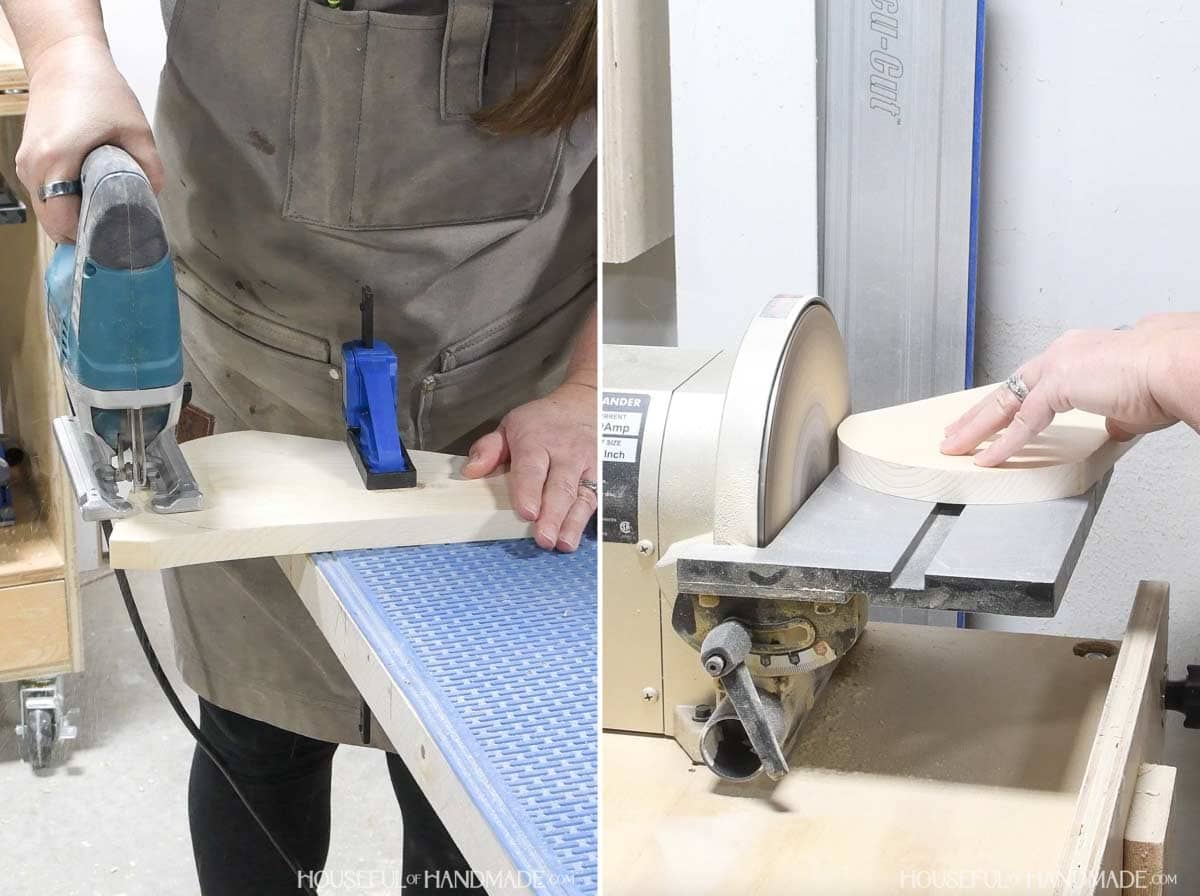
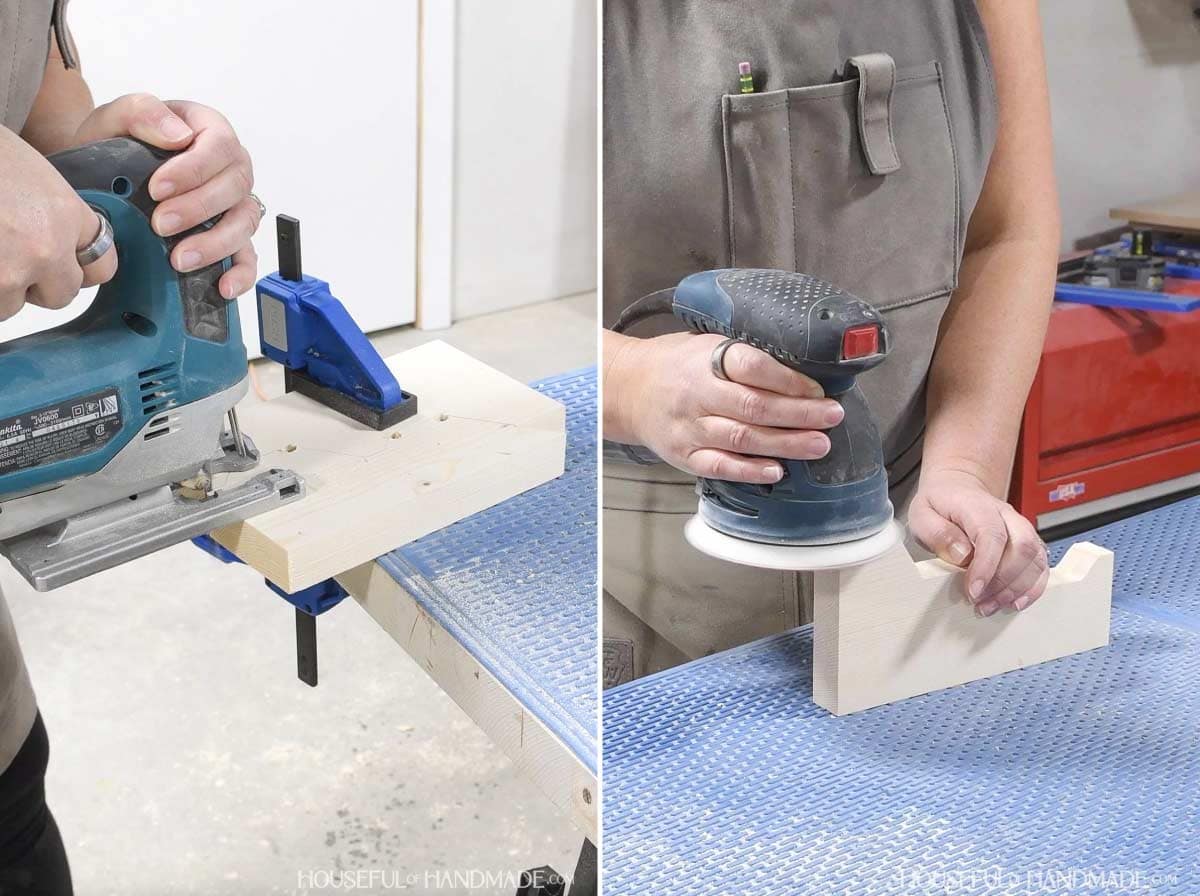
Cut out the headphone holder with a jig saw. Then sand it smooth.
I love using my disc sander for getting smooth clean curves, but you can also sand with a hand sander like this orbital sander.
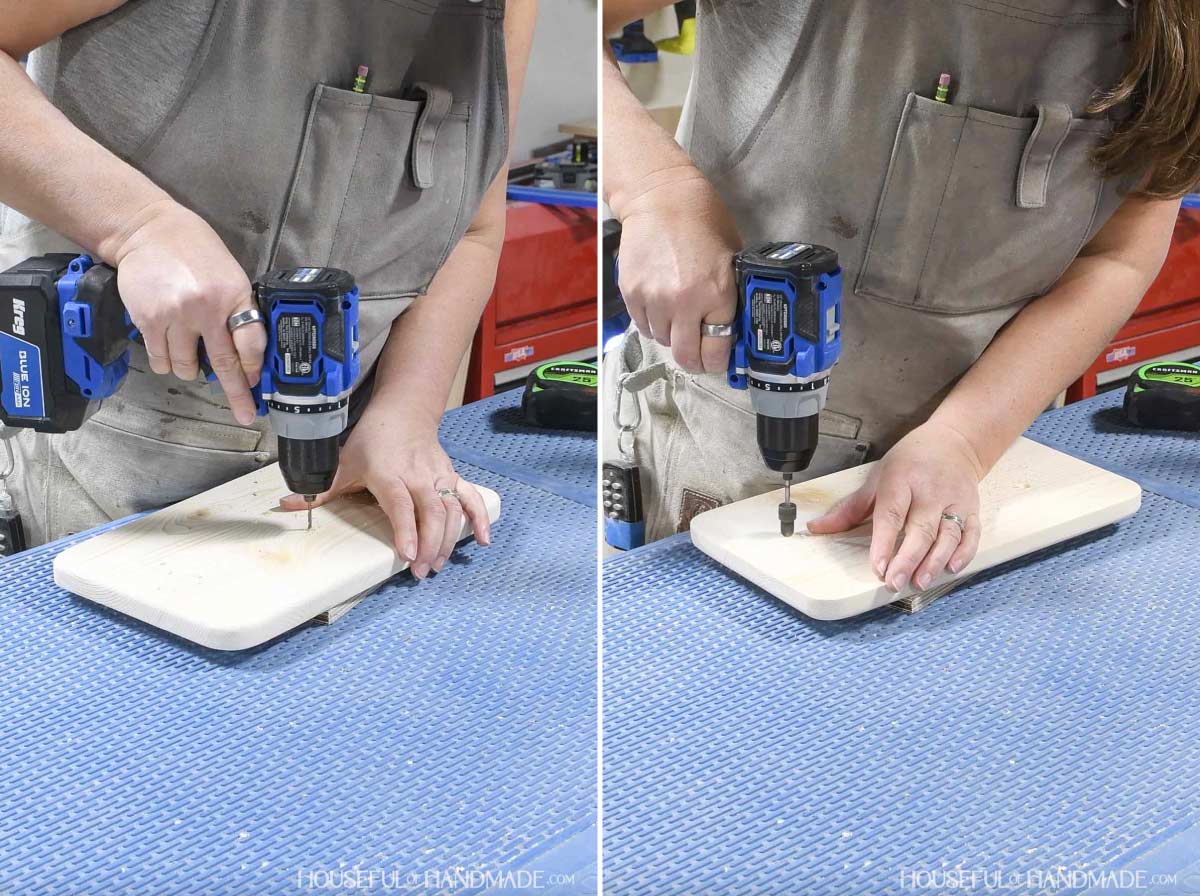
For the controller holder boards, trace the template on only board.
Then secure the two pieces together with brad nails, screws or clamps in the area on the top that will be cut off.
With the boards attached, drill a hole just large enough for your jig saw blade in the lower corners of the design.
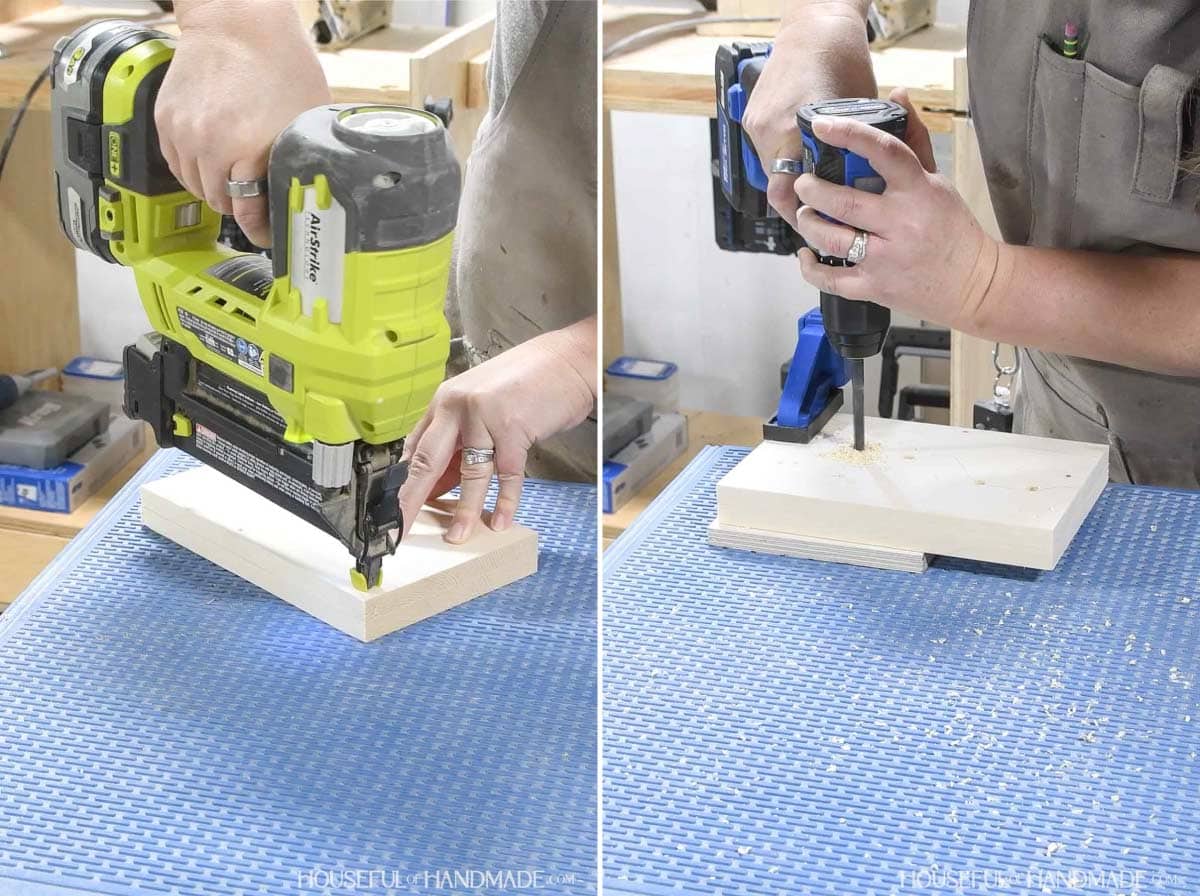
Then cut out the design using the holes to pivot the jig saw. Once they are cut out the two pieces should no longer be attached together.
EXPERT TIP:
I like to use a scroll blade for my jig saw. It is a thin blade with lots of teeth for a clean and detailed cut.
Same the two pieces smooth. I held them together and sanded them as one piece so they were identical.
STEP 2- Prepare base
If desired, round the corners of the base.
I used a small wood filler jar as a template to draw the curve. Cut it out with a jig saw or round it with a sander.
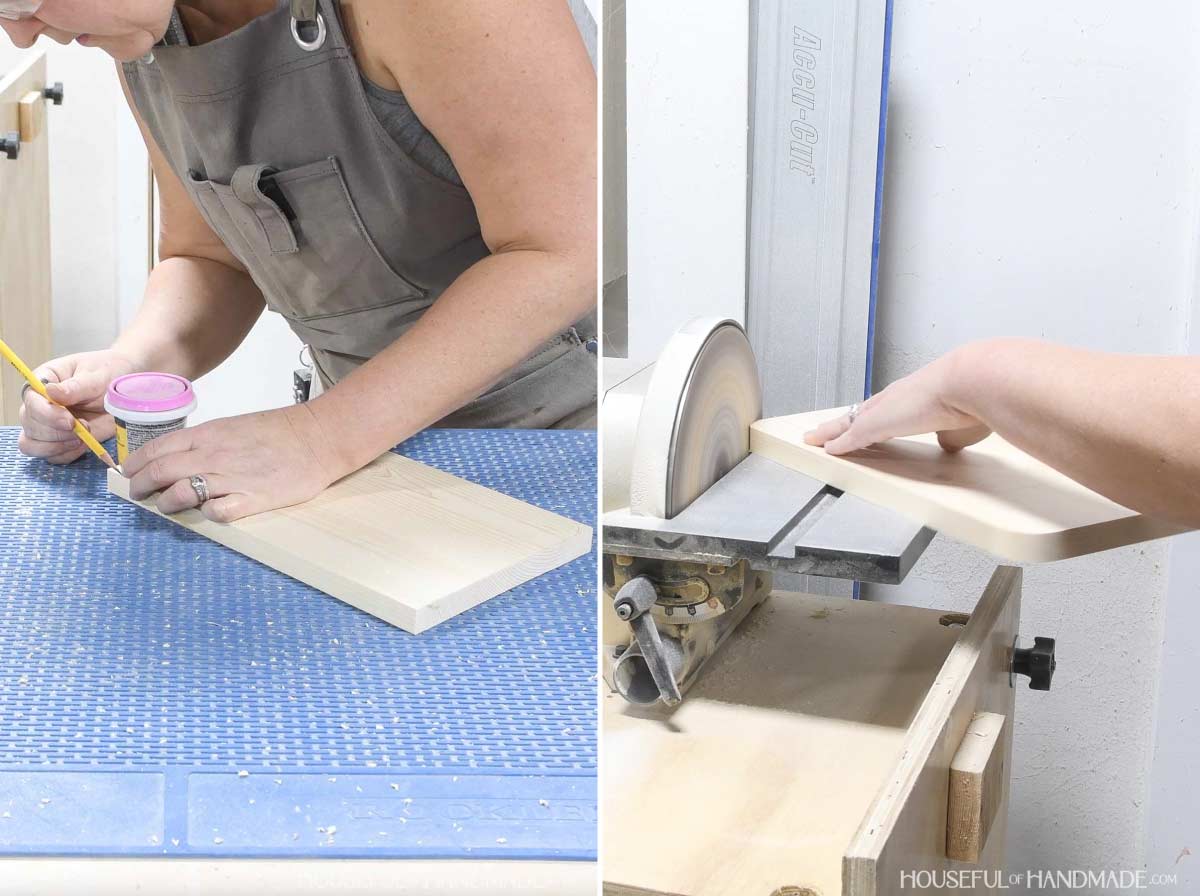
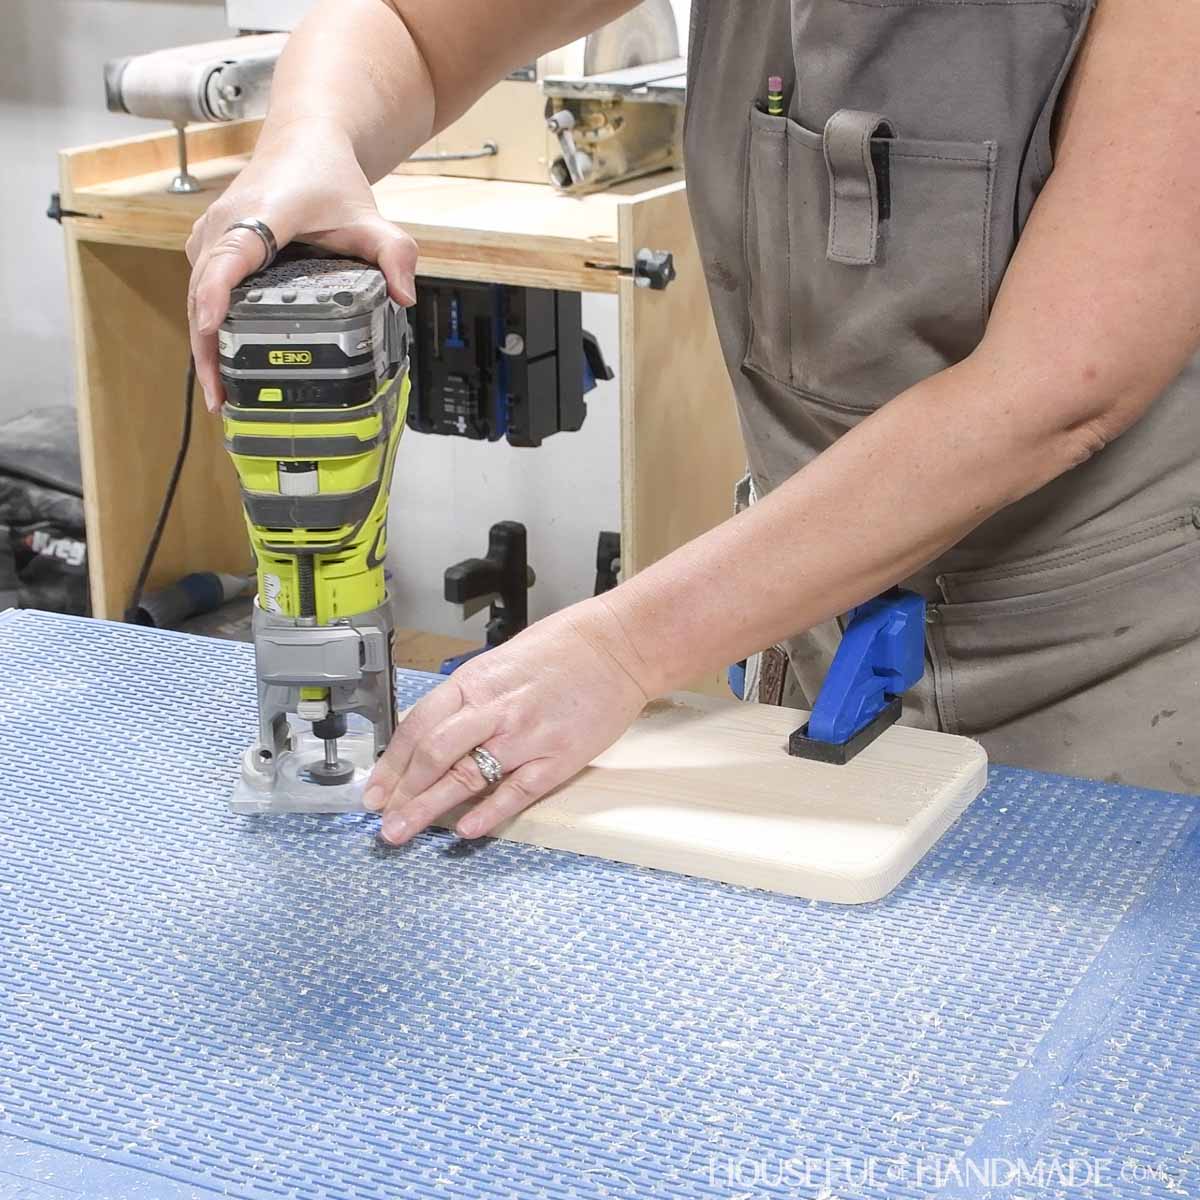
Then round over the top edge of the base with a trim router or sander.
Measure out where the headphone and controller holder pieces will go on the base according to the diagram in the plans.
Then drill pilot holes for the wood screws so there are 2 into each piece that is attached.
Flip the base over and drill a larger hole just barely into the wood of each predrilled hole for the screw head to recess into.
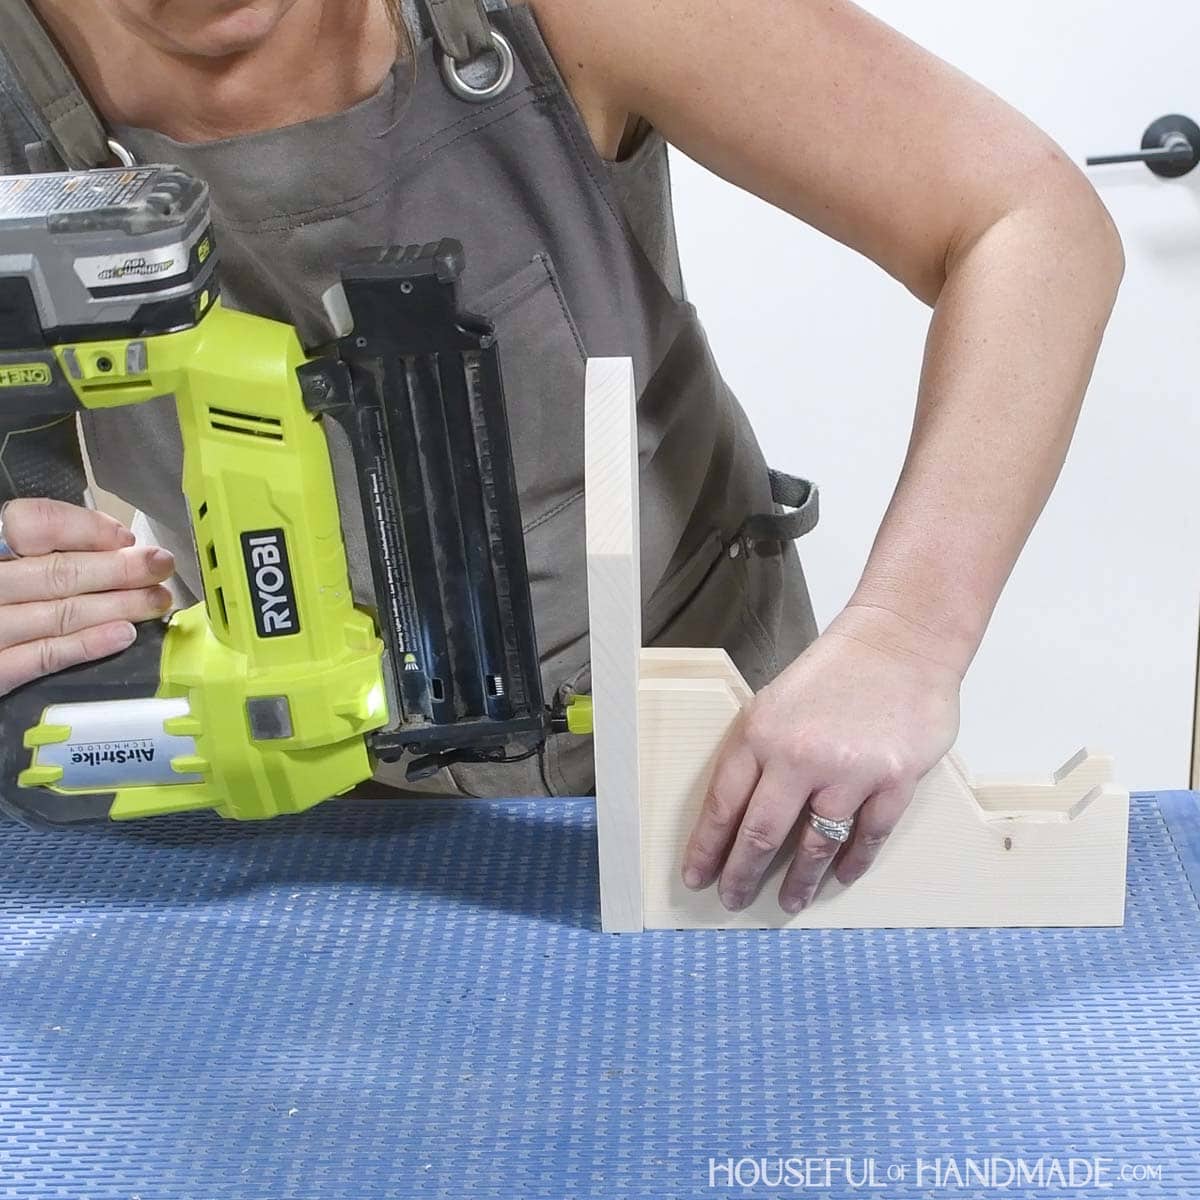
STEP 3- Attach pieces together
Attach the controller holders to the front of the headphone holder board so they are flush with the bottom and positioned according to the diagram in the plans.
Draw a line on the back of the headphone holder where the center of the controller holders is. Then secure with wood glue and 1 1/4” brad nails from the back.
Fill the nail holes with wood filler.
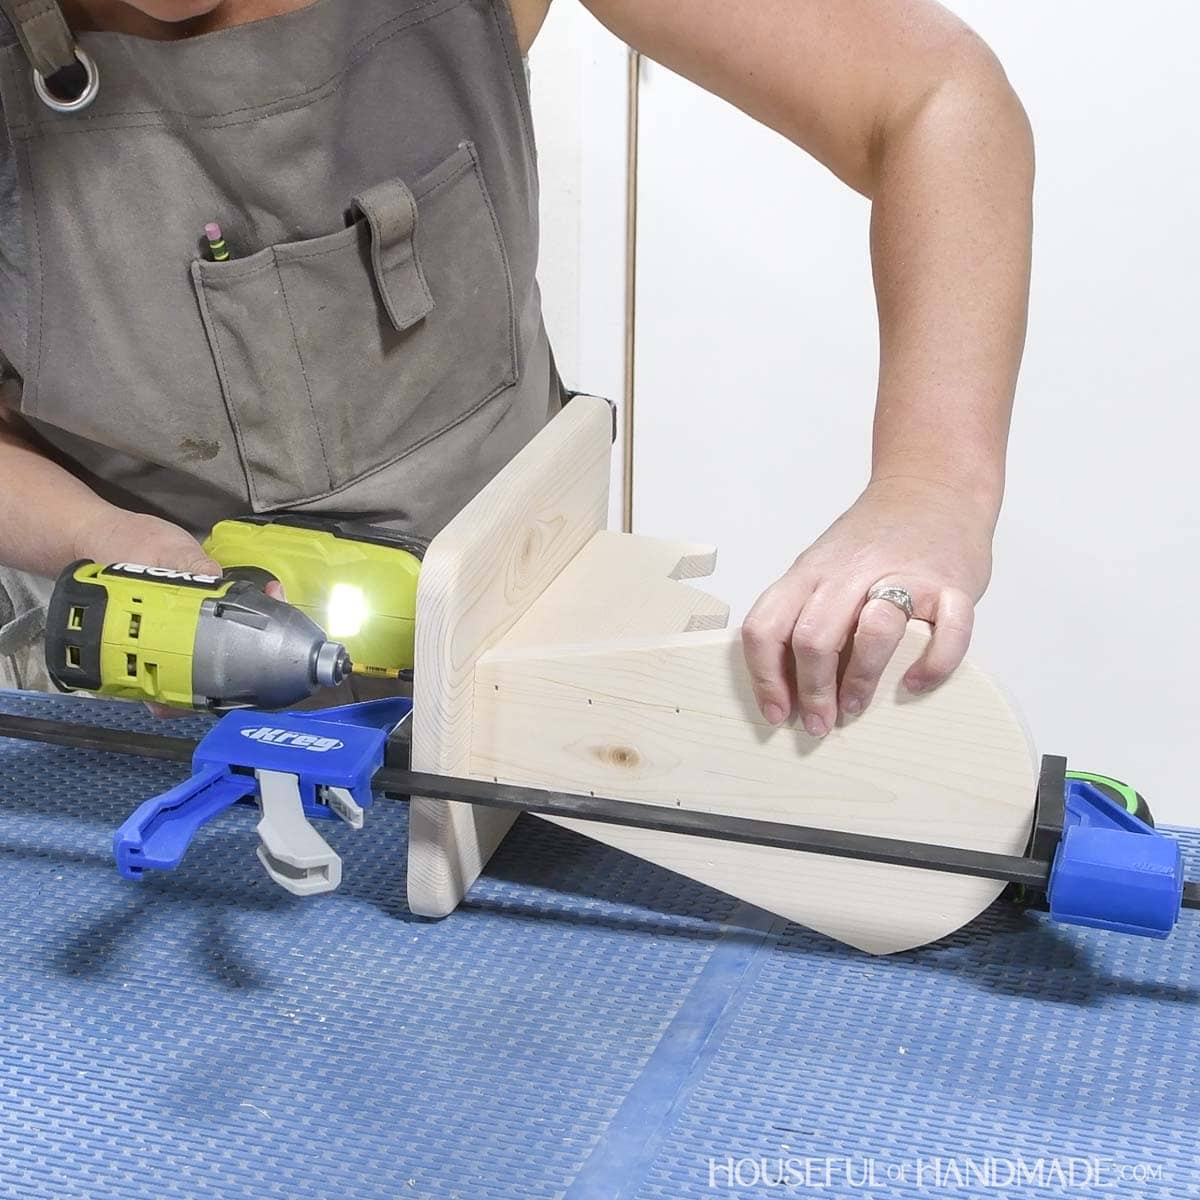
Add glue to the bottom of the holders and center on the base.
Clamp in place then flip it on its side and drive 1 1/4” wood screws in through the predrilled holes into the headphone holder and two controller holders.
Make sure the head of the screws is fully recessed into the base so the base will lay flat.
STEP 4- Finish
Sand and finish your completed stand.
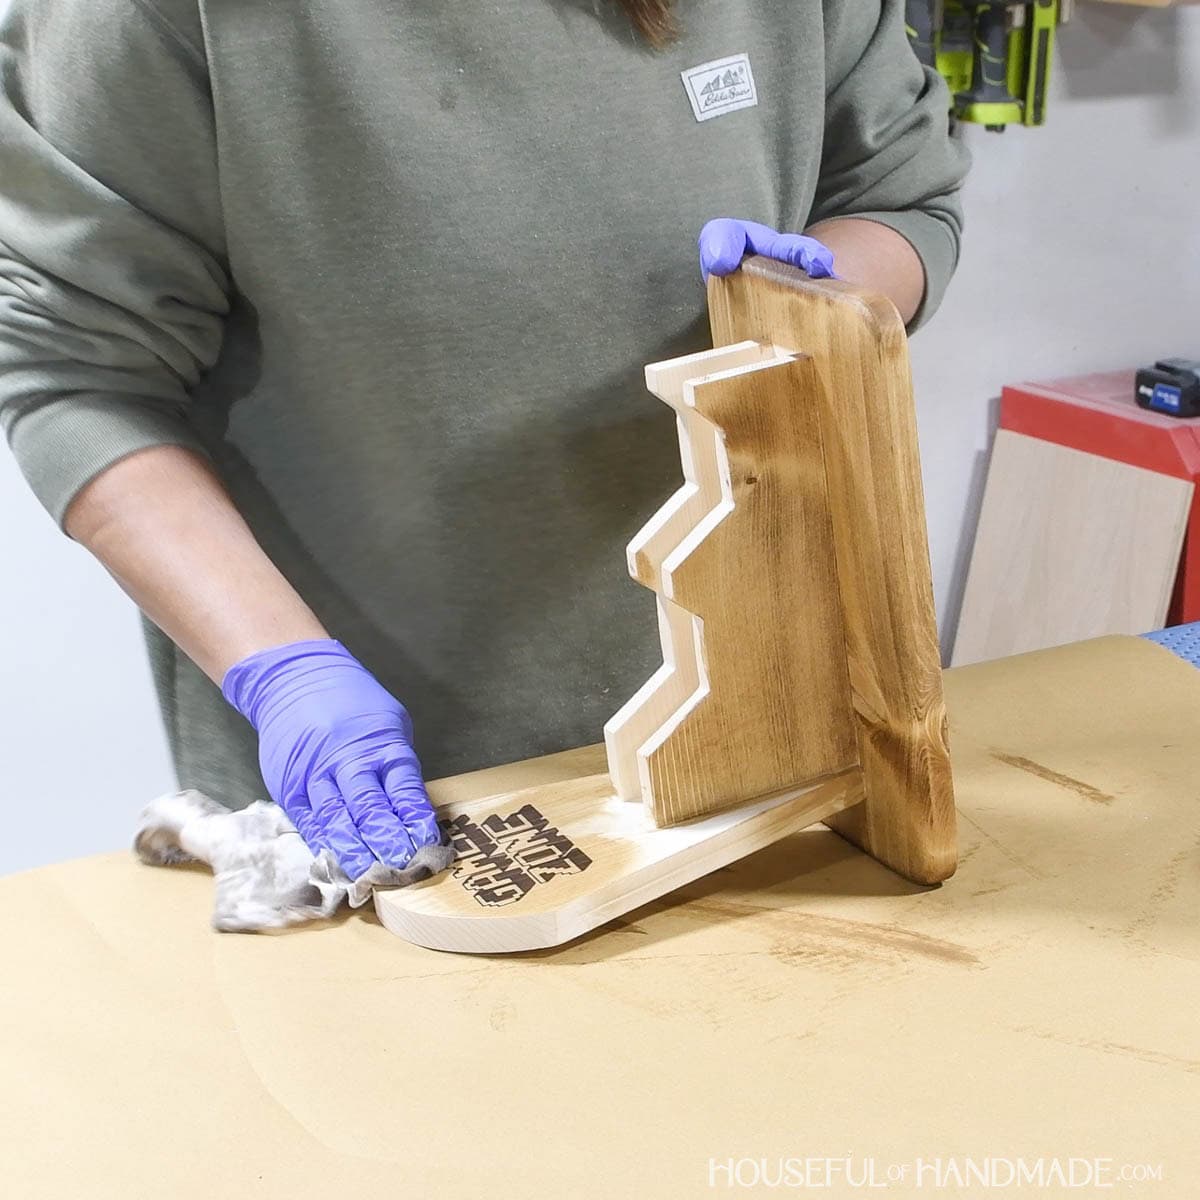
If desired, add a design to the front. I used a vinyl stencil to and added a design with this faux laser engraving technique.
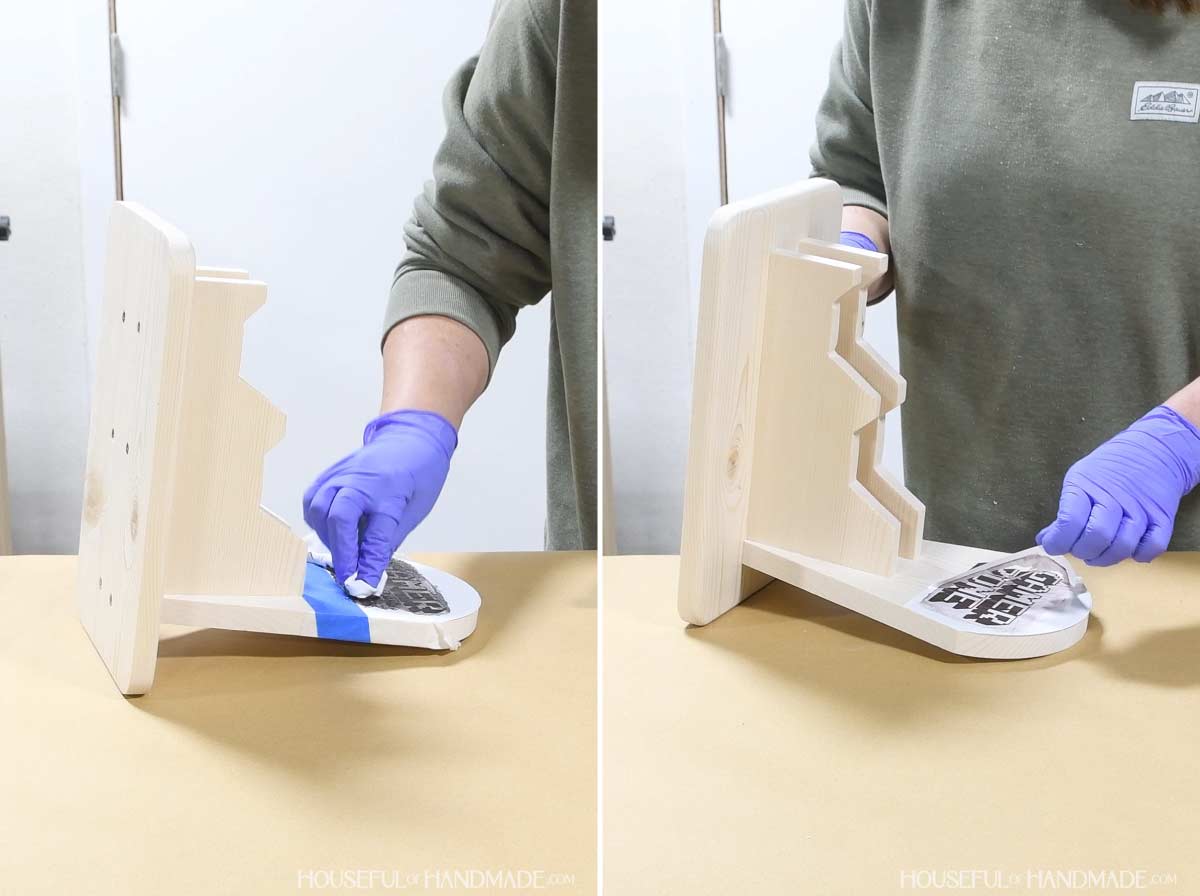
Because I was using an oil-based stain on the entire stand, I added the design with the water-based first.
I used a rag and had to press it in between the controller holders with a thin scrap board.
Premium plans include:
- Recommended Tools
- Shopping list
- Easy to read cut list table
- Cut diagrams
- Step-by-step instructions with 3D renderings
- Helpful resources
- BONUS: 3D SketchUp file
You did it!
Now you have the perfect place to store your gaming accessories so they are always ready for fun.
I am hopeful this stand will help my son put his controllers away when he is done playing too.
Happy building!
