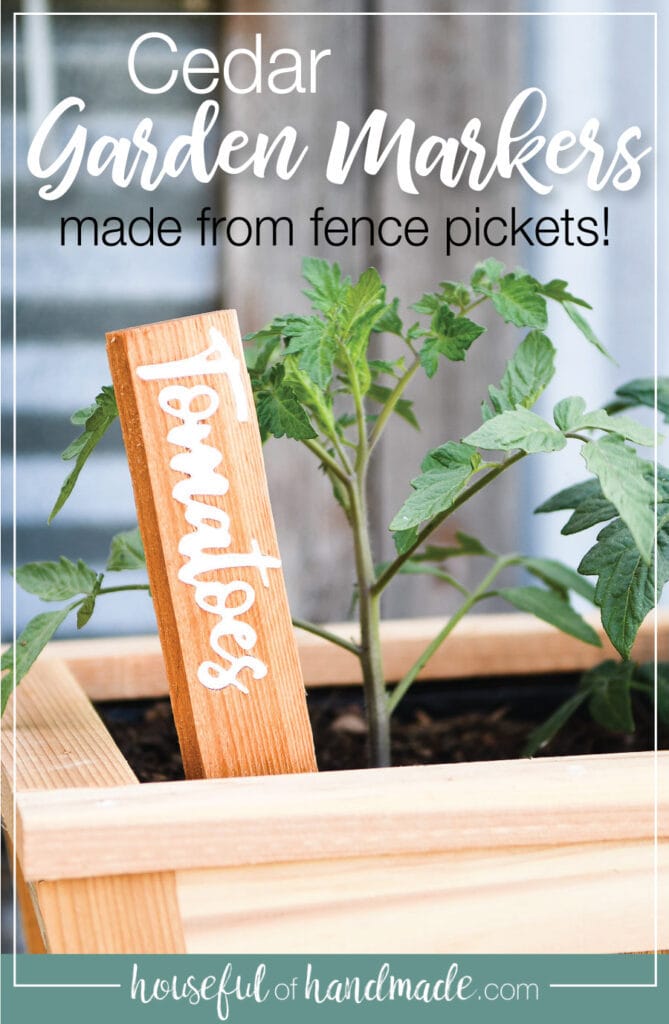
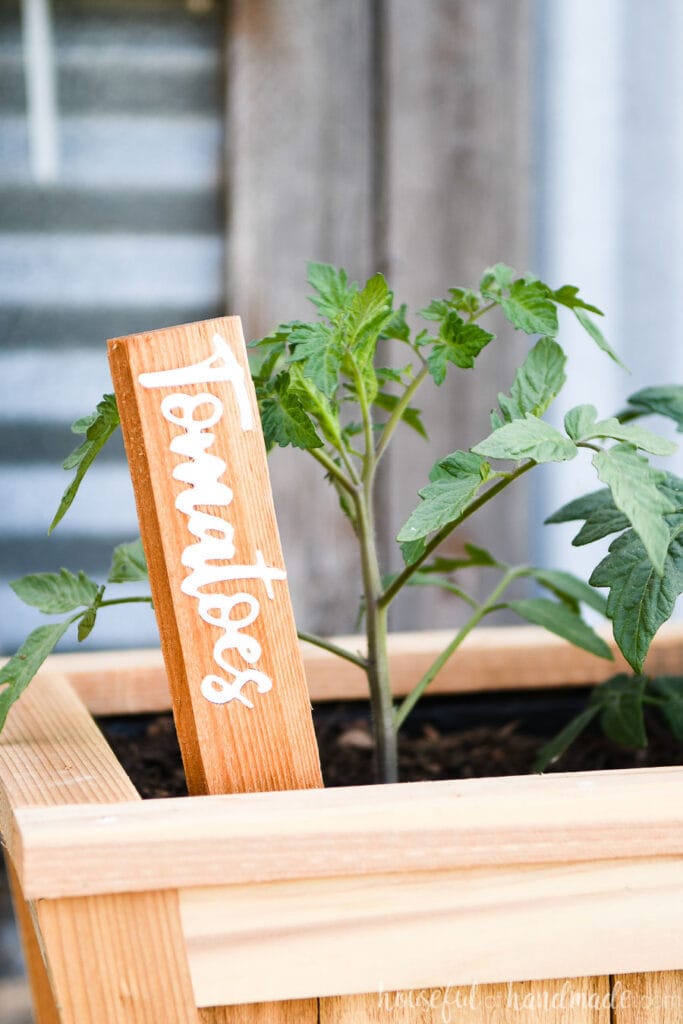
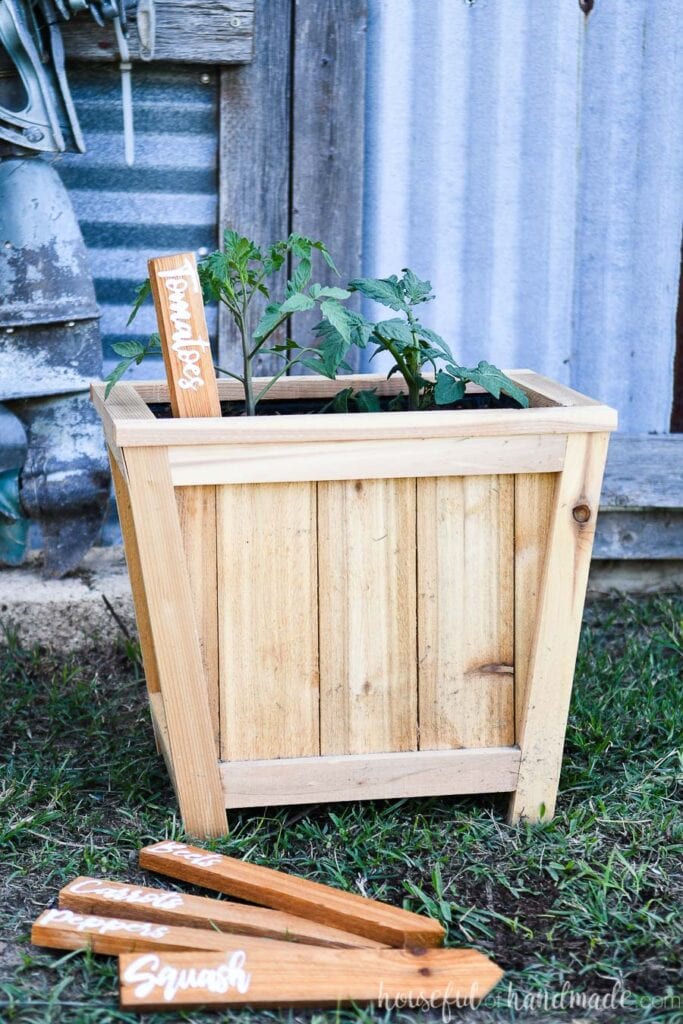
Make these beautiful DIY garden markers to help identify all your planted seeds this year.
To say I am excited for gardening season is an understatement! I am so eager to get to planting. To get ready for planting day, I partnered with Inventables to make some beautiful new garden markers!
Every year when I plant my seeds, I use small found rocks or sticks to help me note where I change the seeds. There tends to be a lot of guessing when things start to sprout.
This year I want to build a bigger garden, so I am hoping to eliminate all that guessing. Instead of sticks and rocks, it was time to up my garden game with DIY garden markers!
This post may contain affiliate links. As an Amazon Associate I earn from qualifying purchases. Click here to read my full disclosure policy.
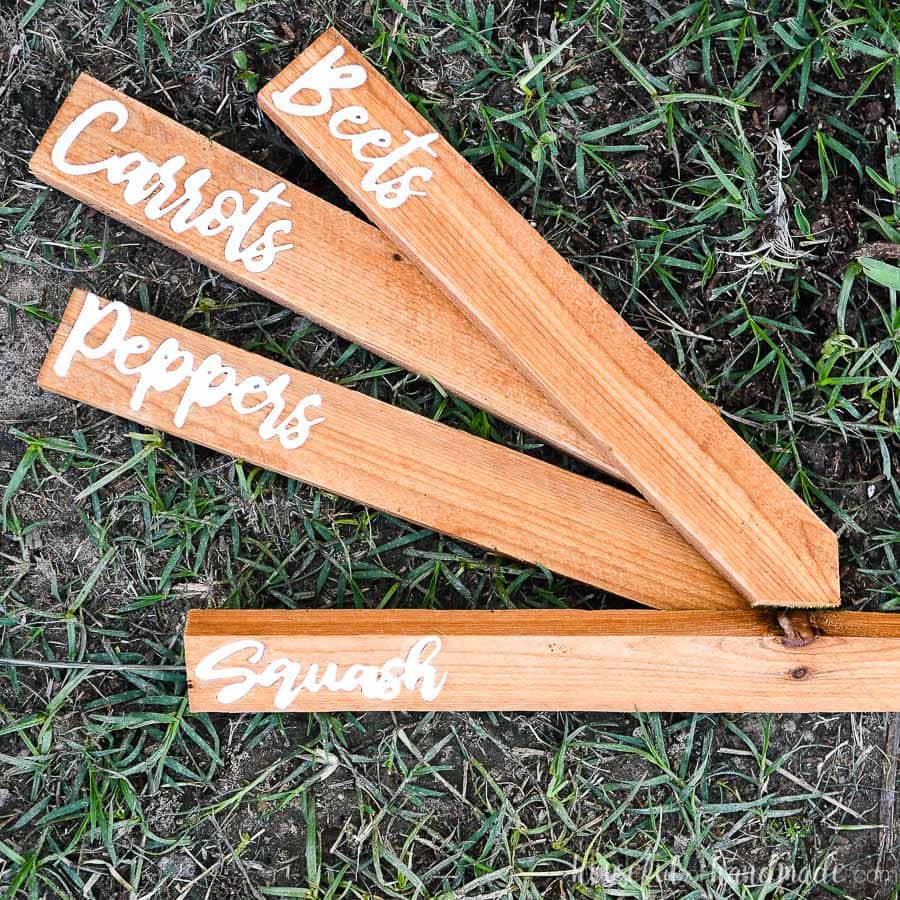
Easy Cedar Garden Markers
The design on these garden markers is so simple.
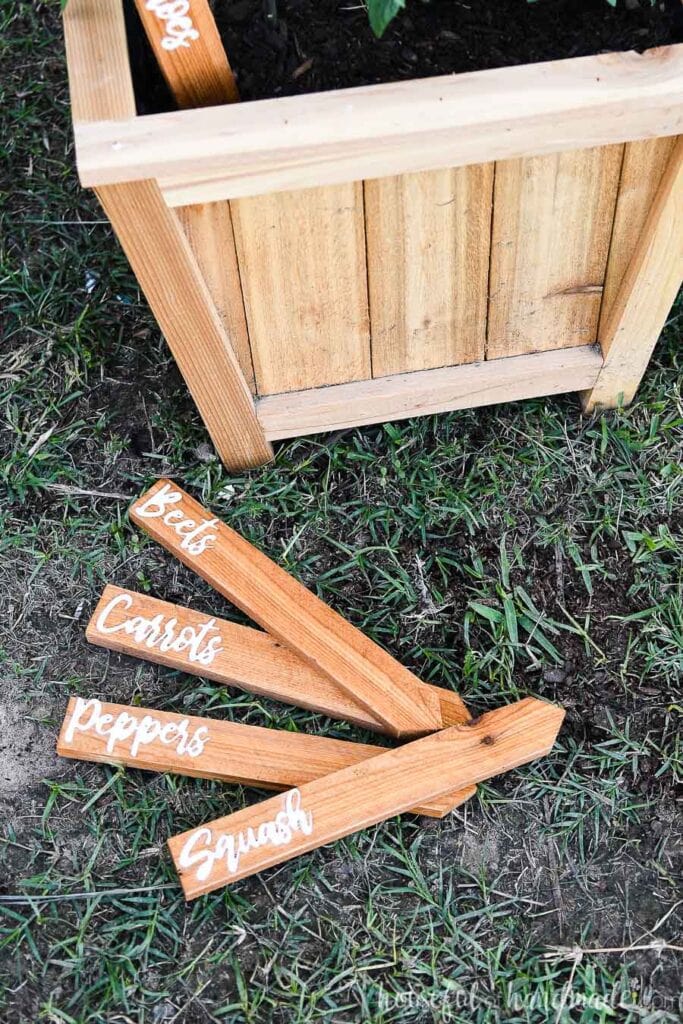
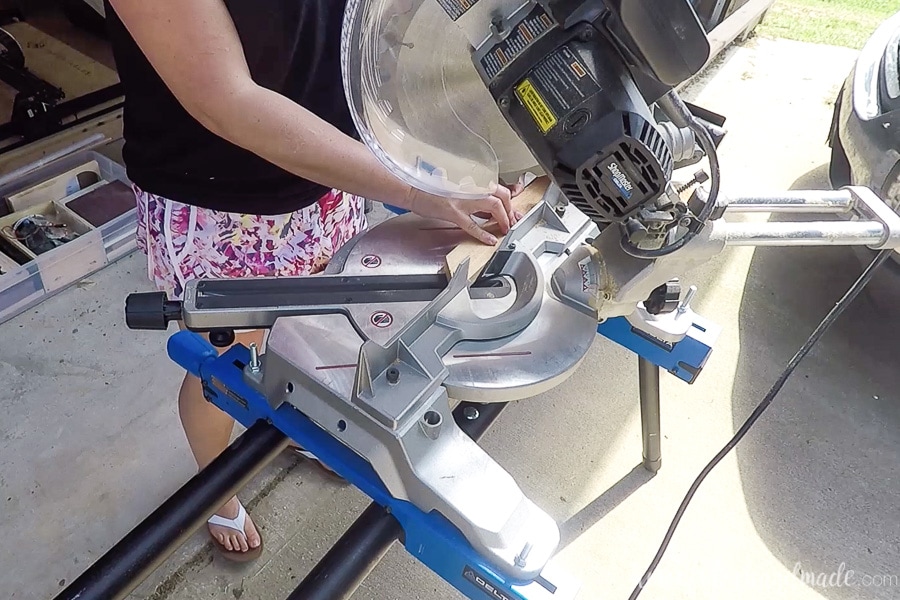
The markers are made by ripping a 1×4 cedar fence picket in half. Then cutting the 1 3/4″ wide boards into 12″ pieces with a simple point at one end.
Cedar is a great option for garden markers since it naturally resists rot and decay. Plus cedar fence pickets are really cheap.
The cedar wood will also weather nicely and even get some beautiful gray patina to it. I’m really excited to see that happen!
So to keep the garden markers easy to read (even after they start to age), I used the X-Carve CNC machine to cut the plant varieties out of acrylic. Then inlayed them into the cedar garden markers.
You can use your new garden markers in for in-ground gardening. Or use them in this ladder planter or vertical garden for small spaces.
Creating an Acrylic Inlay
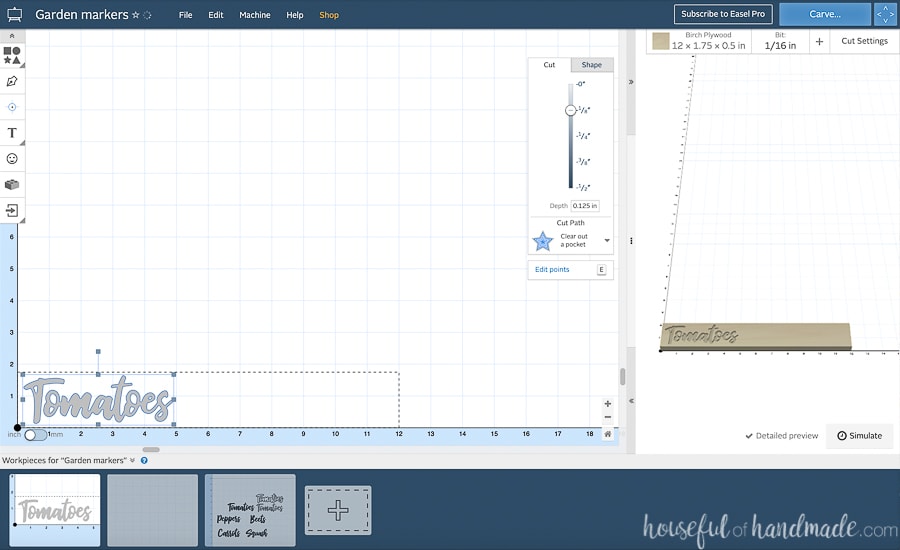
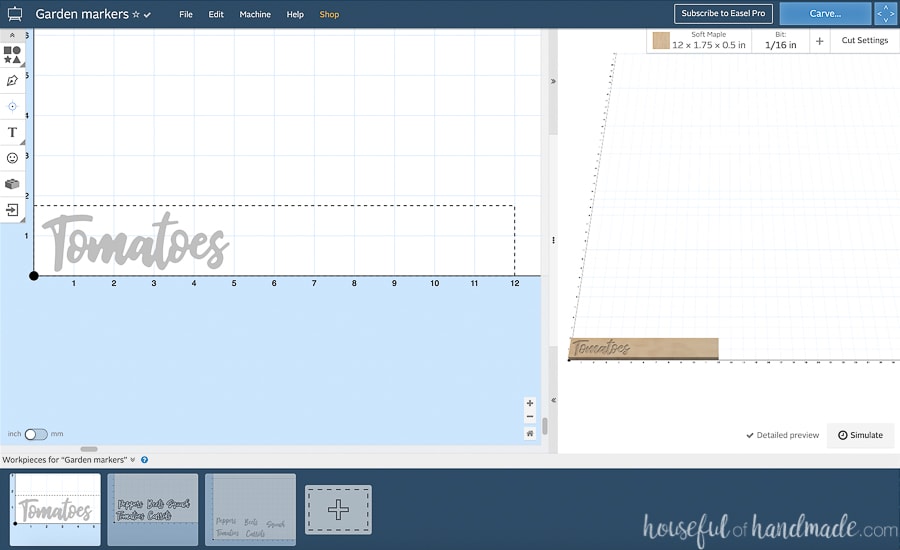
The X-Carve makes it so easy to create inlays! The Easel software has a free app that does it automatically for you. It takes your design and turns it into 2 files that will fit together to create a perfect inlay after cutting.
I designed my garden markers with my favorite script font: Bhatoshine Regular. I used Illustrator to thicken up the font so it would cut out all the swashes and details with a 1/16 bit.
Then uploaded the SVG to Easel to make inlay magic with!
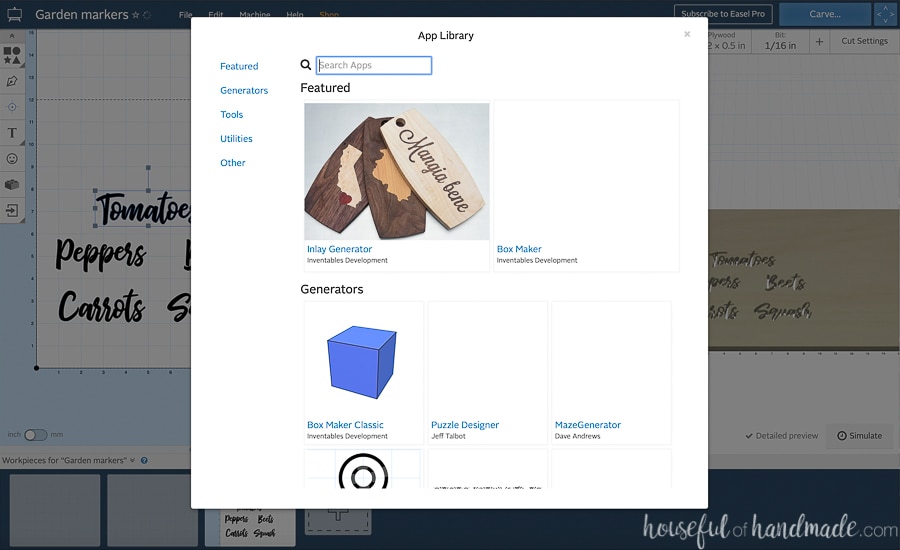
Once in Easel, I doubled checked that the design would properly cut with the bit size using the Detailed Preview. Then with the design selected, click on Apps (the one that looks like a Lego block).
You can only create an inlay for 1 markers at a time, otherwise it will create a large inlay for all items together.
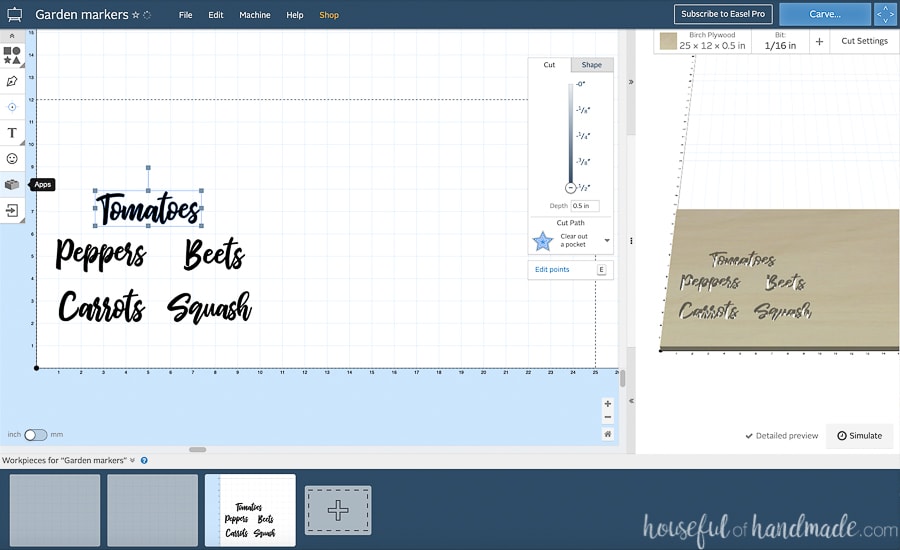
The Inlay Generator showed up right on the front page of the Apps under Featured. If it doesn’t for you, you can always do a quick search for it.
For these garden markers, I left the tolerance at 0.003 and changed the bit size to 1/16 (0.0625). Since I was leaving the rough texture on my cedar boards, I didn’t think it was necessary to get a super tight fit on the inlay. But the inlay still fits very nicely!
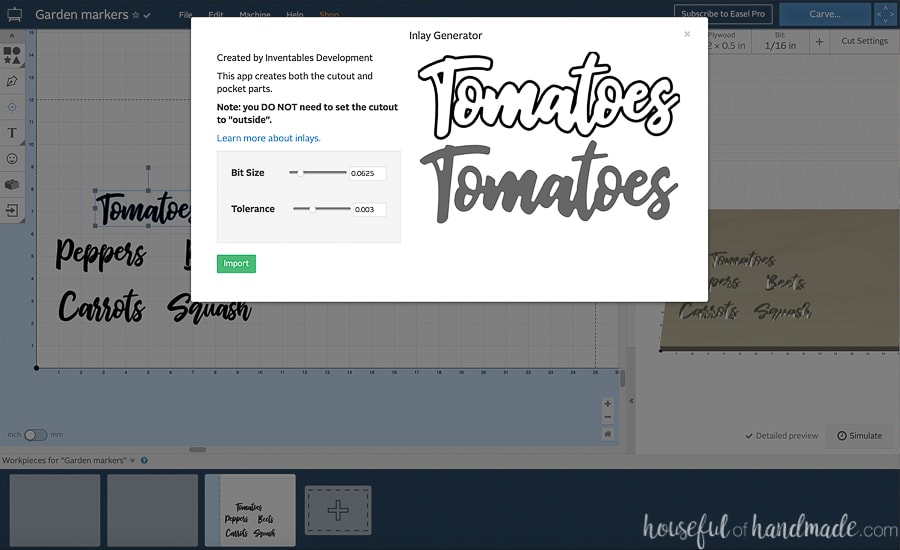
When you’re done, hit import and the two new designs will be in your Easel file.
Copy the carved in piece (grayed out) to the Easel workpiece for the cedar and copy the cut out piece (outlined) to the Easel workpiece for the acrylic.

For the cedar carve piece, change the depth to the same depth as your acrylic. Use calipers to get an accurate thickness of the acrylic and use that number for the carve.
WHAT IF I DON’T HAVE AN X-CARVE?
I understand that an X-Carve is not a basic tool purchase. But there are so many fun things you can make with it. Plus you can always use it to make items to sell!
But if you do not have an X-Carve, you still have options.
- Some high schools, libraries, and maker spaces have X-Carves you can use. Use this link to find a location near you.
- If you have a scroll saw you could use it to cut the acrylic and just glue them to the top of the garden markers instead of making an inlay.
- Make the simple cedar garden markers, then paint the vegetable varieties on top.
Also, you can always start by signing up for a free Easel account to test out designing in their software. I love the detailed preview to show you how it looks cut out of your wood with different bits.
And make sure to look out for fun contest from Inventables. Maybe you can use your design to win your own X-Carve or supplies!
How to Make Garden Markers
Tools Needed:
- X-Carve
- If you do not have an x-carve, find a location near you where you can use one.
- 1/16″ upcut fishtail carving bit
- Digital Calipers
- Table saw
- You can also
- Miter saw
Supplies:
- 1×4 cedar fence picket
- 1/8″ thick cast acrylic sheet
- Double-sided tape
- Sanding block
- Super glue gel
Cut the Cedar Stakes
Rip the 3 1/2″ wide cedar fence pickets down the center leaving you with (2) 1 3/4″ thick boards.
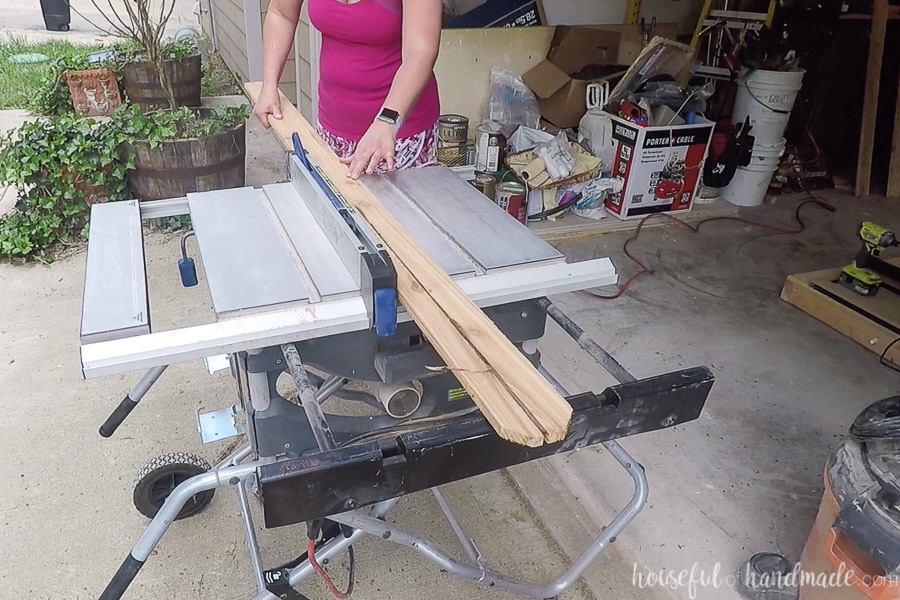
Cut those boards down to approximately 12″ pieces. If you have non-dog eared fence pickets, you can cut 6 pieces from each board.
Then set your miter saw to a 45 degree angle and cut the bottom of each piece to a point to make them easier to press into the ground.
Now your garden markers are ready for their inlays!
Carve the Plant Names
You can use the design I created for 5 different vegetables by first, signing up for a free Easel account, then clicking on the link below to open the file.
When you open the link, it will not be editable unless you make a copy.
In the file, there are 3 different workpieces on the bottom: one for carving the cedar stakes, one for cutting out the acrylic pieces, and one that has the all the vegetable varieties for carving the cedar stakes.
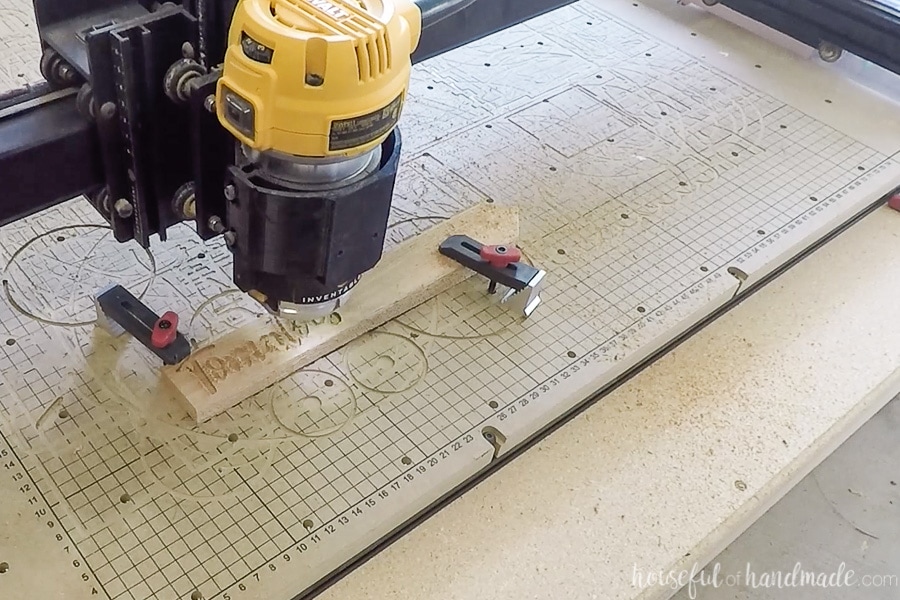
Place a cedar stake on the waste board and secure with clamps. Secure the 1/16 bit into the router and press Carve in Easel.
Follow the prompts to set up your carve and then watch the magic happen. The X-Carve will carve out the perfect spot for your acrylic inlay.
Repeat for all the DIY garden markers you want.
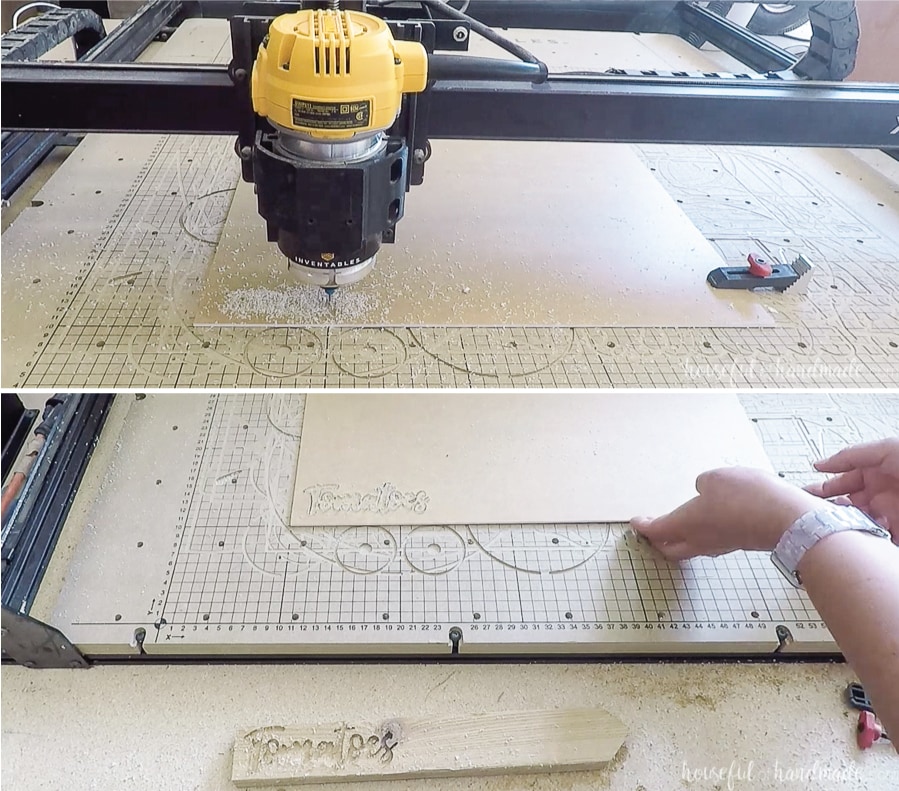
To cut out the acrylic inlay, use the workpiece with the inlay pieces. Do not use tabs for the cut.
Instead, use double-sided tape on the back of the acrylic. I only put it on the parts that would be cut from the larger sheet. This keeps the pieces from moving once they are cut free from the sheet.

Press it firmly to the waste board, then hit Carve in Easel.
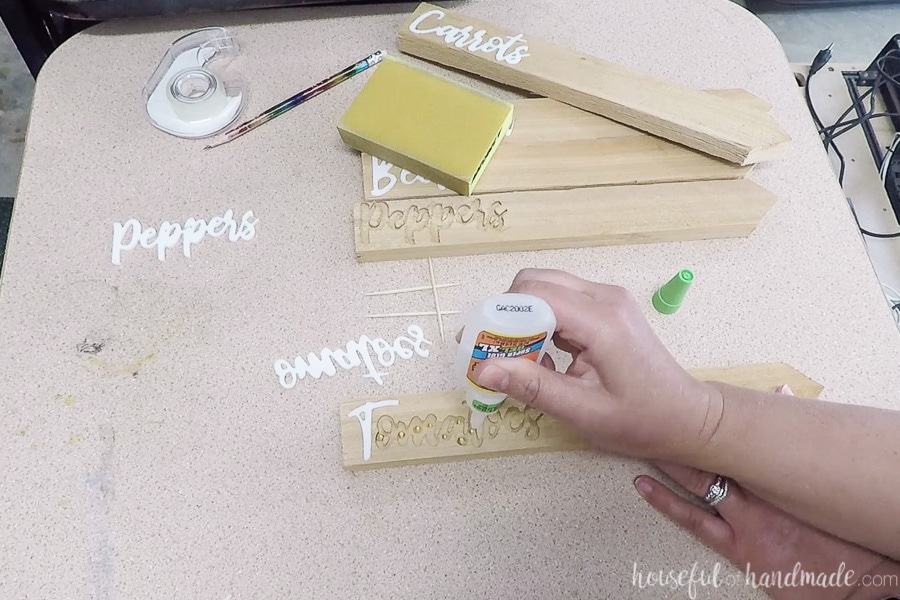
Glue in the Inlay
Remove the cut pieces and peel the protecting covering off the acrylic sheet. Test fit them into your cedar stakes. To get them back out after test fitting, lightly tap the stakes upside down on the edge of the table.
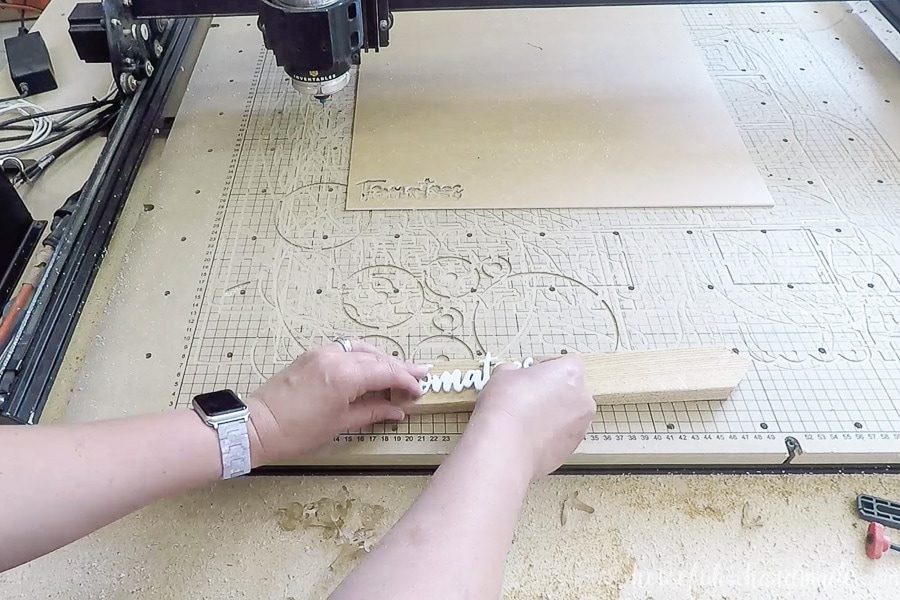
Sand the edges of the cedar cut out with a sanding block to clean up. Make sure there is no sawdust pieces in the inlay area.

Add a few drops of super glue gel around the entire inlay area. Then press the acrylic piece back in and hold firmly for 5-10 seconds.
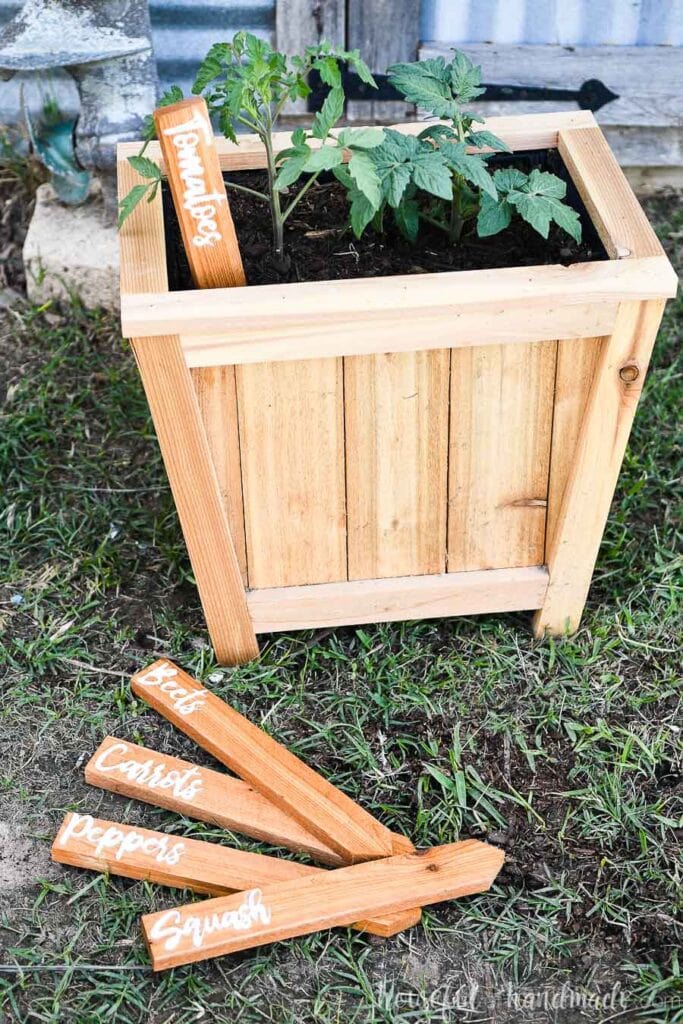
Now your inlay garden markers are ready for the garden!
To secure them into the ground, lightly tap the top of the markers with a mallet. Or use a hammer and a block of wood to spread the force out, otherwise the hammer will dent the top of the soft cedar wood.
I didn’t even need to tap in the marker in my cedar planter. The soil was still light enough for me to press the marker in by hand. So if you use the markers right after tilling your soil you will be fine!
I can’t wait to make even more garden markers as I keep adding plants to our garden. And how cute would these be for pots of herbs on the patio?
Now I am even more excited for planting day!

Thank you to Inventables for sponsoring this post. I only recommend products that I use and love and all opinions are 100% my own. Click here to read my full disclosure policy.