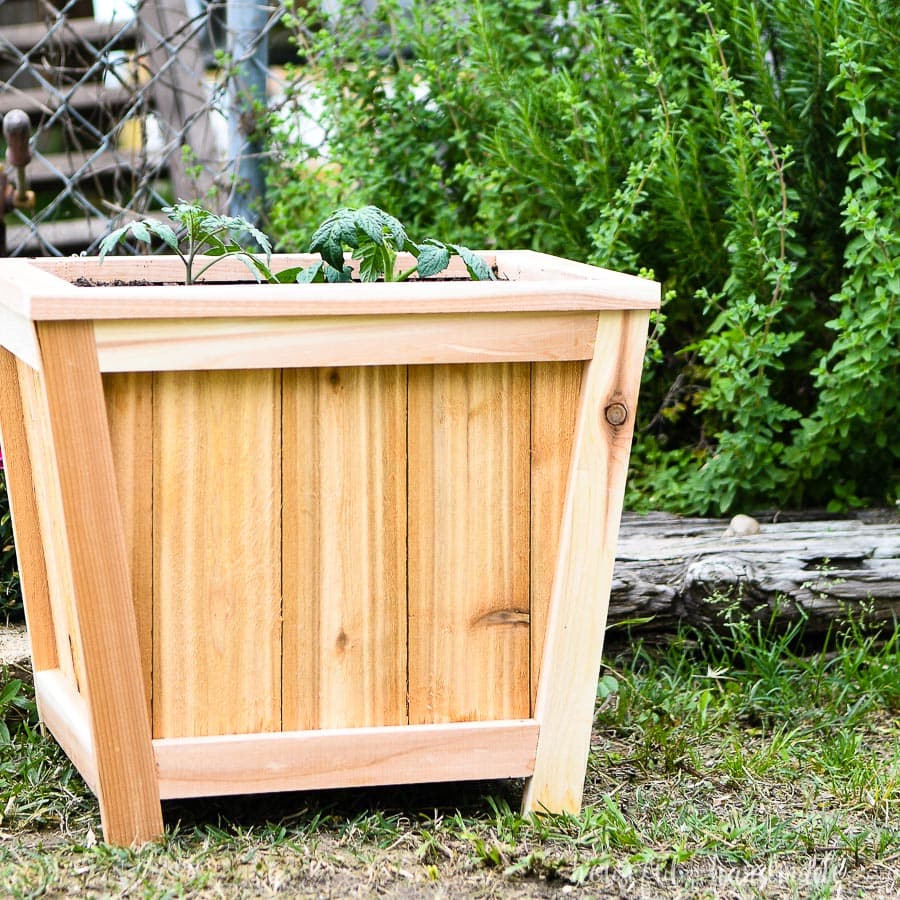
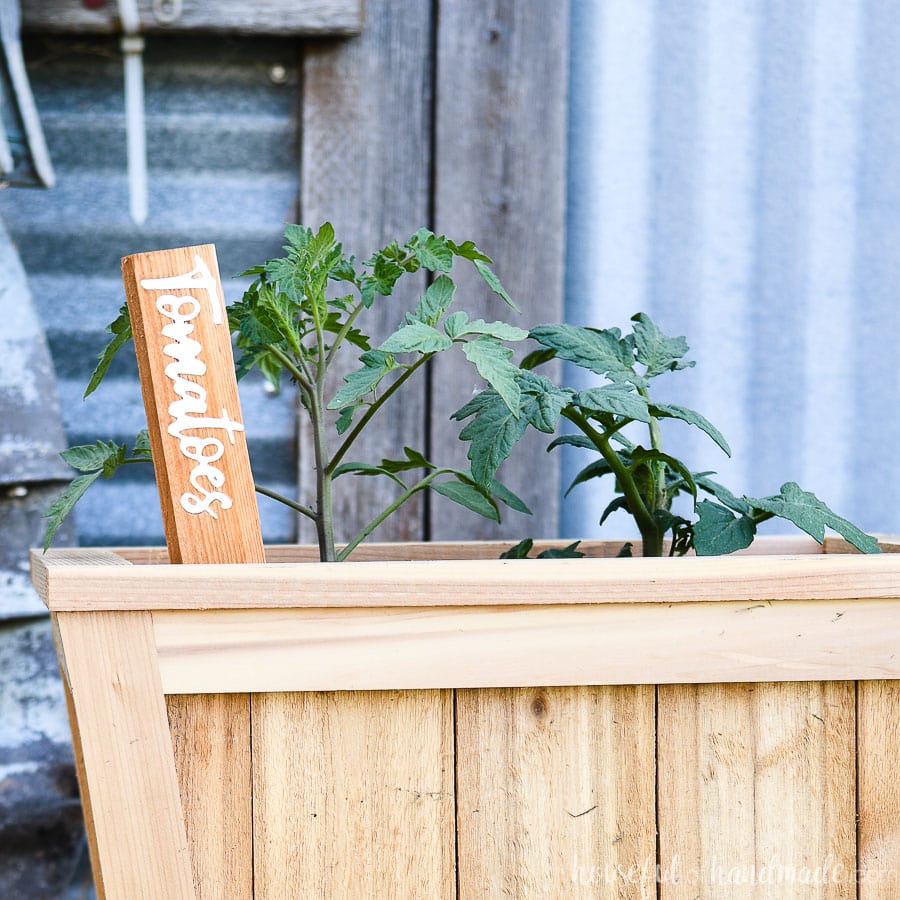
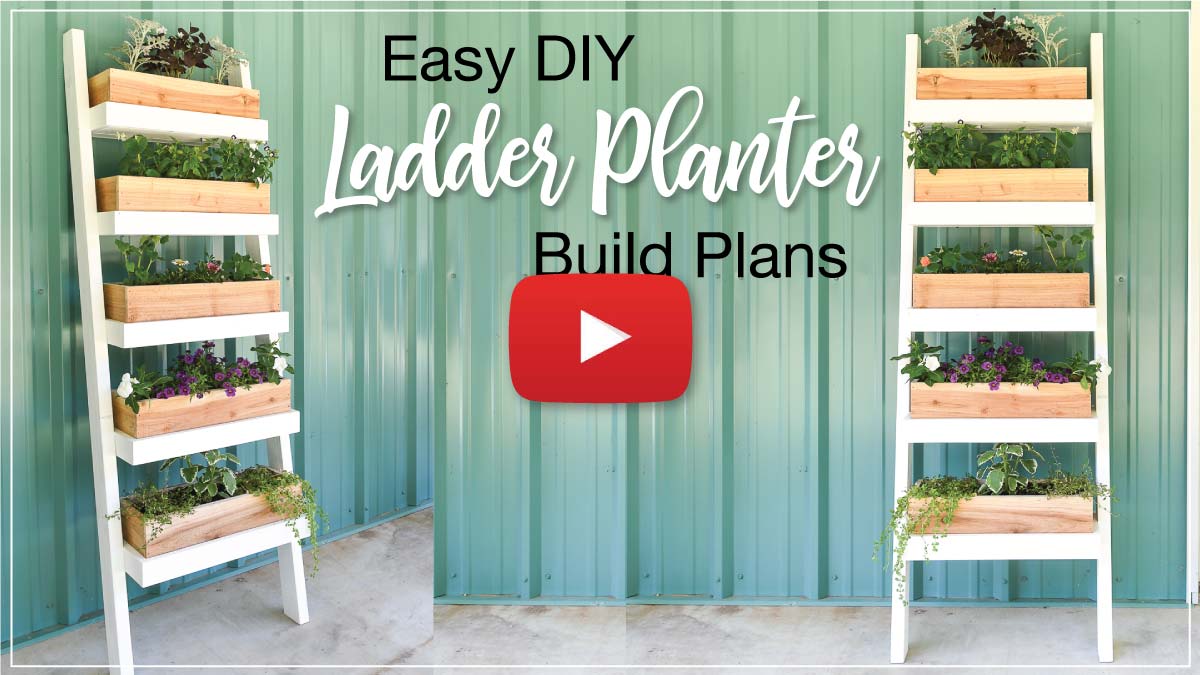
You can never have too many plants! Whether you want beautiful flowers or need a place to grow some food, plants will instantly brighten up your space.
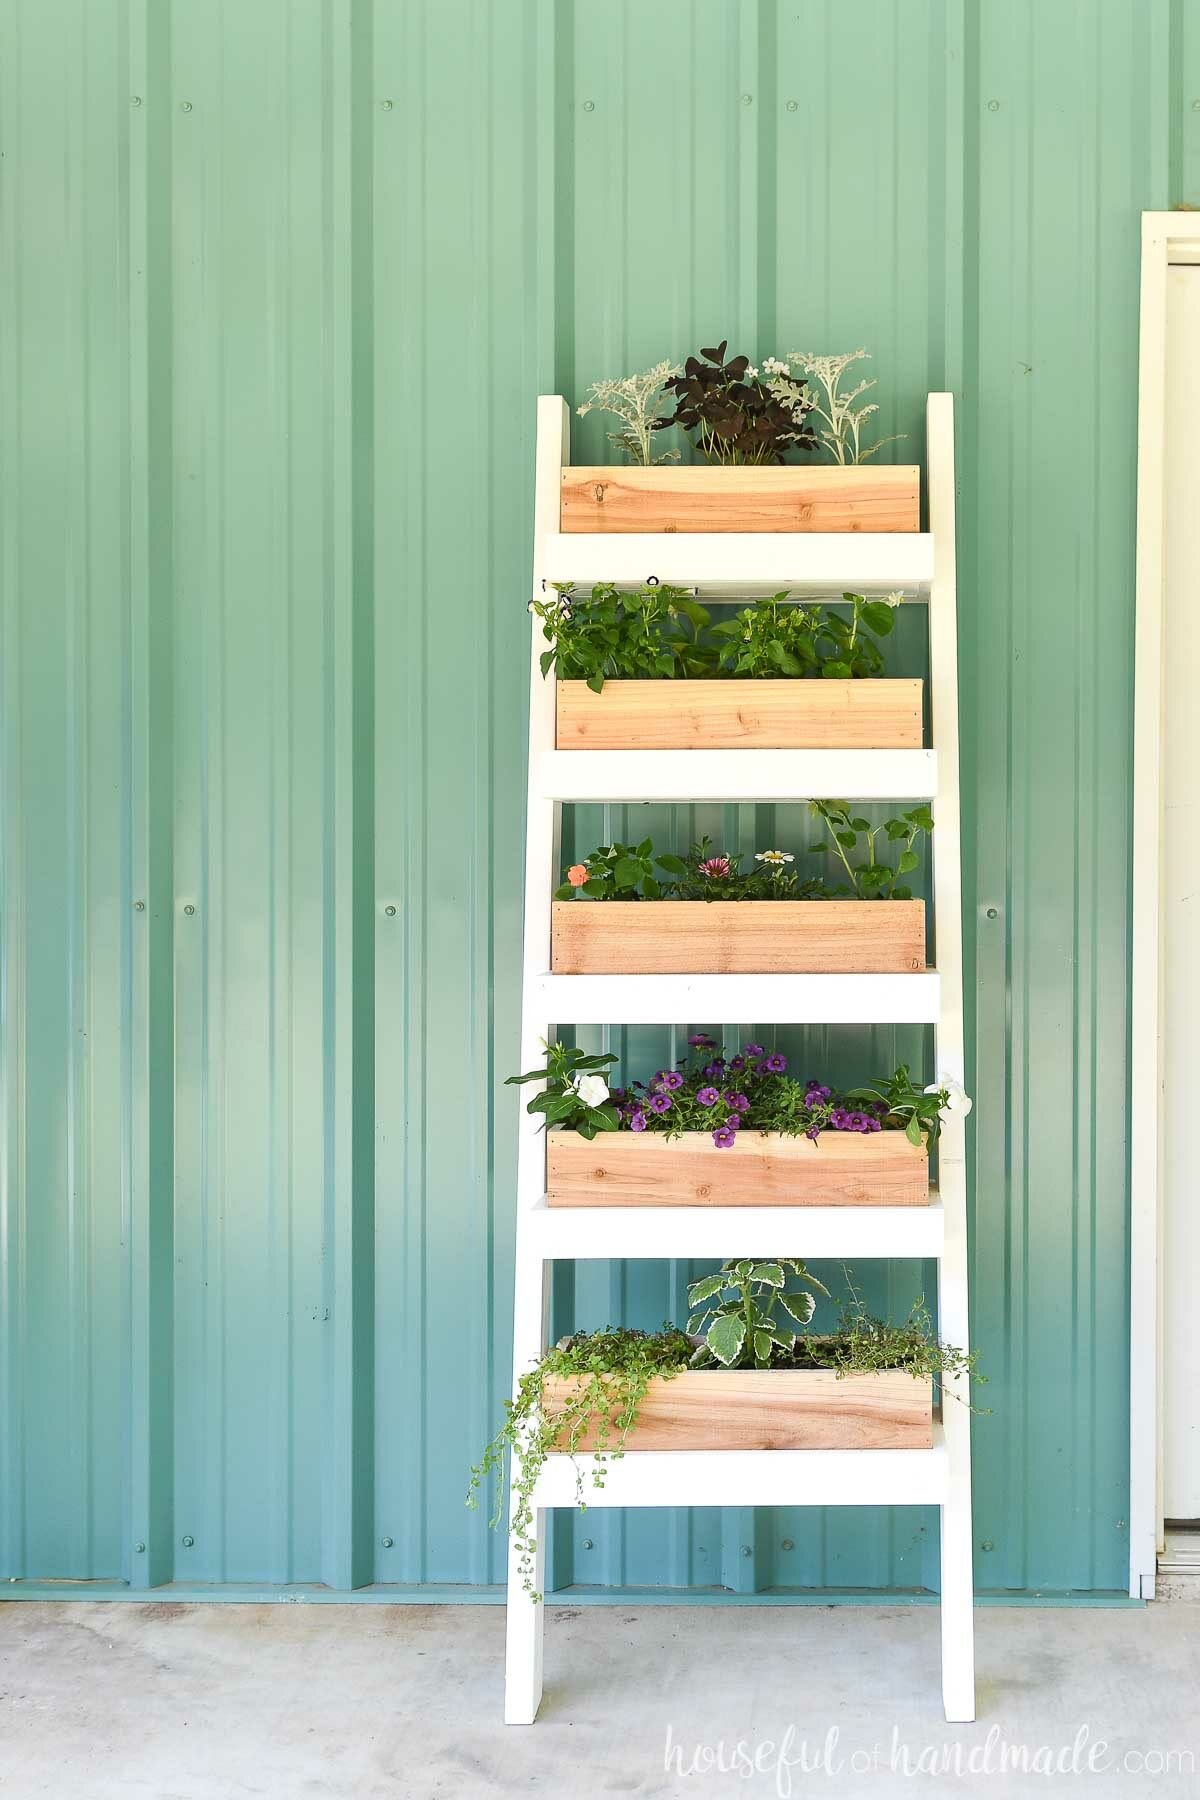
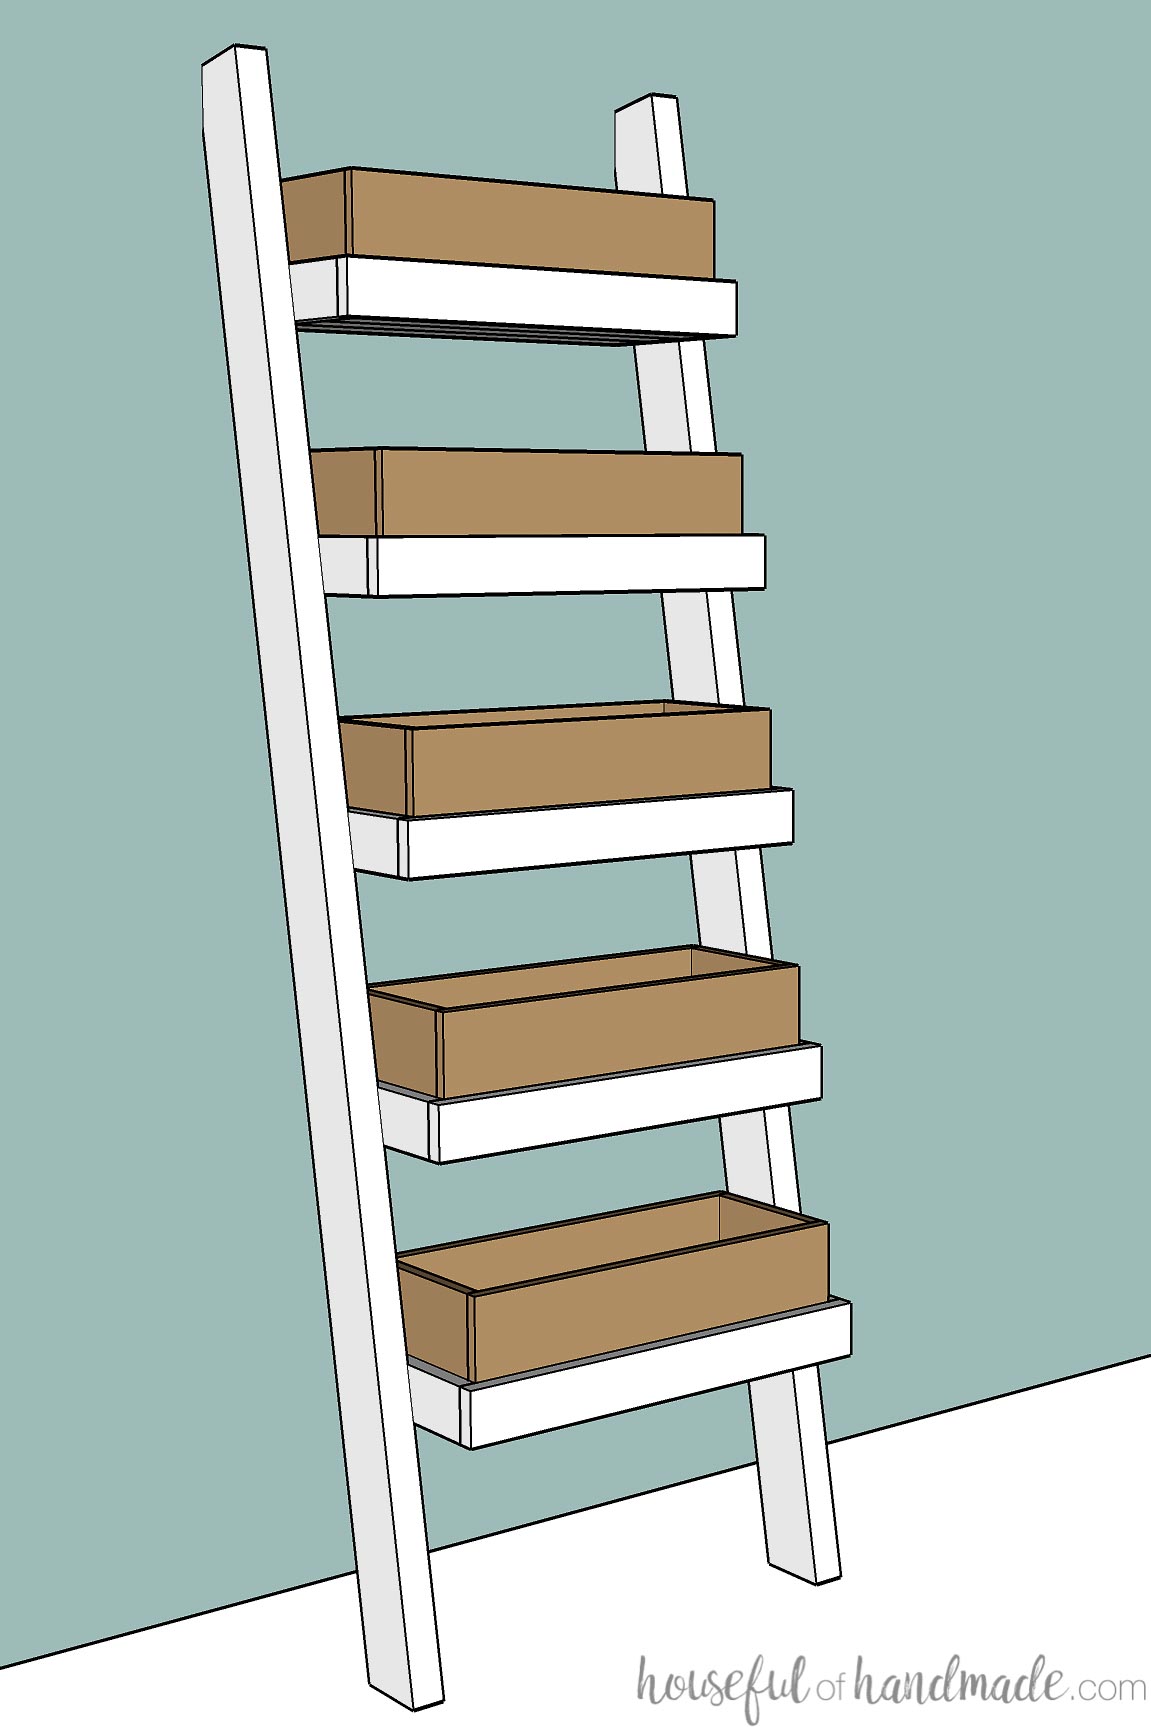
And you do not need a big space to grow a lot with this beautiful ladder planter. It takes the planter boxes vertical to give you lots of room for growing in a small footprint.
Plus, I partnered with Kreg Tools to make this beautiful outdoor planter fast & easy to build! The pocket holes create a strong ladder to safely hold all your favorite plants.
This post may contain affiliate links. As an Amazon Associate I earn from qualifying purchases. Click here to read my full disclosure policy.
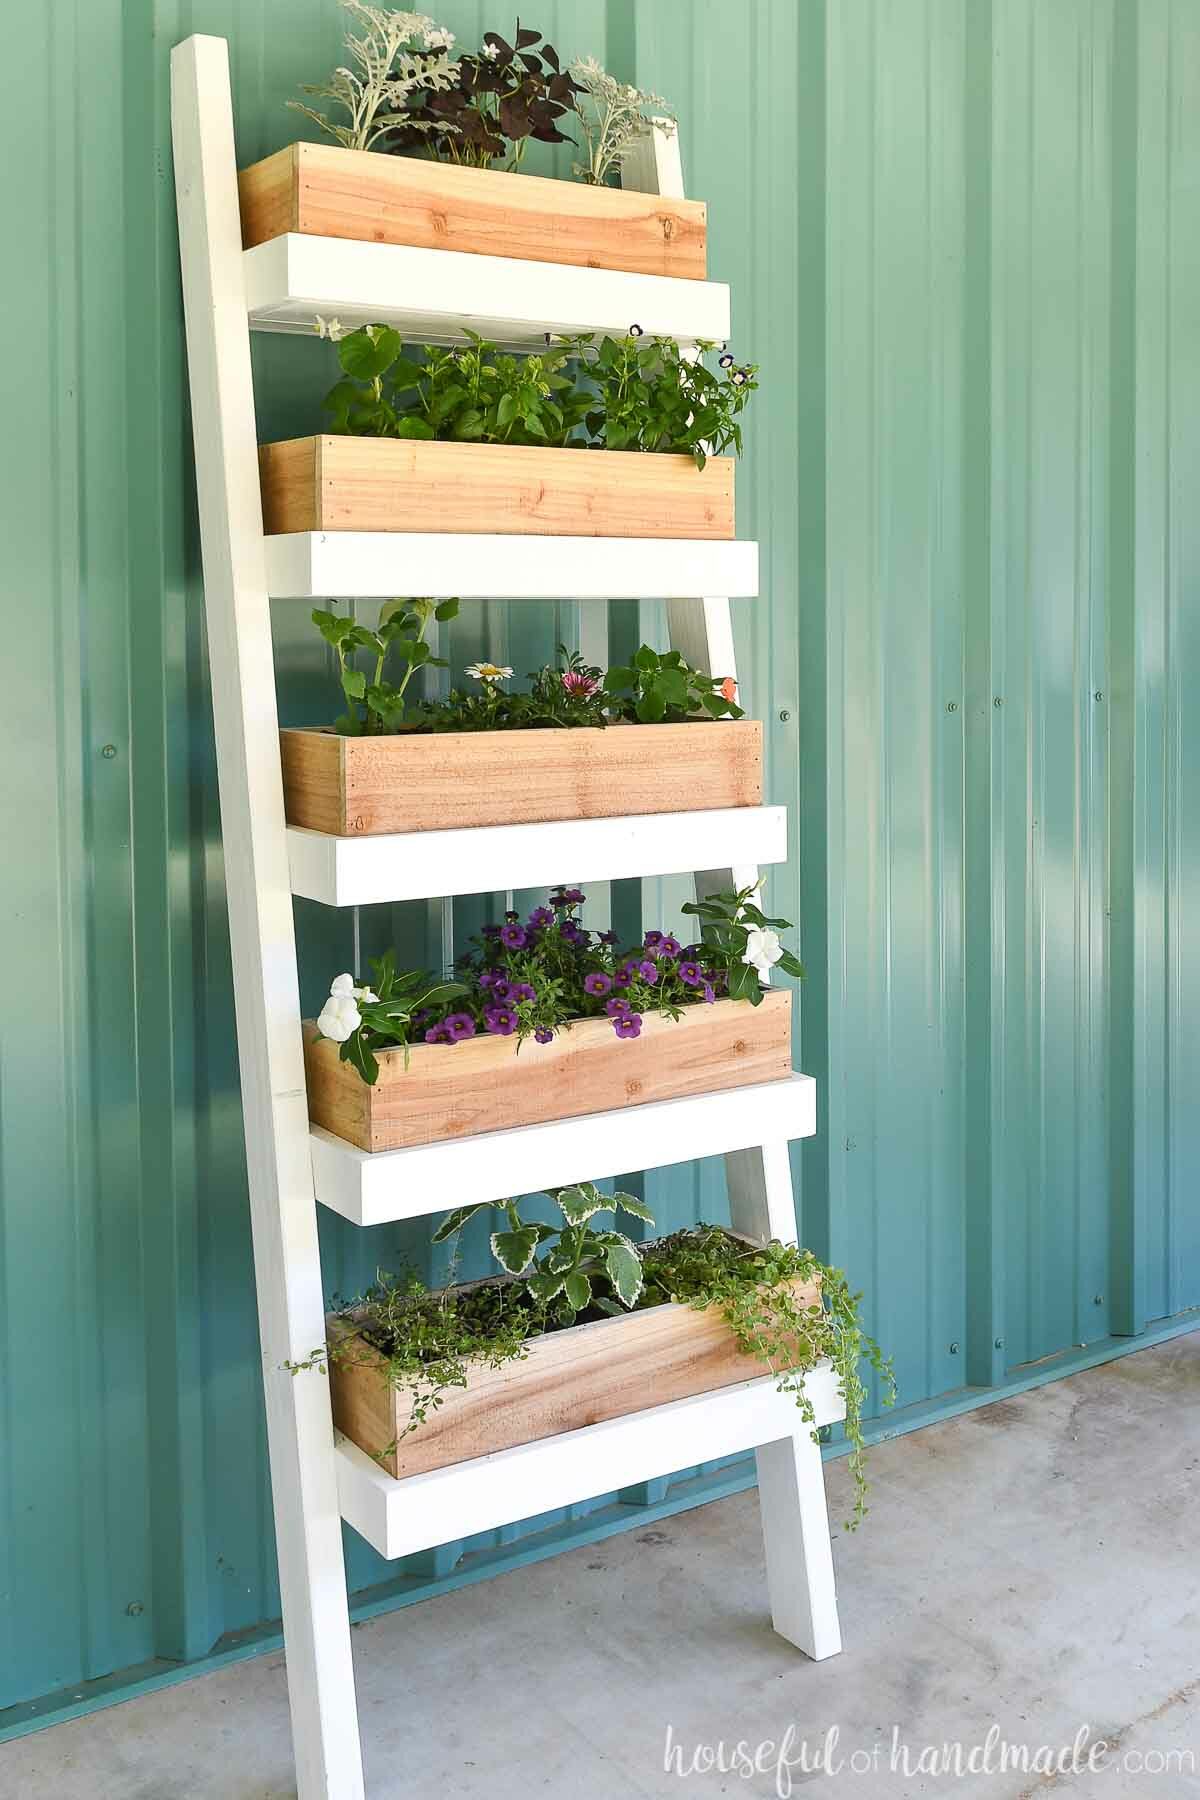
5 Tier Vertical Planter
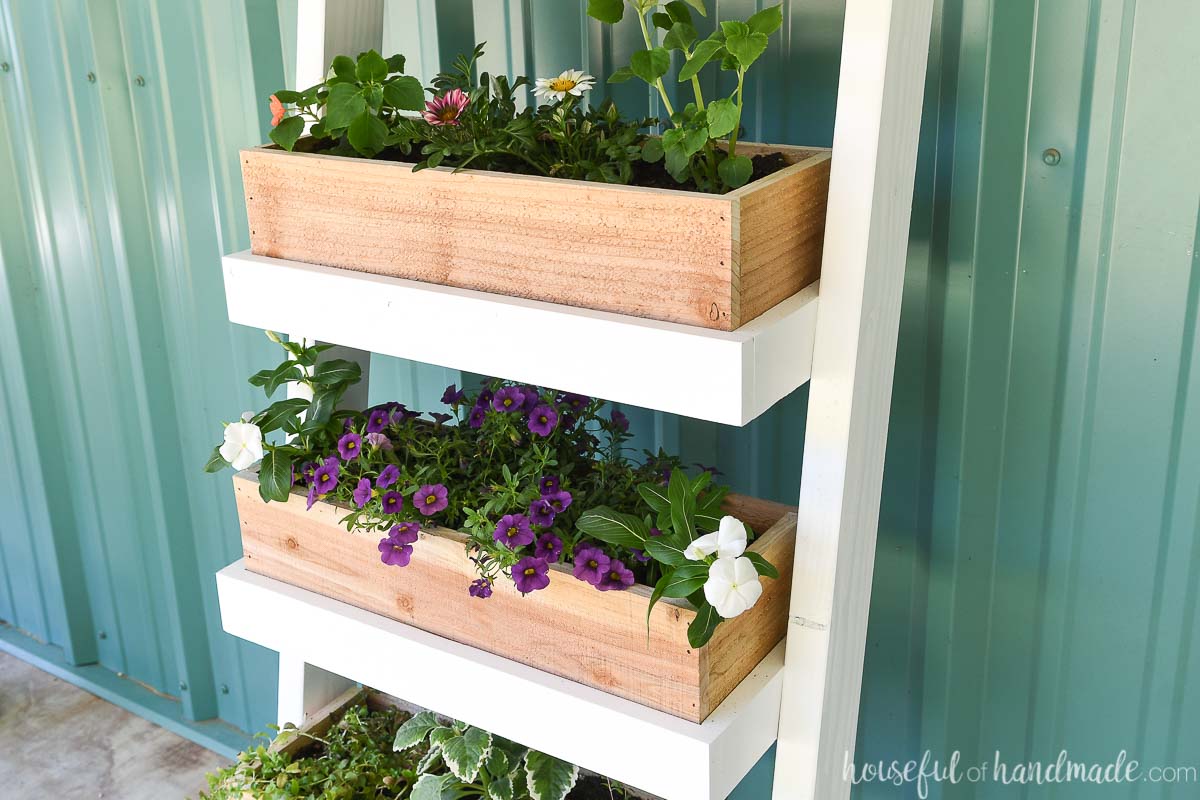
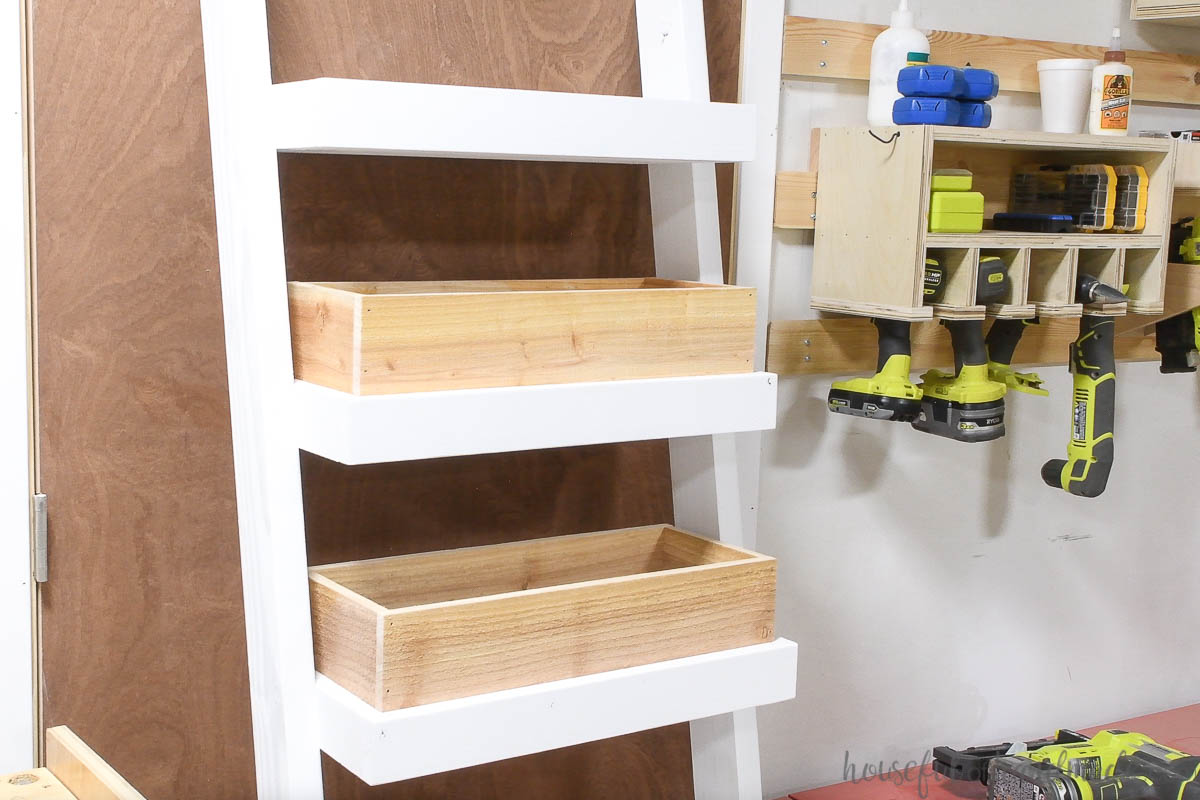
This vertical ladder garden has 5 large planter boxes. Each planter box is approximately 20″ by 8″ and 5 1/2″ deep.
There is approximately 6″ of space between each planter. Perfect for short or trailing plants.
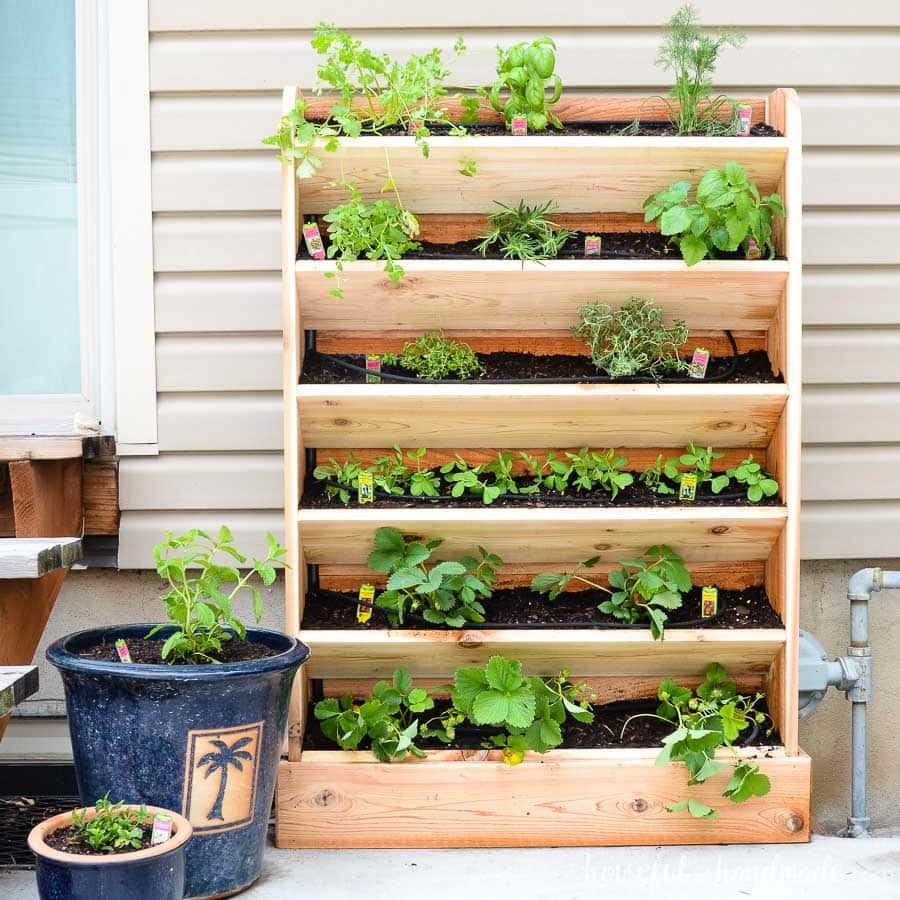
If you want to grow taller plants, just build your ladder with less planter boxes and increase the space between them. That is the beauty of DIY!
You could also use this ladder as a plant stand.
Build the ladder as detailed below, but do not add the cedar planter box sides. This will create sturdy shelves for your plants.
Then you can fill up the shelves with beautiful pots filled with your favorite plants.
More Gardening DIYs
Get outside and plant something amazing with these other DIY gardens and planters.
How to Make a Wooden Ladder Planter
Tools & Material
Recommended Tools:
- Pocket hole jig
- Miter saw
- I recently upgraded to this larger sliding miter saw (watch for it to go on sale), but all my projects before were built with this inexpensive miter saw that I loved.
- Kreg Quick-Flip
- Finishing nail gun
- Drill
- Impact driver (optional, but I love not having to switch bits with the drill)
- 90 degree pocket-hole driver
- Speed square
- Sander
Supplies:
- PDF Build Plans
- Lumber-
- (2) 2×4 boards, 8′ long
- (6 1/2) 1×3 boards, 8′ long
- (4) 5 1/2″ wide cedar fence pickets, 6′ long
- 1 1/4″ Blue-kote pocket holes screws
- 1″ long finishing nails
- Landscaping fabric
- Outdoor wood glue
- Outdoor paint or stain
Overall Dimensions:
The finished ladder planter is 24″ wide by 6′ tall.
It sits 15 1/2″ out from the wall at the base and its 18″ out from the wall at the widest part (lowest planter box)
Prefer to Watch? Check out the Video Below
CUT LIST
Cut out the pieces according to the easy to read table in the premium PDF plans.

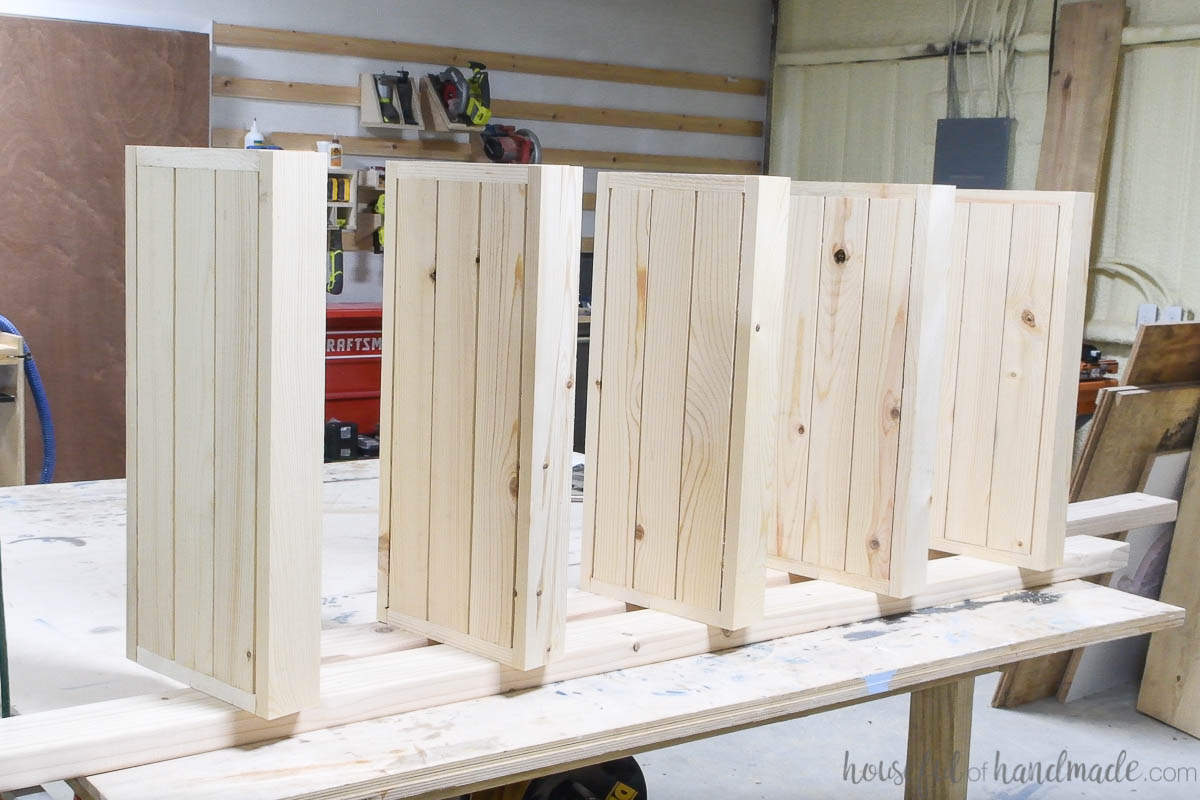
STEP 1 – Build the Planter Box Base
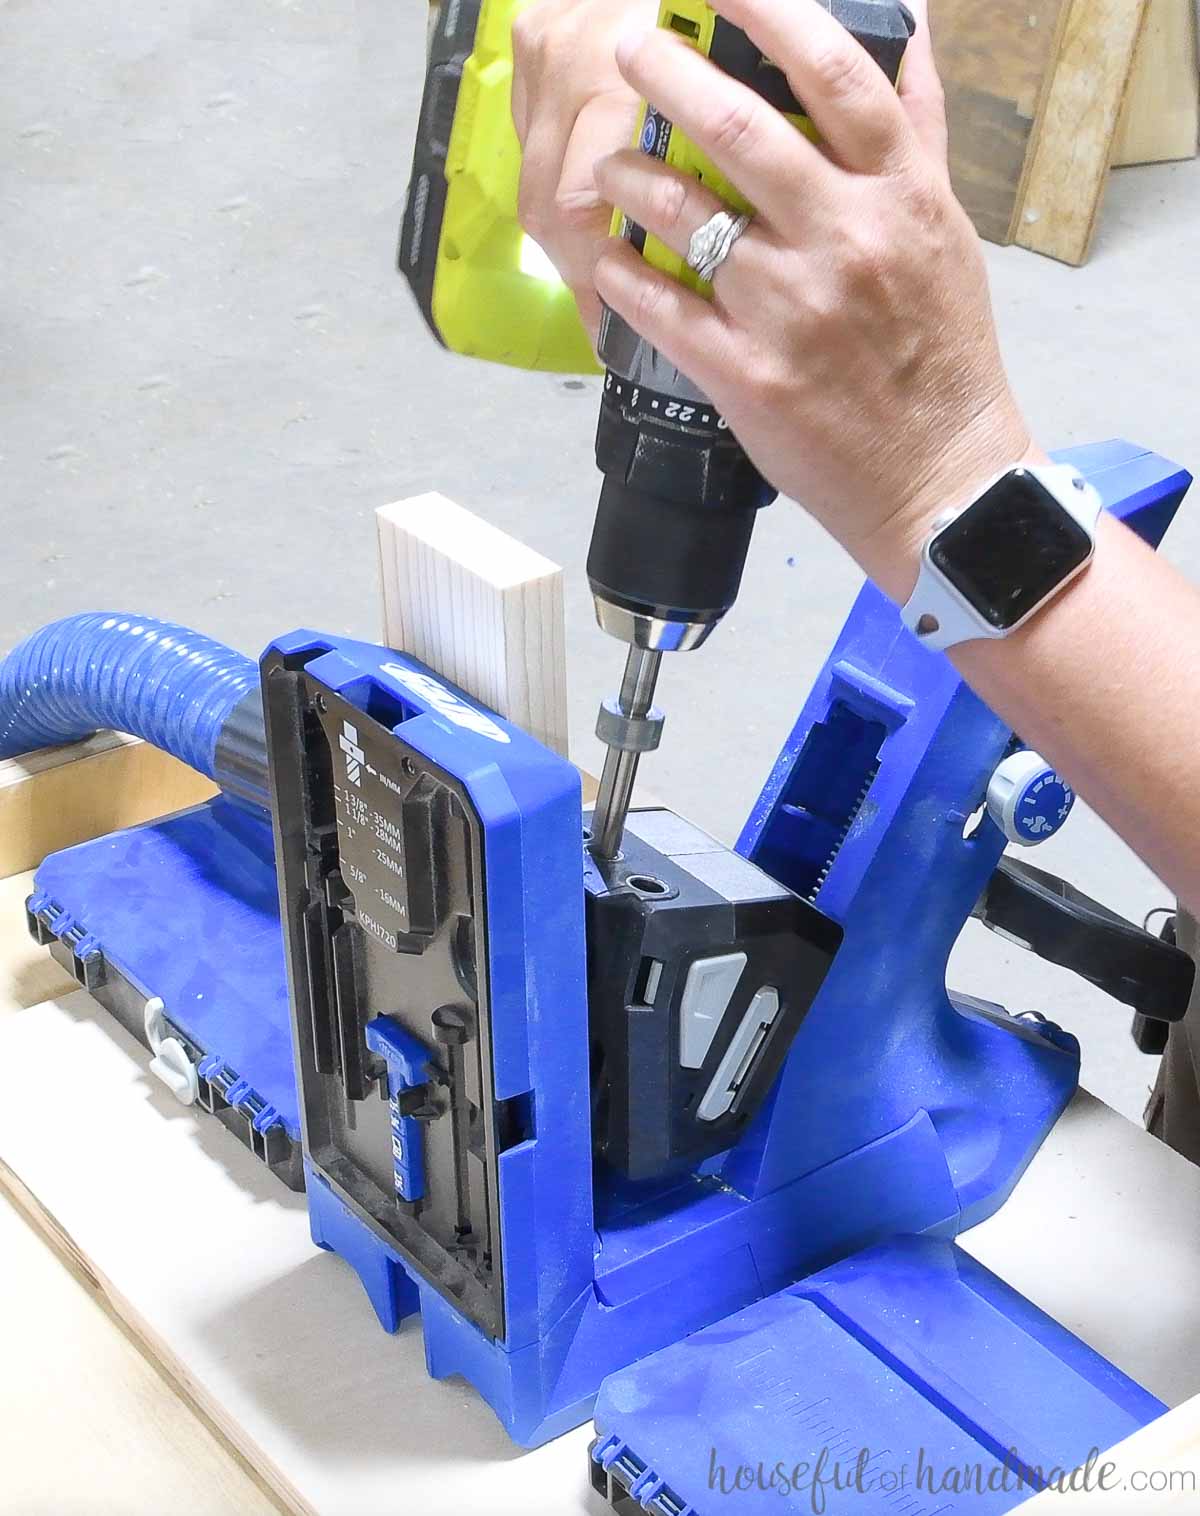
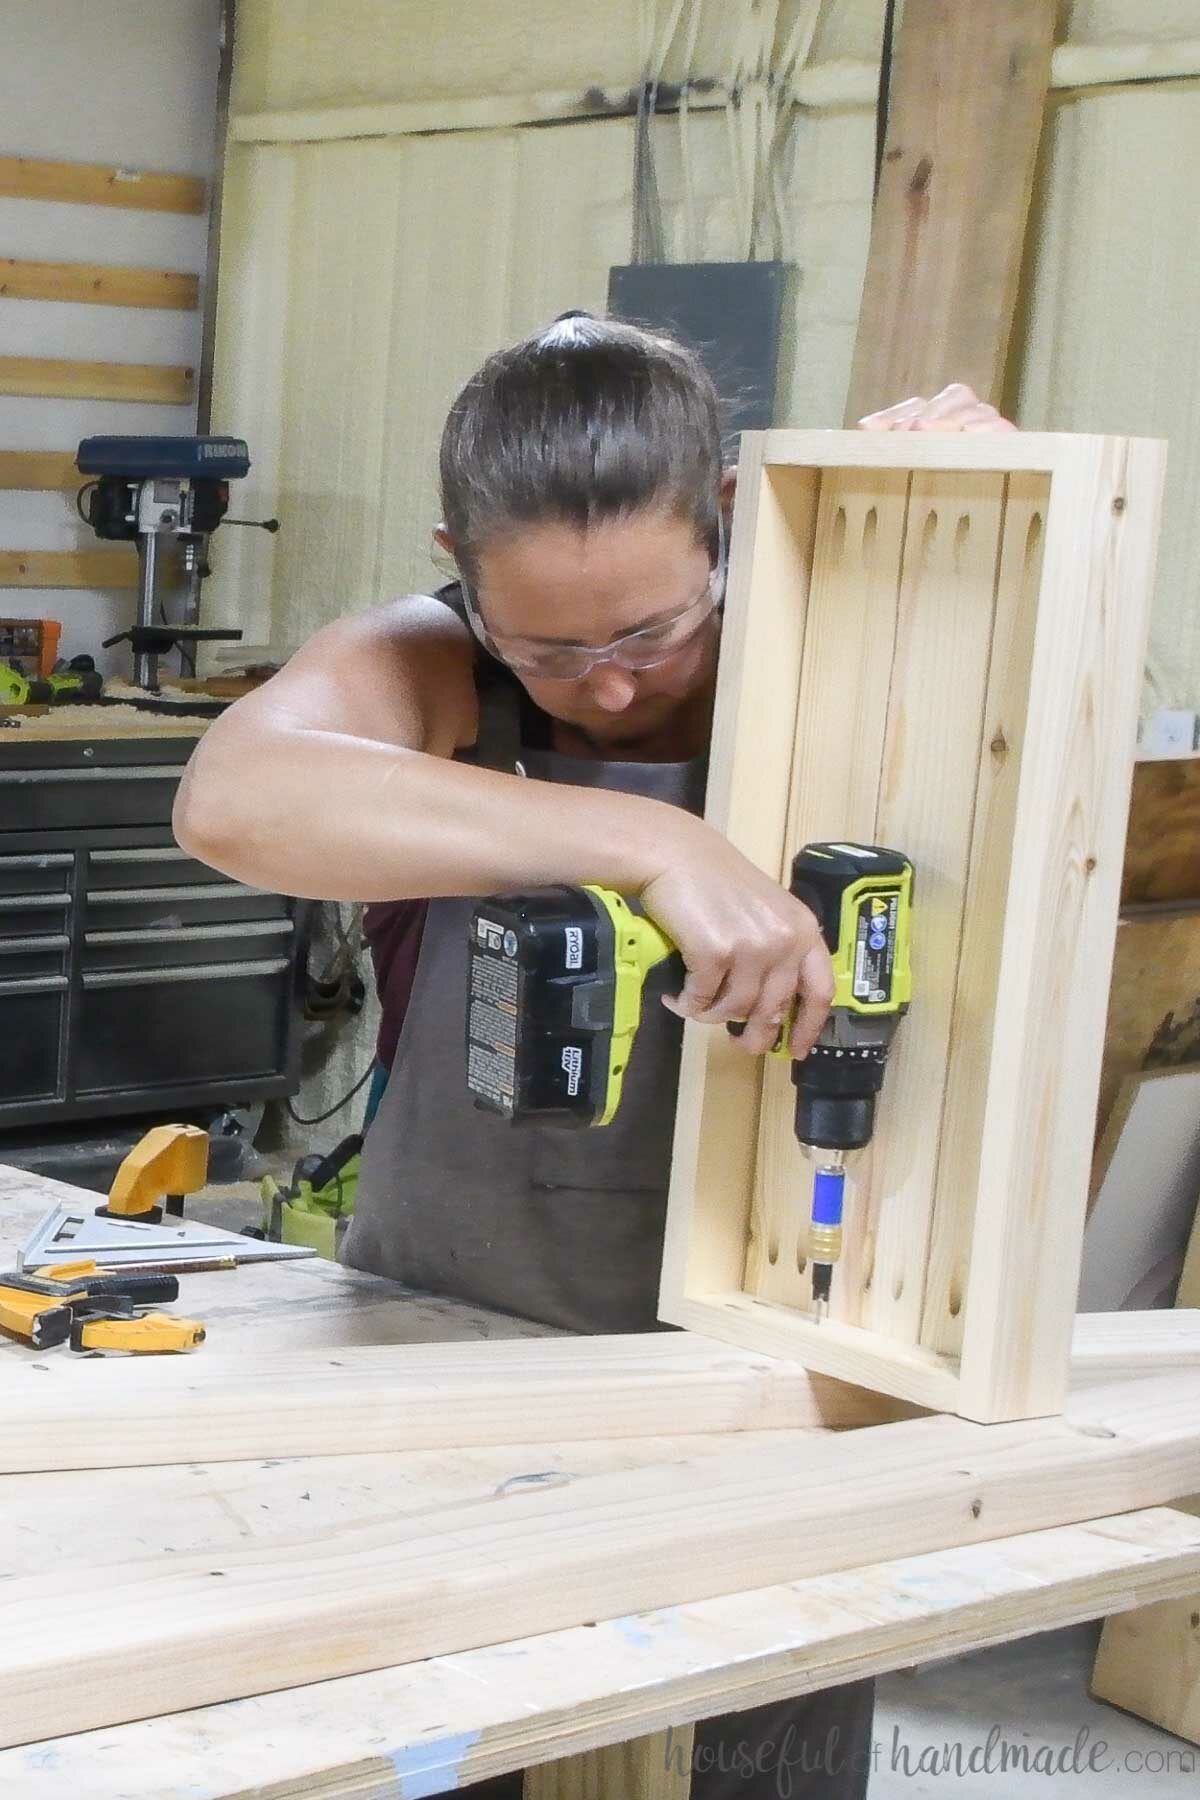
Drill pocket holes set for 3/4″ thick material in each end of the shelf frame boards. Learn how to Use the Kreg Pocket Hole Jig 720 here.
For the 8″ side boards, do not put pocket holes in the bottom 3/4″ of the boards or they will be hidden when you attach the bottom boards. You need to have these accessible to attach the front/back later.
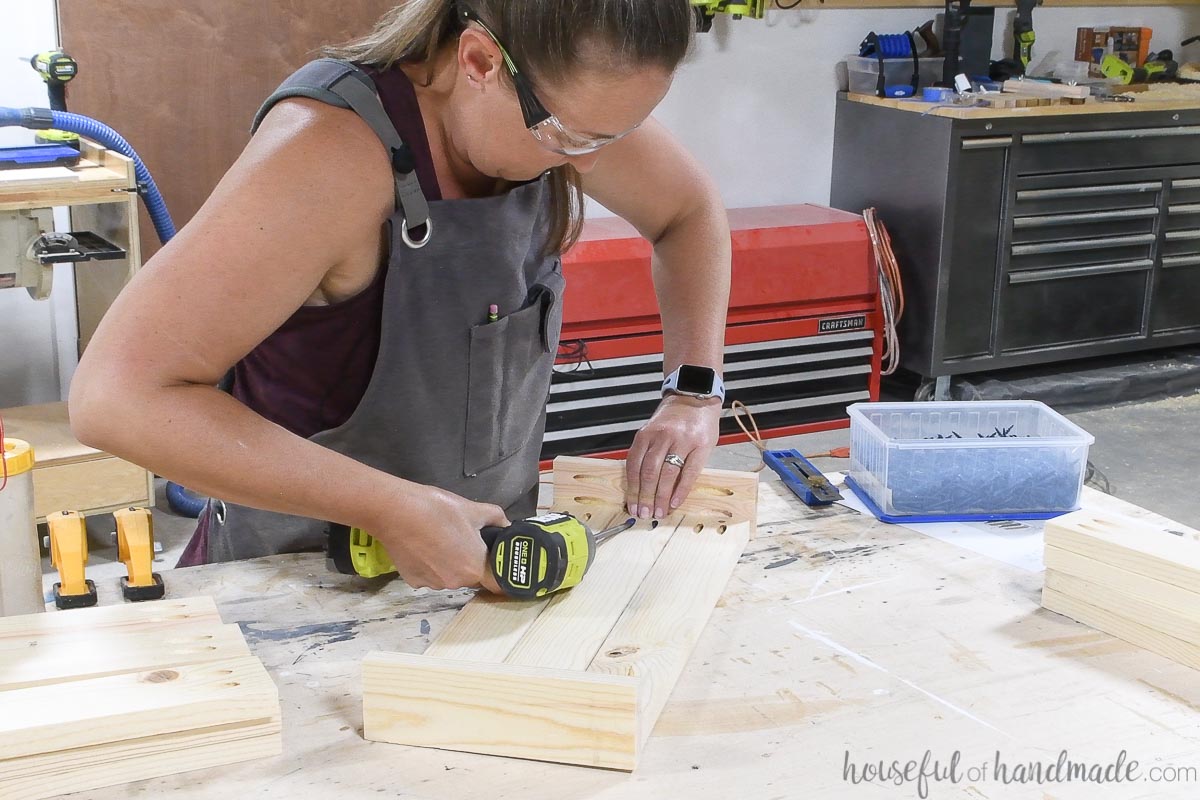
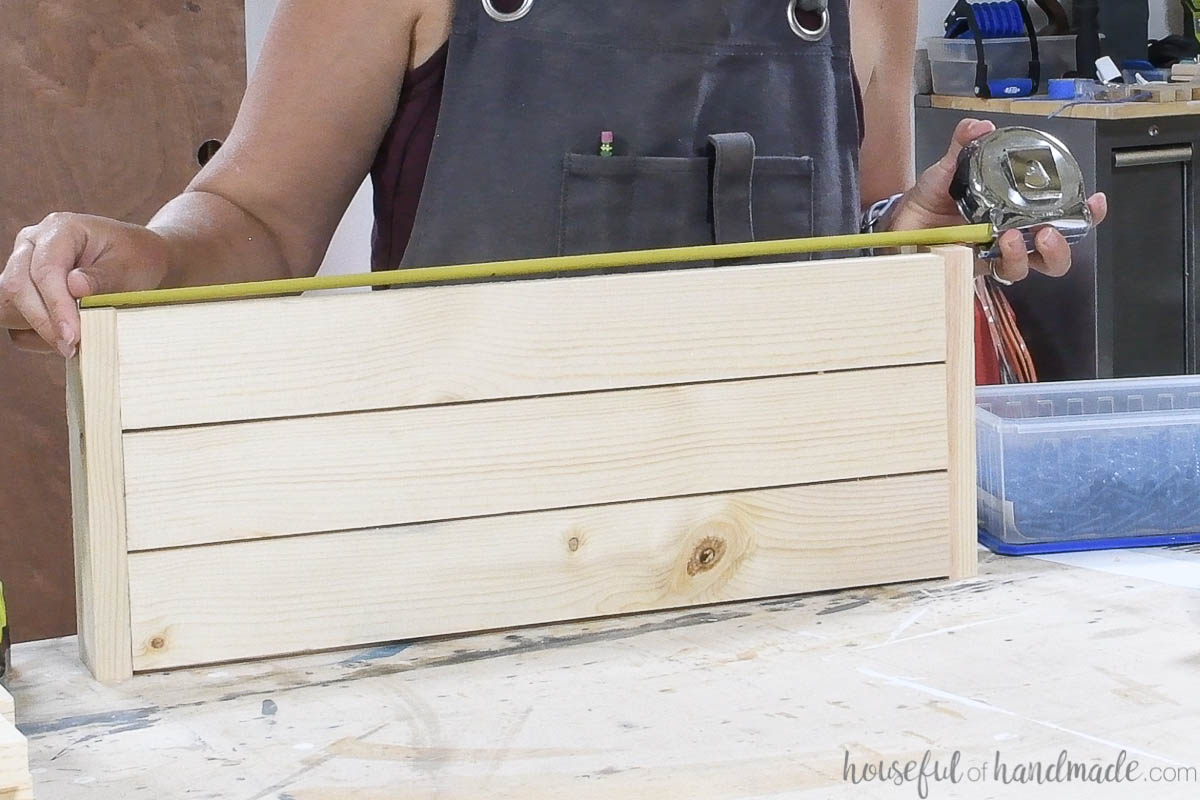
Attach three longer boards in between two shorter side boards with wood glue and 1 1/4″ pocket hole screws. Center the middle board and leave a small gap on both sides of the outer boards.
These gaps in the bottom slats will allow water to run out.
Hide the pocket holes by facing them up on the bottom slats. That way they will be hidden inside the planter box.
However, if you plant to use it as a plant shelf, you will want to place the pocket holes on the bottom.
Measure the assembled piece to see what size you need to cut the pieces for the front/back of the planter box frames. Cut the boards.
EXPERT TIP:
You cannot always rely on the measurements in a plan to be exactly the size needed for your build because your boards might not be exactly the thickness they should be (unless you mill your own lumber precisely). Instead measure where the board is going and cut to fit.
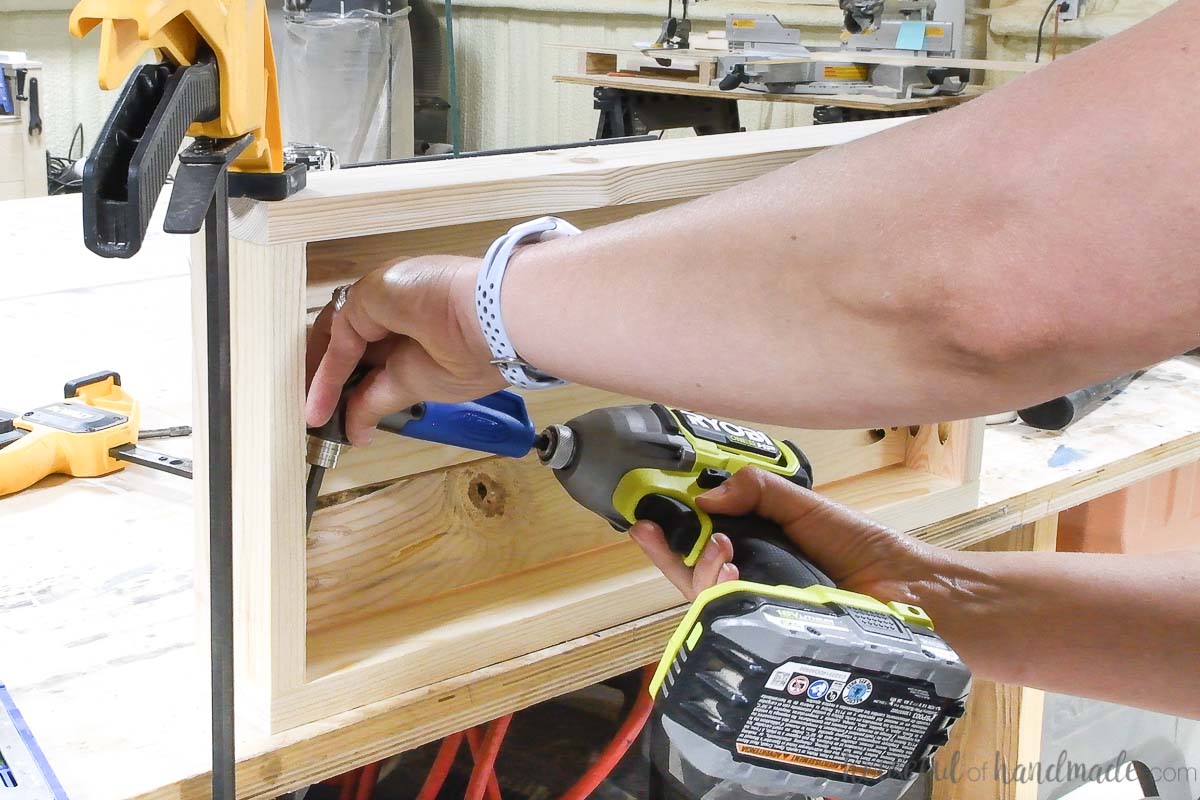
Attach the front and back of the planter frames with wood glue and 1 1/4″ pocket hole screws with the pocket holes previously drilled on the side boards.
The inside of the frame is tight, use the Kreg 90 degree bit to drive your pocket holes.
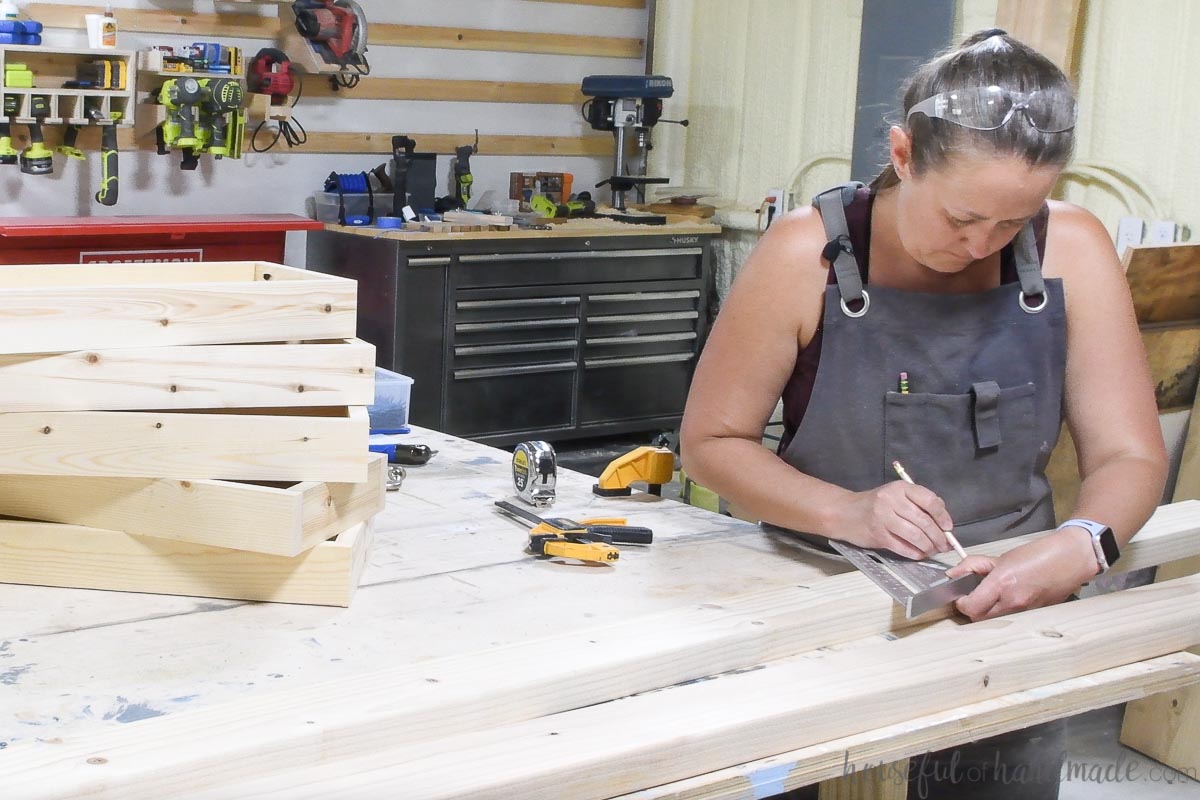
Repeat until you have built all 5 planter frames.

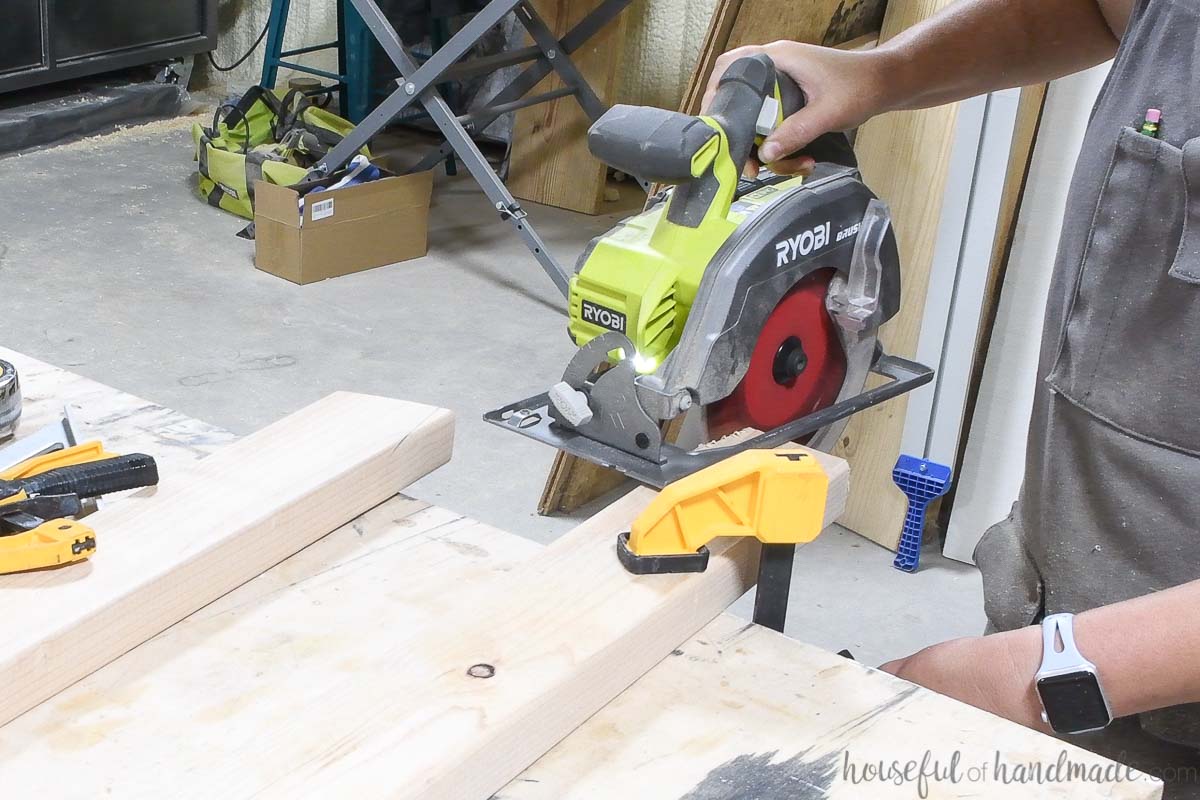
STEP 2 – Cut the Angled Ladder Sides
Cut 2 pieces from the 2×4 boards 6′ long. Both ends need to be cut at a 10 degree angle so the angles are parallel.
Lay the boards mirrored on your worktable. At the top of the board from the front (lower part of the angle), measure in 3″ along the angle.
Then using the speed square, draw a line 90 degrees to the angle. It will run off the back of the board a couple inches from the top.
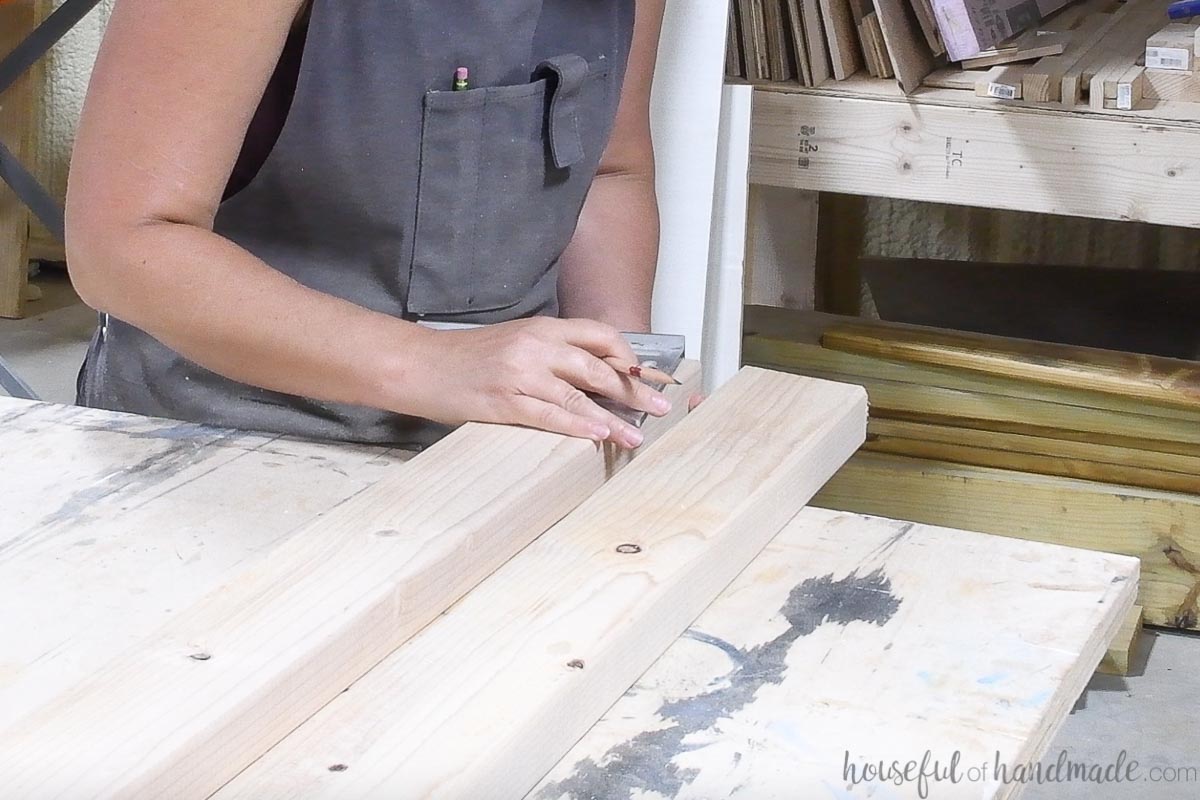
Cut the board on this line. It will create a flat area for the back of the ladder to rest on the wall at.
Repeat for the other side, making sure they are mirrored.
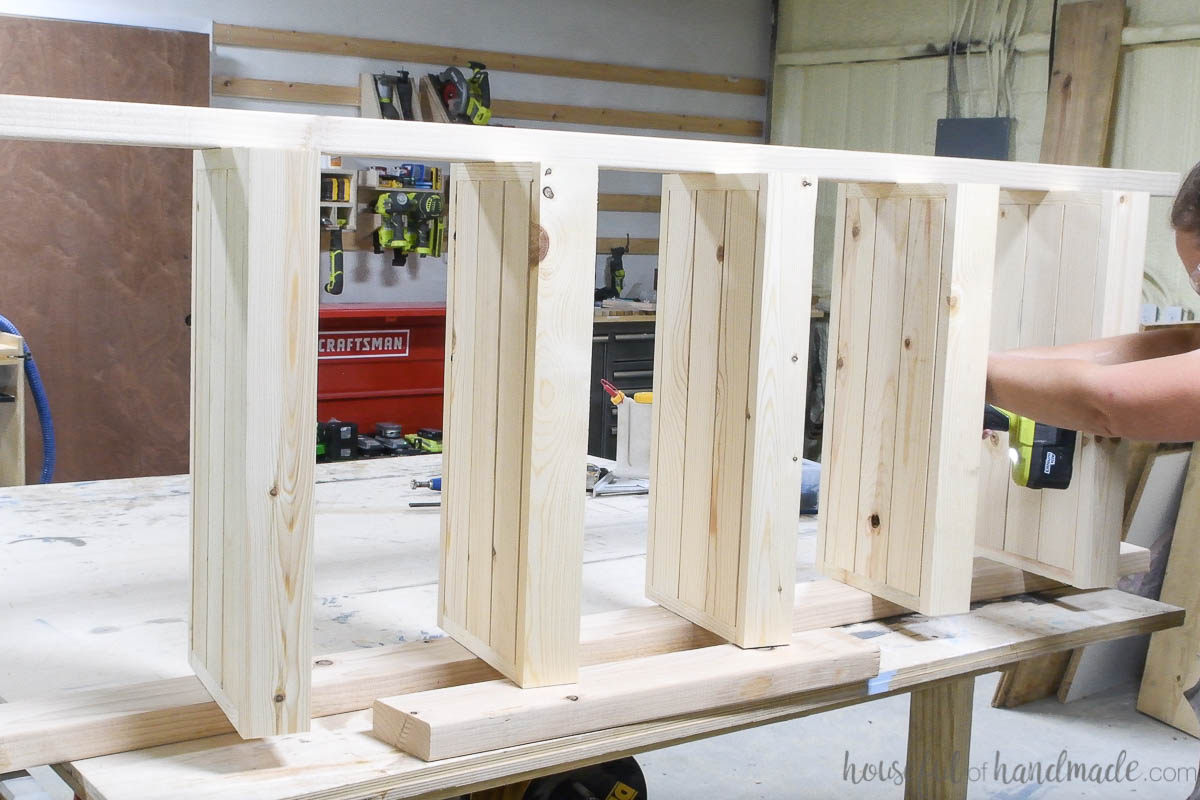
STEP 3 – Attach Box Bases to Sides
From the front/bottom of the side pieces, measure up 12″ and make a mark. Then measure and mark every 12″ up the entire board (you will have 5 marks).
Using the speed square, draw a line from each mark along the board at a 10 degree angle parallel the bottom. This will be where you line the bottom of each planter box frame.
Measure and mark the bottom of each planter box 4 1/2″ in from the front on both sides.
Line the bottom of the planter box up with the line on the side board so the 4 1/2″ mark is at the front of the 2×4 board.
Use the Kreg Quick-Flip to attach the frame with 1 1/4″ pocket hole screws countersunk into the wood.
Repeat to attach all the frames to one side piece.
Then flip the ladder planter over onto the other side piece. You might want to use another scrap of 2×4 to help balance it on the side board.
Line up the frames with your lines on the other side board and secure the same way.
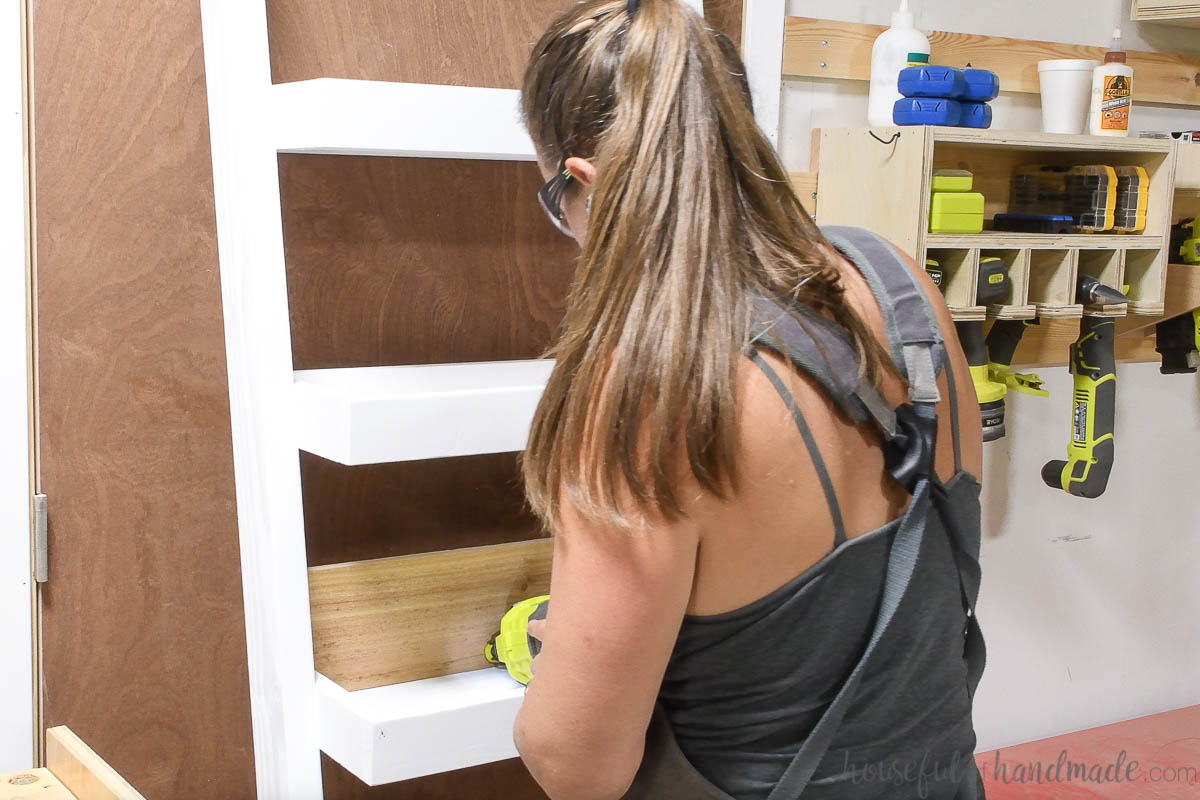
STEP 4 – Finish the Ladder Frame
If you want to paint/stain your ladder planter so it contrasts the cedar on the planter boxes, you will want to do that now.
Sand and apply 2-3 coats of exterior paint or stain.
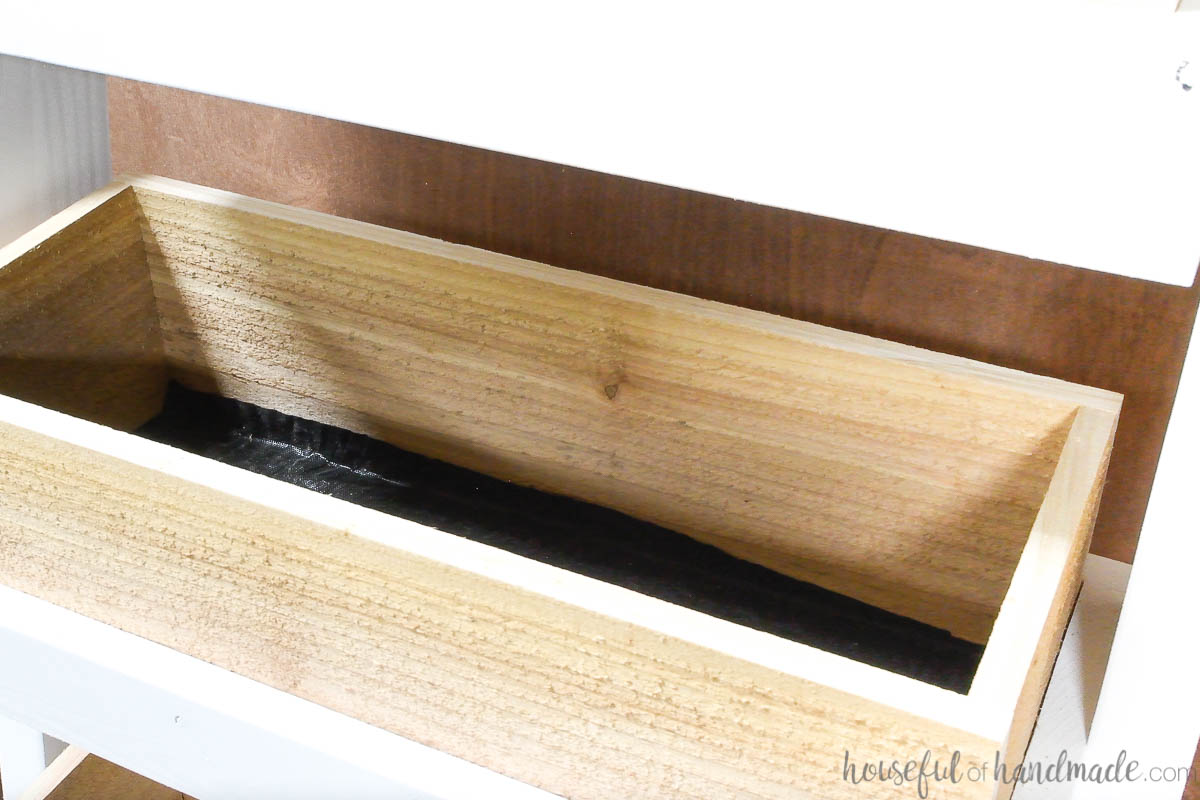
STEP 5 – Attach Cedar Planter Boxes
Cut ten 19 1/2″ long pieces from the cedar fence pickets. They should fit snuggly, but not too tight into the planter box frames.
Secure the back piece to the frame with finish nails.
Place the front piece into the planter. You will probably not be able to fit your nail gun inside to secure it to the frame. Instead, you will just attach it to the one already secured.
With the front and back pieces inside the frame, measure for the side pieces and cut them to length. They should fit snuggly between the front and back.
Secure with finish nails through the front cedar piece into the side pieces. Then rotate the ladder and secure the back piece to the side pieces.
Cut a piece of landscaping fabric to fit inside the bottom. It should be slightly larger than the bottom of the planter box.
This will prevent soil or roots from coming out the bottom of your planter but still allow water to drain.
You did it!
Premium plans include:
- Recommended Tools
- Shopping list
- Easy to read cut list table
- Cut diagrams
- Step-by-step instructions with 3D renderings
- Helpful resources
- BONUS: 3D SketchUp file
Now all that is left is to load your new planter up with soil and plant your favorite plants!It took two 40 cubic foot bags of potting soil to fill all 5 planter boxes.
Place your new ladder planter on your porch, patio, or just lean it up against your house and enjoy your new plants!
If your ladder is properly angled on the house, the angled cuts on the top will be flush with the wall and the bottom will be flush to the ground. This will ensure the plant boxes are parallel to the floor.
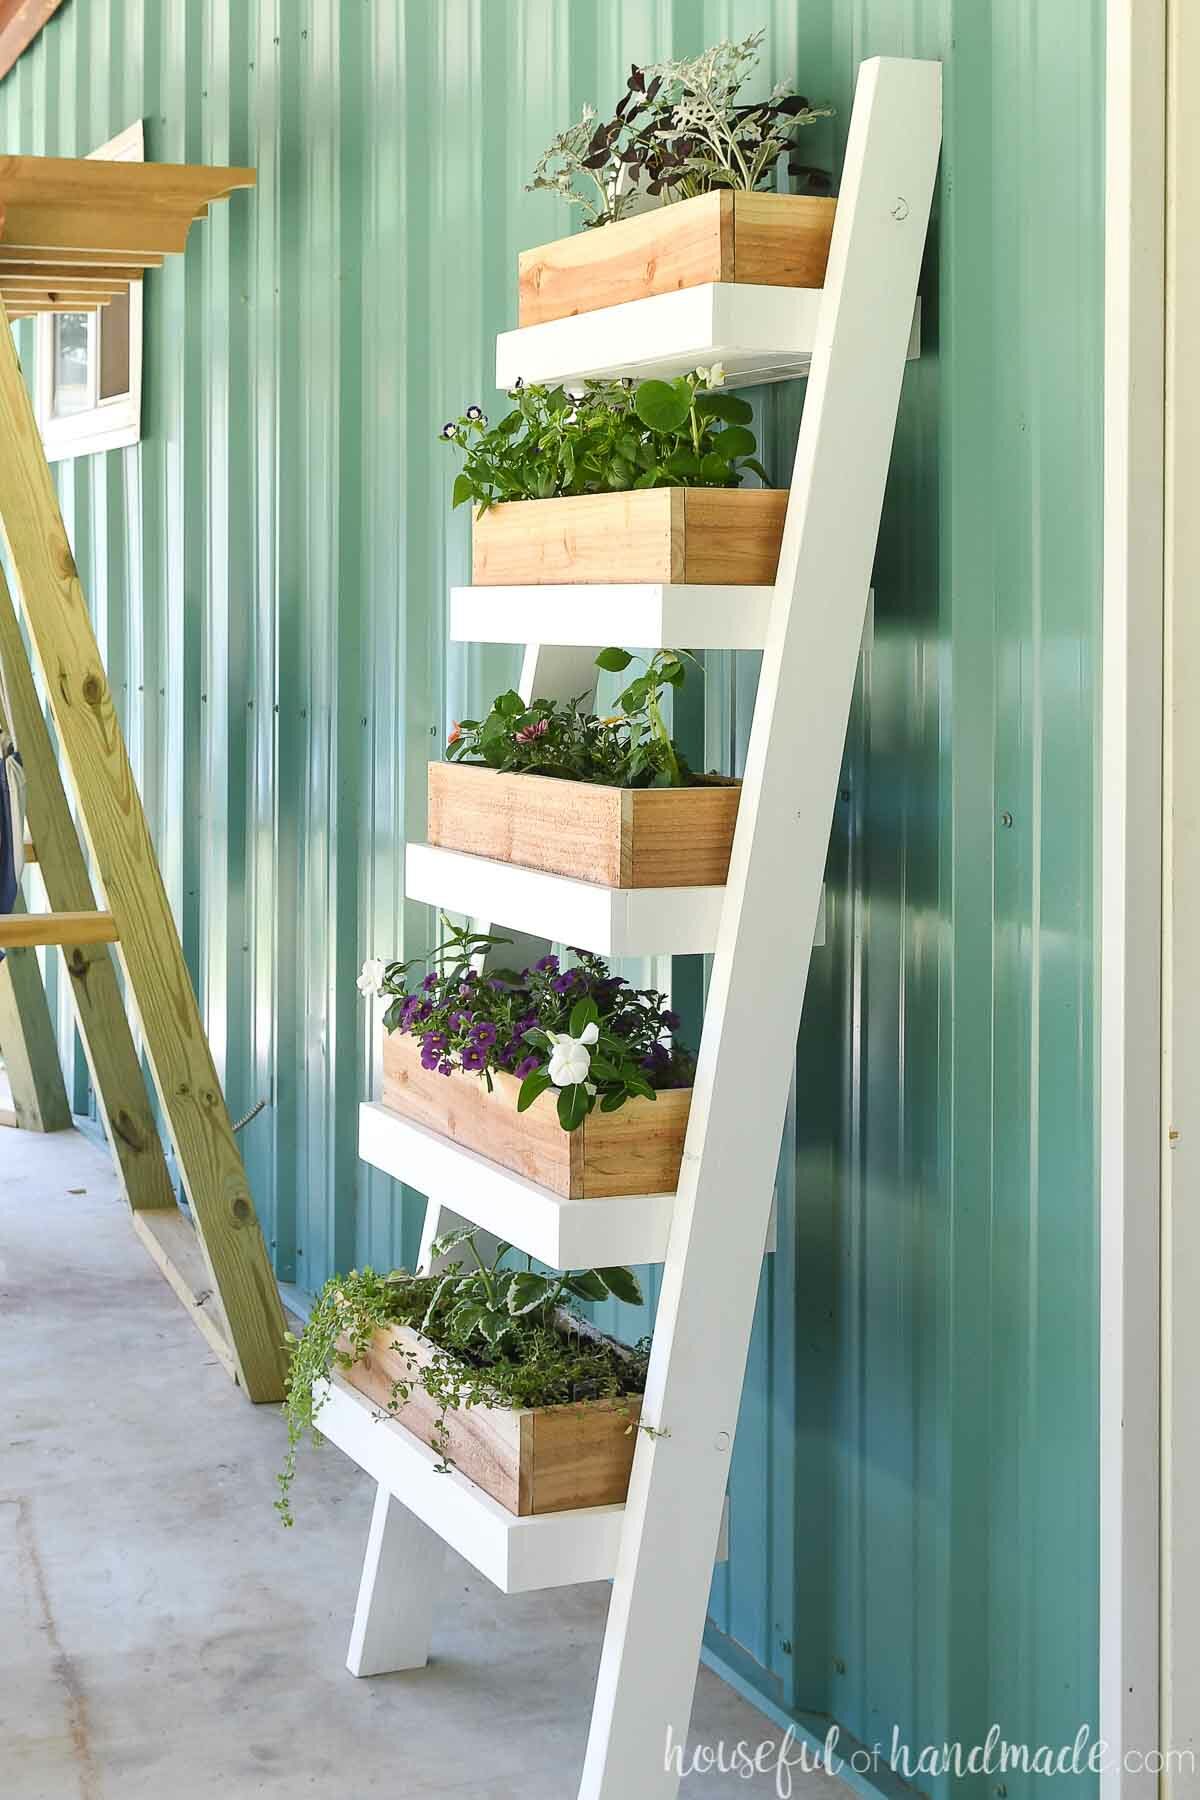
And just like that, my porch is much prettier and ready for summer.
Happy building!

Thank you to Kreg Tools for sponsoring this post. I only recommend products that I use and love and all opinions are 100% my own. Click here to read my full disclosure policy.