

Save money on lighting by making your own DIY linear wood chandelier.
One of my favorite projects from last year was the gorgeous wood light fixture that I built. Sadly, it stayed in the house when we moved. So it was time to partner with Inventables to make a new DIY light fixture with my X-Carve.
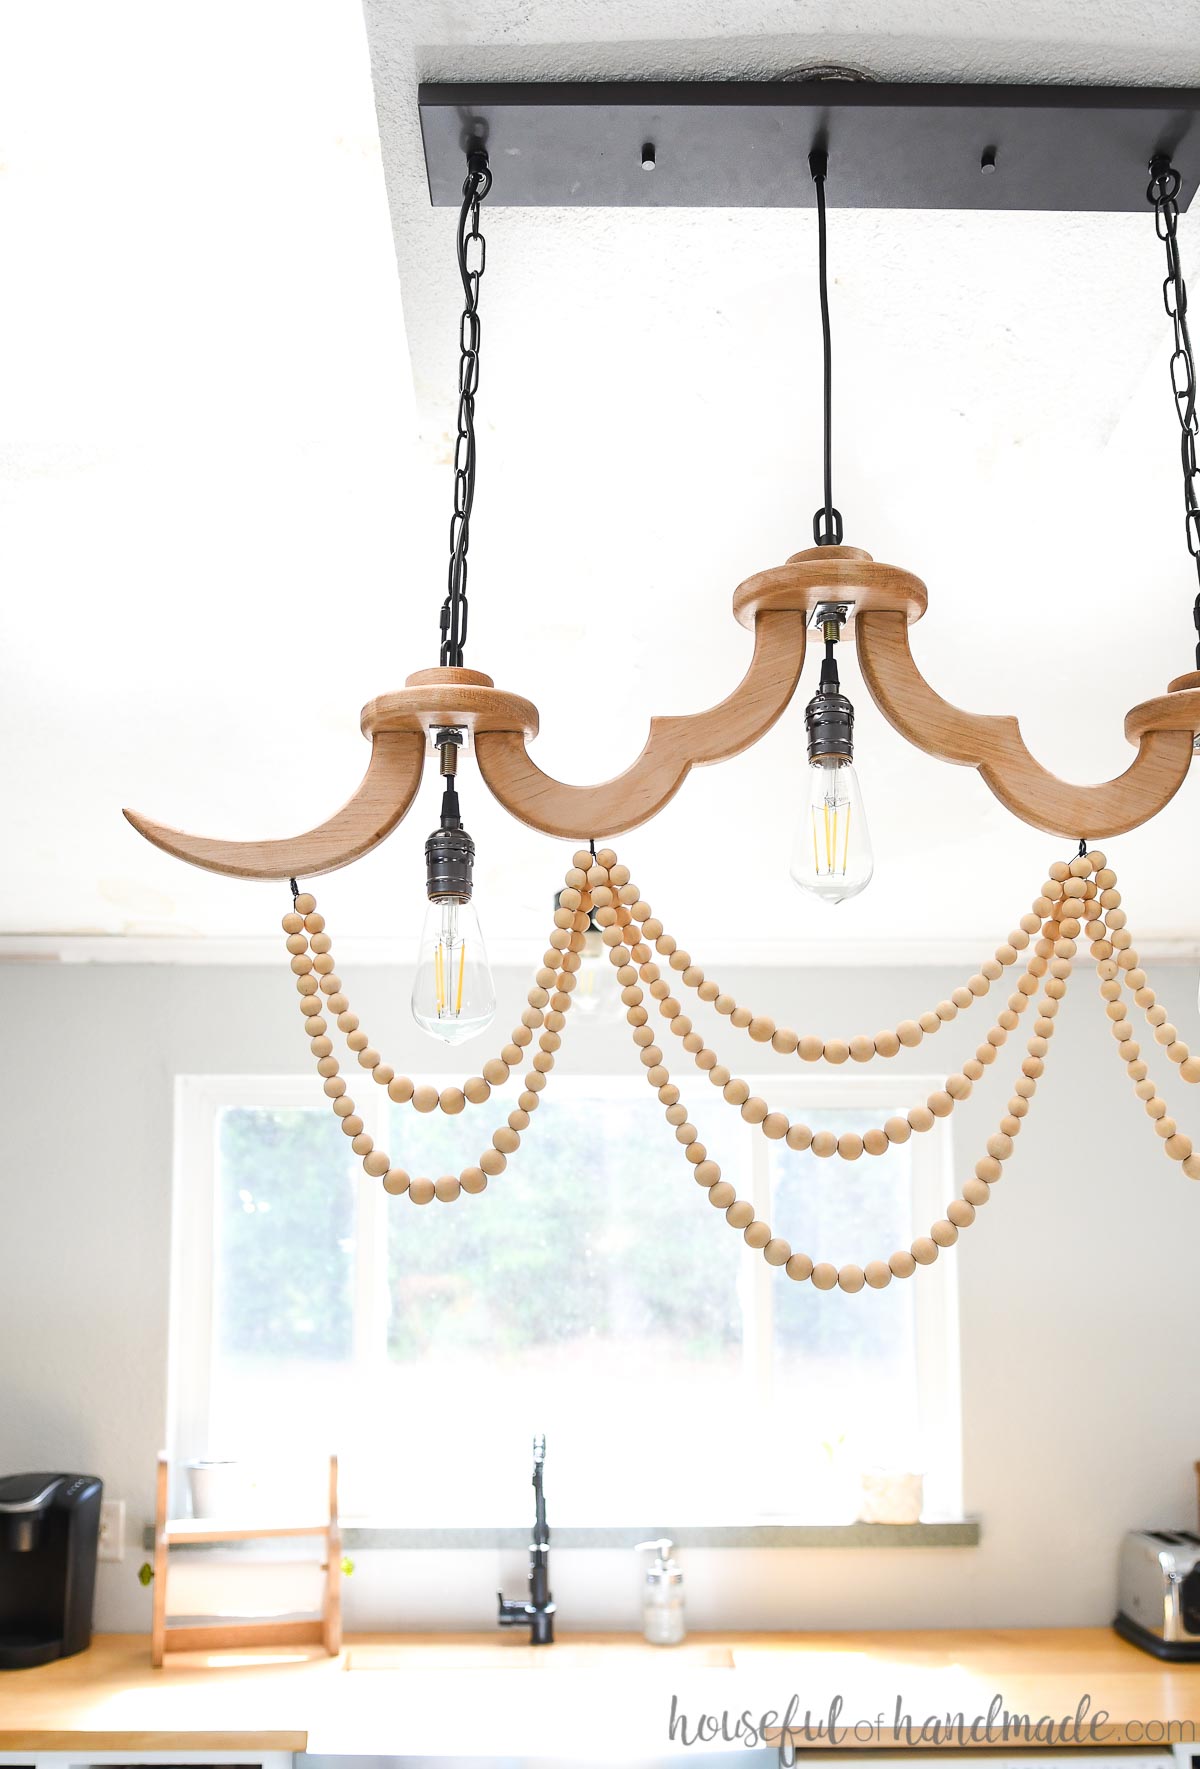
I had the perfect place to put a new beautiful chandelier… above our kitchen island. And since I have 2 skylights above it, I needed to make the new light a linear wood chandelier.
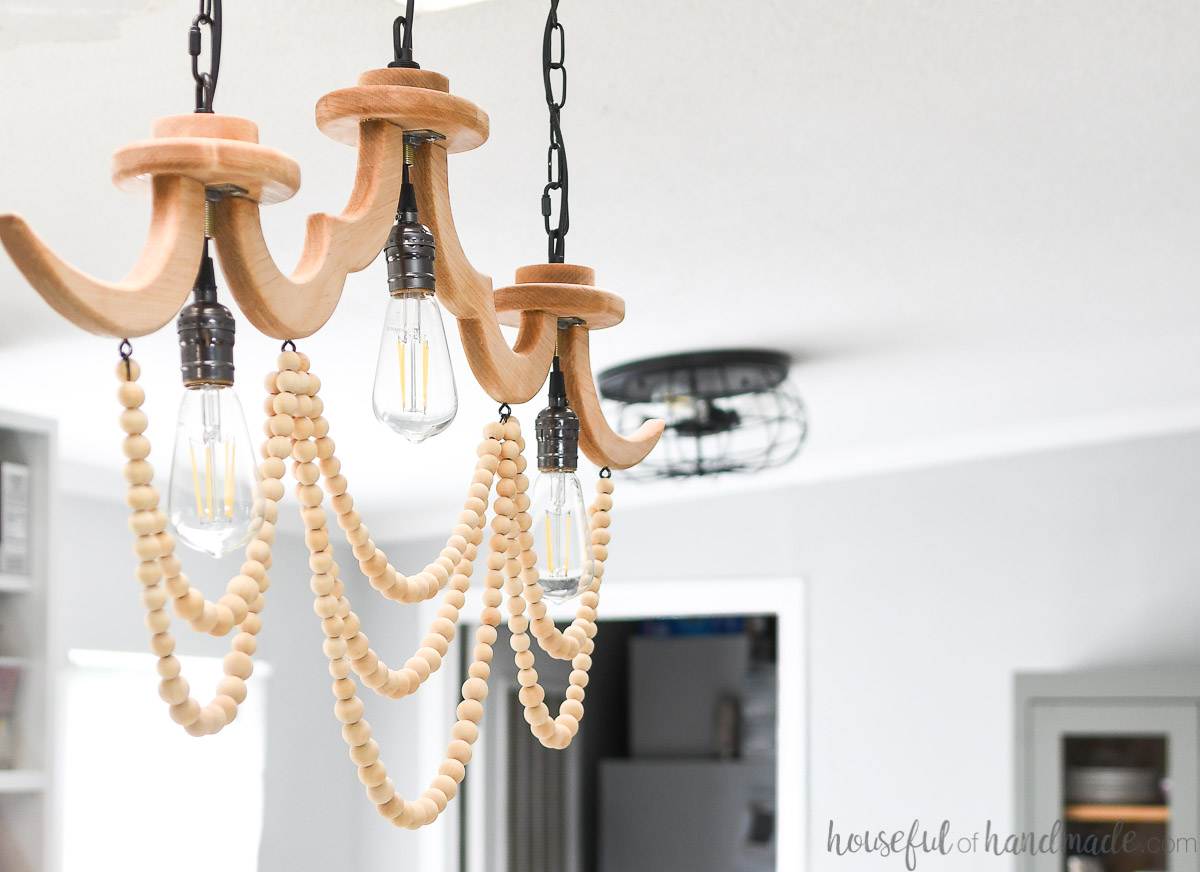
So I set out to design the perfect DIY linear wood chandelier. And I think I did! This DIY light is such a show stopper. Made even more dramatic with the addition of the wood beads.
This post may contain affiliate links. As an Amazon Associate I earn from qualifying purchases. Click here to read my full disclosure policy.

Where to use a linear chandelier?
Linear chandeliers are great because they allow you a statement light fixture in a place that a normal chandelier might not work.
Linear chandeliers are great:
- Over a long kitchen island,
- Over a large table,
- In a long hallway or stairwell.
Our kitchen island needed a lot of light. At dinner time (when I do most the cooking) there is no light coming in the skylights.
But with skylights on both sides of the light box, I needed a linear chandelier to fill the space and make room for more light bulbs.
The three light bulbs along the 40″ wood chandelier, our kitchen island is now well lit. Cooking dinner just got a lot brighter!
Why DIY a light Fixture?
Lighting can make a huge statement in a room, but it can also cost a lot of money! Beautiful wood light fixtures can cost you well over $300.
DIY light fixtures can really save you money. Plus you can make a show-stopping, one-of-a-kind light that everyone will envy.
All of the lighting components for this DIY light fixture cost just under $100. I was able to use left over wood and wood beads to save even more money.
And the satisfaction of seeing our amazing new chandelier everyday isn’t bad either!
What if I Don’t Have an X-Carve
There are so many amazing things you can make with an X-carve. It would be a great investment if you want to start your own business or Etsy shop selling wood decor items.
But if you do not have an X-Carve, you still have options.
- Some high schools, libraries, and maker spaces have X-Carves you can use. Use this link to find a location near you.
- You could cut out the wood pieces with a jigsaw or scroll saw.
- Save up and buy an X-carve! There are so many amazing things you can make with it. And you can always use it to make items to sell.
Either way, start by signing up for a free Easel account to start designing your own DIY light. You can play around with the detailed preview to show you how it looks carved out of your wood with different bits.
How to Make a Linear Wood Chandelier
Tools Needed:
- X-Carve with Easel account
- If you do not have an x-carve, find a location near you where you can use one.
- 1/8″ straight bit
- Digital Calipers
- Router
- Doweling jig
- Drill
- Utility knife or chisel
- Straight edge
- Optional: Grinder
- I chose to trim down the metal plate on the screw collar canopy but it is not necessary.
Supplies:
- 11″ x 25″ x 3/4″ thick piece of wood
- (6) 3/8″ x 1 1/2″ dowels
- (3) screw collar canopy hardware
- (3) pendant light kit
- Linear pendant canopy
- Pendant/chandelier chain
- (4) tiny screw eyes
- Mine were #212 since I had some on hand, but you could go even smaller.
- Black cord
- (166) 16 mm wood beads
- (57) 20mm wood beads
- Optional: hot glue gun and glue sticks
- I used the glue to thoroughly secure the tails of the cording.

Carving the Wood Pieces
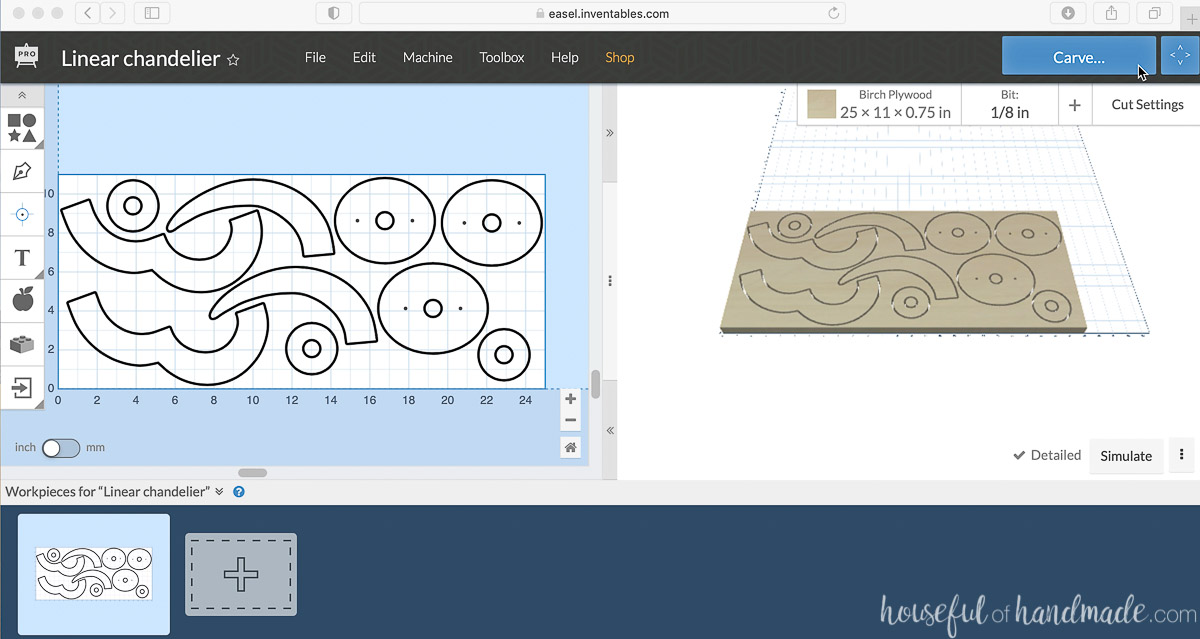
You can use the design I created for my linear chandelier by first, signing up for a free Easel account, then clicking on the link below to open the file.
When you open the link, it will not be editable unless you make a copy.
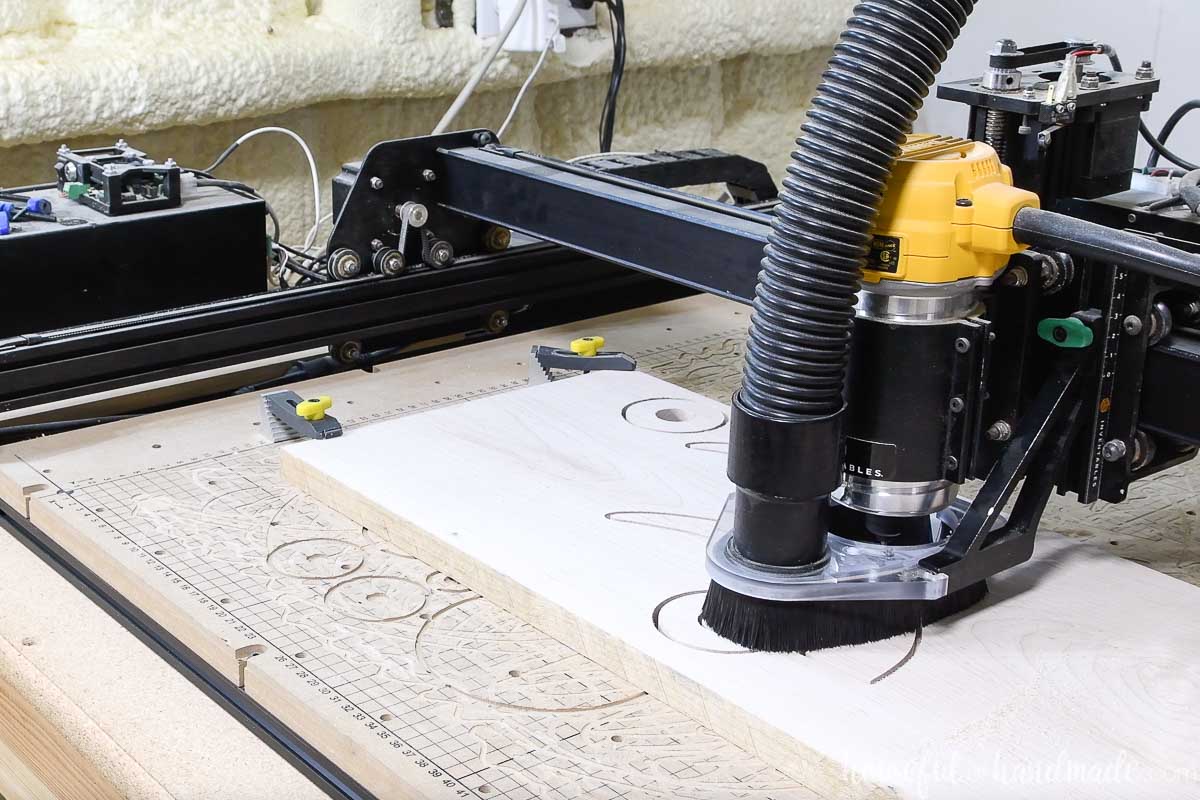
Use the calipers to confirm the thickness of your board. Then secure your piece of wood to the waste board with clamps.
I used a left over hard maple scrap from my DIY wood kitchen countertops. So I used the recommended cut settings for Hard Maple and they worked beautifully.
Send the carve to the X-carve by pressing the blue Carve button in the top right hand corner of the screen. Follow the prompts to get your carve ready.
Then enjoy watching it work!
The carve for my design with the cut setting for hard maple took 1 hour and 10 minutes to carve.
When the carve is done an screen will pop in the Easel software, don’t X out just yet or you will miss one of my favorite Easel Pro settings.
In the lower right hand corner is the opportunity to “Park” your machine. This will quickly move the router assembly out of the way of your carve with one click!

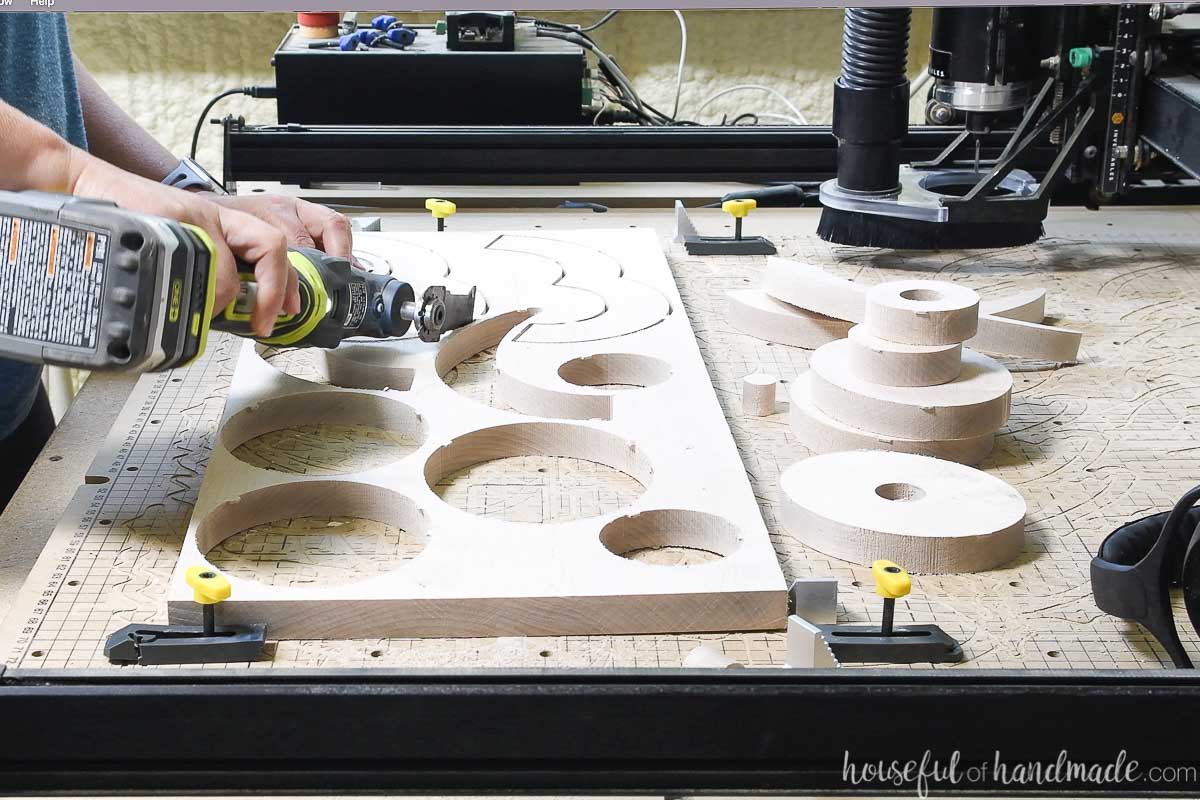
Remove the cut pieces by breaking the tabs on the back. I used a multi-tool but you can also do it with a chisel or utility knife.
Round-over the pieces
Using a router with a round-over bit, round-over the edges of all the chandelier pieces except for the small round toppers.
For the large round toppers, round-over the top and bottom of the pieces. For the decorative chandelier pieces, only round-over the sides (front & back) but leave the tops flat.
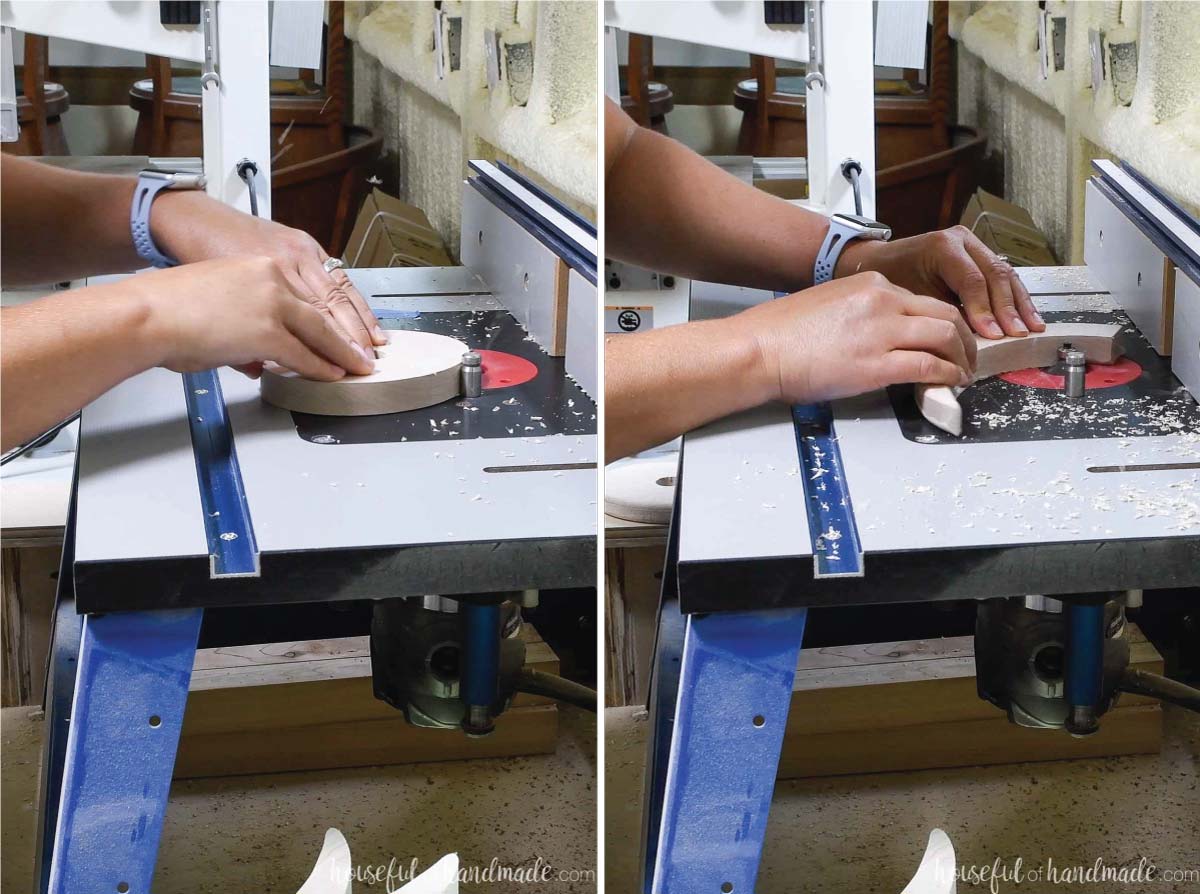
This round-over will also remove any left over tabs from the carve.
Drill for Dowels
Mark the center of the top and bottom (flat edges) of the chandelier decorative pieces.
Using a self-centering doweling jig, drill a 3/8″ hole at least 1″ deep in the top and bottom of the center decorative pieces and just the top of the side decorative pieces.
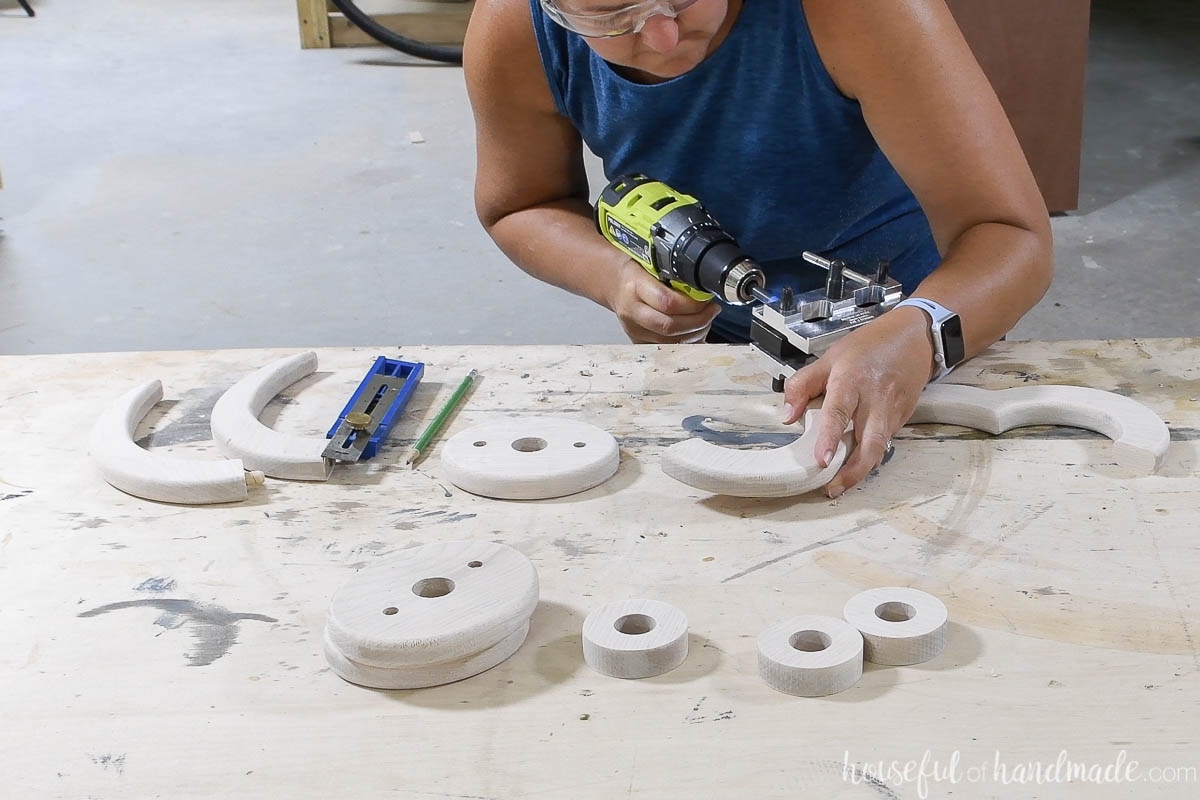
The dowel holes for the large round toppers are drilled with the x-carve, test them for size with your dowels. Mine were a bit tight so I gave them a quick drill with the 3/8″ bit.
Assemble the Chandelier
With all the pieces prepped, sand any pieces that need it before assembly.
Add wood glue to the holes for the dowels, and along the top (or bottom) of the decorative piece around the hole. Press a dowel into the hole.
Firmly press the pieces together lining up the dowel with the other hole.
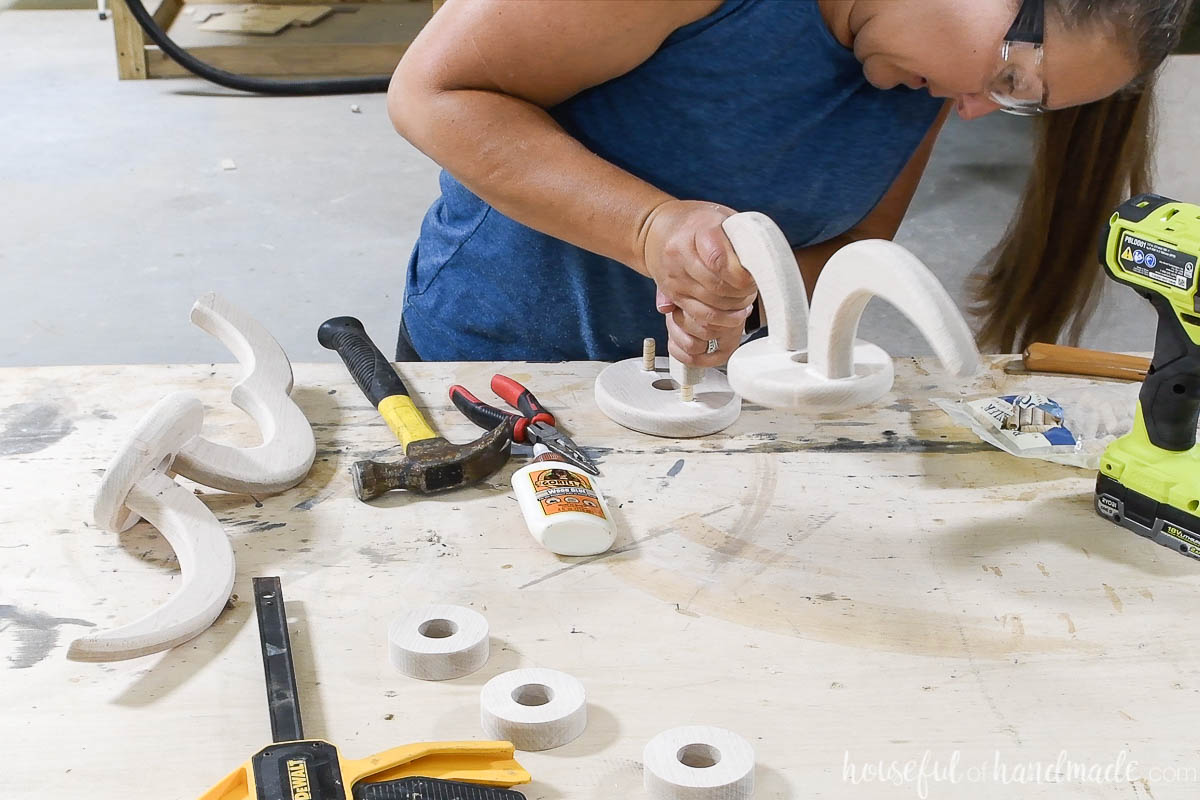
Repeat until you have the two center decorative pieces attached to the largest round topper. Then the outer pieces and center pieces are attached to the two medium round toppers.
Use a straight edge to make sure the pieces are all attached straight.
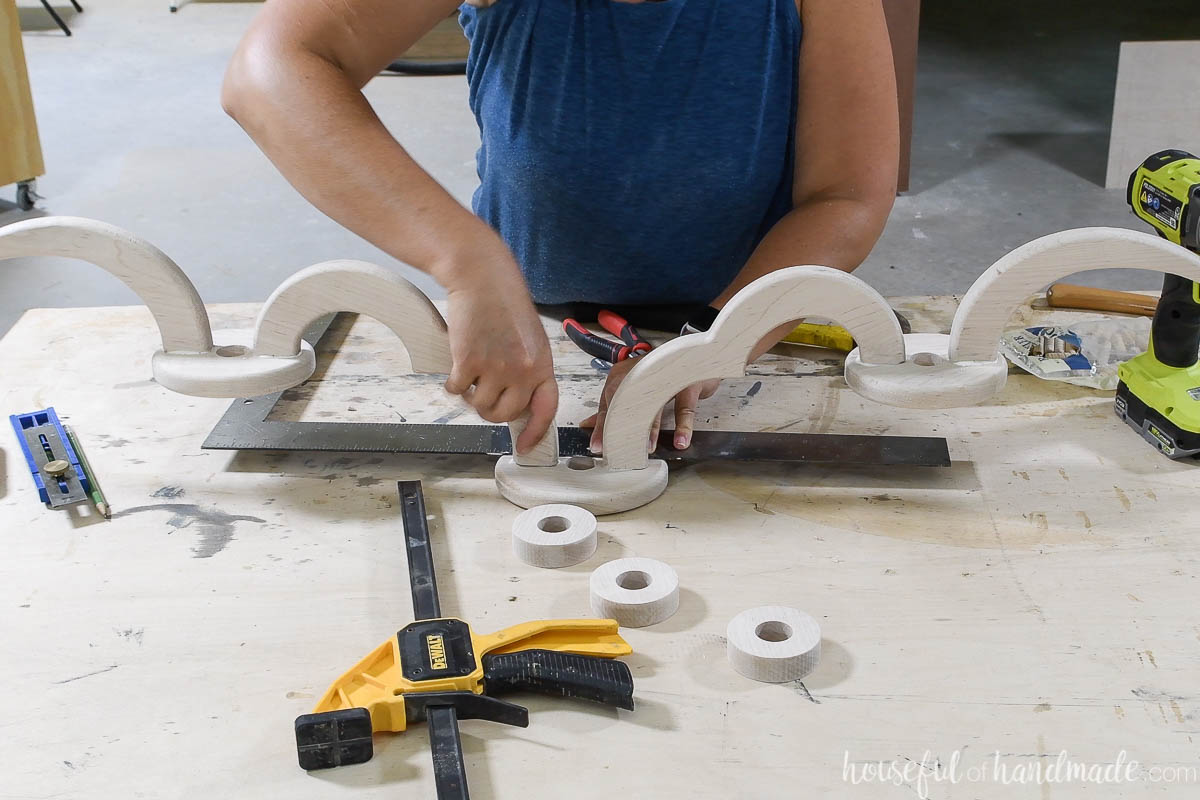
The design of the chandelier is hard to clamp, I used some scraps of wood and shims to hold everything in place.
The pressure on the top of the outer toppers held things together properly while the glue dried.
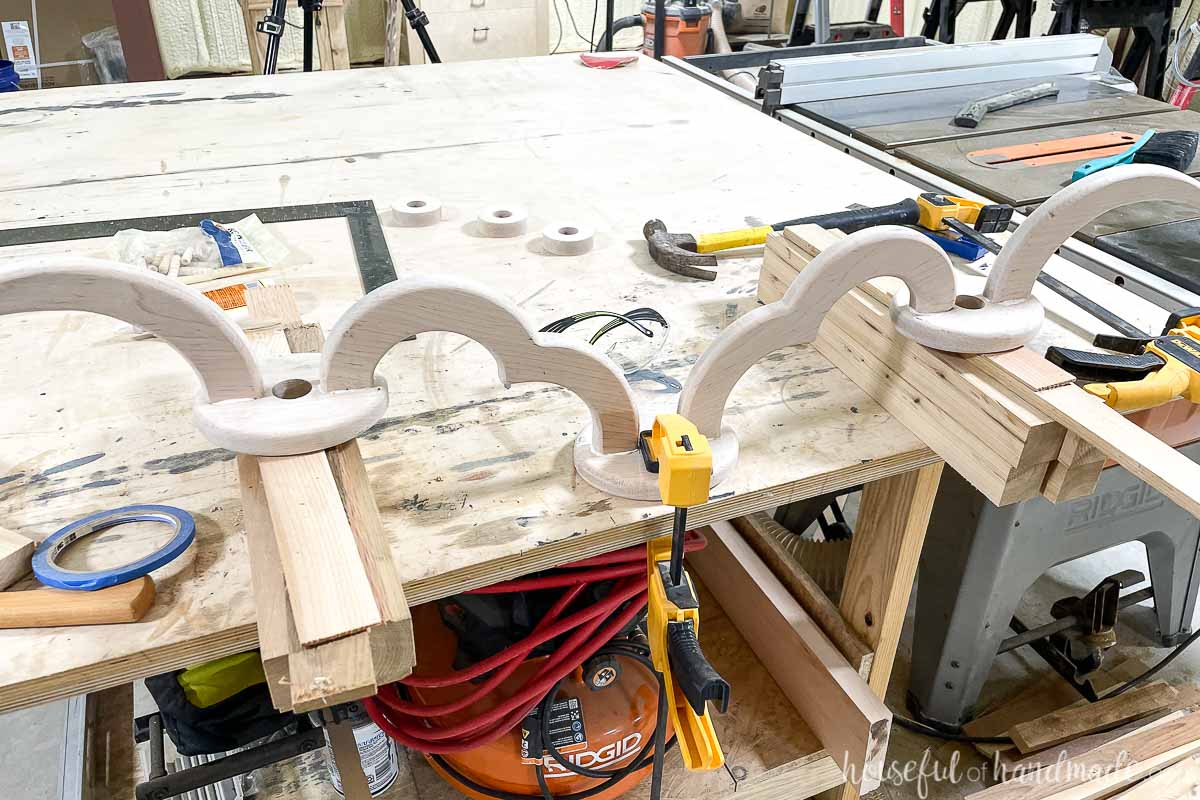
Once the main pieces are dry, attach the small round toppers to the top of the other round toppers. Make sure the center hole is lined up and attach with wood glue. Clamp till dry.
Stain/seal/paint your chandelier as desired.
Attach lighting kit pieces
Now it’s time to add your lighting to your chandelier.
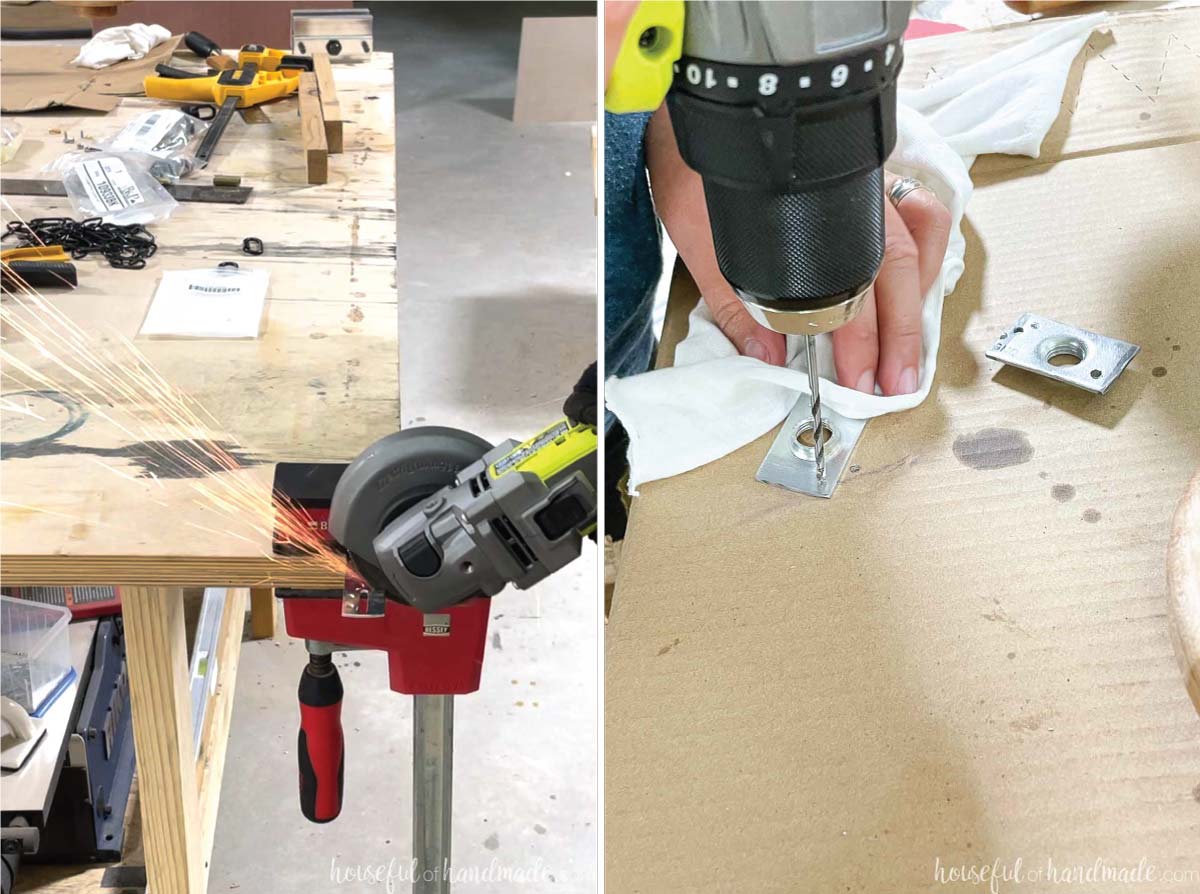
Attach a screw collar canopy to the underside of each of the large round toppers.
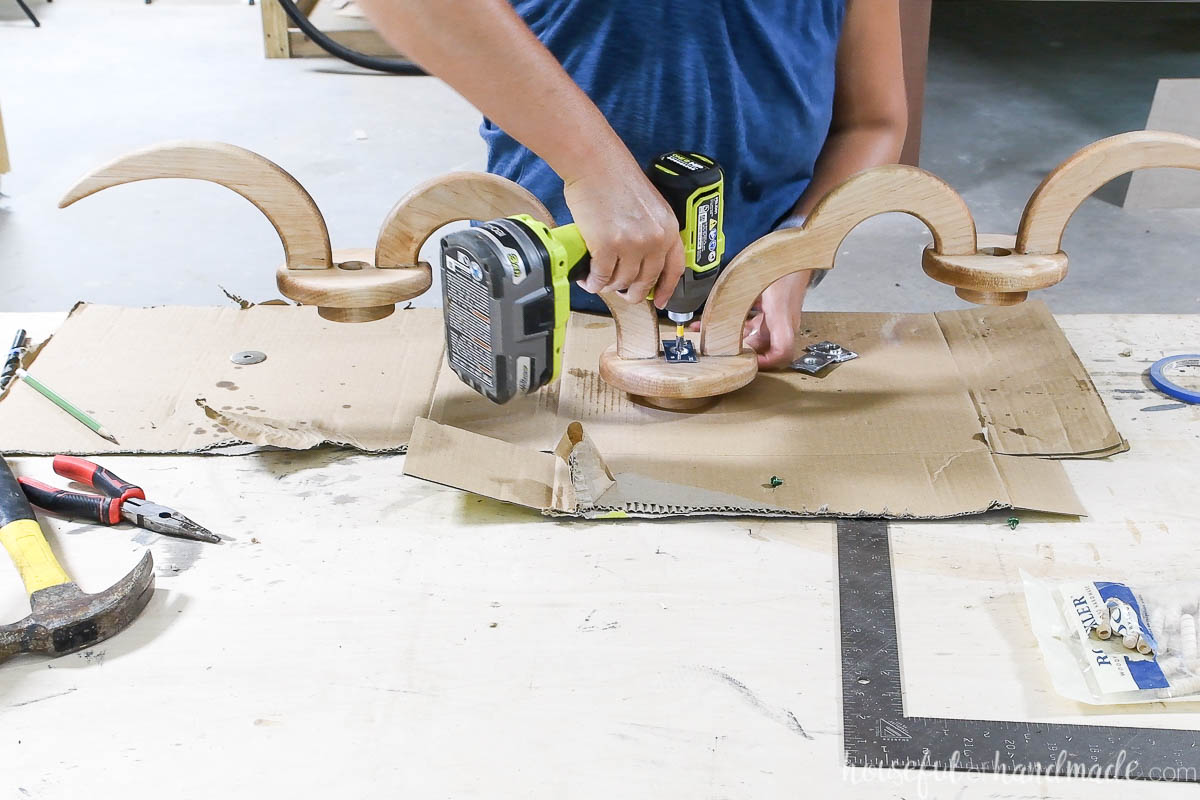
The screw collar canopy was the same size as the round piece, and after I did the round-over, I didn’t like that it was very visible.
So I decided to trim the metal plate down to just under the long hole. My husband made quick work of it with an angle grinder (I let him do my metal work).
Then I added a new hole to the piece for a screw and was ready to attach it.
Next, screw the loop piece to the top of the large threaded bar. And thread the bar into the collar so the top is at the level you like.
Secure the threaded bar at that height with the nut.
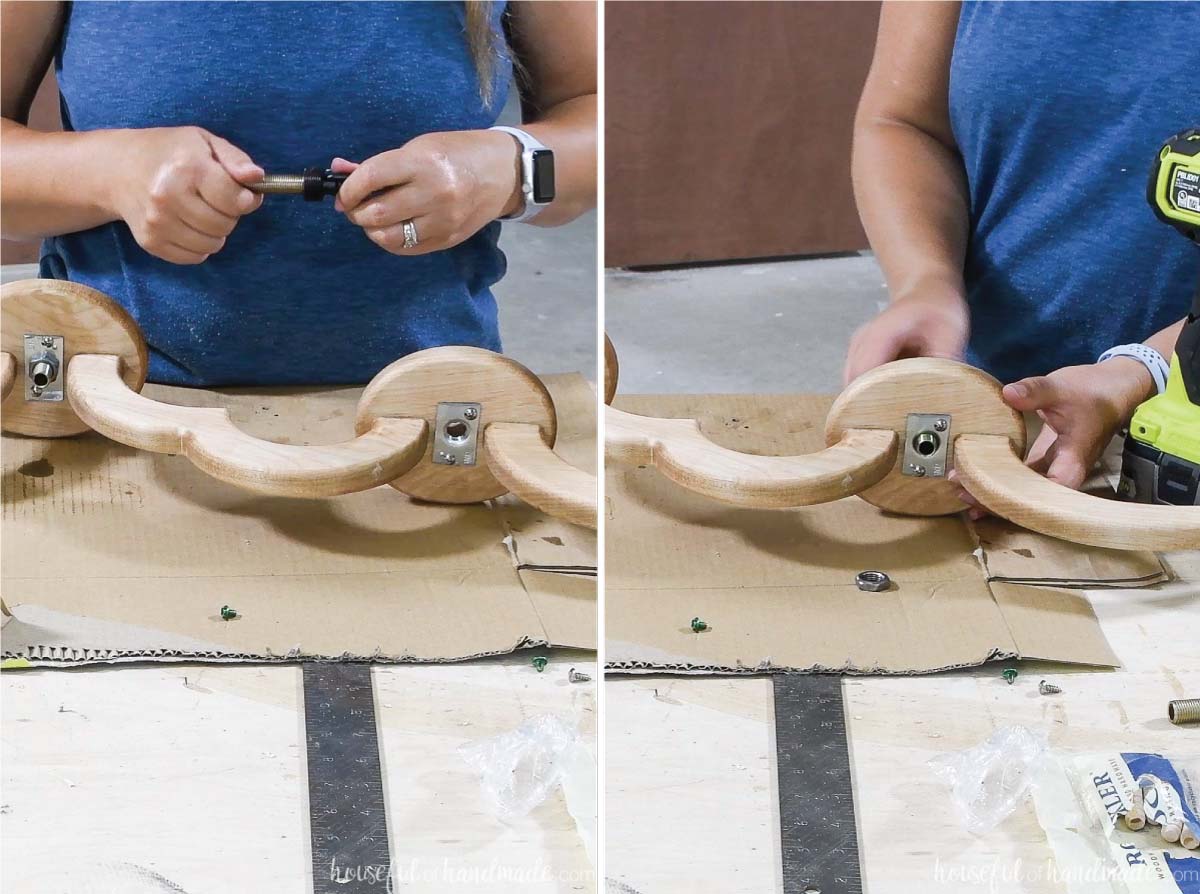
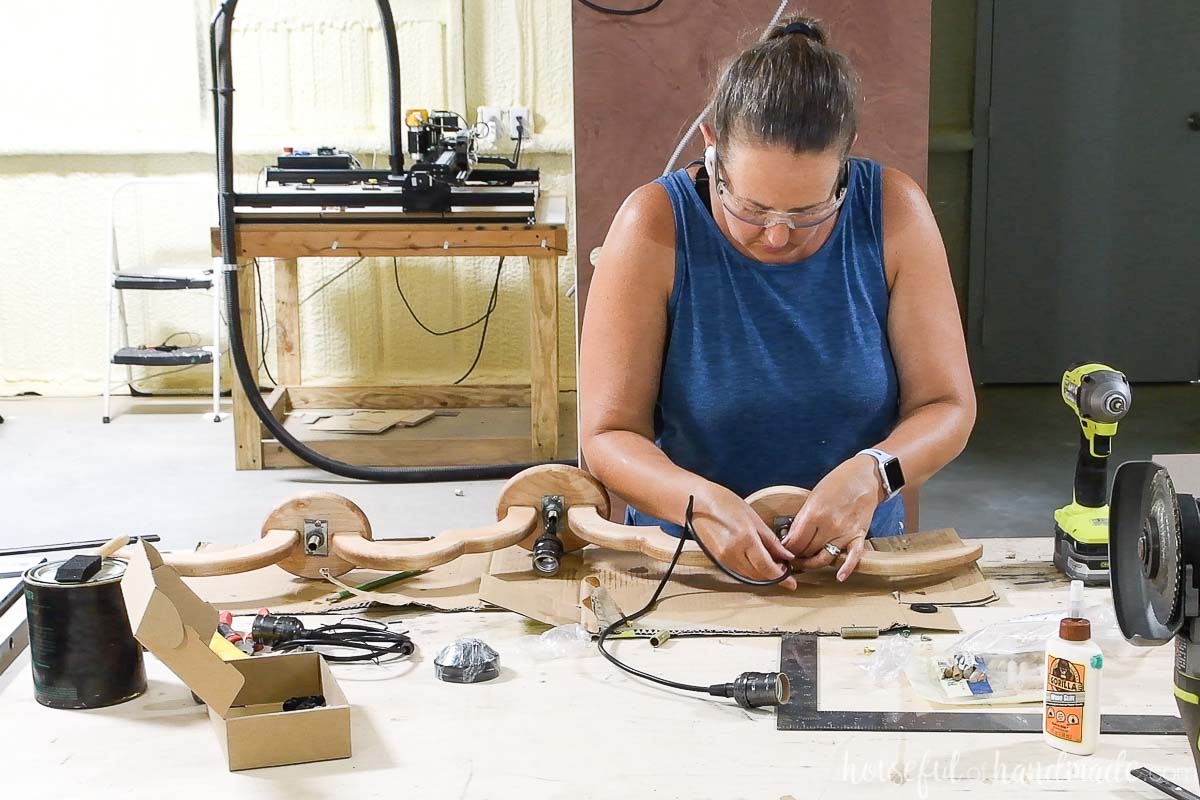
Thread the cord of a pendant through the threaded bar and pull it up to the desired height. I left just a little space for it to have movement.
Repeat for the other 3 pendants.
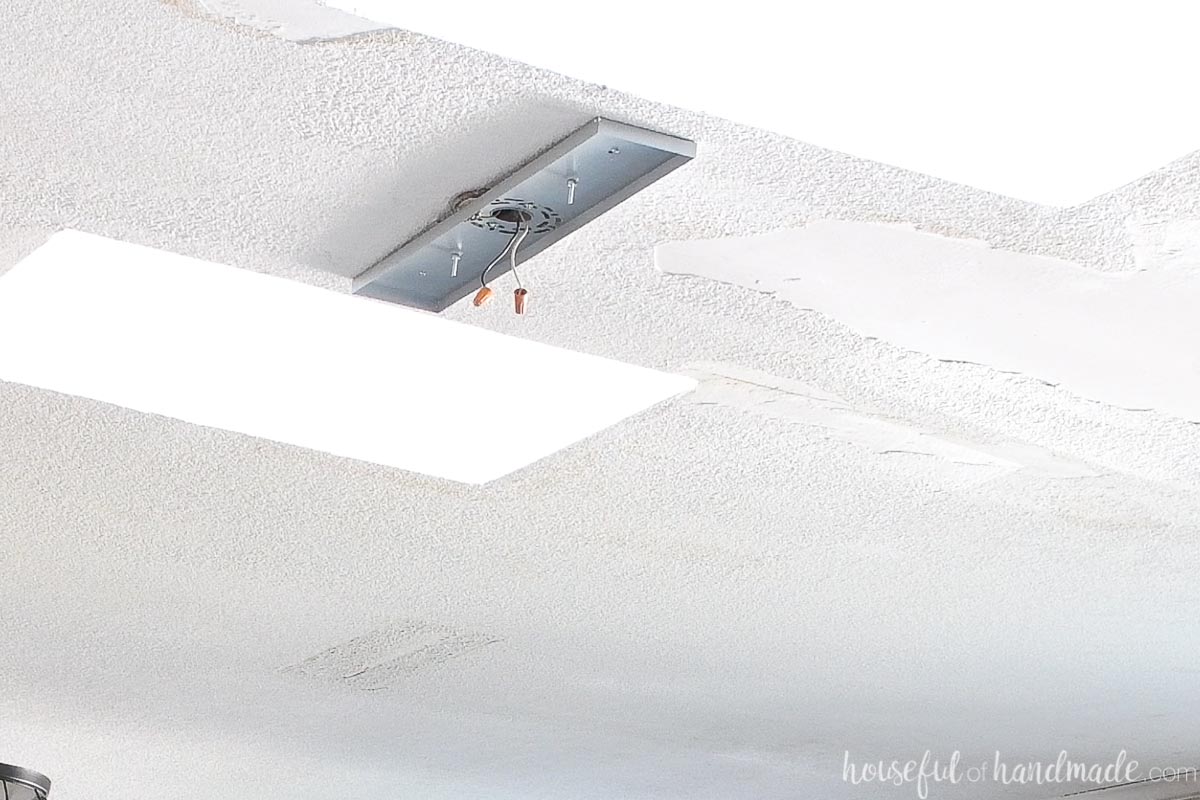
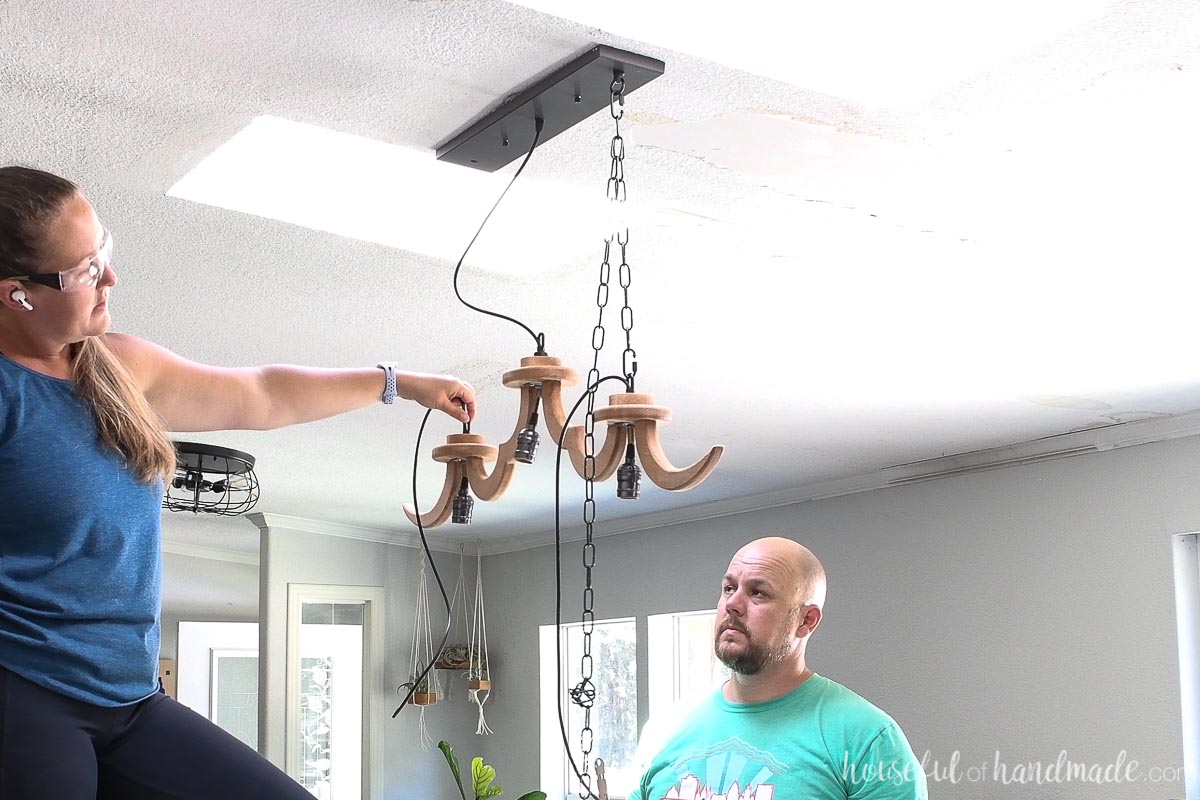
Attach to the ceiling
Now it is time to take it to the ceiling. Mount the linear pendant canopy to the ceiling.
Then hold up the chandelier to decide how long you need to cut your chain.
Cut two piece of chain to the size you determined. Pass the wires from the pendant through the chain, I like to thread it back and forth every 3rd chain piece.
Twist the top of the chain loop to the pendant canopy. Then thread the wires through the hole in the center and secure the chain to the loop.
Repeat for the second side.
For the center, use the top piece that came with the pendant fixture through the hole in the canopy kit. Pull the center cord through it snuggly and secure.
Now you are ready to hang your light!
I had to cut back the black cover around the wires to make it easier to attach it to the wires in my ceiling.
Make sure the electricity is off. Attach the brown wires from the light to the black wires in the light box, then the blue to the white. Secure with wire nuts.
Attach the ground wire to the ground screw on the canopy box.
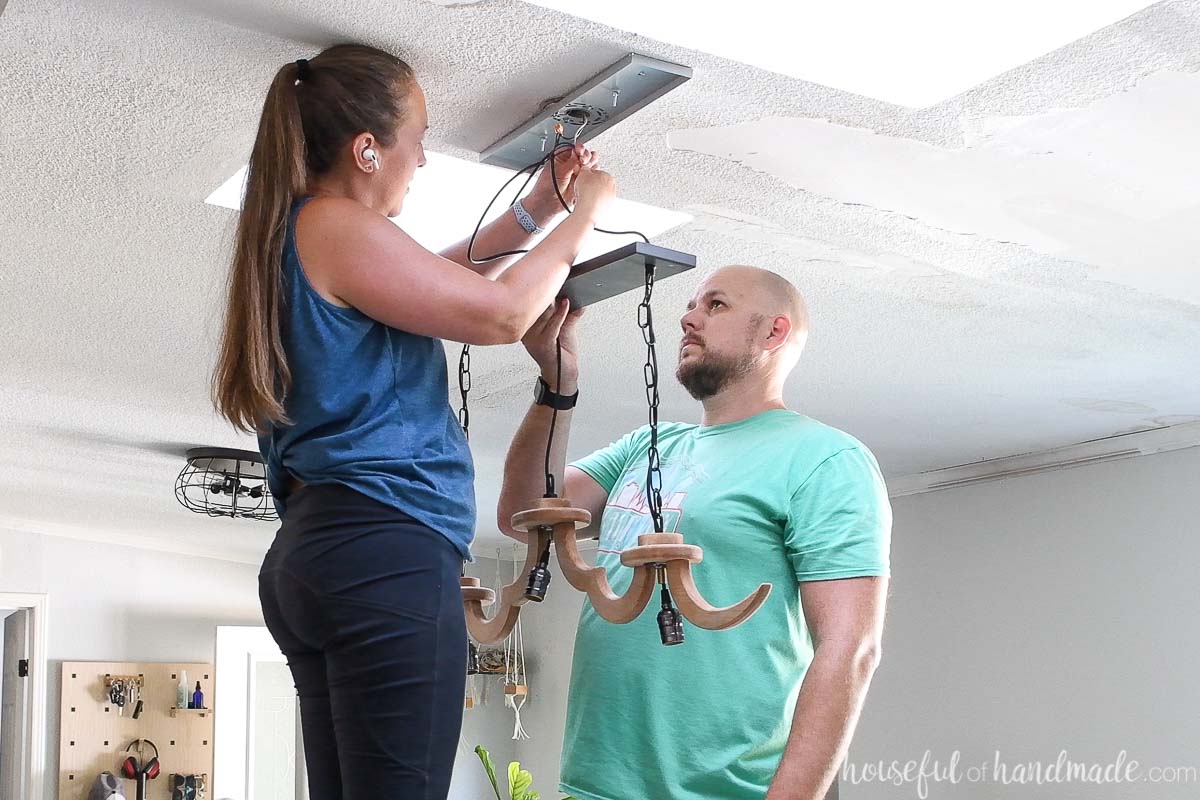
Once all the wires are attached, tuck the excess wires into the box and place the top piece over the one attached to the ceiling so the screws poke through the holes.
Secure with the decorative nut onto the screw.
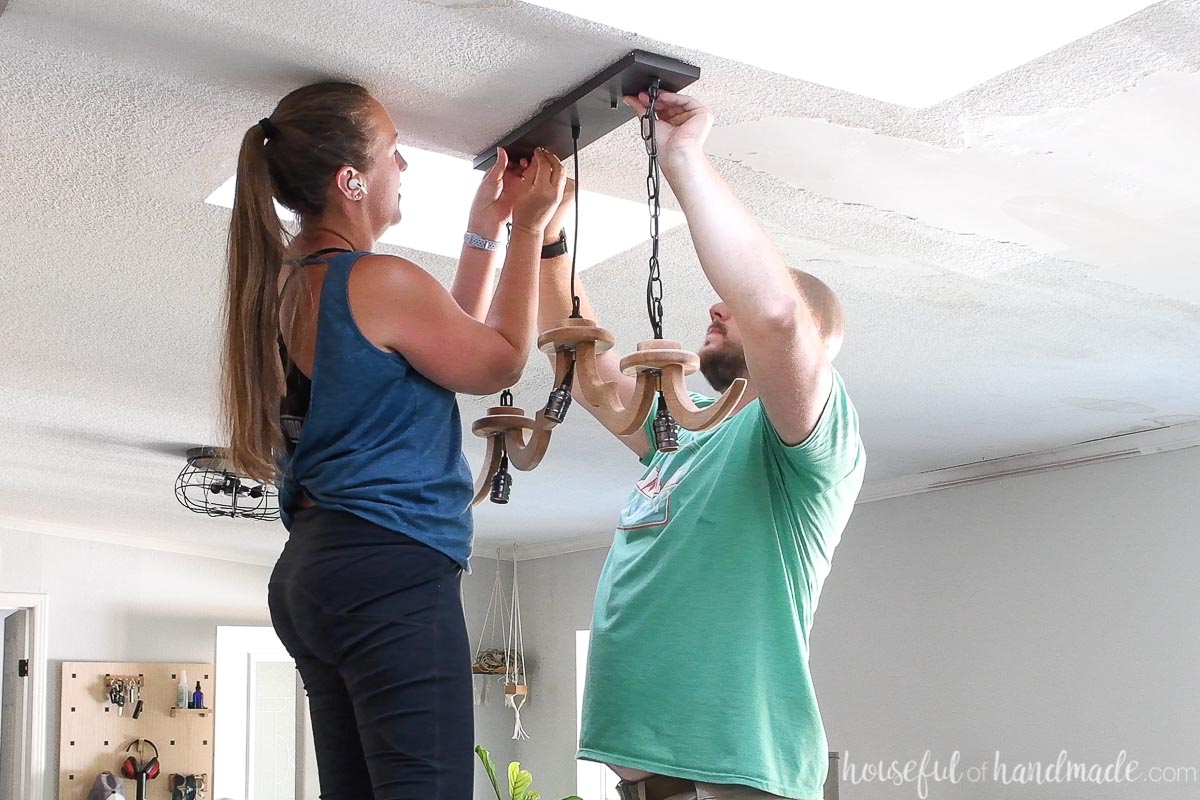
Add light bulbs and test your new light fixture!
Add wood beads
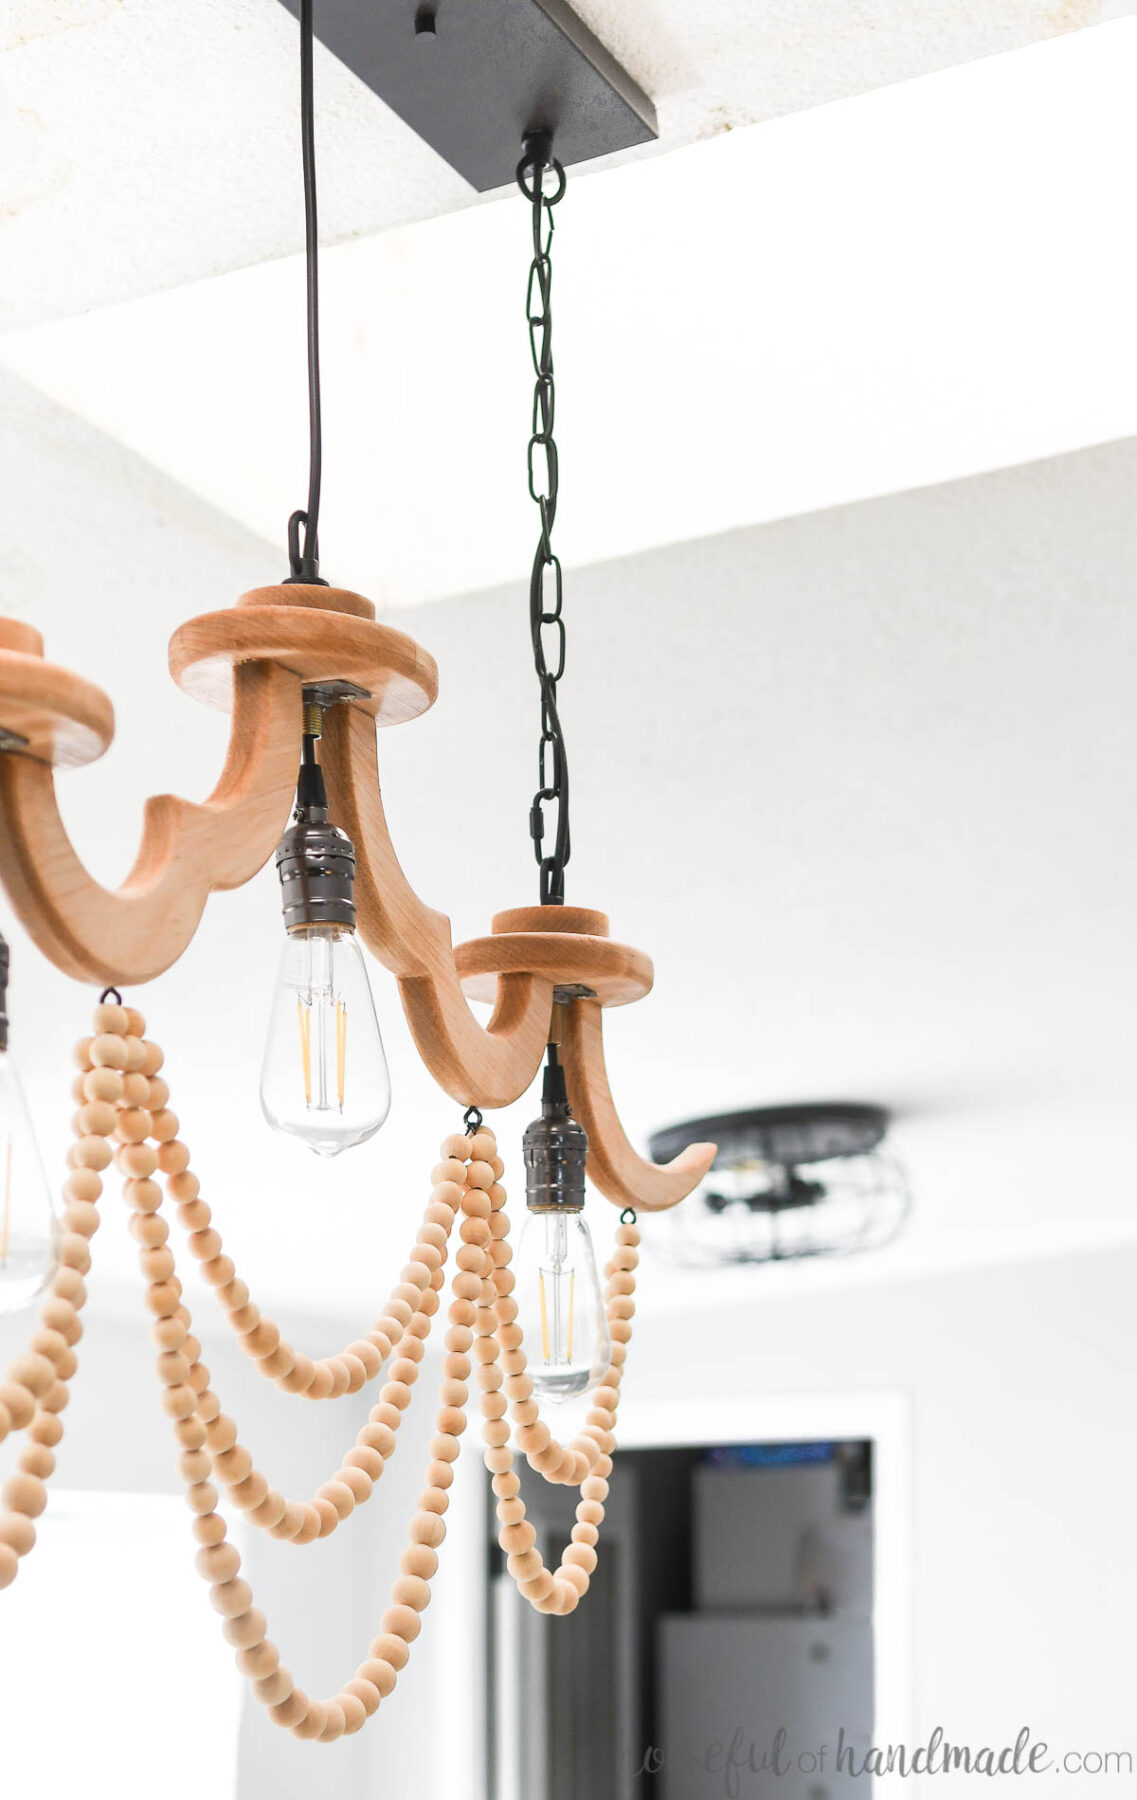
I wasn’t entirely sure I was going to add beads until I hung the chandelier. But once it was up I decided it needed a little bit more!
To hang the beads, I spray painted the screw eyes black to match the rest of the fixtures.
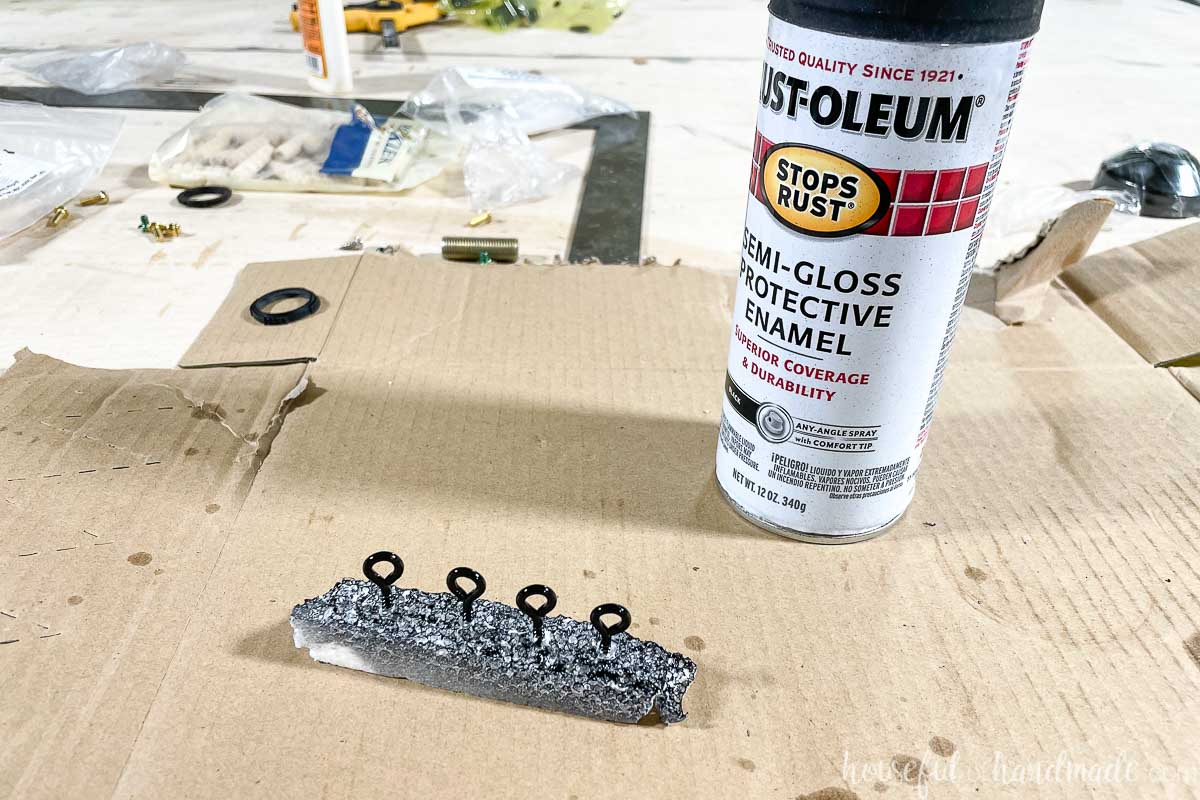
Then I attached them to the underside of the decorative pieces of the wood chandelier. Predrill a hole to make it easier to attach them.
Using black cording or string, tie one end around the far screw eye. Use the hot glue to secure the ends of the cording if desired.
Thread beads onto the cording. I used the number of beads noted below. Then loop the cording around the next screw eye a couple times and thread the center beads on it, loop and thread the other side to it.
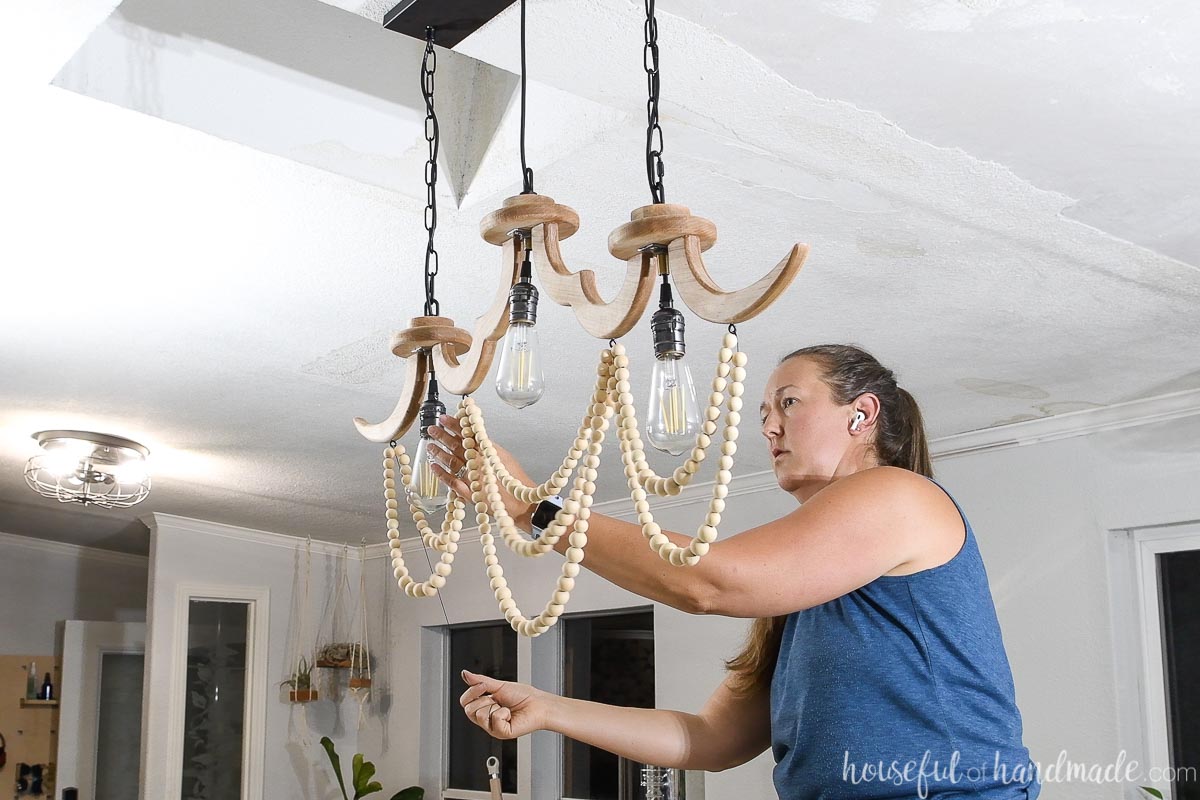
Tie it off on the screw eye on the opposite side of the chandelier. Tuck the tail of the cording back through last few beads and add a drop of hot glue inside one of them to secure it. Trim off the end.
- Upper Side Rows
- 10 small – 5 large – 11 small (toward the center)
- Upper Center Row
- 11 small – 7 big – 11 small
Next add the second row of beads in the center. Tie the cording off on both screws eyes.
- Middle Center Row
- 12 small – 11 big – 12 small
Lastly, finish with the lower row on the sides, then loop the cording around the eye, do the third row in the center. Loop it on the next eye and finish on the other side.
- Lower Side Rows
- 12 small – 7 large – 13 small (toward the center)
- Lower Center Row
- 14 small – 15 large – 14 small
And now you are officially done!
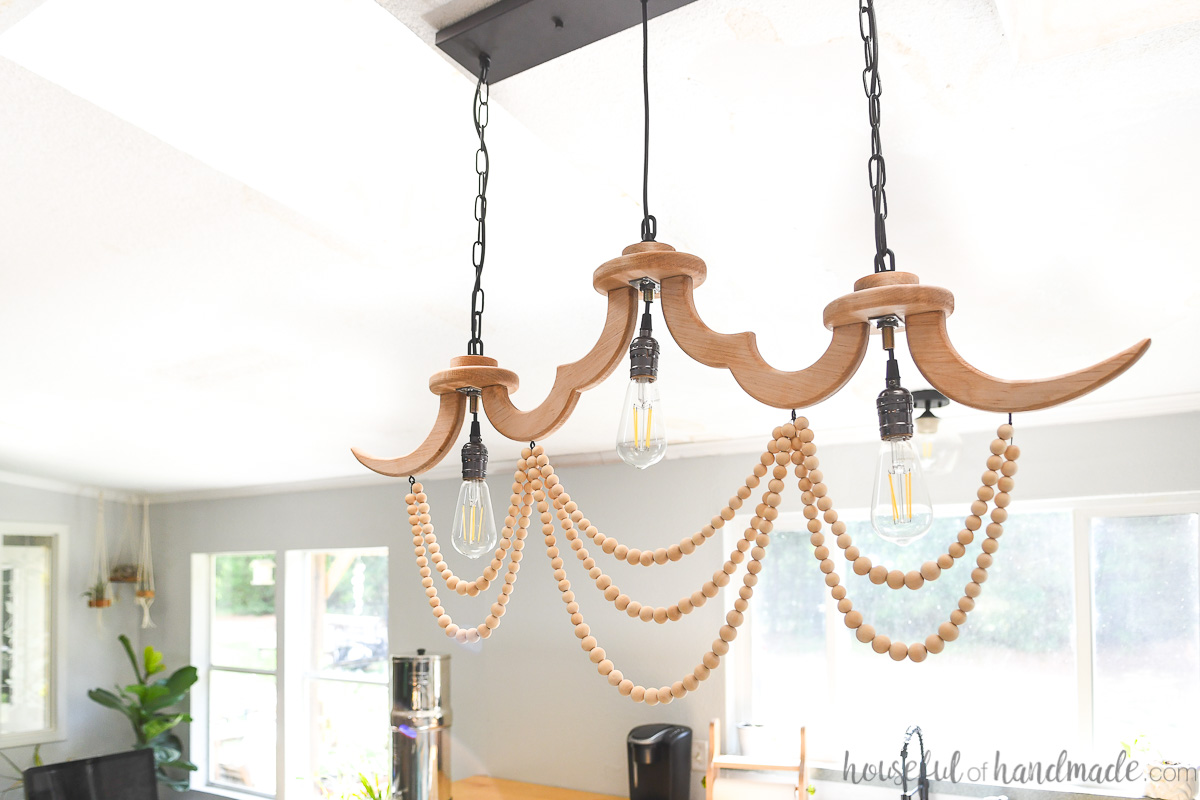
I get so excited to see the amazing new light everyday when I walk into our kitchen. And my husband is super excited to finally have a light up above the kitchen island again!
Happy building!

Thank you to Inventables for sponsoring this post. I only recommend products that I use and love and all opinions are 100% my own. Click here to read my full disclosure policy.