Create beautiful shutter decor with this easy tutorial to add old charm to any room.
When we were decorating our summer living room to look like a tropical vacation, I wanted to add some decorative shutters to the sides of the vintage window hanging on our wall as art.
Instead of spending lots of money on real shutters, I figured out how to easily build some shutter decor. And they turned out so amazing, they are now part of our fall decor too!
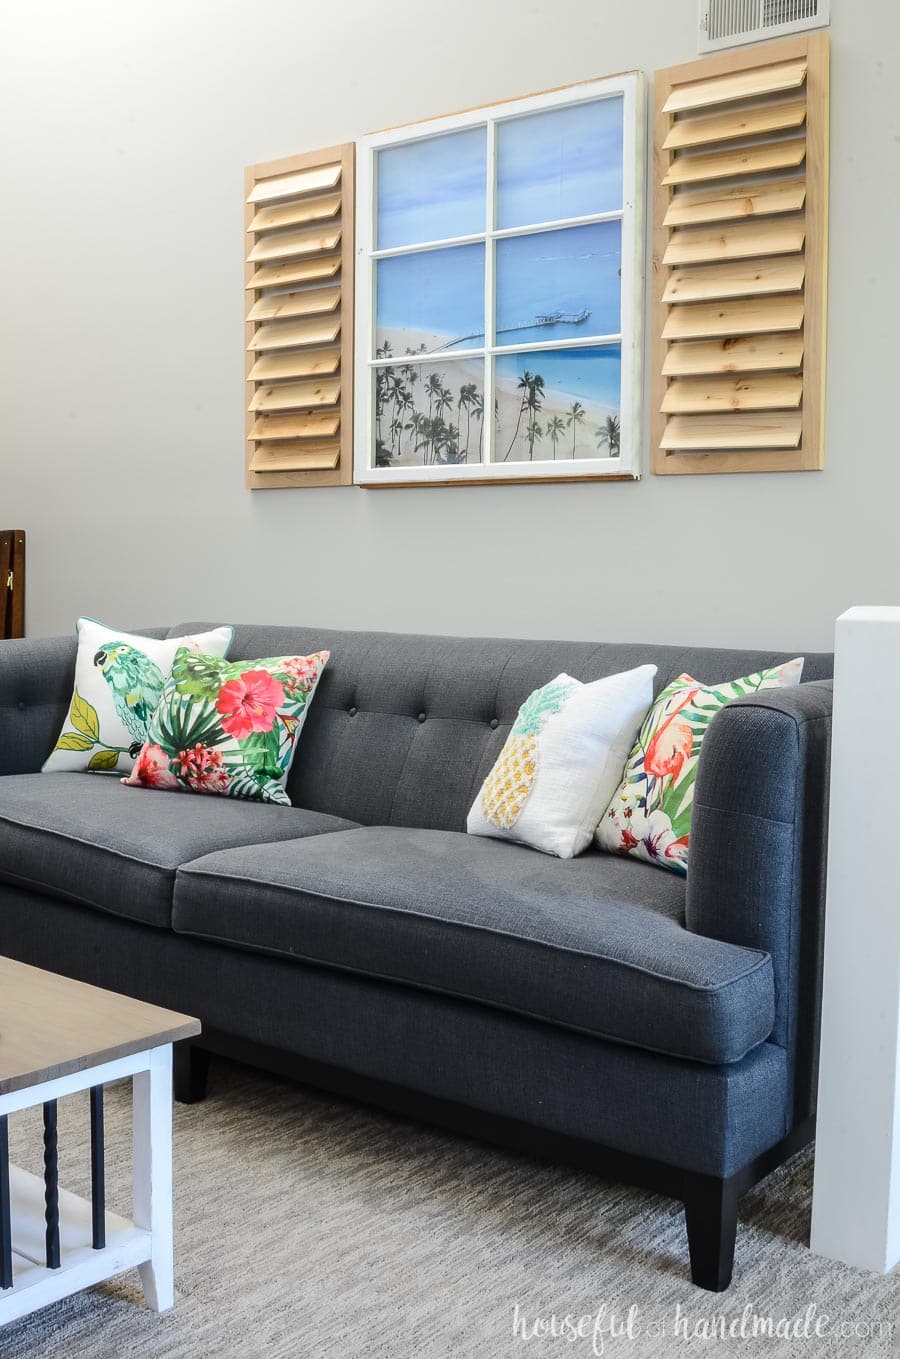
The small window on our large… very large… wall was a little bare. Sometimes I dressed up the window with garlands and wreaths and other seasonal decor.
This post may contain affiliate links. As an Amazon Associate I earn from qualifying purchases. Click here to read my full disclosure policy.
But I always tried to find ways to fill the vast space. When I had the idea for decorative shutters it was like a lightbulb went off and I knew it was exactly what the space needed.
The shutter decor adds weight to the sides of the vintage window. I can still decorate the window with garlands and wreaths, but now it can also stand on it’s own.
And even better, I used raw cedar planks so the shutters give the entire room a woody smell. I do love the smell of cedar!
How to Easily Build Shutter Decor
Supplies:
- 1×2 boards
- I used knotty alder boards because their color matched the cedar planks nicely. The amount needed depends on the size of shutters you want to build.
- 1/4″ x 3 1/2″ cedar planks
- 1 1/4″ pocket hole screws
- Hot glue sticks
Tools Needed:
- Miter saw
- You could also use a circular saw or jig saw to cut the boards
- Kreg Jig
- Drill
- Hot glue gun
- Measuring tape
- Pencil
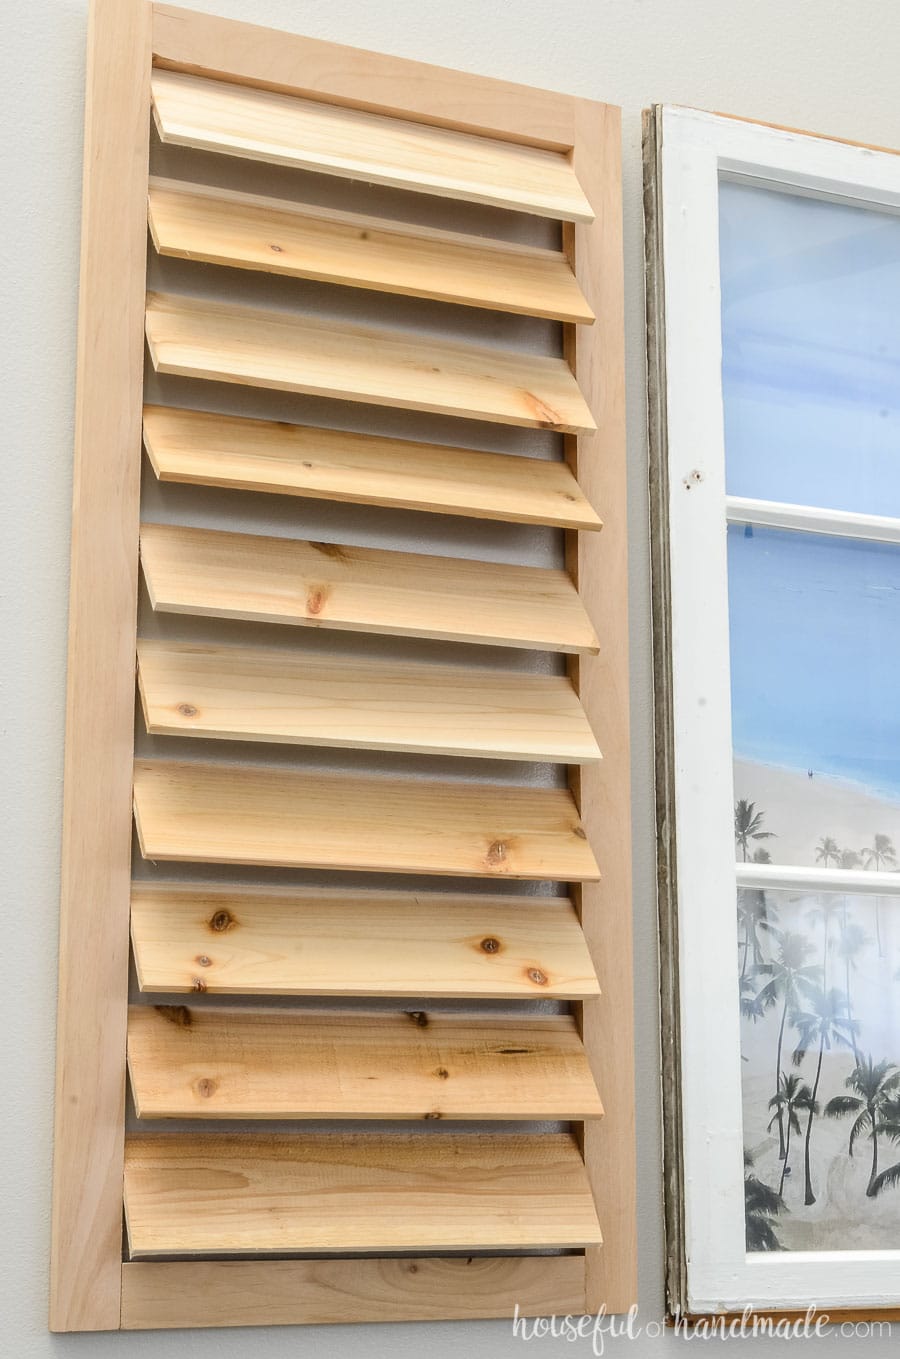
These shutter decor are for decoration only. They will not open and close. But they will give style to your room!
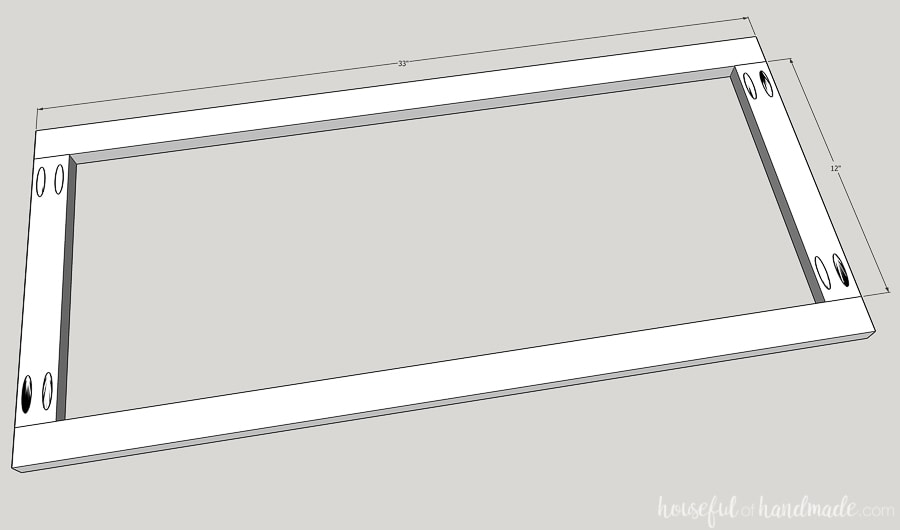
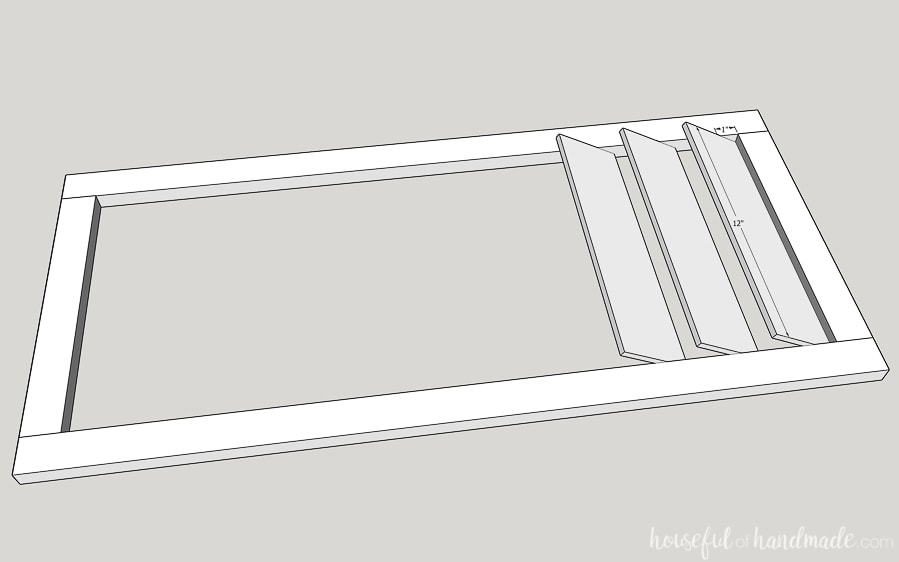
For my shutters, I made them the same height as my windows (33″) and 15″ wide. The height worked out nicely because the center measurement needs to be divisible by 3 to properly space the shutter blinds. With a. 1×2 frame you need to delete 3″ from the total measurement to get the inside frame measurement.
Start by cutting 1×2 boards for your frame. I used 12″ long boards for the top and bottom and 33″ long boards for the sides. You can resize the frame to fit your home decor.
Using the Kreg Jig, drill pocket holes (set for 3/4″ thick material) in the back of the two sides of the top/bottom boards. Put some wood glue on the edge and line it up with the top and bottom of the side boards. Secure with 1 1/4″ pocket hole screws.
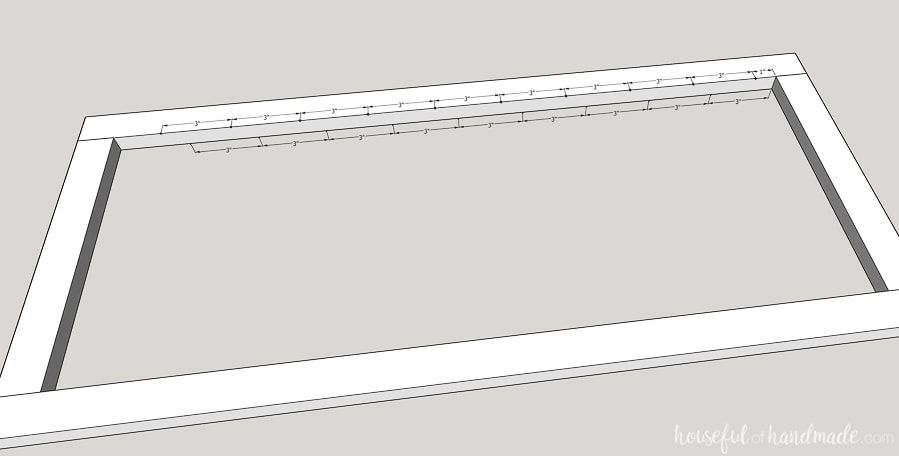
Lay the frame face up and mark-up the inside of the frame. On the top, measure 1″ down from the top inside of the frame and make a mark.
Then measure and make every 3″ until you get to the bottom. On the back, measure and mark every 3″ from the top inside of the frame.
Cut the cedar planks the same length as your top/bottom boards (mine were 12″).
I was reusing some cedar planks from another project and since the tongue and groove was already glued together. I ripped the boards down to 3 1/4″ on my table saw, cutting out the tongue & groove part (which is why my boards are straight and not grooved on the end).
This is not necessary, but make sure that the groove side is facing the back and the tongue is facing the front on the next step.
Wiggle the cedar planks inside the frame and so the top of the board is touching the line on the back of the shutter frame and then angled to also touch the line on the front of the frame. I found it was easiest to stand the frame up on it’s side and focus on one side at a time.
The cedar planks should fit snuggly inside the frame, that is good because we are going to rely on that and a little hot glue to secure them!
Yep, hot glue. I used Gorilla Glue glue sticks and my Ryobi battery powered hit glue gun.
After the one side is secured, add a little hot glue to the back to hold it. Then flip the frame over and line up the other side to your marks and glue. If the boards are not secure, add hot glue then move them into place. Once the glue is dry, add more glue to the back to hold.
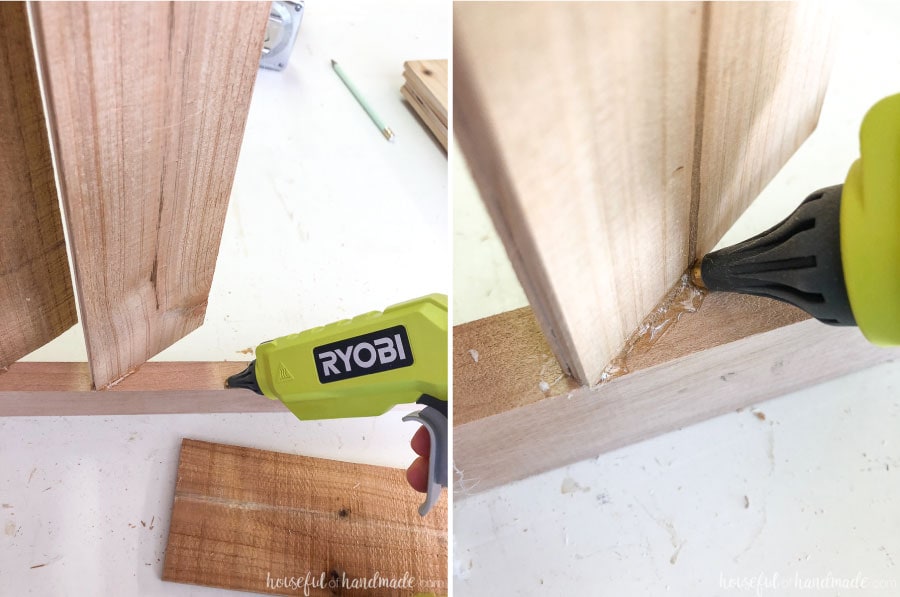
Move down and repeat until all the cedar planks are secured. I used a total of 10 planks in my 30″ frame (3″ for each plank).
To hang the shutters, I nailed in some saw tooth picture hangers on the back. Super easy! And they look amazing in our living room.
Now as I am removing all the tropical summer decor and switching to cozy for fall. I am excited to keep the shutters. What do you think about a leaf garland to finish off the look with the easy decorative windmill I made?

