Create the perfect hair station with this easy to build hair accessory organizer with a mirror.
My daughter has so many hair accessories! And the recent popularity of scrunchies has made her hair stuff piles grow so fast. We needed a solution!
So I partnered with Kreg tools to use their new Kreg Jig 720Pro to build the perfect hair accessory organizer and styling center for the perfect DIY gift!
And right now you can get the 720Pro pocket hole jig in a bundle with my favorite AutoMaxx face clamp and screws (through Jan 31, 2022 or while supplies last). It’s the perfect time to upgrade your pocket hole jig and then make some presents for Christmas with it!
This post may contain affiliate links. As an Amazon Associate I earn from qualifying purchases. Click here to read my full disclosure policy.
Not sure if you want to upgrade your pocket hole jig? Read this post all about the features of the newly designed 720Pro pocket hole jig.
Hair Accessory Storage
When designing this easy to build hair accessory station, I needed to address a few different issues.
- First it needed to store and organizer all the scrunchies, hair ties and clips.
- Second, it needed to be wall mounted since there is no room in the bathroom or bedroom to store something else.
- Third, I wanted it to also act as a place for her to do her hair, like a little wall mounted vanity area.
- But most important, it needed to be EASY to make!
And what I came up with is perfect! It took just an afternoon to build (minus waiting for glue and stain to dry).
And does everything it was suppose to do while looking amazing!
Scrunchie organizer
If you have a daughter you know all about scrunchies! They are huge with all the young girls. You collect them, trade them, sew them yourself.
And that means you have piles or scrunchies everywhere!
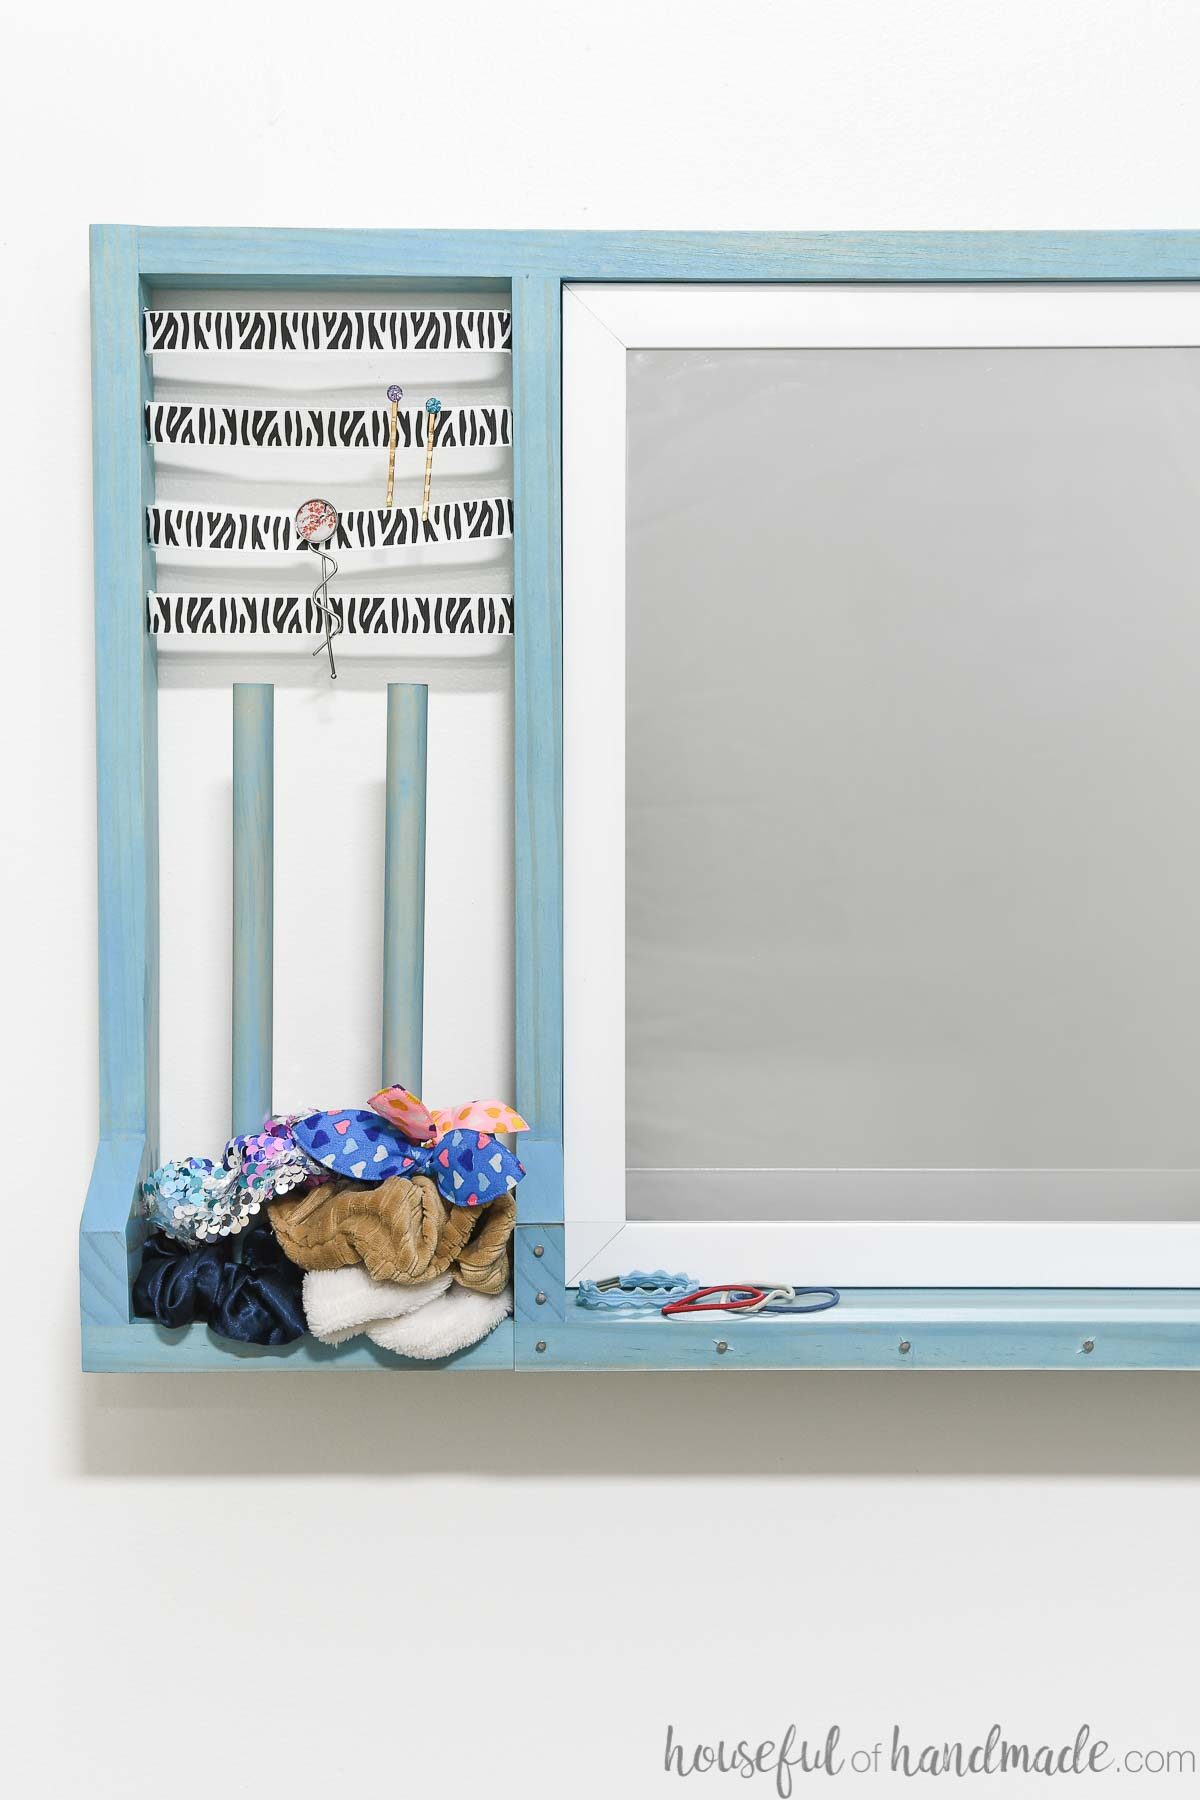
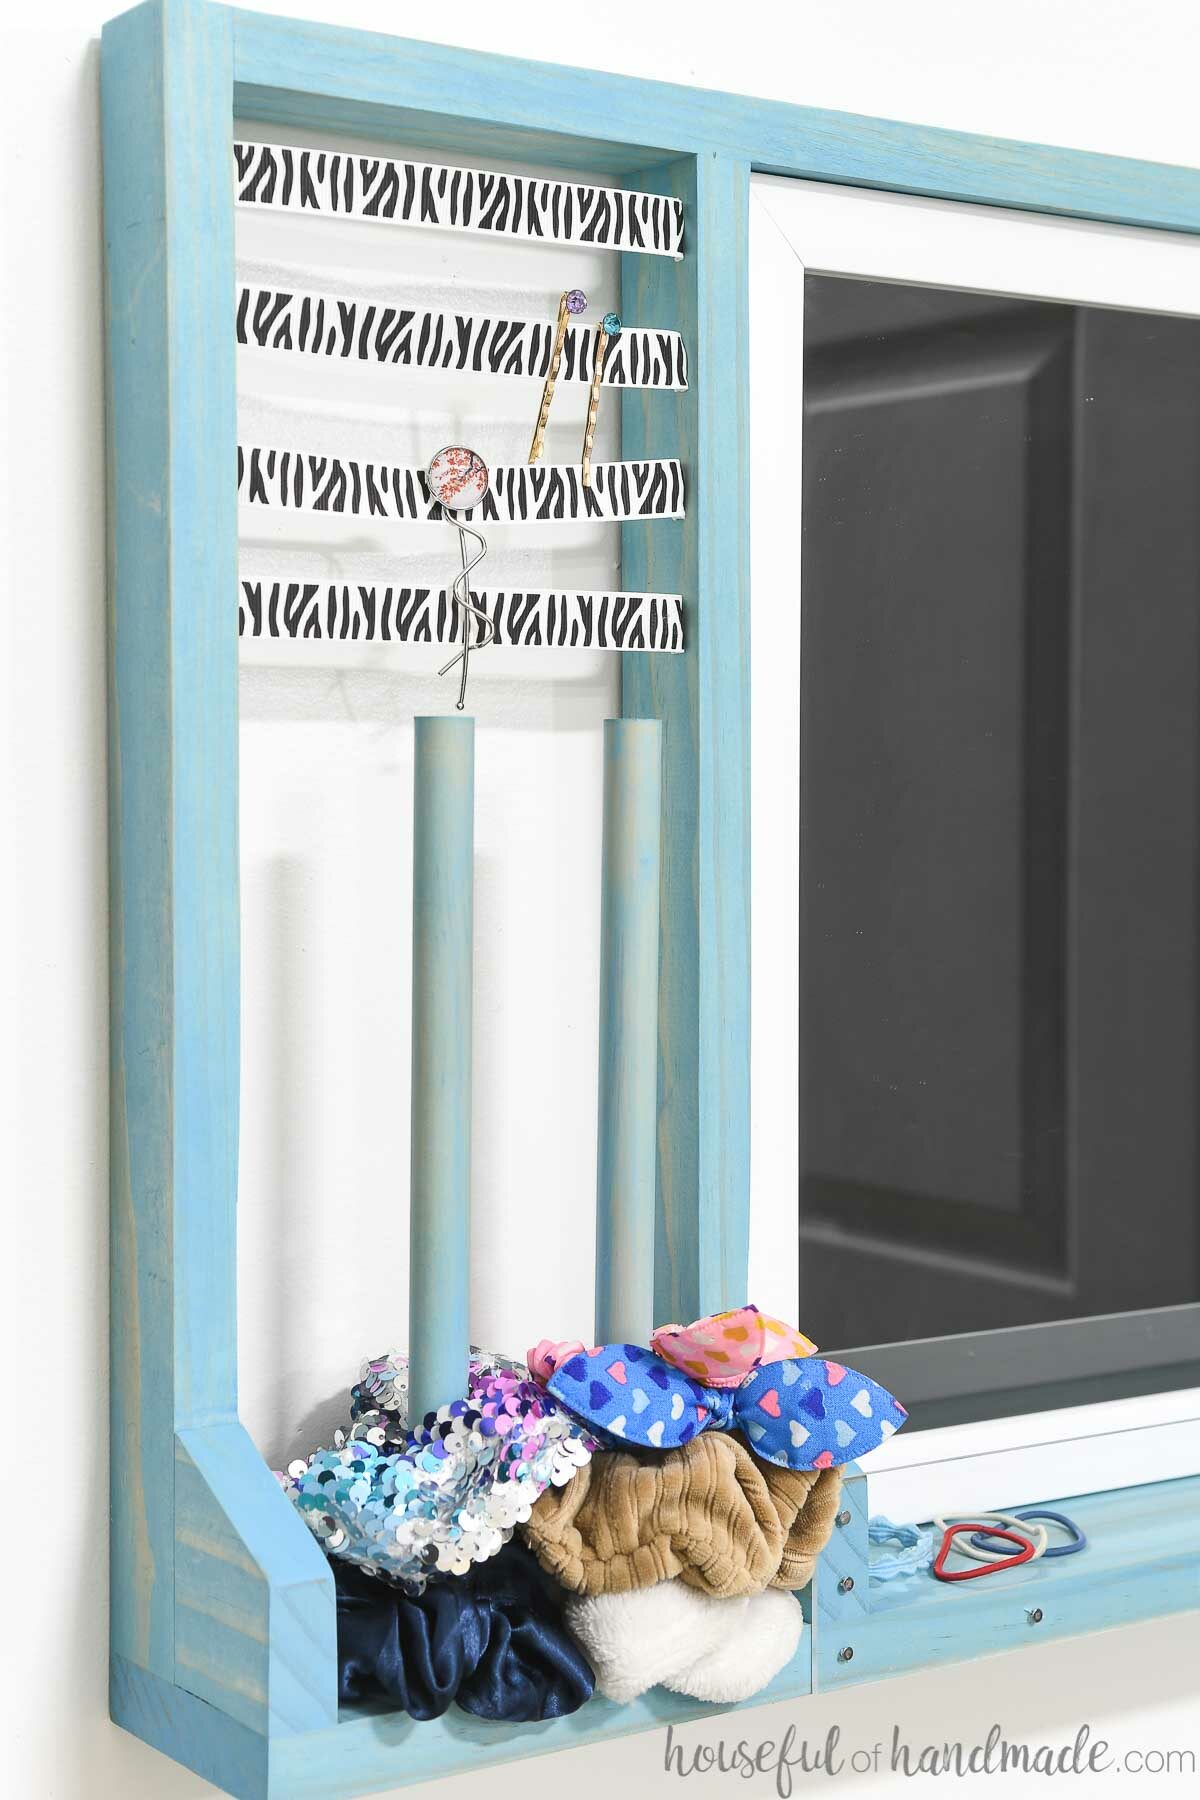
This air accessory organizer has room to store all those scrunchies. And it is so simple. The two tall dowels are the perfect place to store scruchies.
I love the way it looks. But more importantly, I love how easy it is for my daughter to slide the scrunchies on the dowels. That means she will actually put them away!
Hair tie organizer
Hair ties is another big pain point. You buy them in a pack of 50-100 and they end up all over the house (to be fair, this is a problem for me too).
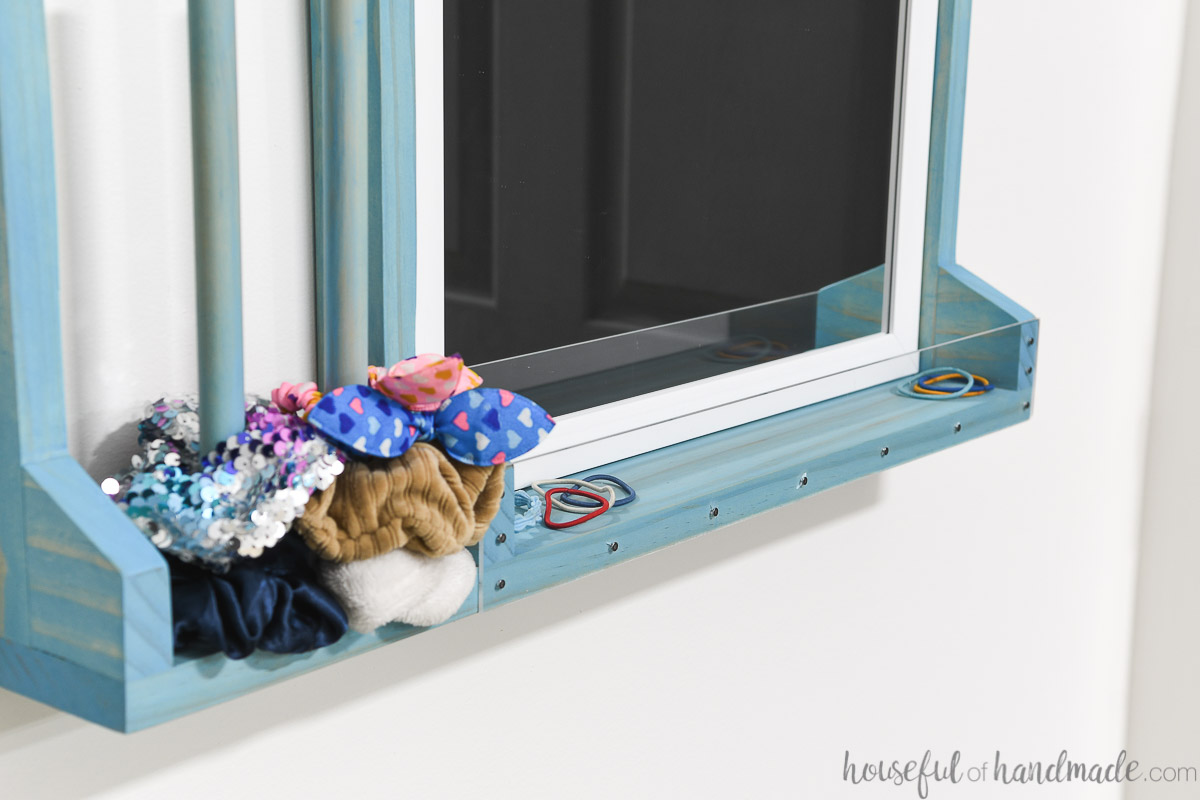
So I created a little tray on the bottom of the hair accessory storage to hold all those hair ties.
The front of the storage bin is made from a piece of plexiglass. The clear front means your bin does not impede the view in the mirror and it makes it easy to see what hair ties you have.
And again, putting away the hair ties in the bin is super quick and easy! Hopefully this will make it easy to always put them away where they need to go.
But most importantly it will mean we can find one when needed too!
Hair clip organizer
The last storage problem we have with all the hair accessories is hair clips. My daughter loves adding a little sparkle to her hair.
Above the scrunchie organizer I added strips of grosgrain ribbon. The ribbon is an easy place to slide pins or snap clips too.
And you can have fun with your ribbon. Use different colors or styles to make the hair accessory organizer custom for your daughter.
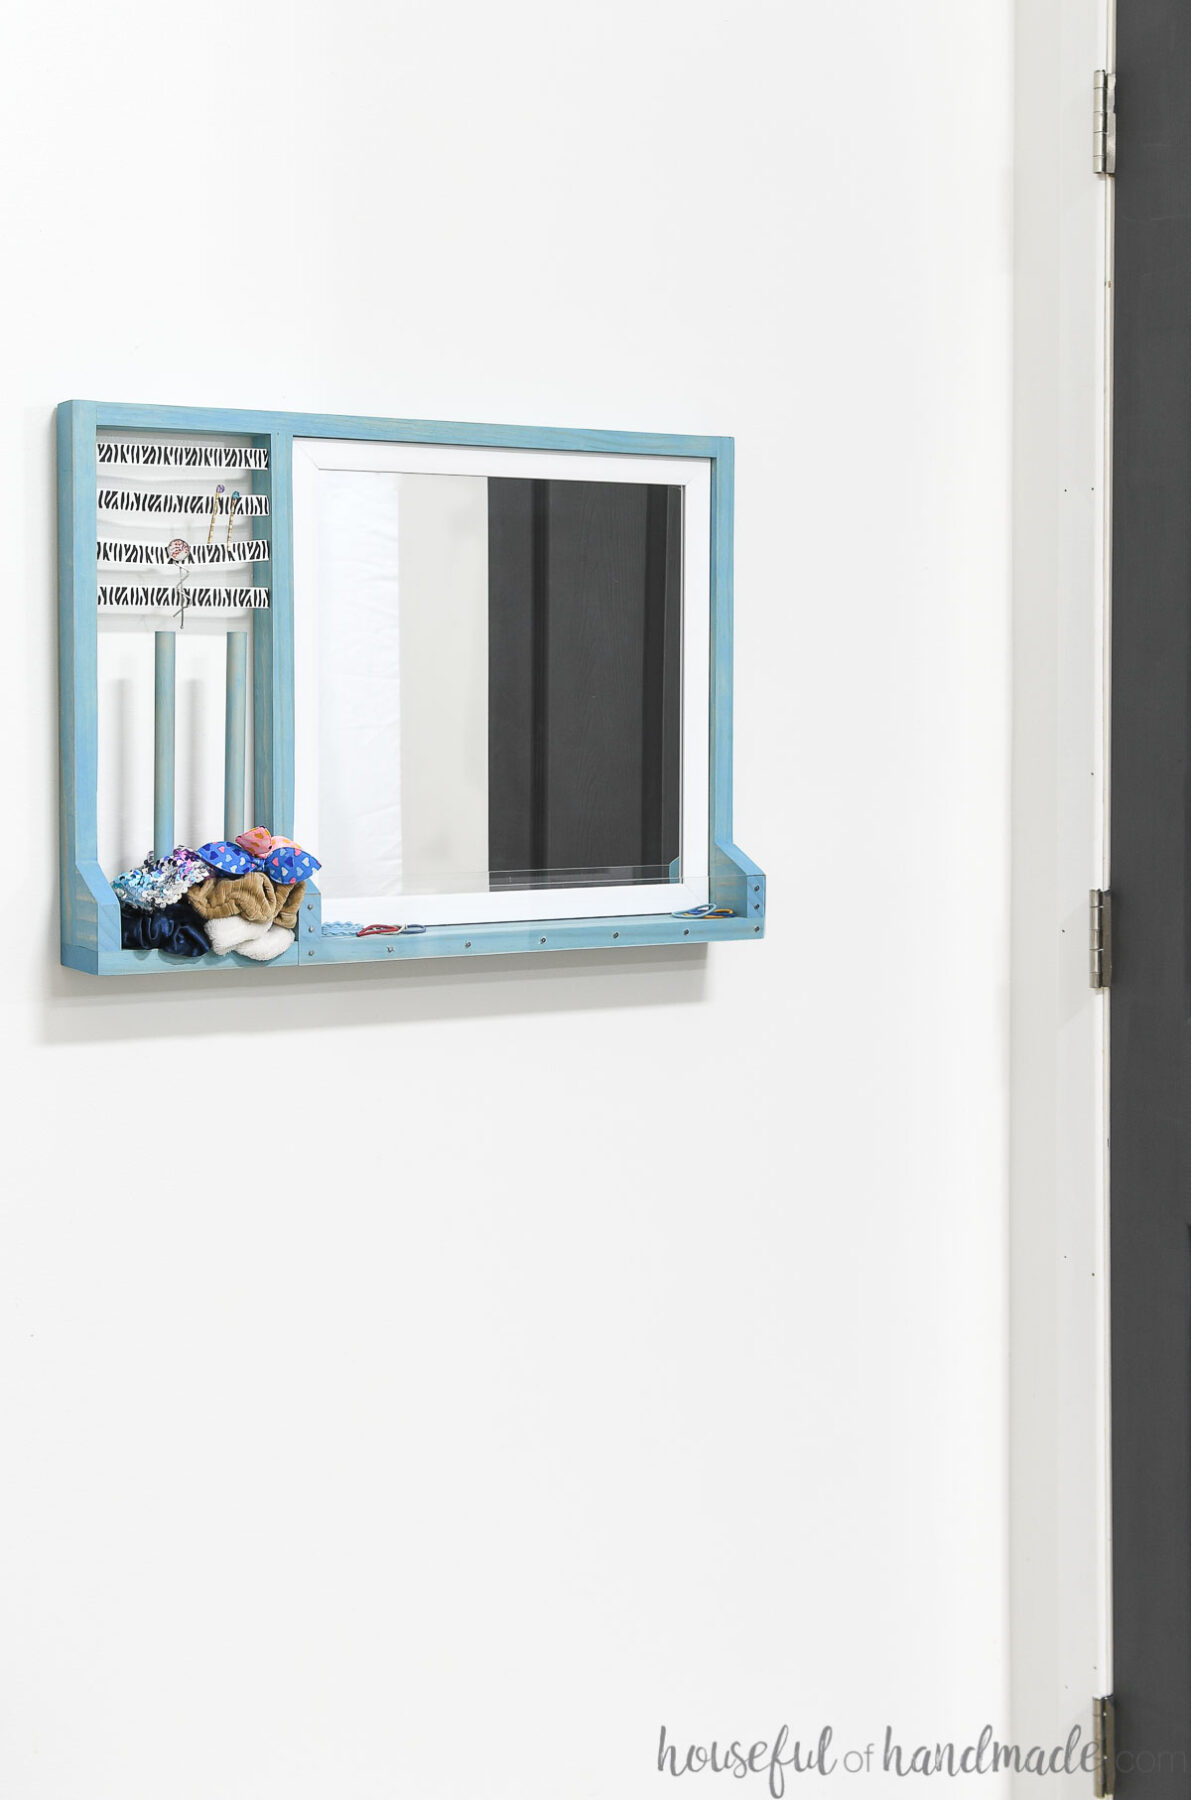
Wall mounted styling center
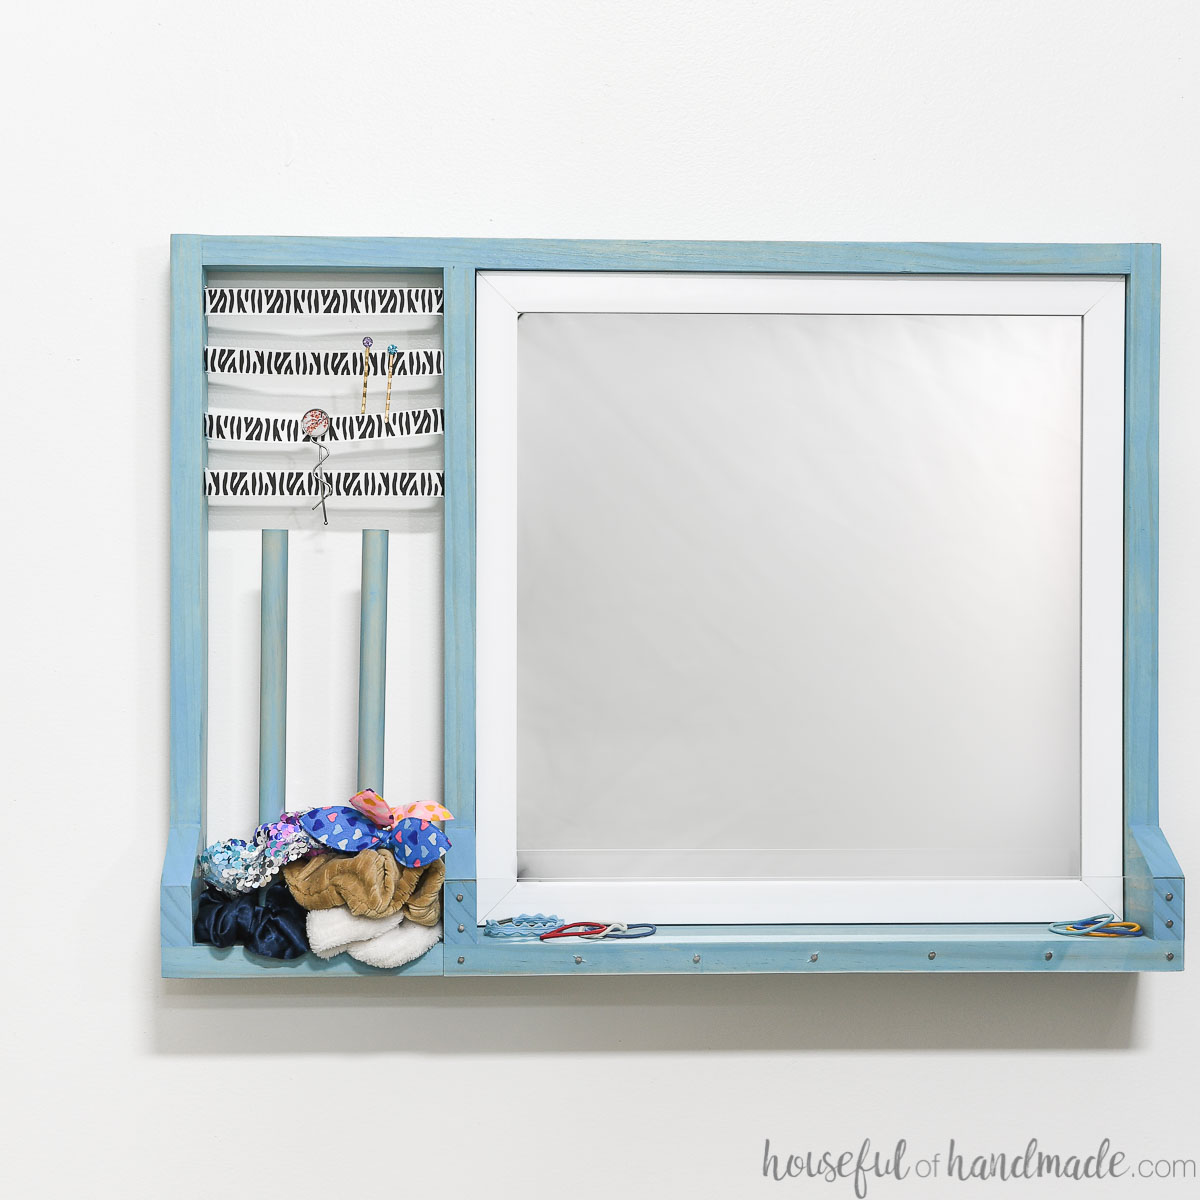
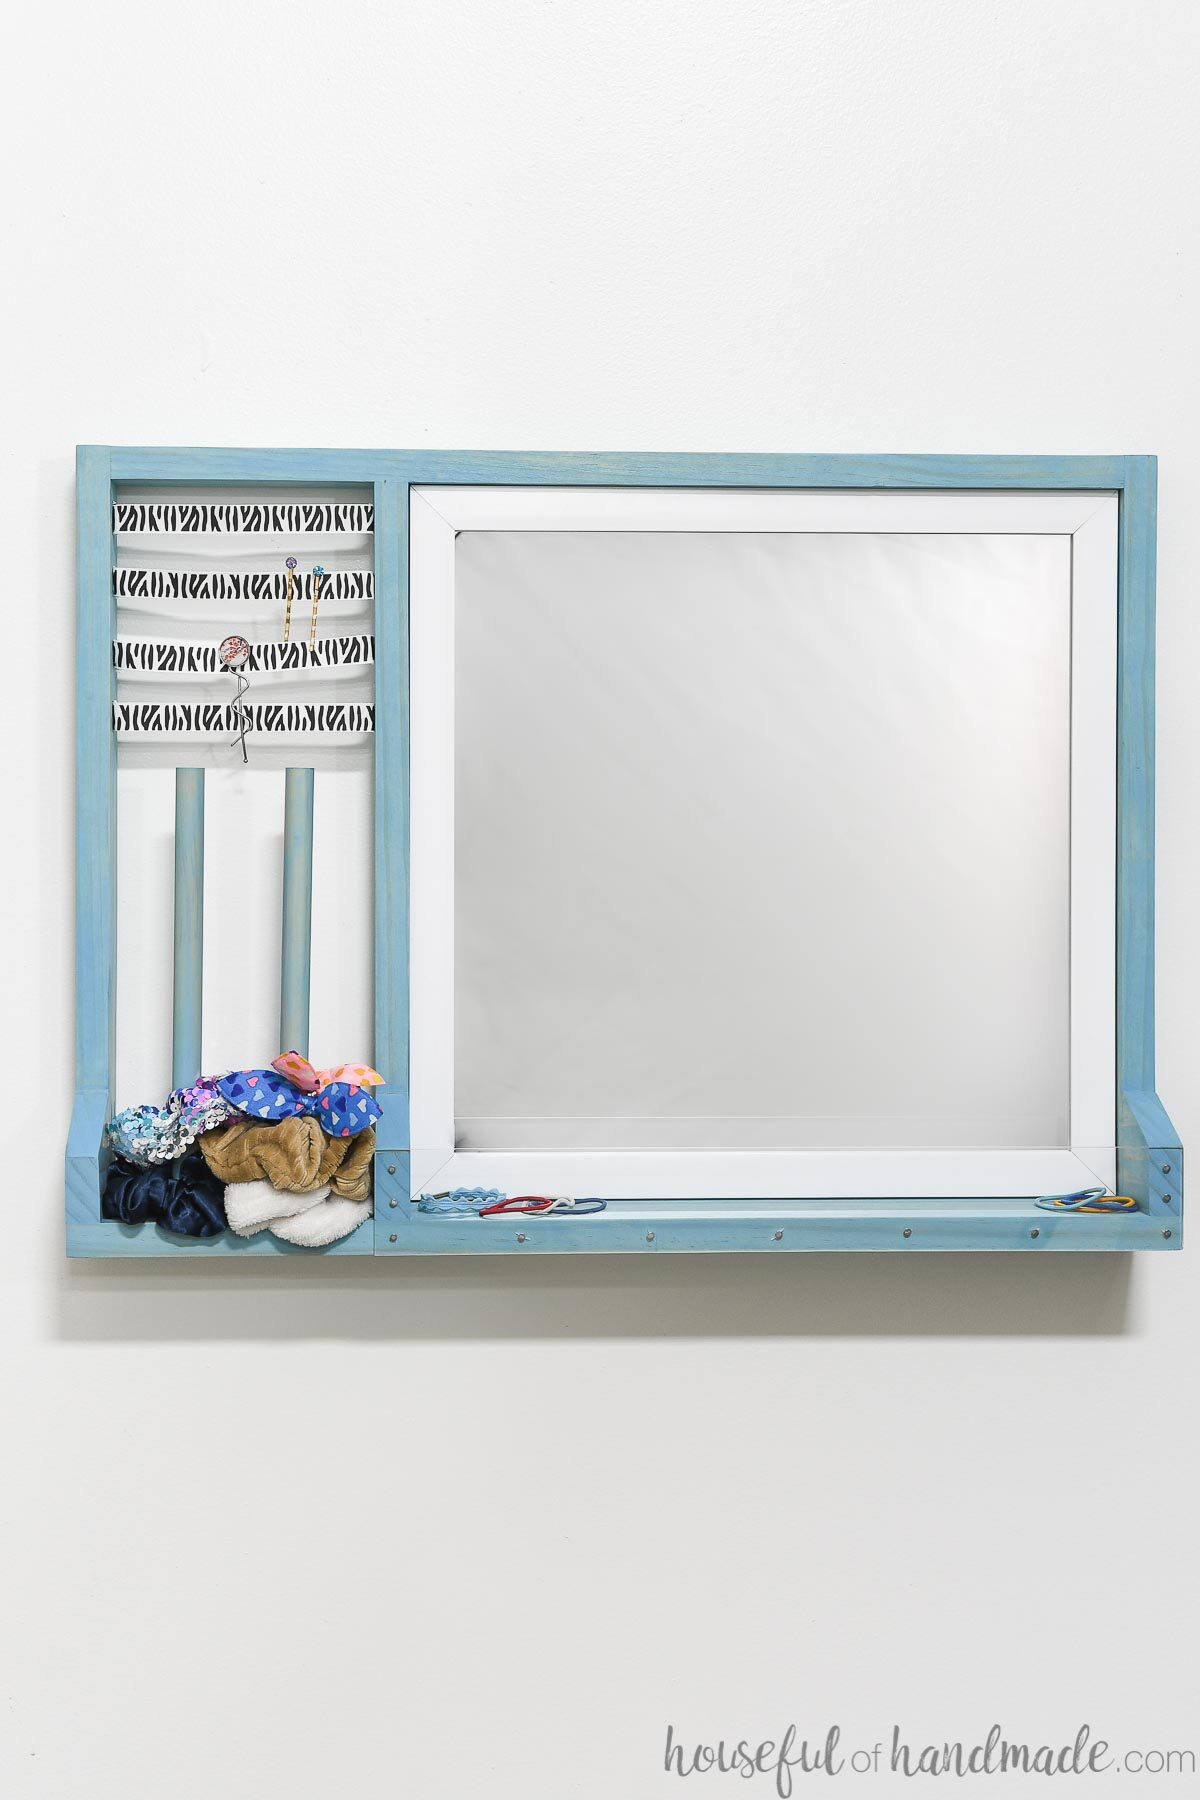
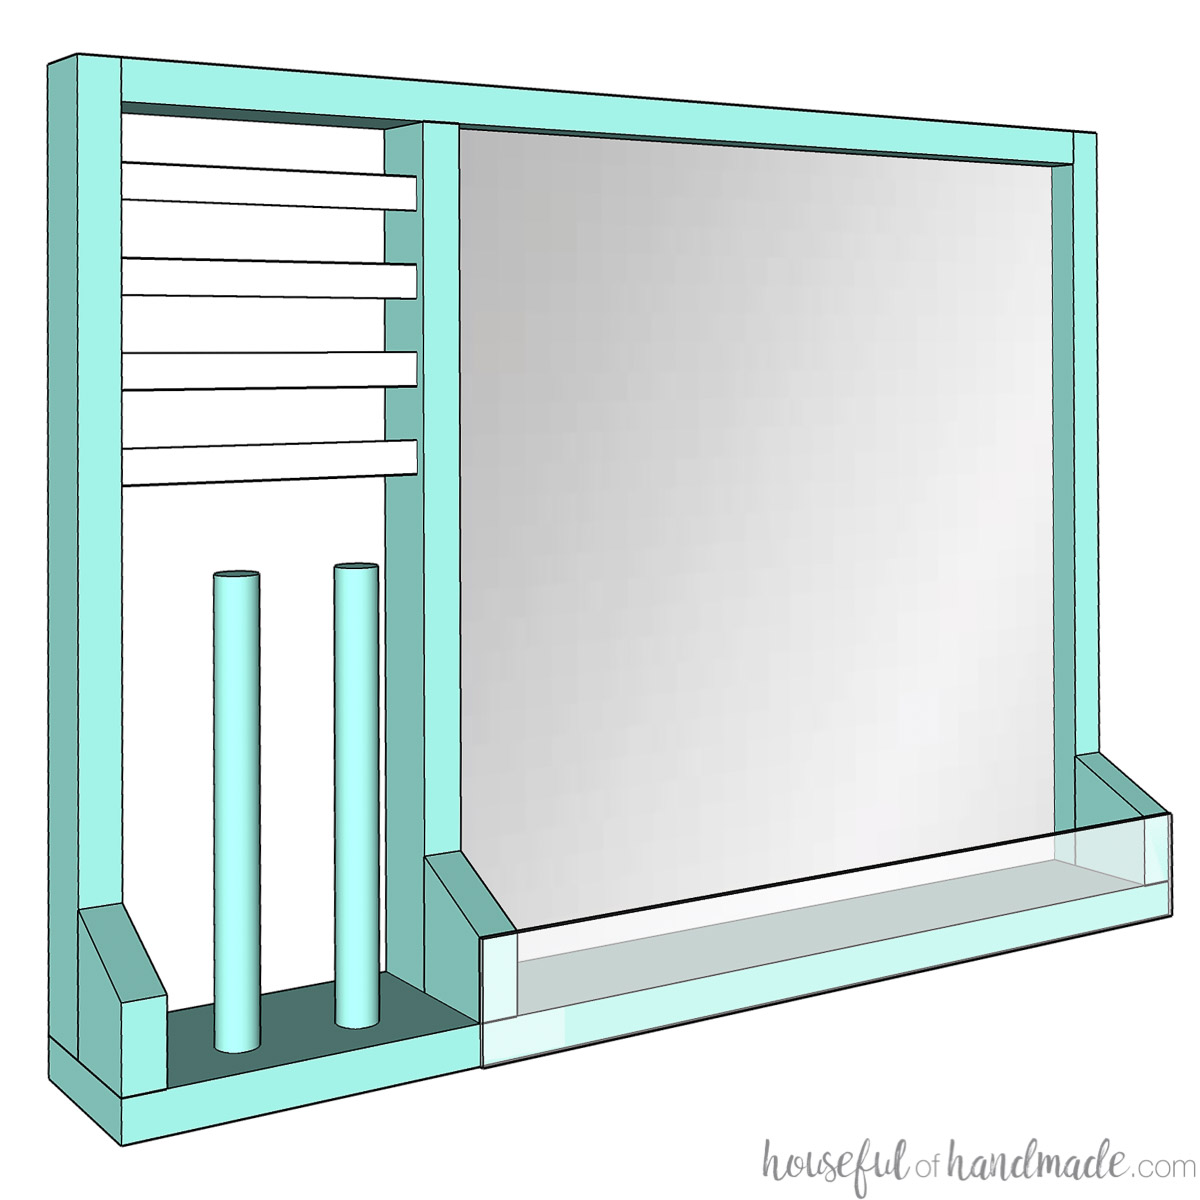
The last part of our hair accessory storage is what I am calling the styling center! All the hair accessories are stored around a 16″ x 16″ mirror.
This means you can do your hair right where all the accessories are stored! If this doesn’t make it easy for my daughter to keep all her hair accessories put away I don’t know what will.
I found this inexpensive 16″ x 16″ mirror at Walmart. It already had a small frame on it.
But you can use an unframed mirror also (which will give you more mirror area). Or use a beautiful beveled mirror for a classy look.
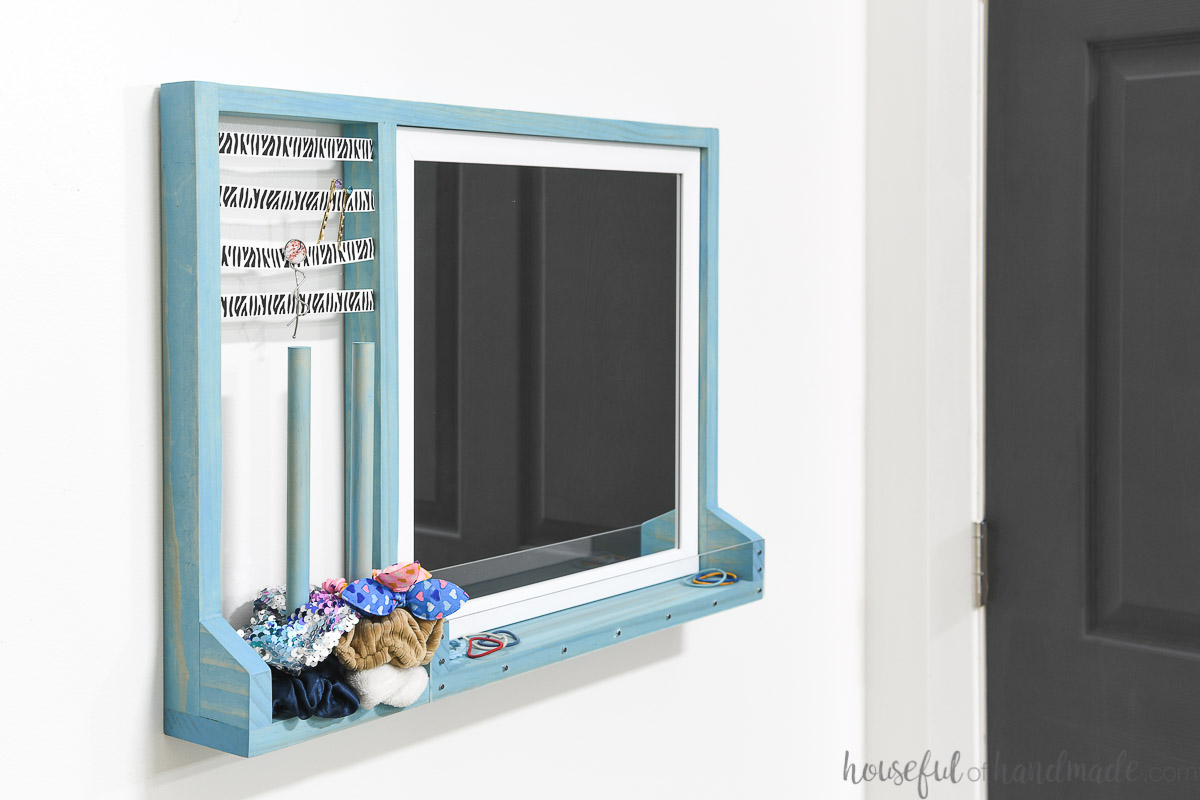
And then you can mount your hair accessory station on the wall. Mount it at your daughter’s height to make is easy for her to style her hair.
I am going to put it on the wall right by the door to her bedroom (after Christmas). That way she can do her hair in the morning and easily check it throughout the day.
How to Build a Hair Accessory Organizer
Tools needed:
- Pocket hole jig
- Get the Kreg 720Pro with a free clamp and screw now through January 31, 2022.
- Miter saw
- I recently upgraded to this larger sliding miter saw (watch for it to go on sale), but all my projects before were built with this inexpensive miter saw that I loved.
- Drill
- Impact driver (optional, but I love not having to switch bits with the drill)
- Sander
- Hammer
- Staple gun
Supplies:
- Wood supplies
- (1) 24″ long 1×4 board
- (1) 8′ long + (1) 16″ 1×2 boards
- (1) 8″ long 1×3 board
- (1) 5/8″ dowel
- (1) 2 1/4″ x 17 1/2″ plexiglass
- 16″ x 16″ mirror
- 1 1/4″ pocket hole screws
- 1″ long wire nails
- 1/4″ long staples
- Super glue
- Grosgrain ribbon
- Keyhole hangers
Cut out the pieces
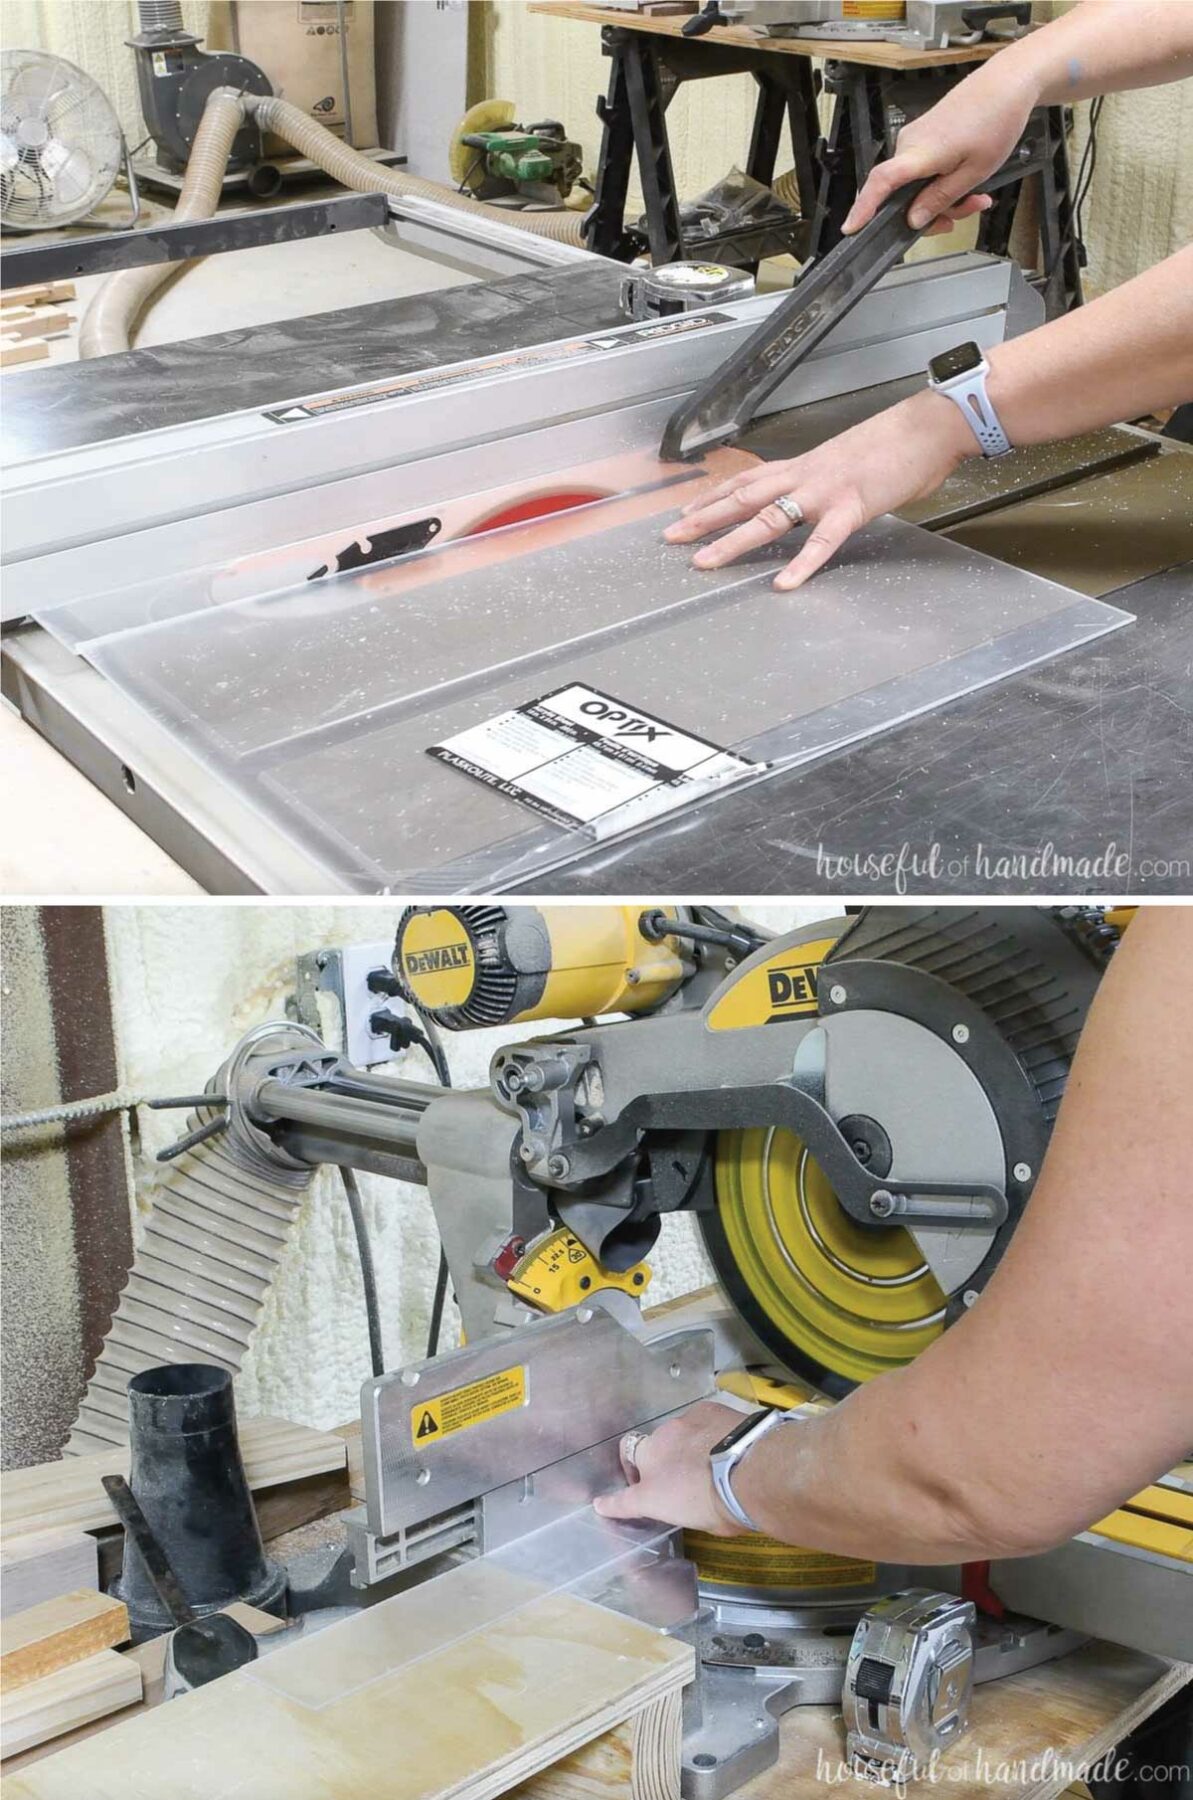
Use your miter saw to cut all the pieces.
- (1) 24″ 1×4 board
- (1) 22 1/2″ 1×2 boards
- (2) 16 3/4″ 1×2 boards
- (3) 16″ 1×2 boards
- (3) 2 1/2″ 1×3 boards
- (2) 10″ long 5/8″ dowels
Normally I do not recommend cutting all the pieces before assembly, but this project is one you can cut all the pieces up front.
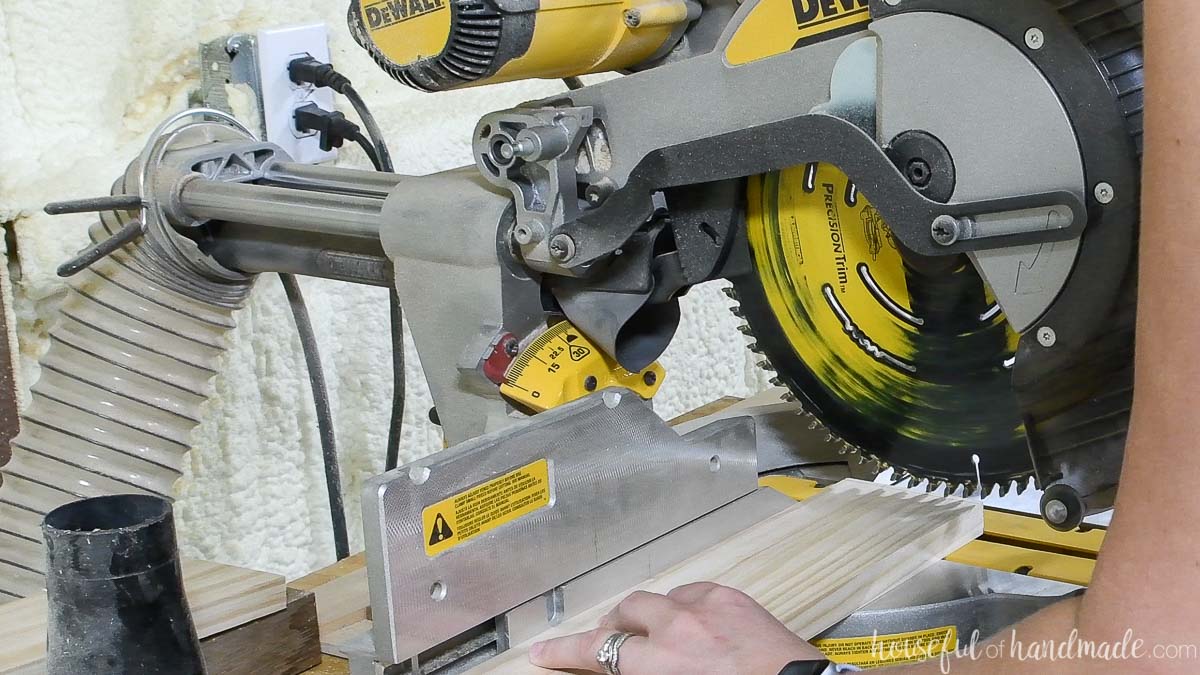
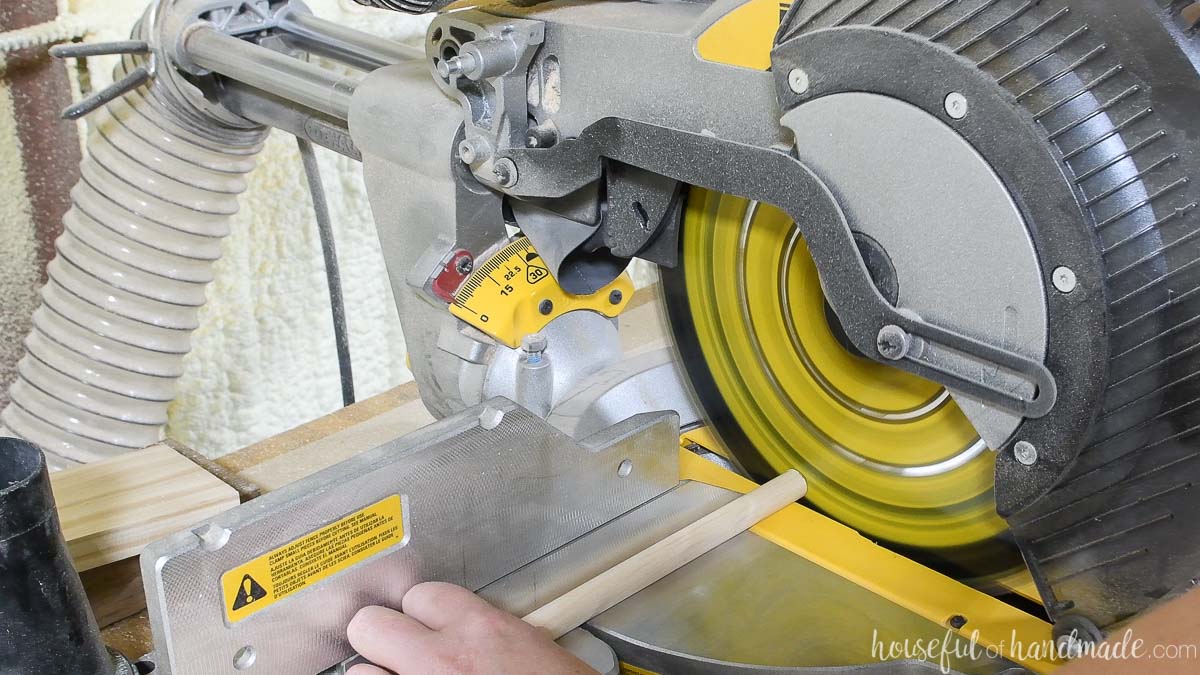
Cut the dowels to length on the miter saw.
The hair accessory organizer has two 10″ dowels for holding the scrunchies. You can adjust these longer or shorter depending on how many scrunchies you need to store.
You can cut out the plexiglass with regular wood cutting tools. Or you can score it with a utility knife and snap it across the line.
Do not remove the backing from the plexi while cutting or after. Wait until the very end to protect it from scratches.
Lightly sand the cut sides with 220 grit sandpaper to remove sharp edges.
Build the frame
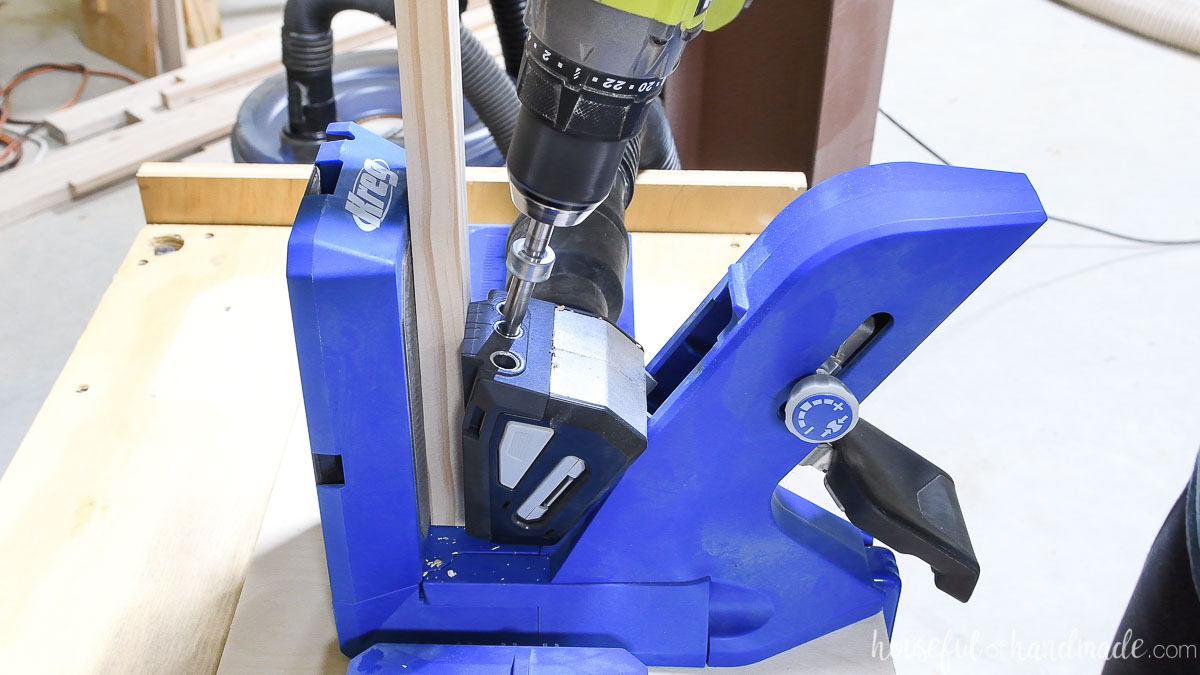
Set the drill bit for the Kreg 720Pro pocket hole jig to 3/4″ thick material. No need to set the jig, just clamp the material in the jig and it will automatically adjust to the material thickness.
Drill pocket holes in the following pieces:
- On both ends of the 22 1/2″ top piece
- On one end of both the 16 3/4″ side pieces
- One both ends of all the 16″ pieces
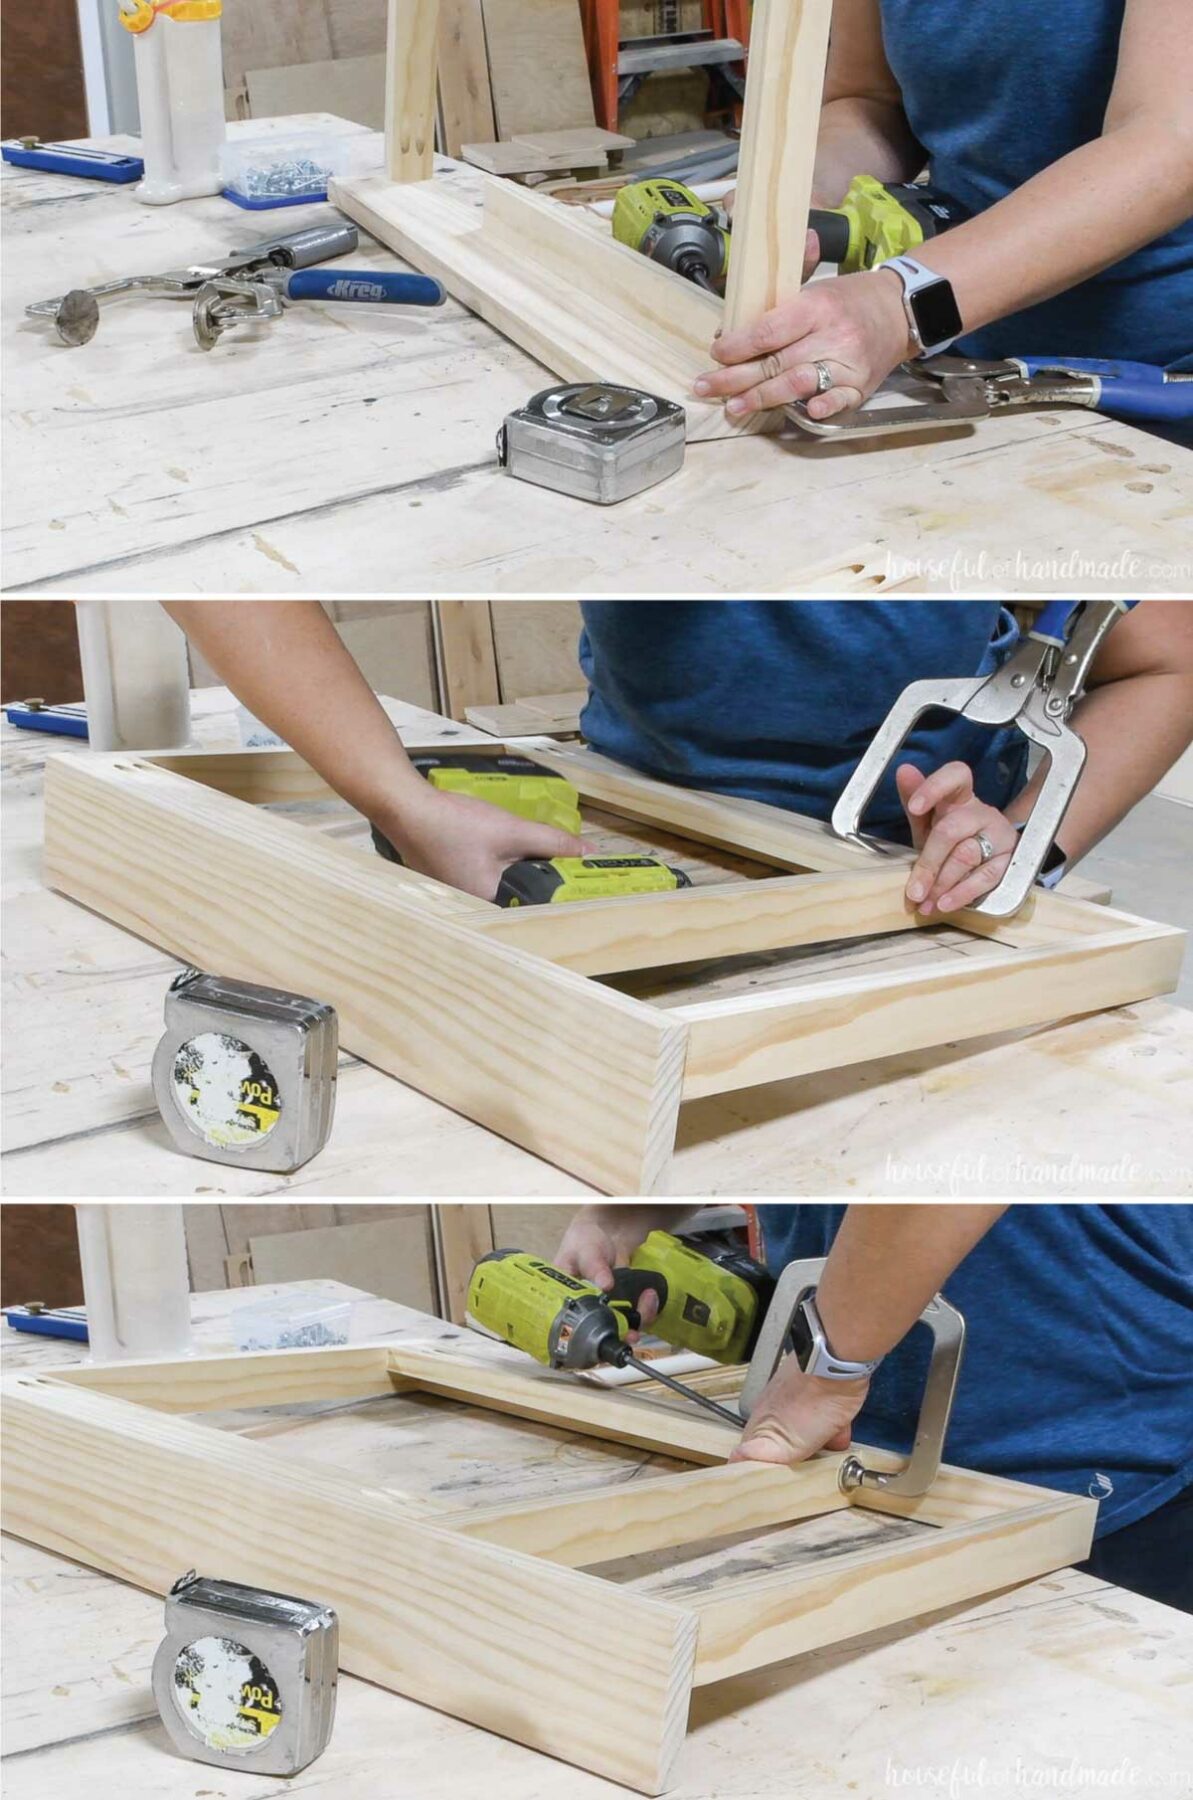
Attach the 16 3/4″ long pieces to the top of the 1×4 bottom with wood glue and 1 1/4″ pocket hole screws. Line them up so the sides and back are flush.
Then attach the 22 1/2″ top piece to the top between the two side pieces. Keep the sides and top flush.
Secure with wood glue and 1 1/4″ pocket hole screws.
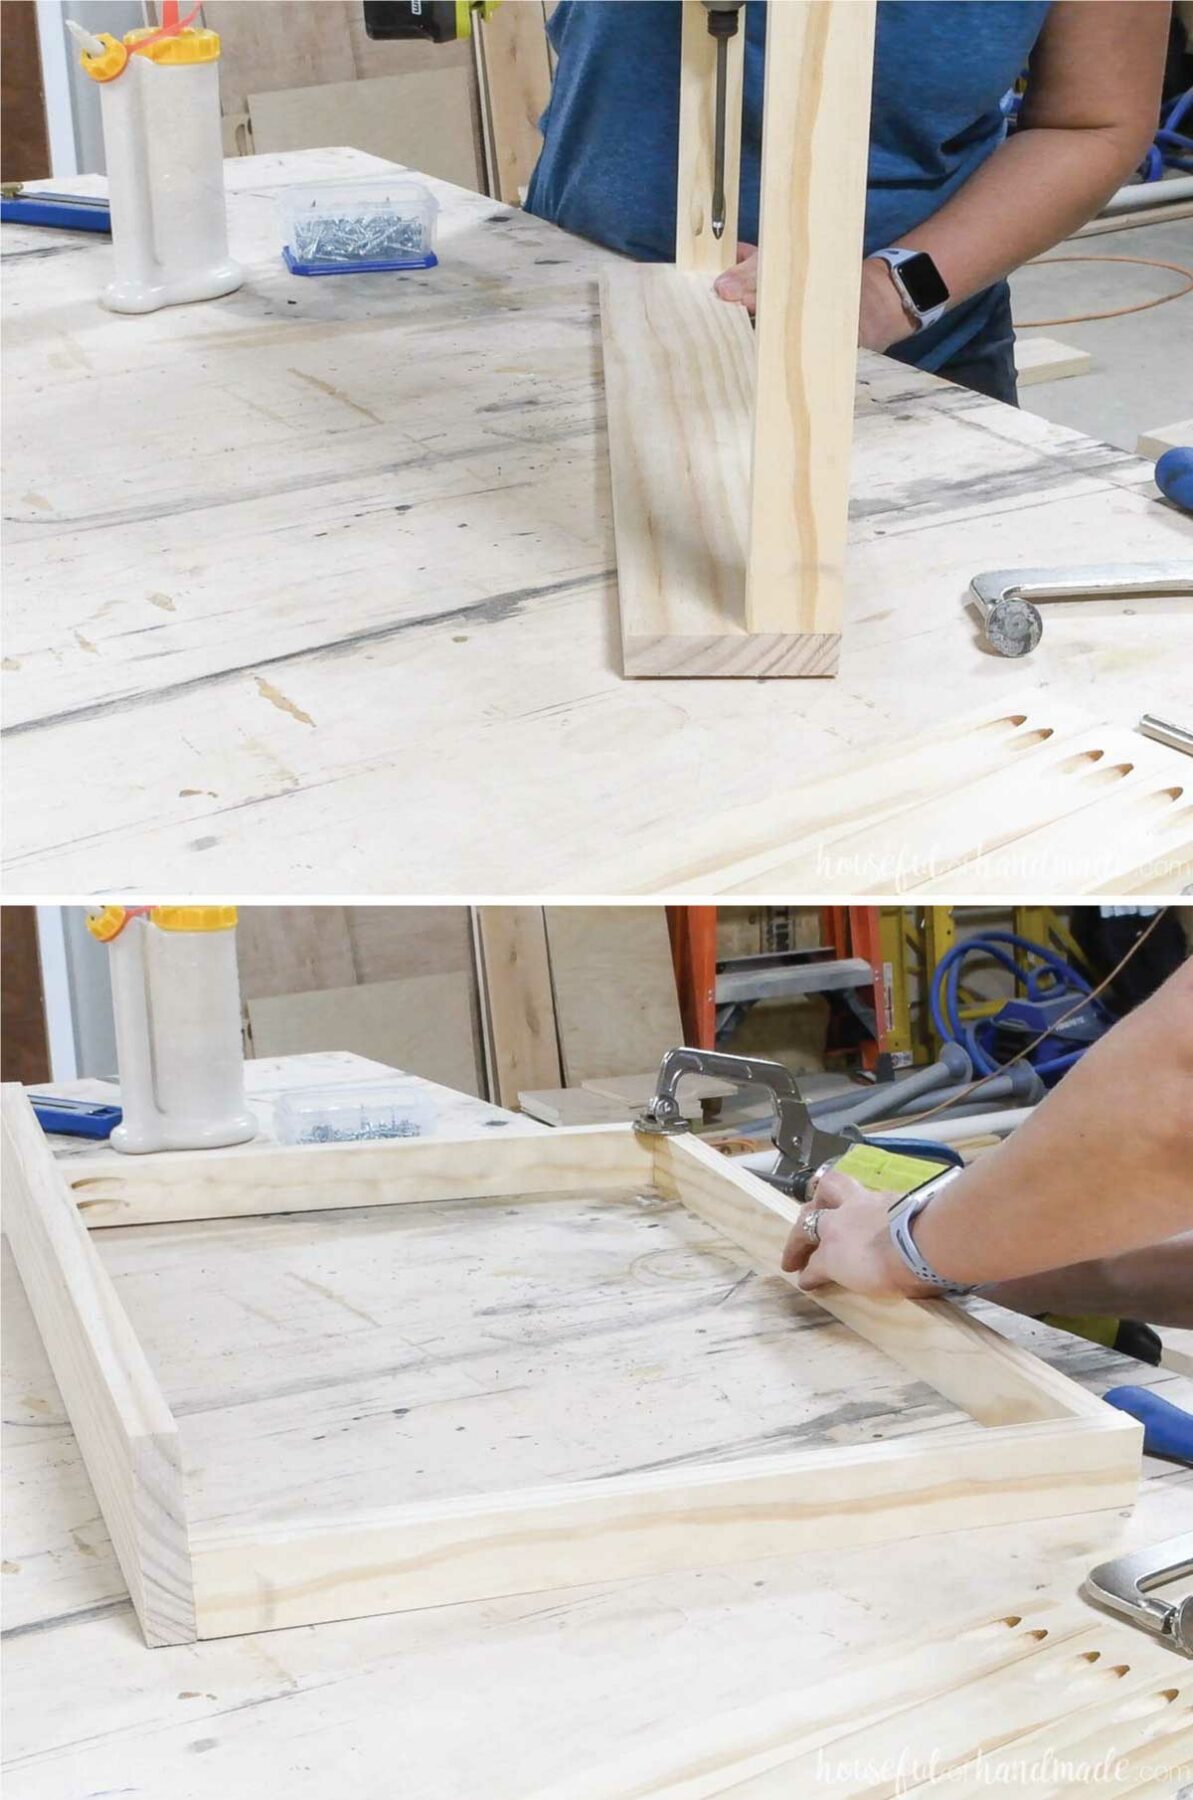
Attach two of the 16″ pieces to one of the side pieces with glue and pocket hole screws. This will be where the mirror is attached.
Attach these pieces so they are flush with the back. One will be attached at the top and the other at the bottom of the opening.
Then attach the other 16″ piece to the top and bottom so it is flush with the side of the 16″ pieces.
Finally, attach the other side of the 16″ pieces to this center piece. Creating a 16″ x 16″ opening for your mirror with a board at the top and bottom for support.
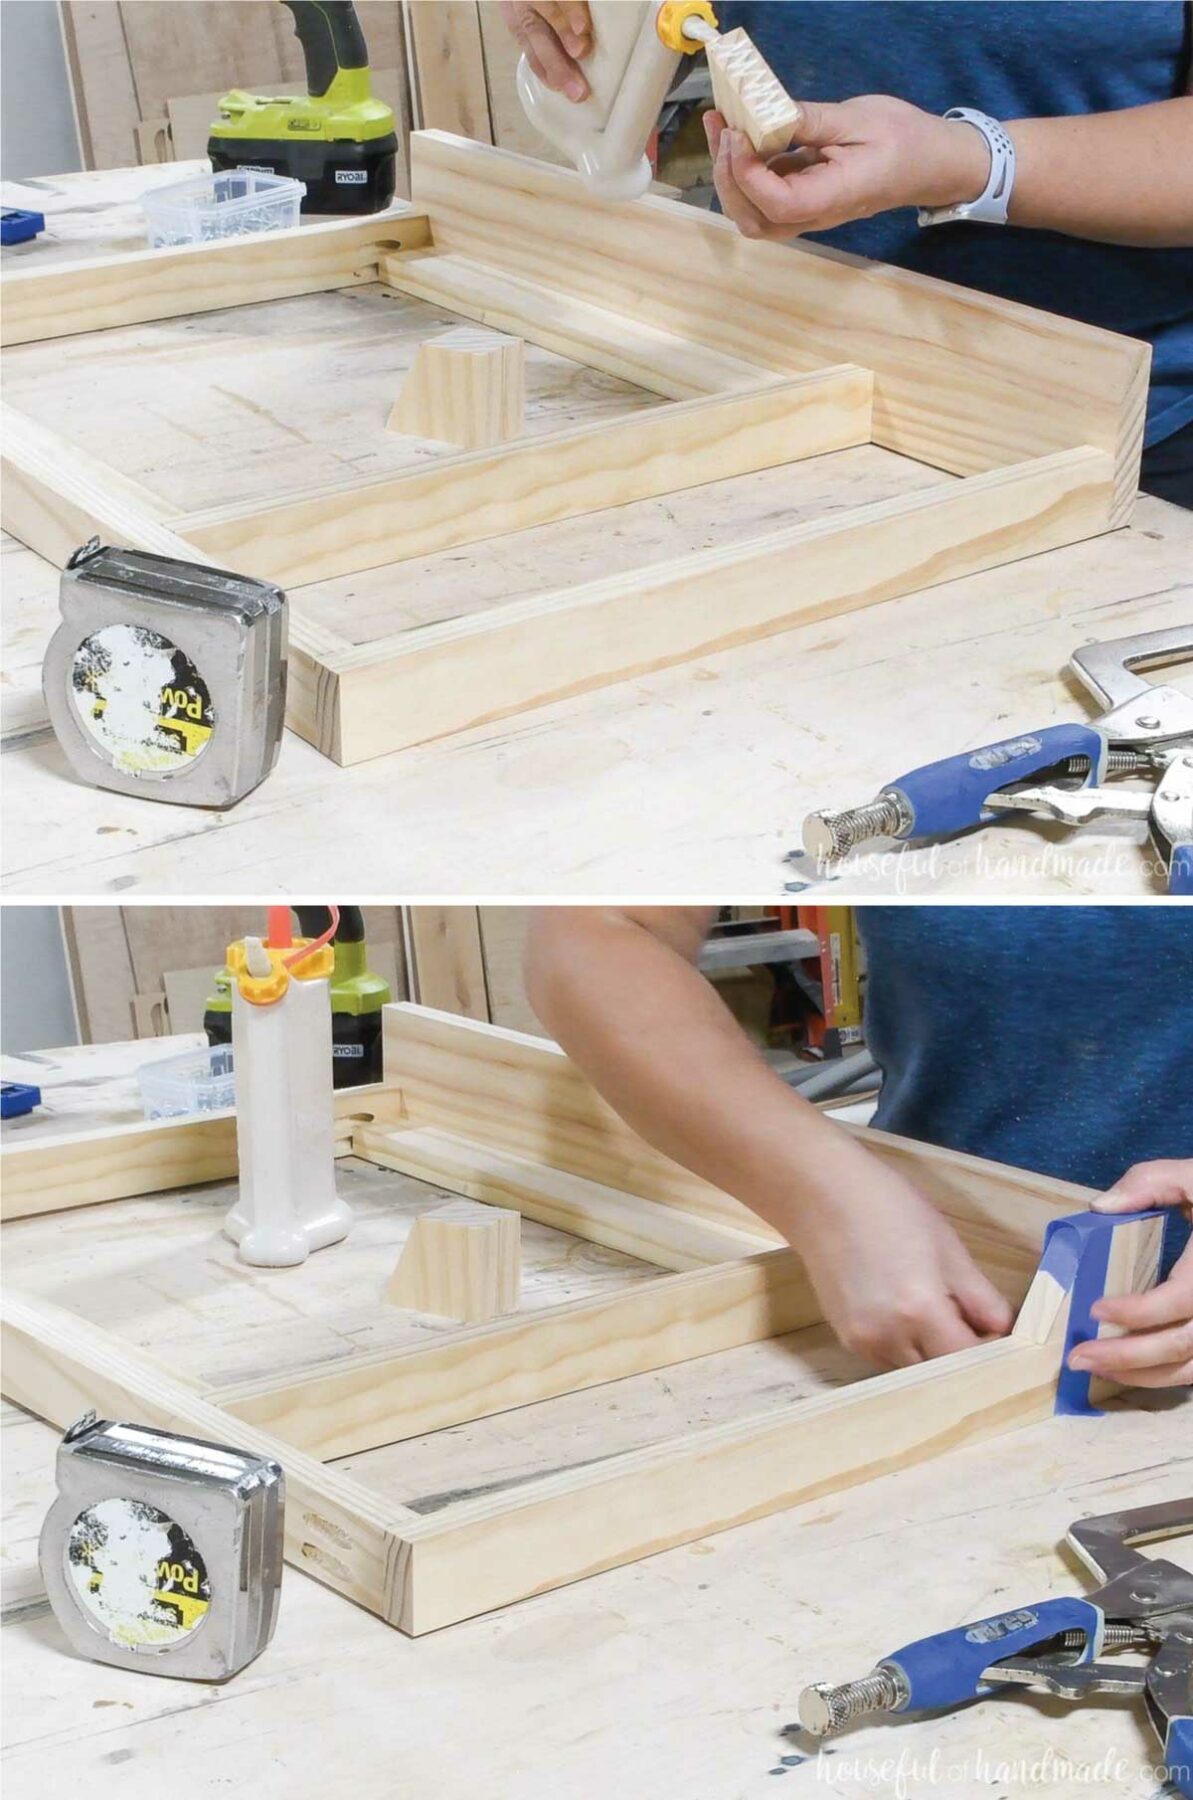
For the 2 1/2″ 1×3 boards, measure up from the outside edge 1 1/2″. Draw a line from the top inside to this mark and draw a line. Cut the board on the line to create a slope.
Add wood glue to the bottom and inside of these boards and glue them to the fronts of the 1×2 boards so they are flush with the 1×2 boards and the front of the 1×4 bottom.
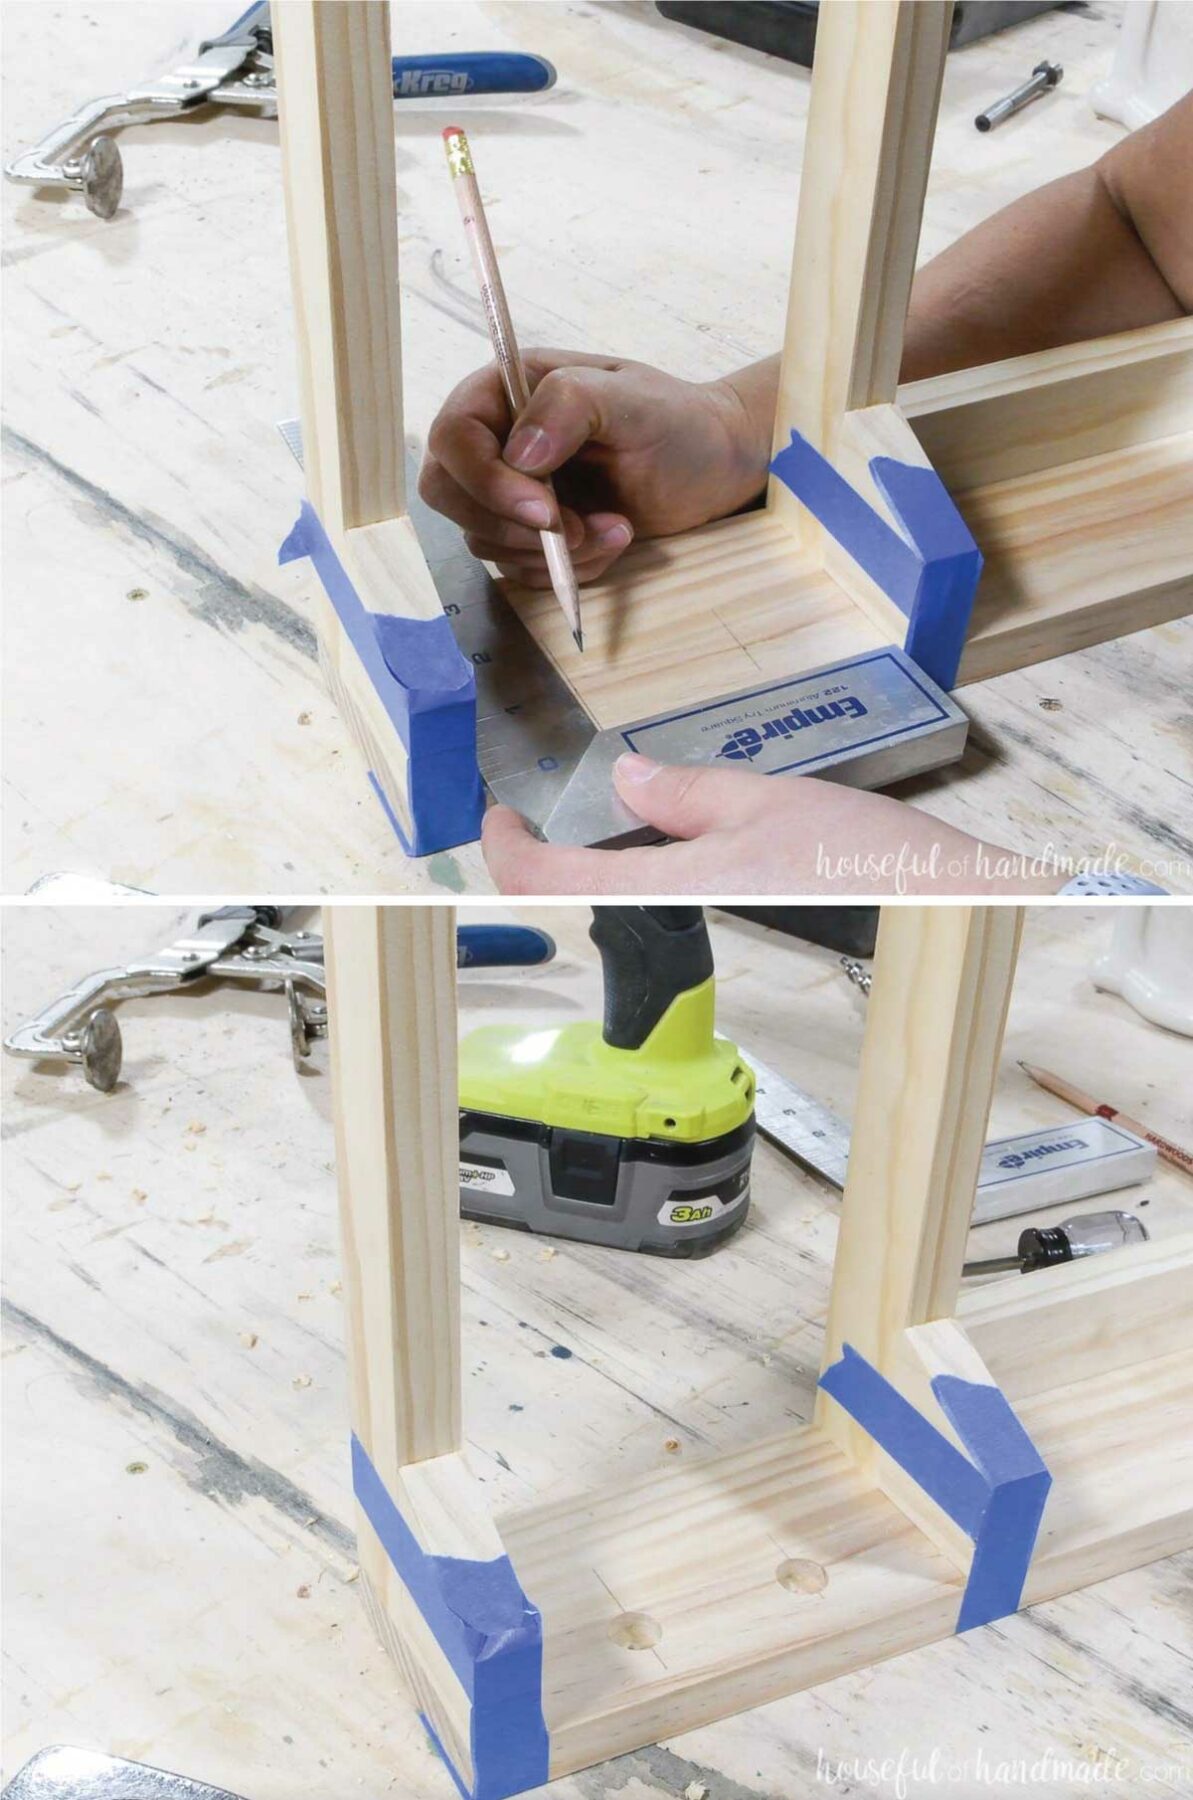
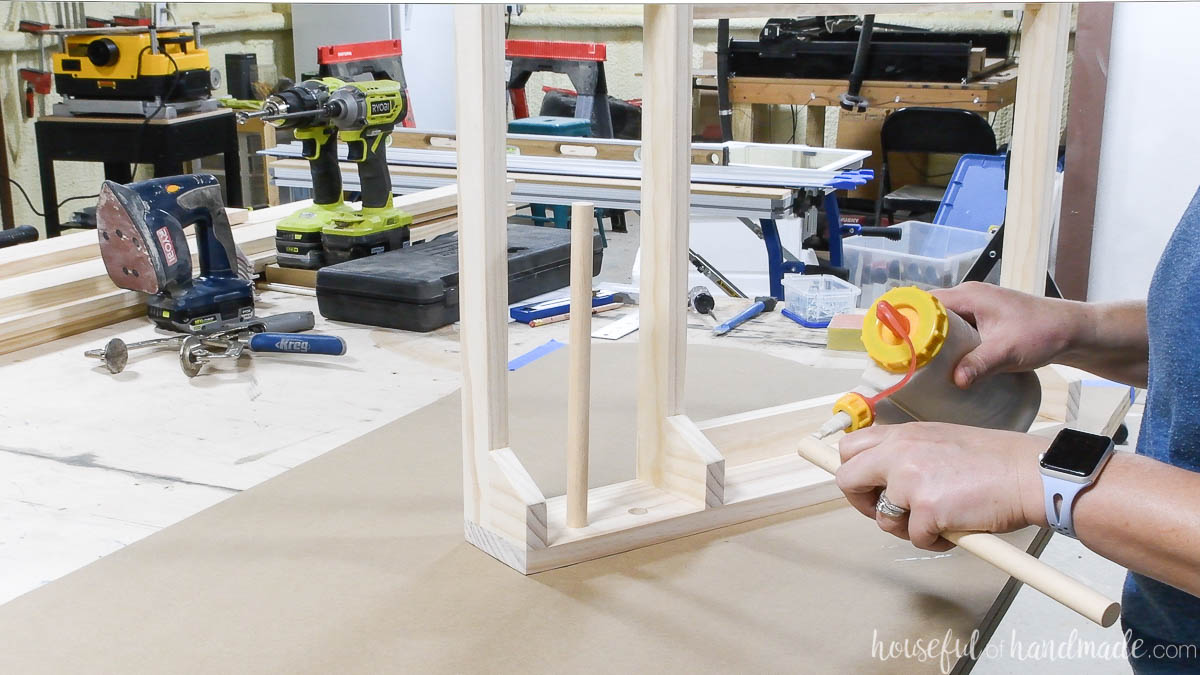
While these dry, drill holes for the dowels. Measure in 1 3/4″ from the edges of the small section. Then measure 1″ back from the front and draw a line.
Drill a 3/8″-1/2″ deep 5/8″ hole on each of these marks. I prefer using a forstner bit to get a flap bottom that the dowels fit into nicely.
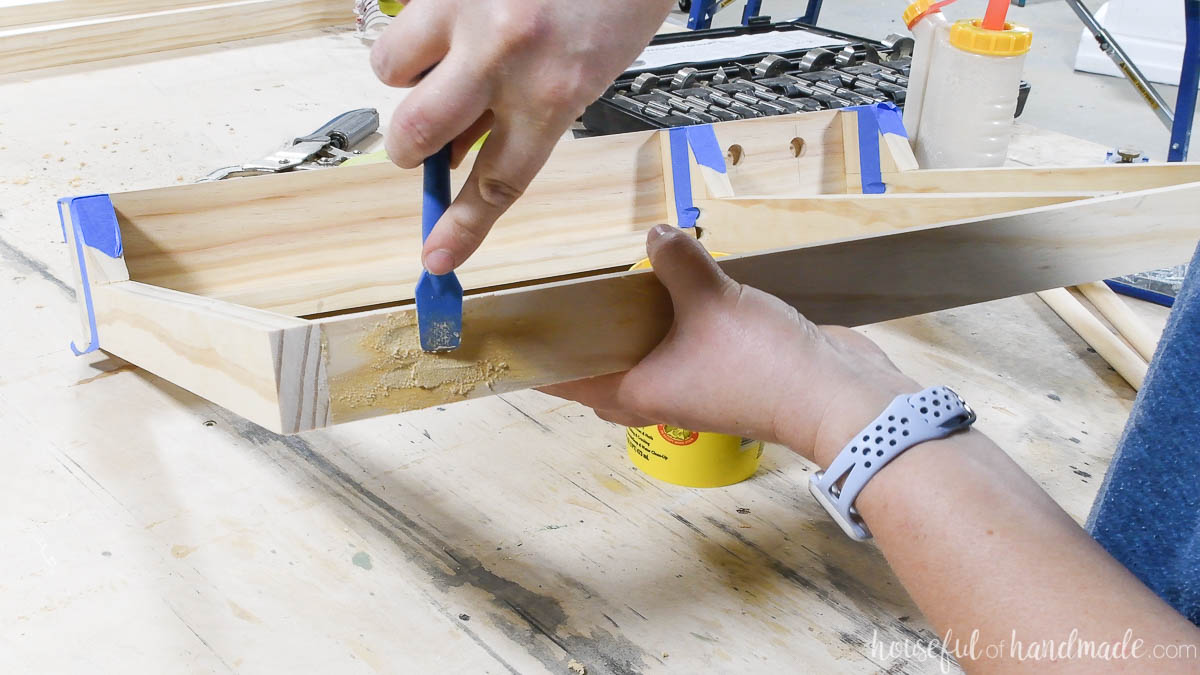
Fill any visible pocket holes with wood putty. Make sure to use stainable putty if you are planning to stain your project.
Let it dry fully then stand the entire hair accessory organizer smooth.
Finish the hair station
Once sanded, glue the dowels into the holes you drilled.
If you do this before sanding, it will be hard to get into the sides to sand the putty from filling the pocket holes.
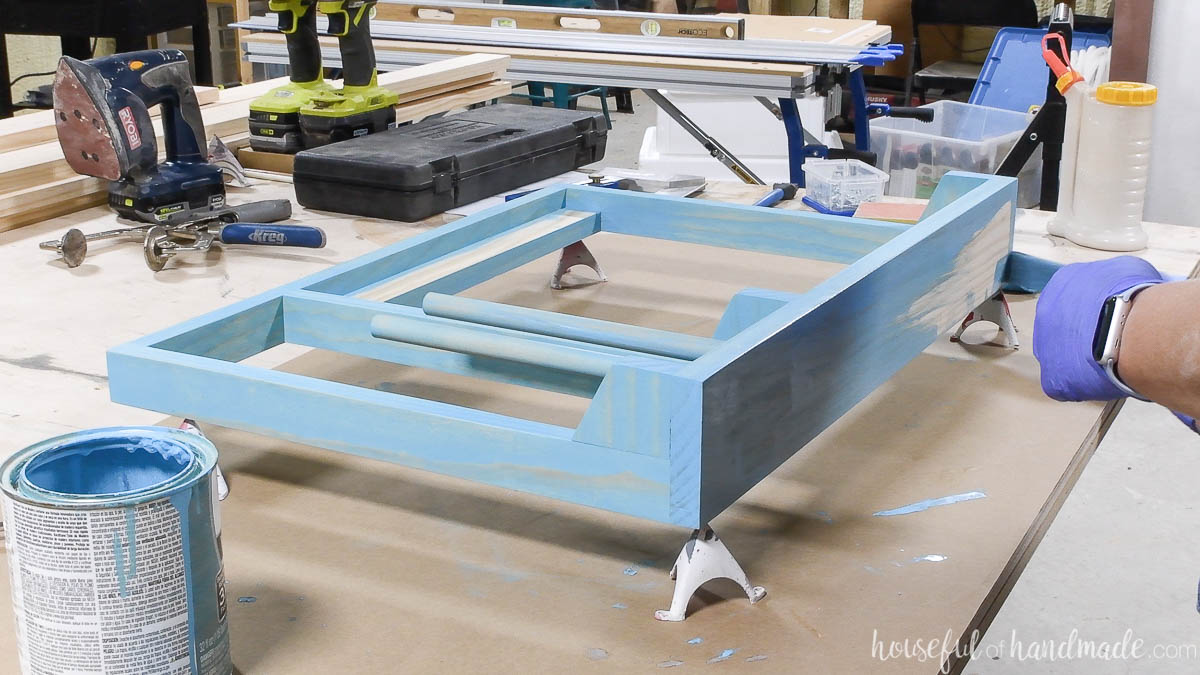
Then stain or paint your hair accessory storage and let it dry.
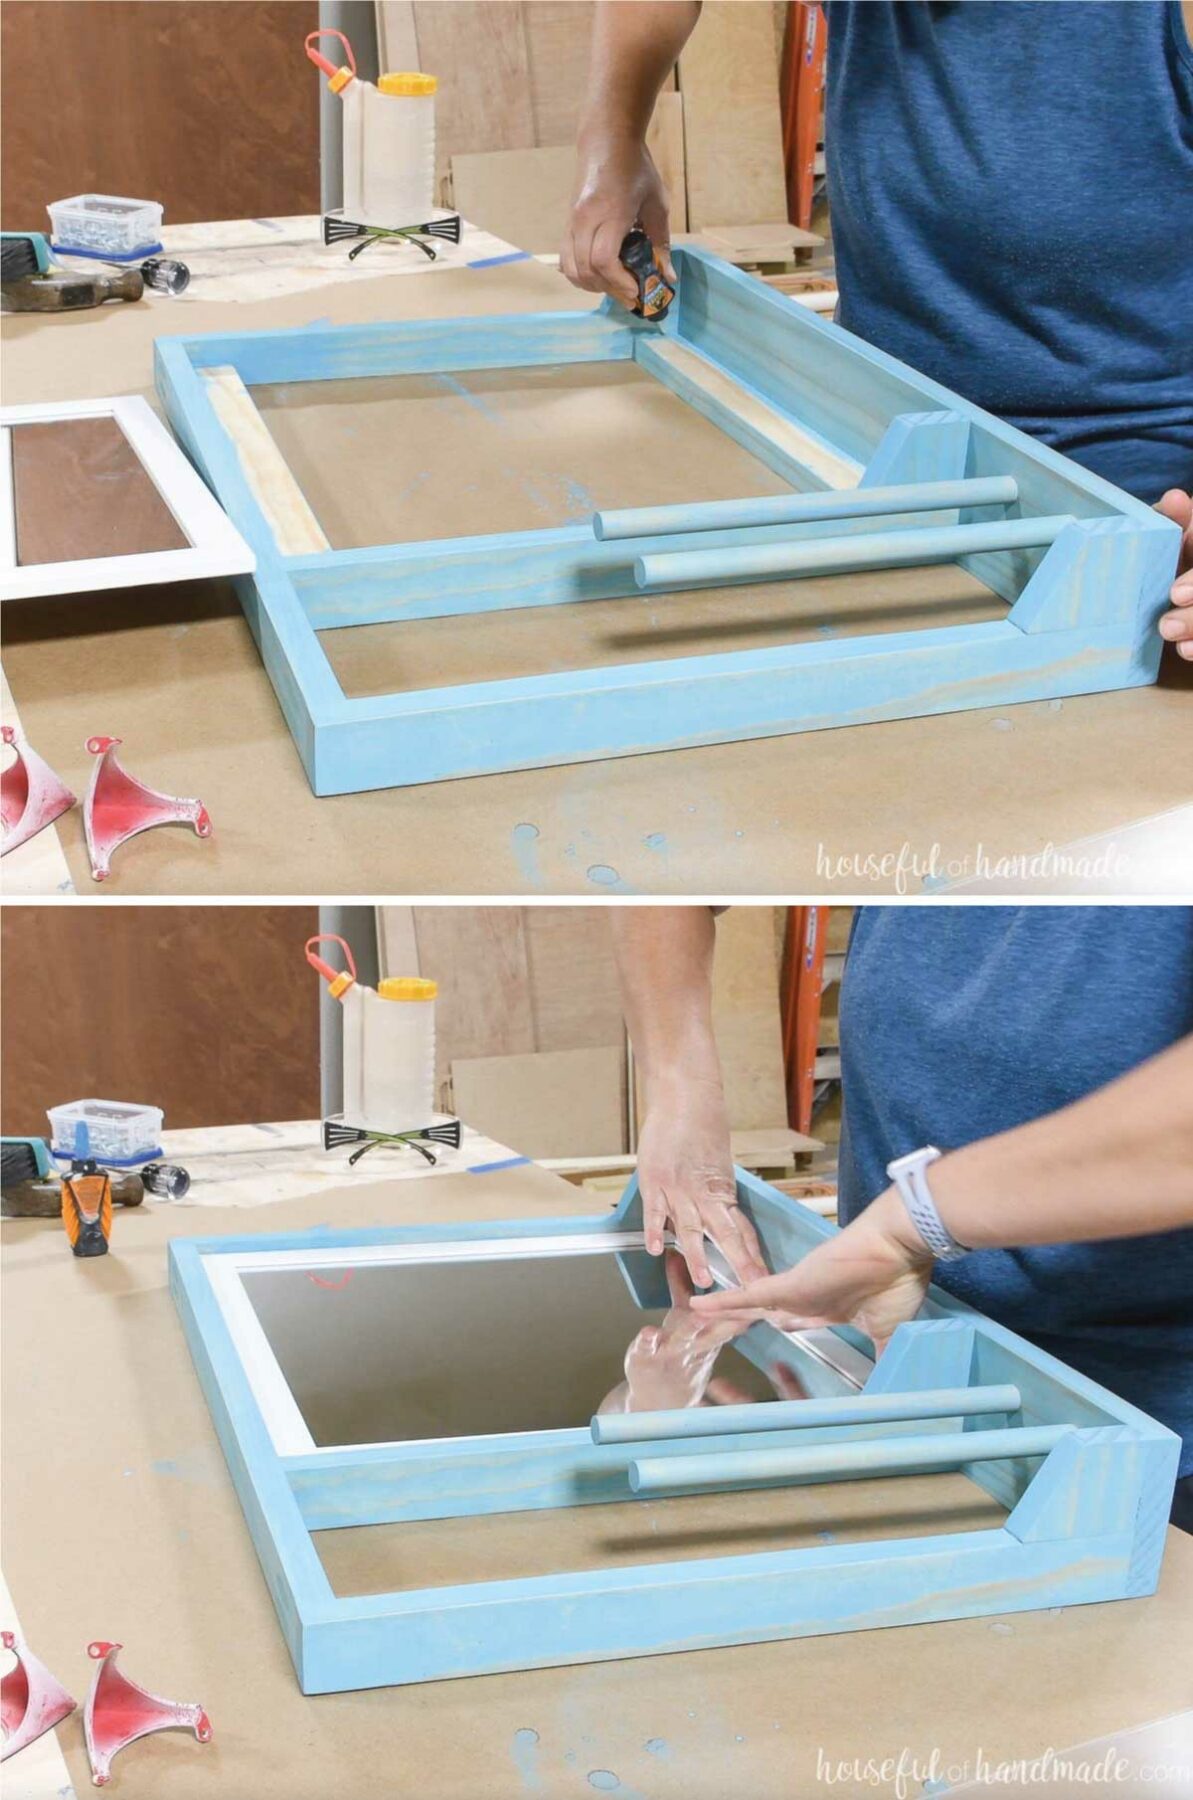
Glue the mirror into the opening. I used super glue to attach mine.
The mirror I bought had a little frame around it and a paper backing. I added the glue close to the edge so that it was attached to the frame not just the paper backing.
Add some weight to the mirror to hold it while the glue dries.
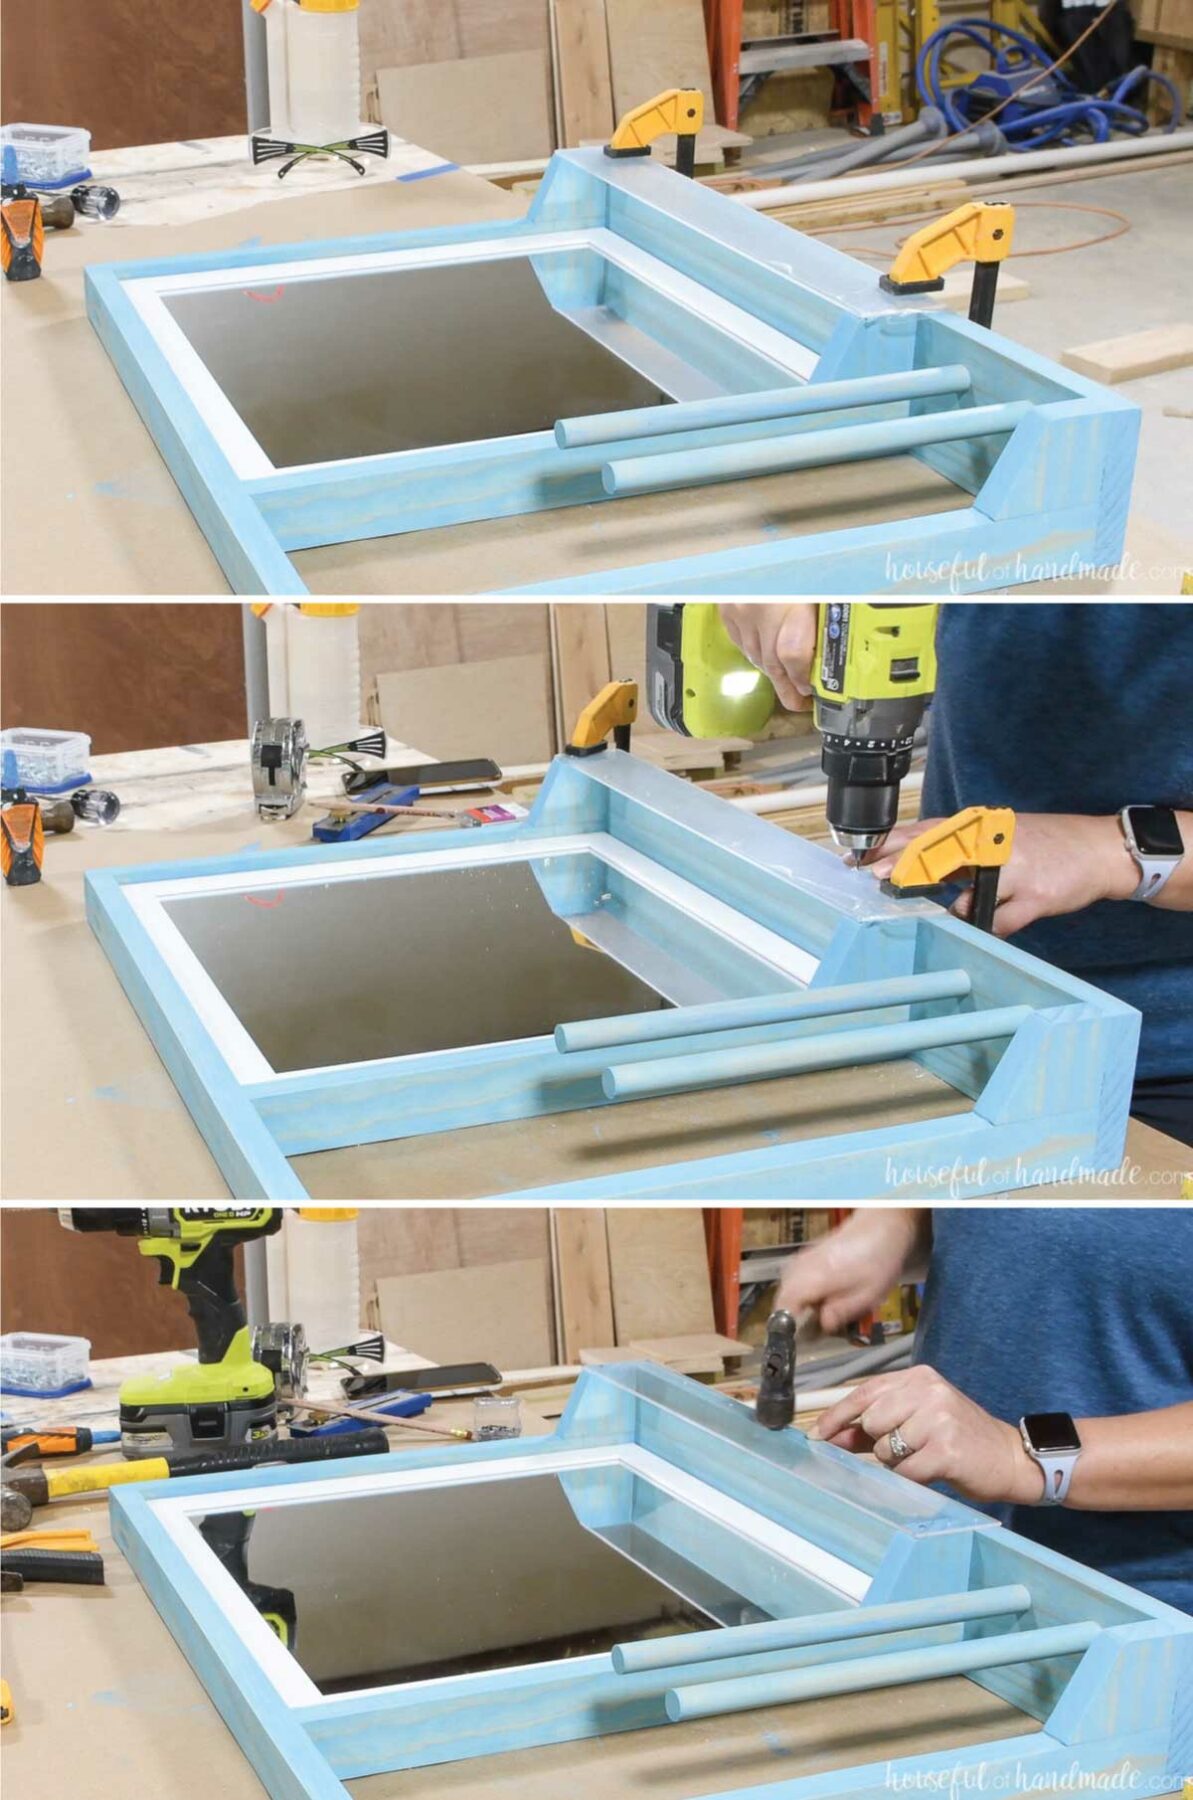
With the protective film still on the plexiglass, clamp it to the front of the mirror section.
Mark the center of the boards around the outside. Mark where you want to attach the nails, make sure they are evenly spaced around the opening.
Predrill holes for the nails. Then remove the protective film from the plexiglass.
Lay it on the opening and carefully tap in the nails to secure.
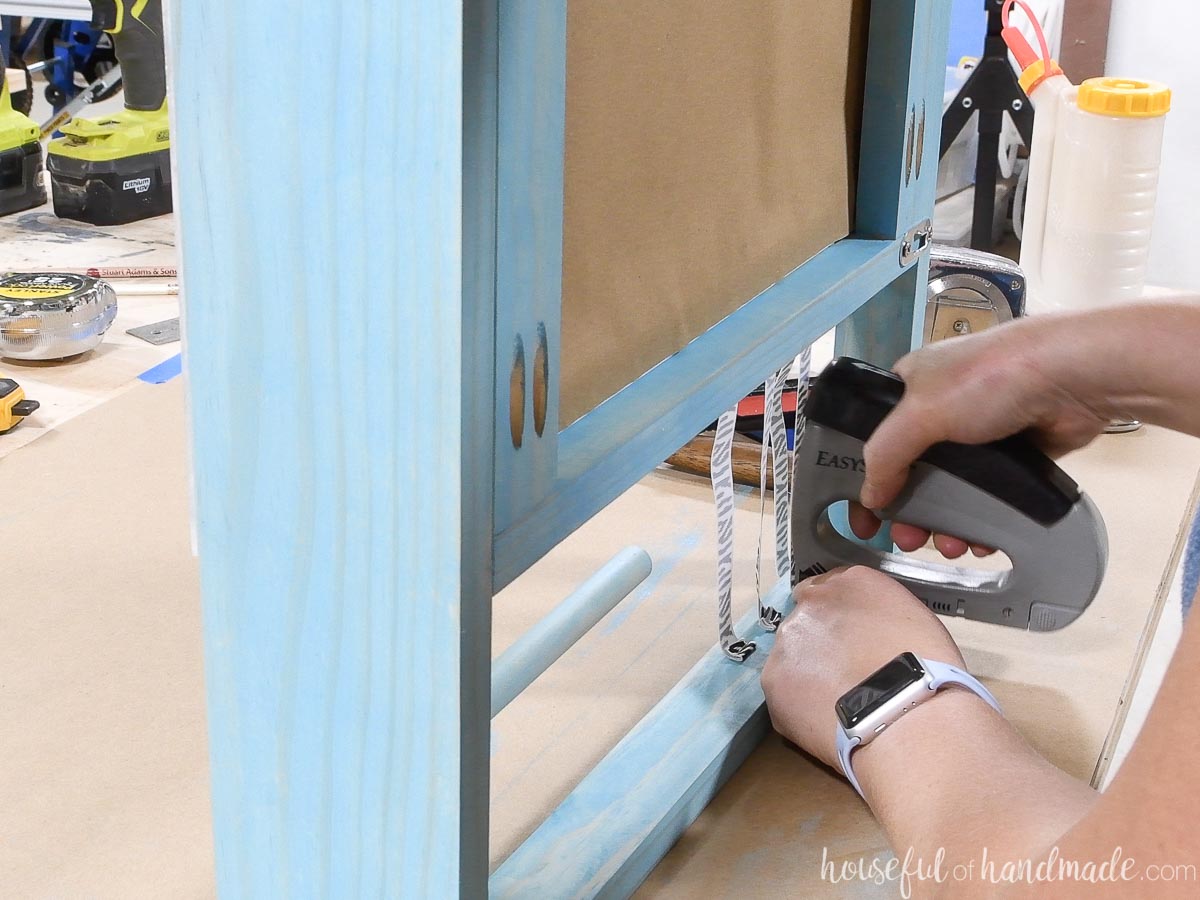
Cut 6 1/2″ long pieces of ribbon. Roll up the ends to hide the cut edge and prevent fraying.
Staple the ribbon to the sides in the smaller section above the scrunchie storage. I used 2 staples in each side.
Finally, attach keyhole hangers to the back of all the vertical 1×2 boards (3 total).
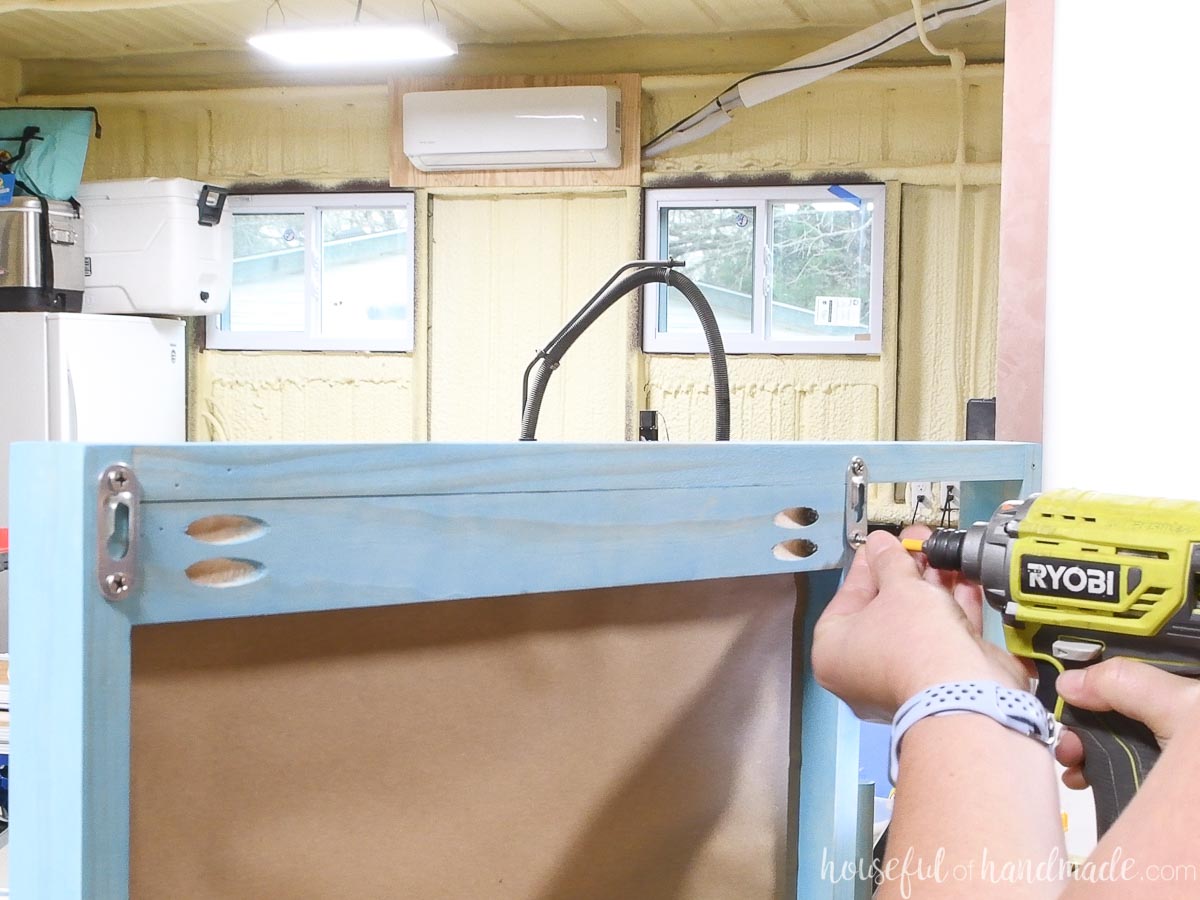
Now you are ready to hang your new hair accessory organizer!
Make sure to get at least one of the screws into a wall stud. Then use drywall anchors for the remaining ones.
If you are giving your hair station as a gift (like I am), add a few fun accessories to it before wrapping it up.
The accessory organizer and new hair accessories is the perfect gift for any young girl!
And don’t forget to grab your Kreg 720Pro while it is on sale. It’s the gift that will help you make everyone’s Christmas special this year!
Happy Building!

Thank you to Kreg Tools for sponsoring this post. I only recommend products that I use and love and all opinions are 100% my own. Click here to read my full disclosure policy.