It’s no surprise I love using my pocket hole jig for creating strong joints in my woodworking projects. Pocket holes are a great option for beginner and more advanced woodworkers.
When Kreg Jig announced the release of a fully redesigned pocket hole jig, I was so excited to see how they could improve on one of my favorite tools. So I partnered with Kreg Tools to try out their new Kreg Pocket Hole Jig 720.
And I am happy to report they were able to improve on it. The new design makes faster pocket holes when switching between different thicknesses of boards, better clamping, and even more features I didn’t know I wanted.
This post may contain affiliate links. As an Amazon Associate I earn from qualifying purchases. Click here to read my full disclosure policy.
Let’s take a deep dive into all the features and how to set up your new Kreg pocket hole jig 720 and start drilling pocket holes!
Not sure which Kreg Jig to buy? Check out the detailed Kreg pocket hole jig comparison here.
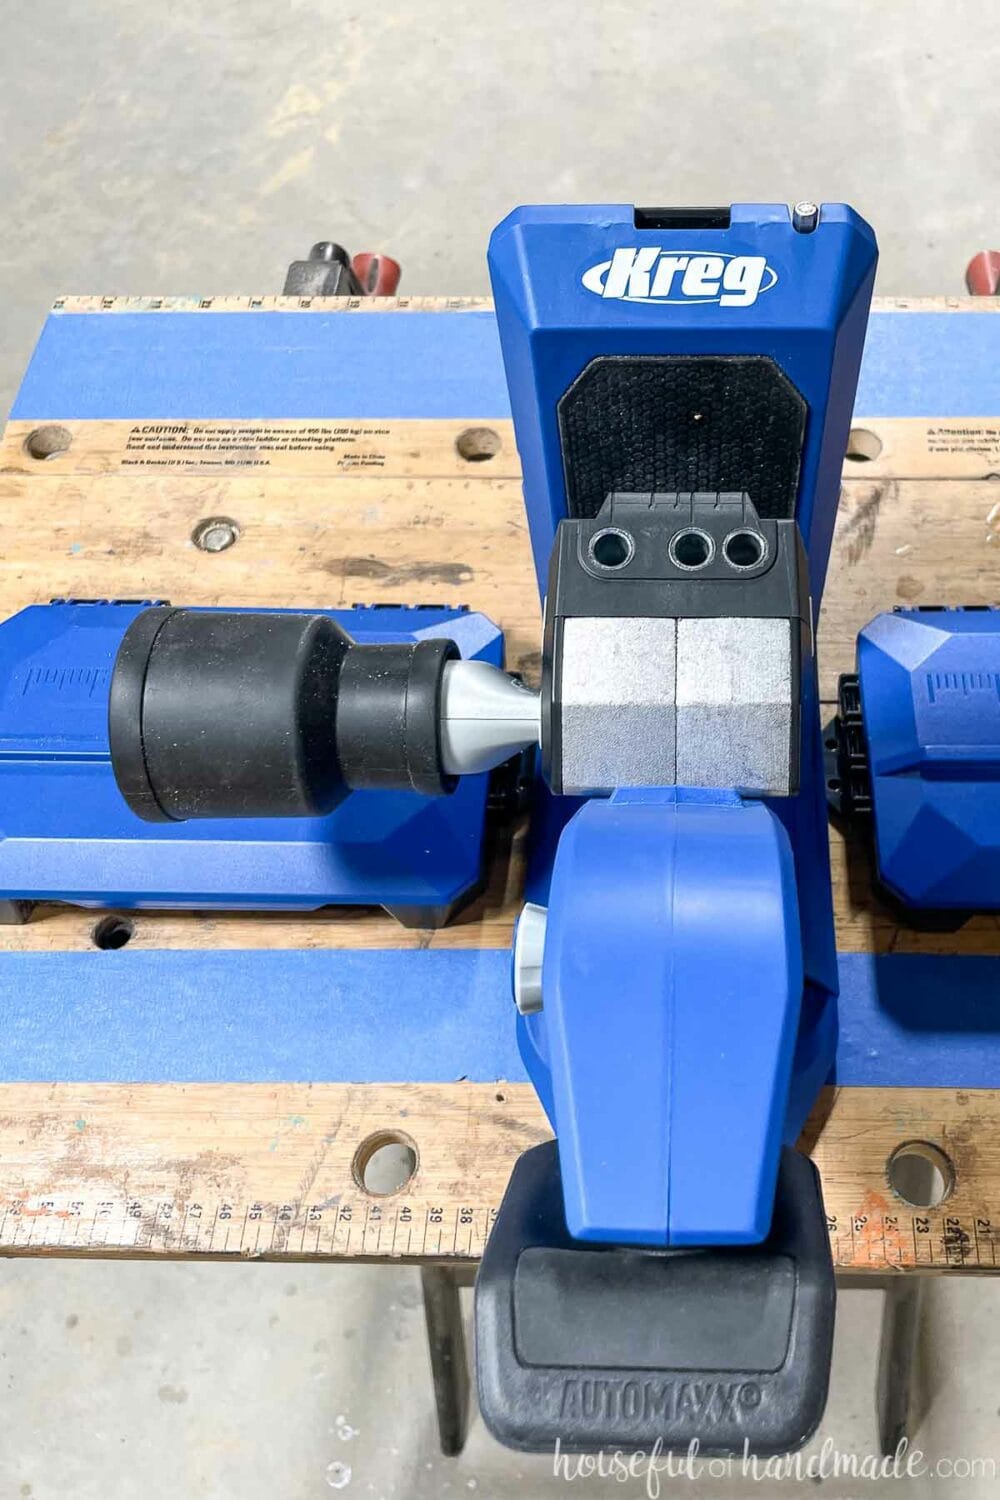
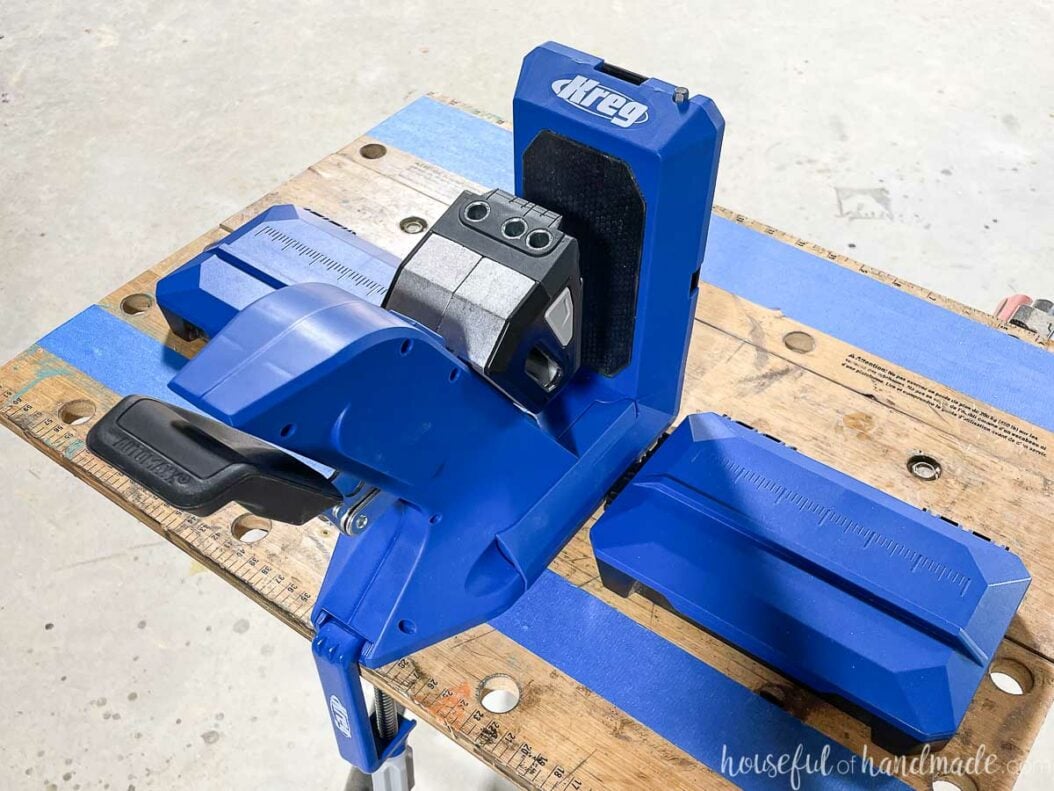
New Jig Design
Right from the beginning you will notice the look of the new Kreg jig is quite different. But the design is not just for looks.
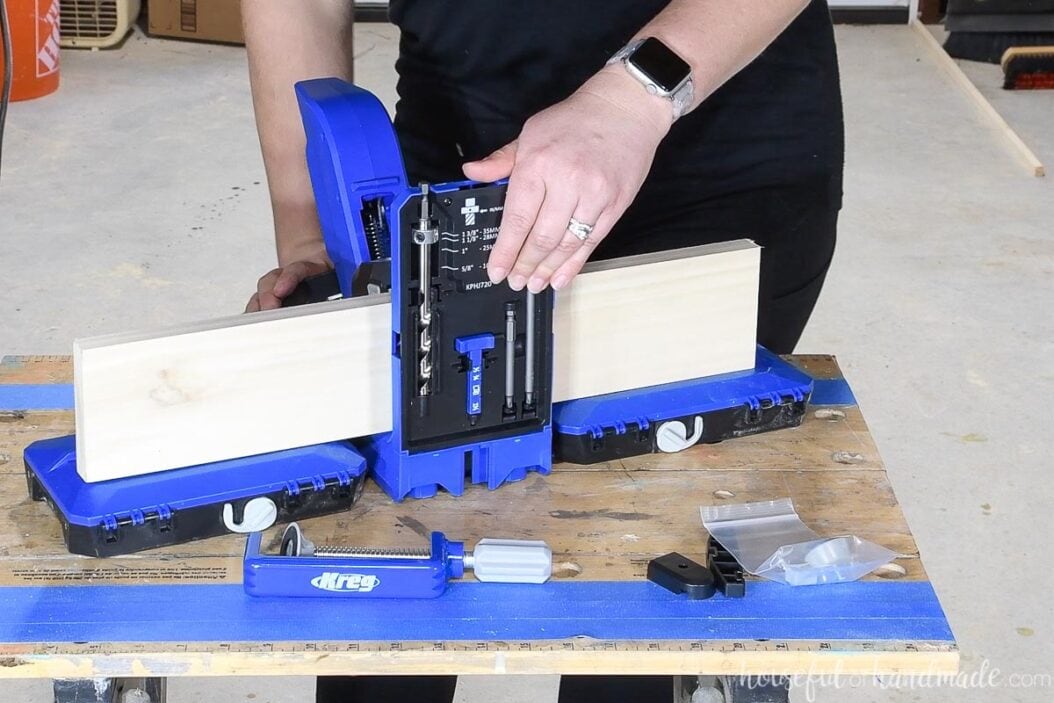
The piece you drill your pocket holes with is mounted on an angled ramp. This angle makes it so that you no longer have to change the jig to accommodate different board thicknesses.
Instead, all you need to do it place your board up agains the grippy base and clamp the jig tight to it. The pocket hole jig around it. It will automatically slide to meet the board at the right height needed for its thickness.
Automaxx ™ Clamping
Besides not having to adjust the jig base for different material thicknesses, my favorite feature is that you also do not have to adjust the clamp!
Instead the 720 pocket hole jig has Automaxx ™ clamping. This is the same clamping technology that Kreg has in their face frame clamp and corner clamp that I love.
The clamp automatically adjusts to the material it is being clamped to. You do not have to do anything but squeeze to get a strong clamp on different thicknesses of boards.
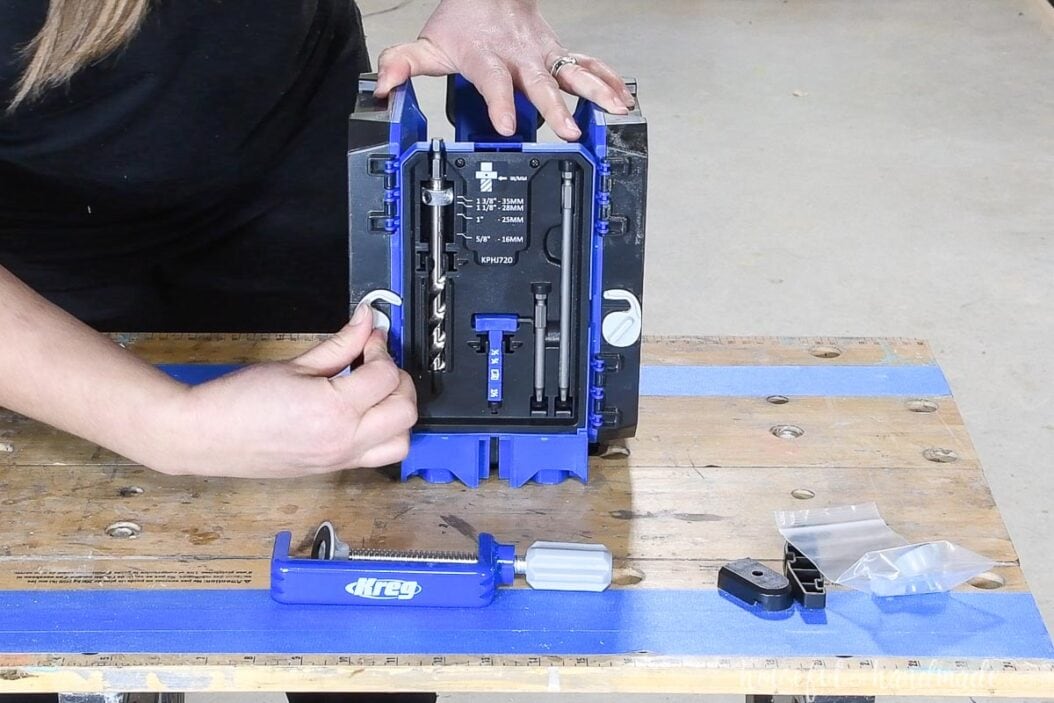
Adjustable Clamp Pressure
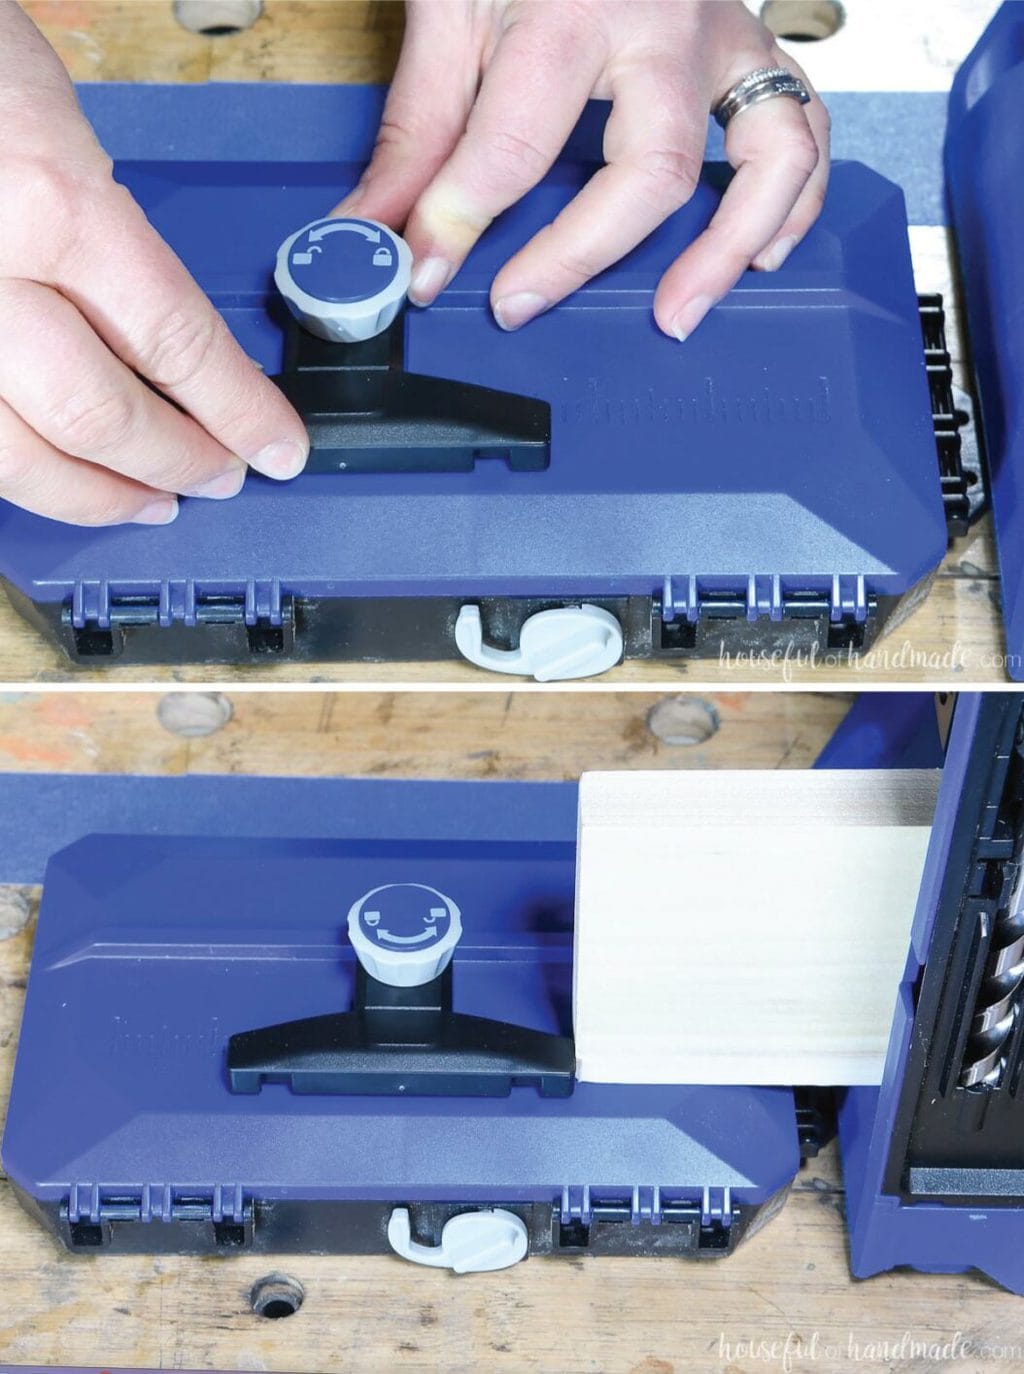
However, just like the previously mentioned clamps, you still have the ability to adjust the amount of pressure the Automaxx ™ clamp applies. On the side of the jig is a knob to do that.
How to adjust the clamping pressure:
- Make sure the clamping handle is all the way released
- Rotate the pressure adjustment knob to increase or decrease the pressure
- Start with just one click in the direction you want
- Use a scrap piece to test the new clamping pressure
- Continue to adjust as needed
Rotate the knob clockwise to decrease the clamping pressure and counterclockwise to increase the clamping pressure.
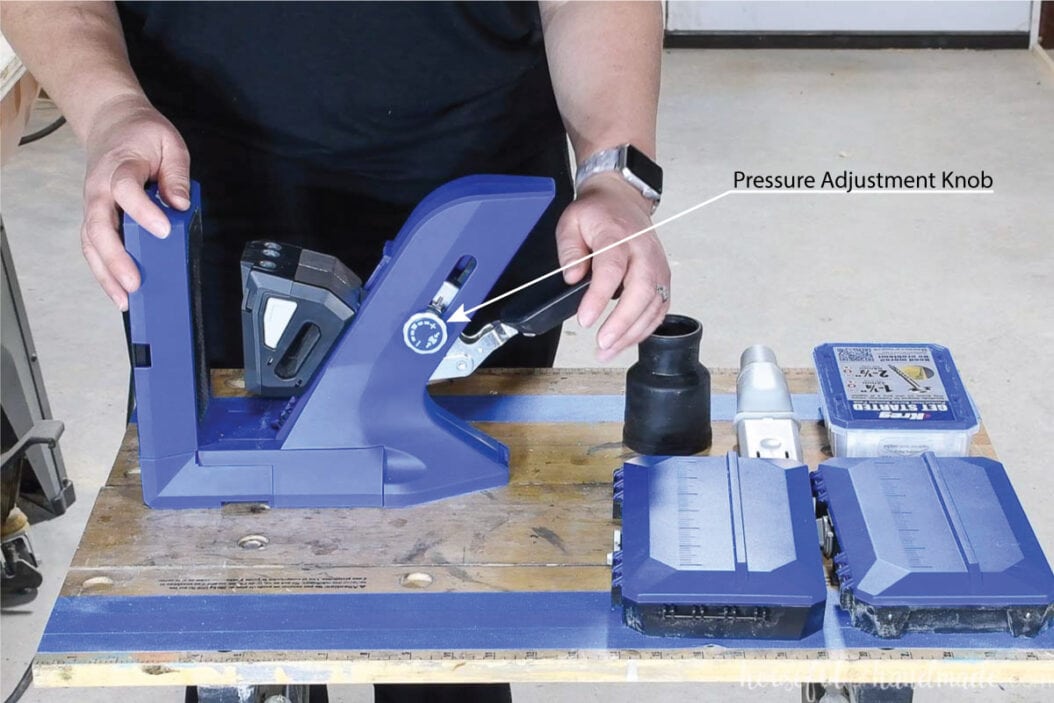
You want to have enough pressure on the board so that it does not move around while drilling the pocket hole jigs, but you do not want it to be too hard to press fully clamp the boards into the jig.
GripMaxx Anti-Slip Pad
Another new feature is one you didn’t know you needed until you had it. The back of the jig, where the board rests while you drill your pocket holes, is lined with a GripMaxx ™ anti-slip pad.
This pad makes sure your workpiece does not move around while you drill your pocket holes. Which is especially useful for drilling pocket holes against the grain. They tend to wiggle around more until the bit can get a good grip into the wood.
The anti-slip pad also makes it so you do not have to apply as much clamping pressure to hold the boards tight as you work. And will reduce scratching or marring of the boards.
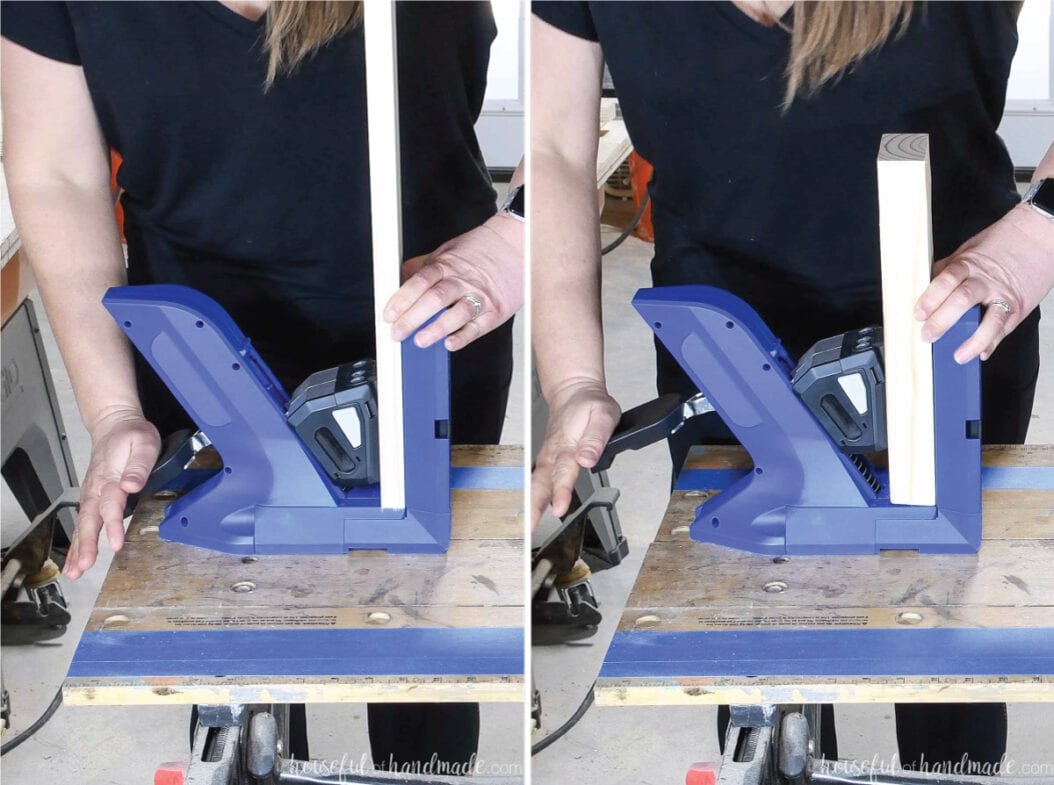
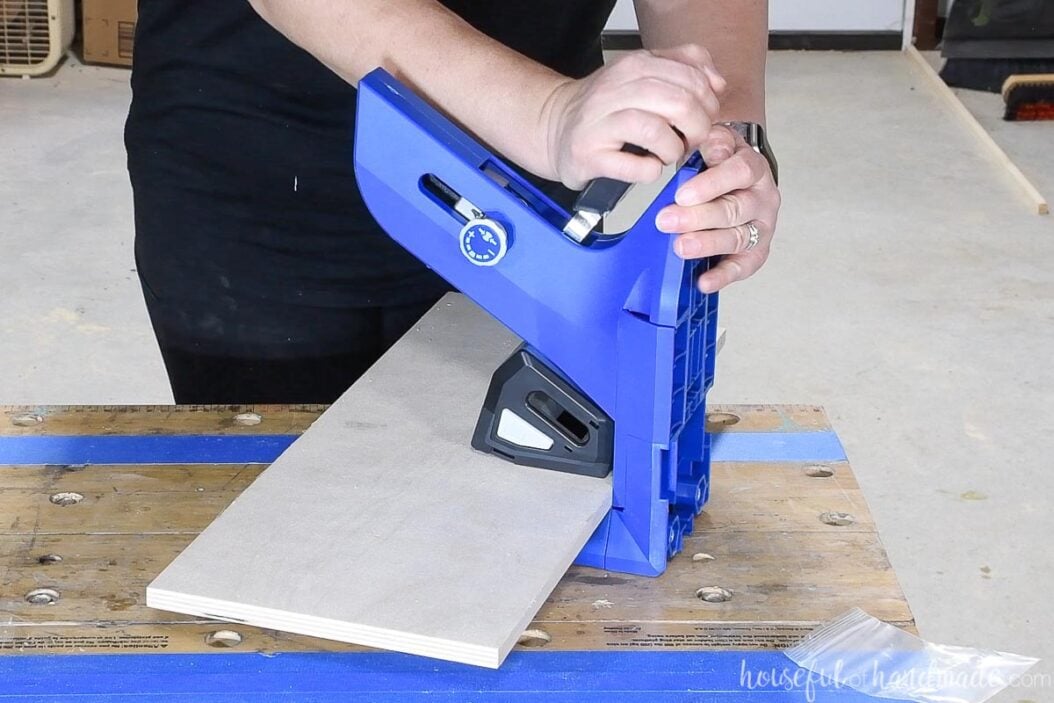
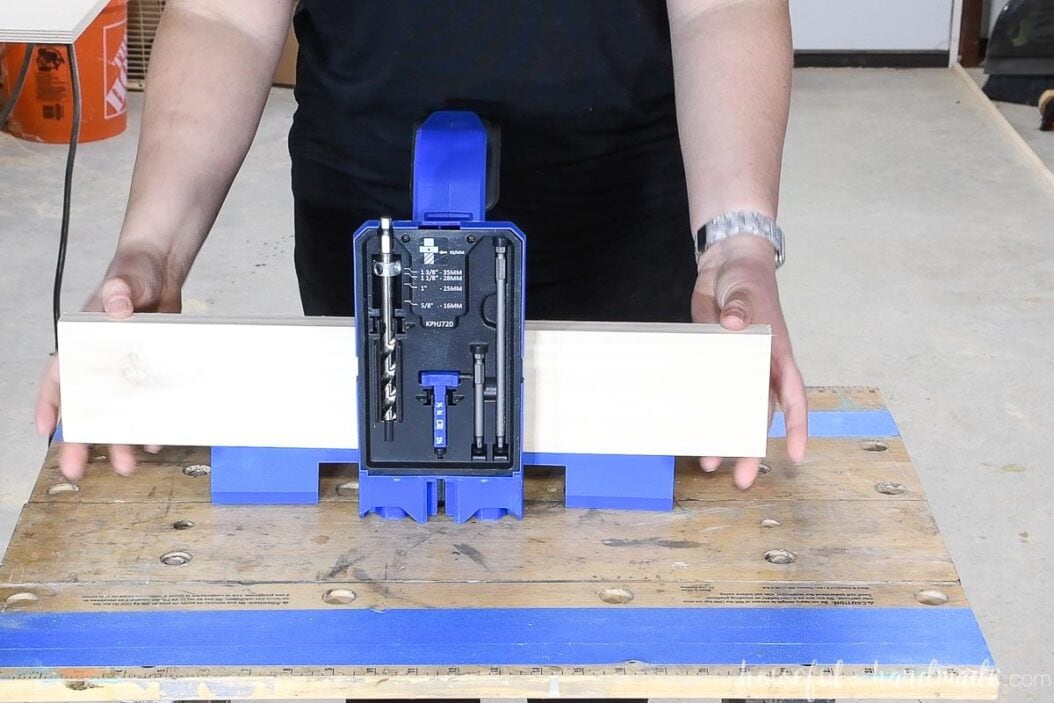
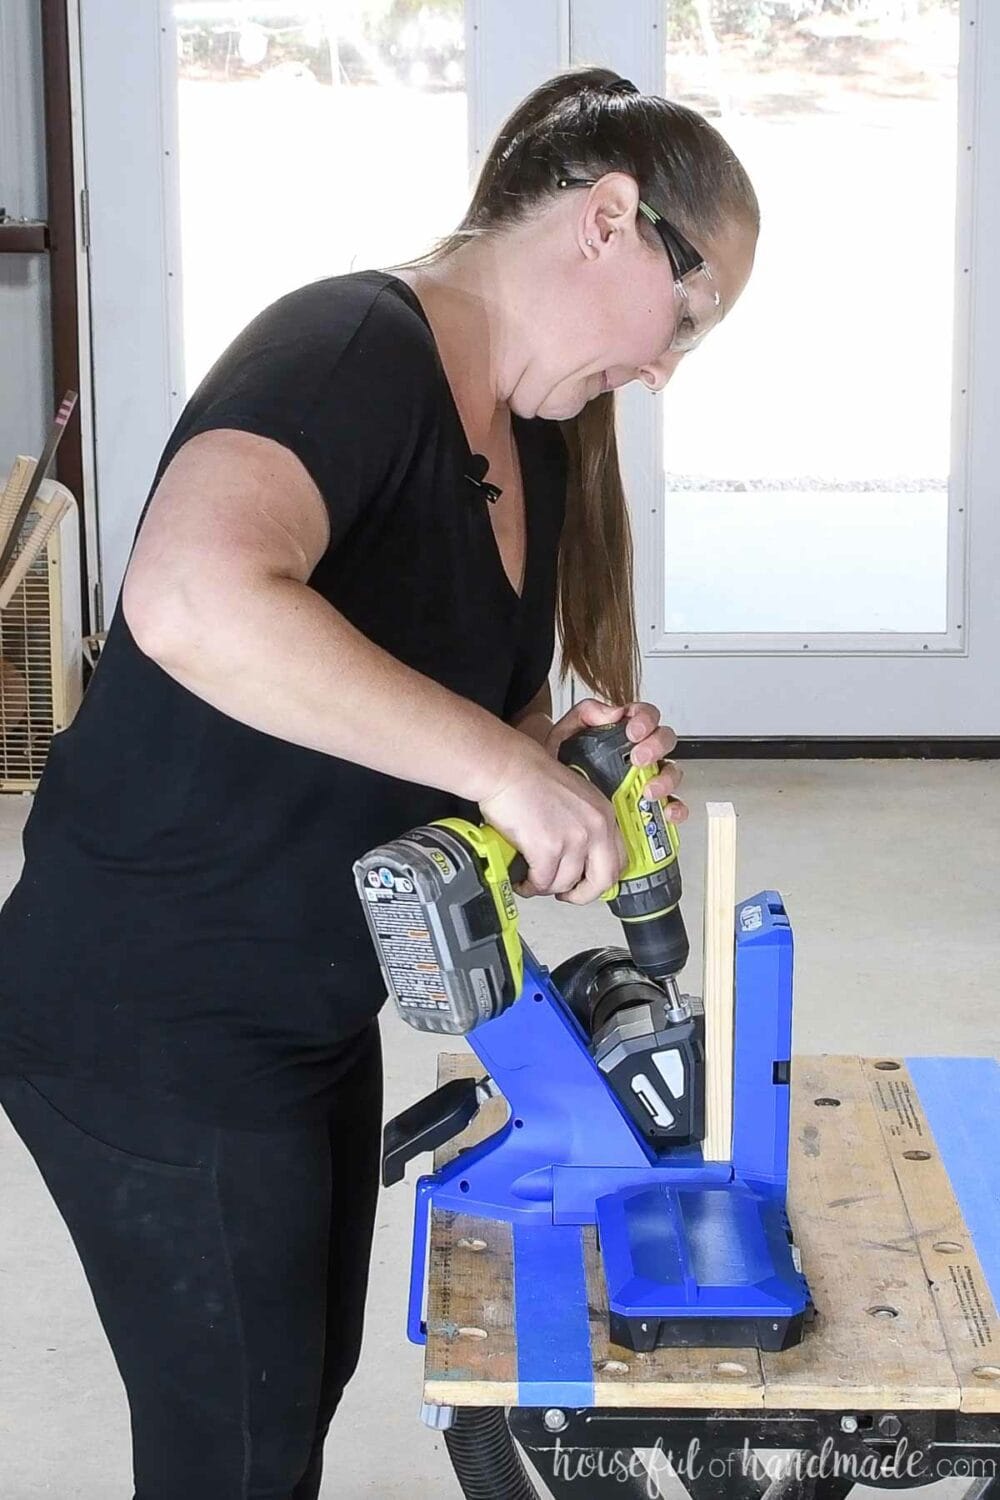
Works Vertically or Horizontally
The new design of the Kreg jig allows it to be used in two different orientations. You can use it vertically (similar to the previous K4 or K5 jig). This works great for smaller pieces of lumber.
But if you have long boards that need pocket holes drilled on the ends, you could have a problem with the ceilings of your workshop not being tall enough to accomodate it.
With the Kreg 720 pocket hole jig, you can rotate the jig 90 degrees and use it in this horizontal position easily. Now you can drill pocket holes on any boards you need to, not matter the size of the board or your shop!
Dust Collection Blade
The redesigned dust collection is amazing. I frequently bumped the dust collection off the back of my older pocket hole jig with my hip when moving quickly around the shop.
The new dust collection blade slides into the pocket hole jig. You can slide it in from the left or right, whatever works best for you.
Then it is secure and adds suction right at the pocket holes where the chips are being made.
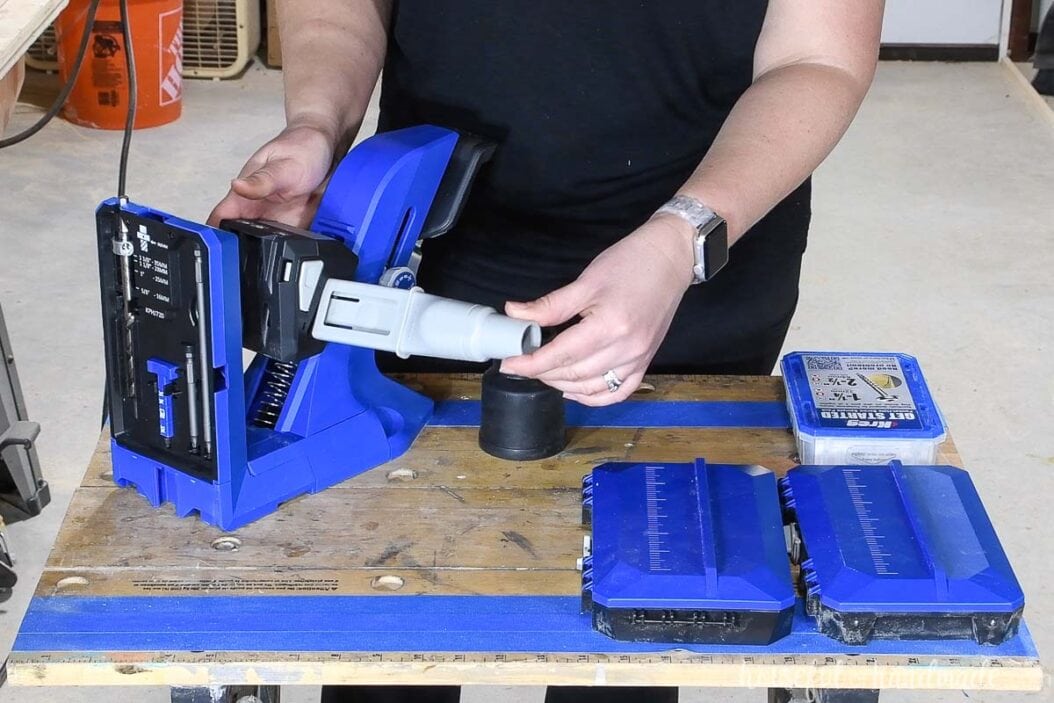
Also included with the the Kreg 720 jig is a dust adapter to allow you to connect the dust collection to any sized hose from 1 1/4″ and 1 7/8″ to 2 1/2″.
And the connection with the adapter is nice and snug and hard for even me to bump off with my hip!

Onboard Accessory Storage
If you are like me and it takes you 15 minutes at the beginning of every project to find your pocket hole drill bit and driving bits then you will love this next feature!
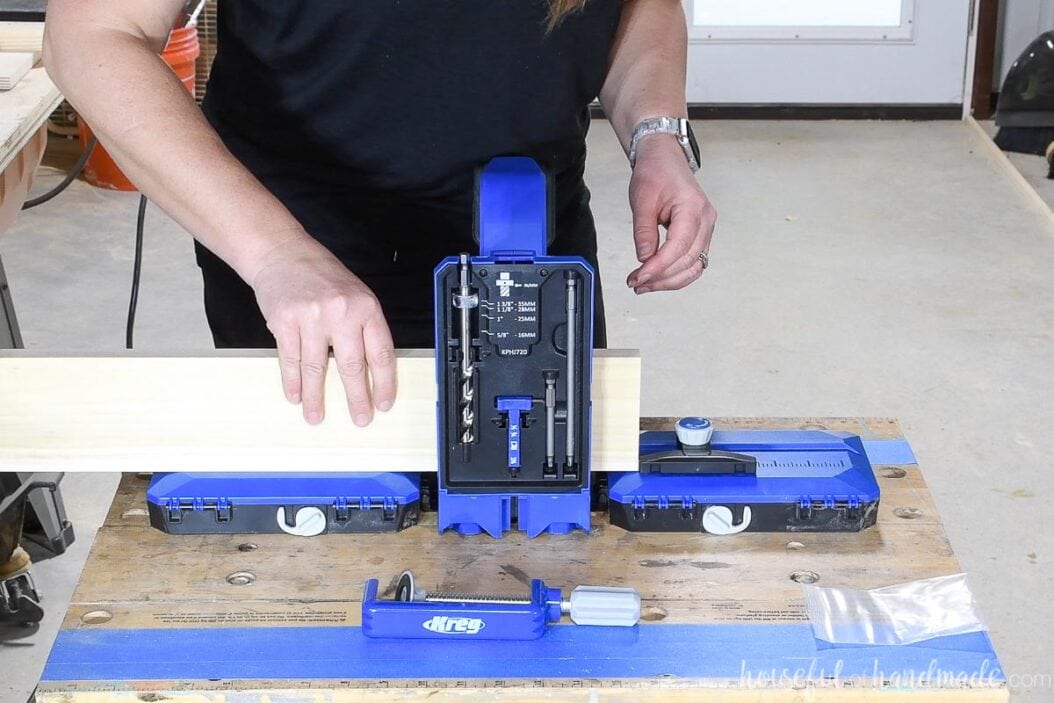
The back of the pocket hole jig is designed to hold all the accessories that come with it! There is a place for the drill bit (with the collar attached), the 6″ and 3″ driver bits, and the material thickness gauge.
All these tools snap into the back of the jig so you never have to worry about loosing them.

Plus there is another handy little feature on the onboard storage that we will talk about below…
Material Thickness Gauge
With the jig comes a handy little blue tool called the material thickness gauge. On the side it has markings to help you quickly measure the thickness of you material to get the perfect pocket holes everytime.
Just hold the gauge up against your board and see where the edge of it falls. If it is by the 3/4″ then you set your drill bit for 3/4″ thick material. The same is for 1/2″ and 1 1/2″.
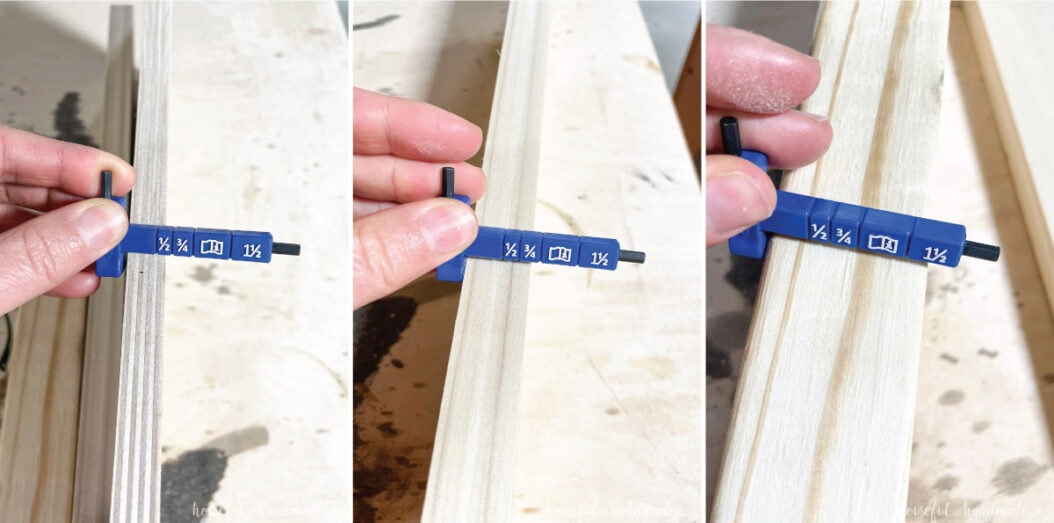
But if your material falls in the “book with an i” range, then that means your material is not one of the standard thicknesses. But you can still use the new Kreg jig for your pocket holes.
You have two choices if you material falls in the “book with i” section:
- Set your drill bit for 3/4″ thick material and use 1 1/2″ long screws (instead of 1 1/4″ that are normally used for 3/4″ thick material)
- Refer to the section below titled “What if you have different material thicknesses then on the drill bit?” to learn how to micro adjust the 720 pocket hole jig.
Also, the side and end of the material thickness gauge also has a hex wrench that is used to loosen/tighten the stop collar on your drill bit!
Easy to Adjust Drill Bit
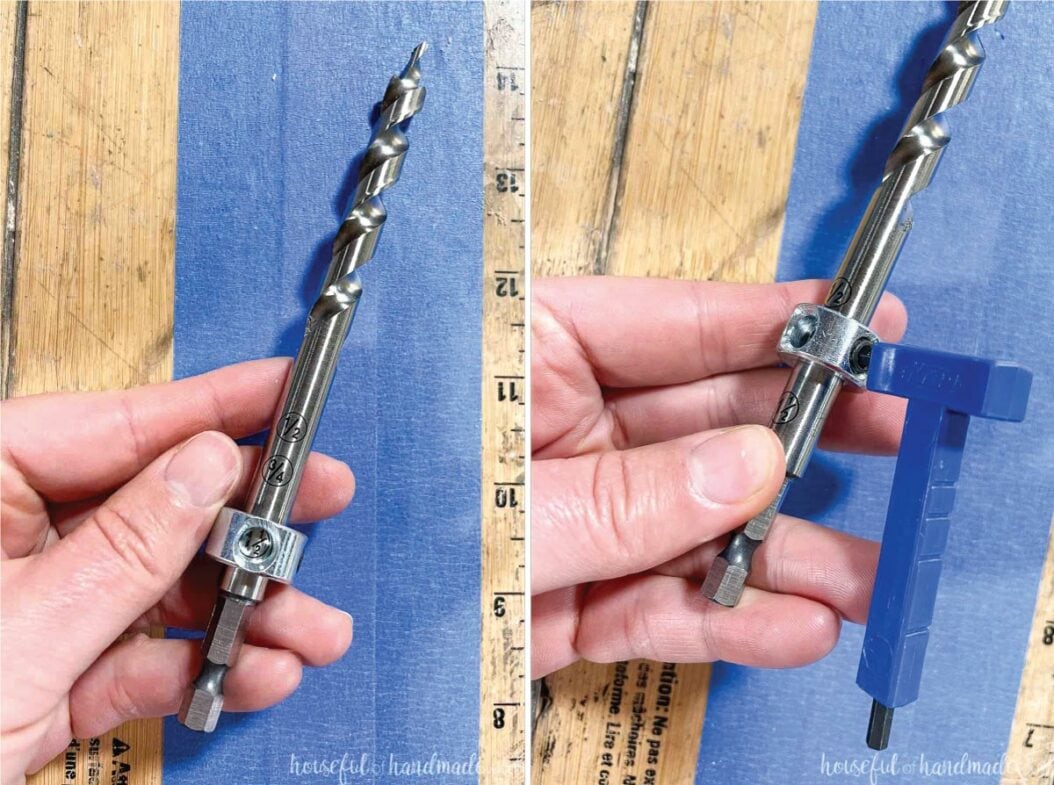
The new drill bit might look a little familiar if you saw my previous post about the 300 series pocket hole jigs that were released just over a year ago.
The drill bit has the material thickness indicators right on the side of it. And the stop collar has a window on it so you can see the material thickness through it.
When you add the stop collar to the drill bit, all you have to do is line up the material thickness indicator you need in the collar window and secure it with the hex wrench on the side of the material thickness gauge.
What if you have a different material thickness then whats on the drill bit?
The drill bit is set with the most common material thickness of 1/2″, 3/4″ (for a 1x board) and 1 1/2″ (for a 2x board). But you can still use the new Kreg jig for any thickness of board you want.
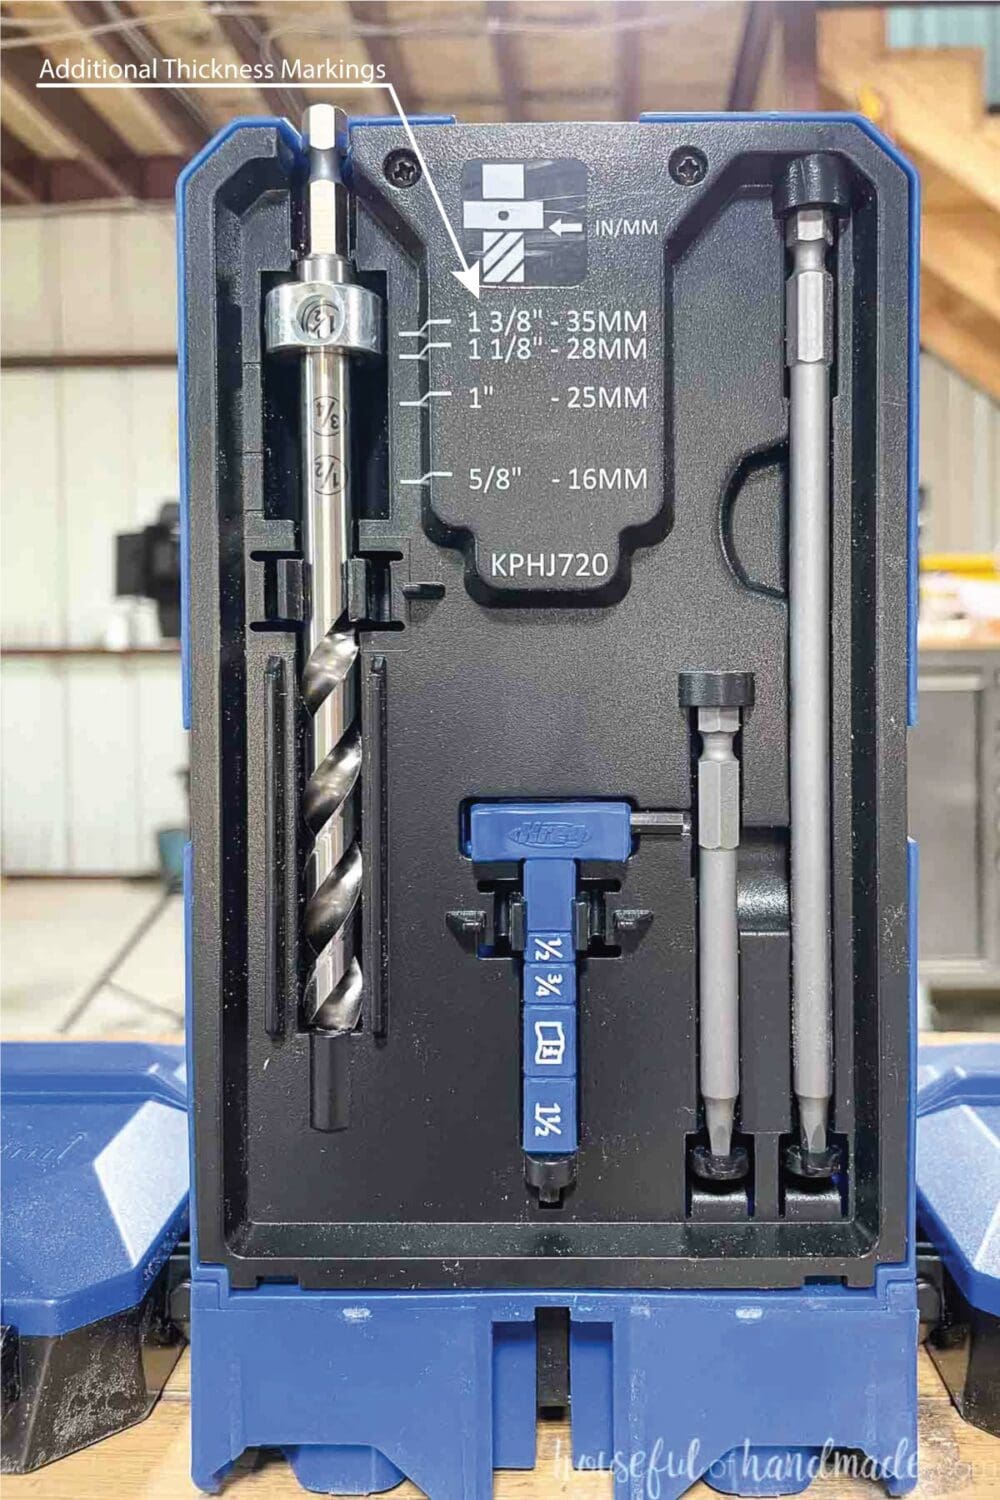
If your lumber is not one of the standard thickness, you can adjust the stop collar to a more dialed in thicknesses with the markings on the onboard accessory storage.
Snap the drill bit into the onboard storage, then loosen the stop collar with the hex wrench on the side of the material thickness gauge and slide it to correspond to the actual thickness of your material.
The tool storage has markings for 5/8″, 1″, 1 1/8″ and 1 3/8″ board thicknesses.
Then use the corresponding screw lengths from the handy table below:
| Material Thickness: | Stop Collar Set To: | 720 Jig Set To: | Screw Length: |
| 1/2″ | 1/2″ | Automatic | 3/4″ or 1″* |
| 5/8″ | 5/8″ | Automatic | 1″ |
| 3/4″ | 3/4″ | Automatic | 1 1/4″ |
| 7/8″ | 3/4″ | Automatic | 1 1/2″ |
| 1″ | 1″ | Automatic | 1 1/2″ |
| 1 1/8″ | 1 1/8″ | Automatic | 1 1/2″ |
| 1 1/4″ | 1 1/8″ | Automatic | 2″ |
| 1 3/8″ | 1 3/8″ | Automatic | 2″ |
| 1 1/2″ | 1 1/2″ | Automatic | 2 1/2″ |
*If using the micro-pocket drill guide use the 3/4″ screws. If using the standard drill guide use the 1″ screws.
Extension Wings
Built into the Kreg Jig 720 are two extension wings on the side of the jig. When using the jig in the vertical position, you can pull out these wings if your boards are wider than the jig for added stability.
Also, under the wings you will see screw holes. These holes can be used to mount your jig to your work surface or table. This will give you added stability when drilling pocket holes.
However, if you purchased the Kreg 720Pro, you will not be using the wings or mounting option because it comes with better options we will look at below.
Optional Docking Station
If you purchase the Kreg 720Pro pocket hole jig, it will come with the docking station that has a whole bunch of amazing features we are going to look at.
If you purchased the 720 without the docking station, don’t worry. The docking station is available to purchase separately when you decide you want to add these features to your Kreg jig 720.
Material Support Wings
The material support wings are the pieces that sit on either side of the jig.
They are the exact same height of the base of the jig and support the material on either side of the jig while you are working with it.
They also add additional storage to your jig. Just open them up to store more accessories right with your jig.
Inside one of the material support wings will be all the accessories that come with it.
The two black “lego looking” pieces are used to secure the docking station to the jig.
Snap the pieces on the underside of the jig in the vertical position. Then snap the material support wings into them to secure.
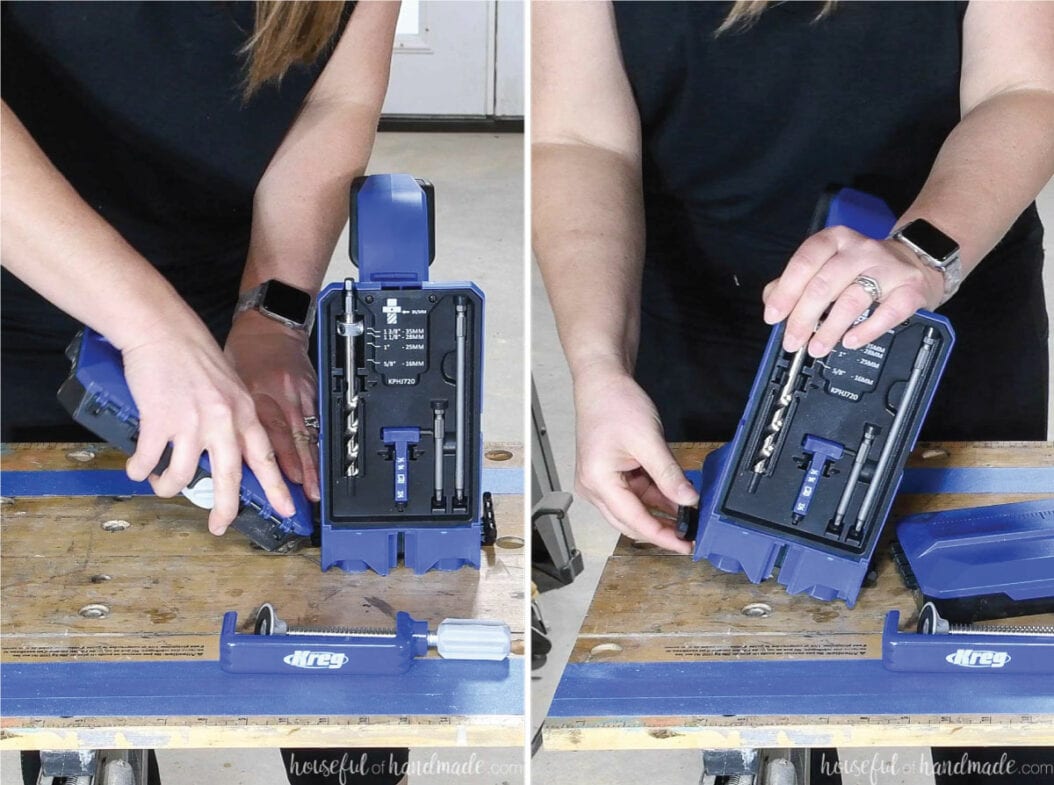
Fold Up for Storage
You can fold the material support wings up and lock them into the jig for storage. Everything folds up into a nice little box to be put away.
Rotate the two gray levers on the sides of the material support wings when they are folded up to secure them to the back of the Kreg jig.
This is a great feature for small shops or people working in their garage on the weekend! And when it’s time to work, you can fold it all back with just a quick twist to drop the wings down and start working.
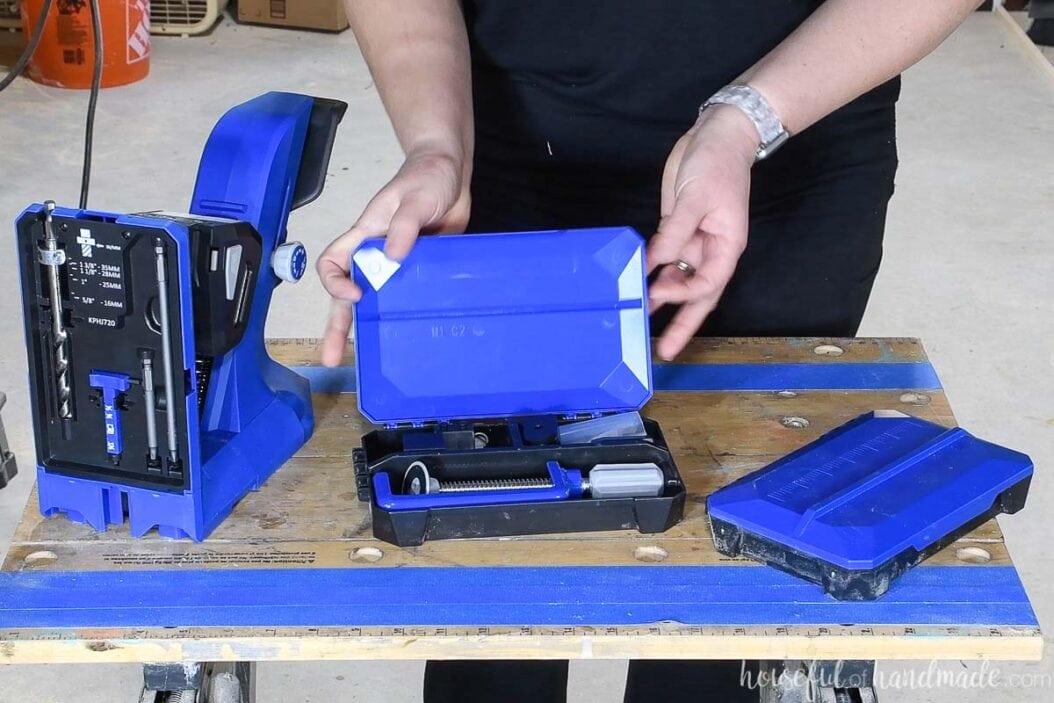
Pocket Hole Jig Clamp
This handy clamp comes with the docking station. It is perfectly designed to fit into the base of the new pocket hole jig, whether in the vertical or horizontal position.
The clamp is used to secure your 720 jig to any work surface or table.
Adjustable Stop
The adjustable stop is used with the docking station to allow you to create a stop to drill pocket holes into the same spot on lots of material quickly.
The adjustable stop comes in 4 pieces that make up the base and an adjustable arm.
To assemble the stop base, insert the light gray wedge into the base. Then insert the square nut inside the wedge. Screw the knob into the hole and secure to the nut through the wedge.
You can snap the base onto the stop arm in multiple configurations to find the one that works best for your project.
Then slide the stop base onto the ledge of the material support wings (either side) and tighten by twisting the knob.
Now you can bump the material up against the stop to drill pocket holes into the same spot on all your boards!
Optional Accessories
For even more functionality with your Kreg pocket hole jig 720 or 720Pro, there are two more optional accessories: the Micro-Pocket Drill Guide Kit and the Custom Plug Cutter Drill Guide Kit.
Micro-Pocket Drill Guide Kit
The micro-pocket drill guide kit is added to your 720 pocket hole jig to drill smaller pocket holes. The holes are 25% narrower around than the standard kit.
These smaller pocket holes are great for 1/2″ thick boards. They also allow you to put pocket holes in narrow boards, up to 1″ wide, because they remove less material.
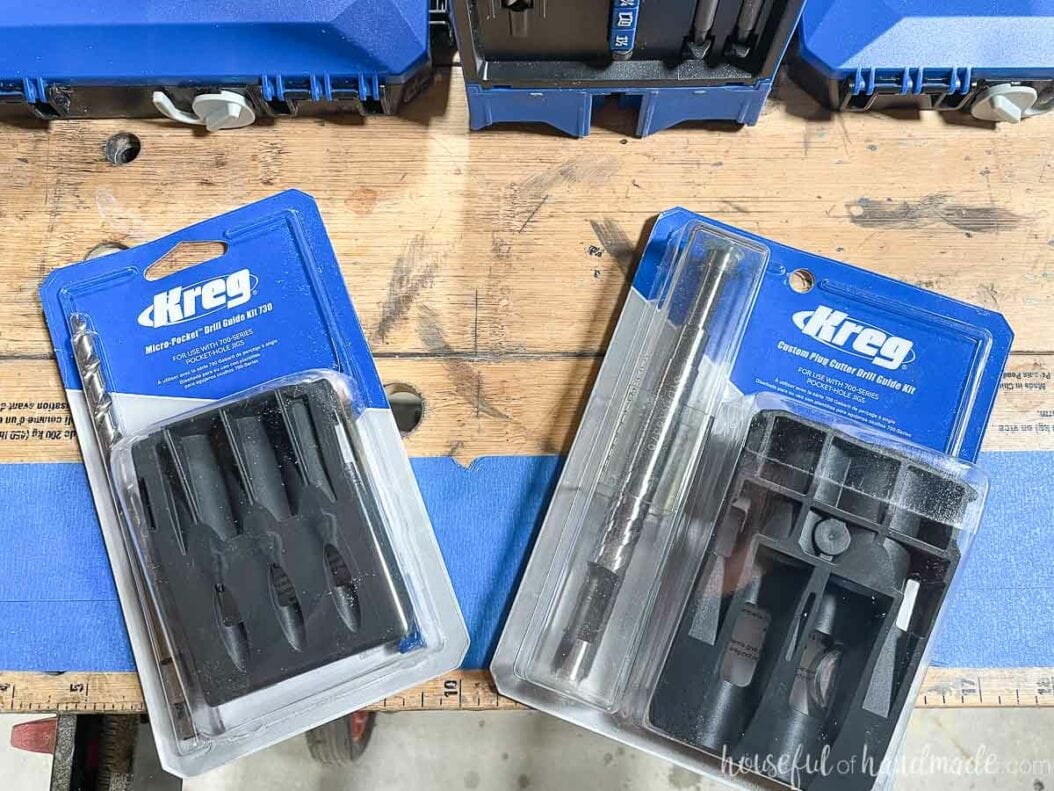
Custom Plug Cutter Drill Guide Kit
The plug cutter kit is added to your 720 pocket hole jig to allow you to cut custom plugs. Cutting your own plugs means you can hide the pocket holes even in projects you plan to stain.
Use the plug cutter to cut plugs out of the same wood you are building your project from. Make sure it is cut in the same direction to the grain as your pocket holes are drilled.
Prefer to Watch? Check out the Video Below
How to Drill Pocket Holes with the Kreg 720
Tools & Materials
Recommended Tools:
- Kreg Pocket Hole Jig 720 or 720Pro
- Drill
- Impact driver (optional, but I love not having to switch bits with the drill)
- Clamps
Supplies:
- 1/2″ to 1 1/2″ thick lumber for your project
- Pocket hole screws
- Learn which size and thread you need in this guide to choosing pocket hole screws.
- Wood glue
STEP 1- Set the Drill Bit
Use the material thickness gauge to determine the thickness of you material.
Loosen the collar on the drill bit and slide it so the corresponding thickness is showing in the collar window. Tighten the collar.
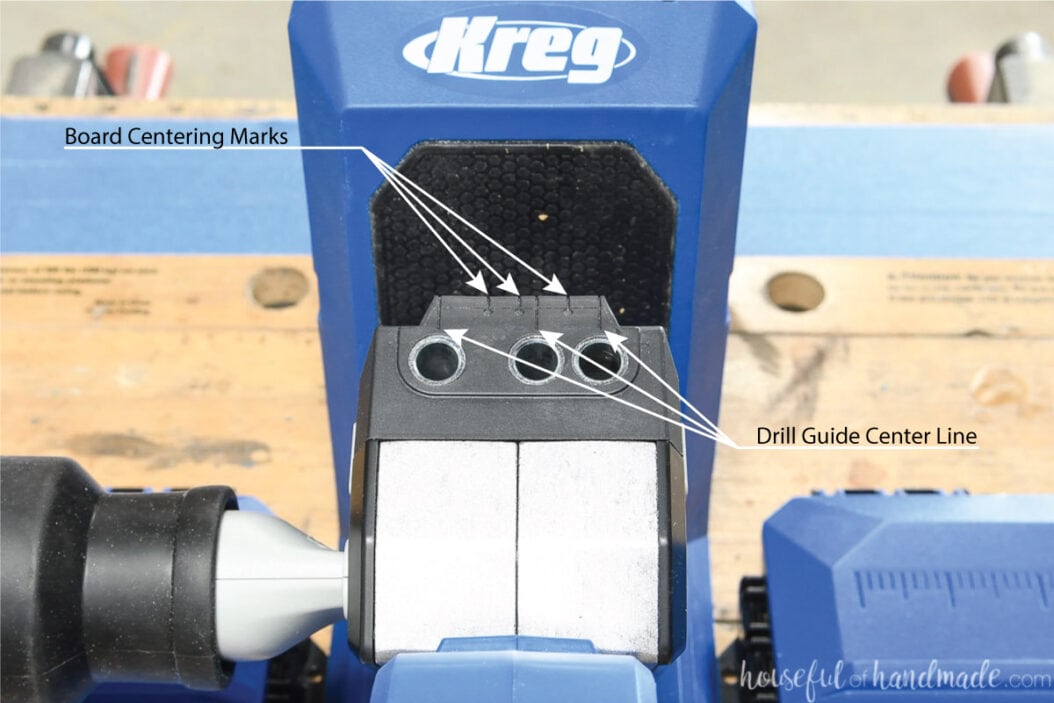
STEP 2- Align your Board
Place your board in the jig so it is flush with the bottom of the jig and the front of the board is pressed against the GripMaxx ™ pad.
When lining up the board, you have a couple options:
- Align the center line of any of the pocket hole guides up with where you want the pocket holes drilled in your board.
- Use the board centering marks to center the two pocket holes on your board. The first mark is the center between pocket the two pocket holes on the far left, the second is for the two outer pocket holes and the third is for the two pocket holes on the far right.
For boards wider than 3 1/2″, make sure to set your pocket holes at least 5/8″ in from the edge of the board (up to 1 1/2″ in) and place pocket holes every 6-8″ along the board.
For boards that are less than 3 1/2″ wide, use the following drill guides for perfect pocket holes:
- 1 1/4″ to 1 3/4″ wide boards- use the two close drill guides on the far right of the jig
- 1 3/4″ to 2 3/8″ wide boards- use the two further apart drill guides on the far left of the jig
- 2 3/8″ to 3 1/2″ wide boards- use the drill guides on the two outer edges
Once your board is lined up properly, press the clamp to secure your workpiece in the jig.
You can also use the stop block on the docking station if needed for your project.
STEP 3- Drill Pocket Holes
Insert the dust collection blade into the Kreg jig and attach it to your shop vacuum. Turn it on.
With the drill bit in your drill, insert the drill bit into the drill guide and start your drill. You want the drill to be at full speed before it touches the wood.
Drill the pocket hole until your stop collar touches the top of the drill guide. Remove the drill from the guide while it is still rotating.
Repeat on additional pocket holes if needed.
Once all pocket holes are drilled on the piece that can be drilled before adjusting, pull up on the clamp handle to release the clamp.
Remove your workpiece. Or if you need to add additional pocket holes, move your piece to the next location to add pocket holes and repeat.
STEP 4- Secure the Pocket Hole Joint
When it is time to connect your boards with the new pocket hole, make sure you select the appropriate screw length and type. See the chart above for screw lengths based on your board thickness.
For screw types, use
- For softwood use corse threaded screws
- For hardwoods use fine threaded screws
- For indoor projects use zinc-coated screws
- For outdoor projects use Blue-Kote ™ screws or stainless steel screws
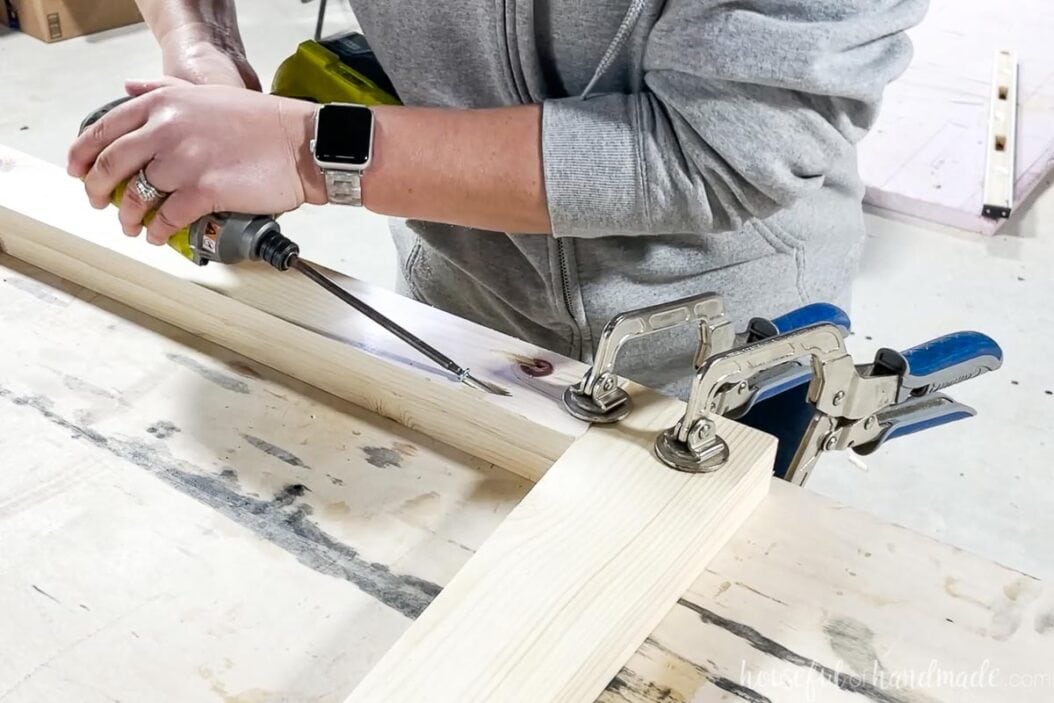
Clamp the joint properly to prevent the joint from moving as you properly secure the joint with screws.
Also, wood glue added to your joint will make it strong and give your joint extra lasting power. Make sure to choose the outdoor wood glue if building an outdoor project.
Use the square tip bit to drive the pan-head screws into your pocket hole. Your screws need to be fully seated into the pocket hole, but be careful not to overdrive them. Stop once you feel the joint come together tightly.
It can take a few tries to feel how the screw feels when fully seated, it is a good idea to test it on some scraps pieces before working on your project.
Projects Using Pocket Holes
And now you are ready to add pocket holes to all your woodworking projects! If you need some inspiration, here are some of my favorite projects using pocket holes.
There are lots DIY furniture projects for every room in your home here.
Happy Building!

Thank you to Kreg Tools for sponsoring this post. I only recommend products that I use and love and all opinions are 100% my own. Click here to read my full disclosure policy.