Add charm and function to your kitchen with a DIY butcher block countertop.
Butcher block countertops are classic and add a wonderful warmth to any kitchen.
Plus, you can install your own butcher block countertop for a fraction of the cost of other countertops. They are a beautiful, functional, and budget countertop option!
A butcher block countertop is basically a giant cutting board on your cabinets. The pieces of wood are glued together so the edge grain is face up and creates a solid and strong surface.
This post may contain affiliate links. As an Amazon Associate I earn from qualifying purchases. Click here to read my full disclosure policy.
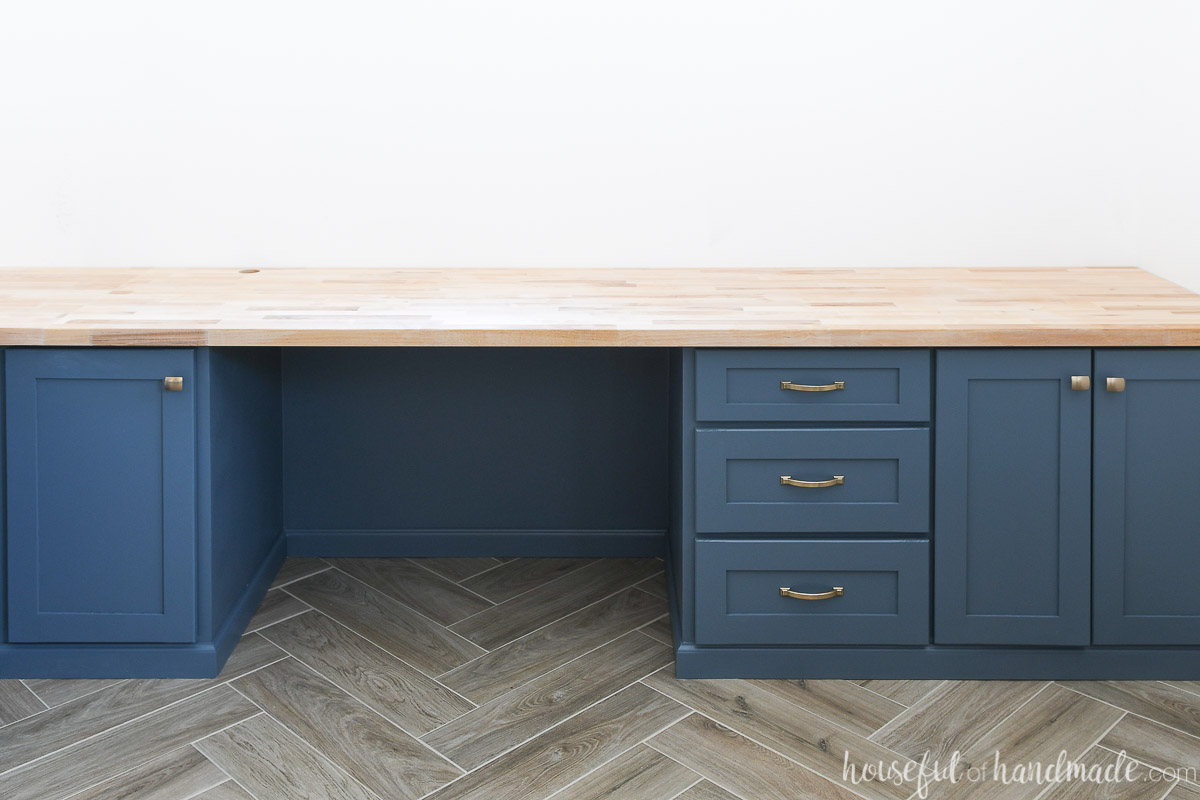
This tutorial is for installing a prebuilt butcher block countertop. Check out this post if you want to learn to build a wood countertop. And check out his post to learn how to seal butcher block countertops.
Wood Species for Butcher Block
Butcher block countertops come in many different wood species. You can usually find birch, maple, acacia and walnut readily available at big home improvement stores (that is where I bought ours).
Or you can special order other wood types at cabinets or countertop stores. These will be more costly than the readily available options.
You can save money on your butcher block countertop by staining a less expensive wood to look like a more expensive wood. Just make sure you use a food grade stain.
Stained countertops may require more upkeep if you plan to cut on them (like a cutting board). Also, the cleaner you use can wear away the stain over time.
Joining Butcher Block Countertops Together
To make the easiest DIY ever, you can install a butcher block countertop to your kitchen island. For most kitchen islands you can find a piece of butcher block big enough to cover it, then you just have to cut it down to size and attach it.
But for any other butcher block countertop install, you will have to worry about joining two pieces (or more) together.
Joining Pieces End-to-End
Wood does not like to be glued end-to-end. The end grain soaks up all the glue and there is not enough left to hold the boards.
Ideally you can find large enough butcher block pieces that you will not have to join them end-to-end. I was not that lucky!
Instead, I used a trick I created when refinishing this large tabletop to create a jointed edge with just a circular saw. Otherwise you will need to be very good with a jointer to get two perfect edges on the ends of the large, long piece of countertop.
The trick is detailed in the How to steps below.
Then you can use a finger joint router bit to create glueable surfaces on the ends of your butcher block pieces to be glued together. But not if you have a countertop that goes between two walls.
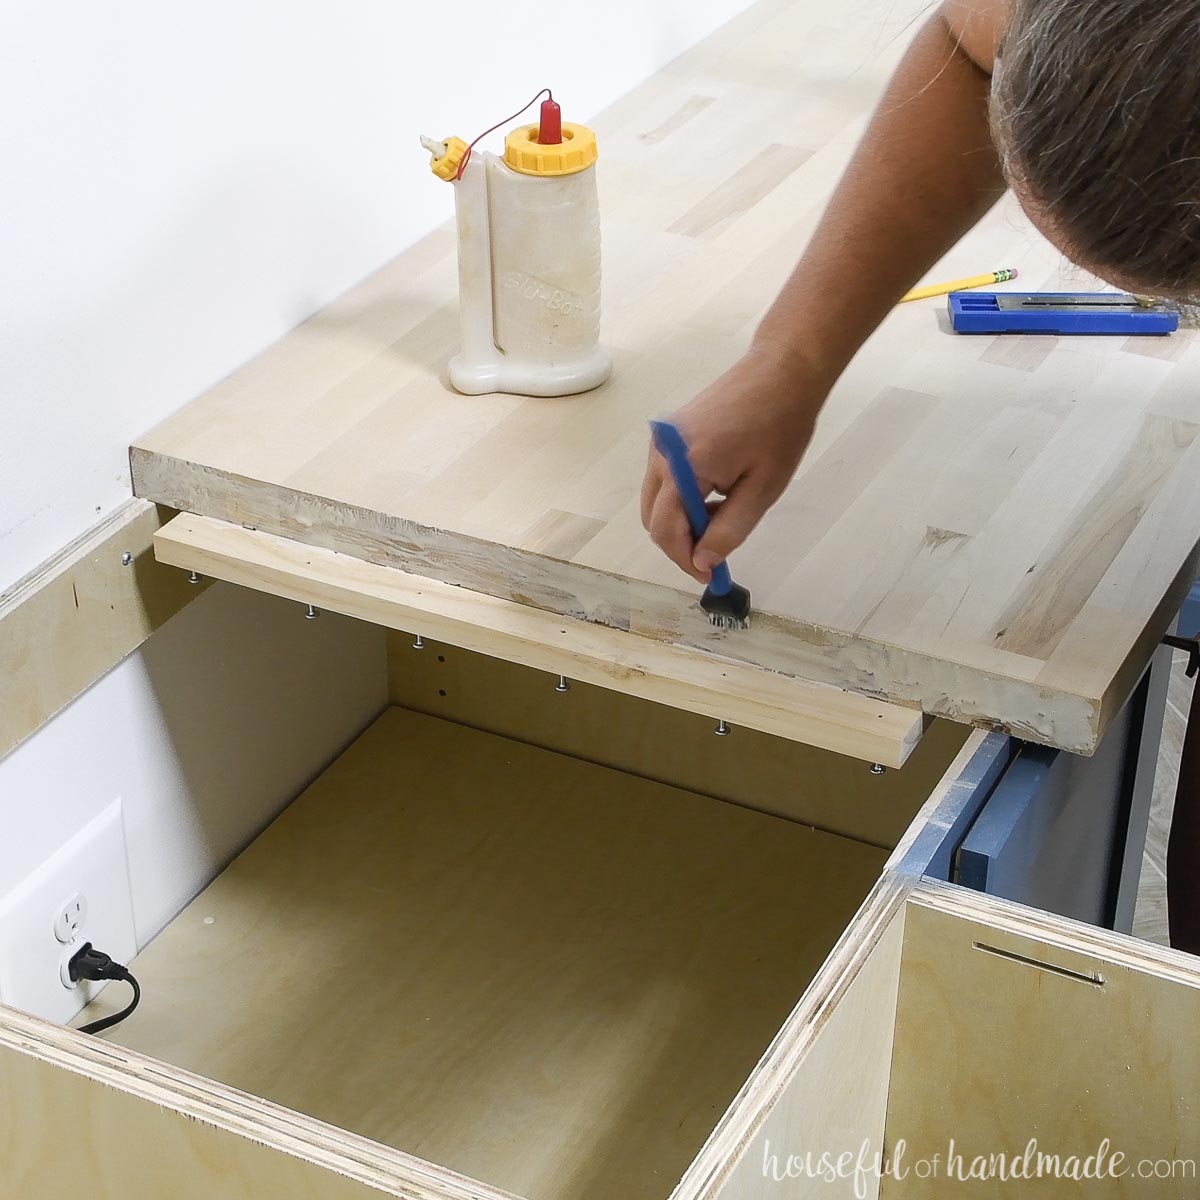
For countertops between walls, to help align, and hold together, these challenging end-to-end pieces, I used a piece of 1×3 screwed into the bottom.
It holds the two pieces together where glue might fail. And is hidden from view inside the cabinet. The seam is not totally invisible, but it is not totally obvious either so I am happy with it.
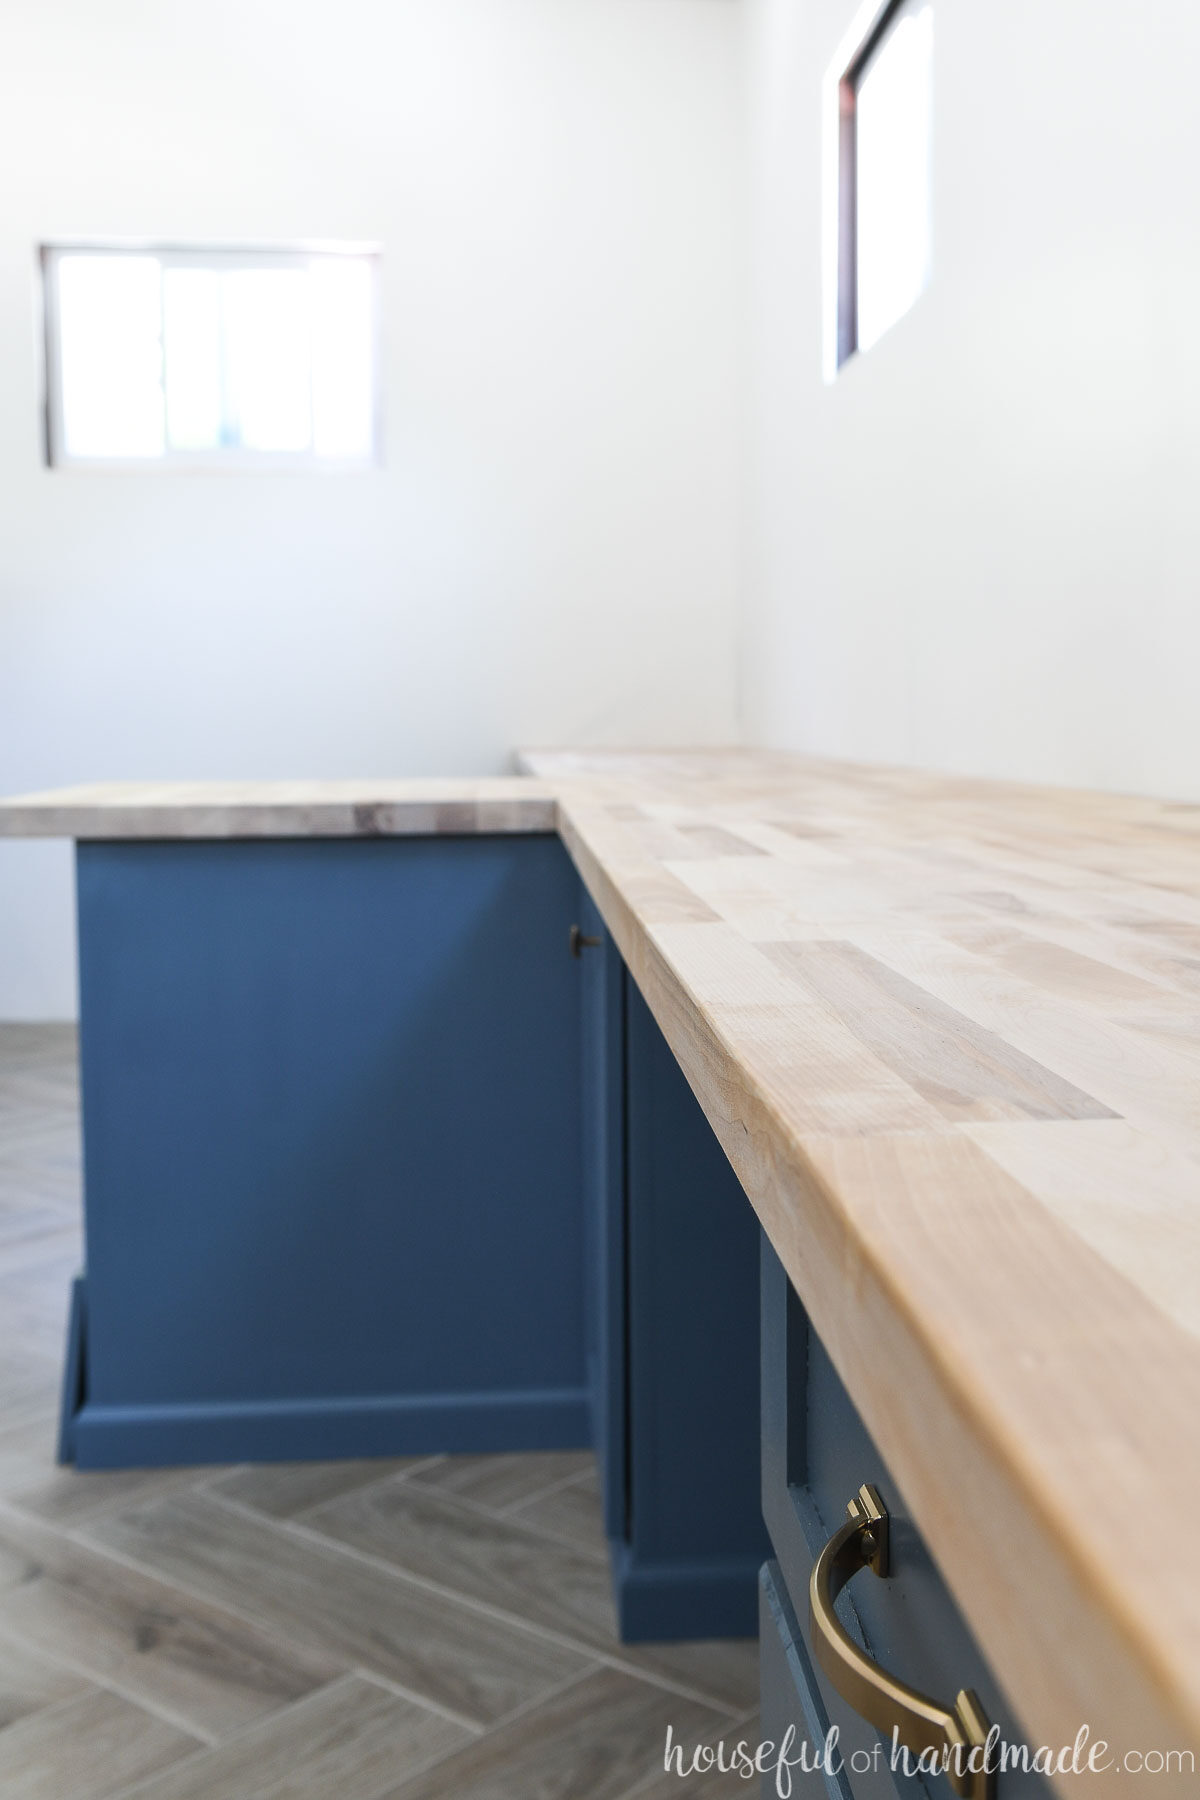
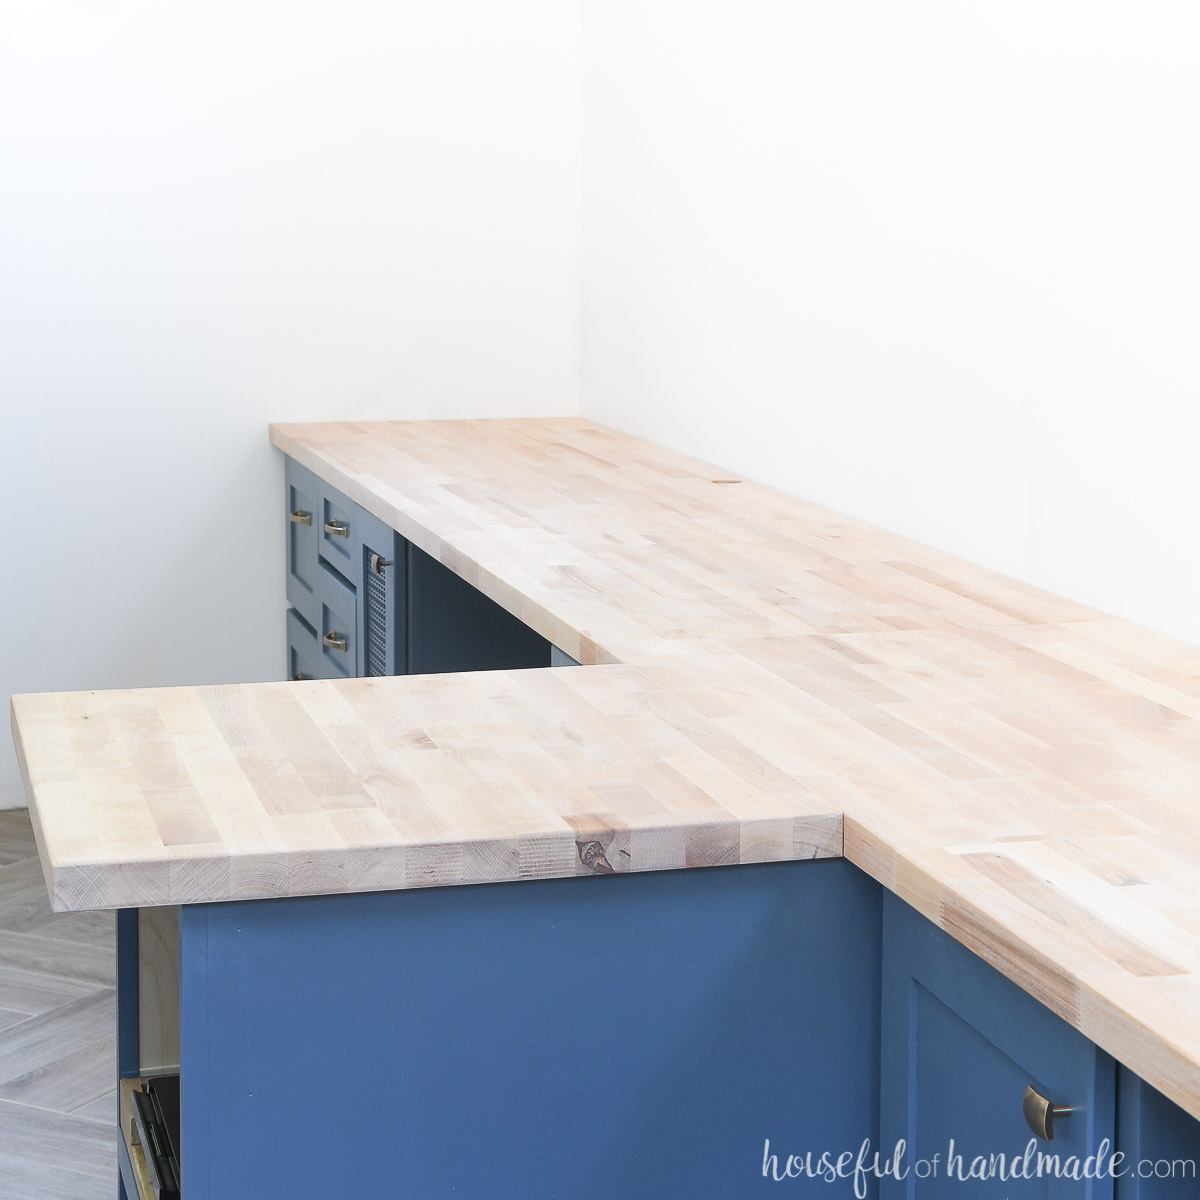
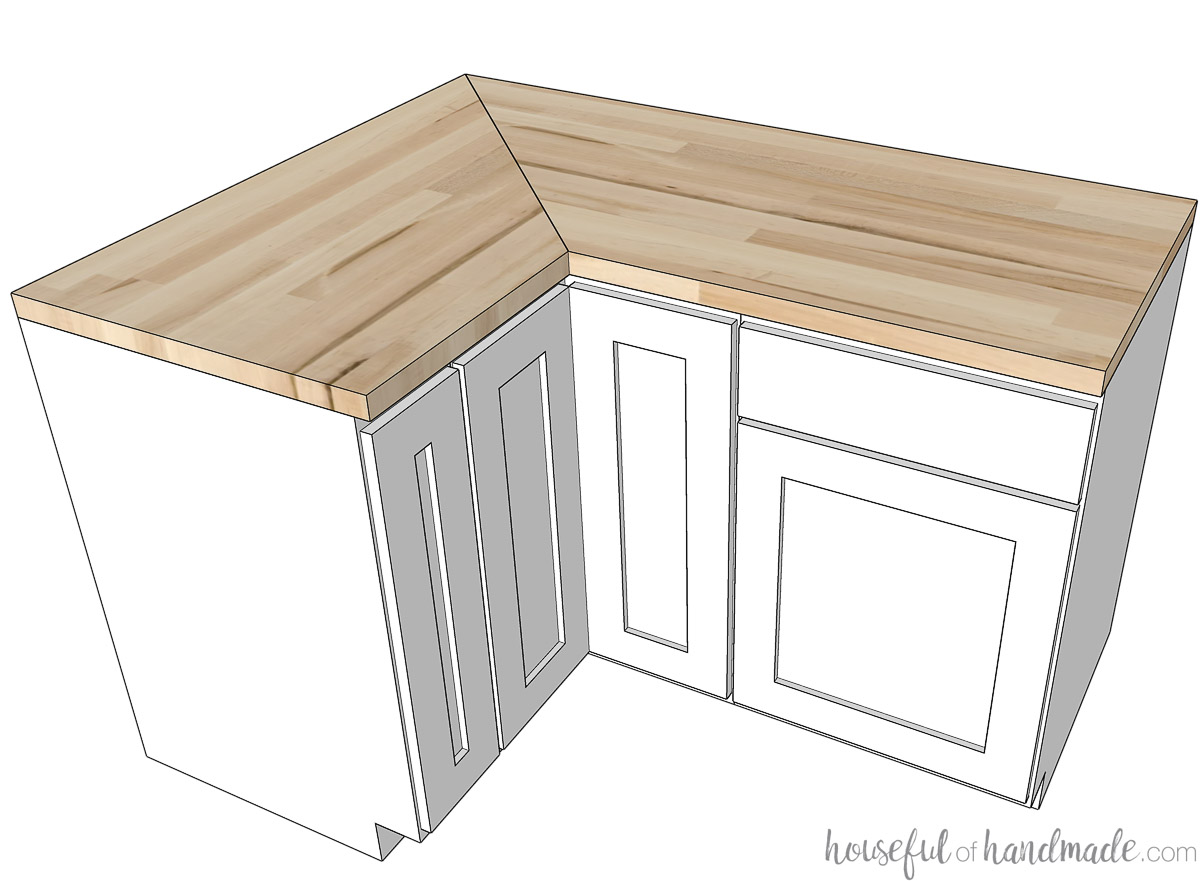
Joining Pieces in a Corner
If you have a countertop with an L from a peninsula, you will need to join together butcher block pieces in a corner.
You want to join the two pieces together in a corner at an angle, typically 45 degree angle.
Use the jointing trick detailed below, joint the to edges at the angle. Use wood biscuits to help align the two pieces.
Then secure them together with lots of glue and clamps until the glue dries.
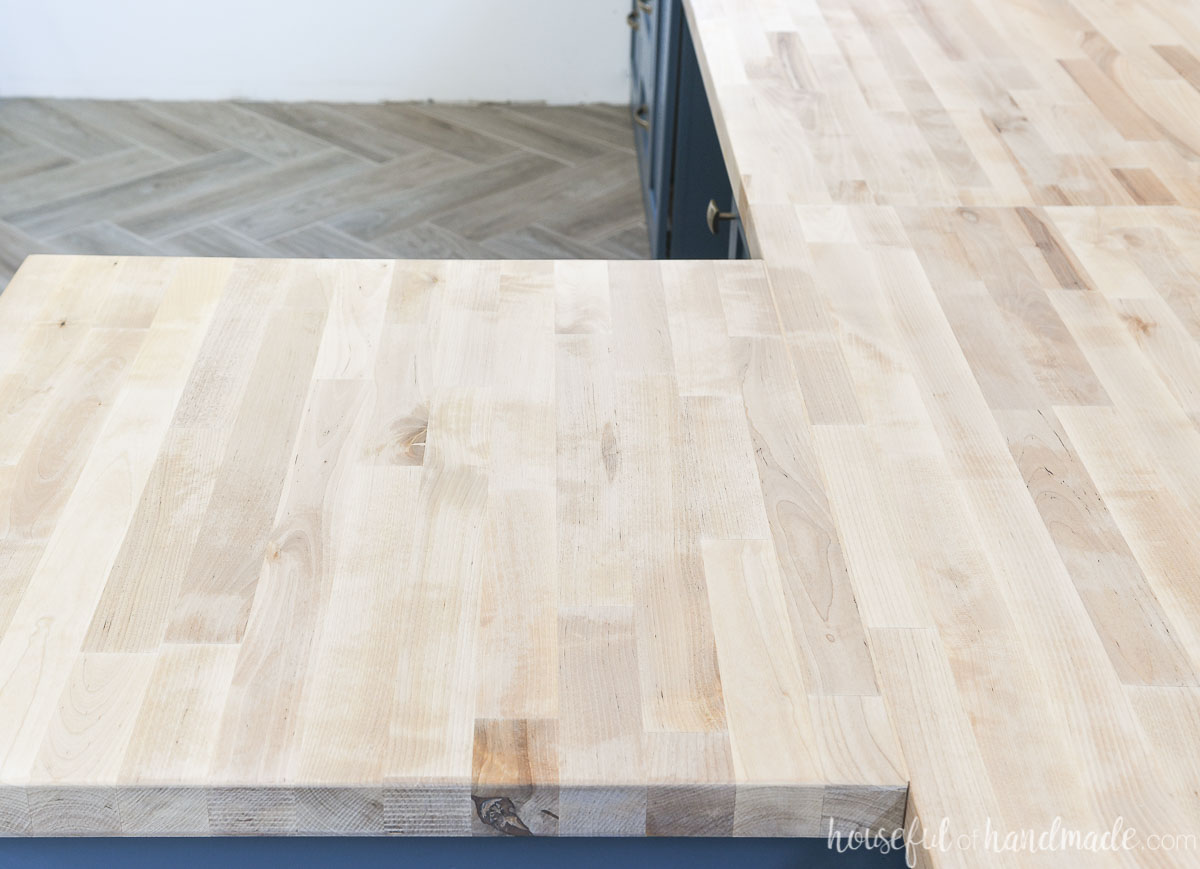
Joining Pieces Edge-to-Edge
Joining pieces edge-to-edge is the easiest! The edges of the glue (technically the face grain for a butcher block countertop) a easy to glue together.
If your countertop has slightly rounded edges, you will need to cut them off before joining the two pieces together.
Or if that is not possible, you can fill the small gap with wood filler that matches your wood species. The filled line will only be slightly noticeable between all the lines on the top of the butcher block.
Use a biscuit joiner to align the two pieces together. Then use lots of wood glue and clamp the two pieces together until the glue dries.
How to Secure a Butcher Block Countertop
Butcher block is wood and wood will move! You need to make sure to attach the countertop to the cabinets in a way that allows wood movement or you risk developing splits and cracks in your butcher block.
Wood expands and contracts with the seasons and humidity change in the width of the boards, not so much the length. Here is a great video that simplifies wood movement.
There are two easy ways to secure your countertop to your cabinets and allow for movement. I used a combination of the two to secure my butcher block countertop.

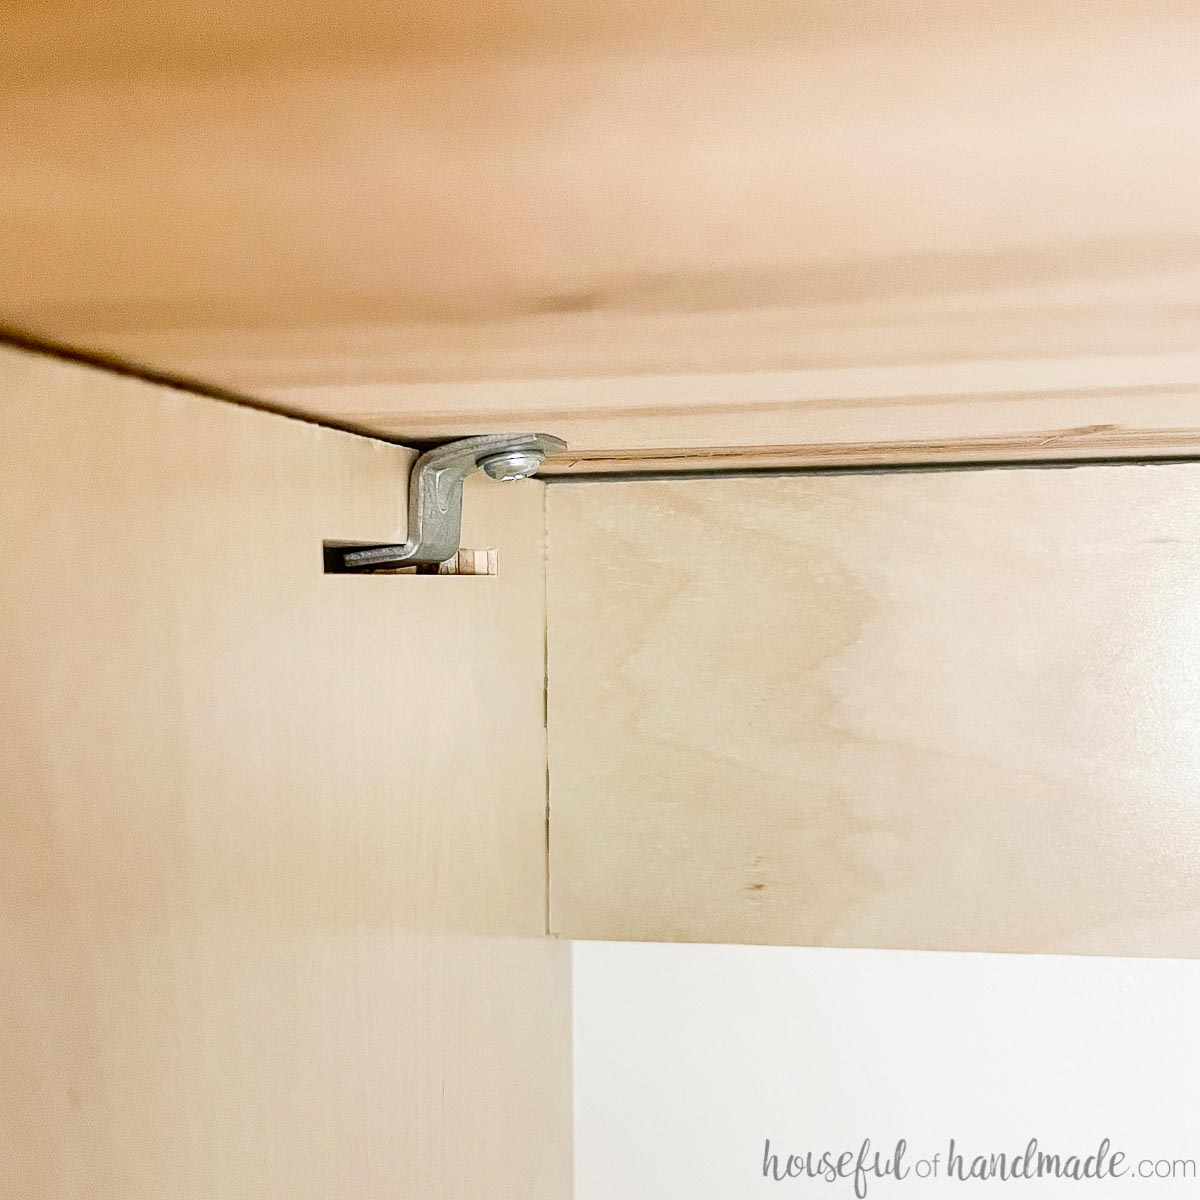
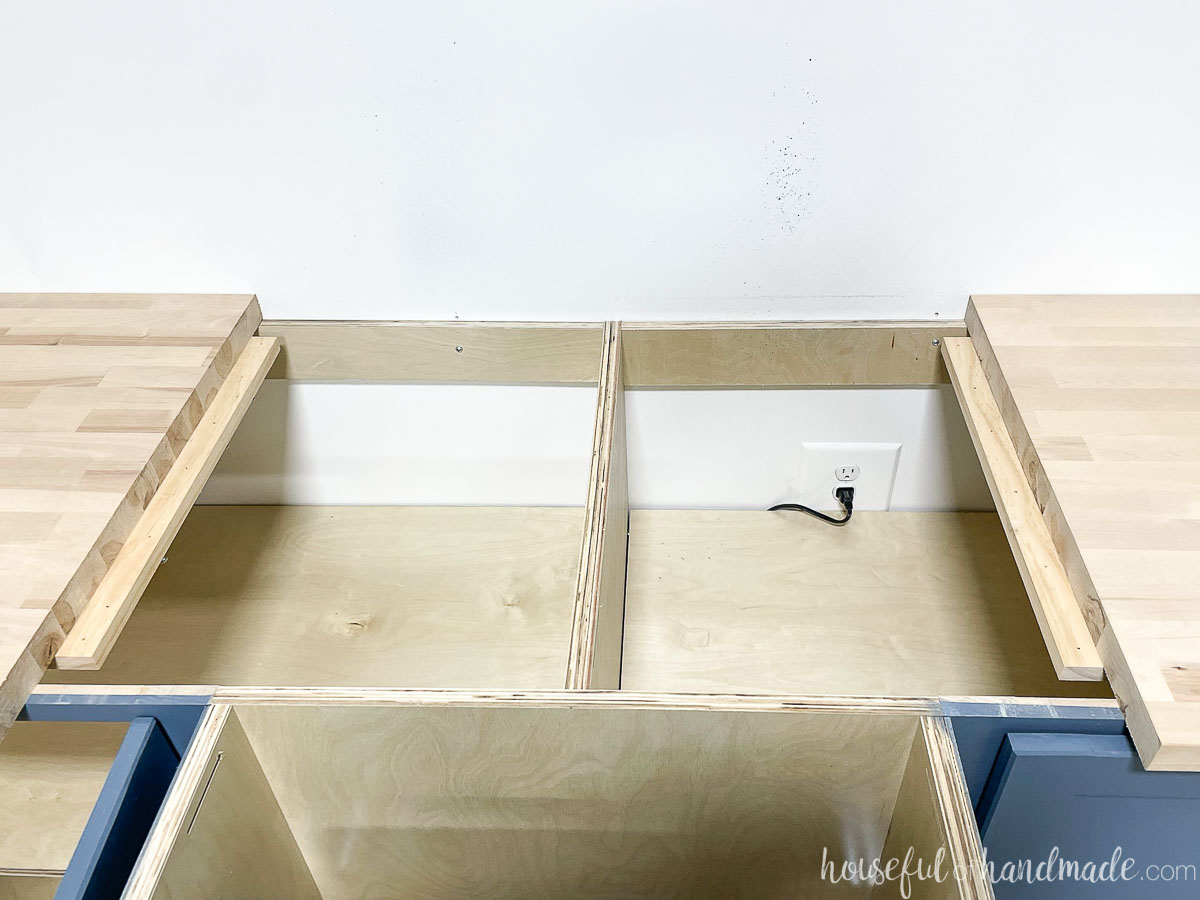
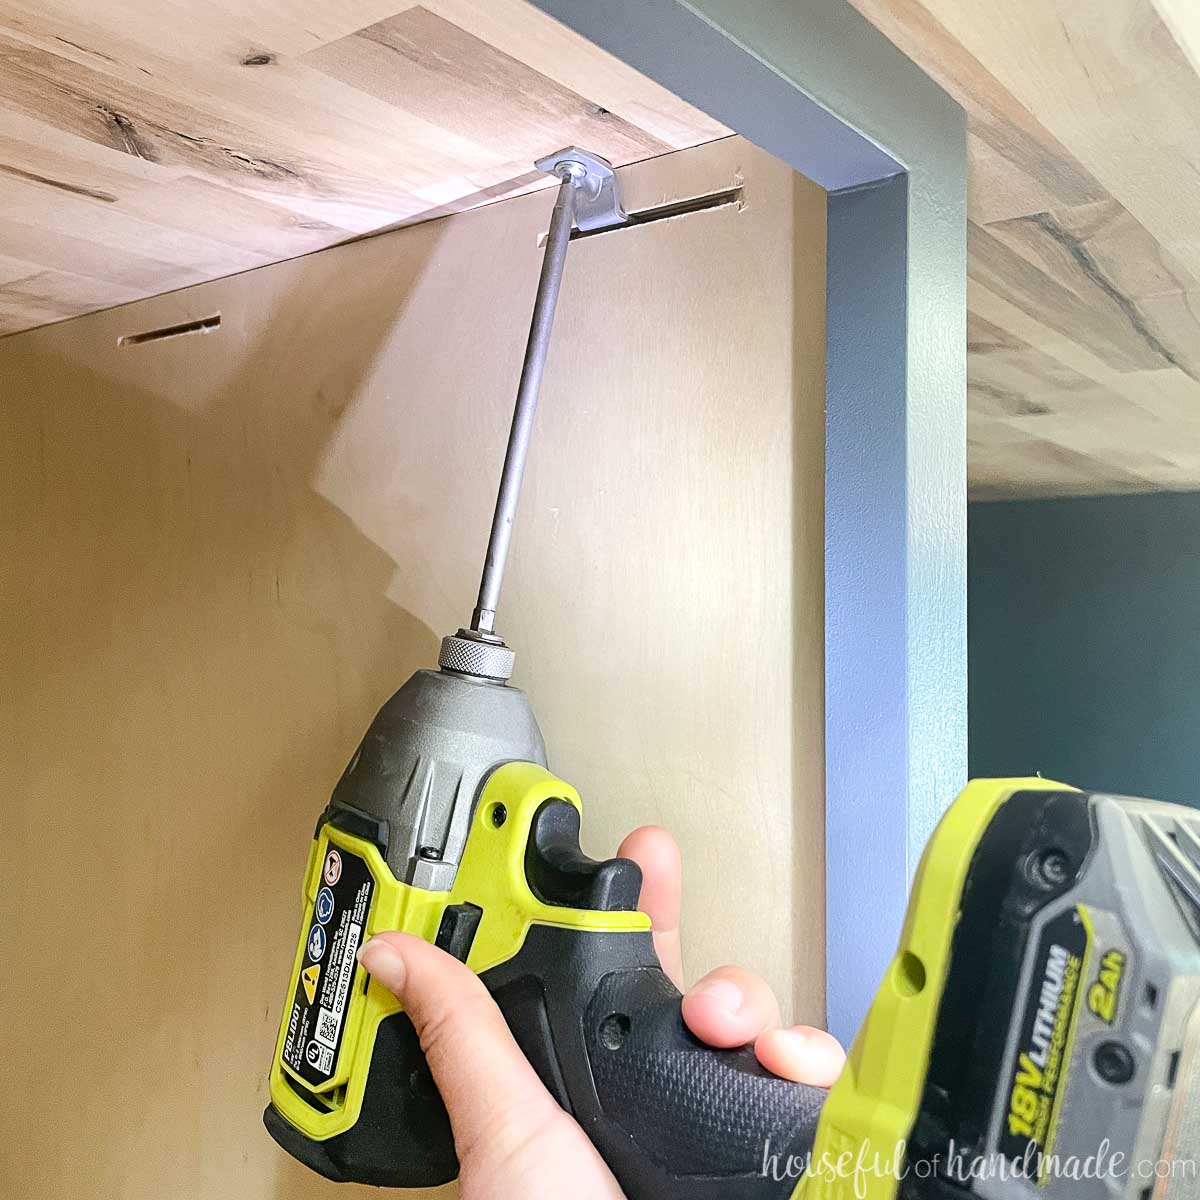
Z Table Top Fasteners
Tabletop fasteners in a Z shape are a great option. The bottom of the Z slides into a slit in the inside of the cabinet and the top secures to the underside of the countertop with a wood screw.
The table top fastener can move around inside the slit to allow for wood movement, while keeping your butcher block countertop nice and secure.
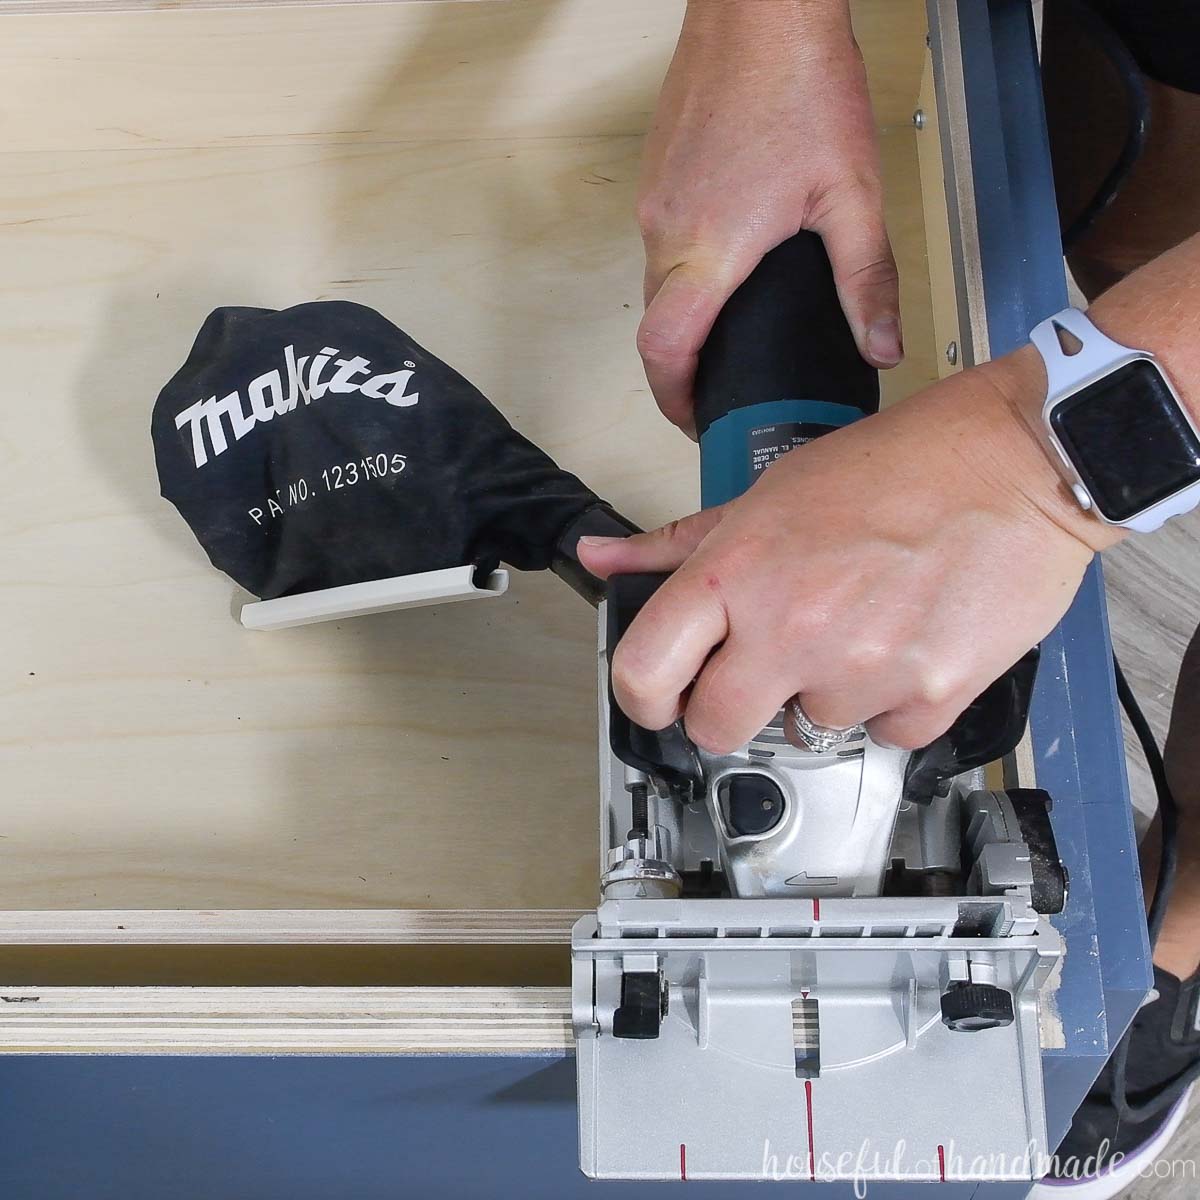
To create the slit in the cabinet, you can use a biscuit joiner or router. The biscuit joiner makes quick work of adding slits for the fasteners and comes in handy when joining the butcher block countertops together later.
When using the z table top fasteners, you may have to add the slits into the cabinets before you install them. I was unable to add slits to the sides of the cabinets that sat against the wall and the back because there was no room for the tool.
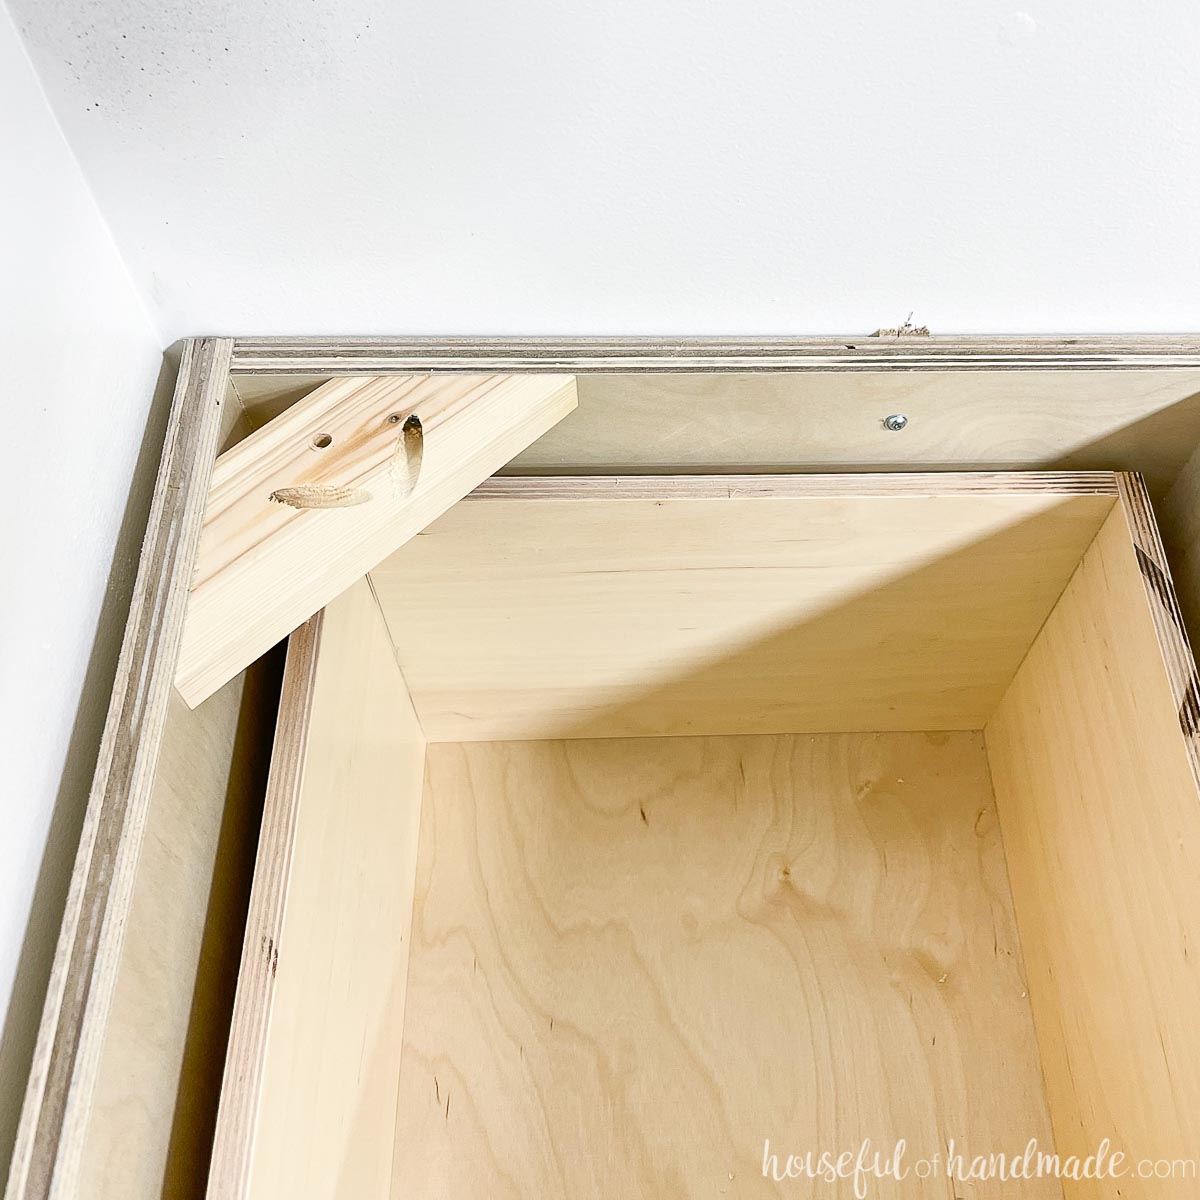
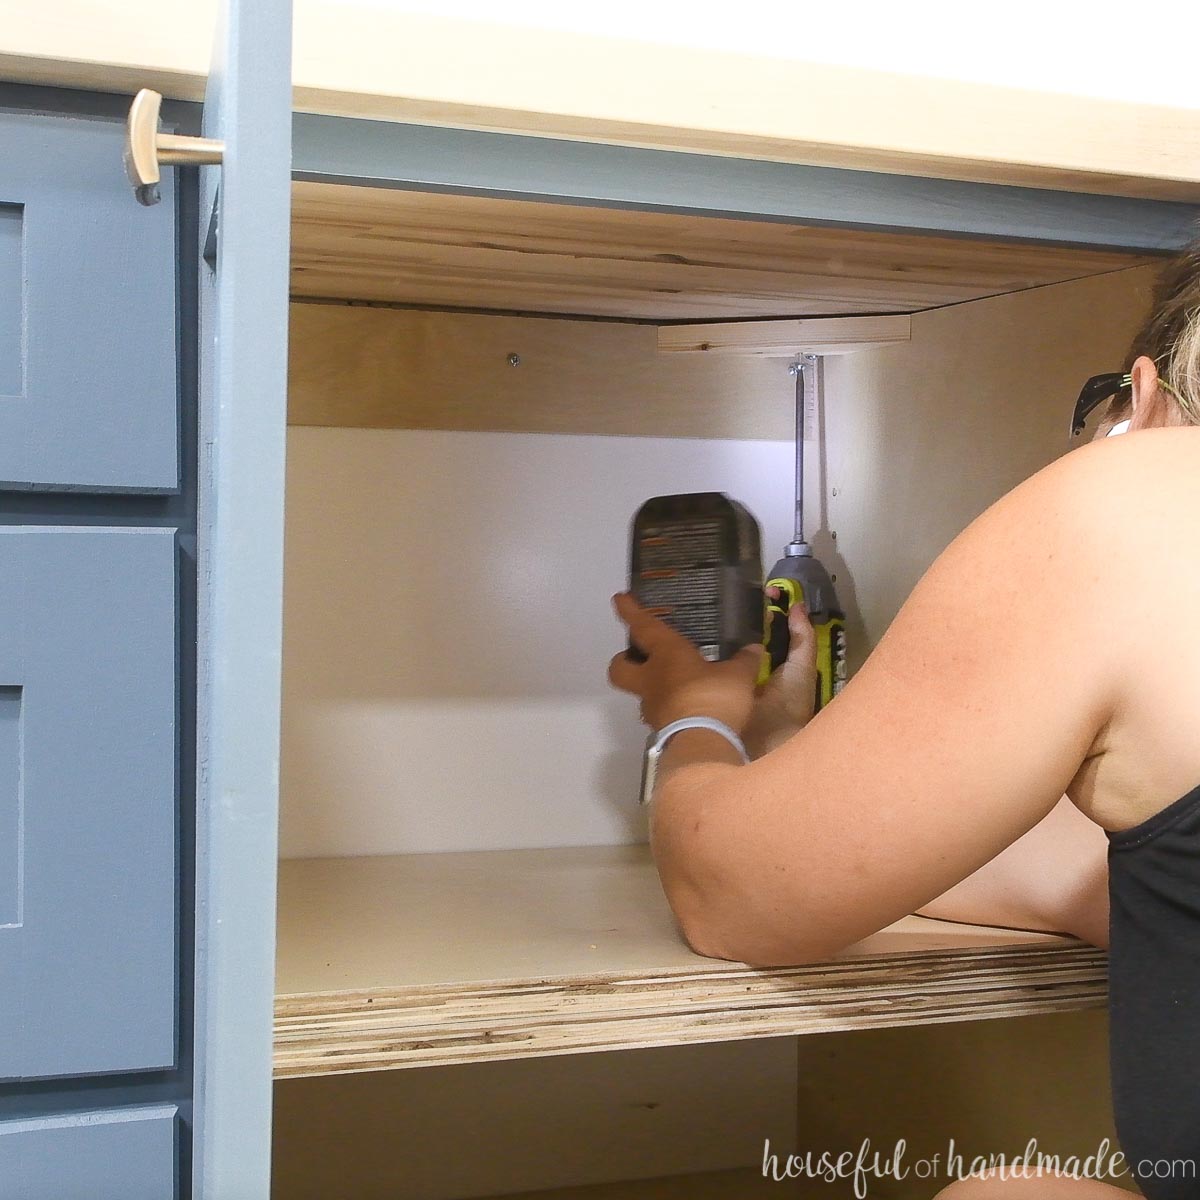
Scraps in the Corners
You can create little support pieces in the corners of your cabinets to allow you to attach the countertop.
Cut wood scraps with both ends at a 45 degree angle and attach them to the top inside corners of the cabinets.
But if you just attach the screw through the scrap into the countertop, your butcher block will not be able to move properly.
To allow for movement, you will need to drill a hole larger than your screw (I used a 1/4″ drill bit). Then use a washer on your screw to attach the countertop through the hole.
The large hole allows for wood movement and the washer keeps the screw from going through the hole.
If you have a lot of scraps laying around, you can quickly cut some corner braces. I attached them inside my cabinets corners with pocket holes and drilled the holes before ever adding the countertop.
How to Install a Butcher Block Countertop
Tools:
- Circular saw with guide track
- Drill
- Impact driver (optional, but I love not having to switch bits with the drill)
- Sander
- Biscuit joiner or router
- Pocket hole jig (optional, if using wood scraps to attach countertop)
Supplies:
- Butcher block countertop
- Measure the linear feet of your countertop. Make sure to add extra for cuts and fitting into corners.
- Wood glue
- Wood biscuits
- Wood scraps and/or Z-shaped table top fasteners
- Self tapping wood screws
- Washers (optional, if using wood scraps to attach countertop)
STEP 1- Prep Cabinets
Decide if you are using Z table top fasteners or the wood scrap method to secure your butcher block countertop (see section above)
I used a combination of both. I added wood scraps to the back corners where I could not easily cut the slit for the tabletop fasteners with the biscuit joiner.
Refer to the instructions with your table top fasteners to determine how far from the top of the cabinets the slits need to be. Make sure the top of the slit is at this measurement. Mine were 1/2″ down.
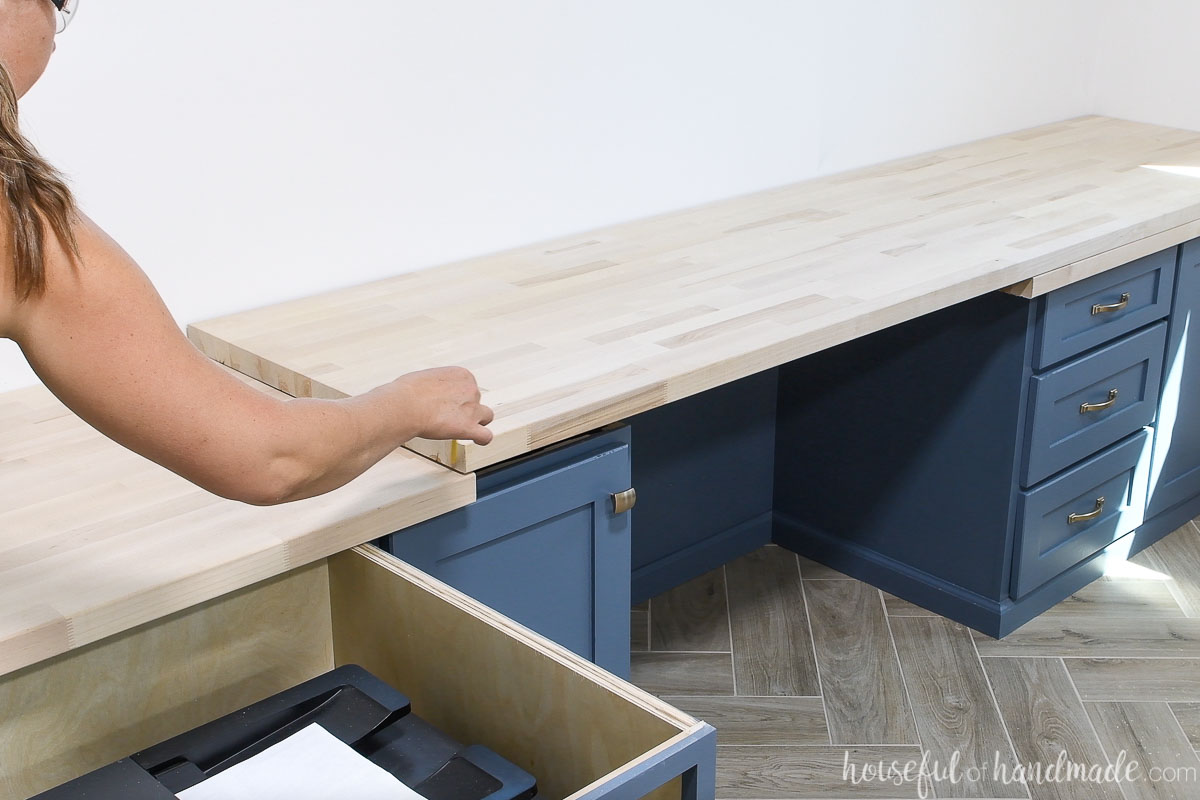
STEP 2- Scribe Countertop to Wall
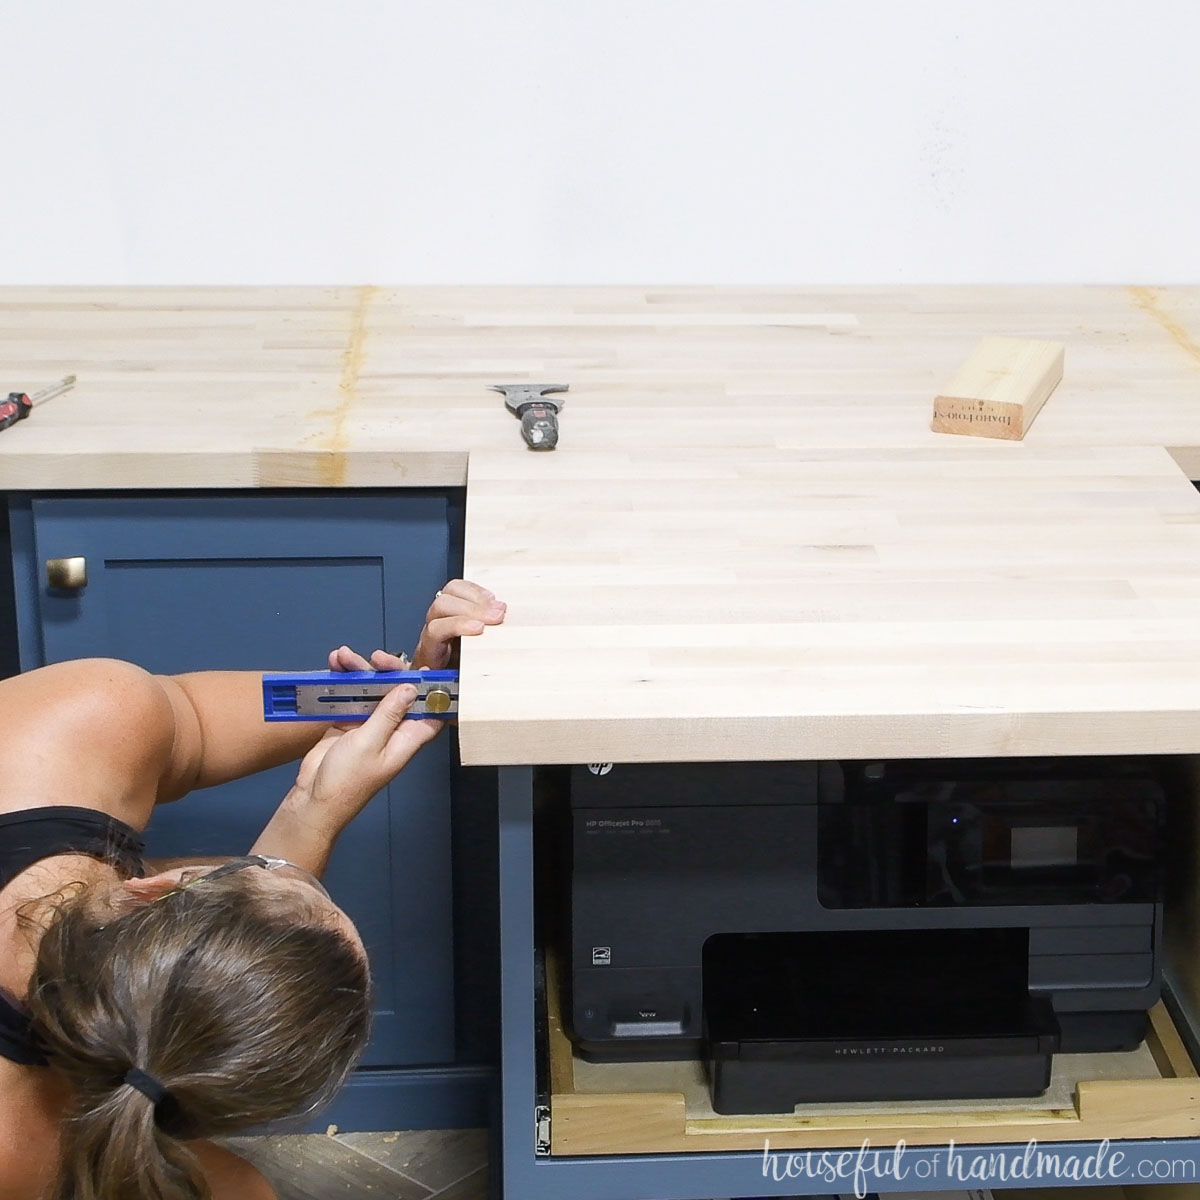
Place the piece of butcher block over your cabinets.
Do not try to push it flush against the walls. Instead, line it up so there is the same amount of overhand along the front of your cabinets.
EXPERT TIP: Use a measuring guide to quickly line up the countertop. Set the guide to the largest overhang measurement and then use it to make sure the overhang is the same all along the countertop.
If you have two pieces of countertop, you will want them both lined up with the same front reveal.
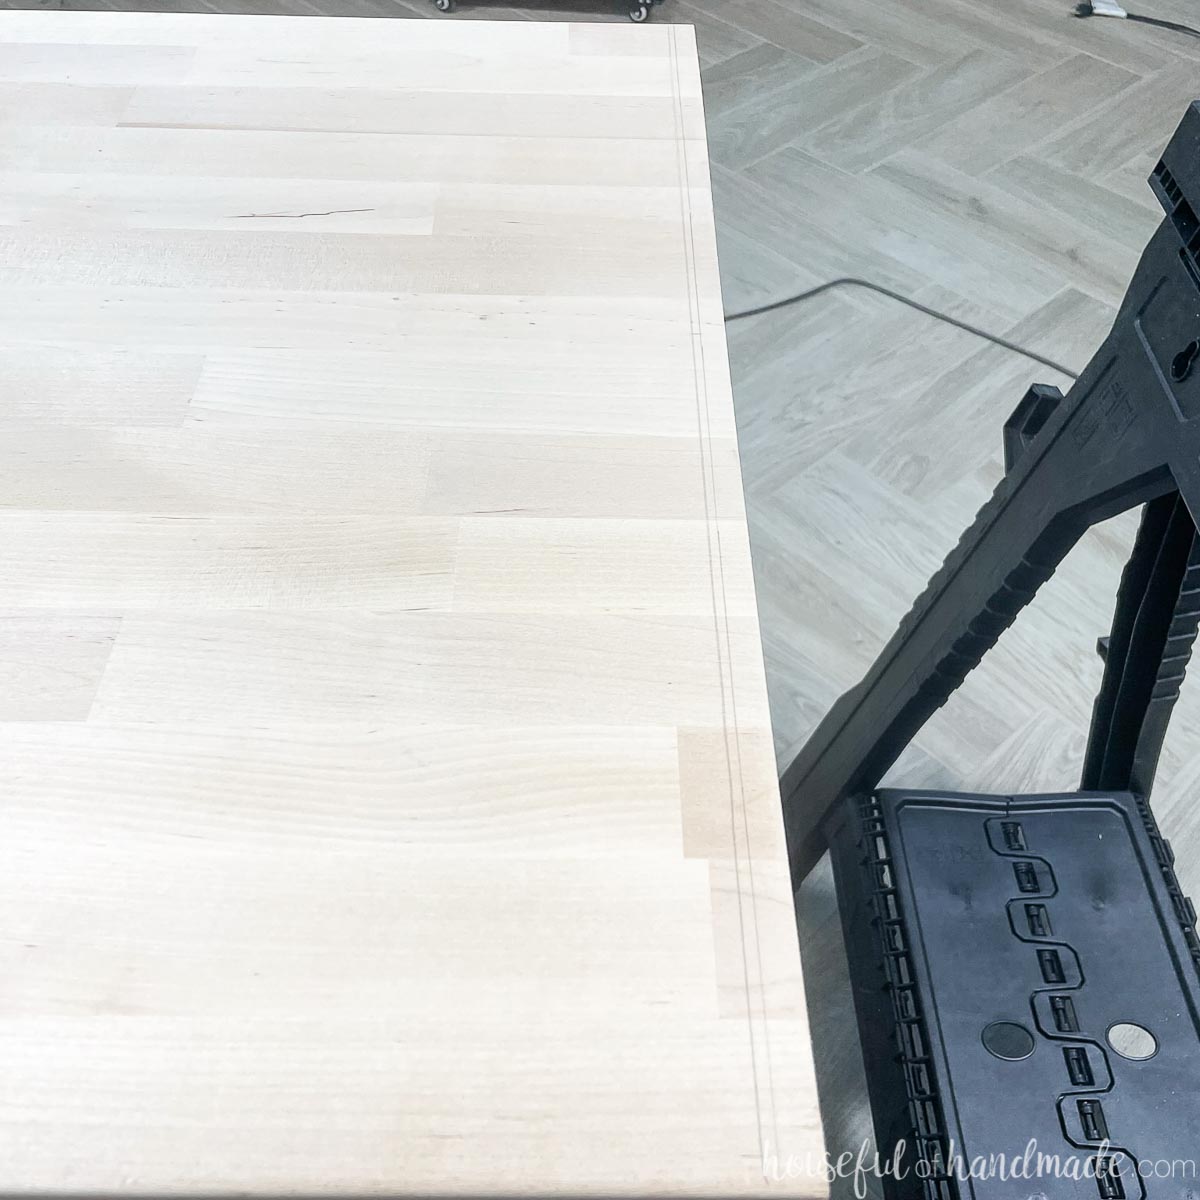
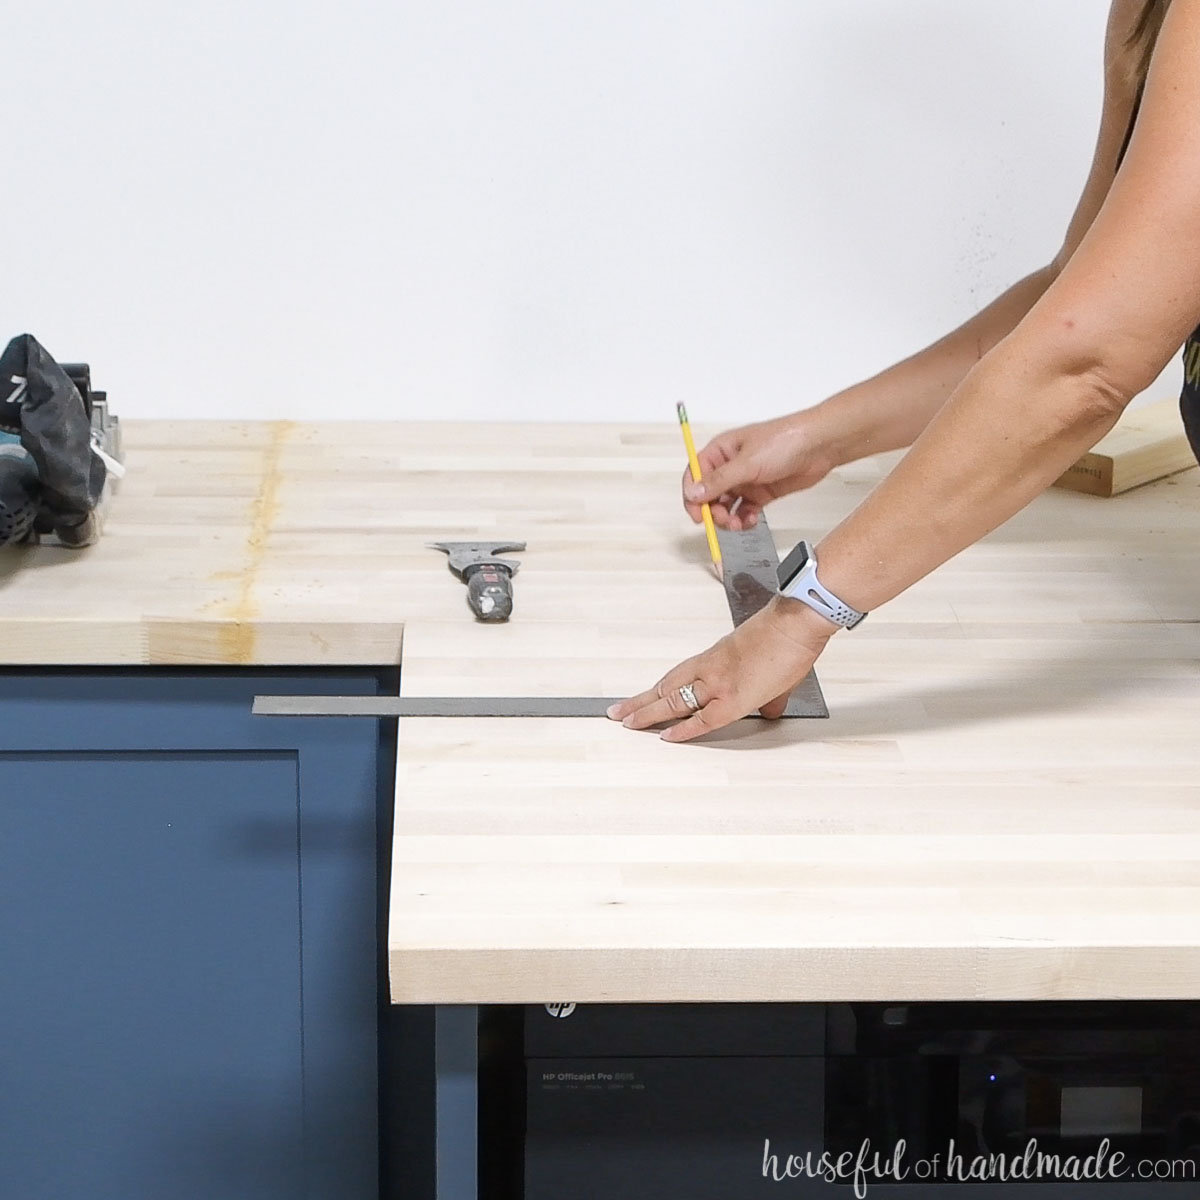
Once the countertop is aligned, set a compass to the thickest gap from the countertop to the wall.
Use this measurement to draw a line across the entire back of the countertop. This will transfer the shape of your wall to the back of the countertop.
If the side of your countertop is up against a wall, scribe it as well.

Remove the countertop and cut along the scribed line with a jigsaw.
Set your jigsaw blade to a 5-10 degree angle so when you cut the bottom is slightly inside the top. This will help you get a cleaner scribe to the wall.
Use a sander with a low grit sandpaper (40-80) to help fine tune the cut line to the scribe line if needed.
Again, make sure to slightly angle the cut so the bottom is inside the top.
Place the countertop back on the cabinets and adjust as necessary.
EXPERT TIP: Make sure to scribe any countertops to the wall before cutting to length or you will end up with large gaps at the walls or too-short countertops.
STEP 3- Cut Countertops to Length
With the edges scribes to the wall, you can measure and cut your countertops to the proper length.
Use a circular saw with a guide track to get straight cuts on the edges or corners.
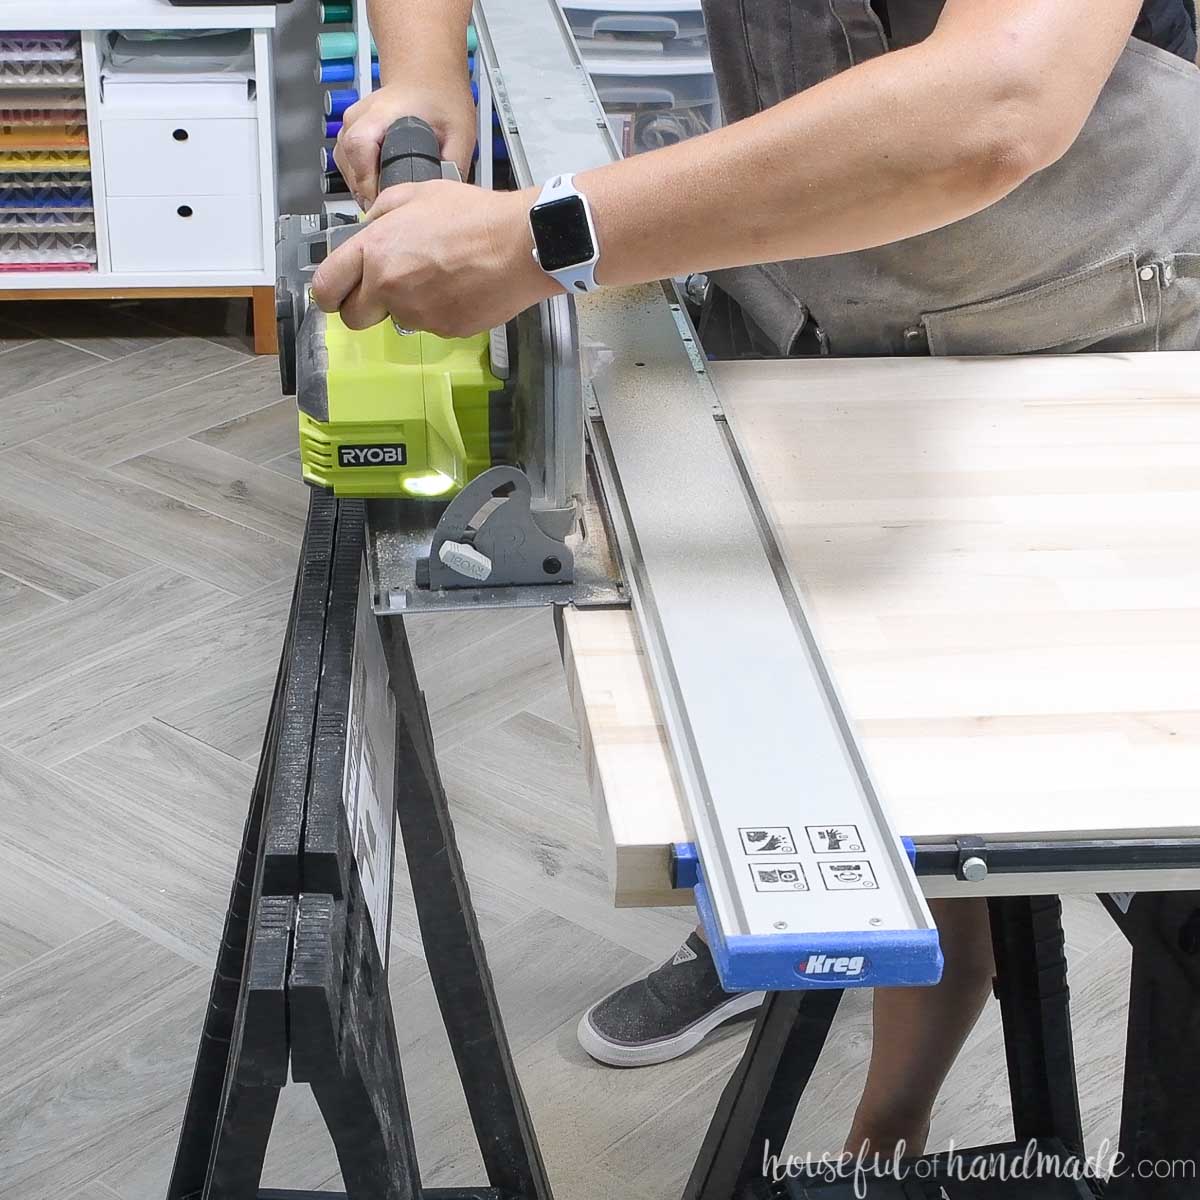
Jointing with a Circular Saw
If you have two pieces that have to be jointed together, it is very tricky to get a perfectly straight jointed edge on the large countertop pieces.
But you can get a very good jointed seam with this little trick!
Line the two pieces of countertop up (cut off any rounded edges first if needed). You will see the seam is not tight.
Attach the two pieces together with a couple scraps on the bottom. Try to keep the seam as tight as possible and the front lined up.
Cut along the seam with your circular saw. Use a guide track to help you stay in the seam.
Make sure you do not cut through the scraps below. They will help hold the two boards together while you cut.
You cannot do it with clamps instead or the clamp will pull the area already cut together as you cut causing your blade to bind.
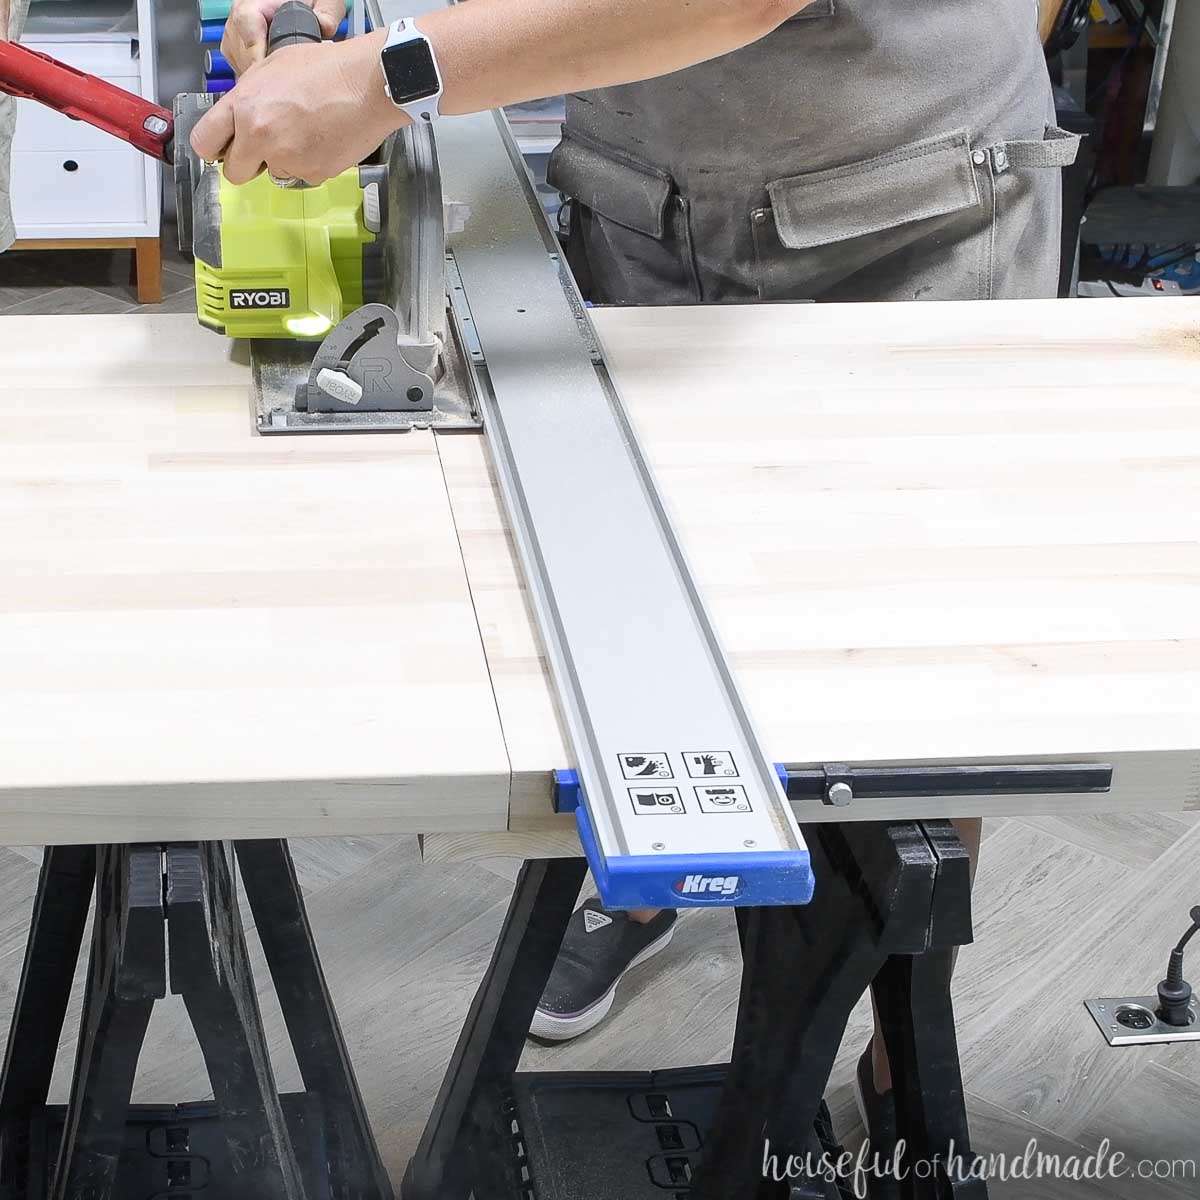
Cutting the two boards with one pass will make the two edges identical.
Even if they are not perfectly flat and at a 90 degree to the top, they will joint together snuggly because they are the same.
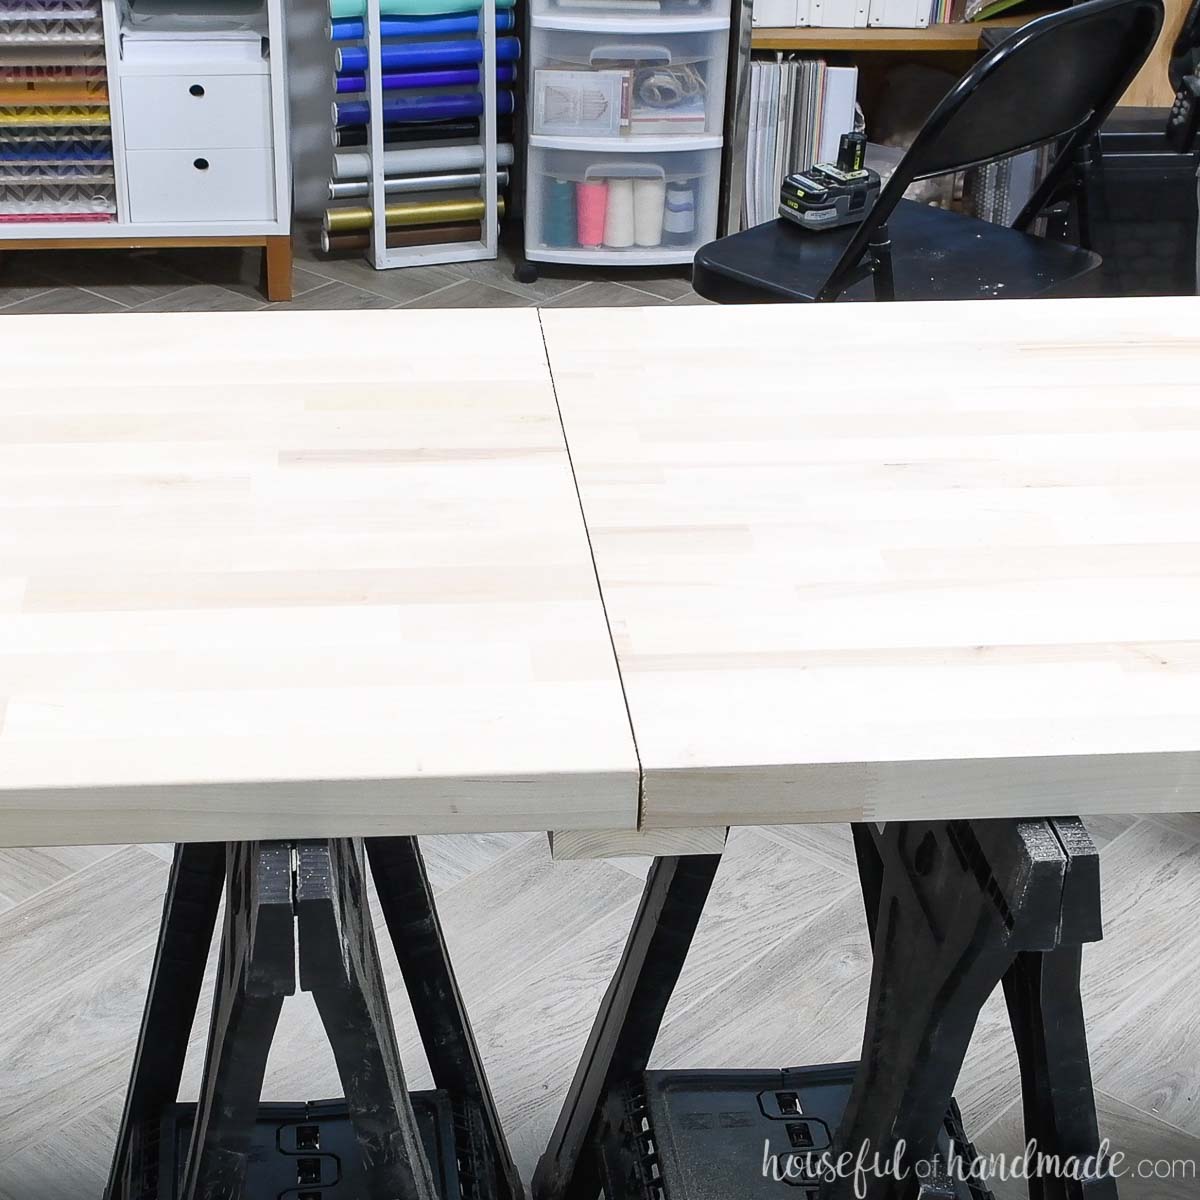
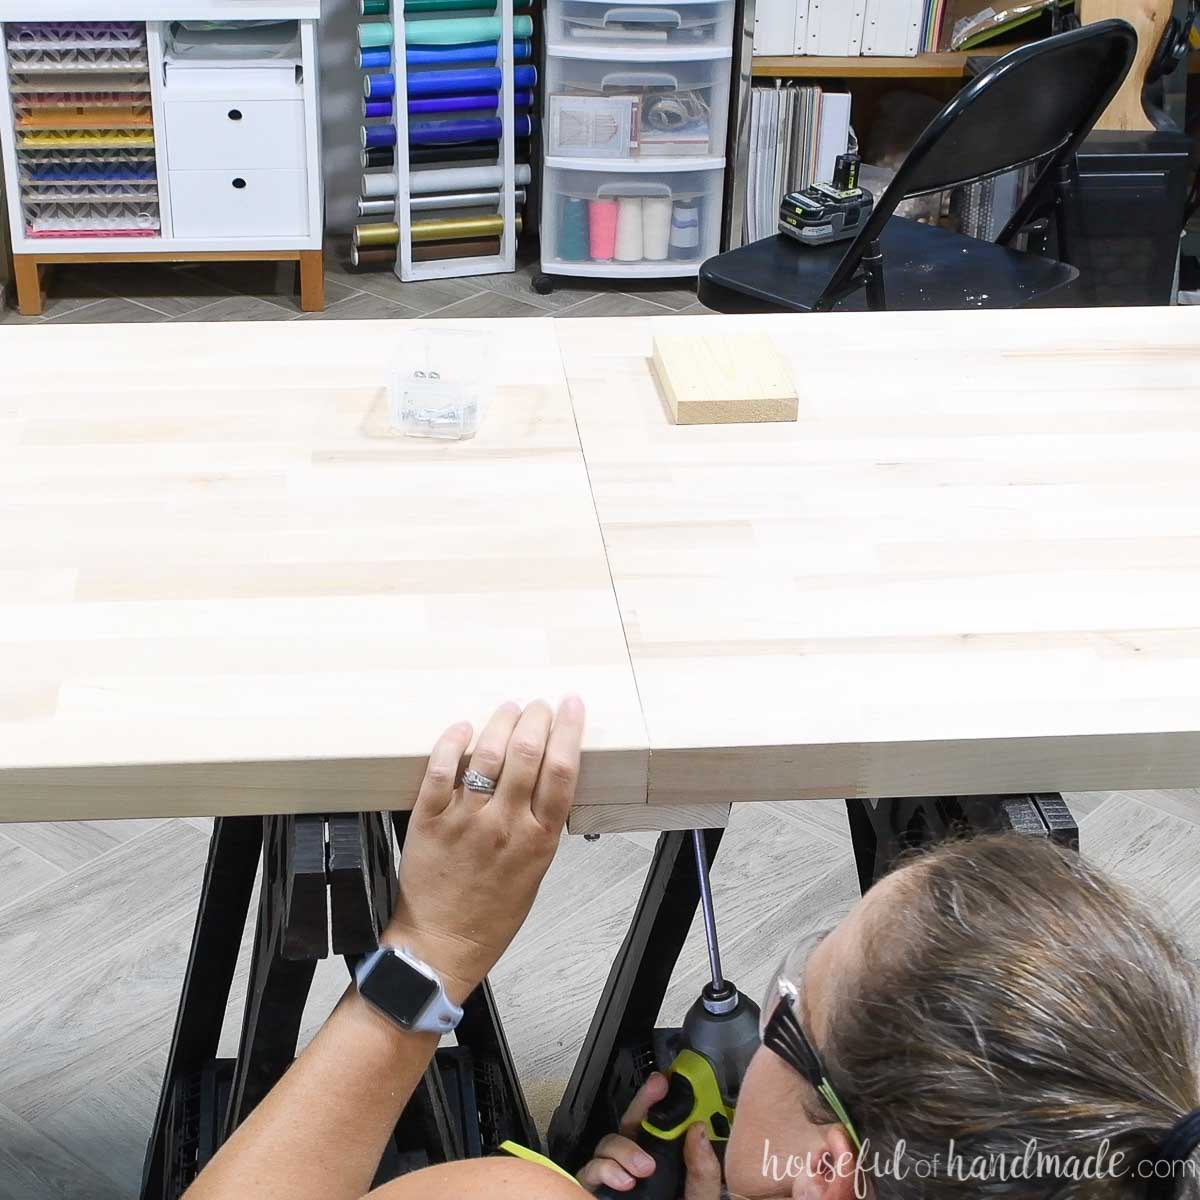
Remove the scrap blocks from below and see the two boards slide together nicely.
If you still have gaps, it is because your original seam was larger than your blade kerf. Repeat the process again to remove these gaps if needed.
When joining boards together between walls, use a scrap of wood to lift one piece on top of the other while keeping it level. Then transfer the edge of the board to the other board. This is your measurement.
If you want to use the circular saw jointing method, you need to account for the width of the blade kerf so that you do not end up with too small of a countertop.
Draw a line next to the one you already drew twice the kerf of the blade. Then cut along this line.
Then use the jointing method to cut the two seams identical. This will take out a second kerf width.
Dry fit your countertop to your cabinets and adjust as needed. You will be able to fill small gaps next to the wall with caulk after the countertops are installed.
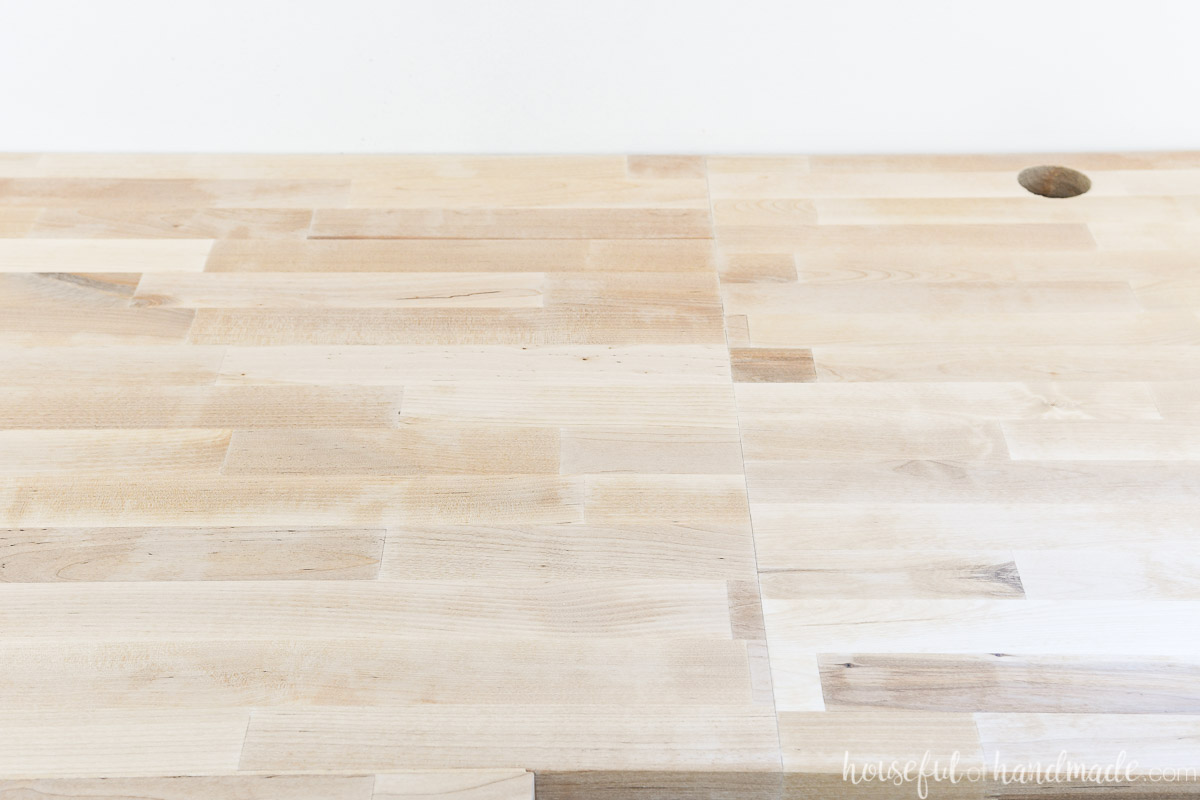
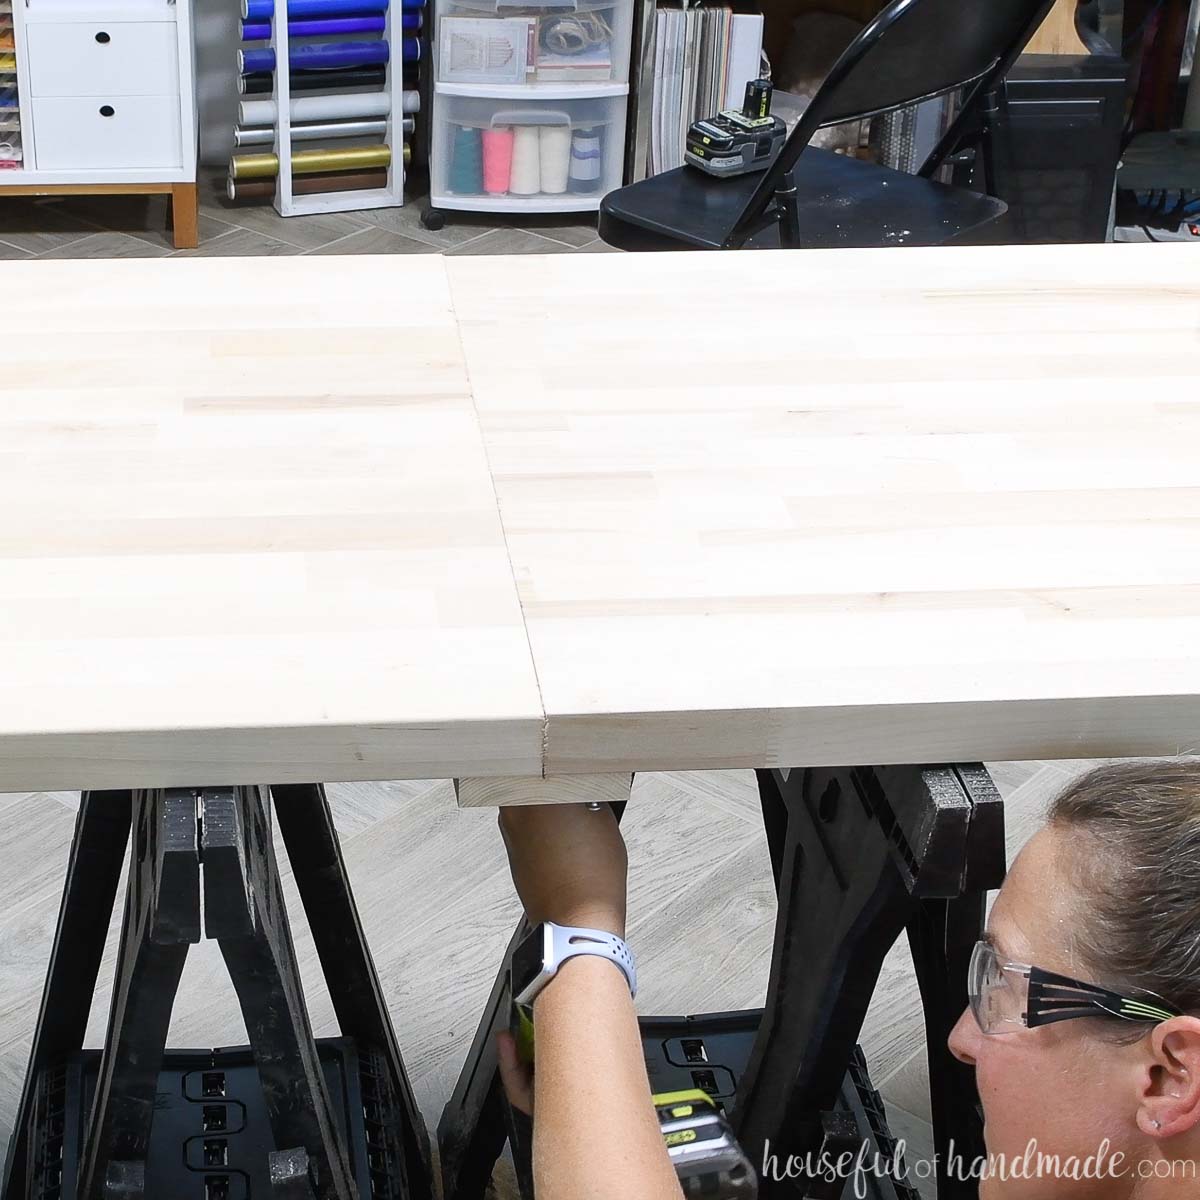
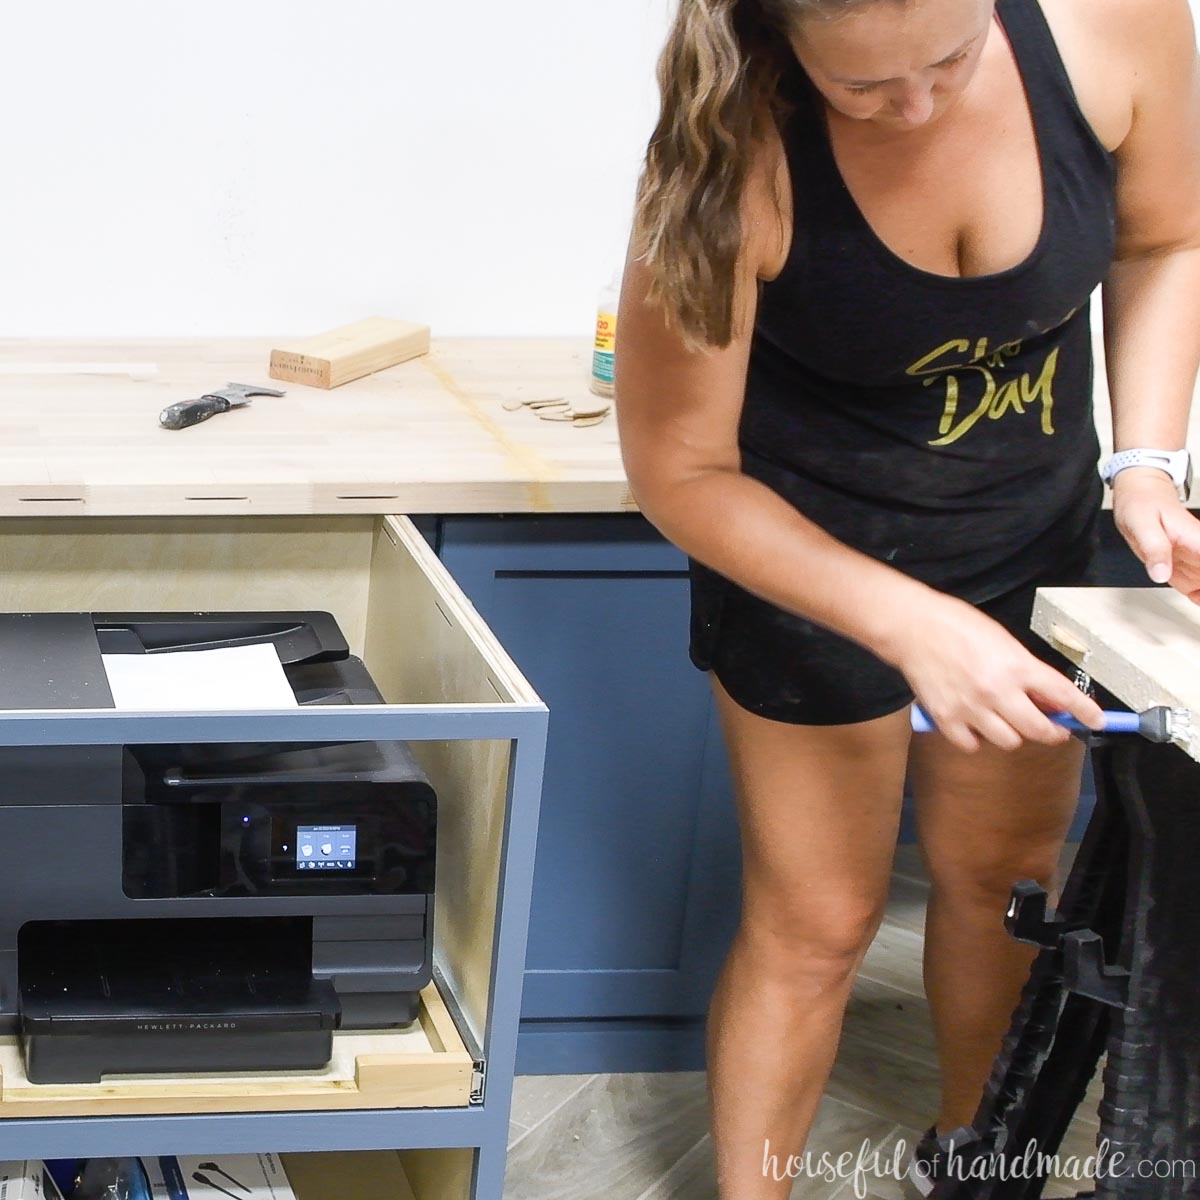
STEP 4- Join Butcher Block Pieces Together
Now that all the pieces are cut and dry fit, it’s time to glue them together.
Since each countertop shape is different, refer to the section above on joining pieces together for the best method to join your countertop.
Our countertop is between two walls, so we were not able to use wood biscuits or finger joints to join the pieces end-to-end.
Instead I used two scrap pieces of 1×3 to help align the pieces together. I attached them to the underside of the large countertop pieces and set those pieces into place.
Add a lot of wood glue to the edges of the pieces to be joined together.
Make sure to spread glue over the entire edge. Also, add glue to both edges being joined.
Place the two pieces together and clamp if able. I was not able, but the fit was nice and tight.
I secured the 1×3 to the second piece inside the cabinet to help hold it together.
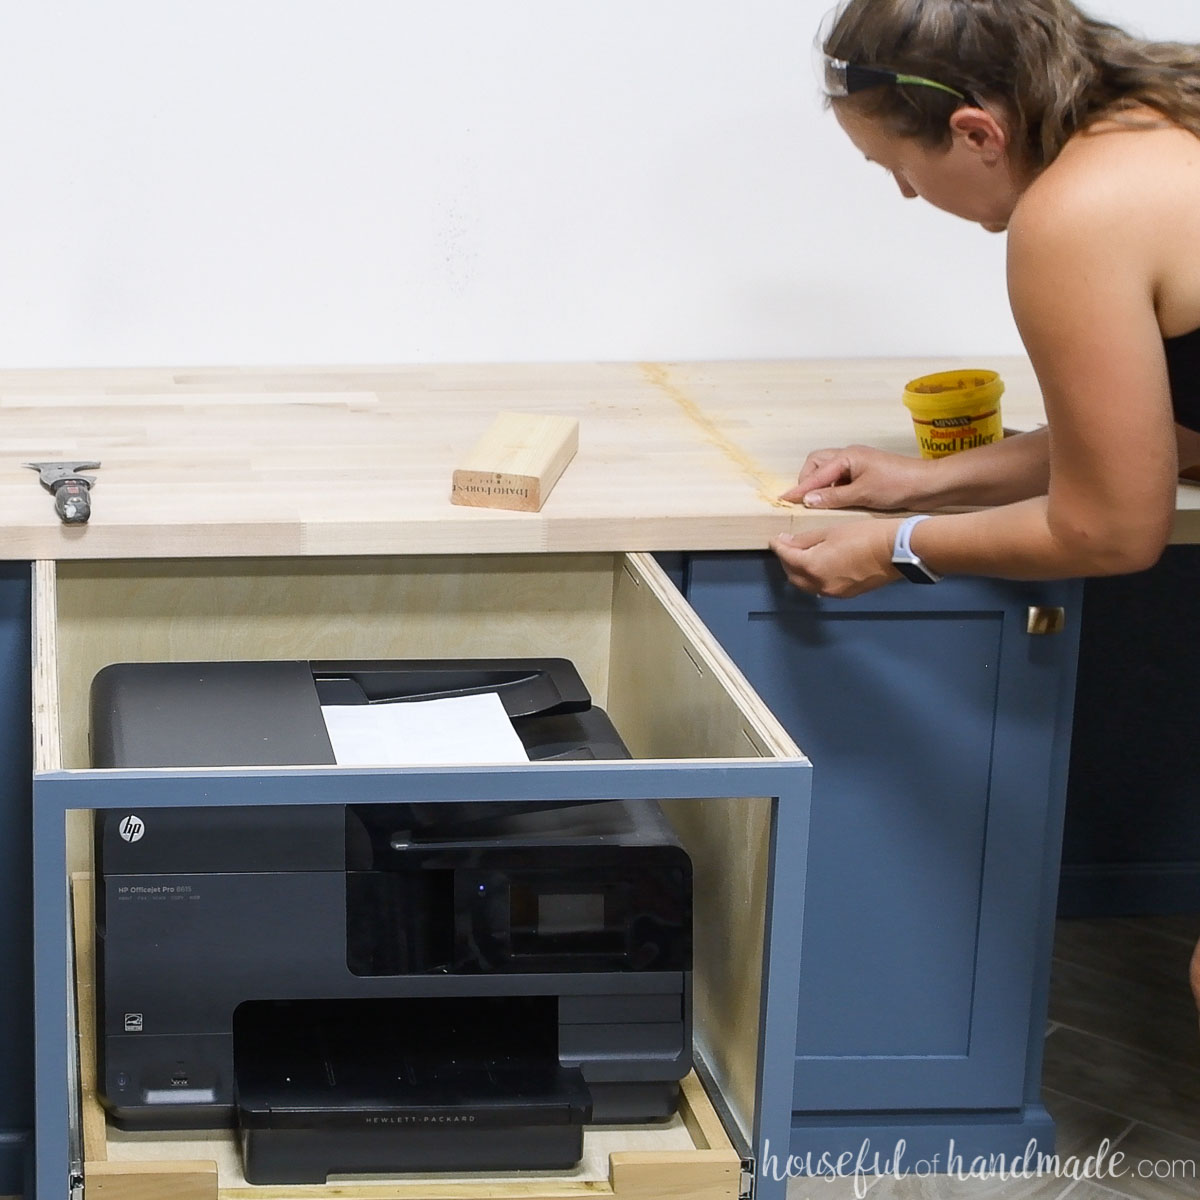
Fill any gaps in the seam with wood filler to help hide it.
For our peninsula, I attached the second piece to the end with wood biscuits.
Line the piece up with the proper overhang.
With both pieces in place, mark lines across the seam for your biscuit placement.
Drill slots for the biscuits with a biscuit joiner.
Add glue to the inside of the slots and place the wood biscuits inside. Spread glue over the entire edge around the biscuits. Then add glue to the edge of the second piece.
Slide the pieces together and clamp. Let the glue dry before removing clamps.
Remove any glue squeeze out with a chisel after it is dry to prevent it from getting all over the wood around the seam.
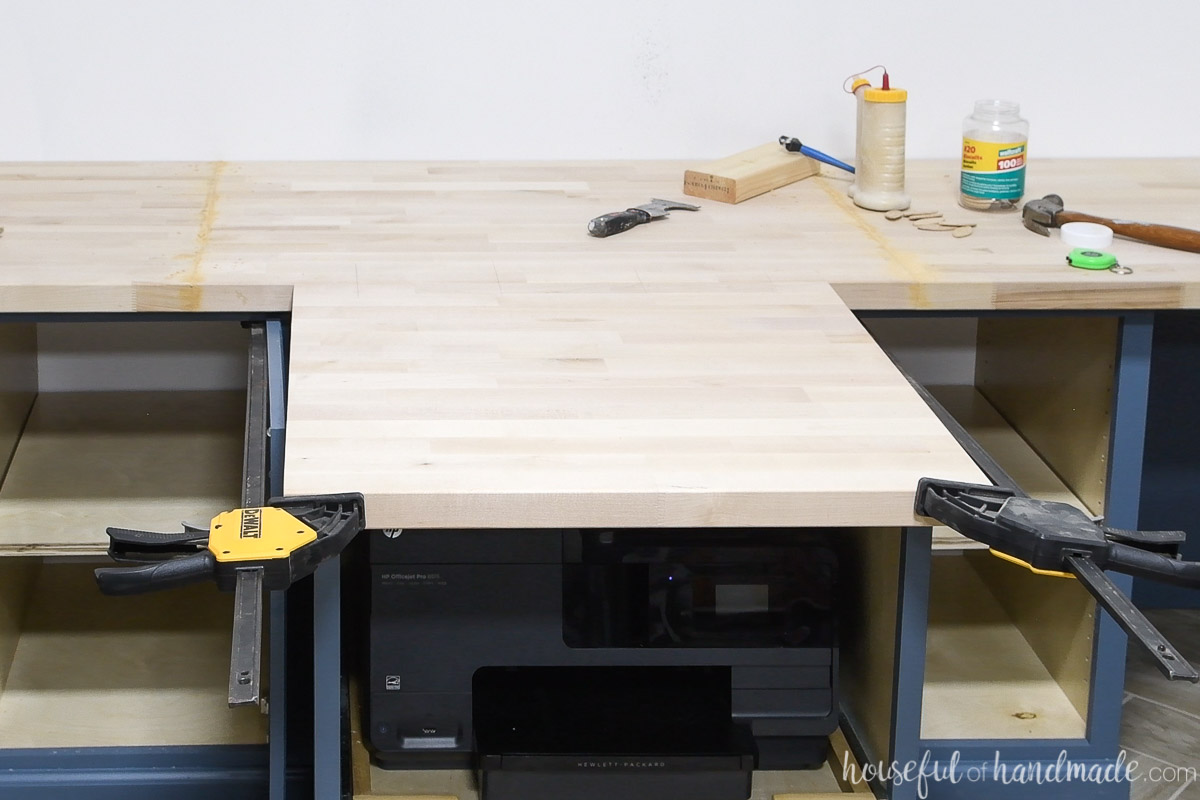
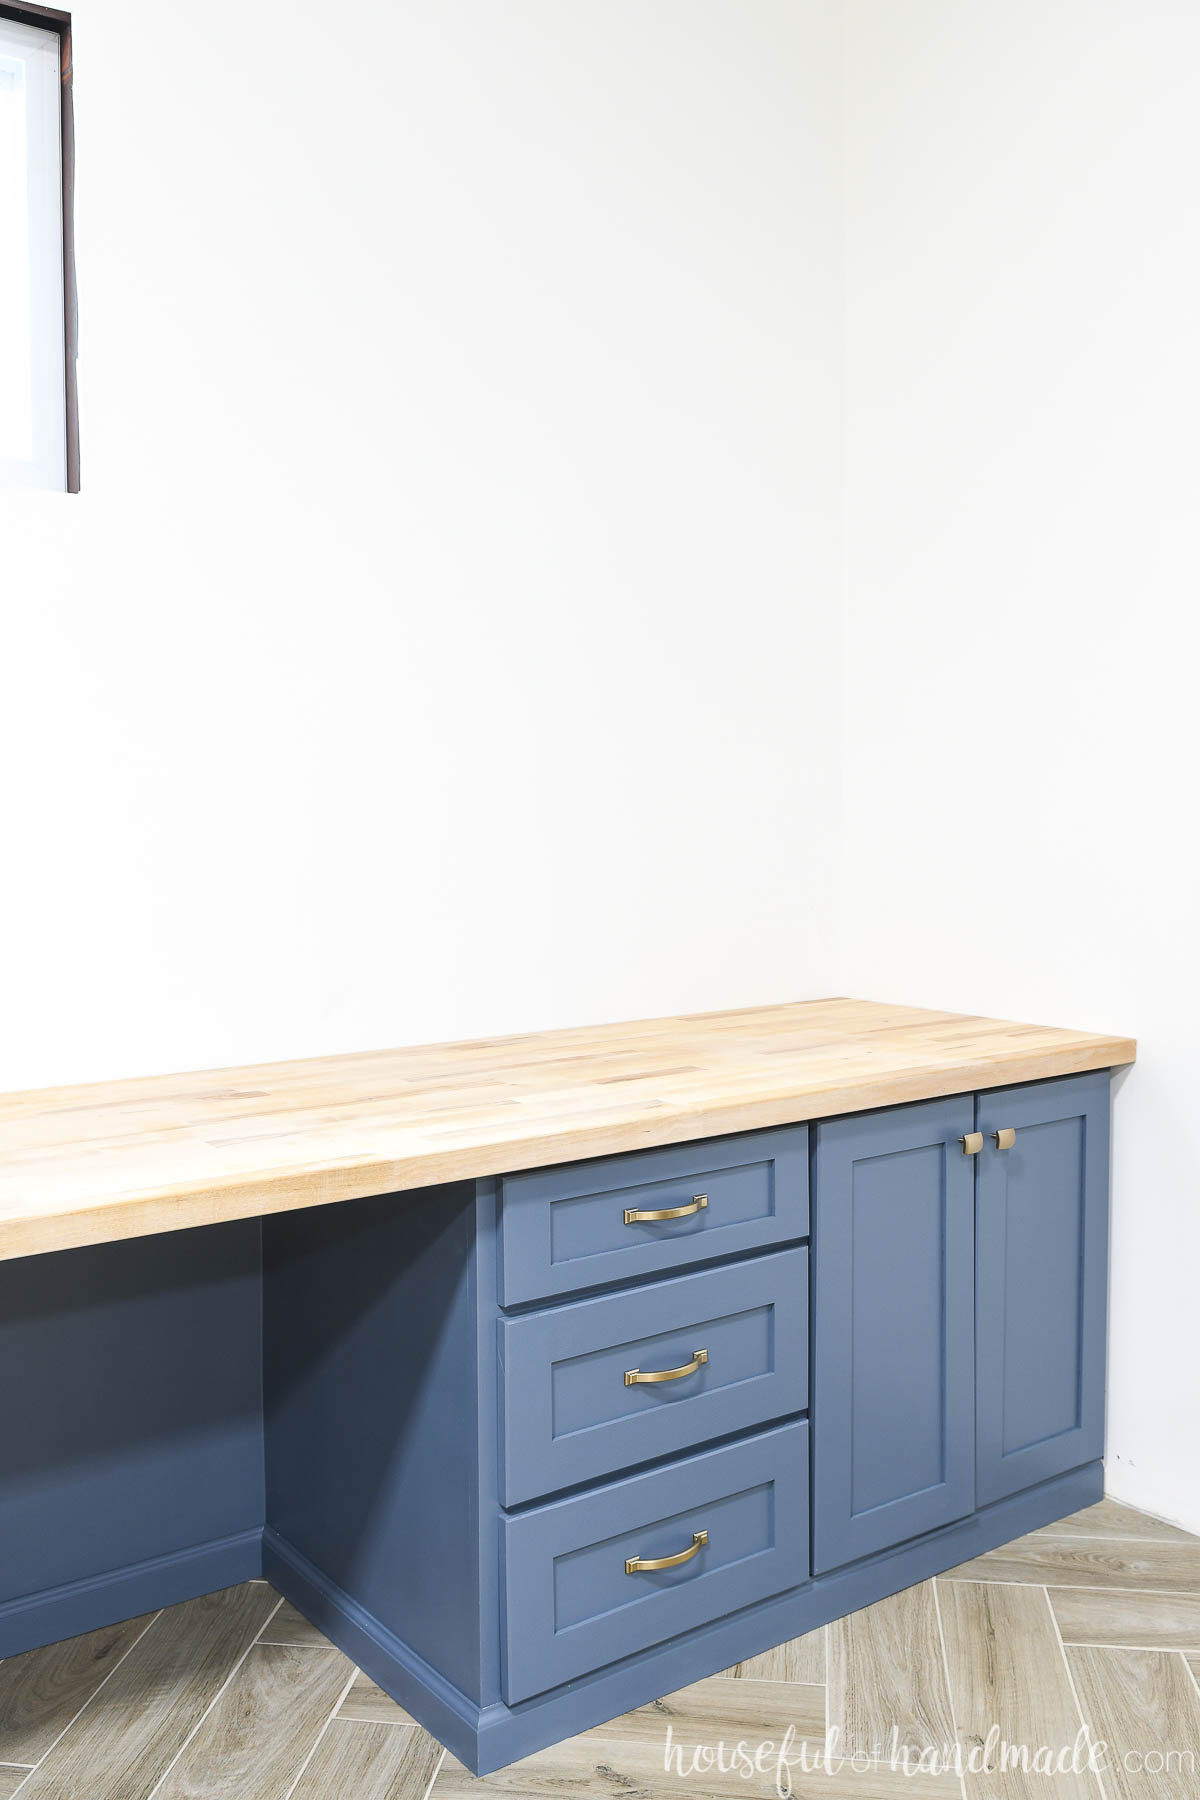
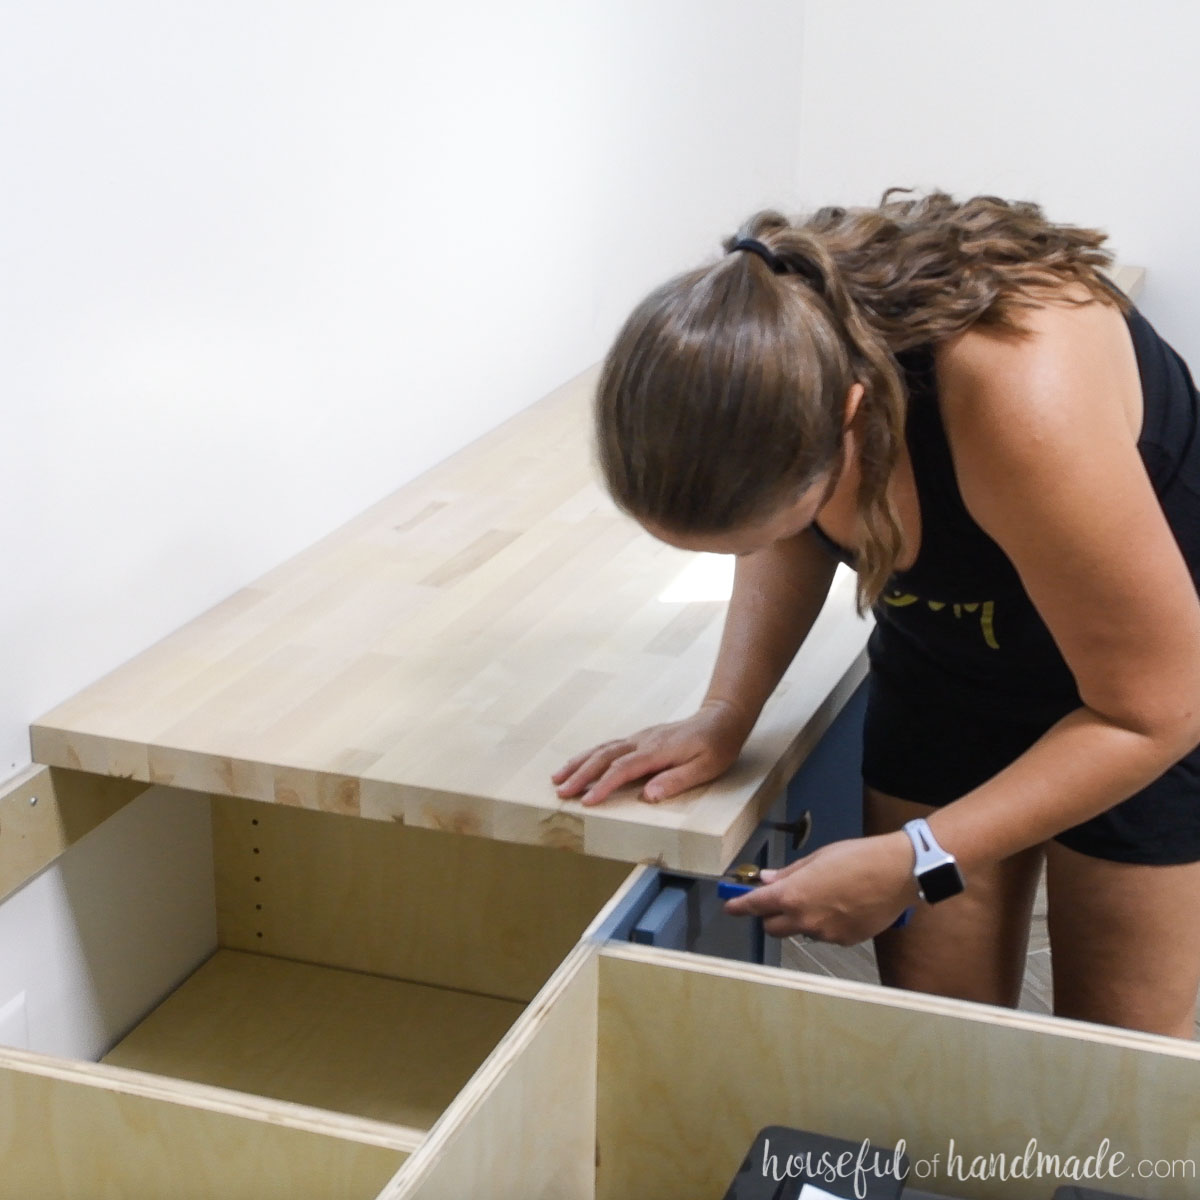
STEP 5- Secure Countertop to Cabinets
The butcher block countertop is now in the right shape over all the cabinets. It will probably barely move around because it is big.
But you still want to secure it to the cabinets. This will pull it level with the cabinets (that should have been leveled when they were installed).
For the wood scrap method (see above), add a washer to your wood screw and screw it into the countertop to pull it tight to the cabinet.
Make sure the screw is long enough to go through the wood scrap and through most of the thickness of the countertop. I used 2″ screws so they were into the 1 1/2″ thick countertop 1 1/4″ after the 3/4″ wood scrap.
Also, use self-tapping screws or you will need to drill pilot hole in the countertop to prevent splitting.
For the z table top fasteners, place the bottom of the Z into the slot. Make sure it is not up against the edges of the slot.
Using a self-tapping screw, drill the screw through the hole in the top of the fastener to secure the countertop to the cabinet.
Use screws that are just shorter than the countertop thickness. I used 1 1/4″ long screws for my 1 1/2″ thick butcher block.
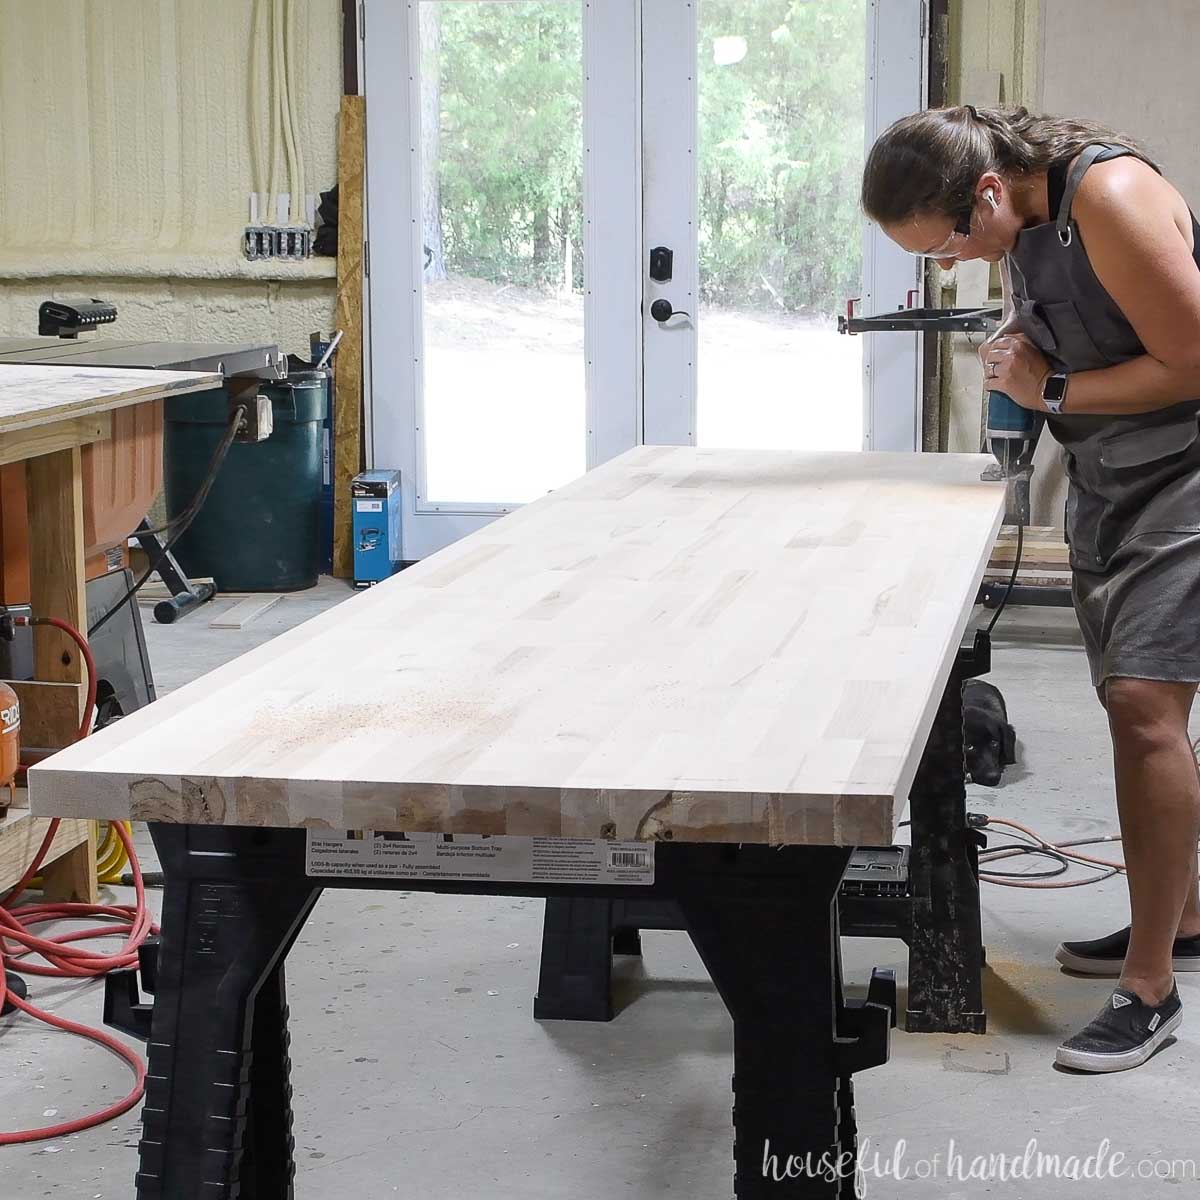
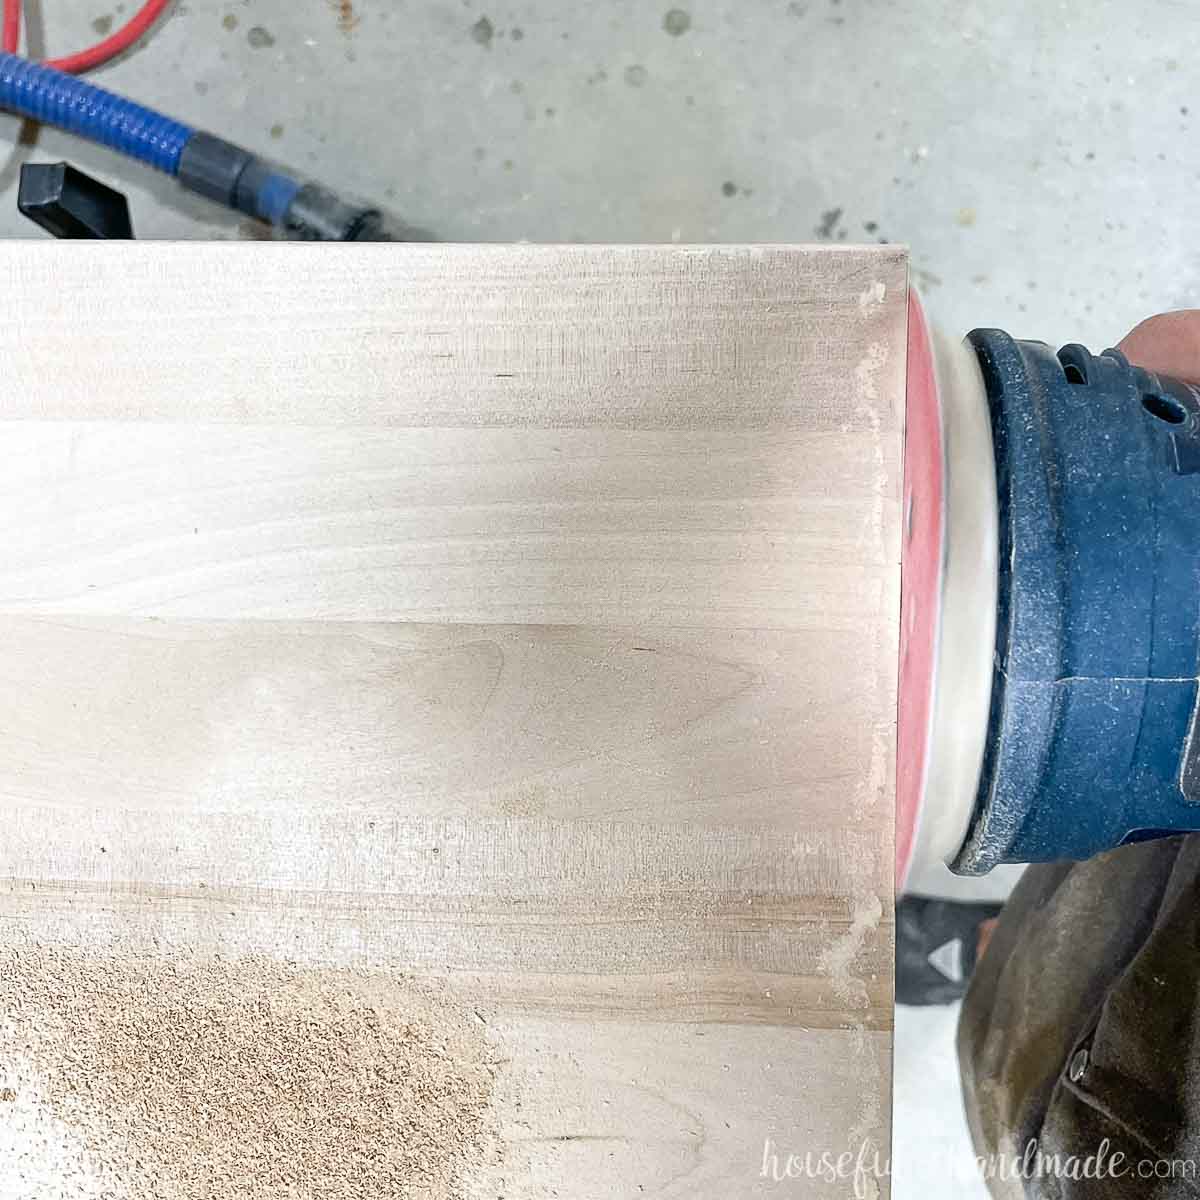
STEP 6- Sand and Prepare for Finish
No your countertop is installed and secured. Give it a good sanding.
Even with all your hard work on your seams, you will probably need to sand them a little extra to remove glue and make sure the countertop is smooth on top.
Start with a course sand paper to get things flush quickly. Then step down to a finer grit for your final sanding.
For a protected, but non-sealed look, I sealed this butcher block countertop with a buff-in matte finish. Learn how to finish countertops so they look unfinished here.
If you want a butcher block countertop that is maintenance free, check out how to seal a wood countertop here or how to seal a wood vanity top here.
All these finishes create an elastic barrier to fully protect the wood from water/oils/stains/anything a kitchen or bath can throw at them and they still look amazing!
Or you can seal them with a butcher block/cutting board oil. These finishes will need to be reapplied often to continue to offer protection from stains and water.
Whatever finish you decide, make sure to use a food-grade finish on any countertop in your kitchen.
Happy building!
