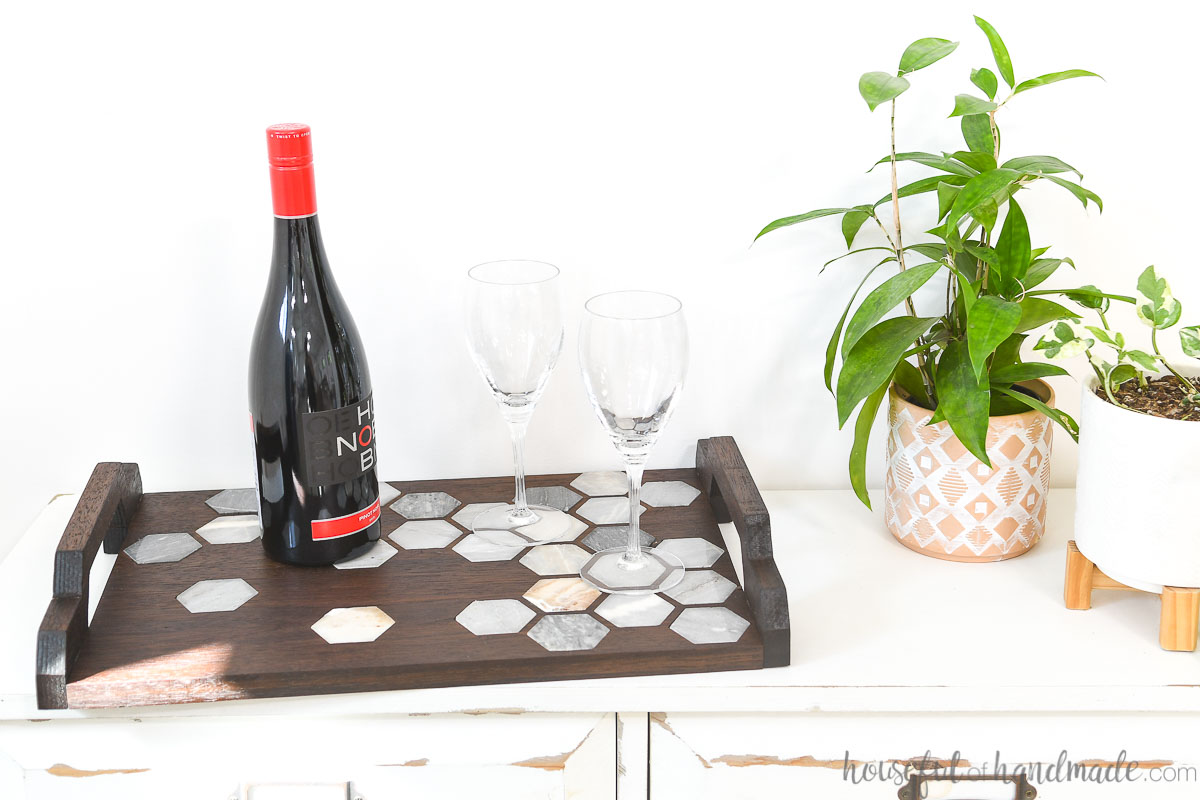
Create an amazing inlay tray with natural stone tiles.
Creating an inlay is such an easy way to make your wood project look AMAZING!
You can inlay a contrasting piece of wood. But when I found some beautiful marble hexagon tiles at the home improvement store, I knew I wanted to try to inlay them instead.
So I partnered with Inventables to create this tile inlay tray with my X-carve. The CNC machine makes it easy to add pockets to inlay all those pretty stone tiles.
This post may contain affiliate links. As an Amazon Associate I earn from qualifying purchases. Click here to read my full disclosure policy.
Best Tiles for Wood Inlays
When looking to use tiles as an inlay, you want to find tiles that do not slope at the edges. Look for tiles that are flat all across the top.
Natural stone tiles will typically be flat on top. Also, natural stone tiles will add lots of texture and movement from all the natural variation in the stones.
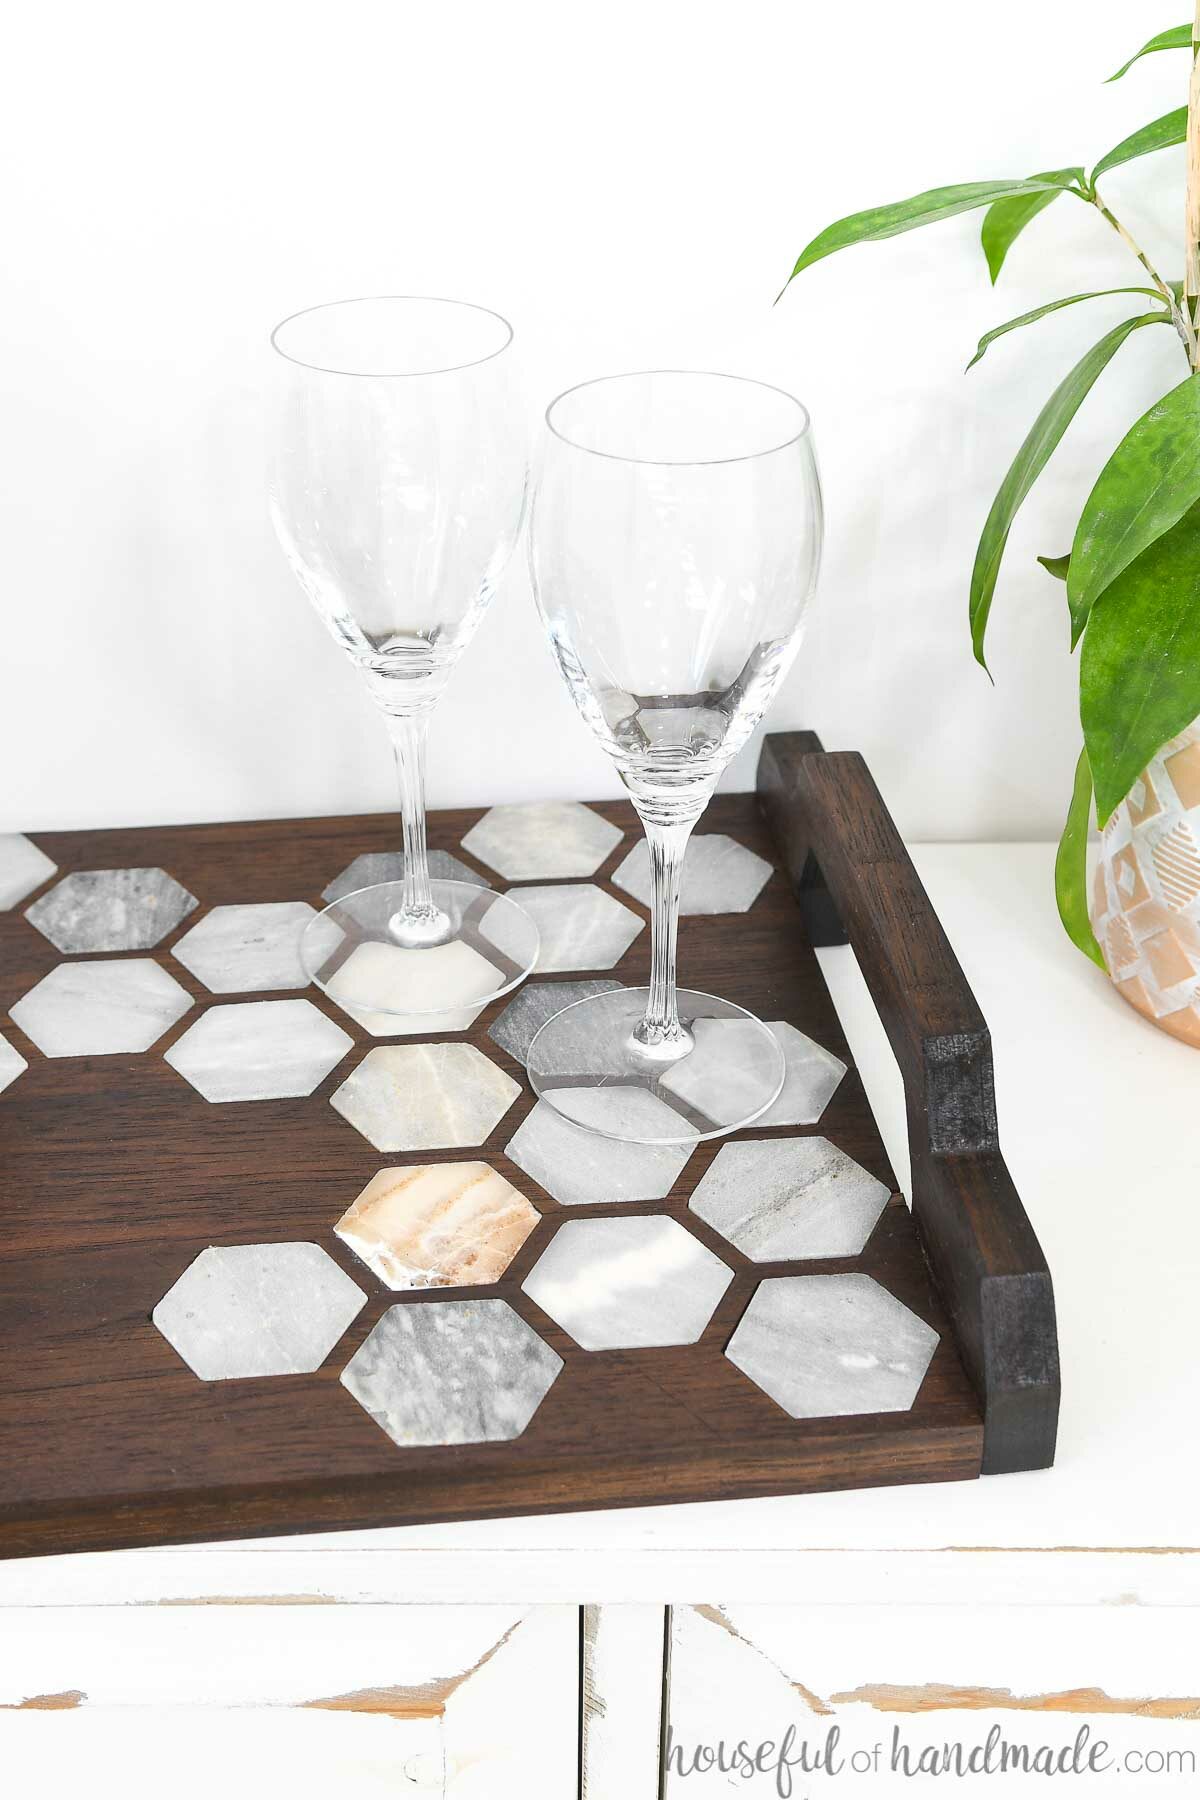
I chose hexagon marble tiles for my tray. But you could use any size of tiles you find. The more complex the tile, the more tests you might have to do to get the inlay pockets correct.
Make sure to find a sheet of tiles with lots of color variations and textures in your tile to give your inlay lots of movement and style.
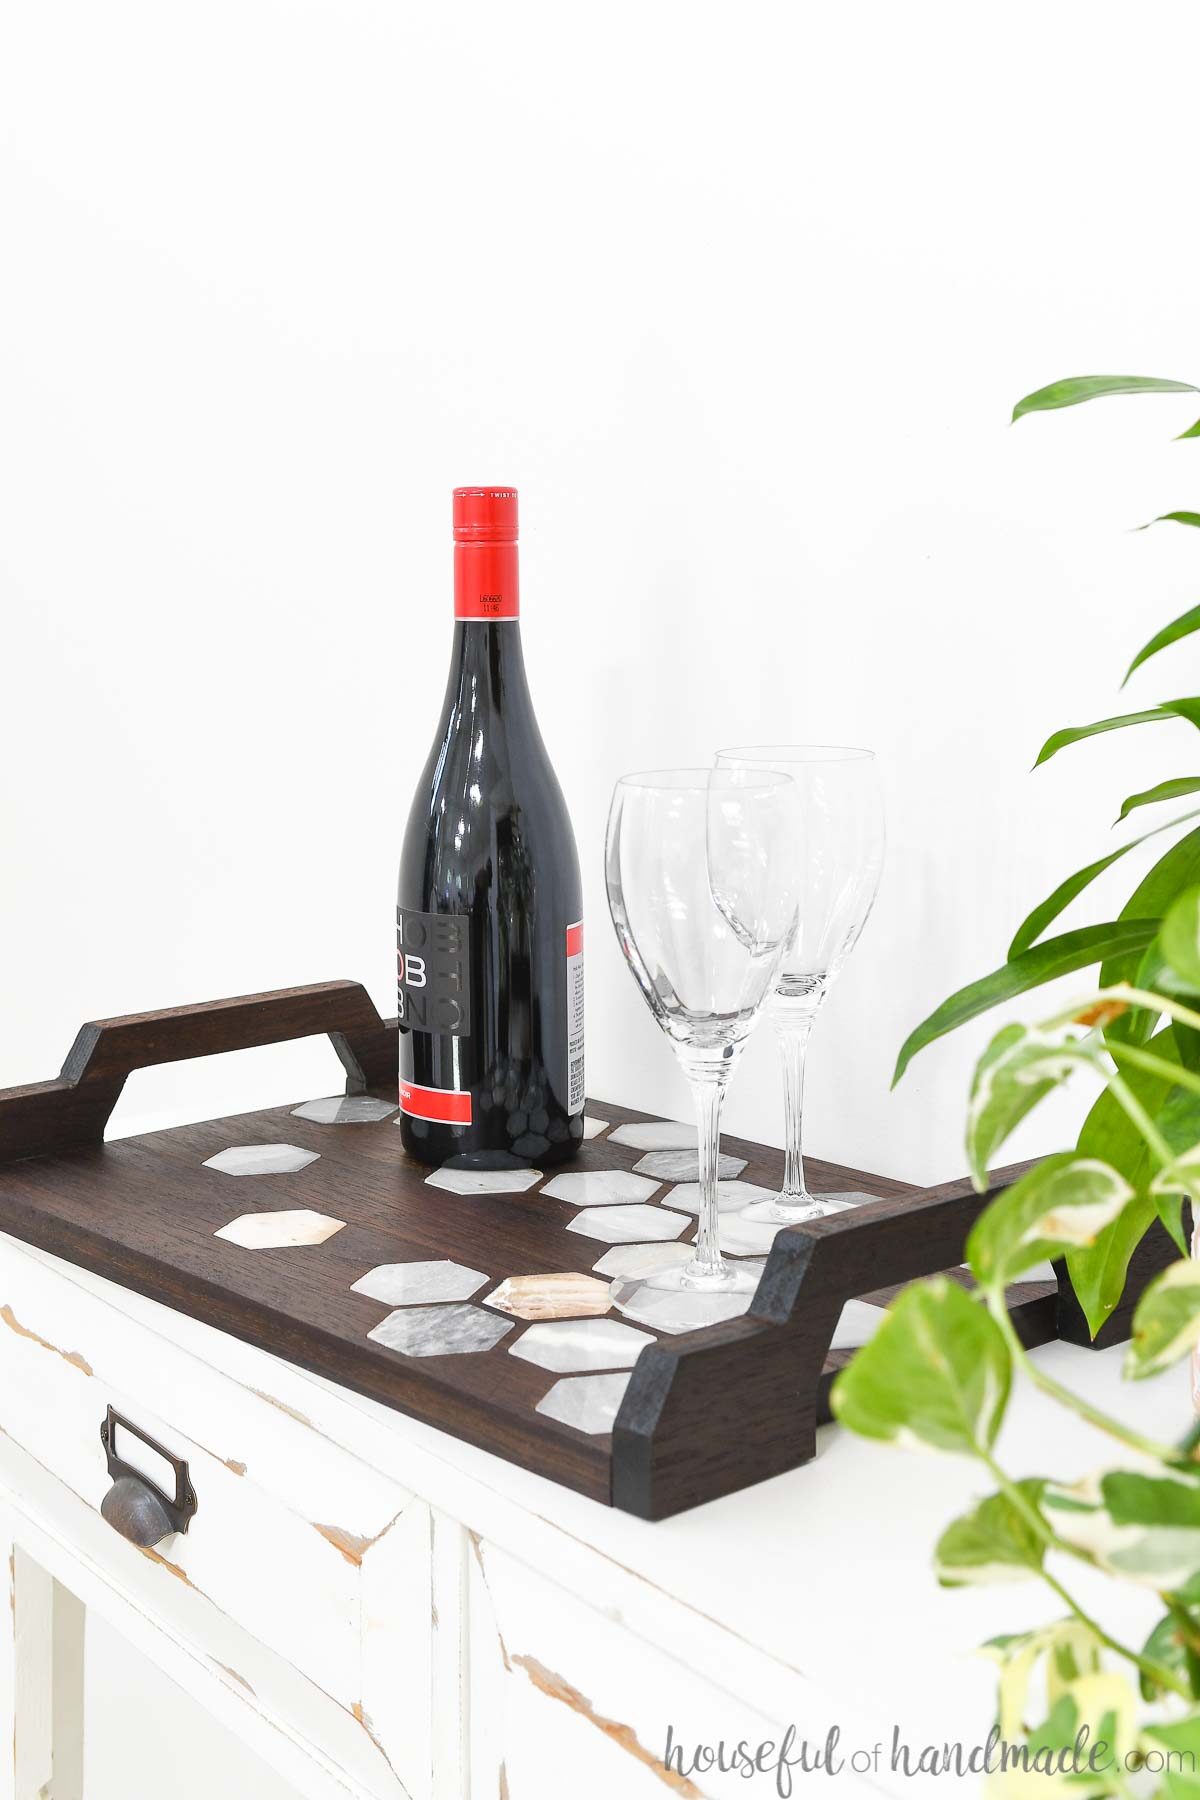
How to Use Serving Trays in Decor
Serving trays are obviously great for serving. When you have a gathering you can load them up with snacks or deserts or drinks to move them from the kitchen to the party.
But between parties, what should you do with them?

Here are few ideas on ways to use your DIY tray as decor in your home:
- Place it on your coffee table to define a location for magazines and the remote.
- Use them as the base for a table centerpieces.
- Tuck it in the corner of your kitchen countertop to corral items like bread or snacks.
- Create a vignette on top of it with seasonal decorations to place on a table.
WHAT IF I DON’T HAVE AN X-CARVE?
There are so many amazing things you can make with an X-carve CNC. It would be a great investment if you want to start your own business or Etsy shop selling handmade decor items.
But if you do not have an X-Carve, you still have options.
- Some high schools, libraries, and maker spaces have X-Carves you can use.
- You could lay the tiles on the wood and fill the space around them with epoxy. Then cut the handles on a scroll or bandsaw.
- Save up and buy an X-carve! There are so many amazing things you can make with it. And you can always use it to make items to sell.
Either way, start by signing up for a free Easel account to start designing your own DIY light. You can play around with the detailed preview to show you how it looks carved out of your wood with different bits.
How to Make a Tile Inlay Tray
Tools & Materials
Recommended Tools:
- X-Carve with Easel Pro account
- 1/8″ straight bit
- 1/16″ upcut spiral bit
- Digital Calipers
- Utility knife or chisel
- Clamps
- Doweling jig
- Dowel points
- Sander
- Drill press or drill with drill guide
Supplies:
- 12″ x 17″ piece of wood
- (2) 3 1/2″ x 13″ pieces of wood
- Marble hexagon tiles
- 1/4″ dowels
- Tung oil or cutting board sealer
Prefer to Watch? Check out the Video Below
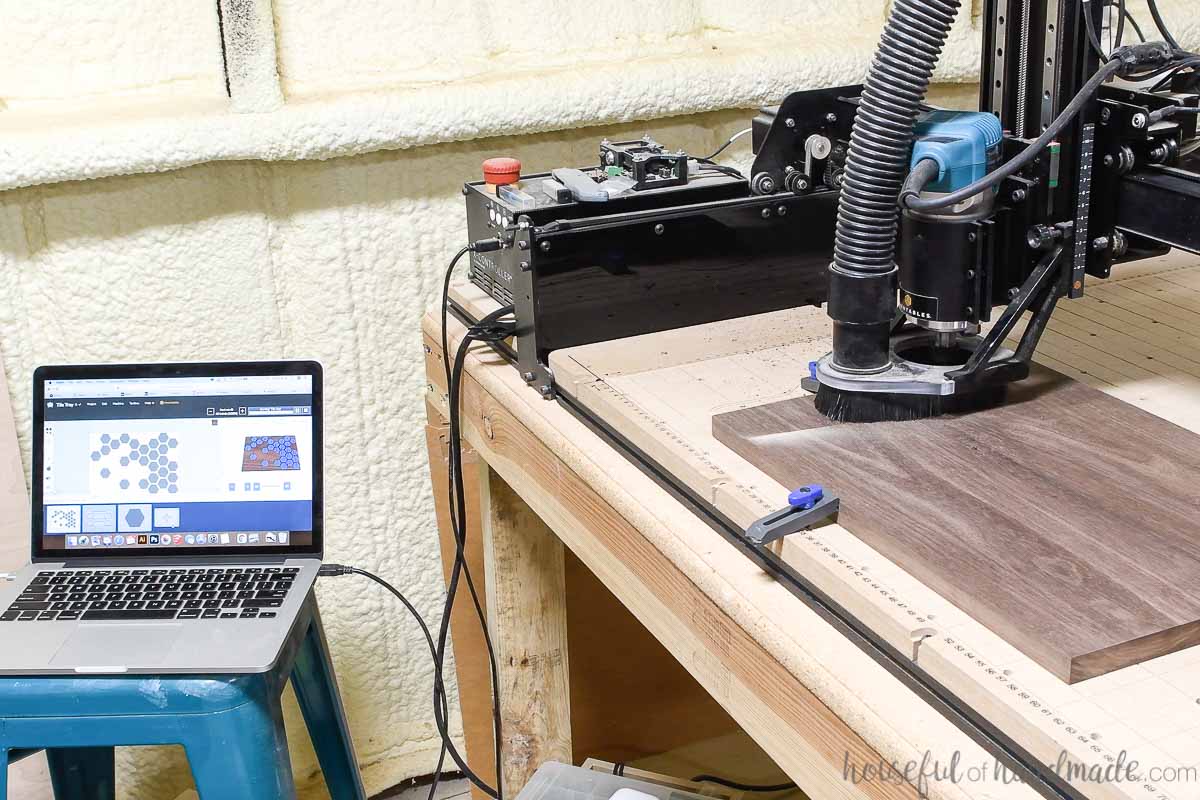
STEP 1- Create the tile inlay design
You can use the designs I created for the tile inlay tray by first, signing up for a free Easel account, then clicking on the link below to open the file. You will need an Easel Pro account to use the 2-bit carving feature.
When you open the link, it will not be editable unless you make a copy.
In the file, there are 3 different workpieces on the bottom: one for the tray bottom, one for the tray handles, and the third has the single tile for the test cut.
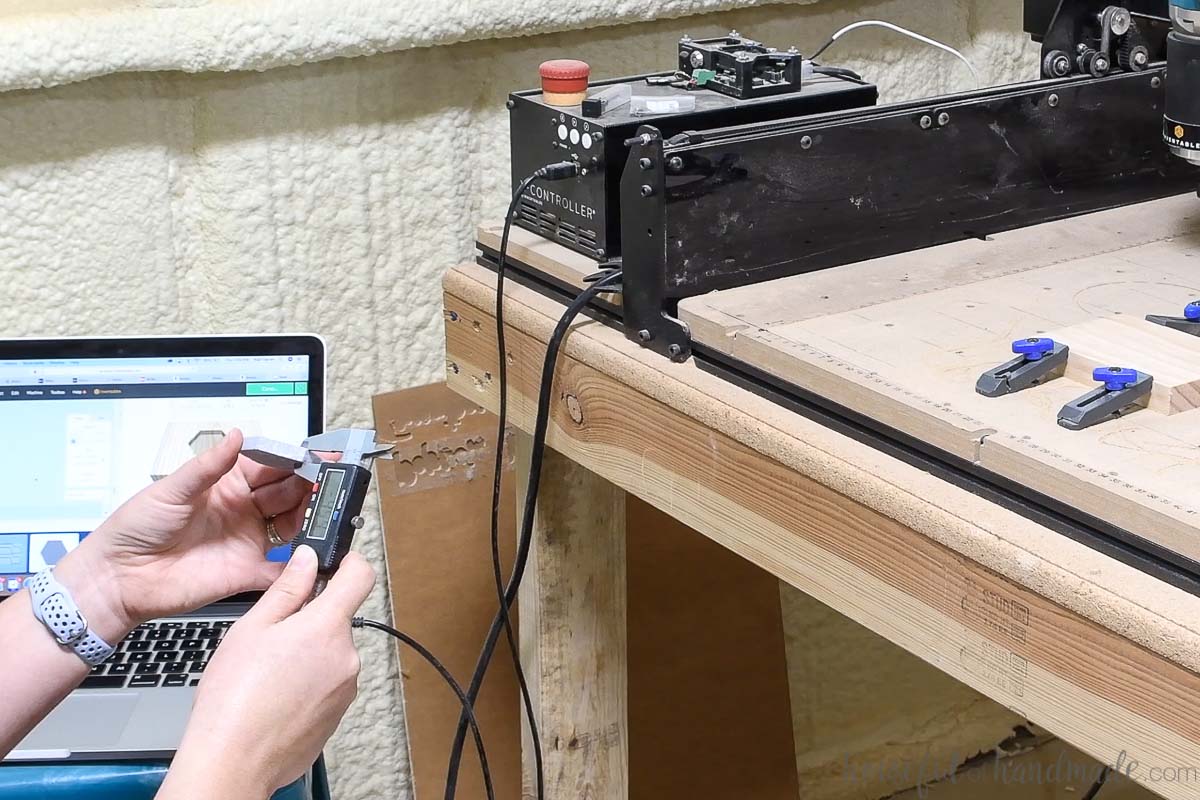
Measure your tiles
Find the flat tiles you want to use on your inlay tray.
Measure carefully the size of the tiles and the thickness. The digital calipers are great for this.
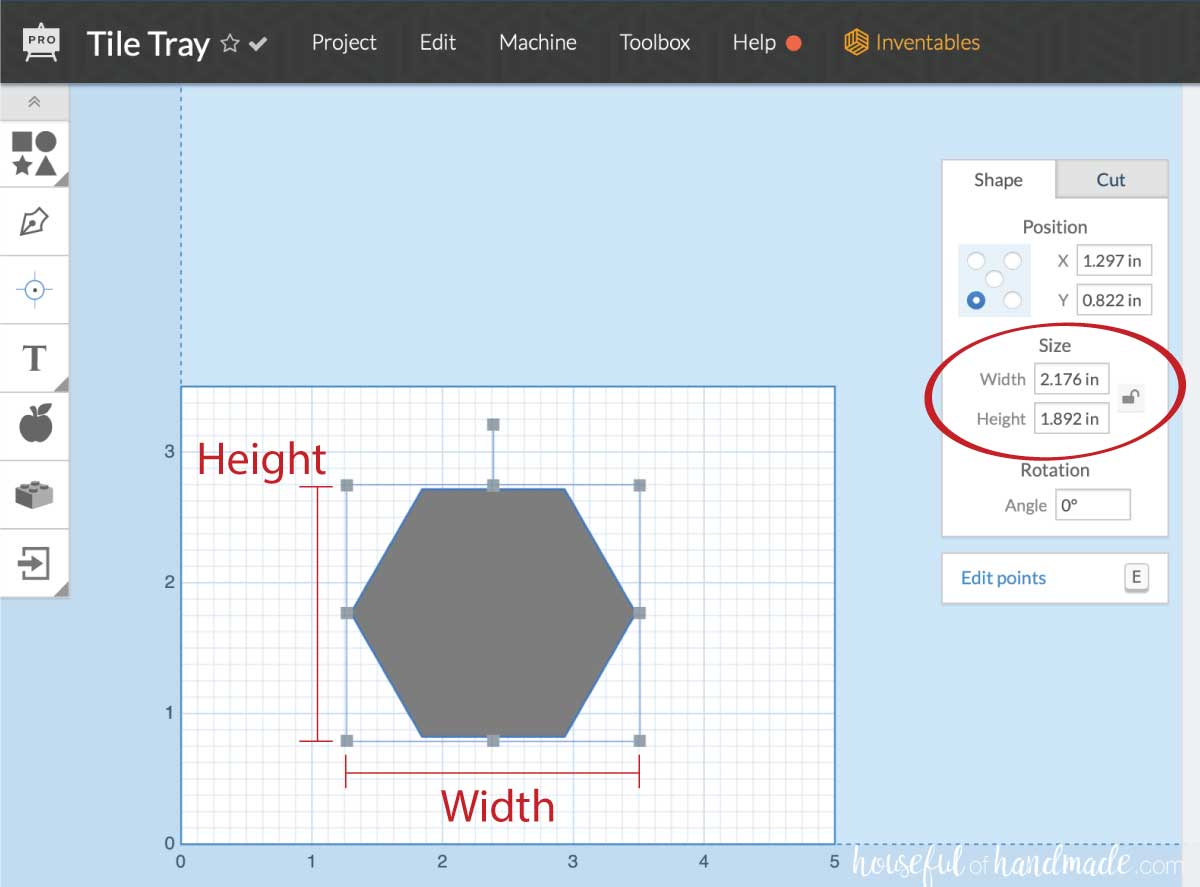
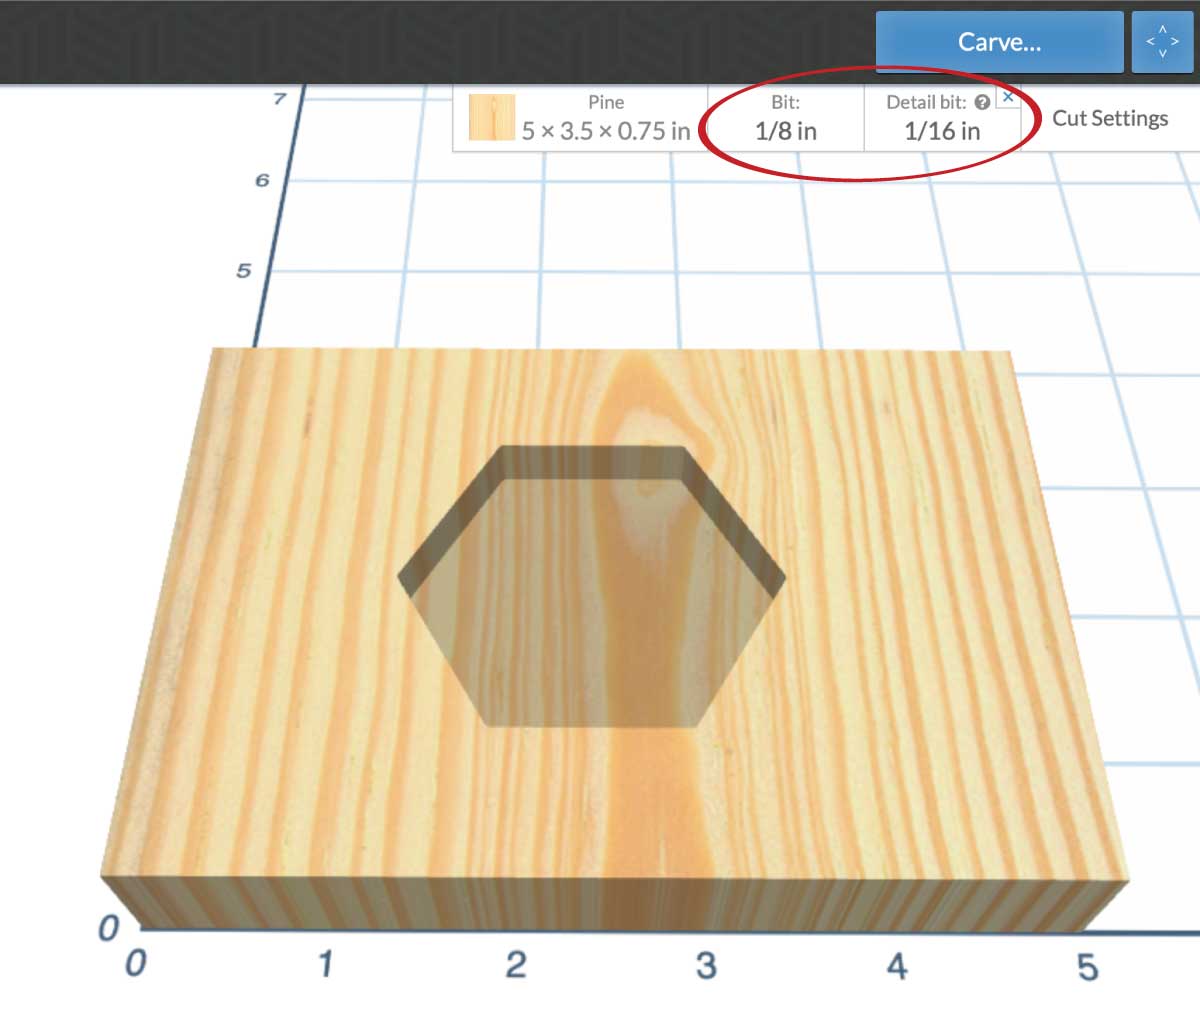
Create a hexagon (or whatever shape your tiles are) in Easel and change the size to the size of your tiles.
For a hexagon, the width will be the size from point to point and the height will be the size from flat edge to flat edge.
Set the cut depth to the thickness of the tile.
Now before cutting you also need to a add a second bit to the design (this is an Easel Pro feature). This will allow you to do a roughing and detail cut on your inlay pockets.
We will use the 1/8″ straight cut bit to rough in the pockets. Then switch to the 1/16″ upcut spiral bit for the details.
If you try to cut all the inlays pockets out with the smaller bit, it would take forever. And if you only cut the pockets with the larger bit, you will have rounded corners that will not fit your tiles.
STEP 2- Cut a test inlay pocket
Secure a piece of scrap wood to the waste board. Set your x-carve up with the 1/8″ straight bit.
Click carve and walk through the prompts to cut the test cut.
Then switch out your bits and press carve again. It will ask you to verify the size of each bit and clarify that you are doing the detail pass.
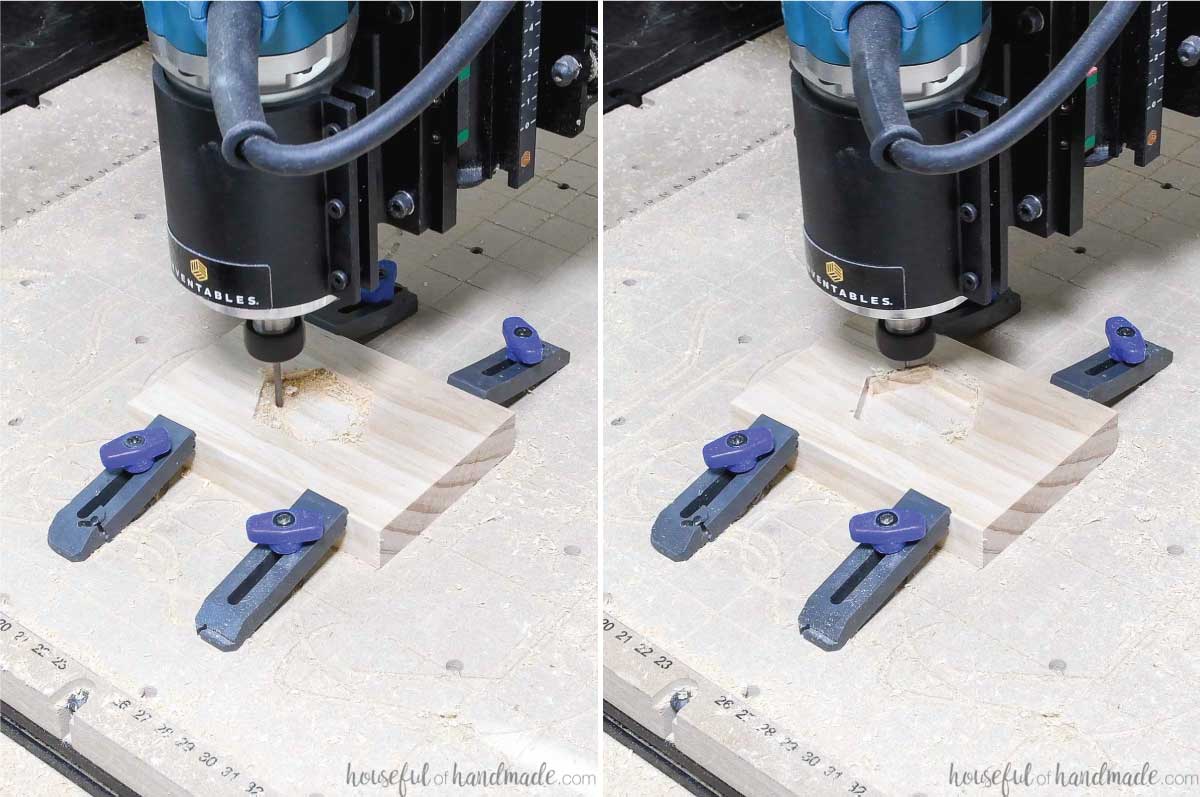
Make sure to use the same XY location as the first. My machine jogged a little bit when I switched the bits so the detail pass was slightly off.
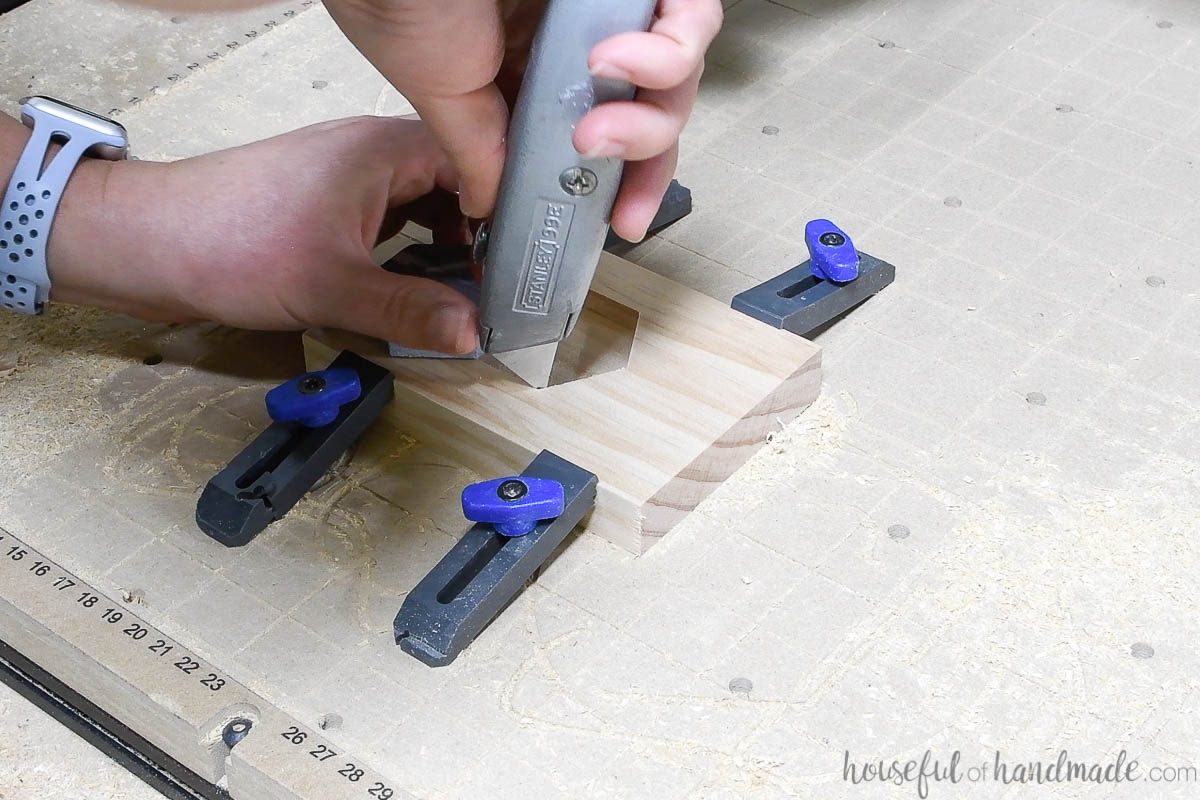
But it was easy to pop out the leftover pieces. Then I used a utility knife to clean up the sides of the pocket in a couple spots.
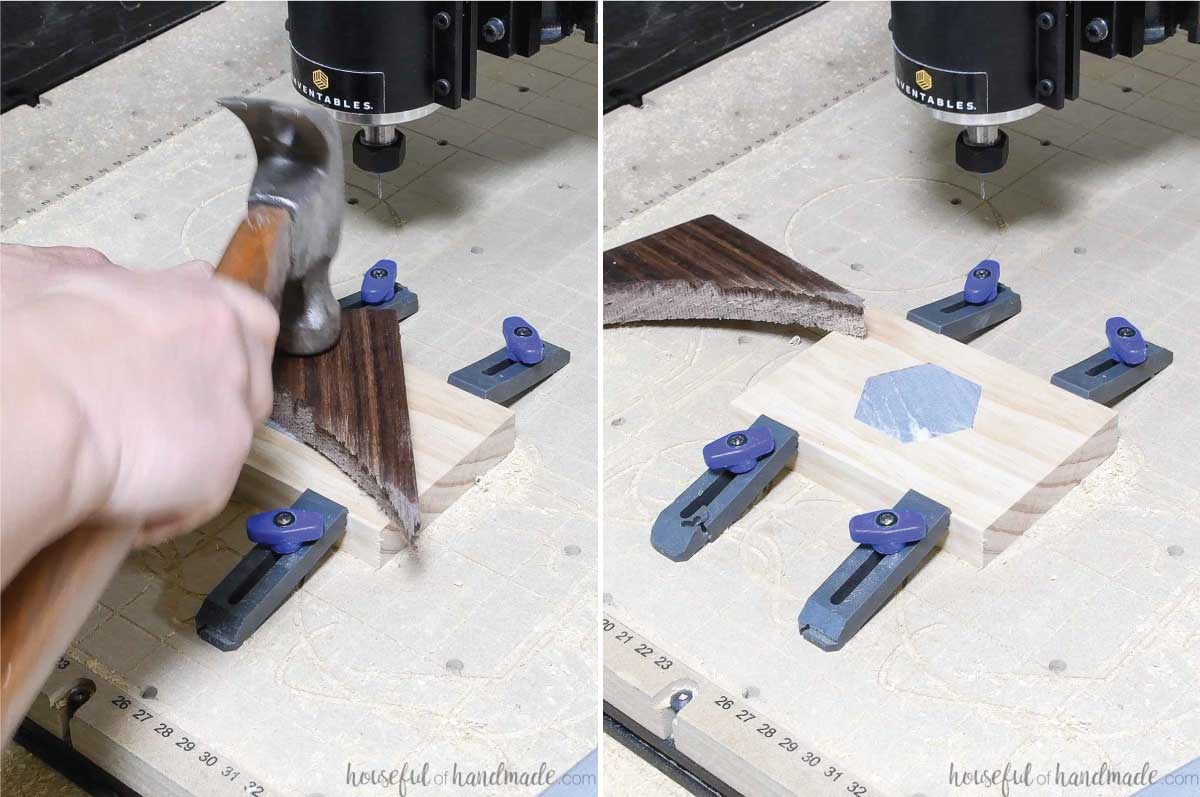
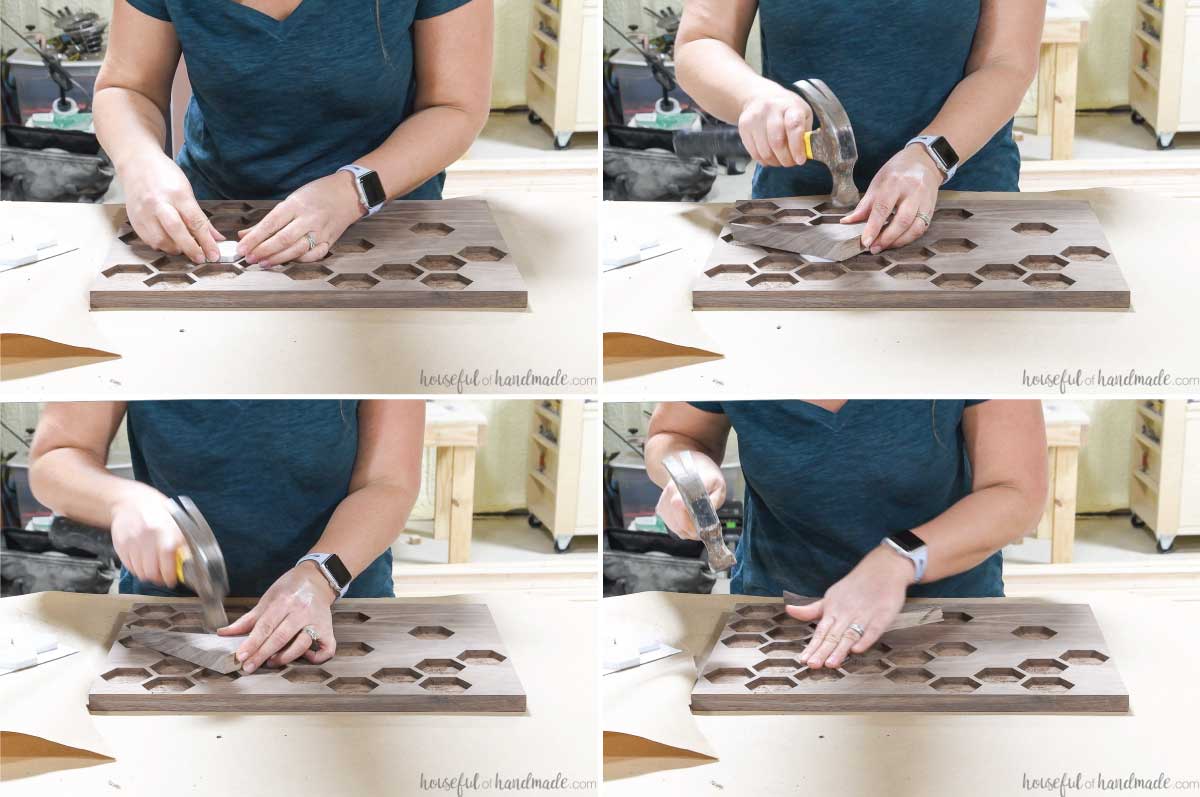
Make sure all the sawdust is out of the inlay pocket then place the tile in it. Tap it in to secure with a scrap piece of wood and a hammer.
If it does not go in, your pocket is too small. If there are large gaps around the edges, your pocket it too large. And if the tile is not flush with the top of the wood, the depth is off.
Make adjustments and re-test cut as needed.
For my tray, the test tile went in perfectly, but the remaining tiles seemed too tight. I wish I had given myself a little more space on the pockets and used glue if needed to hold them in place.
Lesson learned!
STEP 3- Carve the tray pieces
Once you are happy with your test piece, adjust the final design as needed so the size of the inlay pockets are the same.
Cut the tray wood to the size needed and sand it smooth. Secure it to the waste board.
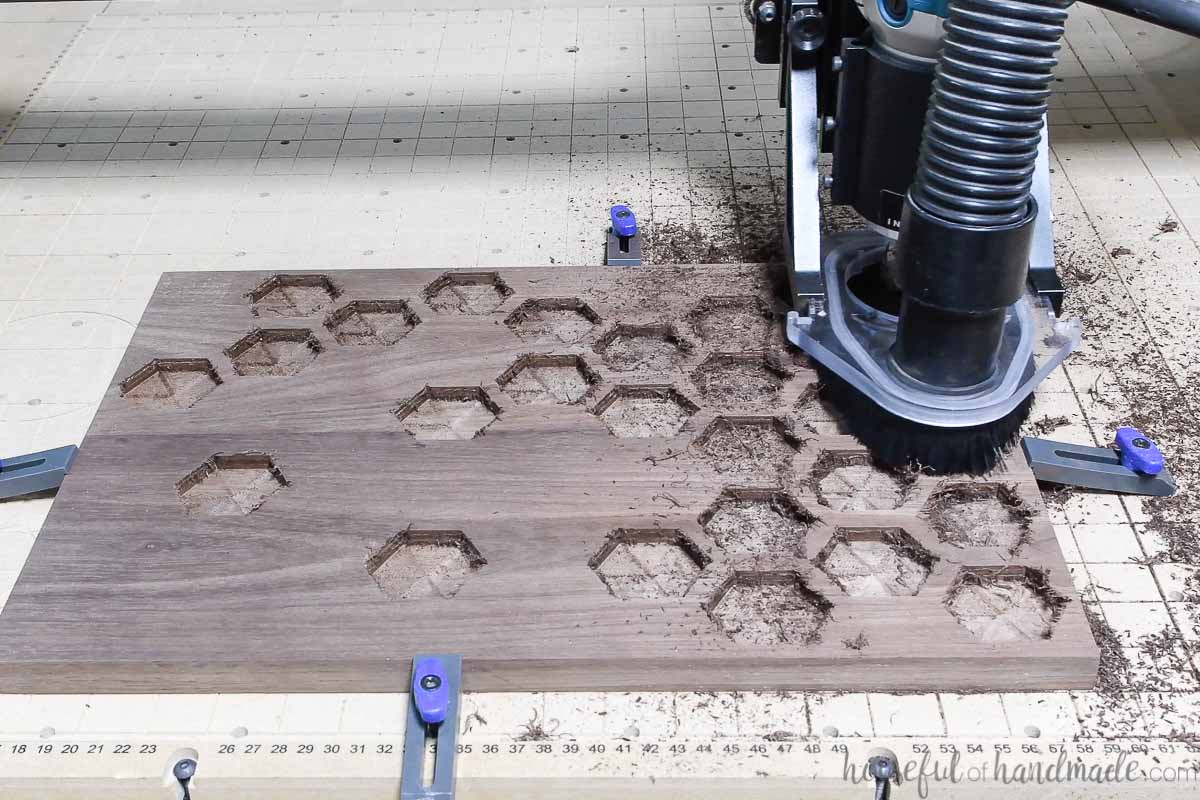
Switch back to your 1/8″ straight cut bit for the roughing pass.
Open your design in Easel and hit Carve. Follow the prompts to cut out the roughing pass.
You will see that the sides of the pockets looks a little frayed. This was just the walnut not cutting smoothly with this bit on the angles. With or against the grain it cut great.
Don’t worry, you can easily clean this up with the detail pass and some light sanding.
Swap out the bit, being careful not to jog the machine (like I did).
I always forget to click the option to lock the machine when doing this.
Another option is to always set your XY zero at the machine home position so if you jog it, you can re-home it before the second cut (which I also did not do this time).
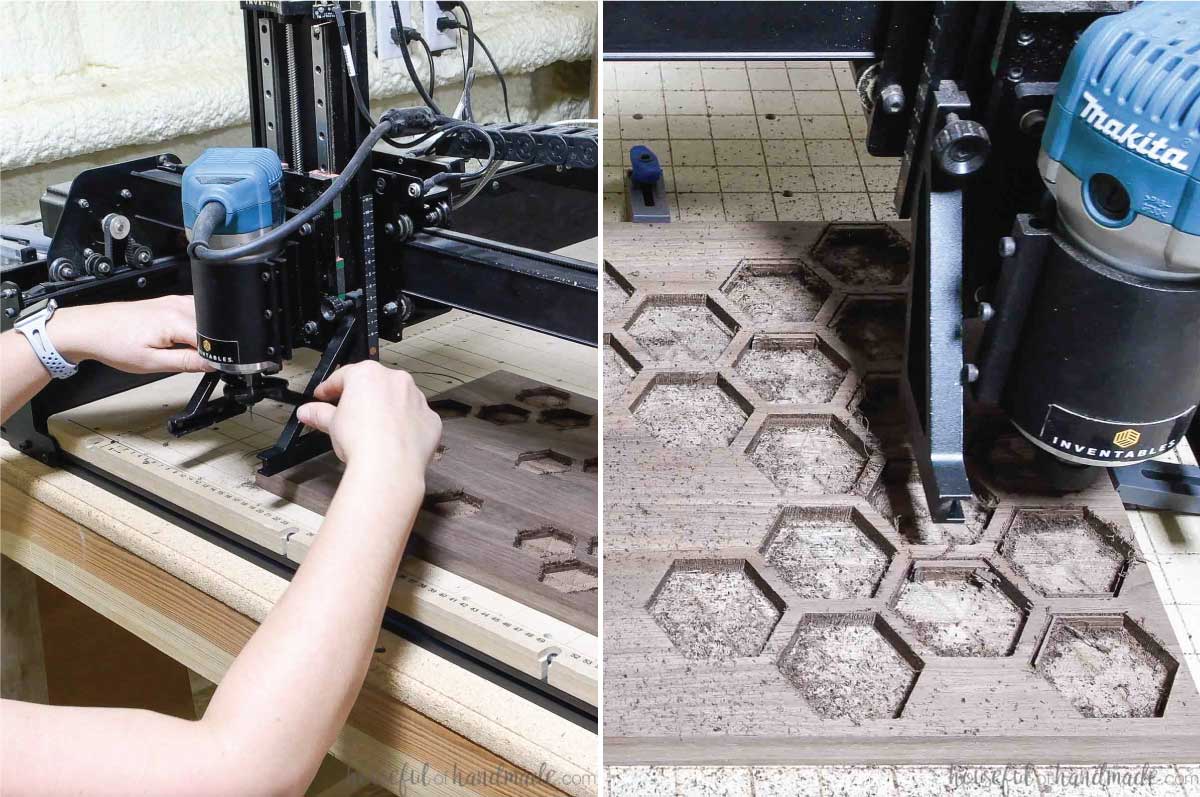
Use a chisel or utility knife to clean out any thing in the pockets. Then sand the surface as needed before adding in the tiles.

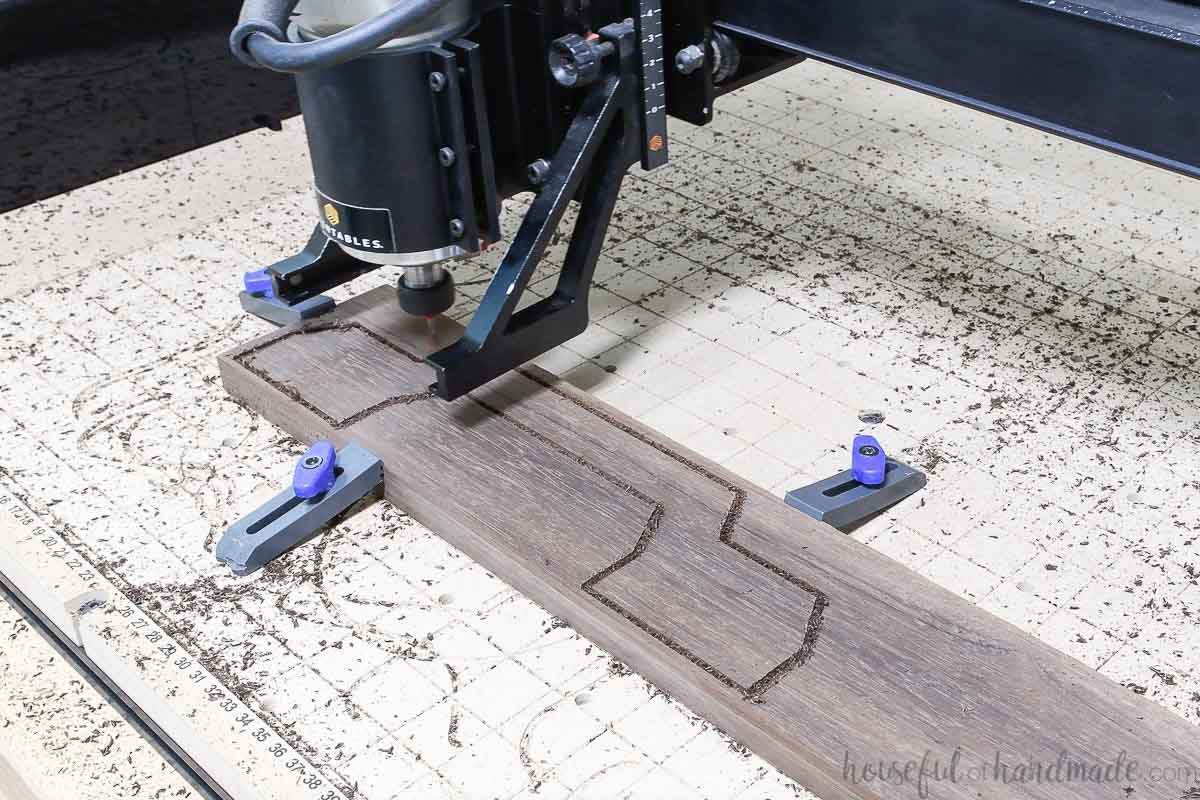
Select the second workpiece on the bottom of the Easel file and carve out 2 of the handles. Then sand the edges.
STEP 4- Inlay the tiles
Peel the tiles off the backing. Make sure there is not glue clumps to prevent them from sitting flush.
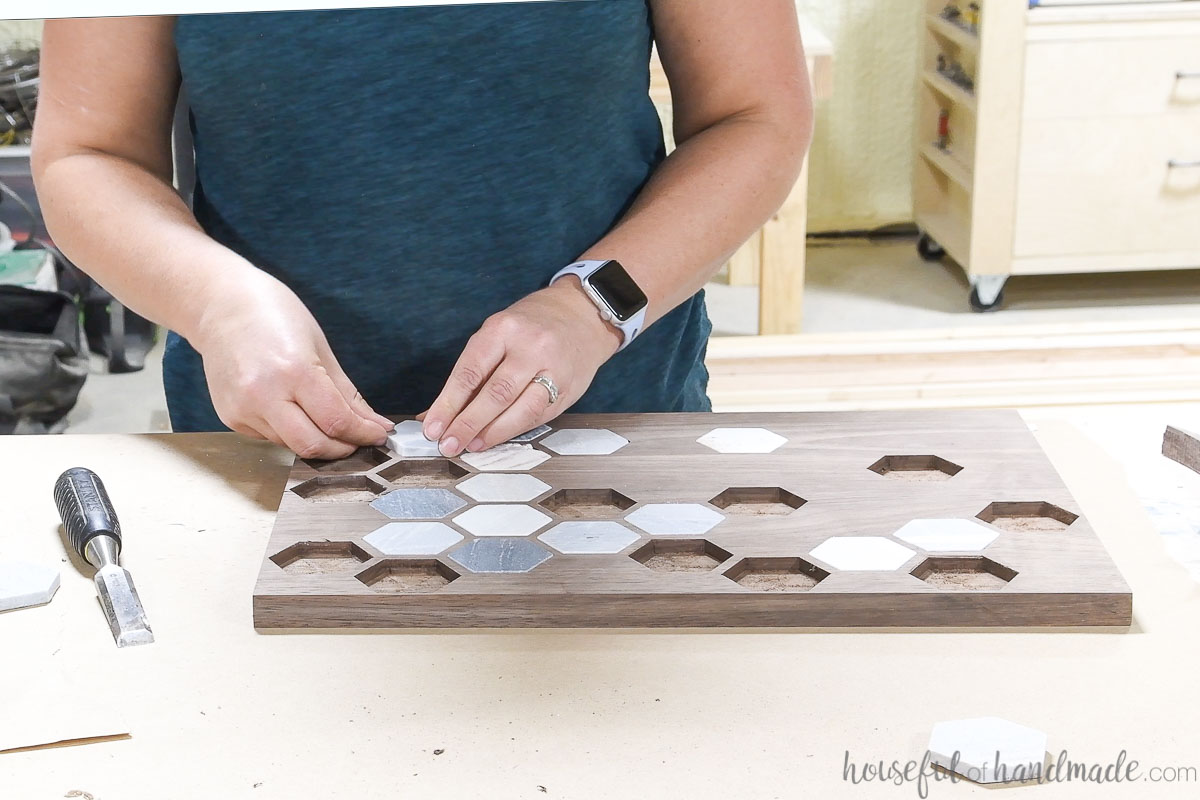
Start adding in tiles the same way you did for the test tile.
Take your time evenly distributing tiles of different hues throughout the tray so not all light colors or darker colors are clumped together.
The tiles are not all going to be the same size. Some may be too big to use in the inlays.
As I mentioned above, I wish I would have made my pockets every-so-slightly bigger. The test tile went in smoothly, but I struggled with a lot of the tiles on the tray.
One of my favorite colored tiles even crumbled as it was tapped into the pocket. I used a tiny bit of white tinted epoxy to fill in the corner where it crumbled.
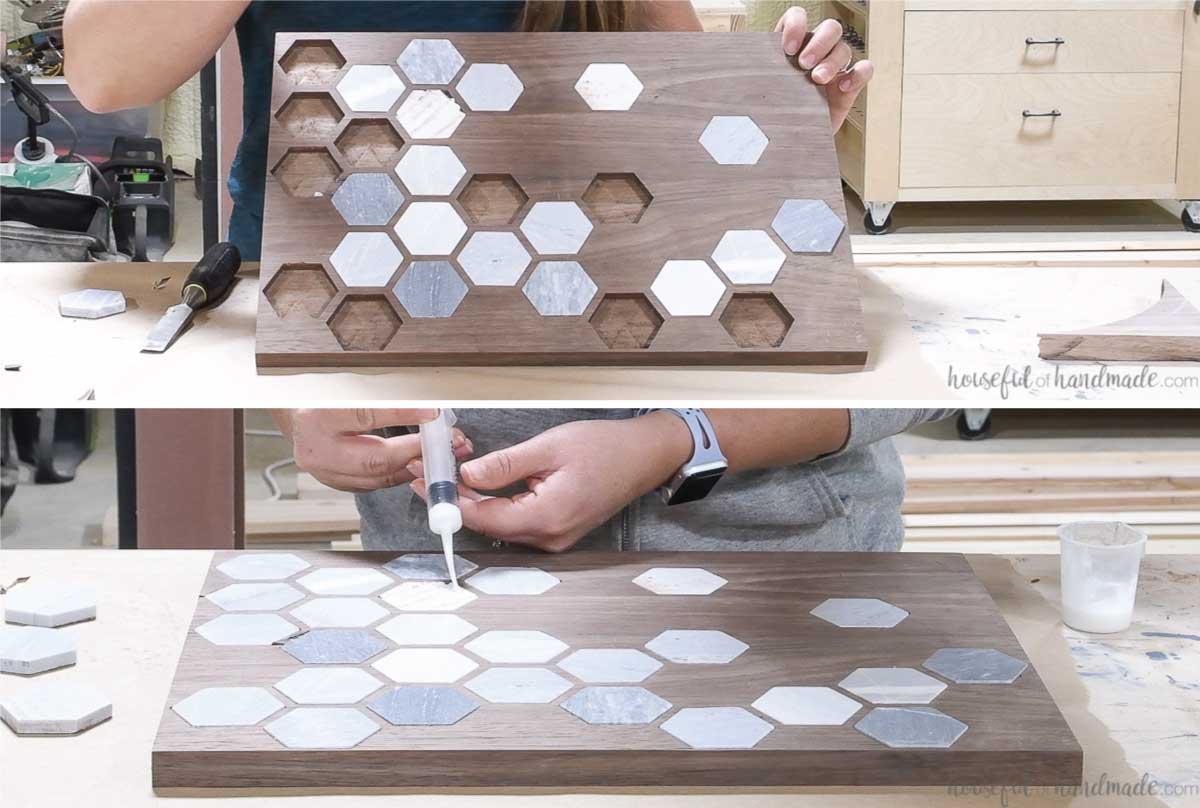
Tap in all the tiles. If any are not secure, you can use glue to prevent them from coming out of the pockets. All of mine were very secure.
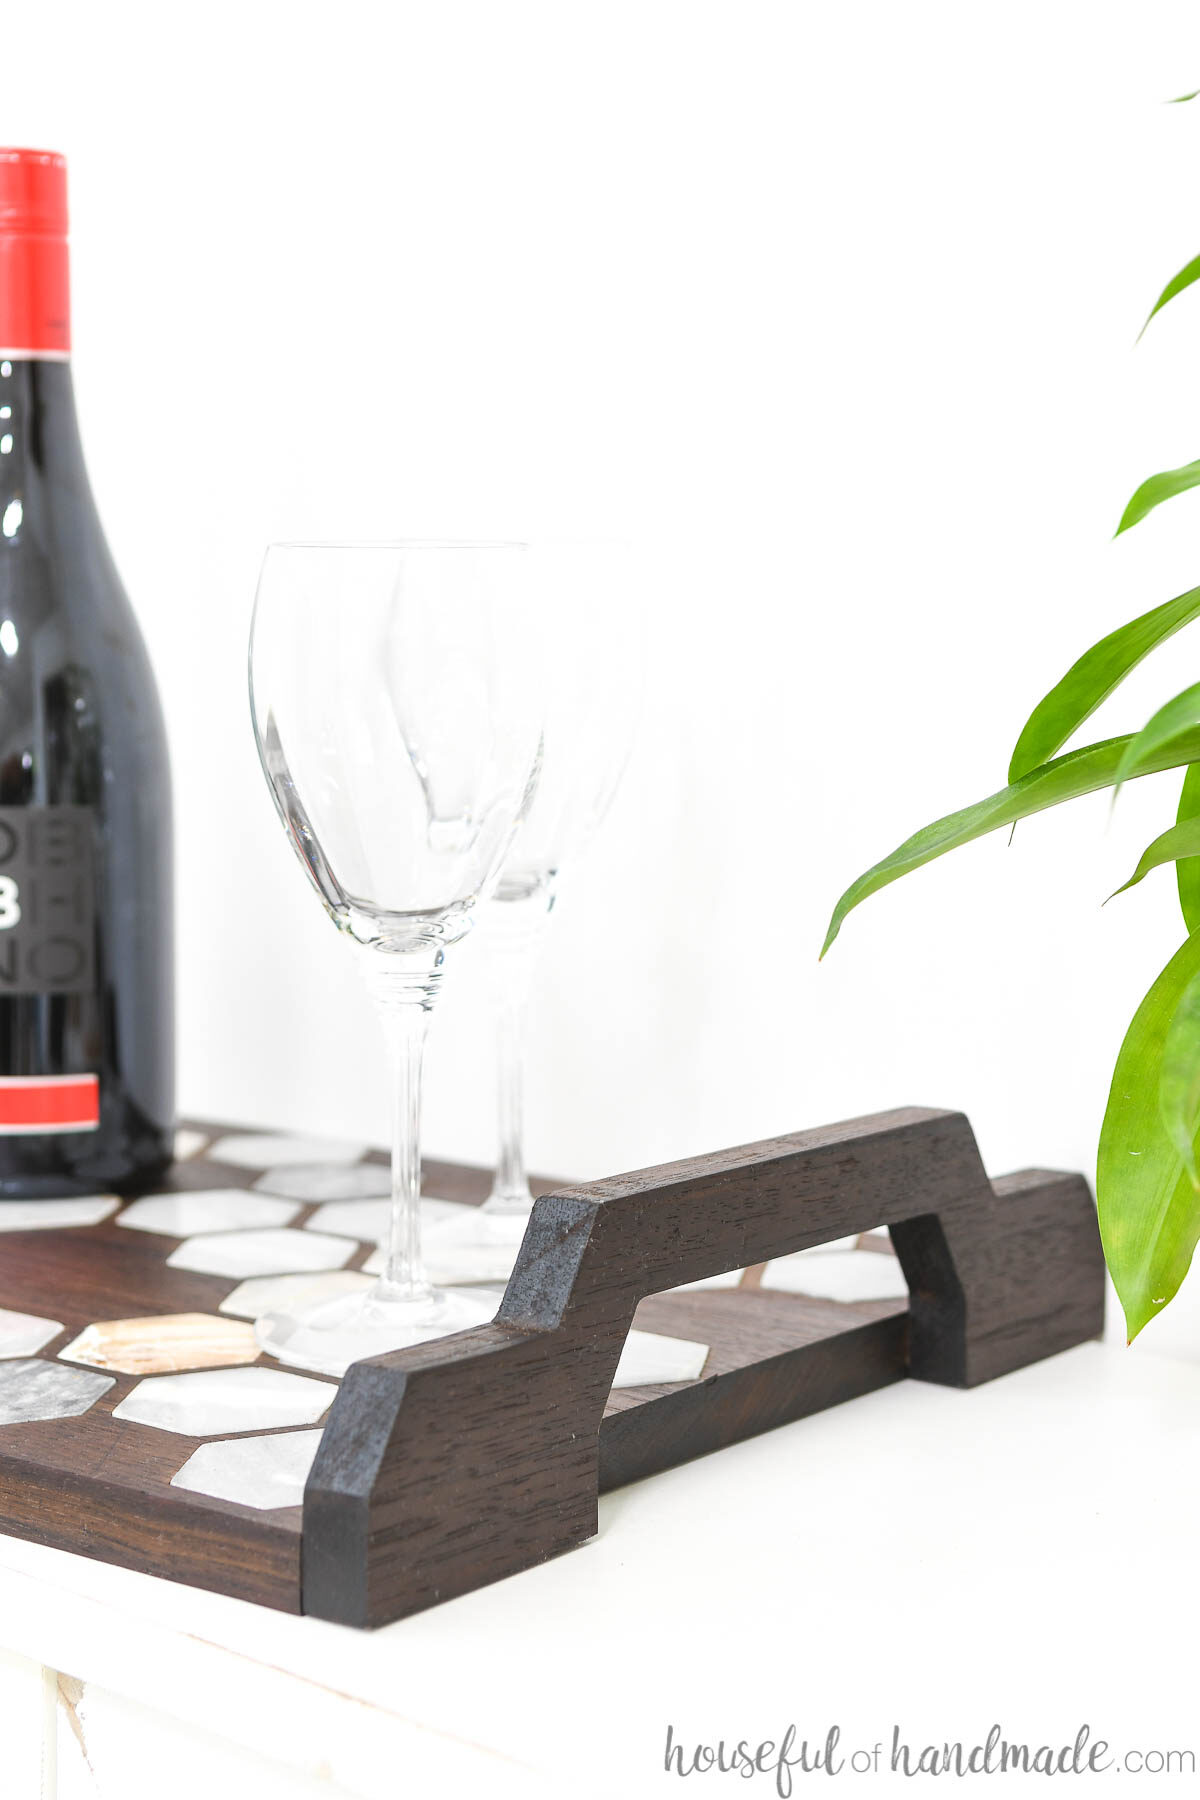
STEP 5- Attach the handles
I used dowels to attach the handles to the sides of the tray. You could also use screws and plug the hole with a matching dowel.
When adding dowels to the tray, you have to be careful to avoid the tiles. So on one side of the tray I only was able to use 1 dowel on each side of the handle.
But on the other side I used 2 on each side for a total of 4 dowels.
After you mark where the dowels will go, use a doweling jig to drill the holes in the side of the tray.
Use a drill press or drill with drill guide to add the holes to handle pieces.
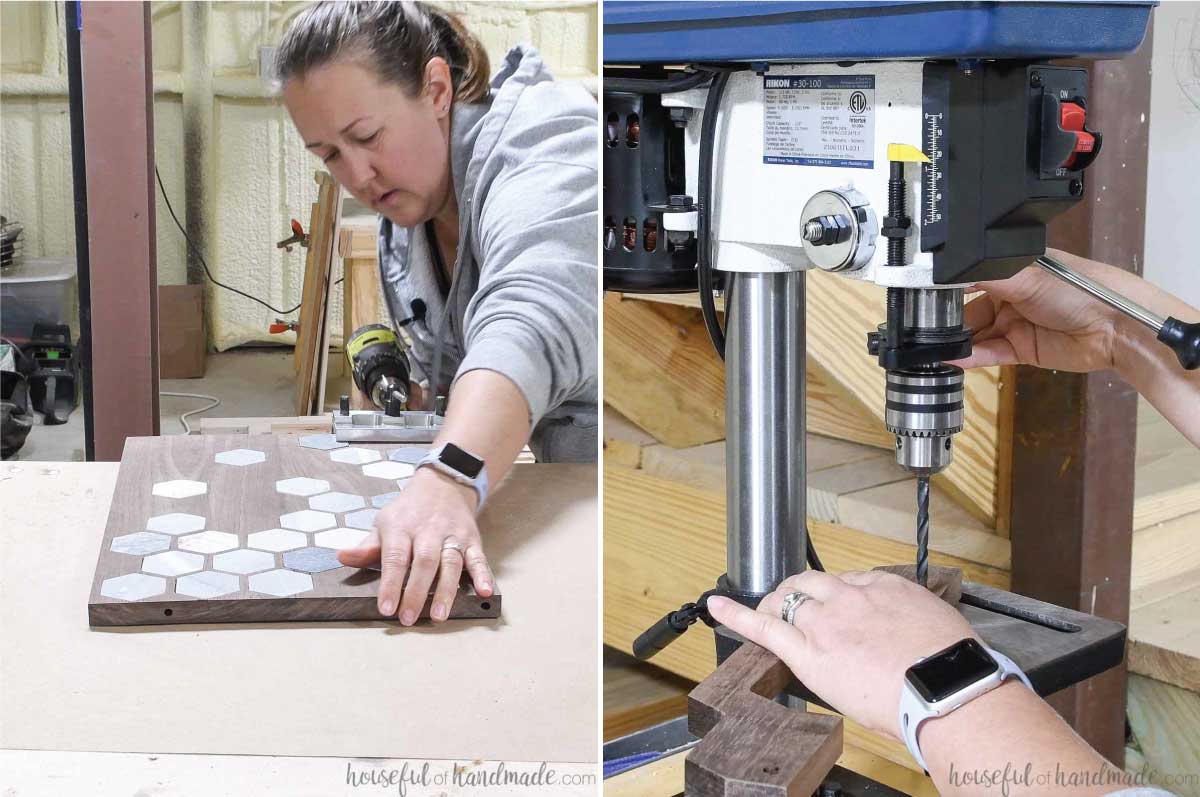
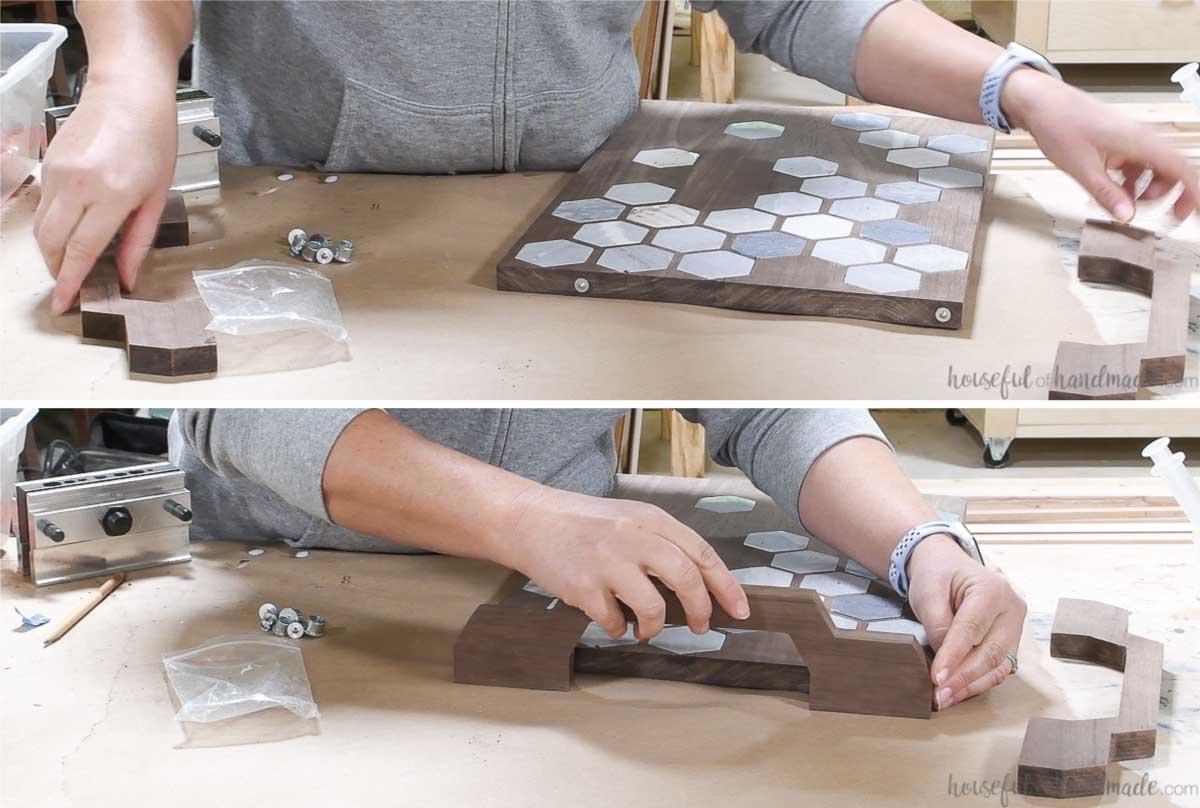
To determine where the holes needed to be in the handles, after drilling the holes in the side of the tray, I used dowel points in the holes.
Then you line up the handle and press it into the dowel points. This will transfer a mark to the handle for you to center your hole on.
After the holes are drilled, add wood glue to the bottom of the handles and in the holes. Add your dowels (I used 1/4″).
Also add glue into the holes on the tray.
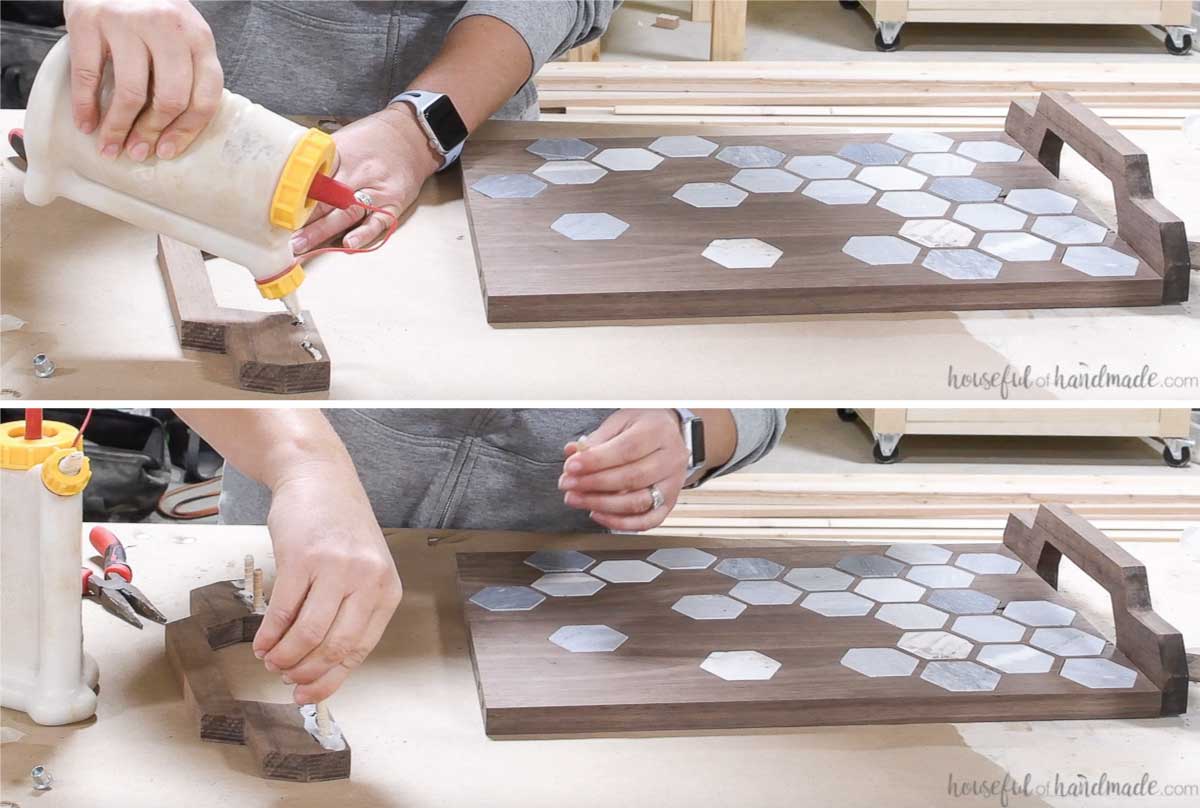
Press the dowels into holes. Then clamp until the glue dries.
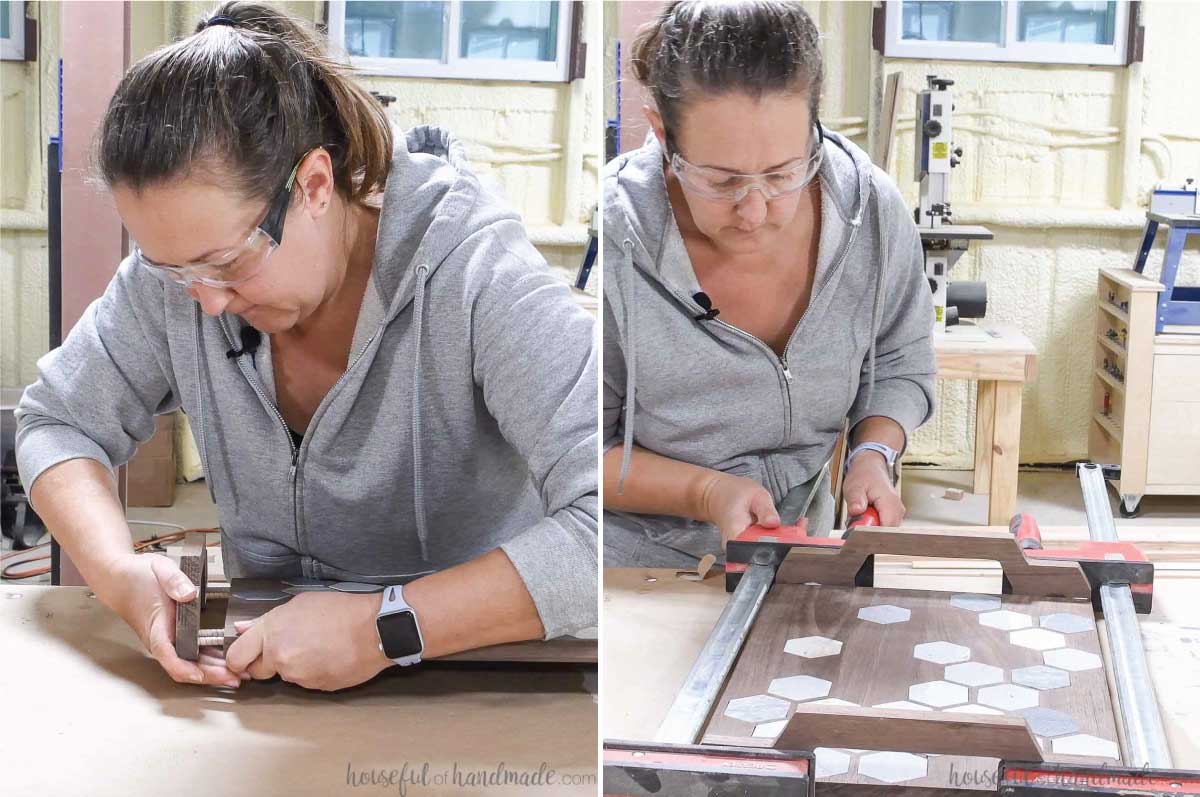
You may need to sand some areas around the handles if the dowels did not line them up perfectly.
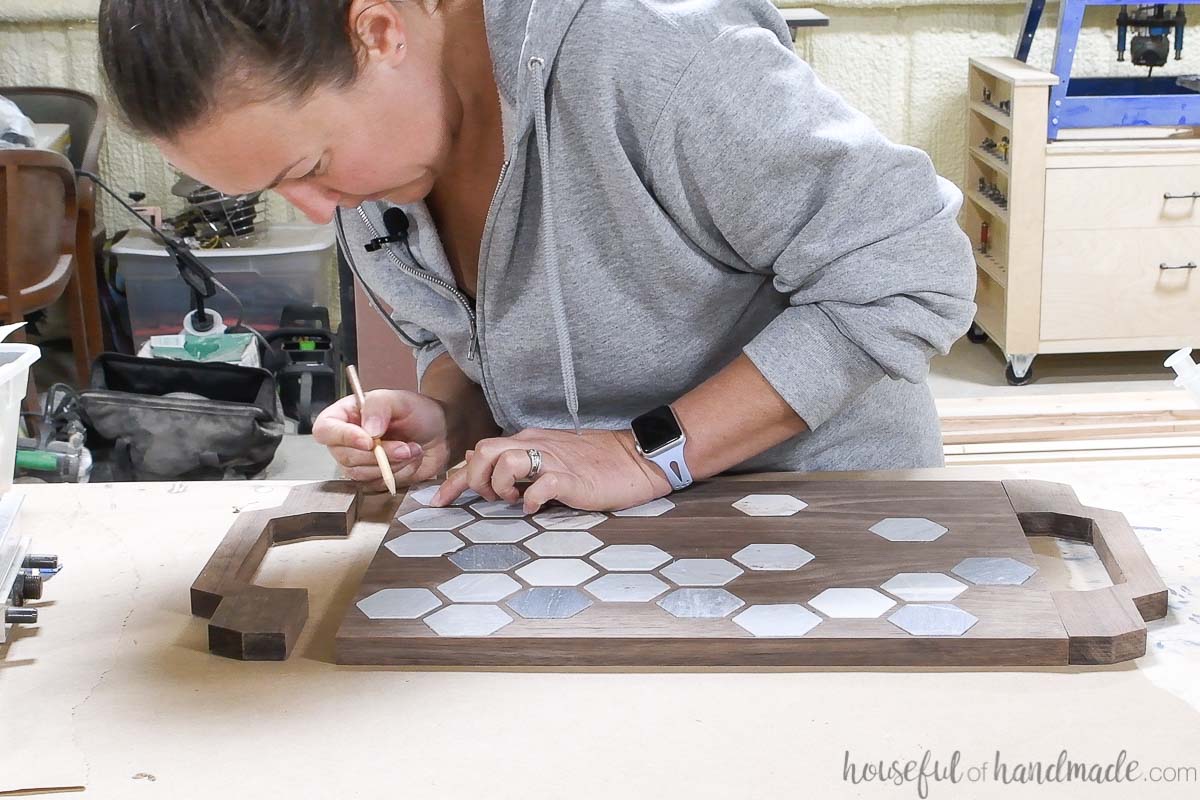
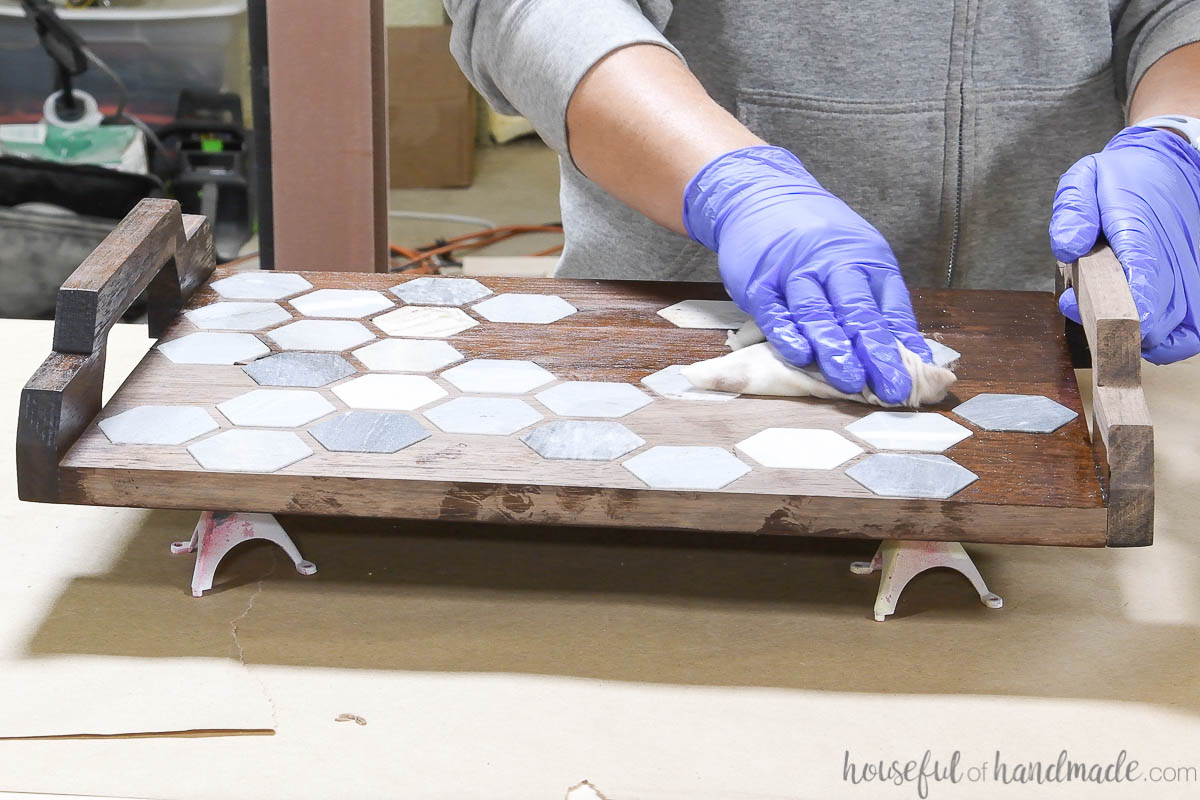
STEP 6- Finish
Seal the tray with a pure tung oil or cutting board sealer.
This natural sealer will also be okay to use on the natural marble tiles.
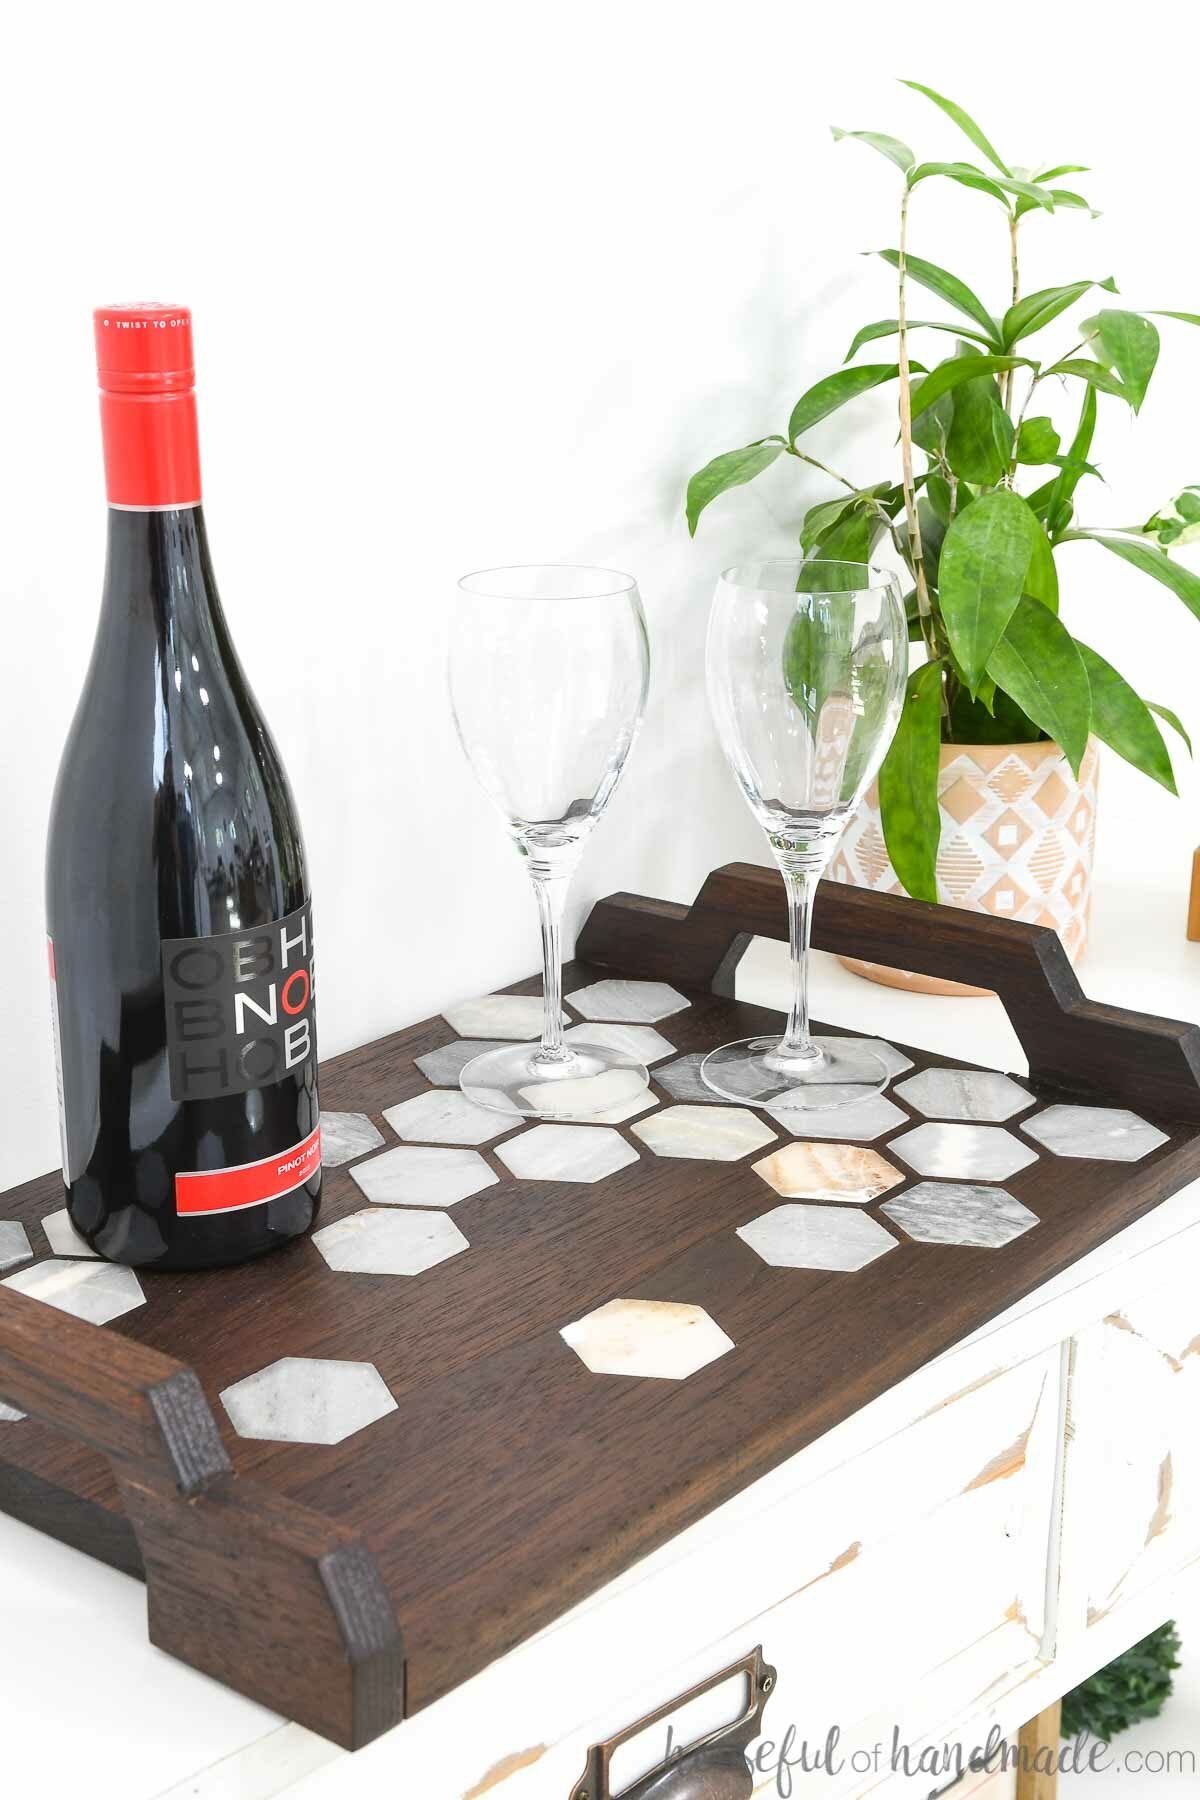
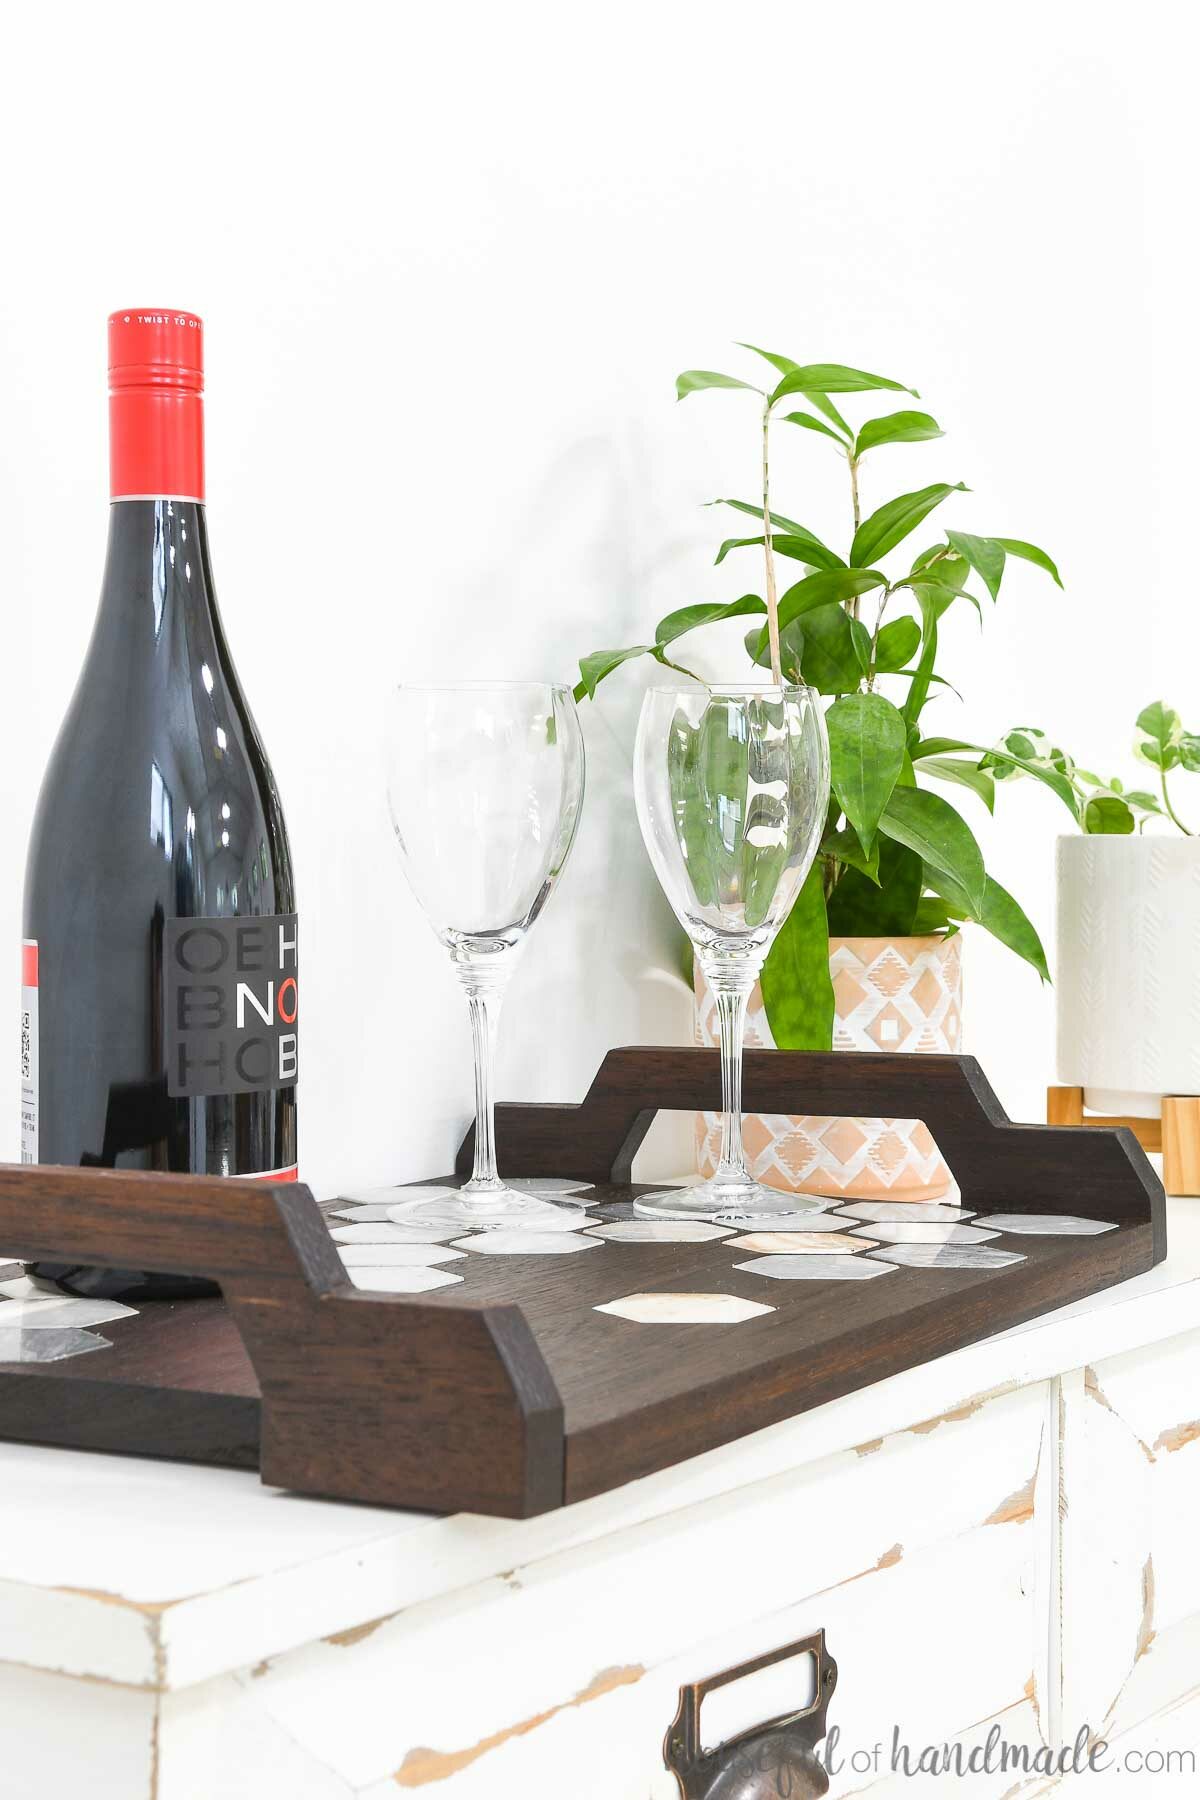
And now your amazing tile inlay tray is finished. The natural wood and natural stone combination is one of my favorite.
I am just obsessed with how the dark walnut looks agains the marble tiles. Even with the slightly less than perfect inlays from the tight fit, I love the way it turned out!
But next time I will give myself a little more tolerance on my inlay pockets to ensure a more perfect fit!
I also found some herringbone marble tiles that could be fun to inlay as well… Oh the possibilities!
Happy building!

Thank you to Inventables for sponsoring this post. I only recommend products that I use and love and all opinions are 100% my own. Click here to read my full disclosure policy.