Create amazing DIY furniture by learning to avoid these common woodworking mistakes.
The world of woodworking is big and vast. There is so much to learn and so many words you hear that seem foreign. Which can lead to mistakes.
And when you are a beginner woodworker, there is so much to learn that it can be overwhelming. But don’t let that stop you from starting!
Instead, I am sharing the 3 big mistakes that I see most beginners making so that you can avoid them and have success with your next project.
This post may contain affiliate links. As an Amazon Associate I earn from qualifying purchases. Click here to read my full disclosure policy.
Then you can keep learning and growing and before you know it, you can build your own kitchen cabinets too. Or anything else you decide you want!
Mistake #1: Not Accounting for Kerf When Cutting
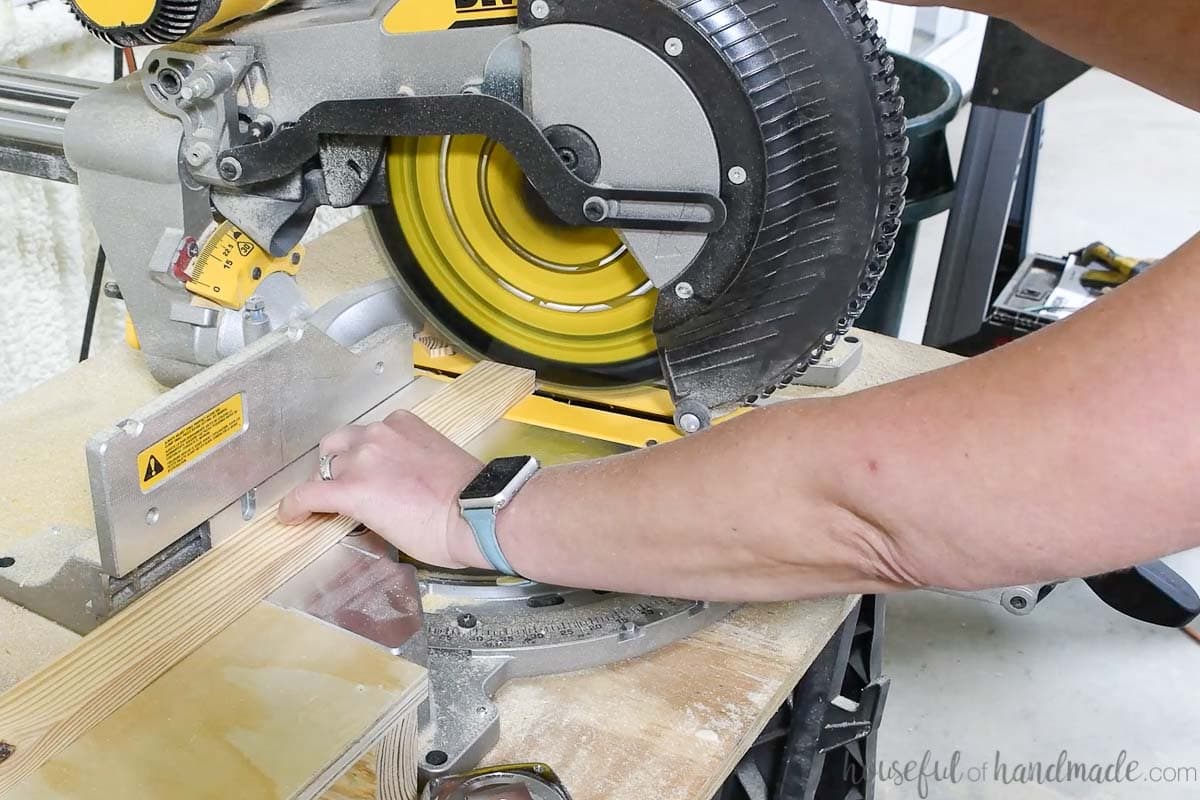
You have a project that needs 5 pieces of 1×4 cut at 12″ long. So you grab your boards and mark out the five 12″ sections. Then off to the miter saw!
You cut all those carefully measured boards and then you realize they are all slightly shorter than the 12″. What happened???
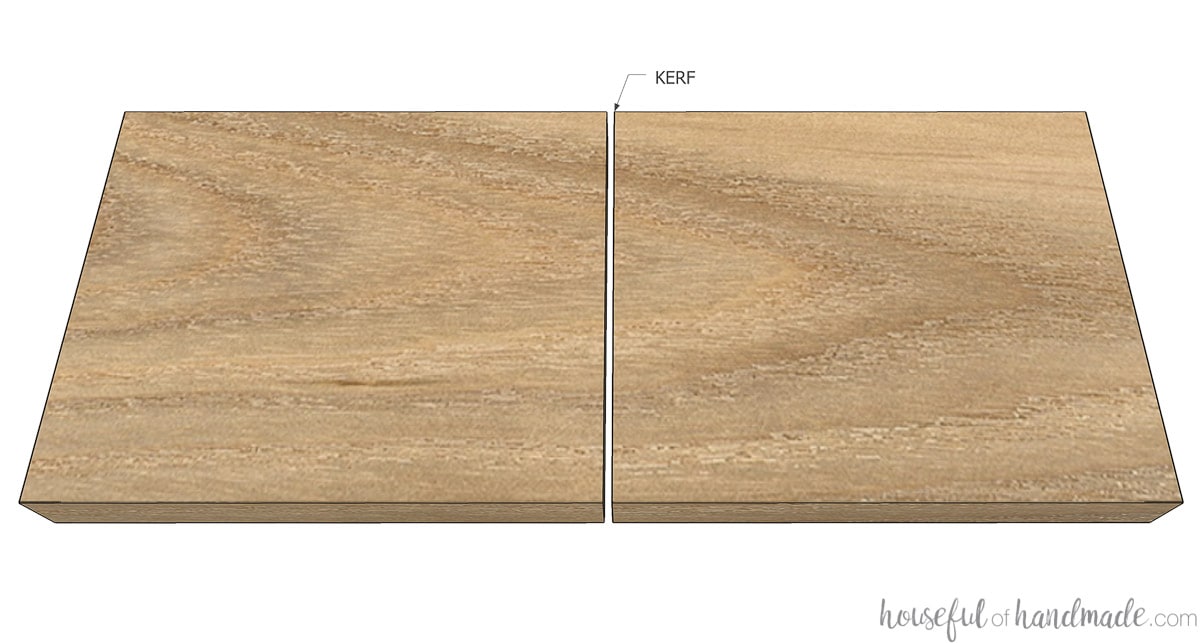
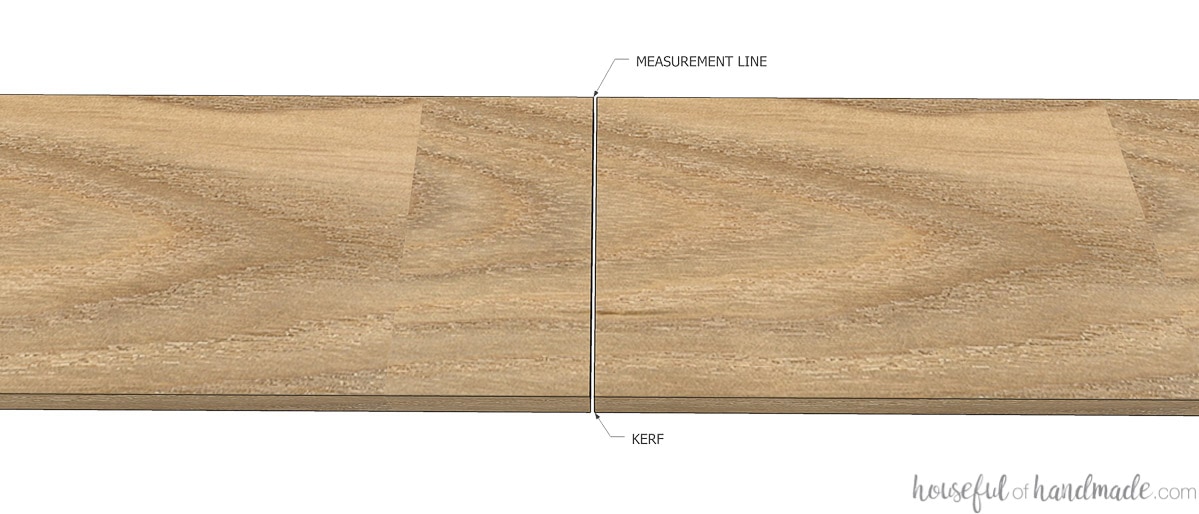
What is Kerf?
Kerf refers to the slit made by the saw when cutting. Different saw blade have a different sized kerf based on the thickness of the blade.
If you do not account for kerf when cutting your boards, all your cuts will be too short. You cannot measure out multiple cuts on the same board and then cut them because each time you cut the board you lose a small amount. Those small amounts will add up to big errors on your build.
How do you cut accurately?
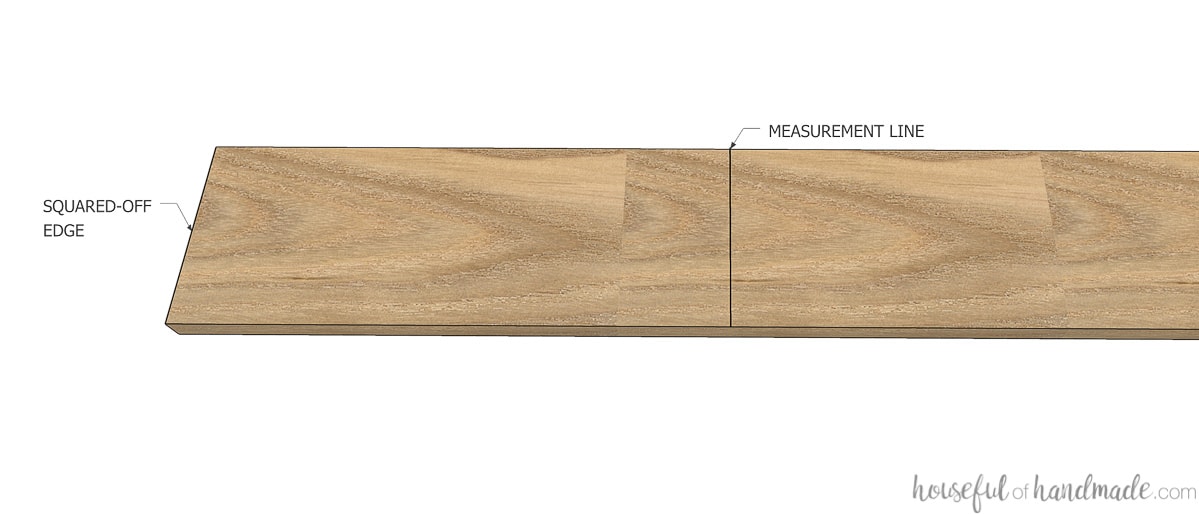
- Square off the end of the board: Start at one end of your board (or plywood). Square off the end by cutting a small amount off with your saw at a 90 degree angle. Make sure to hold your board flush against the fence to ensure an accurate angle.
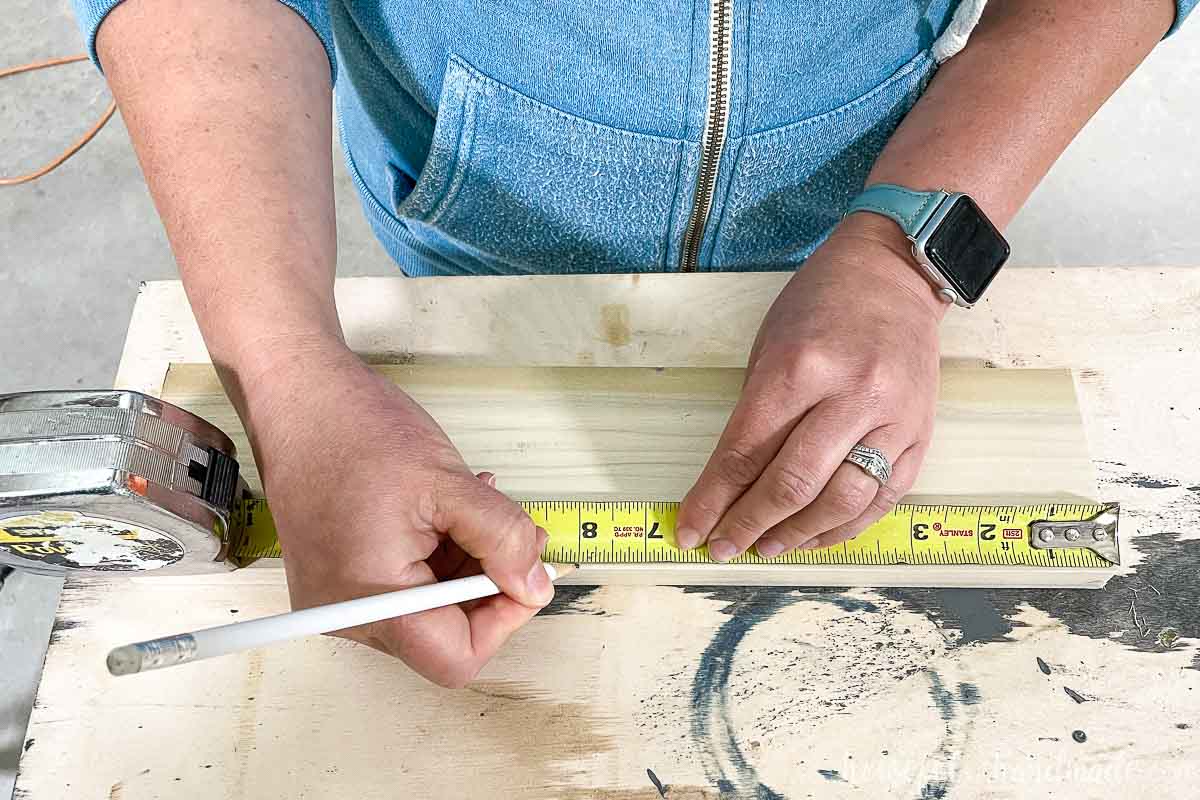
- Measure from the squared-off end: Hook your measuring tape over the squared off edge and measure the distance for your cut. Use a sharp pencil and make sure your measuring tape is pulled taught and is straight.
- Draw a line: Using a square (I use this handy & inexpensive one), hold the flat side up against the board and then draw a line though the measurement marks across the entire board. Your line will be a perfect 90 degrees. If you need to cut at an angle, see angled cutting notes below.
- Line up the blade: Line up the blade so the kerf will be removed off the board on the edge of the line not in the measured area. Without starting the saw, line the edge of the blade up with the line.
- Make your cut: Once it is all lined up, start your saw and make your cut. You should barely see the edge of your sharp pencil line. Double check the correct measurement and adjust as needed.
- Cut the next piece: Now you have a new squared off end that you can use to repeat the above steps and make your next cut.
Measuring and cutting each piece one at a time will ensure you have exact cuts for each piece. None of them will be too small because of the missing kerf from the blade.
But what if you need to cut at an angle, the process is the same. However, instead of drawing you line at a 90 degree angle to the board you will need to draw an angled line. This is easy to do with the speed square.
How do you mark an angled cut?
- Measure the top or bottom of your angle: Depending on your measurement, mark on your board on the edge at the peak or bottom of your angled cut.
- Line up the angle with the speed square: Place the speed square on the measurement mark and pivot it until the number on the long edge for your desired angle lines up with the edge of the board. You may have to adjust how the speed square is oriented on the board based on the direction of your angle.
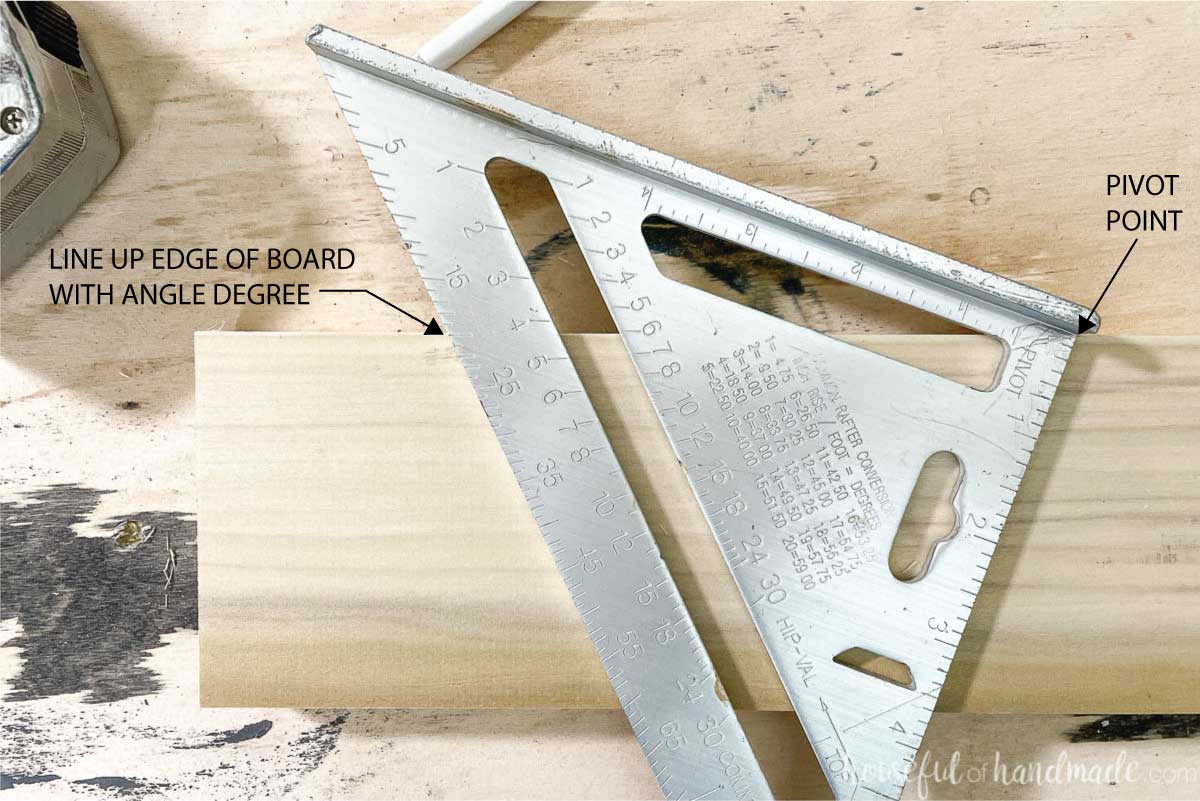
- Draw a cut line: Draw your cut line along the side of the speed square.

- Set the miter saw angle: Adjust your miter saw to the same angle as you just measured.
- Line up the blade: Line up the blade so the kerf will be removed off the board on the edge of the line not in the measured area. Without starting the saw, line the edge of the blade up with the line.
- Make your cut: Once it is all lined up, start your saw and make your cut. You should barely see the edge of your sharp pencil line. Double check the correct measurement and adjust as needed.
Mistake #2: Not Buying Straight Boards
Starting your project with quality lumber is the easiest way to get great results. But quality lumber does not mean expensive. You can pick through cheaper lumber to find the quality boards. Learn about the different kinds of lumber and more in this beginner’s lumber buying guide.
Working with warped or twisted boards will result in wobbly furniture, bad joints, and lots more headache for a new woodworker. So take the time to carefully select your boards, whether they are inexpensive furring strips or more pricey hardwood boards.
How do you find straight boards?
To check a board for straight, hold it up to your nose and look down the length of the board. You will be able to see if the board curves or twists.
If it looks straight, rotate the board 1/4 turn and look down the next side. Continue to turn the board 1/4 turn and check all 4 sides of the board for straight before selecting it. And be picky, a few extra minutes checking boards can save you a lot of hassle or a failed project later.
Always take the extra time at the store to check every single board before buying them. A simple glance can save you time and money on your next project.

Also examine the entire board for splits, knots and other imperfections. Sometimes knots are great to add character to your woodworking project, but knots are super hard and can split out of the boards when cut or drilled through.
If you want to include knots, you may need extra wood to ensure the cuts are not going through them. Try to avoid buying boards that are split.
How do you store boards to keep them straigh?
Once you have selected all the straight boards for your project, don’t bring them home and store them wrong. Boards can warp or twist from improper storage (and it can happen fast if there is a lot of moisture in the air).
Instead, store them properly to keep your lumber straight.
- Lay boards flat on the floor or on shelves that support the entire span of the board.
- Stack boards so they are flat and straight.
- Propping boards against the wall can cause them to bow.
Mistake #3: Cutting All Pieces Before Assembling
You just found a new woodworking plan and you are so excited to build it. So you buy all your lumber and cut all the pieces on the cut list.
You think this will make the build go smoothly, but you are wrong! Why? Because most woodworking plans are based on the standard sizes for your boards, but that does not mean the boards thicknesses and widths are perfectly accurate.
If your boards are off my 1/16 of an inch, it can add up as you work through your build. That 1/16″ can add up to 1/8″, then 1/4″ and more depending on the size of your project.

When Should You Cut Your Pieces?
Always start by reading through the entire build plan first. Then cut the pieces for each step as you build.
As you are assembling the project, any boards that are spanning across an assembled section, you will want to measure and cut to fit.
Measure to the 1/32″, or as precise as you can, to get a perfect fit. Even if your measuring tape only has marks down to the 1/16th inch, use the space between the marks for the 32nd measurements.
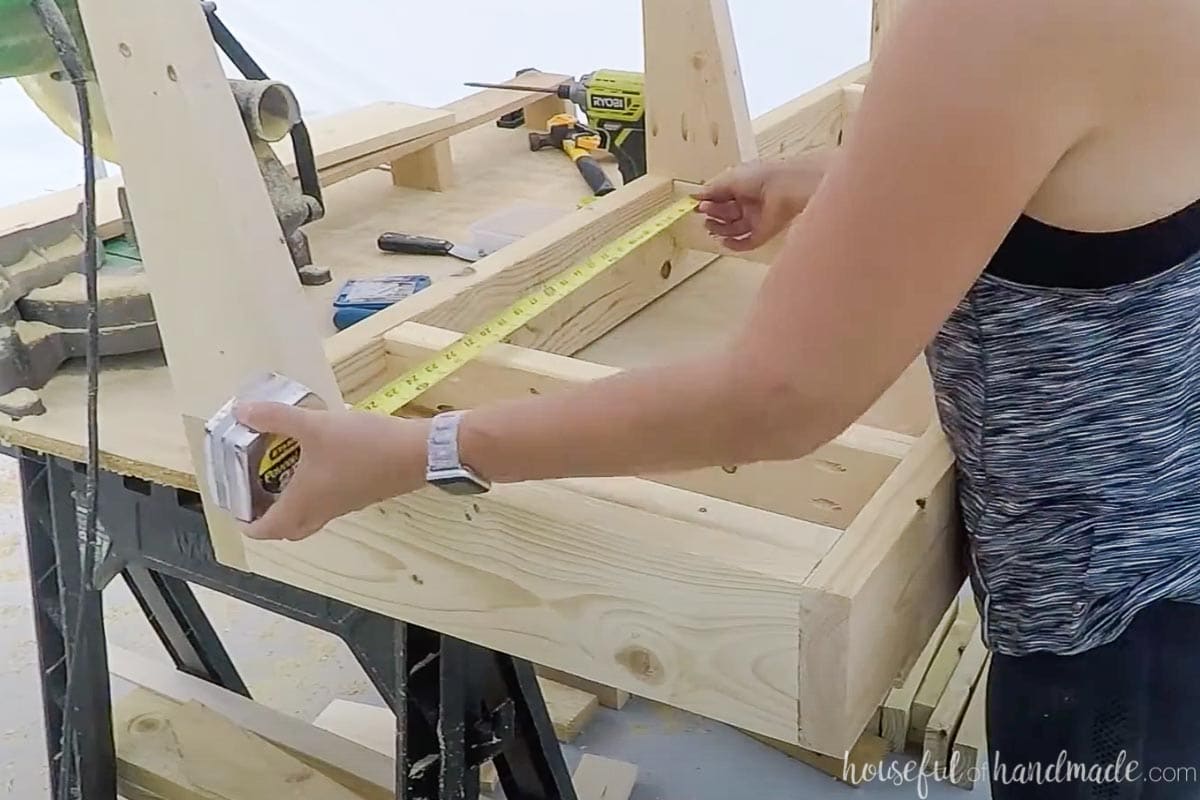
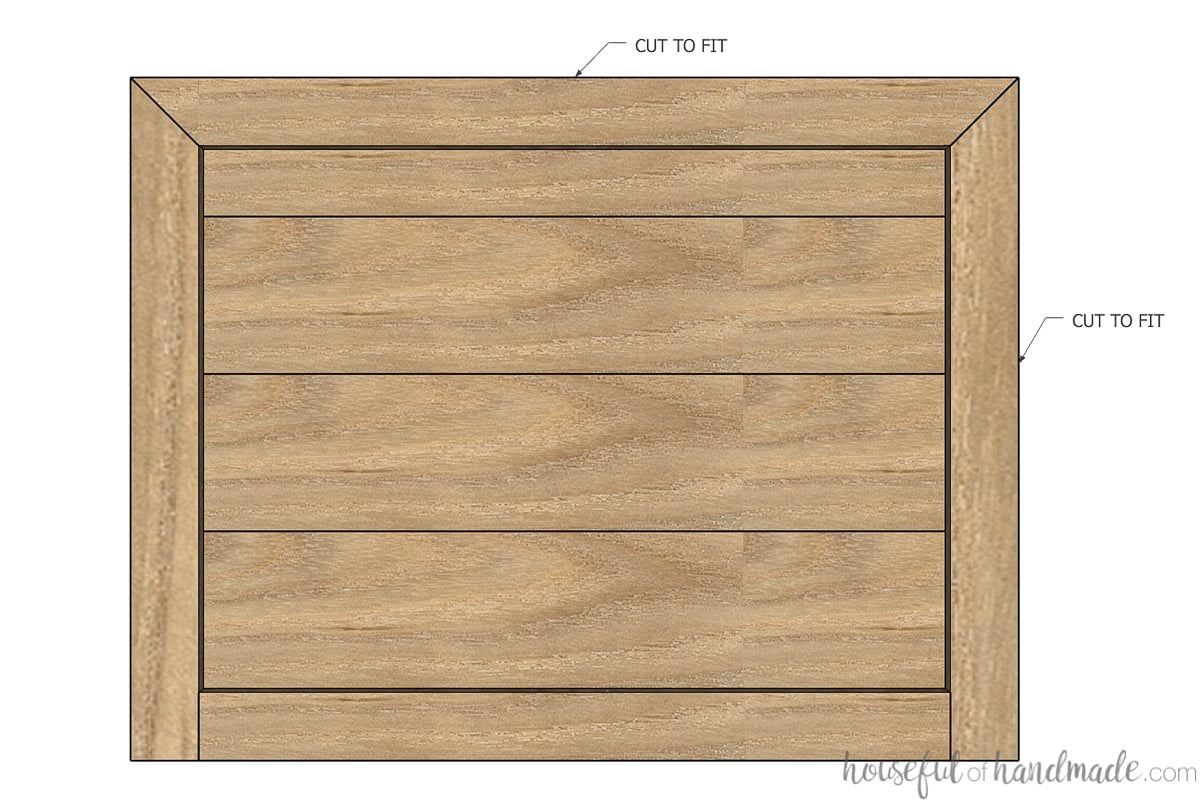
In the example below, the center boards are cut according to the cut list, but the side boards are cut to fit. The measurement might be exactly the same as the cut list, but it also could be a little bit bigger or smaller.
Also, the top board that is cut with 45 degree mitered corners needs to be cut to fit since the width of the boards might be slightly smaller or larger.
As you continue to work on projects, and make mistakes, you will learn from them and grow as a woodworker! Just don’t give up when you encounter a hurdle! Push through and ask questions.
Before you know it, you might even stop calling yourself a beginner woodworker 😉
Happy Building!
