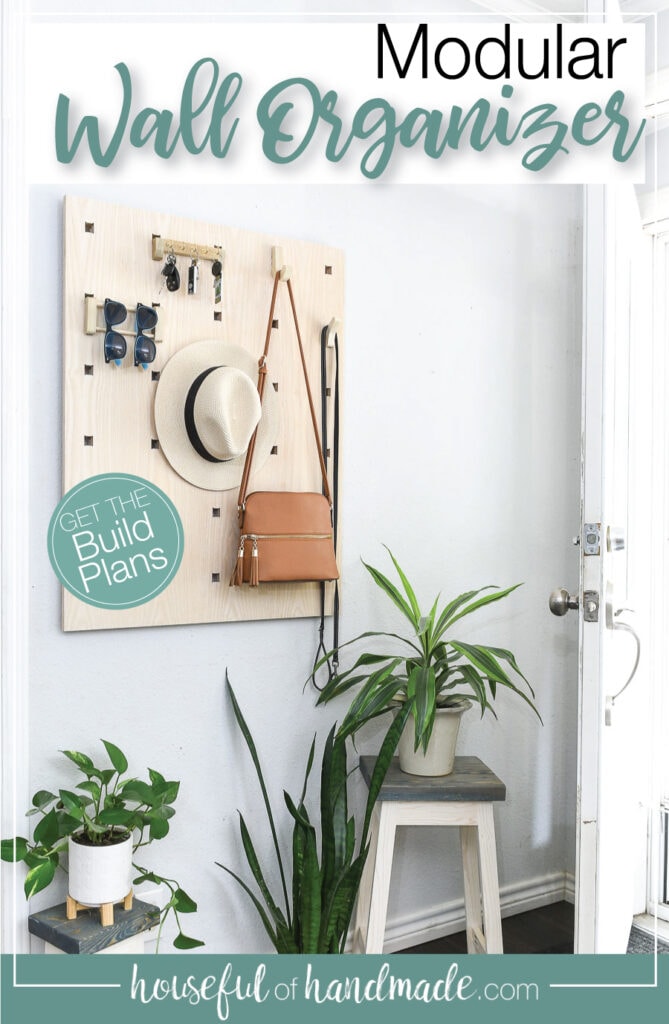
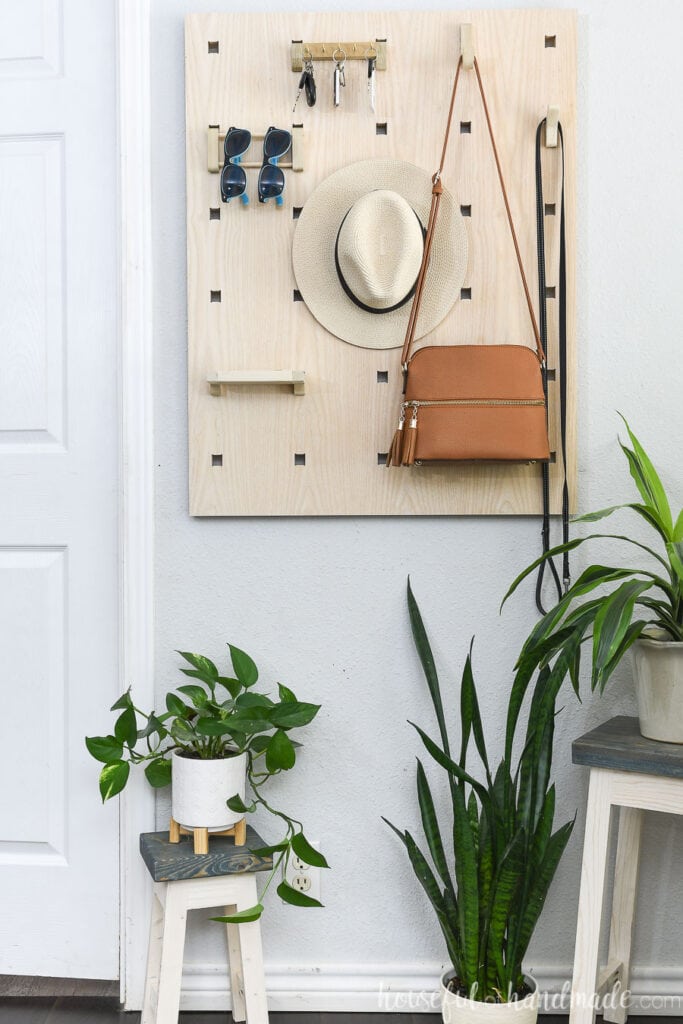
Need storage? You’ll love this beautiful modular entry organizer.
As much as I wished the small entry closet in our last home was bigger, I desperately miss it now. Our new house has no closet at all!
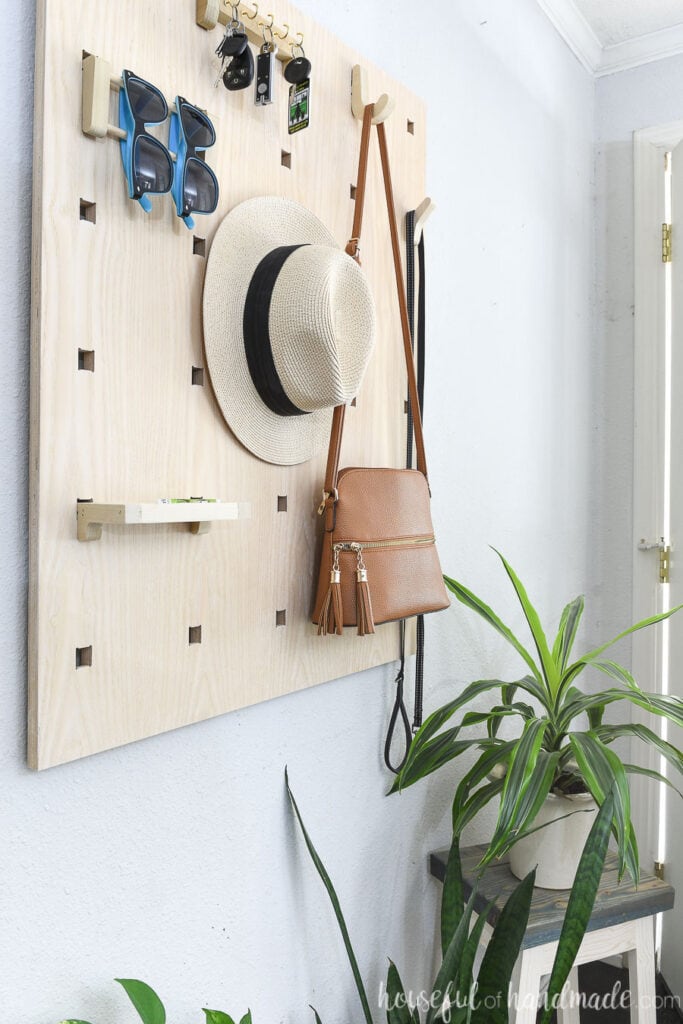
So I partnered with Inventables to use my X-Carve CNC machine to make the perfect modular entryway organizer. It is not as much storage as a closet, but it is a beautiful place to drop things as you enter the house.

Pegboard Style Organizer
I love using pegboard for organizing in more places than the garage. It came in very handy in my craft room as a removable pegboard storage. But regular pegboard is not pretty enough for an entryway organizer that will be the first thing guests see when they come visit.
This post may contain affiliate links. As an Amazon Associate I earn from qualifying purchases. Click here to read my full disclosure policy.
So I used the same pegboard idea, but carved out notches for 3/4″ wide boards (standard 1x boards) to sit into them. And I used a left-over piece of Ash plywood from this gorgeous bathroom vanity I built last year.
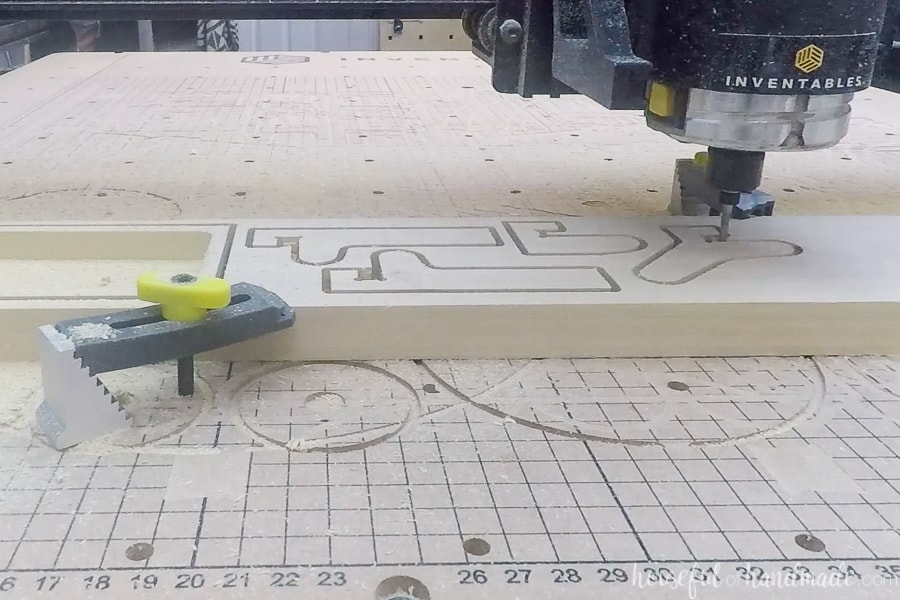
The design was easy to carve with the X-carve. In just over an hour, I had a 28″ x 36″ board ready to organize all the things!
Modular Design
What works for me in my house, might not work for you in your house. It might not even work for me in a different house. That is why I love modular design.
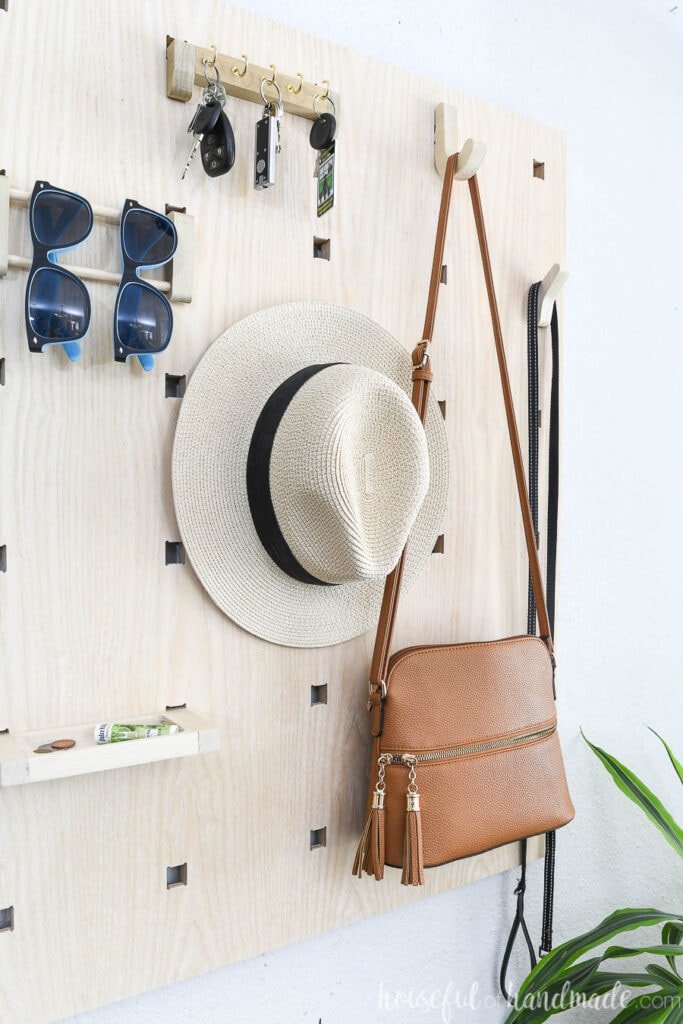
This entryway organizer was so fun to make storage components for. I started by thinking what I wanted to store: sunglasses, purse, keys, hats, stuff from my husbands pockets, etc.
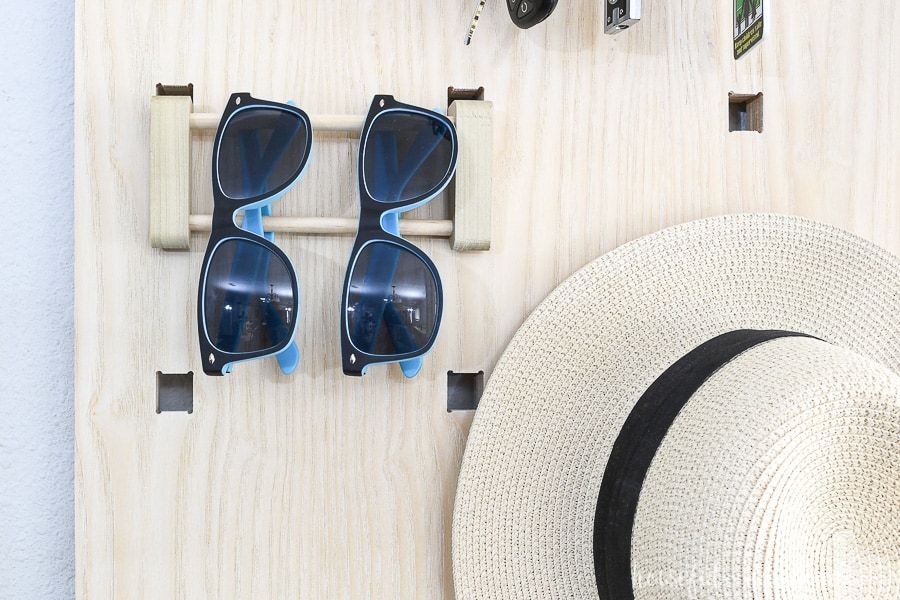
Then I started creating solutions for each thing. Each modular piece has an L style cleat on the back that slides into the carved squares. And you can mix and match and move them however you want!
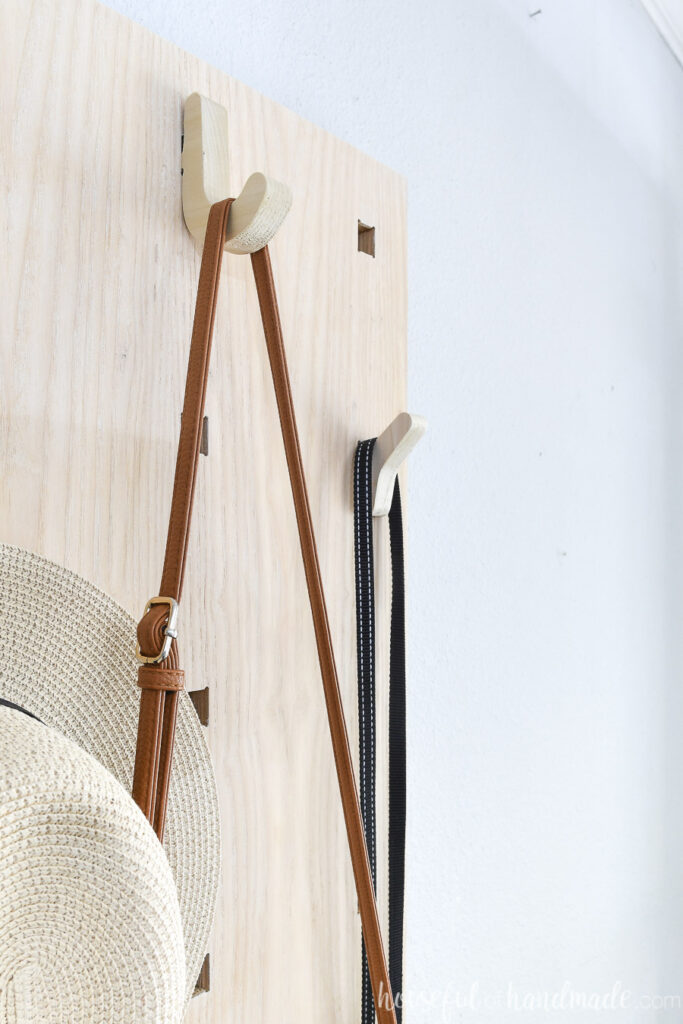
I think my favorite component is the giant round hook that holds my purse. It looks so pretty, and is really sturdy (important for heavy purses). Plus, it will be great for holding a coat or jacket when winter arrives.
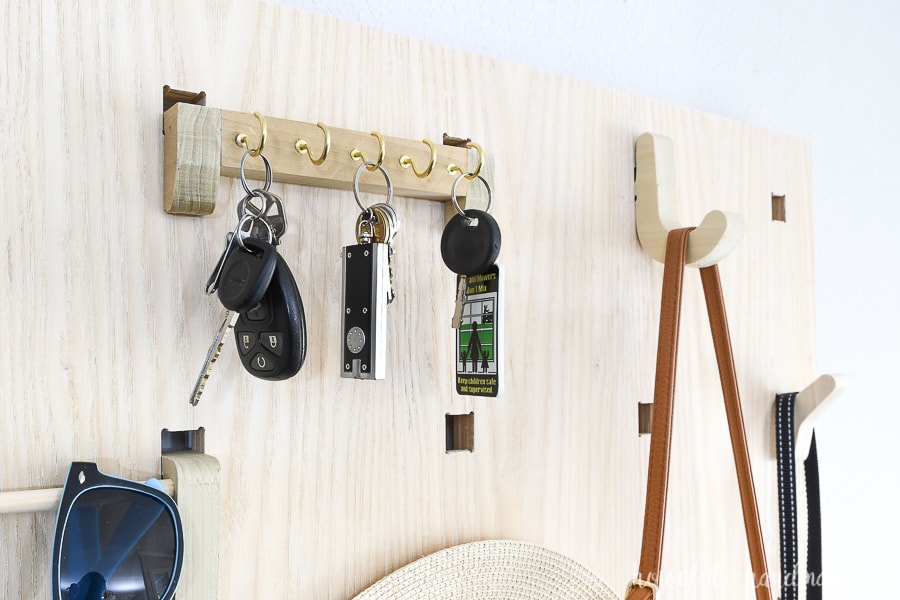
And the row of key hooks might be my next favorite. We seem to be acquiring keys for all kinds of things now that we have more land to care for. I love having a specific place to store them.
I love all the organization for all the small items at hand as we leave the house. But for larger items, like coats and backpacks, as well as the ultimate shoe storage we also added these amazing DIY mudroom storage lockers. Now our entryway is super organized!
WHAT IF I DON’T HAVE AN X-CARVE?
If you don’t have an X-Carve, you can still make you own modular entryway organizer.
- Some high schools, libraries, and maker spaces have X-Carves you can use. Use this link to find a location near you.
- You could simplify the design for large round holes and dowels for the pegboard. Then use a jigsaw to cut out your own modular components to work with the dowels.
- Save up and buy an X-carve! There are so many amazing things you can make with it. And you can always use it to make items to sell.
How to Make a Modular Pegboard Organizer
Tools Needed:
- X-Carve
- If you do not have an x-carve, find a location near you where you can use one.
- 1/8″ straight cut bit
- Digital Calipers
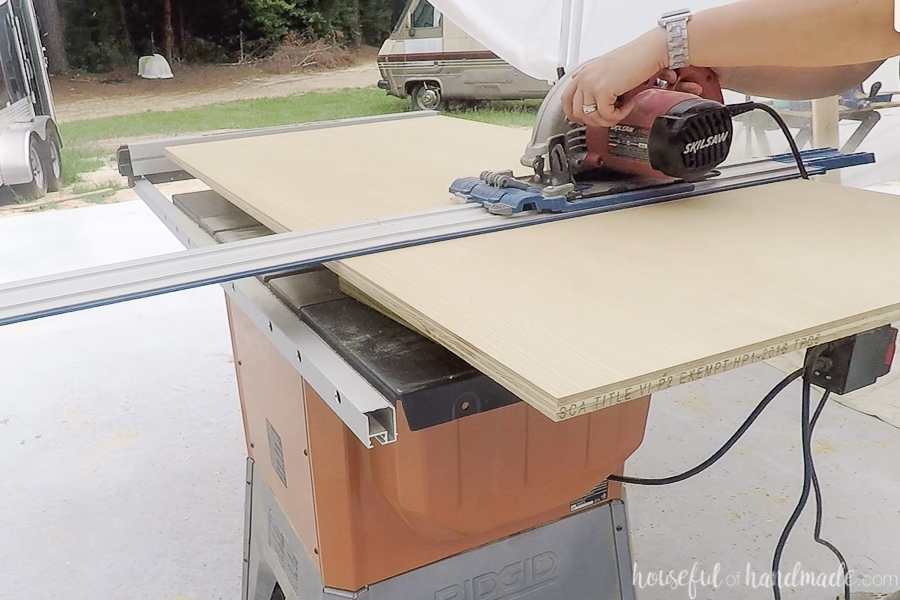
- Table saw (or circular saw)
- Finish nail gun
- Drill
Supplies:
- (1) 28″ x 36″ piece of 3/4″ plywood
- (1) 3″ x 28″ piece of 1/2″ plywood
- (1) 1 x 6 board, 18″ long
- (1) 5/16″ dowel, 12″ long
- Wood glue
- 1″ finish nails
- (5) 7/8″ cup hooks
- (8) 1″ wood screws
- (3) 2 1/2″ wood screws
- Sealer
- I used liming wax to put a hiny of white in the grain of the ash plywood and a wipe on polyurethane for the components.
Prepare the Plywood
I discovered with a bit of tweaking, I could cut the holes for the pegboard on a 28″ x 36″ board on the 1000mm X-Carve. The typical work area is 29 1/2″.
You can cut your 3/4″ board any size you want to work for your space. To keep the component sizes correct, there needs to be 6 inches (on center) between the holes. I also left 2″ to each side and the top.
The 1/2″ plywood is used for a French cleat to mount the entryway organizer to the wall. Cut 2 3″ squares off the end leaving you with a 3″ x 22″ piece.
Set your table saw blade to a 45 degree angle and set the fence so it will cut the board in half (or close to it) lengthwise. Run the longer board through the table saw to cut it.
Carve the Holes
You can use the design I created for the modular entryway organizer by first, signing up for a free Easel account, then clicking on the link below to open the file.
When you open the link, it will not be editable unless you make a copy. Also, the holes for the board are on the first workpiece. The components are on the second.
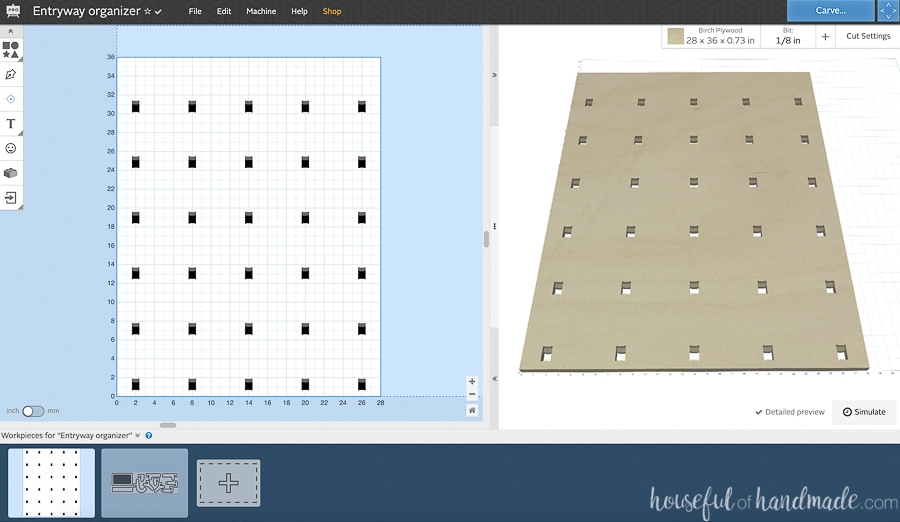
Set the plywood on the wasteboard of the X-carve. To carve all the holes, hang the front of the board 1″ over the front of the work area.
Double check that the last row of holes will be able to be carved with the router without hitting the back of the rails. I did this by measuring where the router tip was at the furthest back and checking that against where it sat in the Easel software.
Clamp the plywood and get ready to carve.

To carve the holes from the 3/4″ ash plywood I used the following settings:
- Feed rate 60 in/min
- Plunge rate 12 in/min
- Depth per pass 0.125 in
These settings worked great for clearing out the pockets of all the holes. They are not the recommended rates. Make sure to test any settings you plan to use with scraps before cutting into your final project.
Finish the Pegboard
Sand and seal your plywood.
Place one of the pieces of the French cleat on the back of the board, a few inches from the top. Make sure the angled cut is facing toward the bottom of the plywood and there is a gap between the angled section and the plywood.
Make sure it is level with the top of the board. Secure with 1″ wood screws and wood glue.
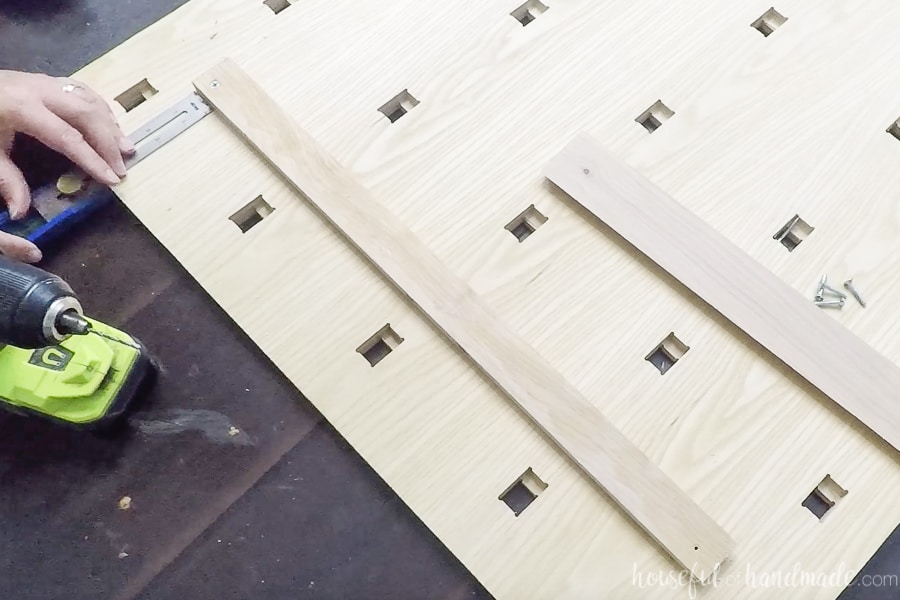
Add the two 3″ blocks to the lower corners. This will keep the bottom of the plywood flush with the French cleat so it will not lean. Secure with 1″ wood screws.
Add the other piece of the French cleat to the wall. It will be secured so the angled piece is facing up and there is a gap between the angled section and the wall. Secure with 2 1/2″ wood screws into studs.
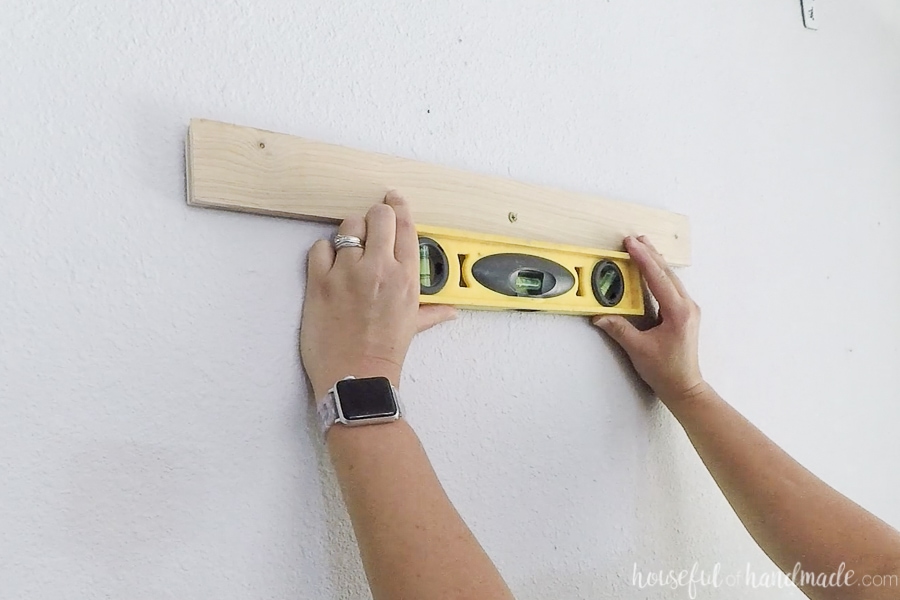
Hang the plywood on the wall by lifting it just above the French cleat on the wall and letting the two angled pieces slide together creating a tight hold.
Carve the Storage Components
The storage components are on the second workpiece of the Easel file I shared here.
I cut all my pieces out of a scrap of poplar left over from other projects. But you could use any wood you have lying around. I recommend using a hard wood for more stability than a soft wood.
All the components fit on an 18″ piece of 1×6 board. There are 2 pieces needed for the sunglass holder and 3 pieces needed for the pocket tray and key holder.
To carve the poplar, I used the following settings:
- Feed rate 60 in/min
- Plunge rate 12 in/min
- Depth per pass 0.09375 in
Assemble the Components
After the carve is complete, remove the piece from the wasteboard and cut the tabs to release the carved pieces.
Sand off the tabs and all the edges to give you a smooth piece.
For the sunglass holder:
Cut (2) 6″ pieces of dowel. Press them into the holes, but not all the way.
Test the spacing by placing the sunglass holder on the pegboard. Secure the dowels with wood glue if desired.
For the key holder:
Place glue on the side of the piece with the 5 small holes in it. Attach it between the two small locking pieces.
Secure with a couple finish nails to hold while the glue dries.
Use the small holes on the front as spacing for the cup hooks. You will want to drill small pilot holes to twist the hooks into.
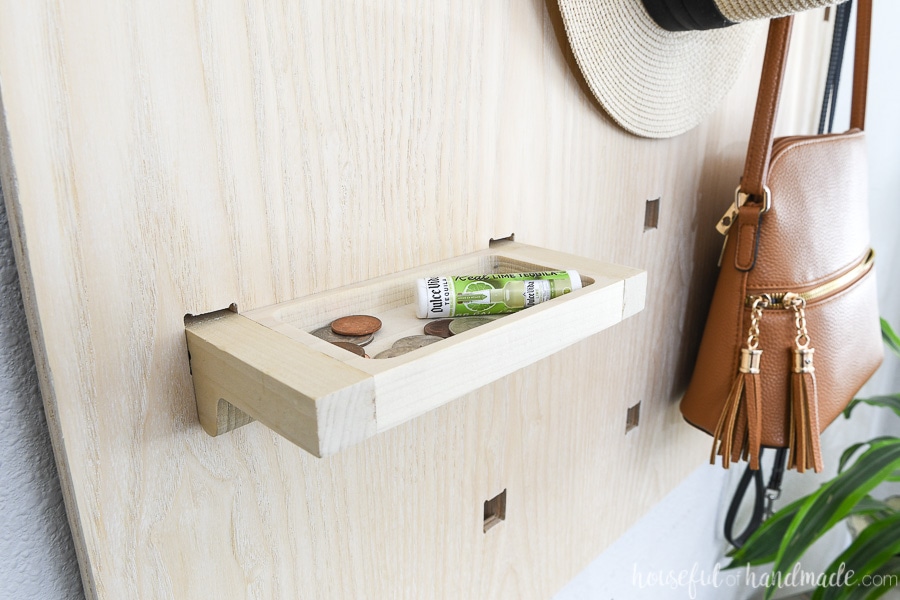
For the pocket tray:
Add wood glue to the sides of the carved out tray. Attach it between the two longer locking pieces.
Secure with a couple finish nails to hold while the glue dries. Be careful to only put the nails in the front and back to prevent them from showing in the tray.
Assemble the Entry Organizer
Now it is time to put all the modular pieces into the plywood!
They should slide into the squares with little tension, and drop down over the cleat to hold tight.
Have fun making whatever pieces you need for your own entryway. And you can move them around for more storage or less depending on the season!
That is my kind of storage solution for sure. I am thinking I need to make one for each kid to put inside their bedroom doors too. That way they can keep all their things organized too.
Where would you use your own modular organizer?

Thank you to Inventables for sponsoring this post. I only recommend products that I use and love and all opinions are 100% my own. Click here to read my full disclosure policy.