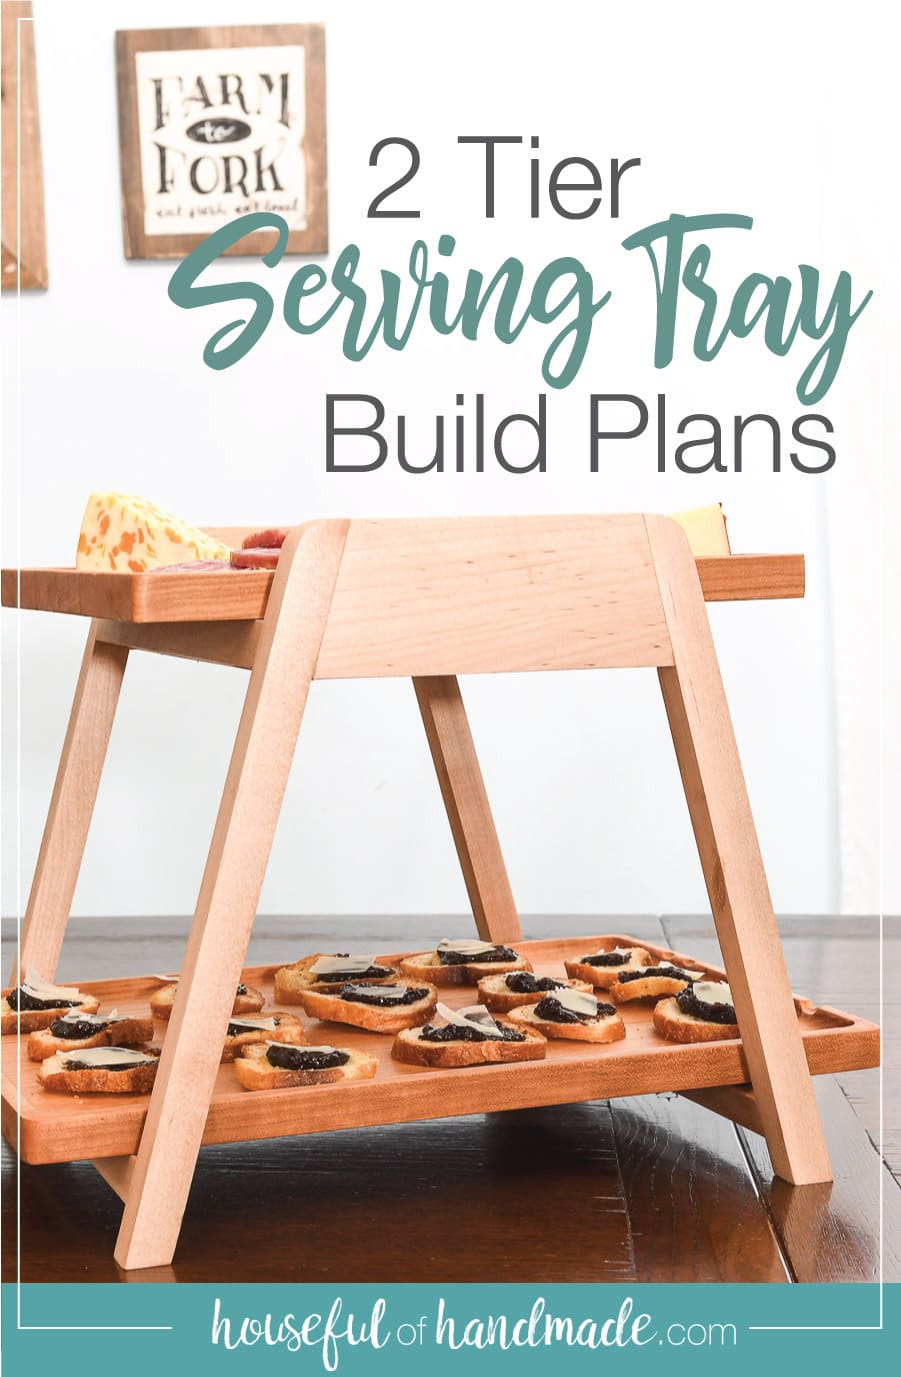
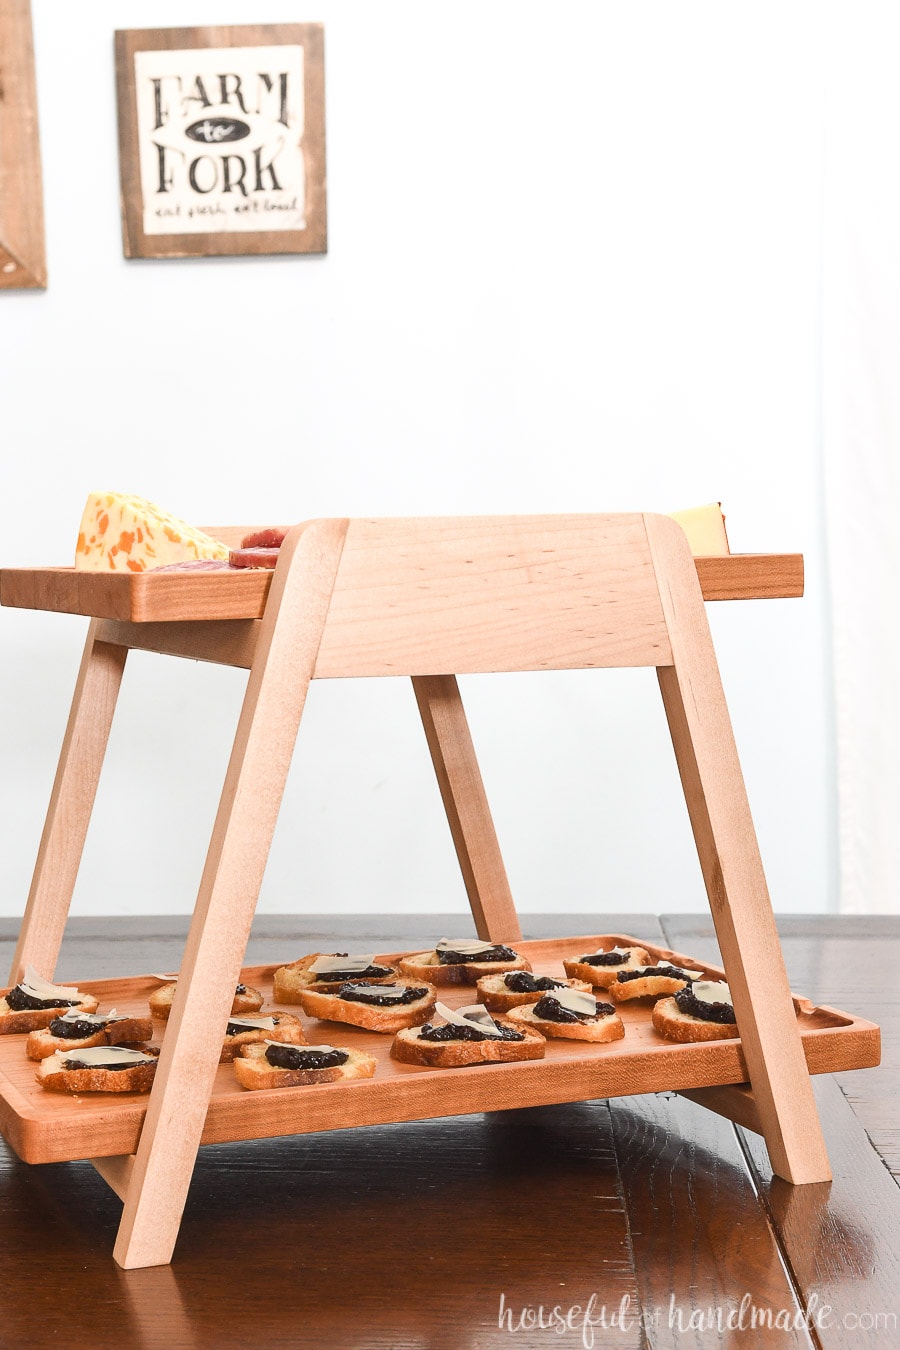
Make this beautiful tiered serving tray to give you extra room on the table.
One of my favorite things about the end of the year is entertaining! I love hosting parties and having friends and family gather around food.
So to prepare for this year, I partnered with Kreg Jig and their new project plan website, BuildSomething.com, to make the perfect tiered serving tray to share with you.
While I love entertaining, sometimes there is just not enough space for all the delicious things I want to make. We have a nice island in our kitchen that serves as the buffet table, but I still run out of room.
This post may contain affiliate links. As an Amazon Associate I earn from qualifying purchases. Click here to read my full disclosure policy.
But that’s not going to happen this year! This year I have a new 2 tier serving tray to hold lots of goodies.

DIY Wood Serving Tray
This wood serving tray is built so you can put food directly onto. Because of that, you need to be more conscious of the wood you choose. For the stand you could use any wood you want.
But the amount of wood in the stand is so little it’s also a great time to use up scraps or have fun trying a new wood you’ve always wanted too. I used scraps of hard white maple and love the simple white appearance. It’ll blend with any holiday or occasion.
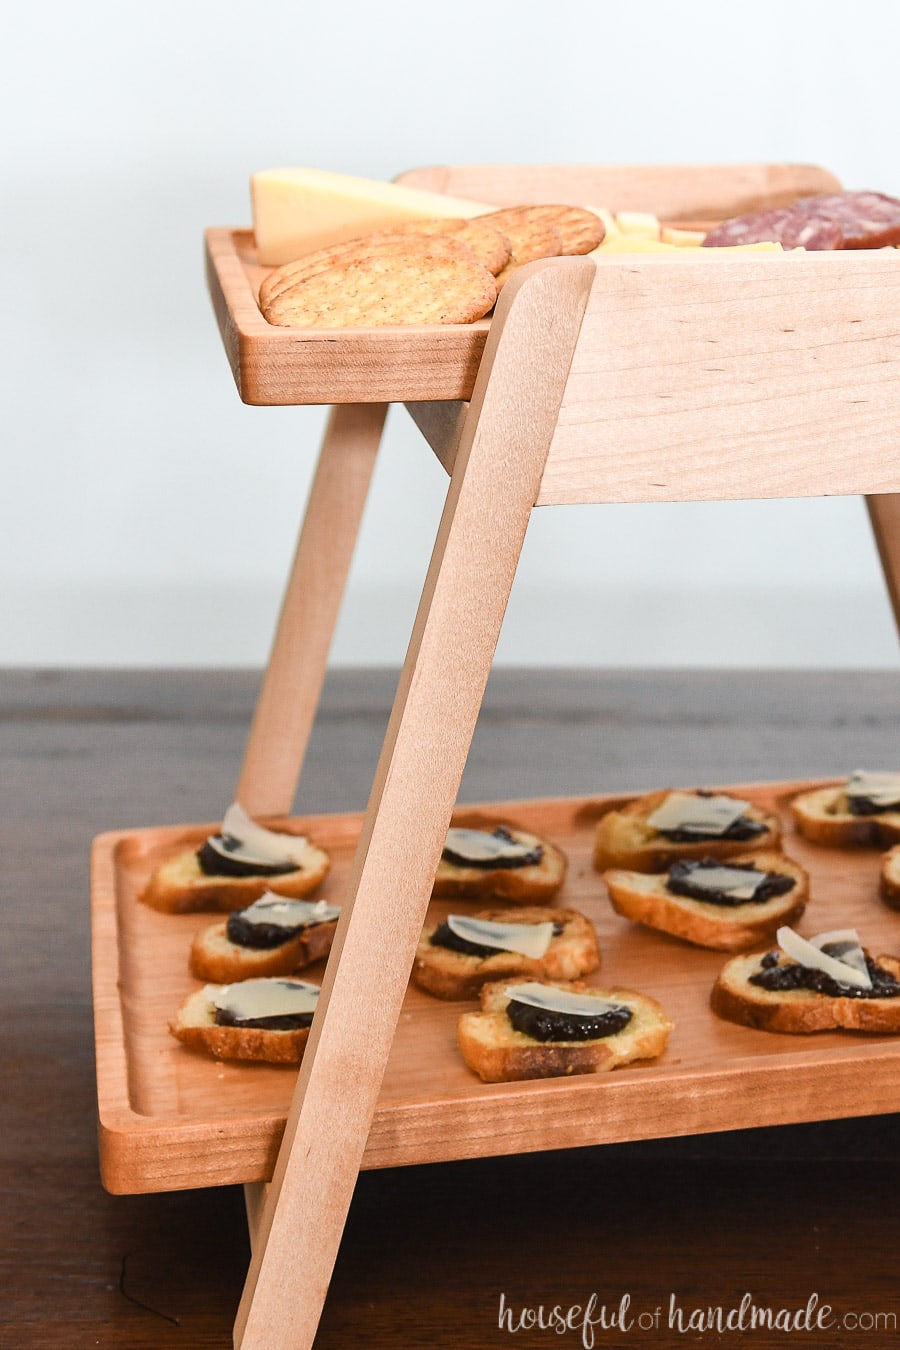
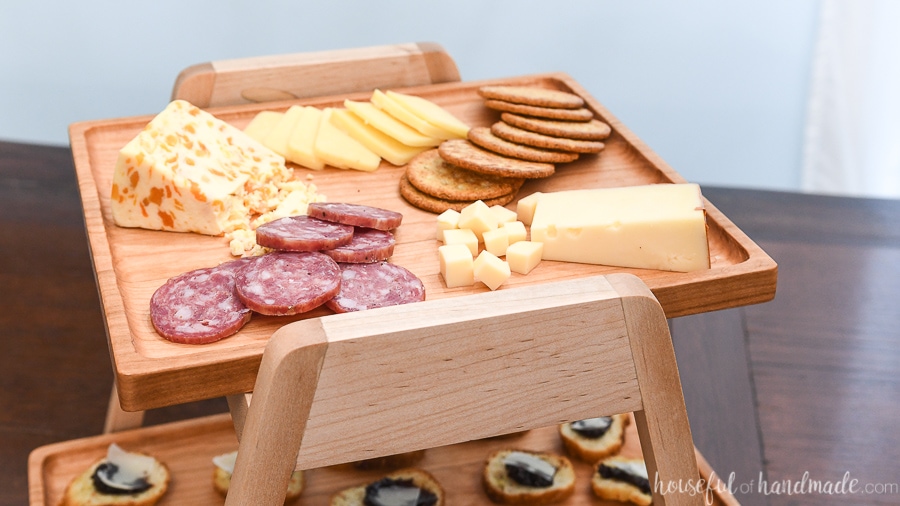
However, the wood trays need to be built from woods that are food safe. I recommend using maple, cherry, or walnut. These hard woods have a tight grain preventing food from getting inside to contaminate them.
I would also recommend you steer away from exotic woods as these can have toxic elements to them you do not want in contact with your food.
Also, make sure to choose a food safe finish for your trays and allow them to cure completely to ensure they are safe!
Routed Trays
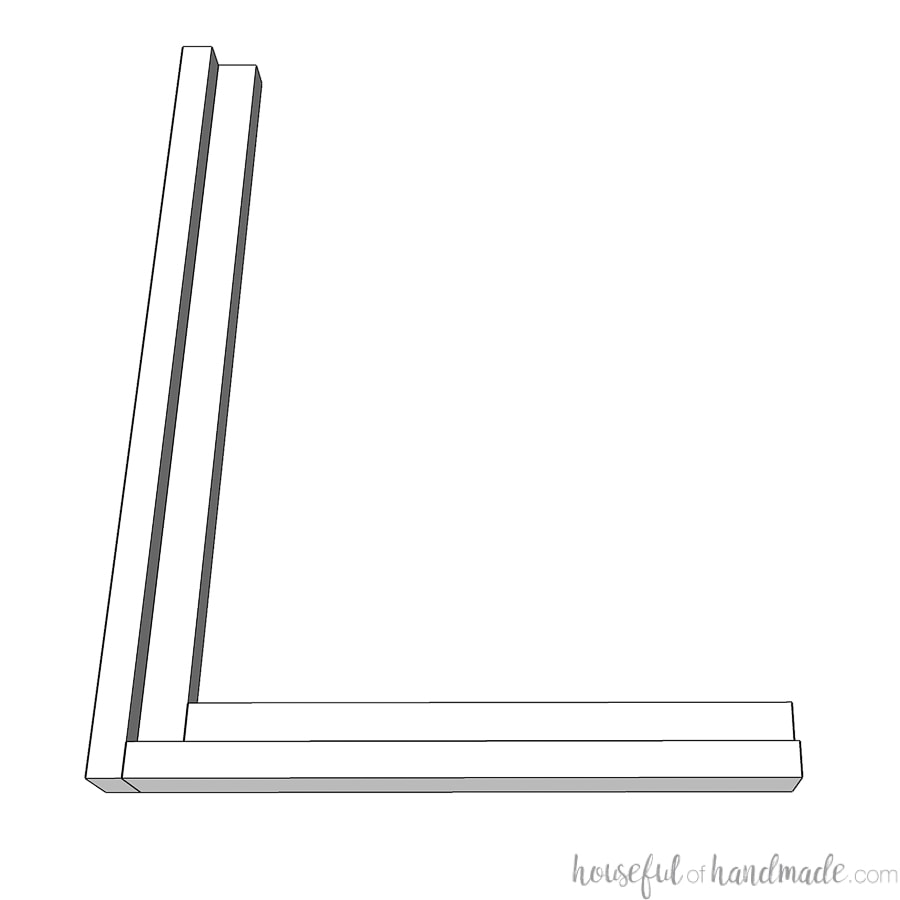
This tiered serving tray is an easy and quick build. The stand is made up of just a few pieces held together quickly and easily with the Kreg pocket hole jig.
But I decided to try a new skill on the trays!
Of course you could keep your trays flat and use them more like serving boards. They would be perfect for cheese plates, breads, etc. that way. But I wanted to create a tray with sides.
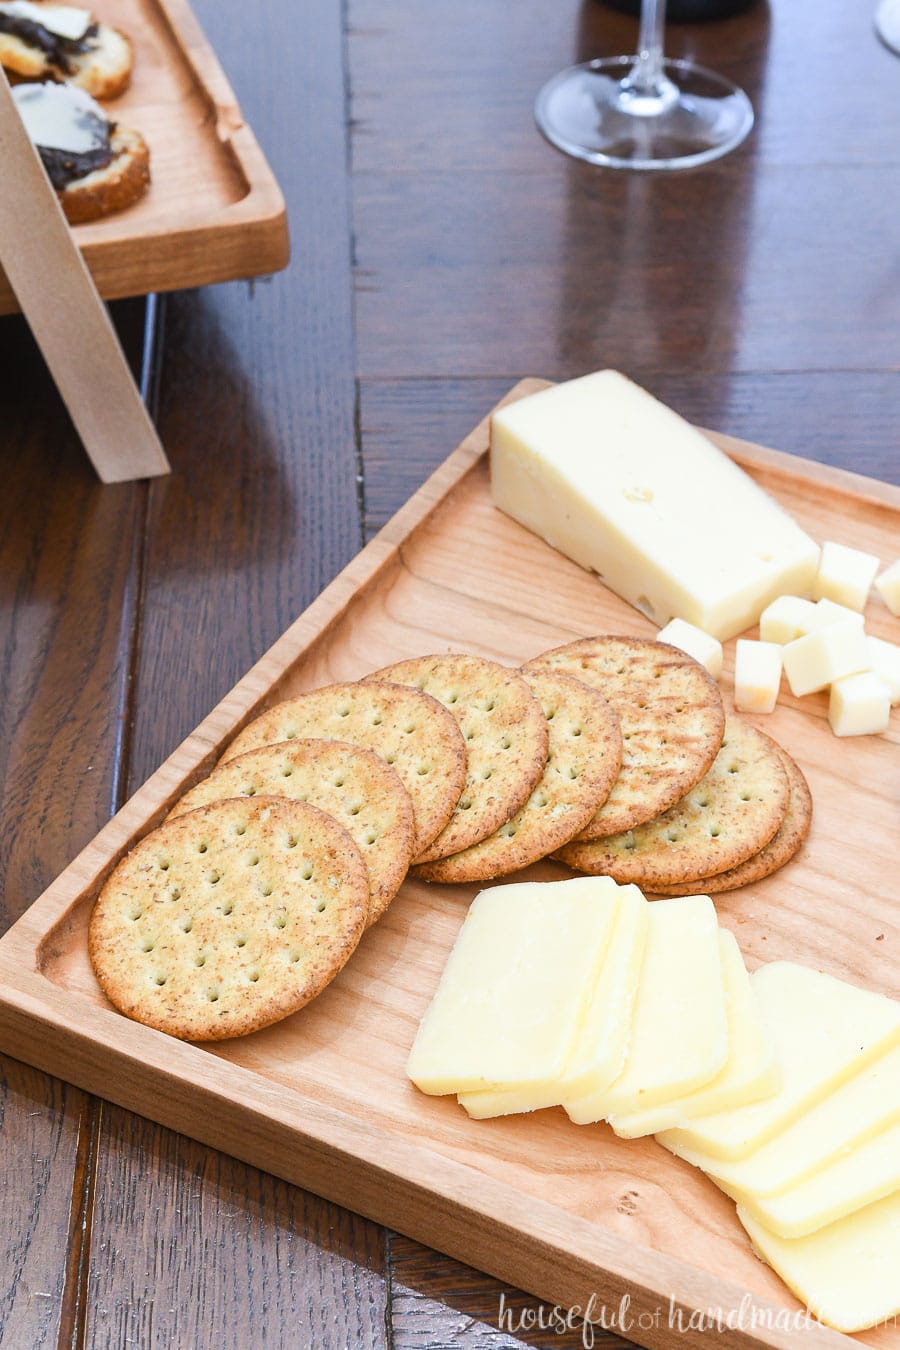
There are many ways you could add sides to a tray, I chose to keep it clean and router out the center of the tray leaving a small lip around the outside.
This was the very first time I have tried something like this. I learned that it is not a quick process, but it’s also not hard, just a lot of repetition.
Routing Jigs
To ensure your trays are routed out smoothly, you will want to create a couple jigs. These jigs can easily be made from scraps of wood.
Perimeter Jig:
- Determine how far from the edge of your tray you want the routing to stop. Measure the size of your router plate.
- Cut strips of 3/4″ material the width for spacers. These need to allow the router plate to come only as far as you want from the edge. Mine were 1″ thick and I used scraps of 3/4″ plywood.
- Cut 1 1/2″ strips of material to create a stop on the edge of the spacers for the router plate to butt up against. Attach the edge pieces to the spacers with glue and screws or nails.
Router Sled:
- Measure the size of your router plate. Cut a piece of thin scrap (I used 1/4″ MDF) to this measurement + 1 1/2″. Make the length at least 2″ longer than the larger tray.
- Drill holes in the ends of the board. They need to be inset 1″ from the ends and centered on the width. Make sure the hole is large enough for your drill bit to fit inside.
- Cut a line from the top of one hole to the other and then the bottoms to create an open groove.
- Cut 3/4″ thick scraps 1+” wide and the length of the board above.
- Attach the 3/4″ thick scraps to the edges of the other board with glue and nails or screws. But be careful that they are not sticking out the bottom of the sled.
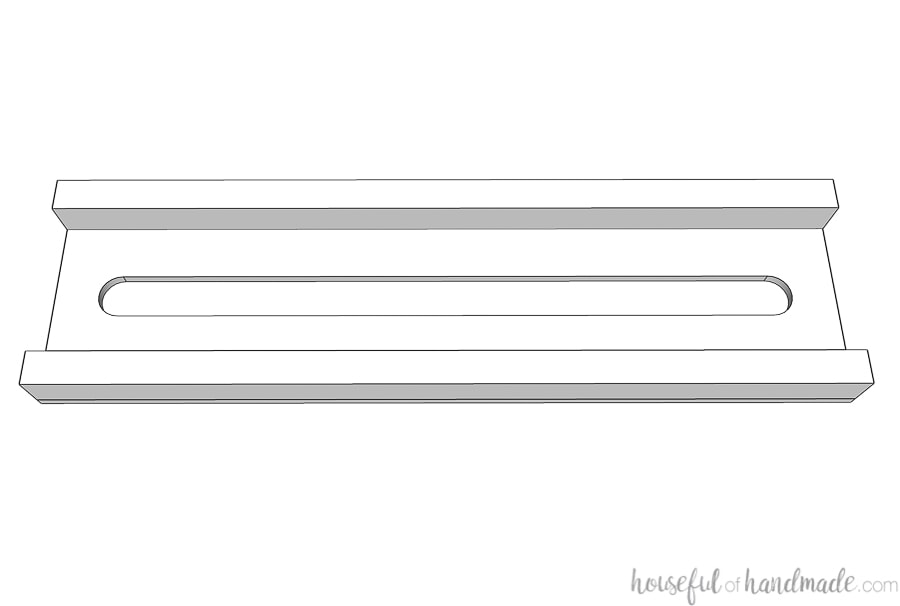
Now you can use these sleds to carefully router out the center of your trays. Only router out 1/16-1/8″ at a time. Also, be careful as you router out the center so you do not accidentally go beyond the perimeter.
On my larger tray I have a few spots that where I accidentally hit the edges. I learned this was because I was trying not to get my head in the way of the camera. On the smaller tray I did not have any problems because I was able to watch the front of the router and see when it got close to the edge.
Tiered Serving Tray Build Plans
If you want to build your own two tier serving tray to get ready for upcoming holiday entertaining, I am sharing the free plans on BuildSomething.com. Click here for the complete plans.
Who’s ready to party? I know I am!

Thank you to Kreg Tools for sponsoring this post. I only recommend products that I use and love and all opinions are 100% my own. Click here to read my full disclosure policy.