Transform an upcycled chest into a beautiful coffee table full of storage.
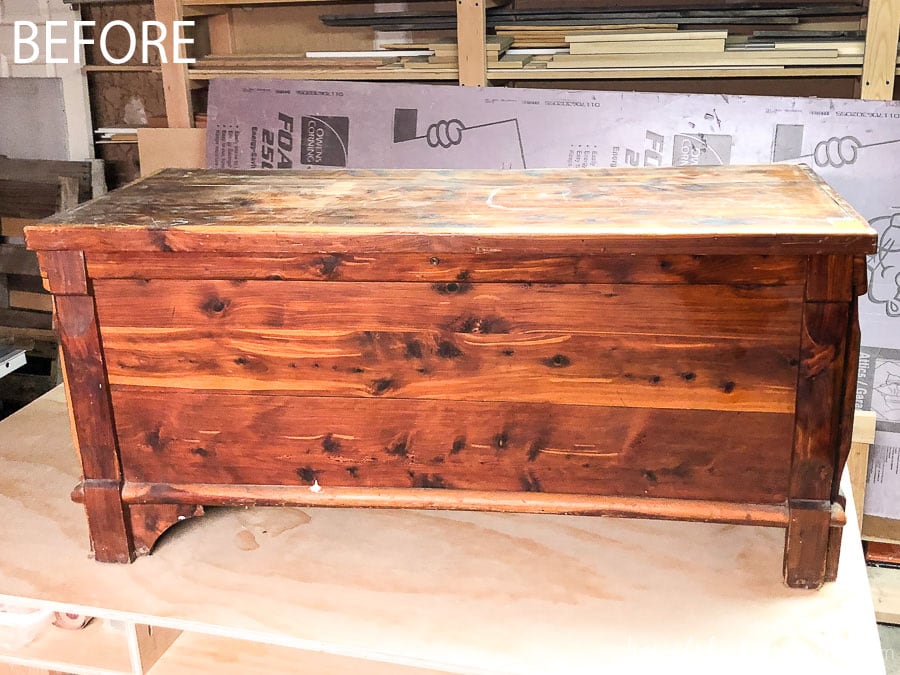
On a recent trip to the thrift store, I came across this old cedar chest. It had lots of damage to the decorative feet. But the main body was in good condition.
And the giant cedar chest was perfect for storage. So I grabbed it up to upcycle the chest into the perfect coffee table for our living room.
I have been looking for a storage solution for our blankets for some time. The old chunky blanket ladder that we used to hang them on just didn’t fit in our reorganized space.
This post may contain affiliate links. As an Amazon Associate I earn from qualifying purchases. Click here to read my full disclosure policy.
But with the cold winters we have, and my love of cuddling up with a blanket watching a movie, getting rid of blankets was not an option.
So when I saw the large cedar chest I knew it was the solution to my blanket storage problem. And bonus, the chest was built out of cedar wood. Perfect for a storage chest! With the price tag of $40 and armed with a 30% off coupon, I couldn’t pass it up.
Questions to ask before buying any used furniture:
- Is the piece made from quality materials? I recommend putting time into restoring or upcycling solid wood pieces not inexpensive laminate or melamine furniture.
- Is the wood in good condition? Check for water damage, rot or mold.
- Will the piece fit in my house? It is really easy to fall in love with something only to discover it is too big (or small) for the intended space.
- Do I have the time and patience it will take to upcycle the piece? If you need something today, maybe buying a used piece isn’t the best option. But if you have time to work on your project and the patience it will inevitably take, you will love the experience and hopefully the final results.
When I got our new storage coffee table home, I realized the damage to the base of the piece was more extensive than I originally assessed. I thought it was just missing some decorative pieces of the base, but in actuality there were large pieces of the feet missing.
That did not scare me away from creating the perfect living room storage spot! I knew I could use my woodworking knowledge to quickly replace the base and feet. I even had some left over cedar from our DIY vertical garden in my scrap wood stash.
How to Upcyle a Chest into a Coffee Table
There were 3 parts to our storage chest makeover. First I had to remove the broken base/legs and build out the new ones. Second, sand and paint the body of the chest. And lastly, strip and stain the lid. In total, it only took a couple days to complete this fun makeover and I love the results.
Building out the New Base & Legs
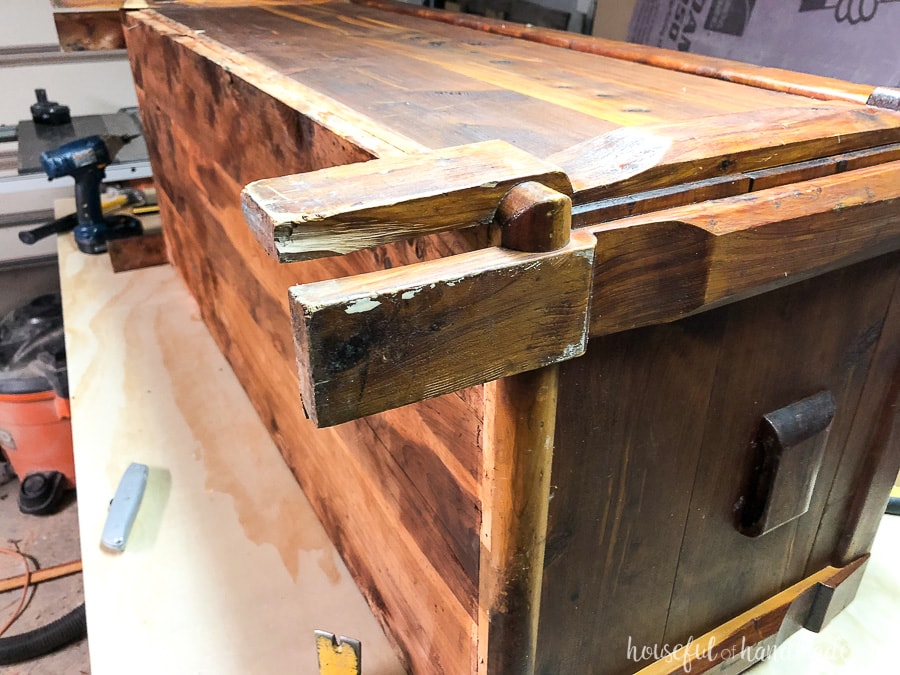
I started by removing all the pieces that were just attached to the bottom of the upcycled chest. They were held on with just nails so a couple strong hits with the hammer loosened them up nicely.
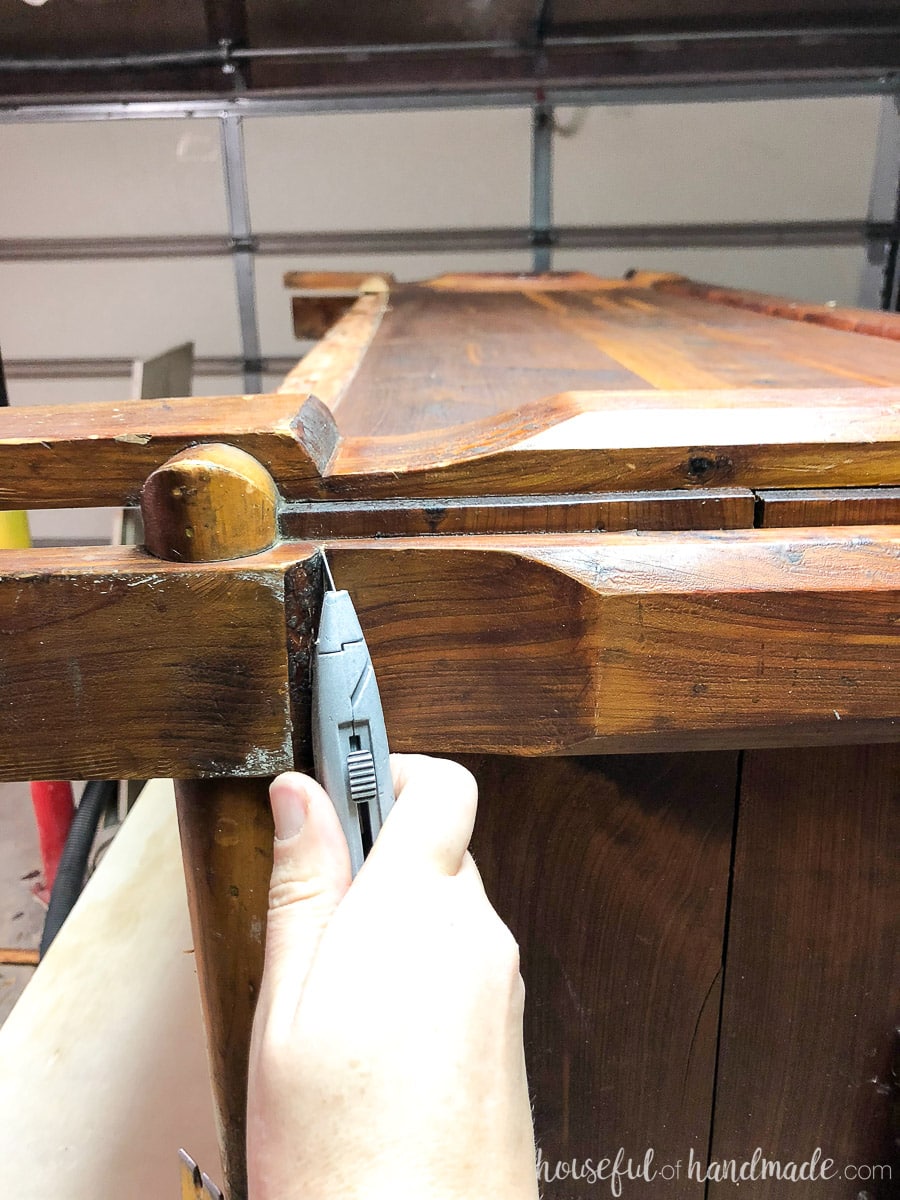
The decorative front pieces were a single piece that ran all the way to the floor, over the missing legs. That was probably the only reason the chest was still standing! Instead of removing them completely, I used a utility knife to score and break the pieces at the thin point near the bottom. And I removed the rounded bottom trim.
Next I used some left over cedar fence picket wood to create a trim around the entire base. This butted right up against the decorative pieces that were cut and helped cover up the less than pretty joints on the bottom of the chest.

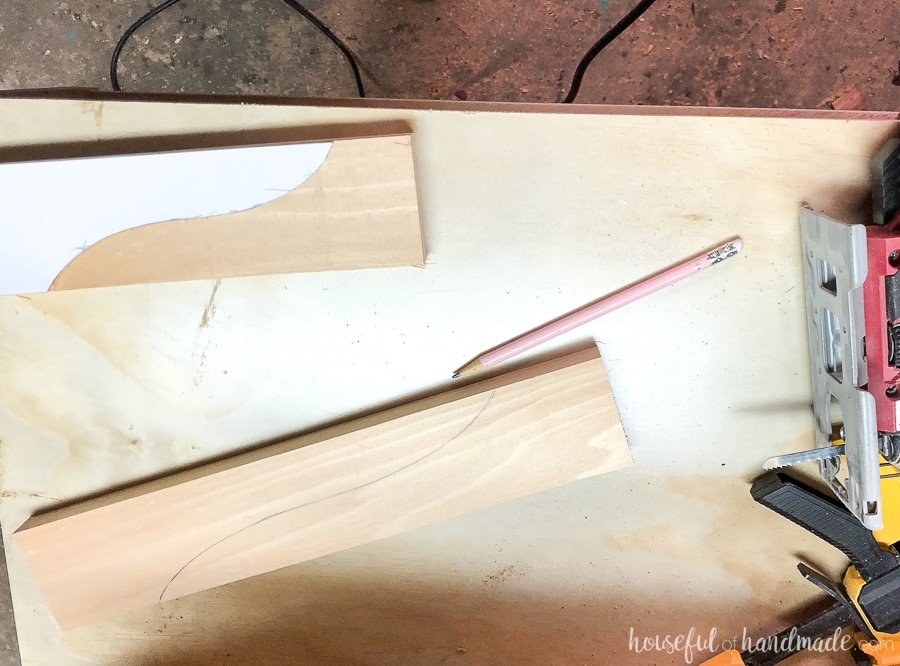
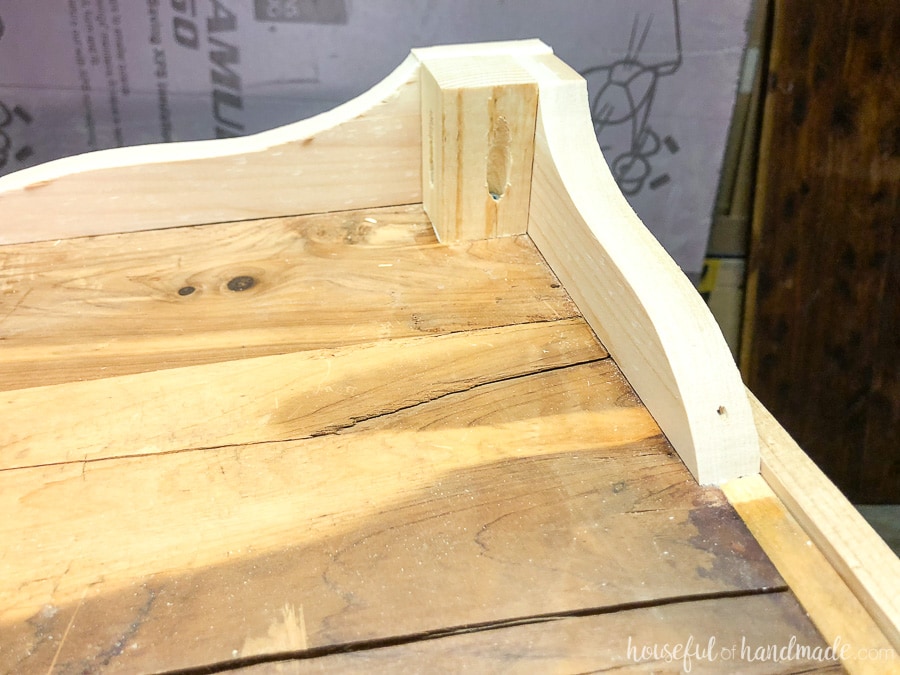
To make new legs, I cut some 1×3 cedar boards into decorative feet with a jigsaw. Then I cut some 2×2 boards to the same height as the decorative feet.
I secured the feet to the base of the chest with some picket hole screws and 1″ finish nails and lots of wood glue.
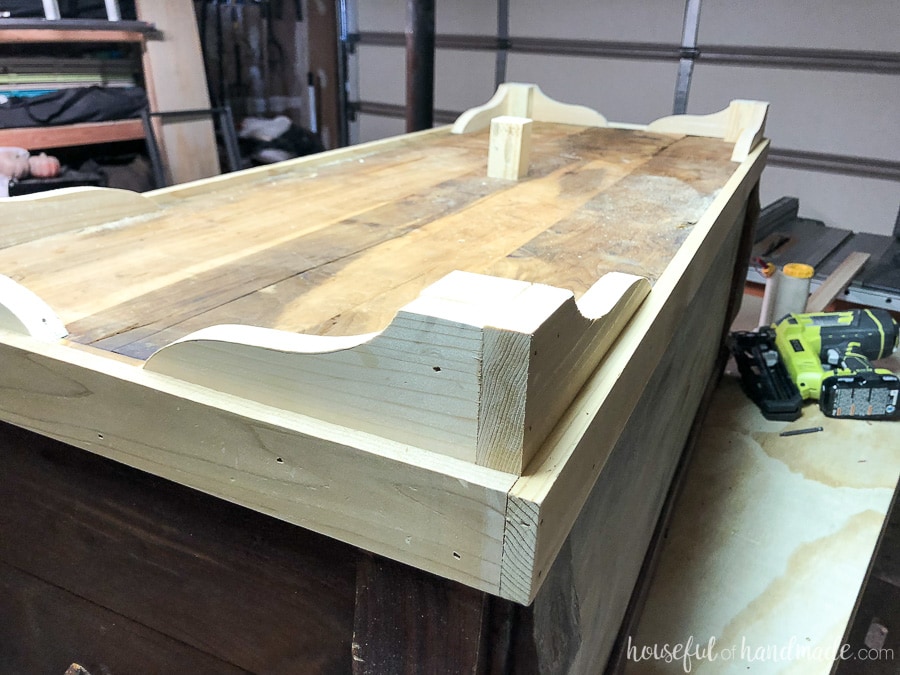
The 2×2 feet were there to hold most of the weight and the decorative feet were attached to it and the chest. All in all, this is way sturdier than when I bought it.
I even added a center foot to help prevent the bottom of the chest from further sagging (and hopefully help push it back up a little).
A good sanding on the old and new and it was ready for paint!
Painting the Chest
I chose to paint the new coffee table with Chalky Finish paint from DecoArt. This is my first time using it. The chalky finish paint is suppose to be extra durable, and requires less prep work, so it sounded perfect for living room piece that is sure to get lots of love.
Even though this paint requires “less prep” I still took time to get my piece ready.
How to Prepare Old Furniture for Paint
- Remove hardware, hinges, drawer slides, etc. Store all the pieces in a zip top bag with the coordinating screws so you don’t loose anything.
- Clean the entire piece with a mixture of approximately 3 parts water to 1 part distilled vinegar and a couple squirts of dish soap. This will help remove any built up grime.
- If it’s really dirty, mix up a second batch of cleaner and give it a second scrubbing.
- Sand the areas to be painted with a medium grit sandpaper to scuff up the surface. This is necessary to give the paint something to adhere to. Use flexible sandpaper to get into all the nooks and crannies.
- Wipe off all the sanding dust with a tack cloth or a slightly damp cloth (but make sure to allow it to dry fully if using a damp cloth before painting).
Once the piece was ready for paint, I gave it 2 coats with a small paint brush to help me get into all the details.
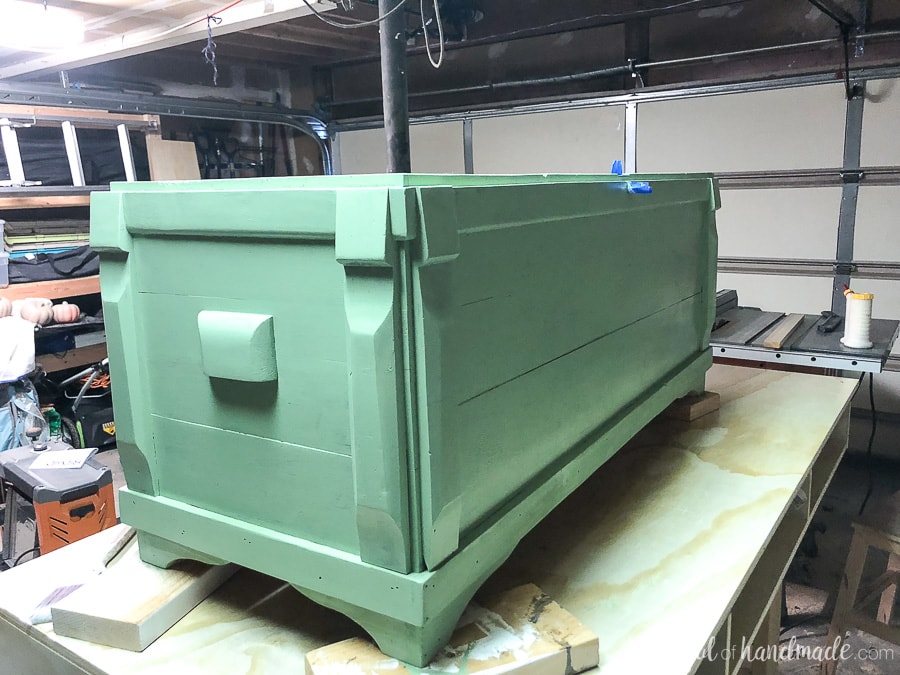
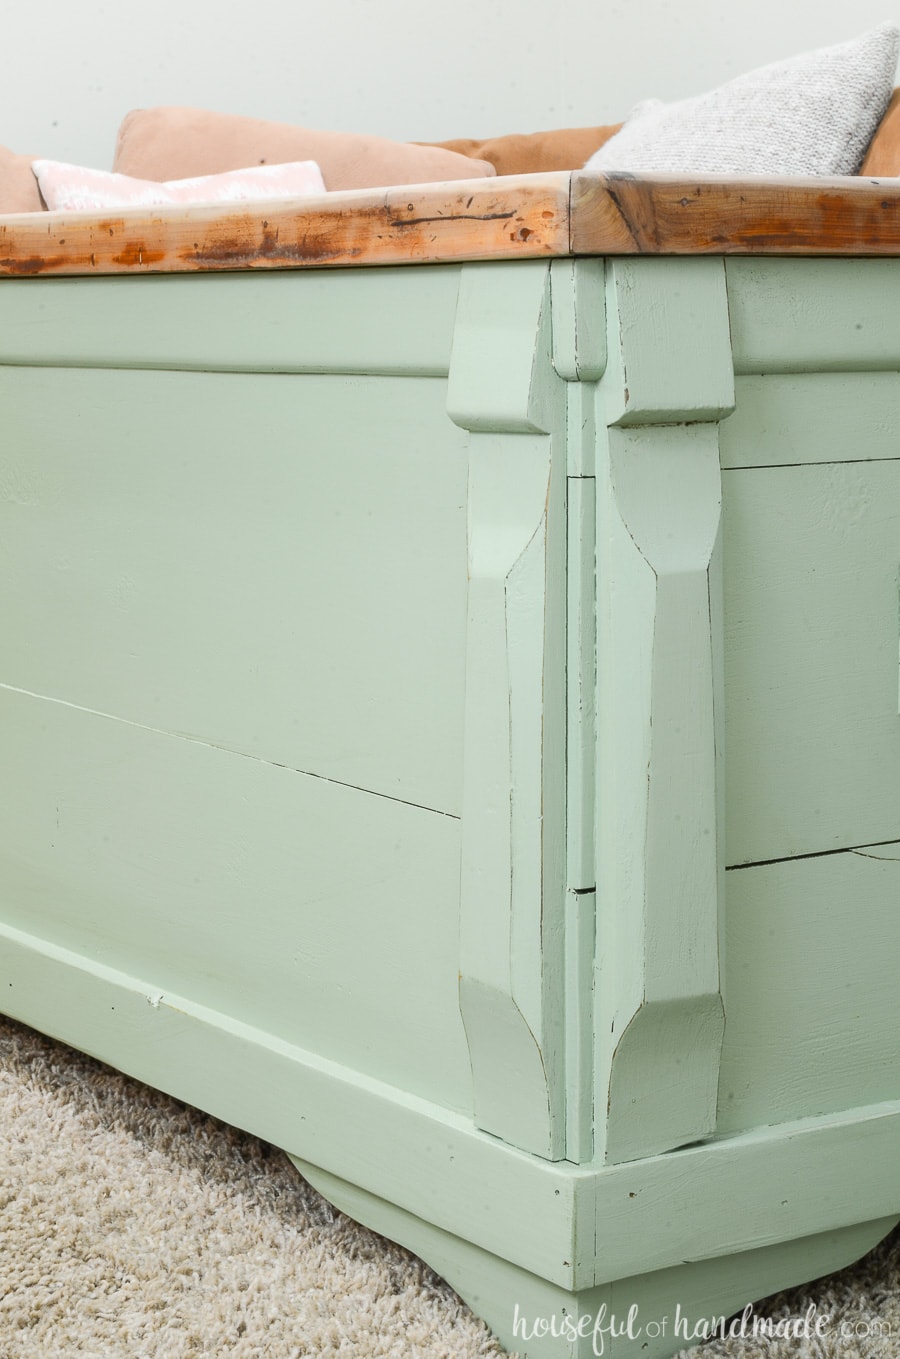
After the paint dried, I used a piece of 220 grit sandpaper to add some distressing to the edges of the decorative pieces to really make the unique shape pop. The chalky finish paint distresses easily with just a few swipes of the sandpaper.
When distressing, always start small. You can always add more but it’s way harder to fix it if you take off too much!
Stripping the Chest Lid
To give the upcycled chest more of a coffee table look, I wanted to leave the lid bare wood instead of painting it. Also, the I am sure my kids would scrape off the painted top in no time at all (they play hard in the living room).
And since the lid is straight and solid, it was easy to strip the finish from. It would have been harder to do on all the detailed parts.
I used CitriStrip to remove the finish. It is pretty easy to use and doesn’t smell totally like chemical stripper. I covered the entire lid in a nice coat of the stripper and let it sit for a few hours.
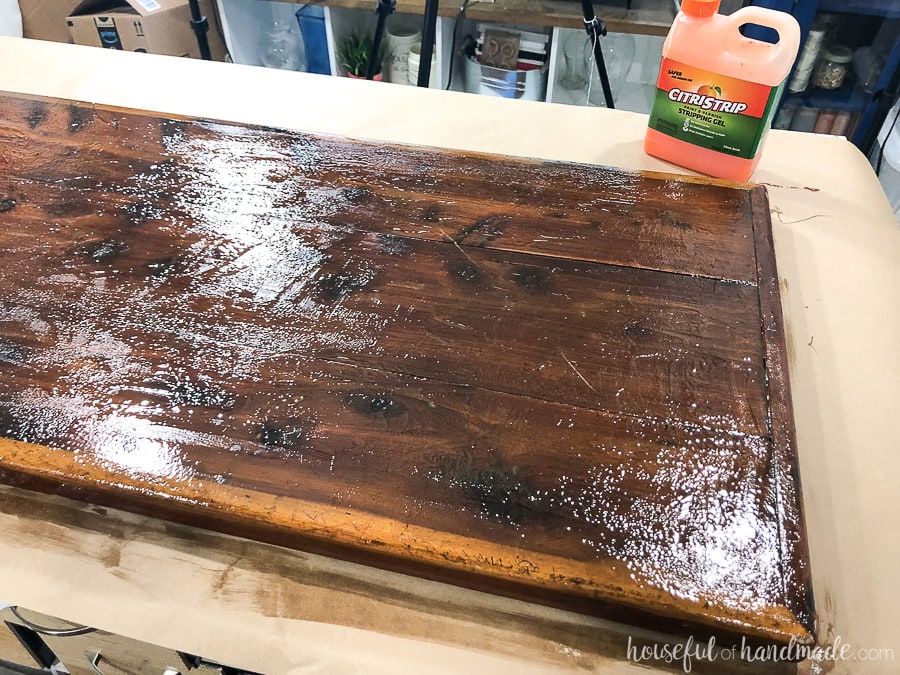
To remove the loosened finish, I used an inexpensive putty knife to scrape the CitriStrip off. This is so satisfying! And you can start to see the pretty wood underneath the old, dated stain.
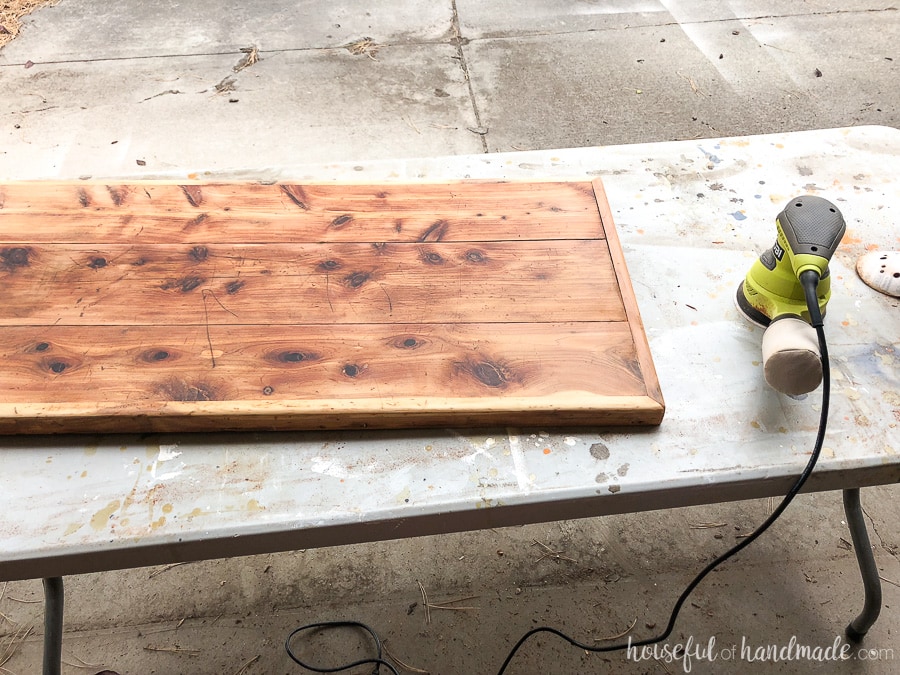
After scraping all the finish I could off, I cleaned the entire surface with mineral spirits. This takes off the remaining CitriStrip residue. Then I busted out my sander to get a smooth clean surface.
There was still a decent amount of finish on the piece. I probably could have done a second coat of CitriStrip. But I am impatient and just let my orbital sander do the heavy lifting.
I started by sanding with a 100 grit sandpaper to remove the rest of the finish, then I switched to a 220 grit sandpaper for the final sanding.
The cedar still had quite a red tone to it, which cedar normally does. But I wanted to give the lid a little more of a worn color. I added a coat of Varathane Aged Wood Accelerator to give the wood some gray tones and it worked like a charm.
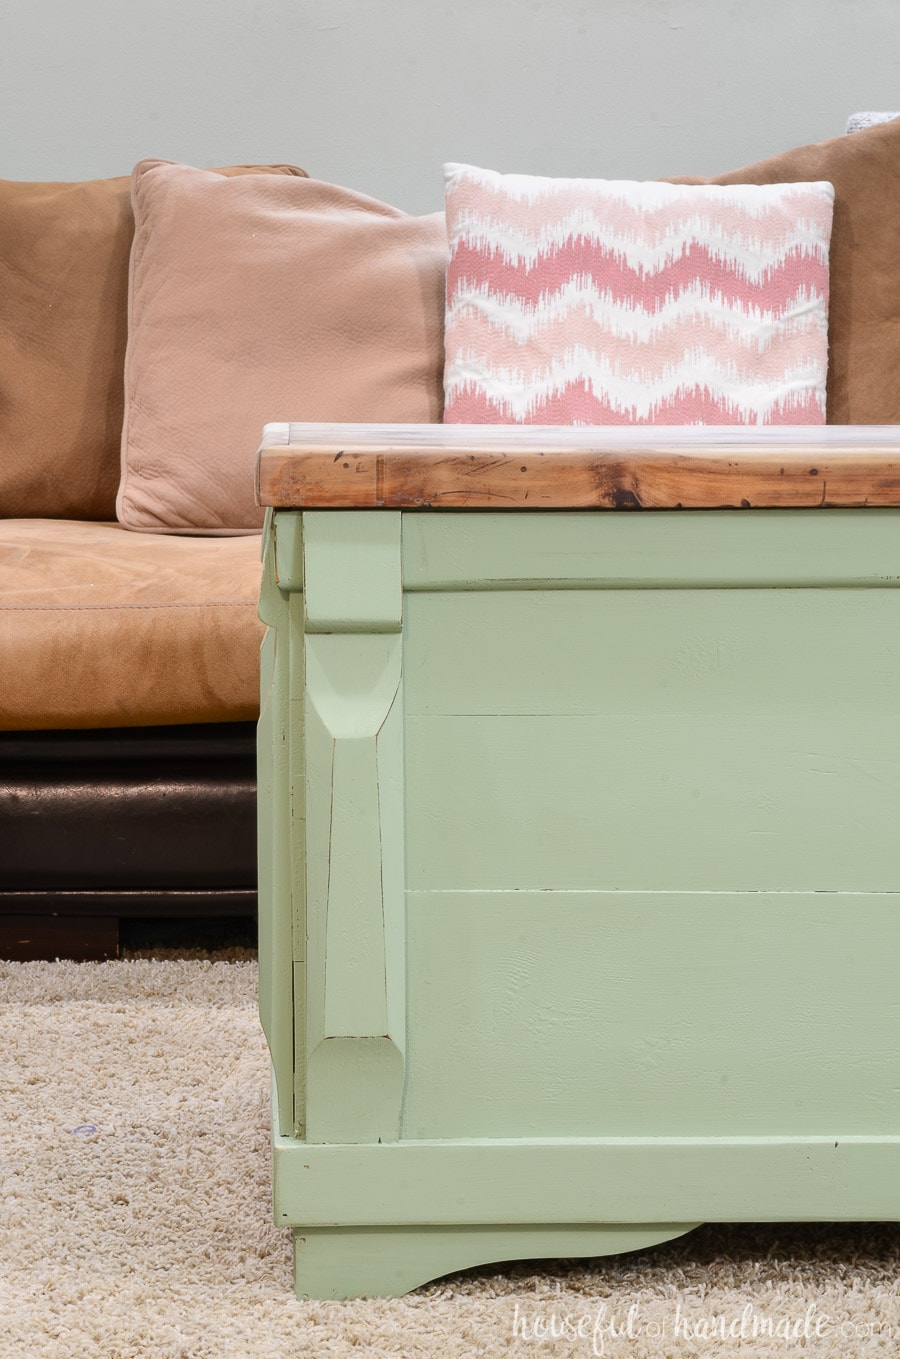
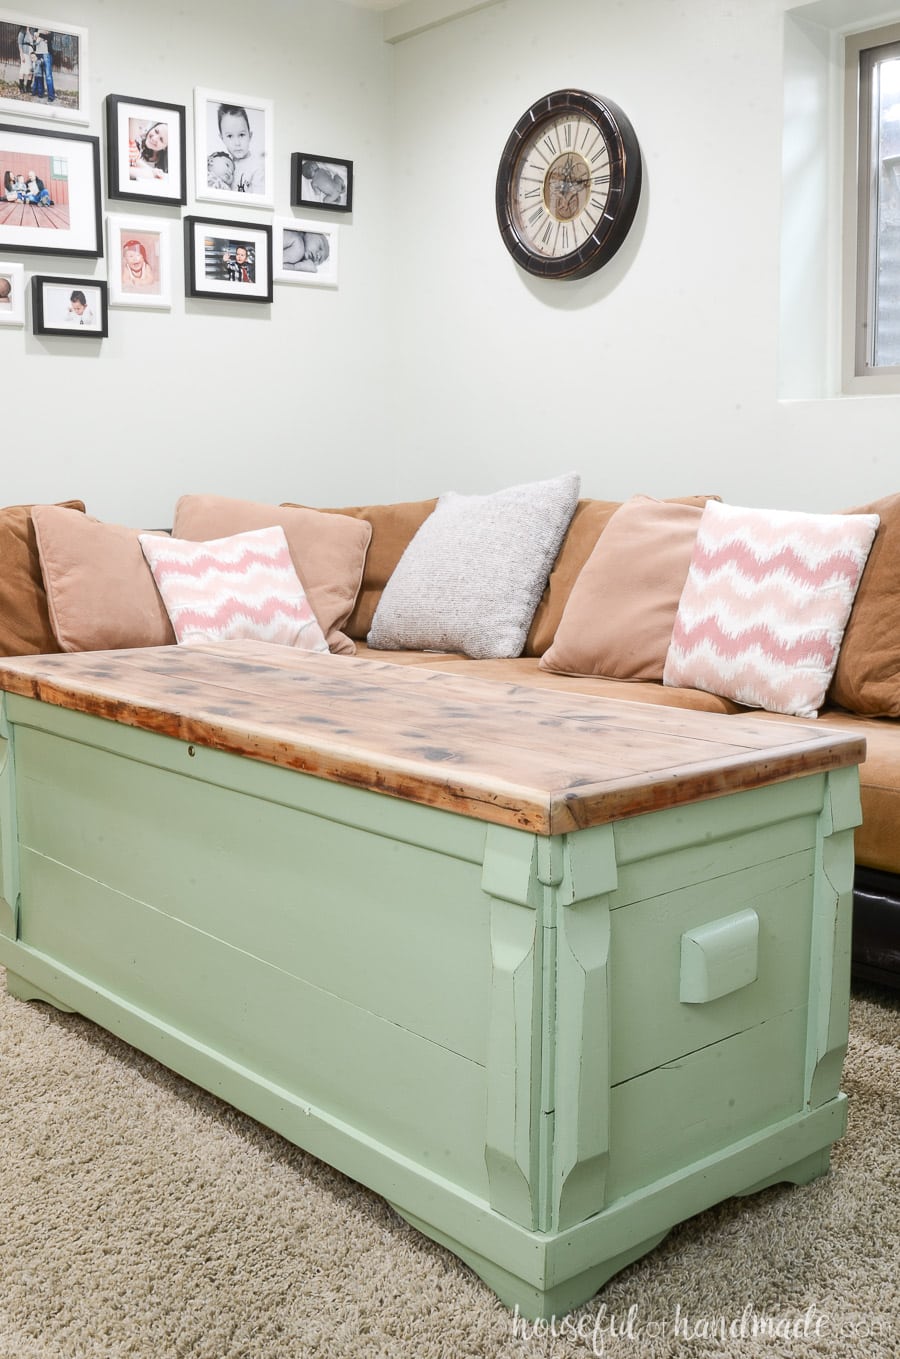
The Final Reveal
Using the same hinges, I reattached the lid to the storage chest. To save my kids fingers, I replaced the broken lid chain with these soft close hinges.
I also gave the entire piece a coat of wax to give the piece a protective finish. I love how the matte finish of the furniture wax looks on this upcycled chest.
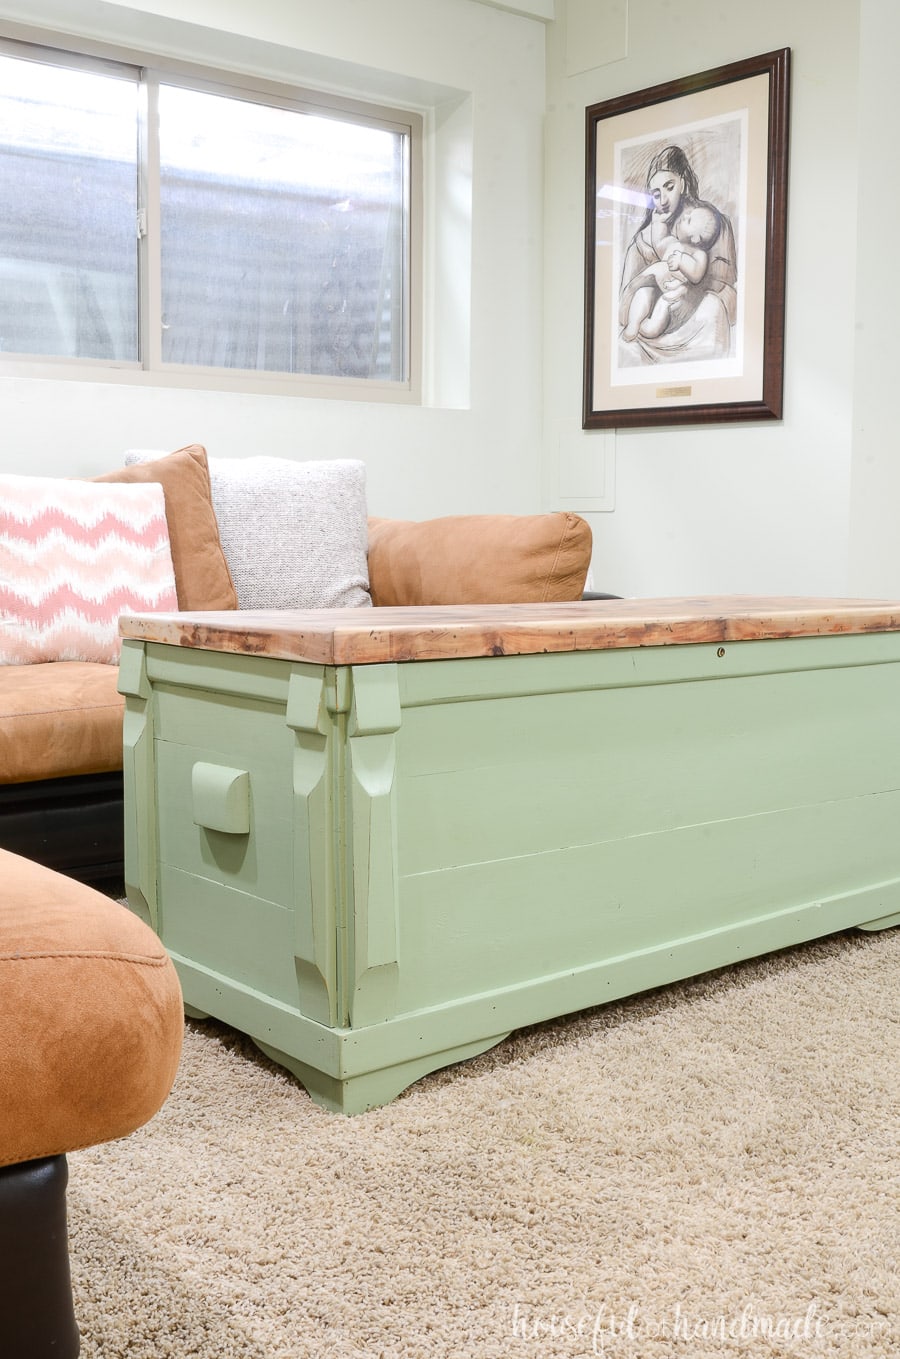
I love how the upcycled chest turned out. It is the perfect coffee table for our sectional. And I cannot believe how much storage it gives us. All our blankets fit inside it with room to spare!
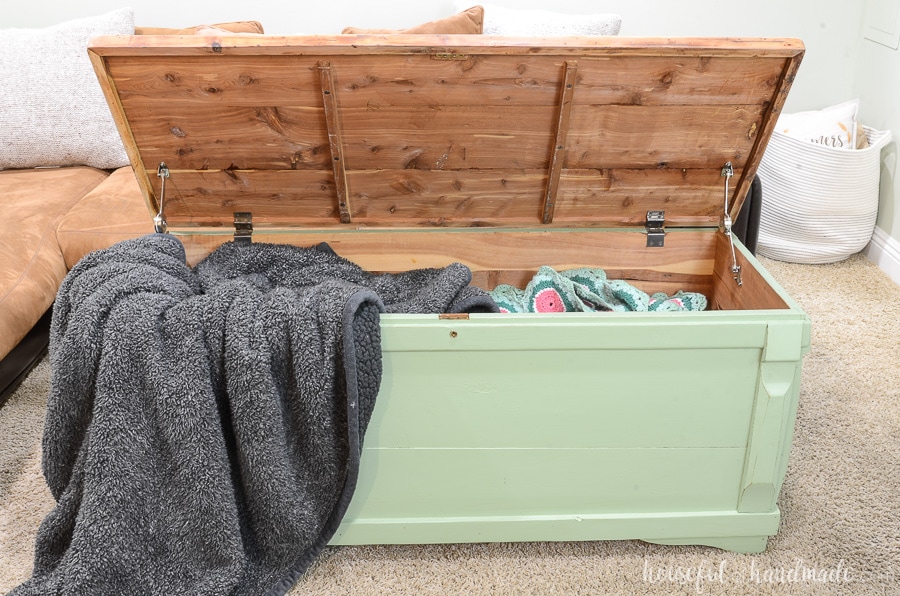
We are ready for the coming winter with a space to keep all our blankets. And we even have the perfect coffee table to hold our popcorn bowl while enjoying a family movie night!
If you are tempted to try your hand at giving old furniture new life, I would recommend starting with a simpler piece. Something that you can complete in a weekend will help you learn for the bigger projects.
Or to build your own coffee table from scratch, check out this simple modern coffee table DIY or my new favorite asymmetrical coffee table build.

Upcycled Chest to Coffee Table
Materials
- Wood Chest
- Cedar Fence Picket Wood
- 1x3 Cedar Boards
- 2x2 Boards
- Picket Hole Screws
- 1" Finish Nails
- Wood Glue
- Chalky Finish Paint
- Small Paint Brush
- Tack Cloth
- 220 Grit Sandpaper
- CitriStrip
- Mineral Spirits
- Varathane Aged Wood Accelerator
- Furniture Wax
- Soft Close Hinges
Tools
- Orbital Sander
- Utility Knife
- Jigsaw
- Drill
- Putty Knife
Instructions
- Remove hardware, hinges, drawer slides, etc. Store all the pieces in a zip top bag with the coordinating screws so you don’t loose anything.
- Clean the entire piece with a mixture of approximately 3 parts water to 1 part distilled vinegar and a couple squirts of dish soap.
- If it’s really dirty, mix up a second batch of cleaner and give it a second scrubbing.
- Sand the areas to be painted with a medium grit sandpaper to scuff up the surface. Use flexible sandpaper to get into all the nooks and crannies.
- Wipe off all the sanding dust with a tack cloth or a slightly damp cloth.
- Paint the entire piece with 2 coats with a small paint brush to help me get into all the details.
- Use a piece of 220 grit sandpaper to distress the edges of the decorative pieces and really make the unique shape pop.
- Strip the chest lid with CitriStrip. Cover the entire lid and let it sit for a few hours.
- Use an inexpensive putty knife to scrape the CitriStrip off.
- Clean the entire surface with mineral spirits to take off the remaining CitriStrip residue.
- Use the orbital sander to get a smooth clean surface.
- Add a coat of Varathane Aged Wood Accelerator to give the wood some gray tones.
- Reattach the lid to the storage chest with soft close hinges
- Give the entire piece a coat of wax to give it a protective finish.
