Whether you are growing your own food, buying from the farmers market, or buying bulk, storing all your produce can get tricky.
During the harvest, the countertop can get cluttered in bowls of fruits and vegetables or fridge bins can overflow. Instead, you need a solution to store it all and keep your kitchen clean.
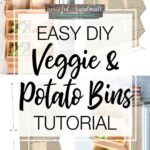
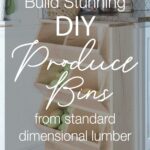
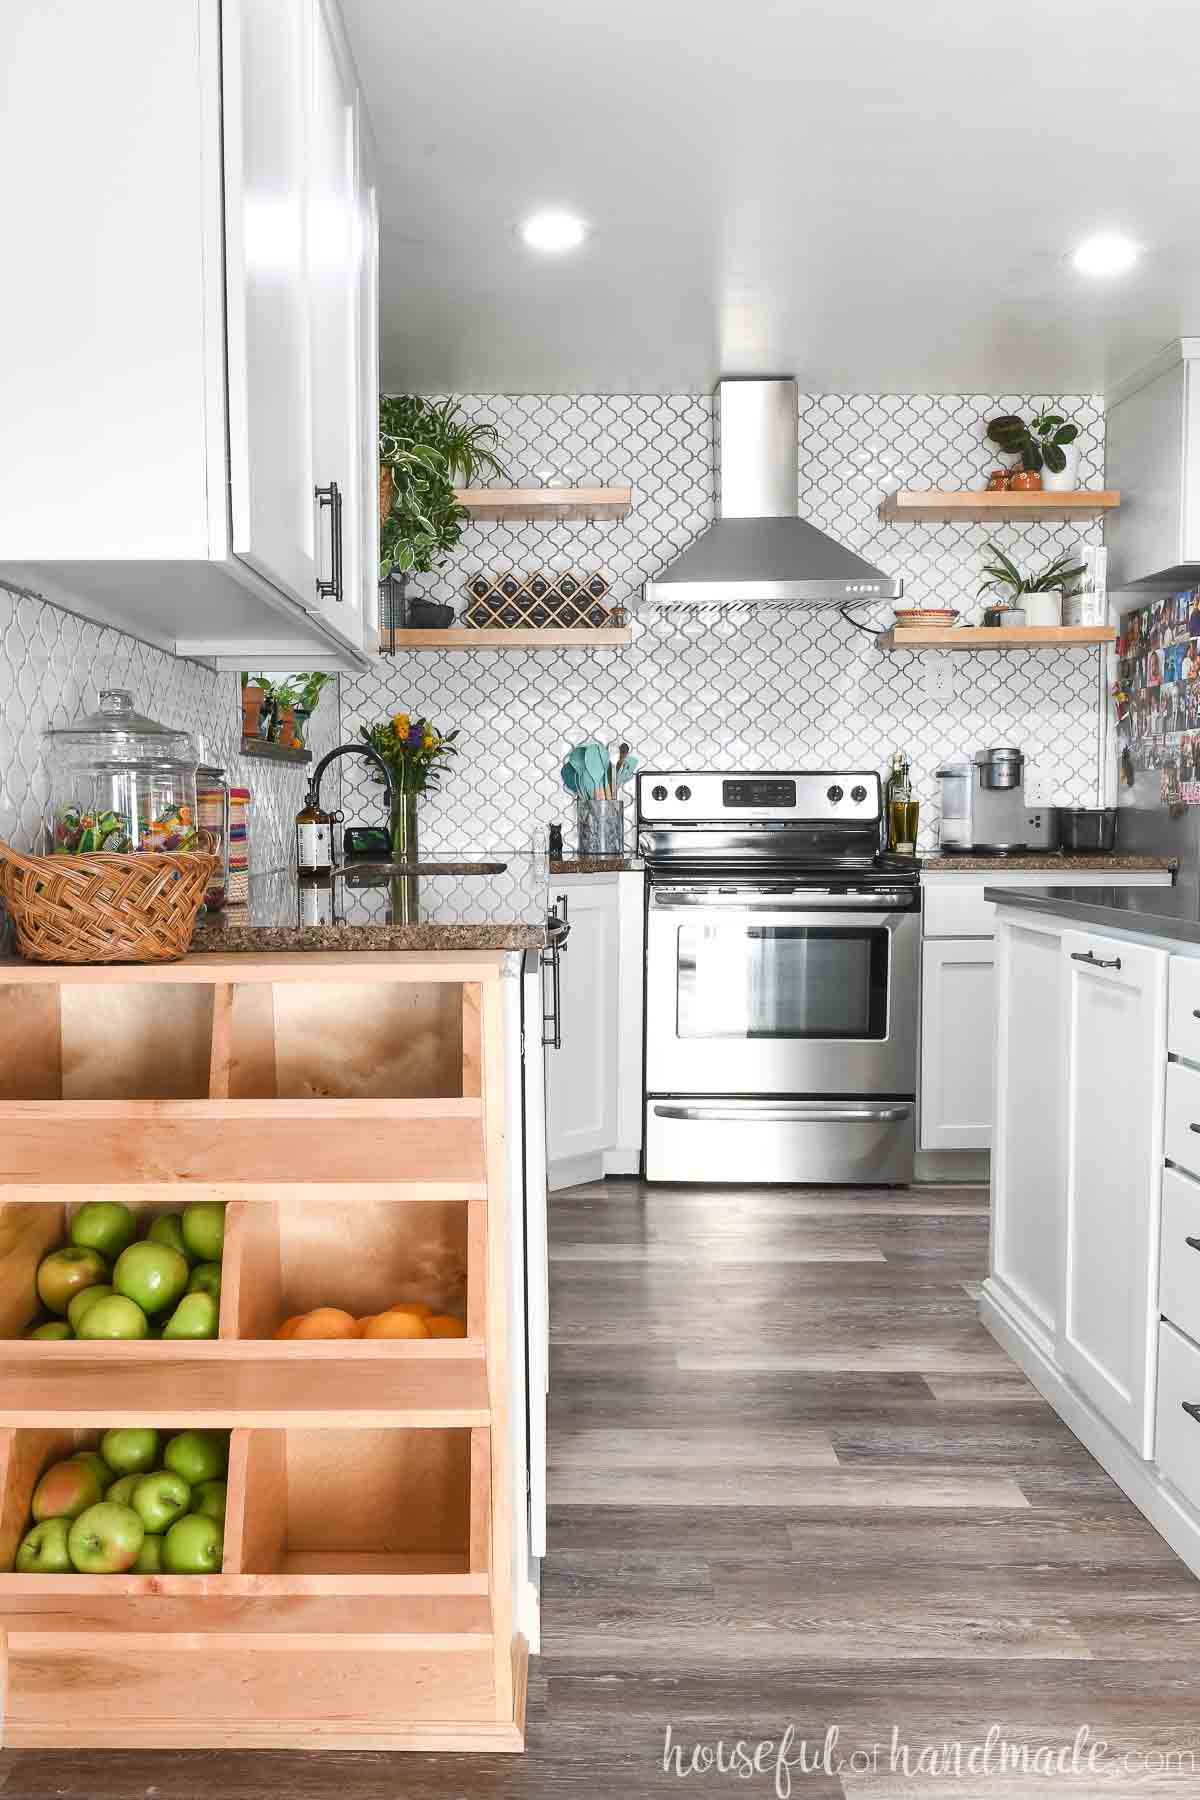
This beautiful wooden vegetable and potato bin is the answer! These stunning stacked vegetable storage bins hold tons of produce in a small amount of space.
This post may contain affiliate links. As an Amazon Associate I earn from qualifying purchases. Click here to read my full disclosure policy.
Stacked Vegetable Storage Bins
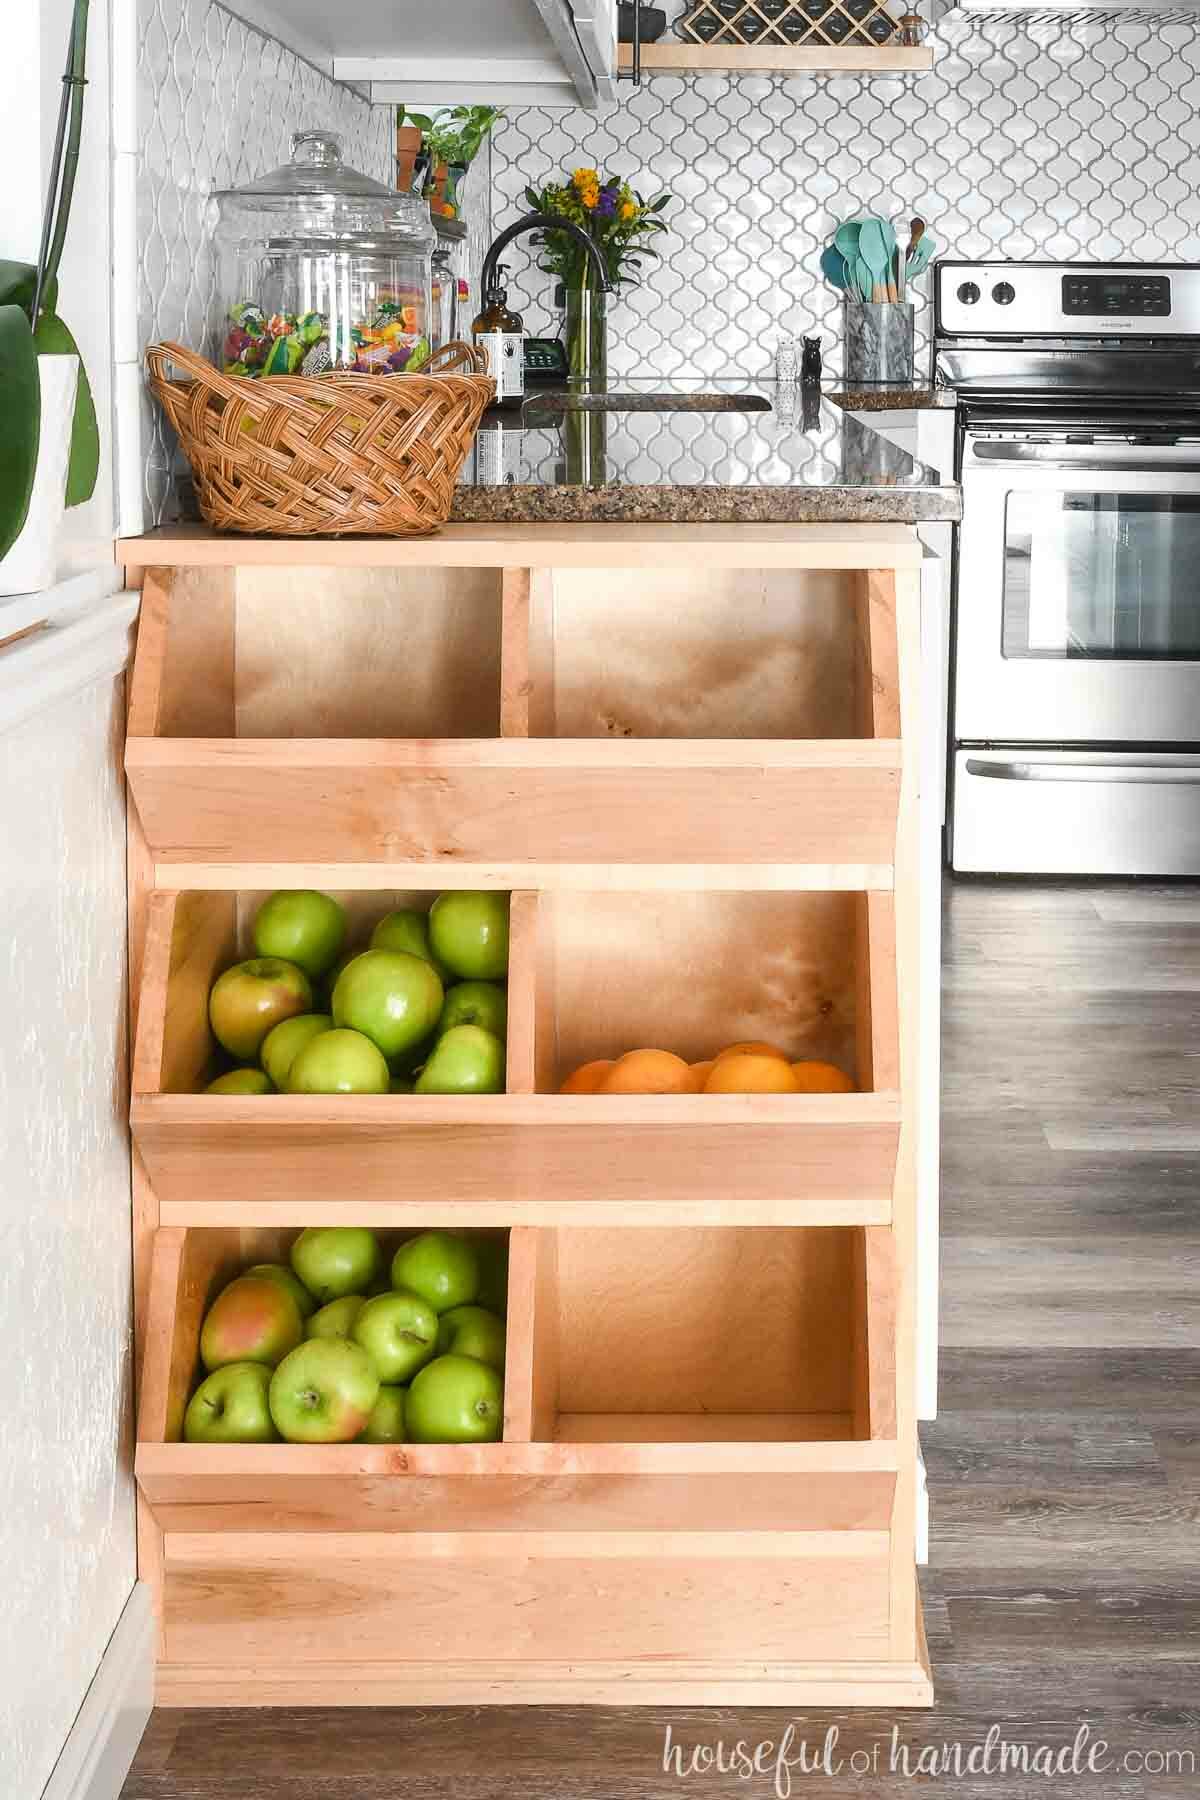
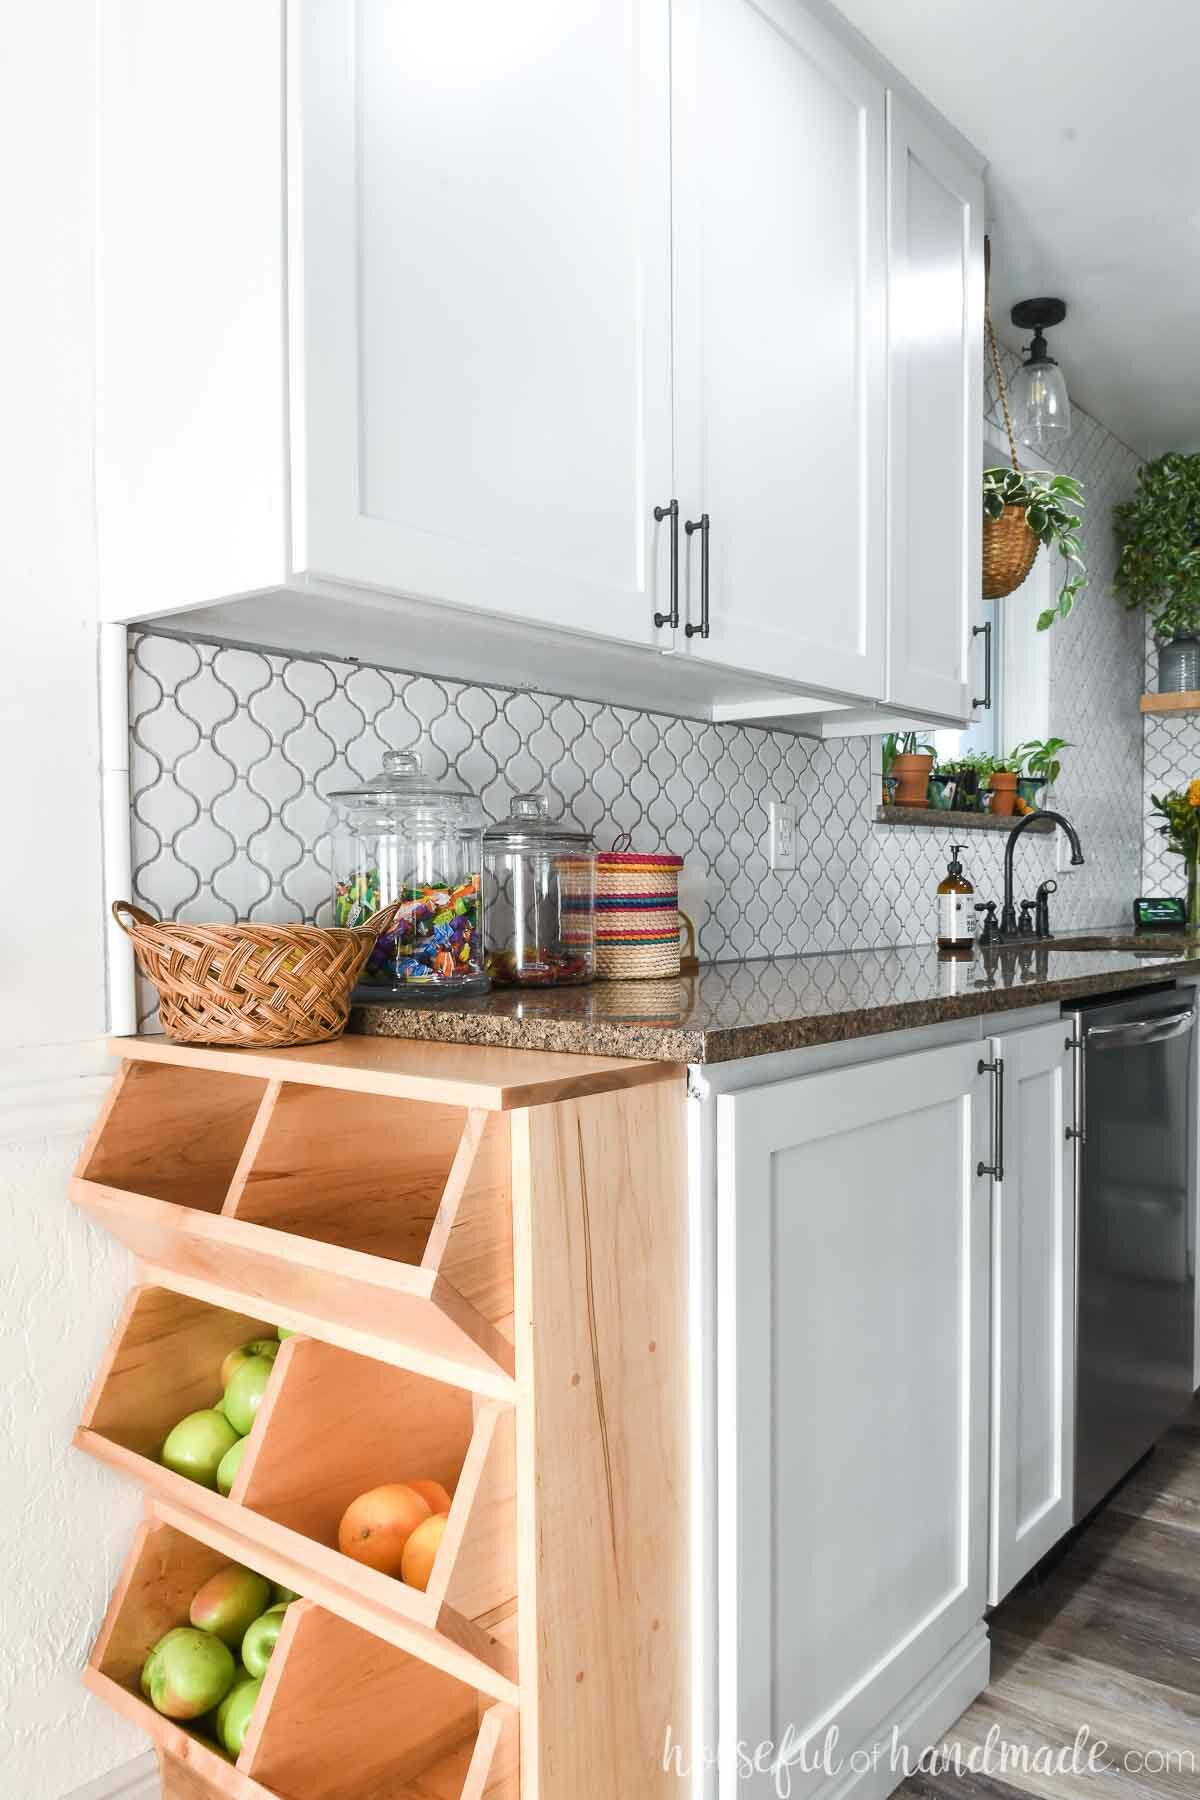
My favorite part of these vegetable bins is that it was designed to fit at the end of a standard base cabinet. The top should sit just below the countertop so it won’t get in the way of any overhang.
And since the product bins are just under 12″ deep, they can add a ton of vegetable storage to any kitchen without taking up valuable space.
Having the produce visible in your kitchen will be a great reminder to remember to eat your veggies. And to use up all that delicious food before it goes bad.
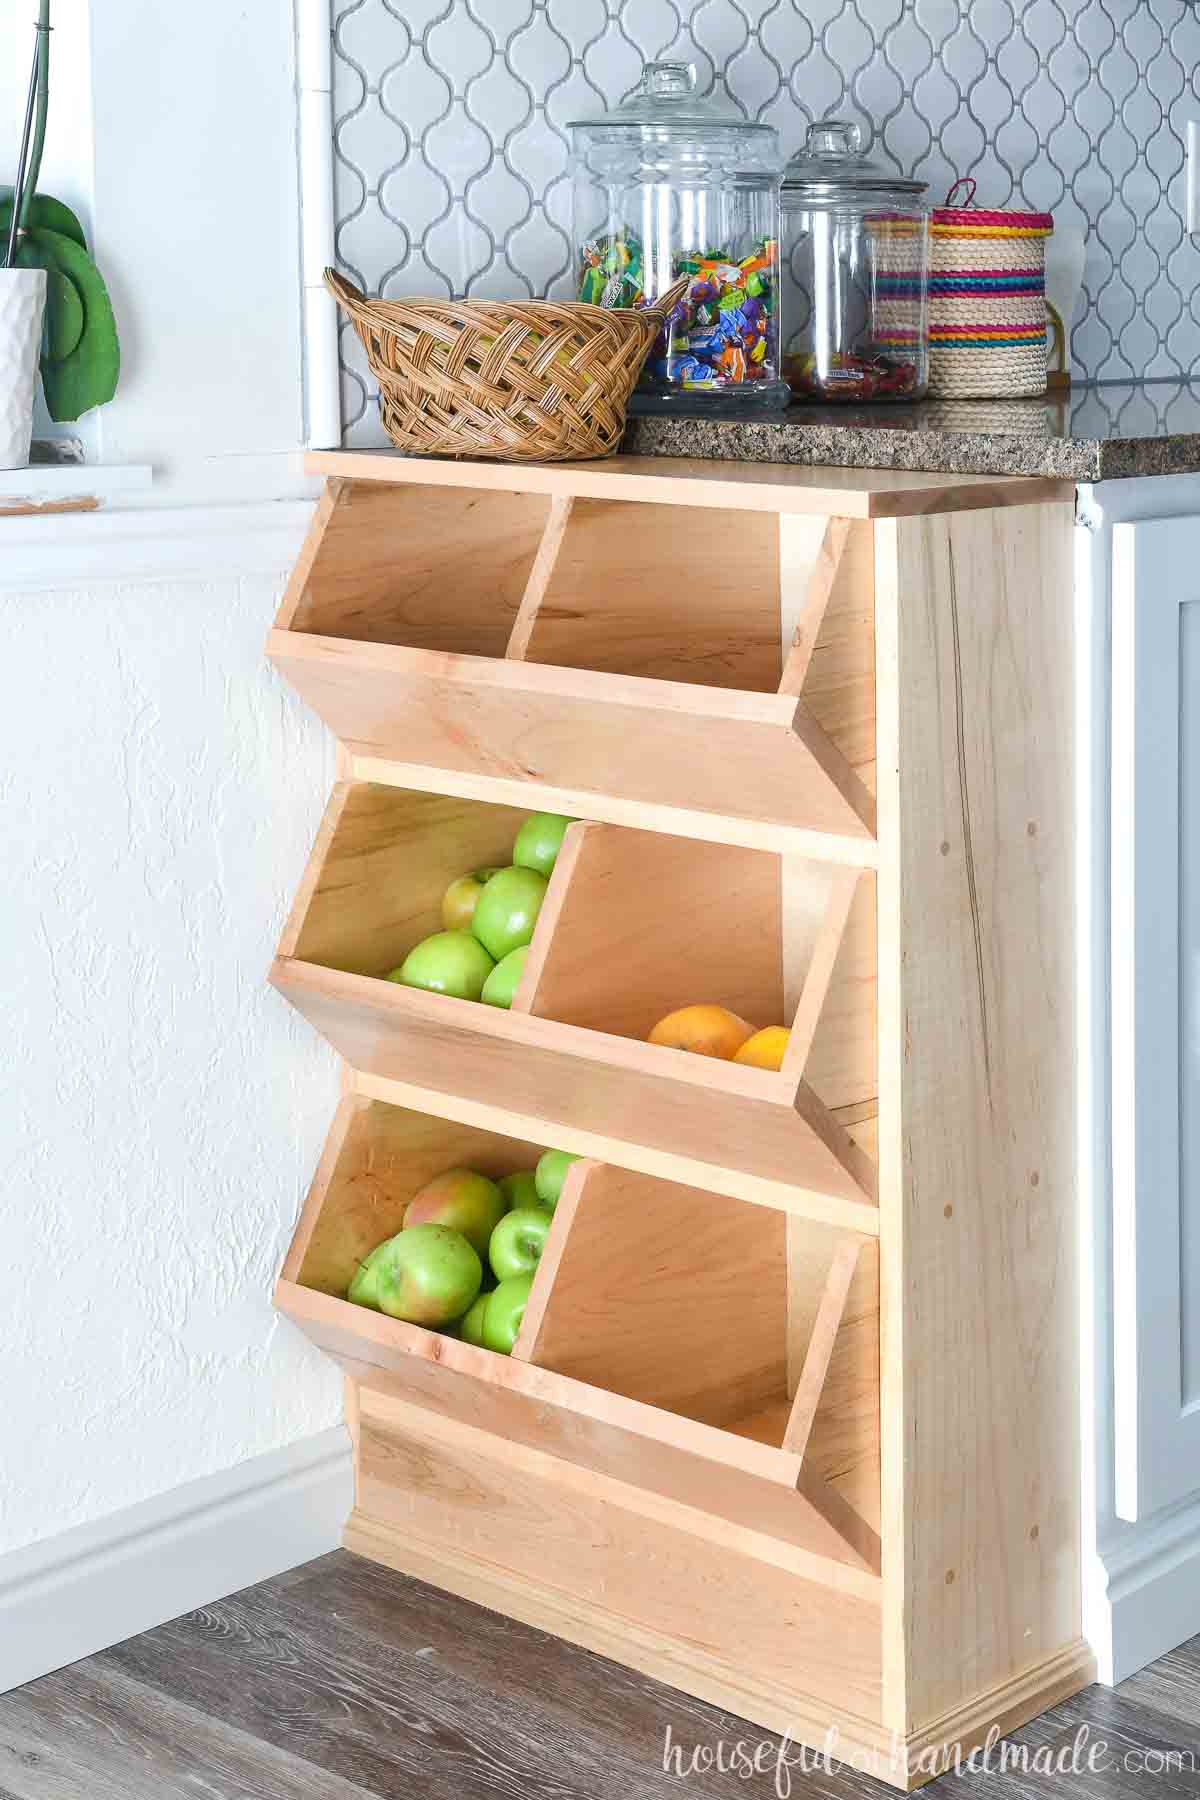
The storage bins also have a divider in the center. This allows you to separate your vegetables, potatoes, fruit and onions out.
- Store onions separate from potatoes or your potatoes will grow eyes quicker.
- Store apples away from other fruits and vegetables because the ethylene gas can cause other produce to ripen/spoil quickly.
- Keep onions away from fruits and vegetables that could absorb the smell/flavor.
With this produce bin, you can store your fruits, vegetables, potatoes and onions properly but still have them within easy reach so you remember to use them!
How to Build Vegetable & Potato Storage
Tools & Materials
Tools needed:
- Miter saw
- I recently upgraded to this larger sliding miter saw (watch for it to go on sale), but all my projects before were built with this inexpensive miter saw that I loved.
- Circular saw
- Pocket hole jig or doweling jig
- Drill
- Impact driver (optional, but I love not having to switch bits with the drill)
- Finish nailer
- Flush cut saw
- Sander
Supplies:
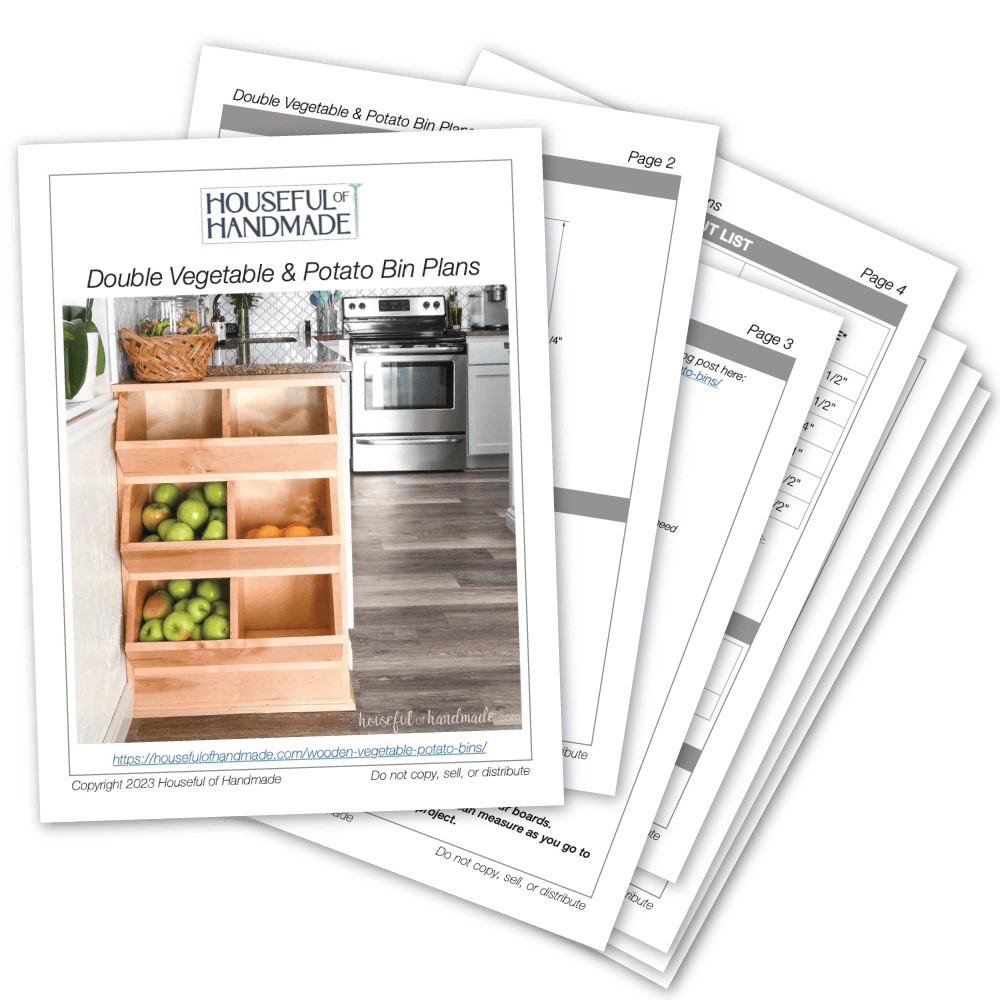
- Printable PDF Woodworking Plans
- Wood products-
- (2) 1×8 boards, 8′ long
- (1) 1×10 board, 10′ long
- (1) 1×6 board, 6′ long
- (1) 1×4 board, 2′ long
- (1) 1/4″ plywood, 4×4 sheet
- (1) 3/8″ wood dowel
- 1 1/4″ pocket hole screws or dowels
- 1 1/4″ wood screws
- 1 1/4″ finishing nails
- 5/8″ finishing nails
- Wood glue
- Sandpaper
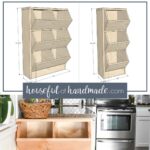
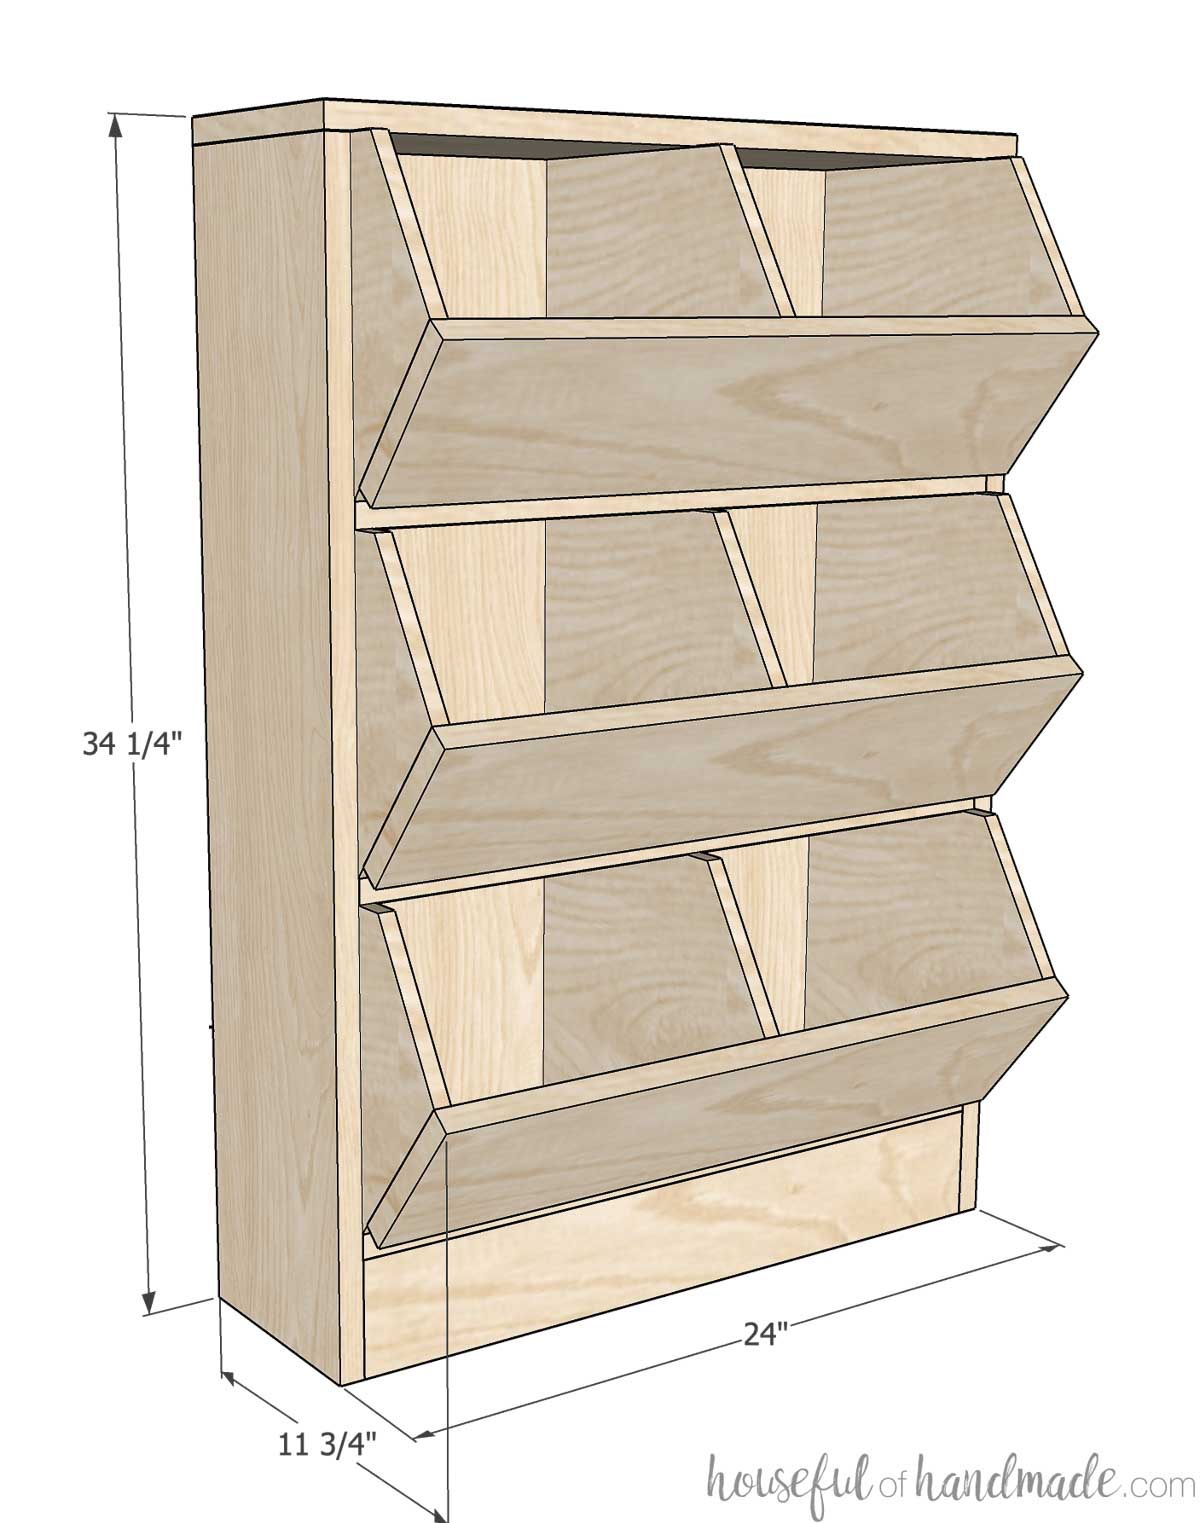
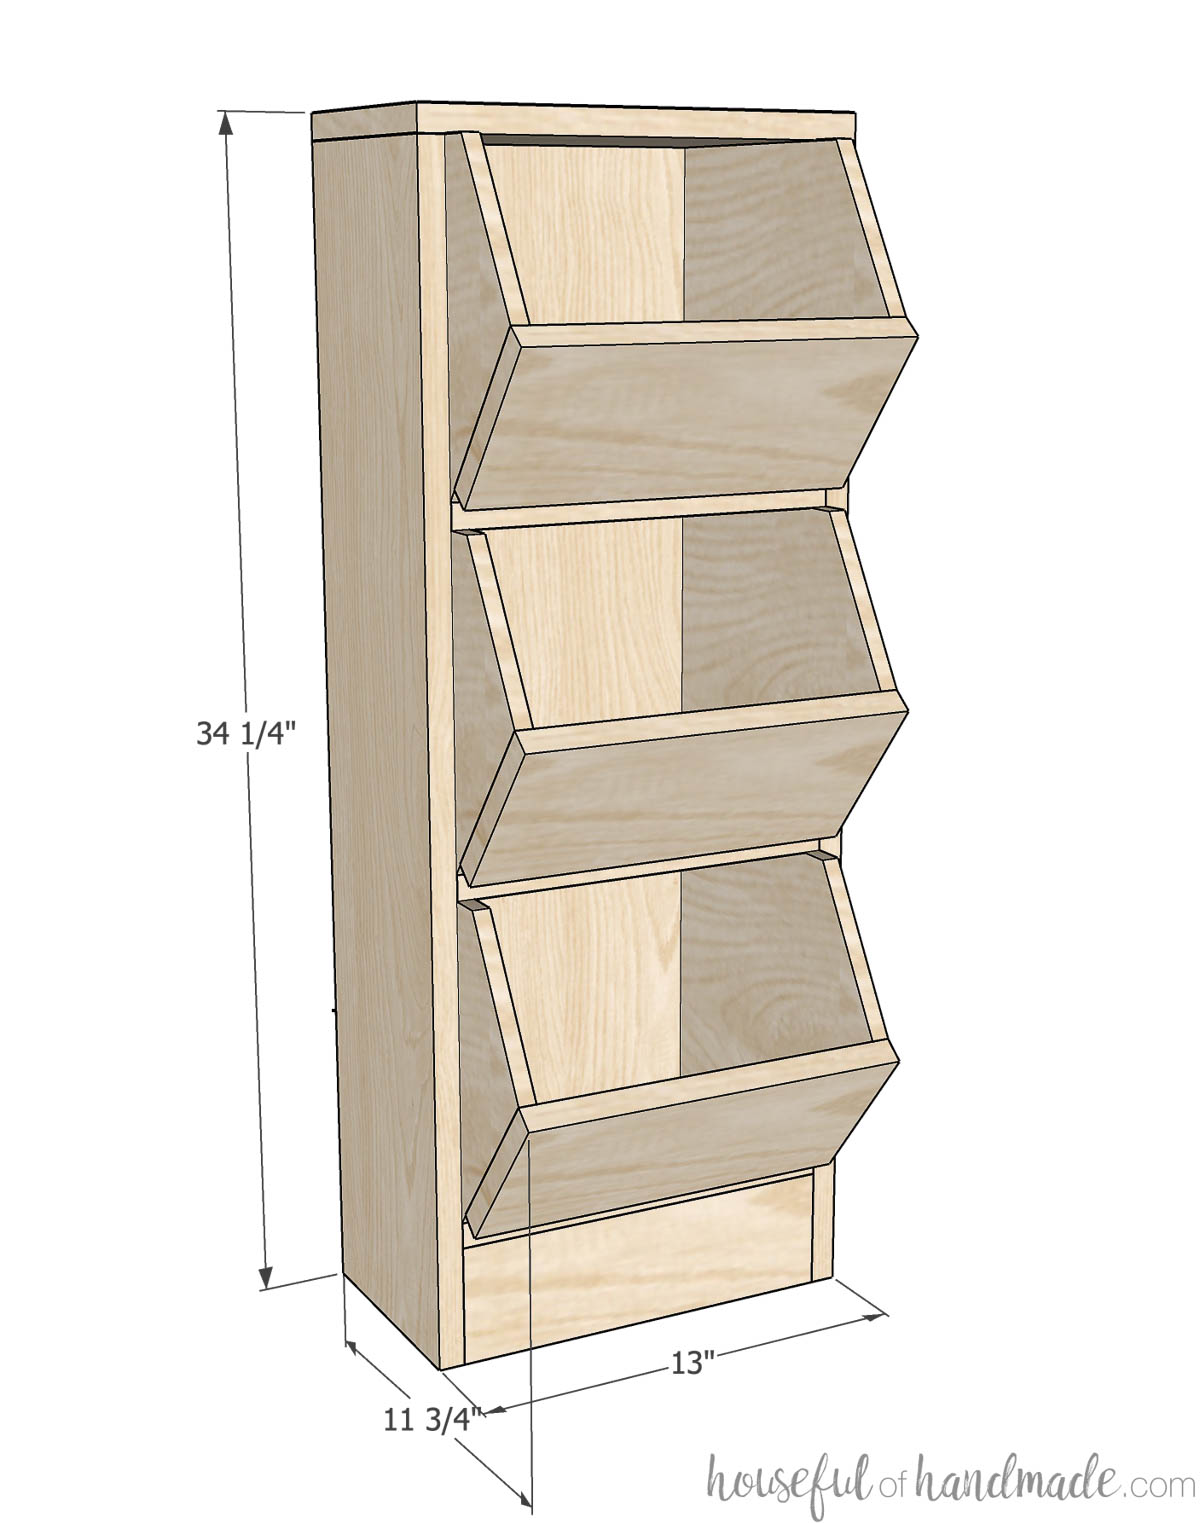
Overall Dimensions
Need a smaller storage bin? I also have build plans for a single vegetable and potato bin.
Cut List
Cut the boards for the dividers then shape them according to the diagram in the plans.
To cut the angles on the boards, use a circular saw with a straight edge.
EXPERT TIP:
Place your wood on a piece of inexpensive rigid foam when cutting with a circular saw. The foam can be cut into with the saw and will fully support your pieces to prevent the blade from pinching.
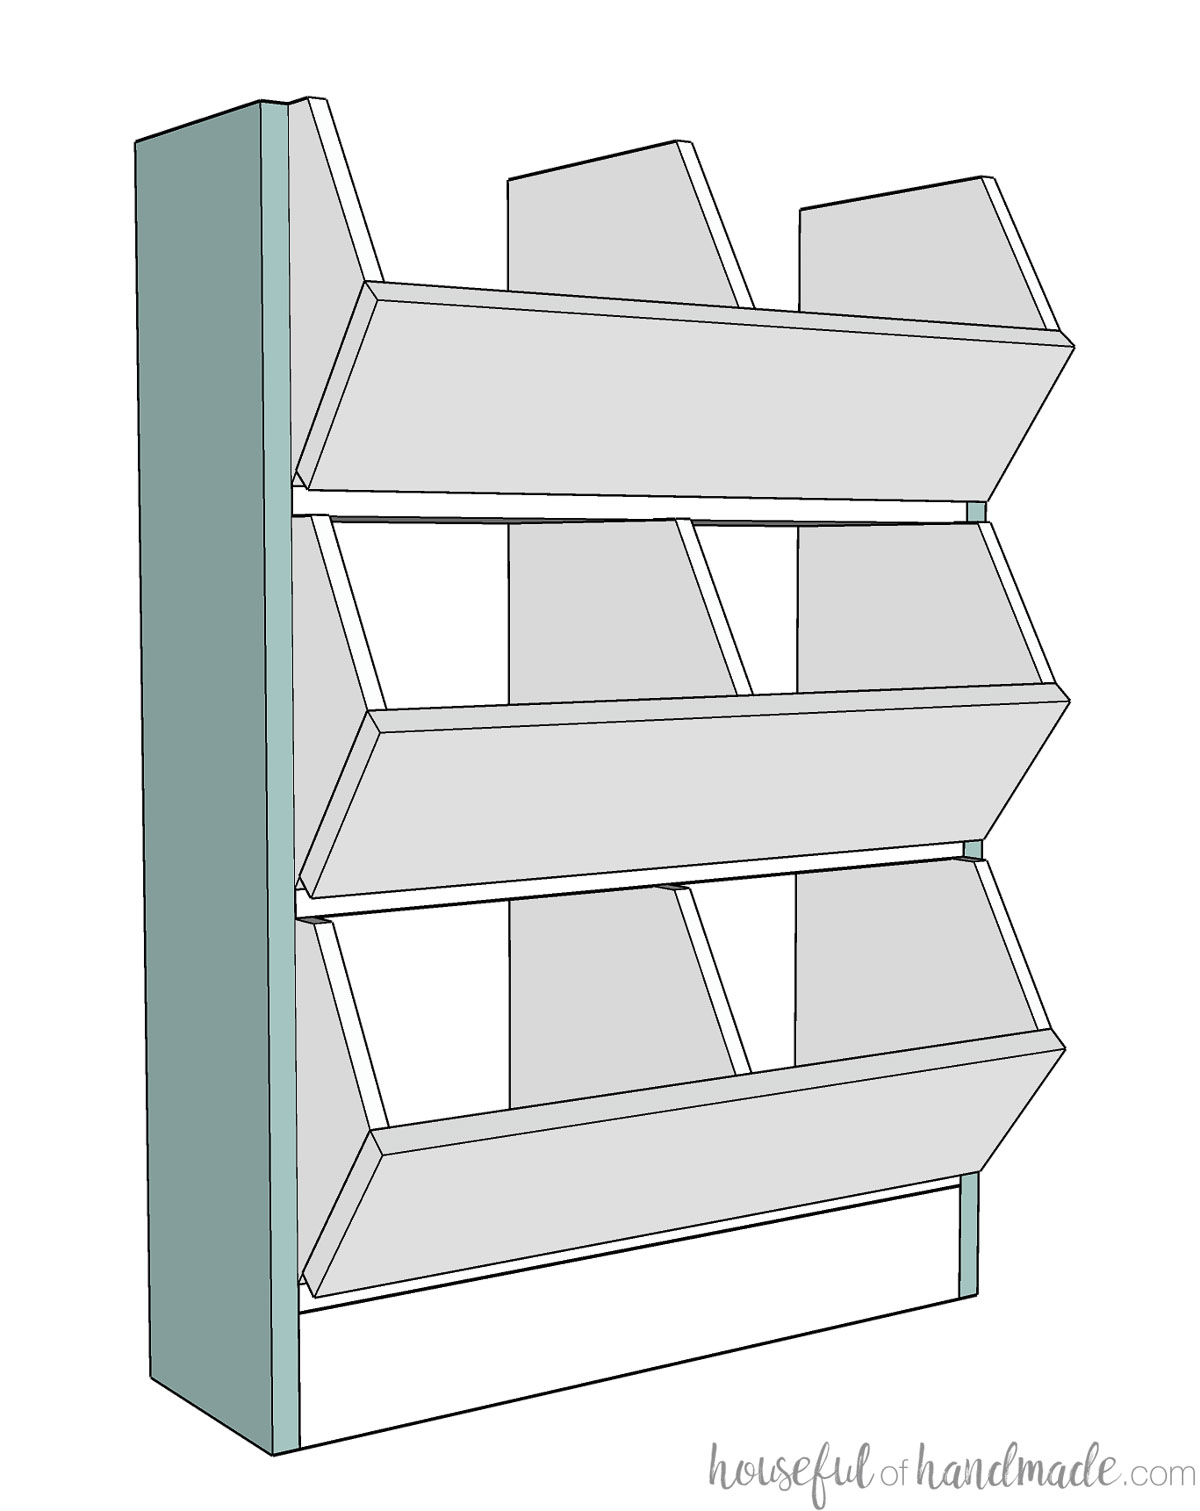
STEP 1- Build the shelves
Attach three dividers on top of each shelf board. The outside boards should be flush to the outside of the shelf board and the inside should be centered.
Secure the boards with either pocket holes or dowels. The pocket holes can be hidden on the outside dividers but will be visible on the inside.
I prefer to use pocket holes where they can be hidden (on the outer dividers) and use dowels for the center dividers to keep it clean. But you can use what you have available!
Visible pocket holes can be filled with plugs or wood filler.
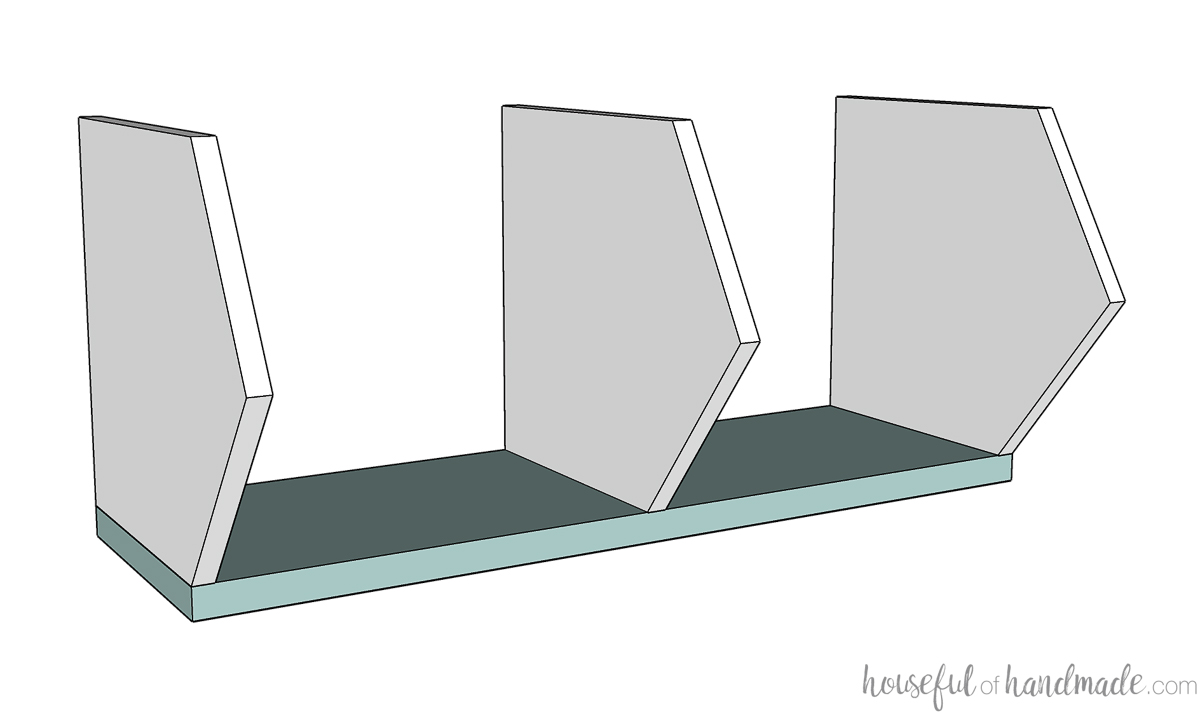
To attach with pocket holes:
Set your pocket hole jig for 3/4” thick material. Drill 2 pocket holes on the top and bottom of each divider.
Place the pocket holes on the outside for the dividers on the ends since they will be hidden when you attach the sides.
Secure with 1 1/4” pocket hole screws and wood glue.
To attach with dowels:
Line up the dividers on the shelf and draw a line where you want the dowels (2 per divider).
Use your doweling jig to drill holes the same size as your dowels at those lines.
Attach the dividers to the board with wood glue and dowels. Clamp till wood glue is dry.
STEP 2- Build the base
With all three shelves assembled, it is time to attach them together.
Attach them together at the dividers with the same method as before. The top of the bins will not be covered yet.
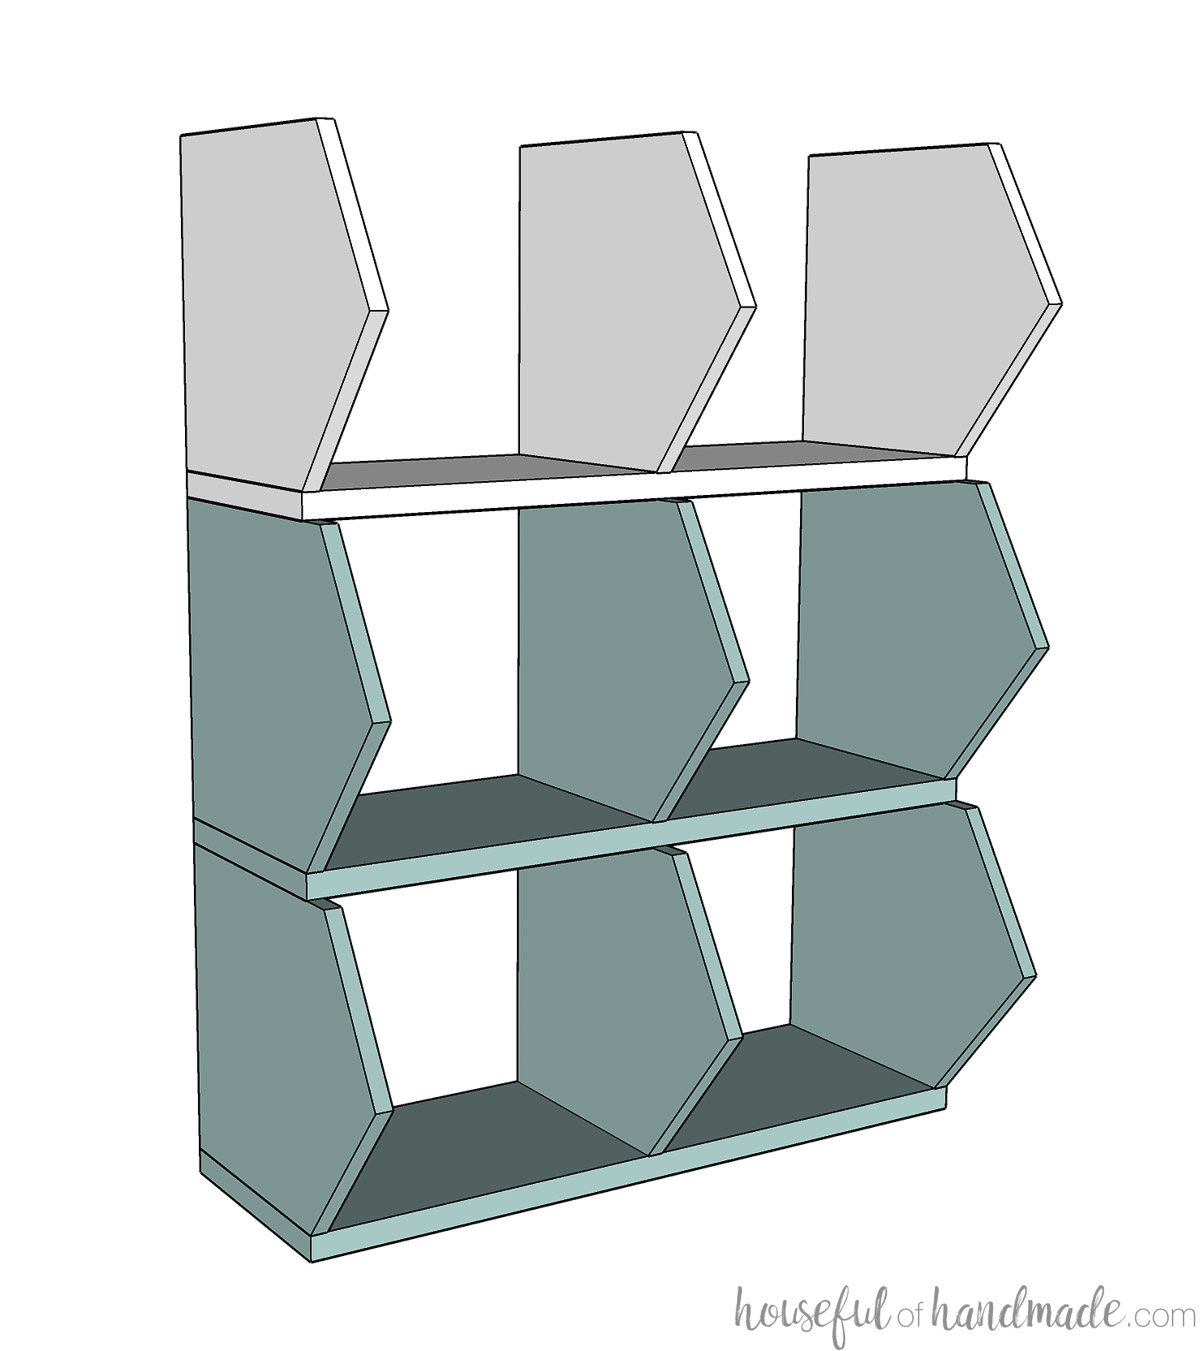
Attach the toe kick to the front bottom shelf.
Attach with either pocket holes (set for 3/4” thick material and secured with 1 1/4” pocket hole screws) or dowels and wood glue.
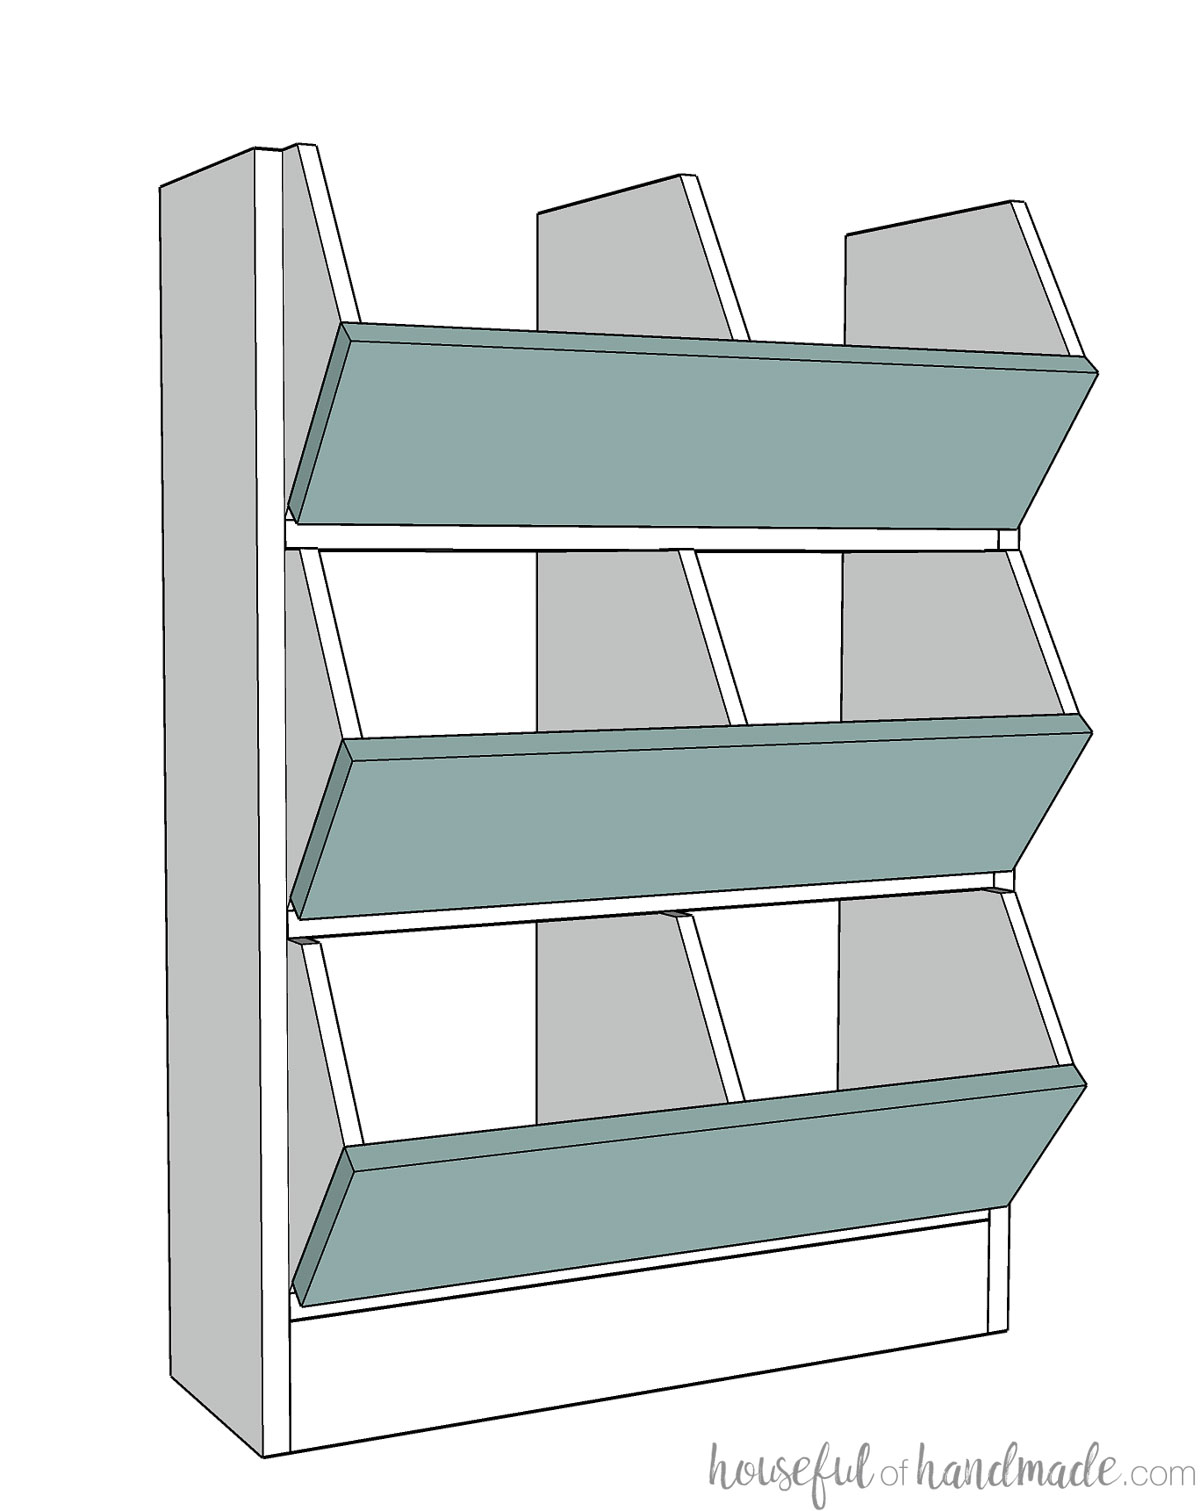
Attach the sides to the assembled base by add wood glue to the side board. Then line the side up according to the diagram in the plans. Mark where the center of the shelf boards are on the outside of the side board.
Predrill a small 3/8” hole at that mark. Then drill a wood screw through that hole into the shelf to secure. Plug the hole by glueing a 3/8” wood dowel into it, then flush cut it off.
Repeat to secure all shelf boards and the toe kick.
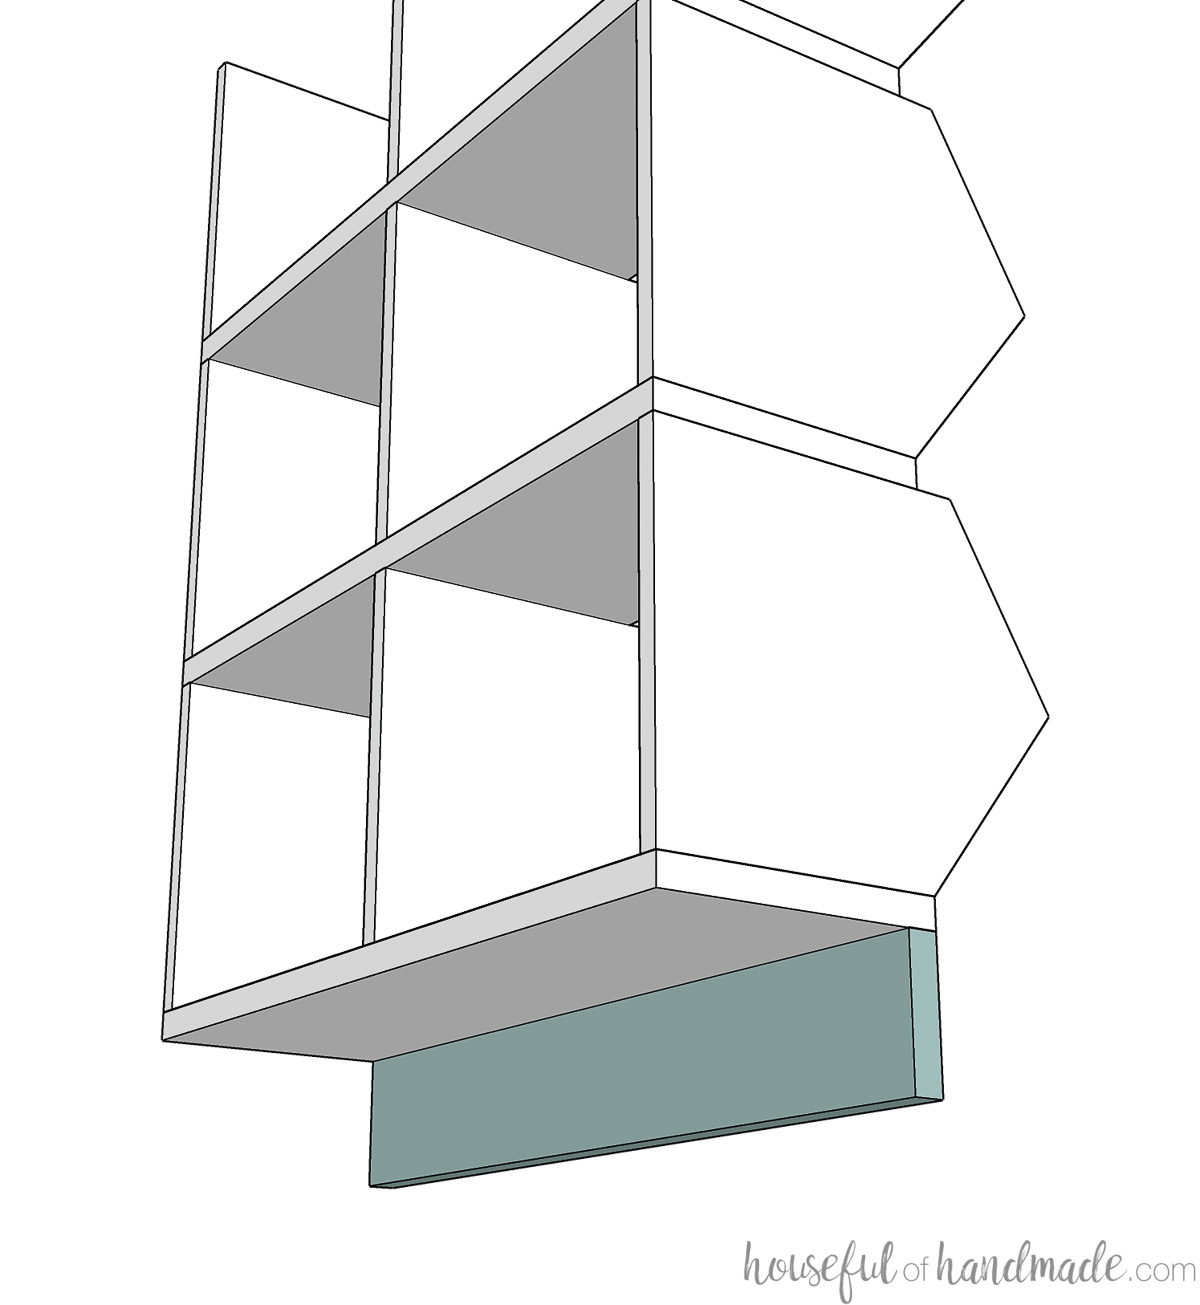
STEP 3- Attach front of bins and top
Finish off the front of the produce bins by attaching the front boards.
You can add the front with either a solid board or slatted boards.
The solid board is more modern and sleek, but still offers a small gap at the bottom. The slatted boards will add a more rustic look and allow more airflow to the produce.
To attach the fronts, line the board up with the peak of the dividers. Secure with wood glue and finishing nails.
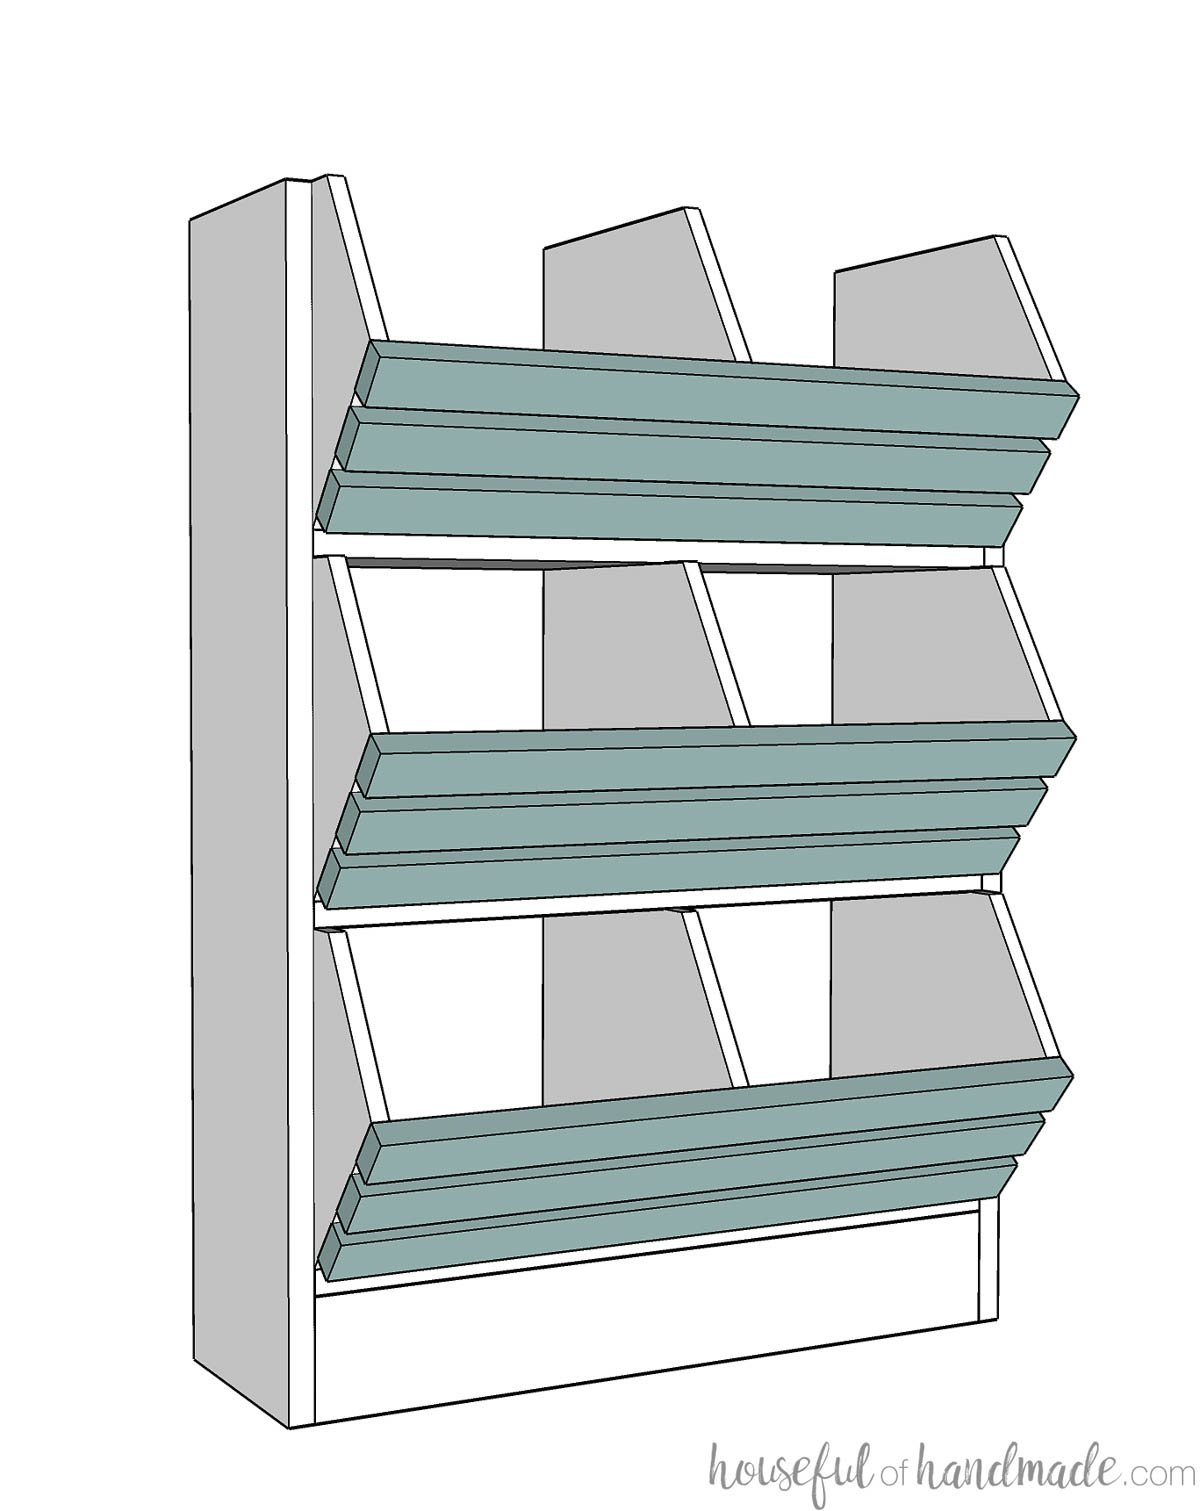
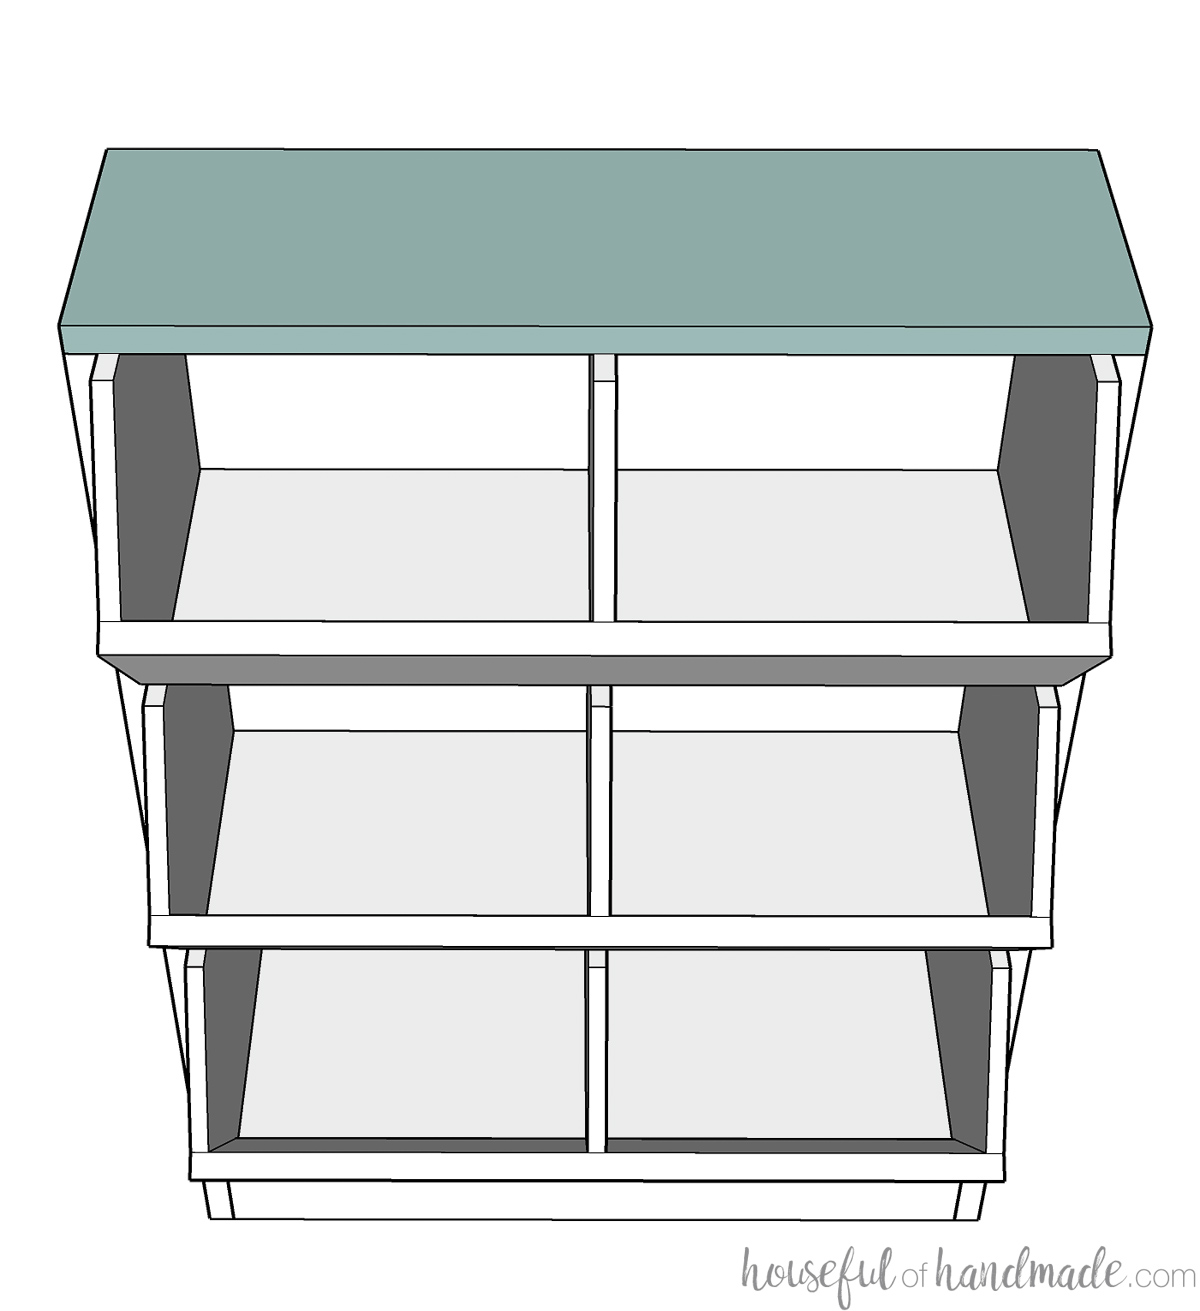
Attach the top so it is flush with the sides and back Secure with wood glue and finishing nails or dowels. You could use pocket holes for the center divider but the sides of the outside dividers is covered.
STEP 3- Finish the bins
Sand and finish your vegetable and potato bin. Use a stain or paint that is food grade once cured.
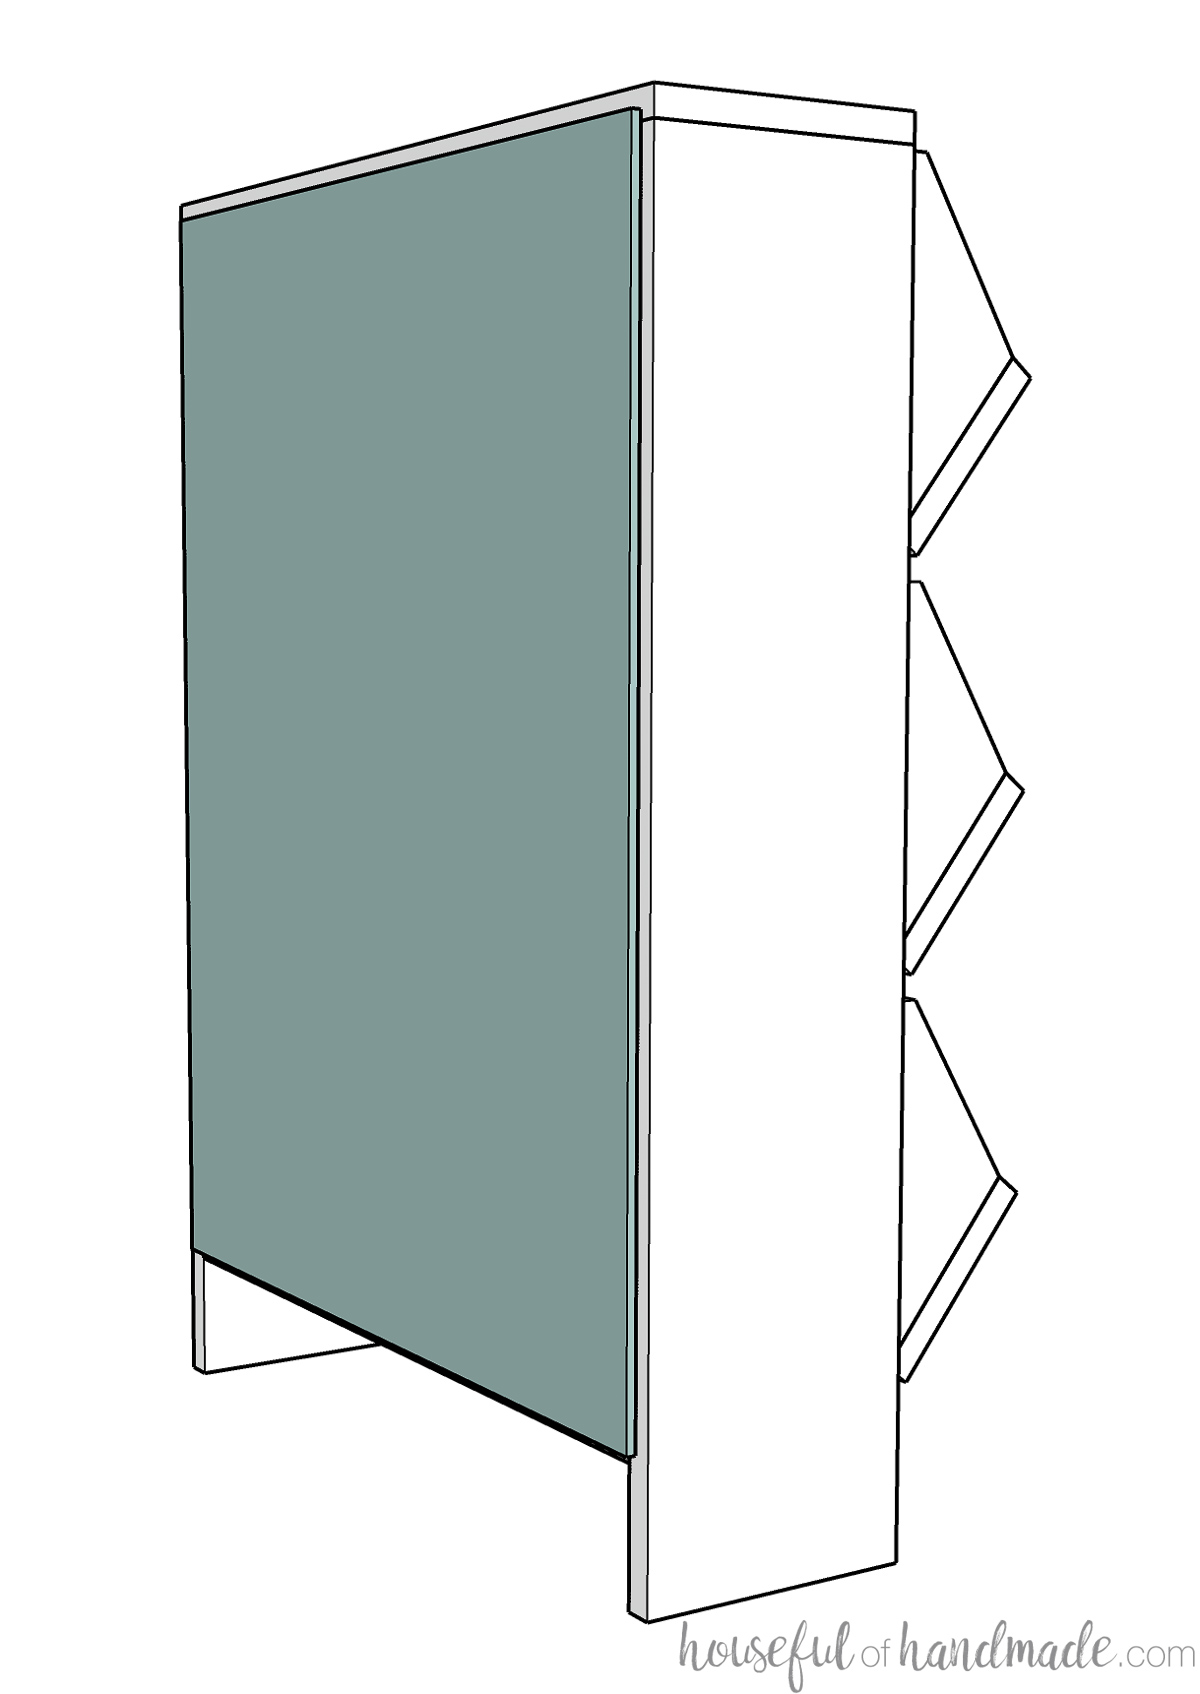
If you are placing the vegetable bins up against a cabinet, you can skip the back if you don’t mind seeing the color of the cabinet in the back.
To attach a back, center the plywood on the back so it is recessed 1/2” in from the top and sides. Secure with 5/8” finishing nails.
You did it!
Premium plans include:
- Recommended Tools
- Shopping list
- Easy to read cut list table
- Cut diagrams
- Step-by-step instructions with 3D renderings
- Helpful resources
- BONUS: 3D SketchUp file
Now you can fill your new product bins up with all those delicious fruits, vegetables, onions and potatoes!
And since they are visible and within reach, you will remember to eat those vegetables every day 😉
Happy building!
