Build some beautiful Adirondack chairs with modern lines for lazy summer days.
Nothing beats lounging outside on a warm summer day! And lounging just got a lot better with these beautiful modern Adirondack chairs.
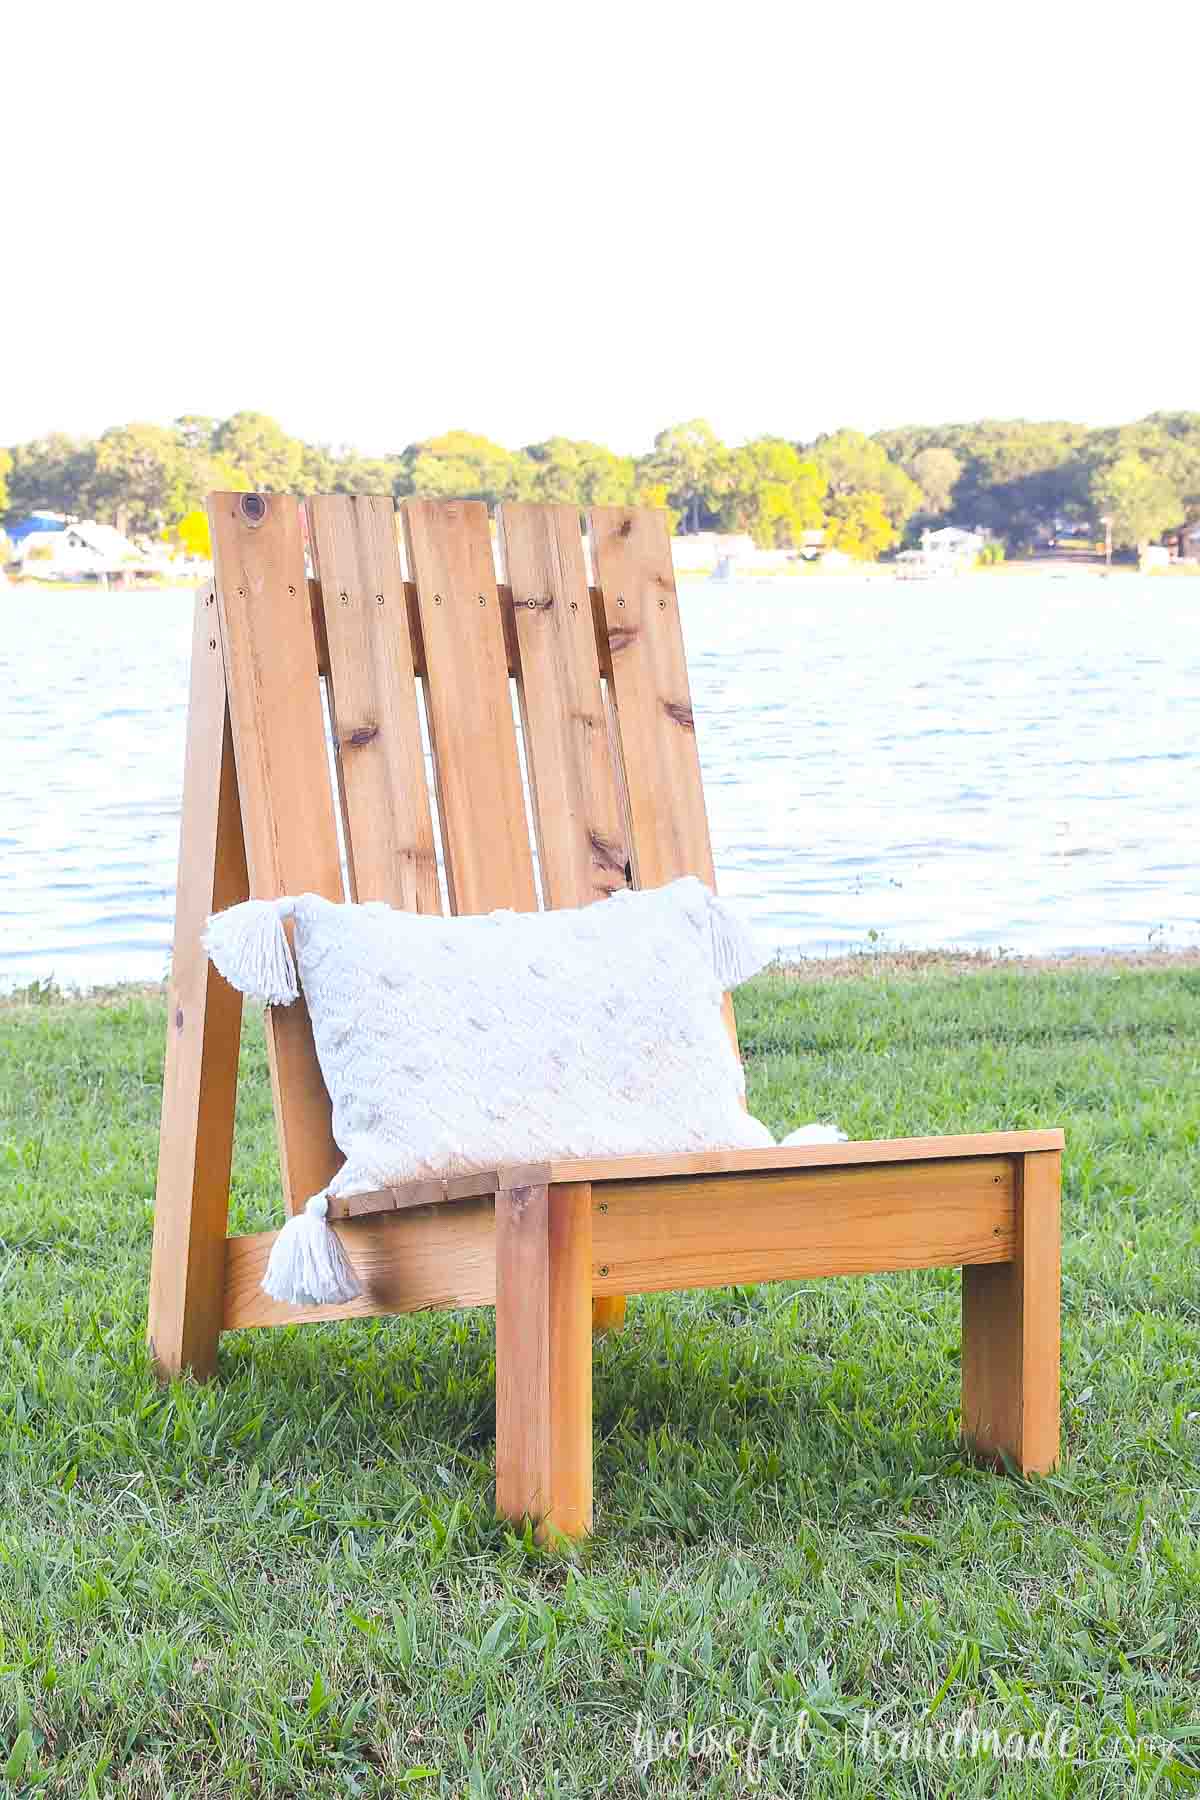
These simple chairs are so comfortable, even without a cushion. They will inspire you to put your feet up and stay a while.
But even better, these chairs are fast and easy to build using just a few basic tools. They can built in an afternoon so you have the perfect seat outside in no time.
This post may contain affiliate links. As an Amazon Associate I earn from qualifying purchases. Click here to read my full disclosure policy.
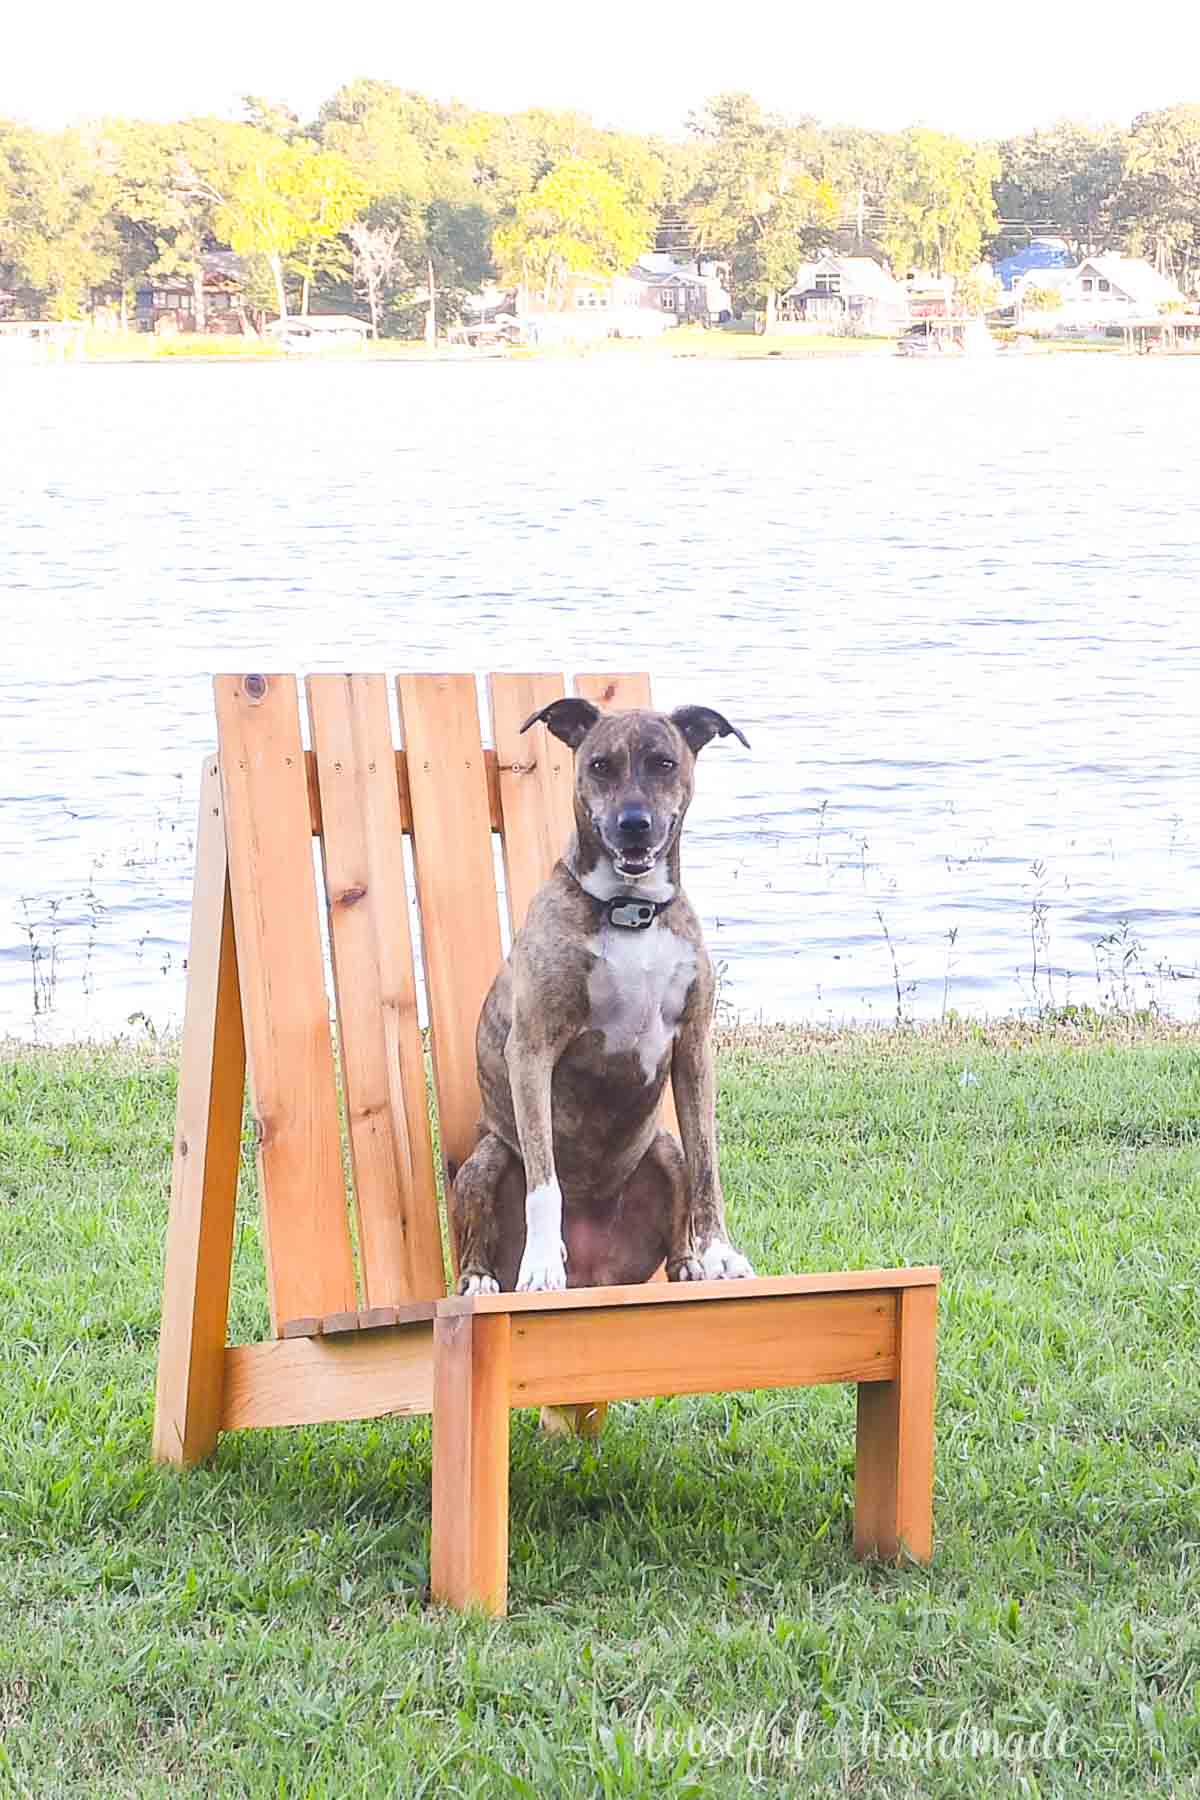
Cedar Outdoor Chair
You can build your modern Adirondack chair out of any lumber you prefer. I chose to build mine out of cedar for a few reasons.
1- Cedar is ideal for outdoor furniture because it’s natural oils resist rotting, water and bugs.
2- Cedar is strong and not prone to twisting, warping or sagging. Which means your Adirondack chairs will look clean and modern for many years.
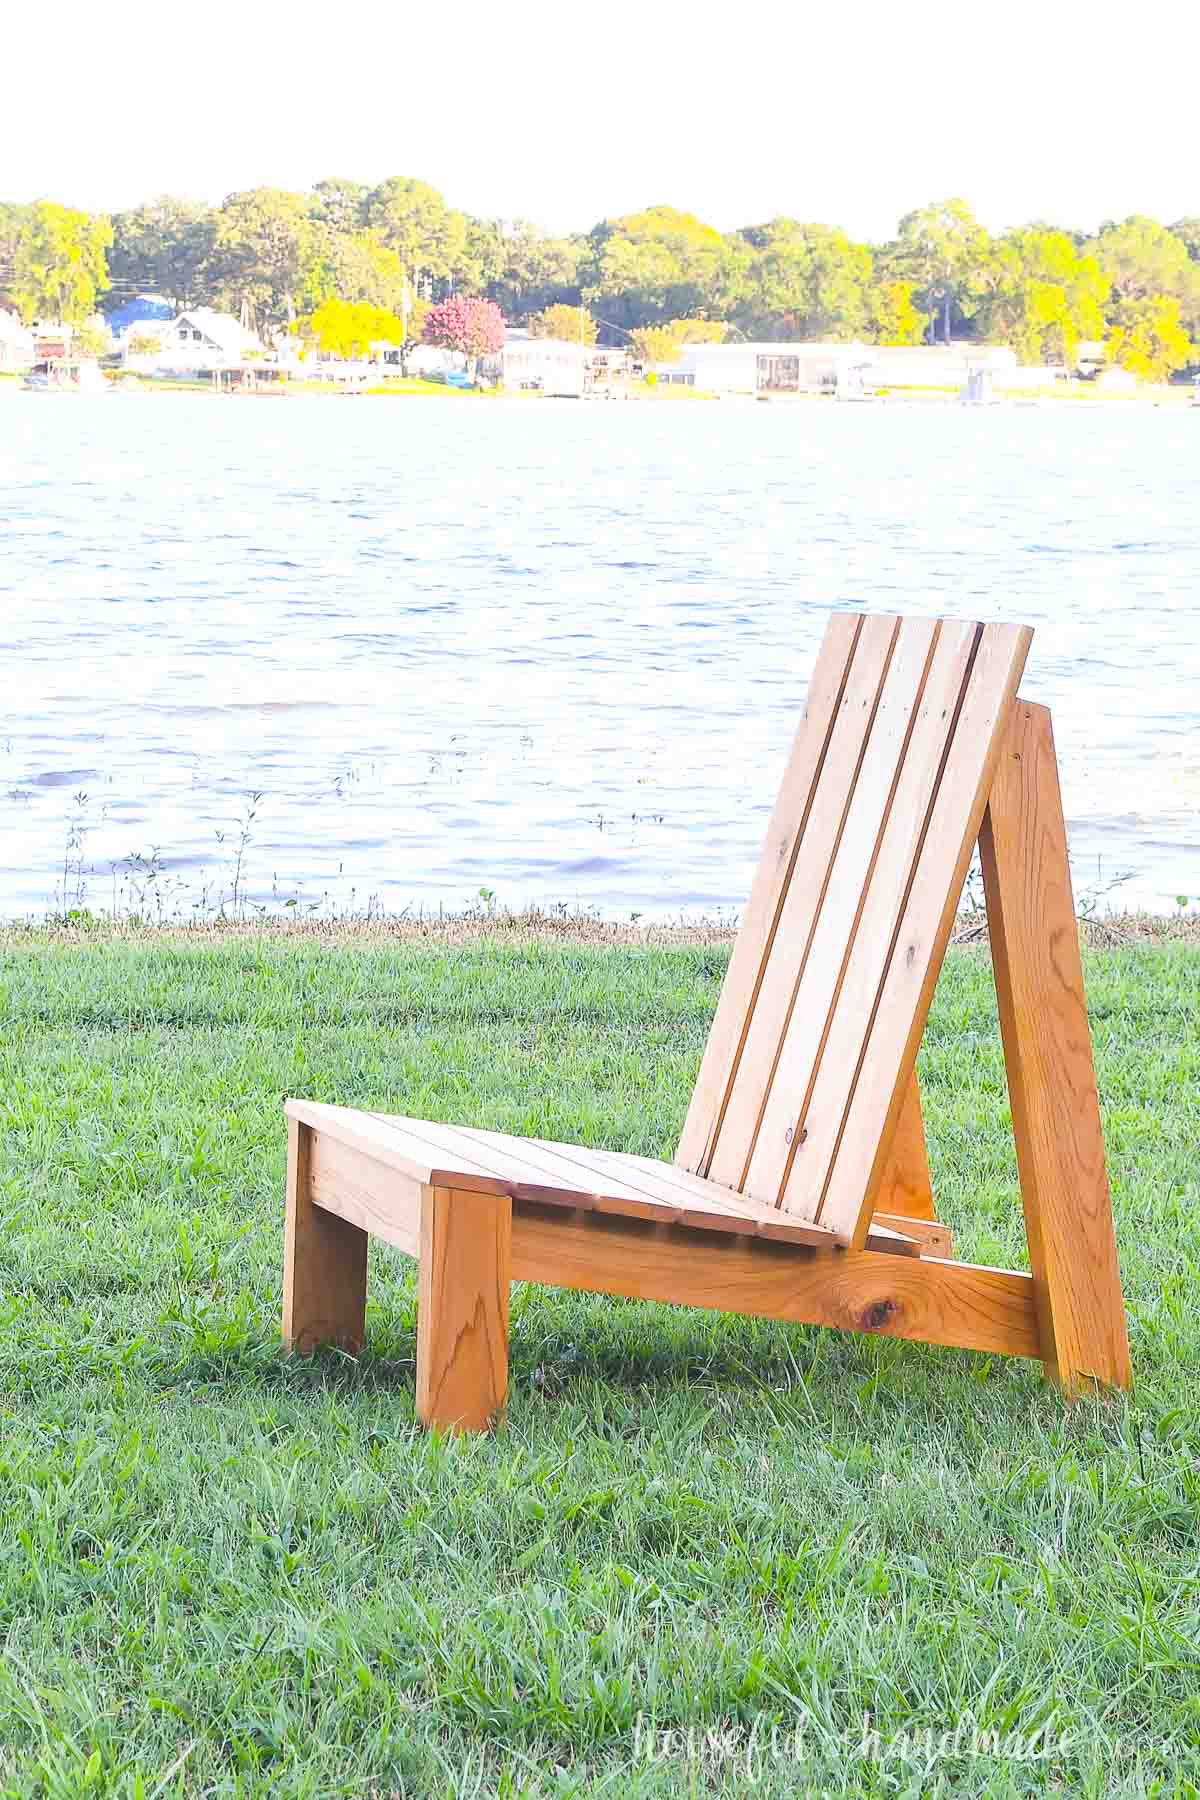
3- Cedar aged beautifully and gets a nice patina if you forget to reapply the outdoor sealer. And if you do not love the pretty gray patina, you can reapply the stain to bring out the natural warmth again.
4- Cedar is lightweight. Perfect for these Adirondack chairs I want to be able to move around the yard to where we want to lounge today!

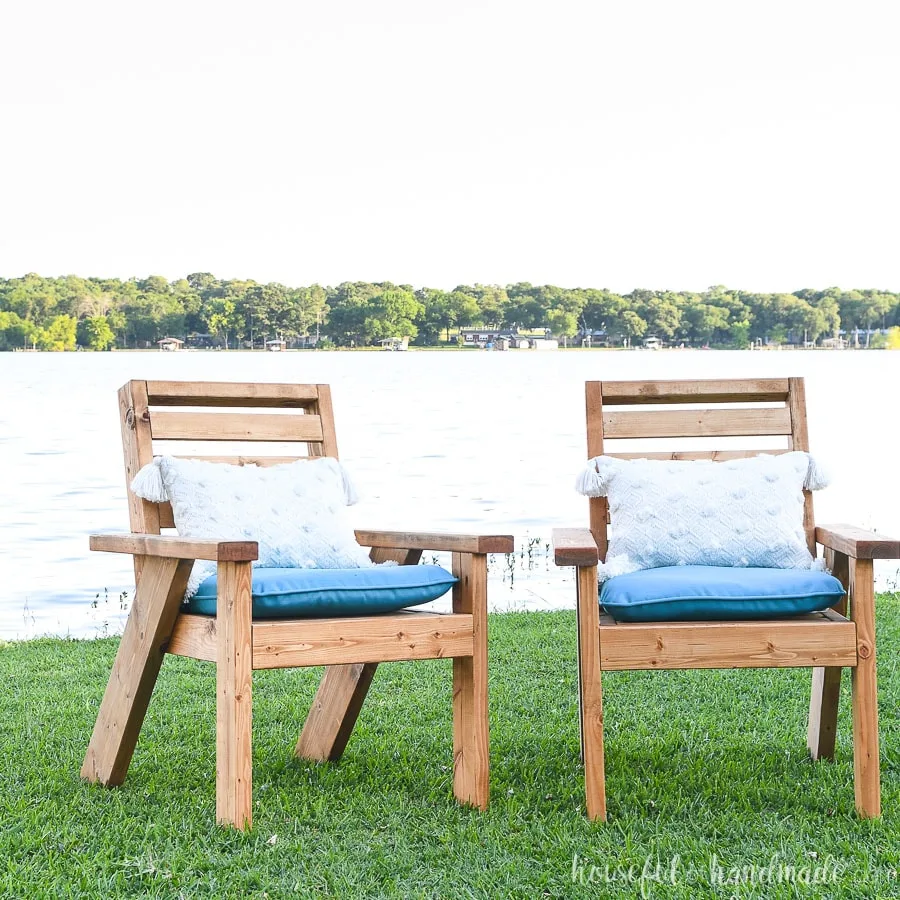
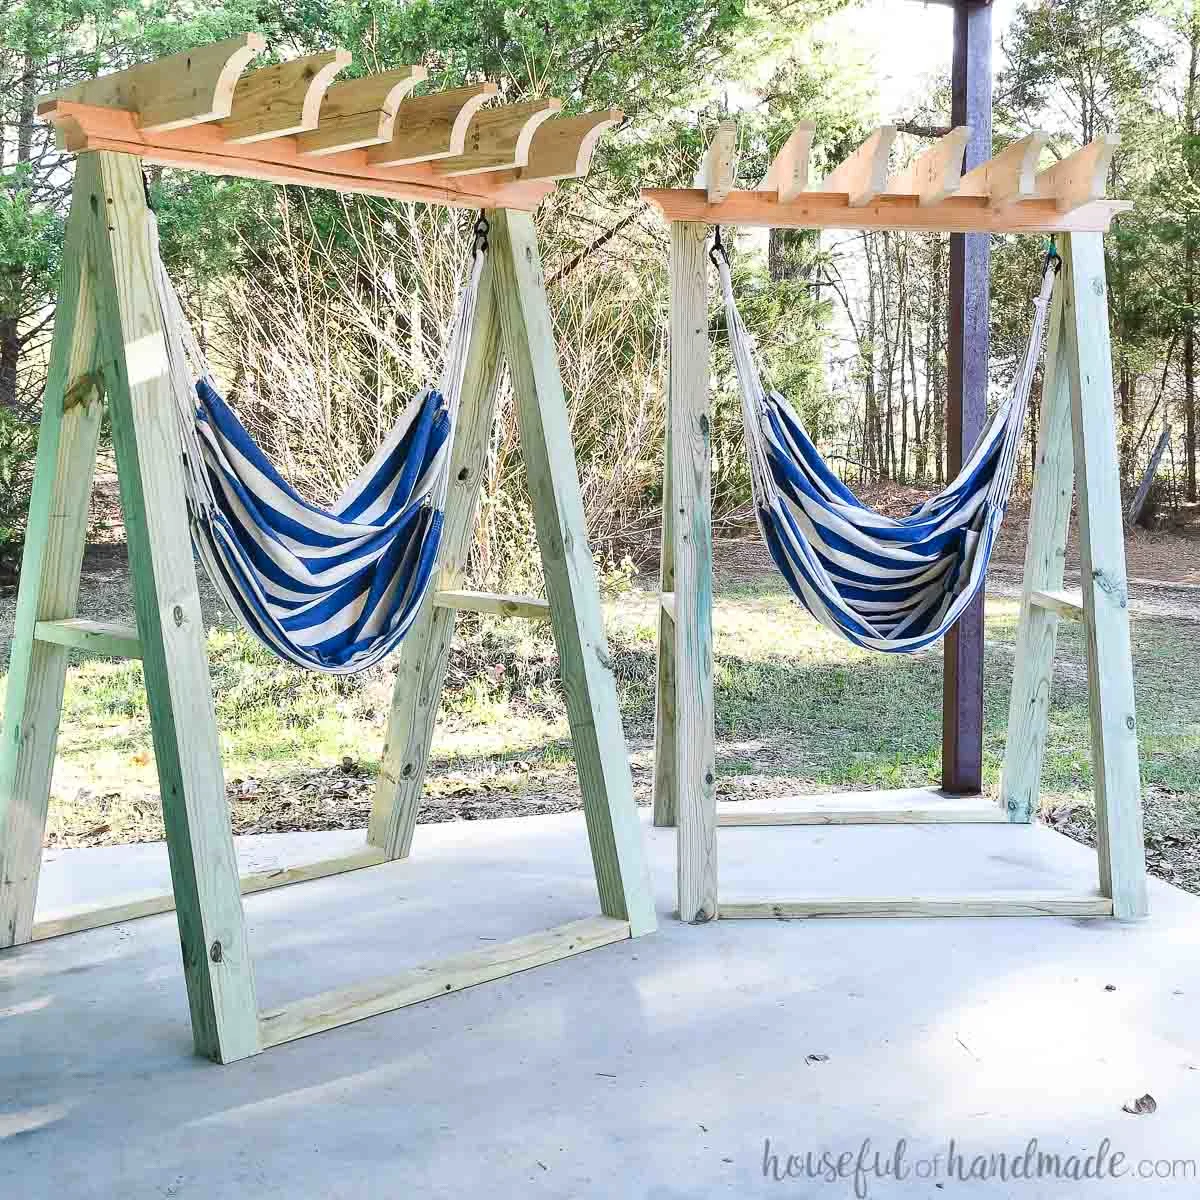
More Outdoor Seating Ideas


How to Build a Cedar Adirondack Chair
Tools & Materials
Recommended Tools:
- Miter saw
- I recently upgraded to this larger sliding miter saw (watch for it to go on sale), but all my projects before were built with this inexpensive miter saw that I loved.
- Circular saw
- Drill
- Impact driver (optional, but I love not having to switch bits with the drill)
- Speed square
- Multi-mark measuring tool
- Sander
Supplies:
- PDF Build Plans
- Wood products
- (2) 2×4 boards, 8′ long
- (3) 1×4 boards, 8′ long
- 2 1/2″ exterior wood screws
- 1 1/2″ exterior wood screws
- Outdoor wood glue
- Outdoor sealer
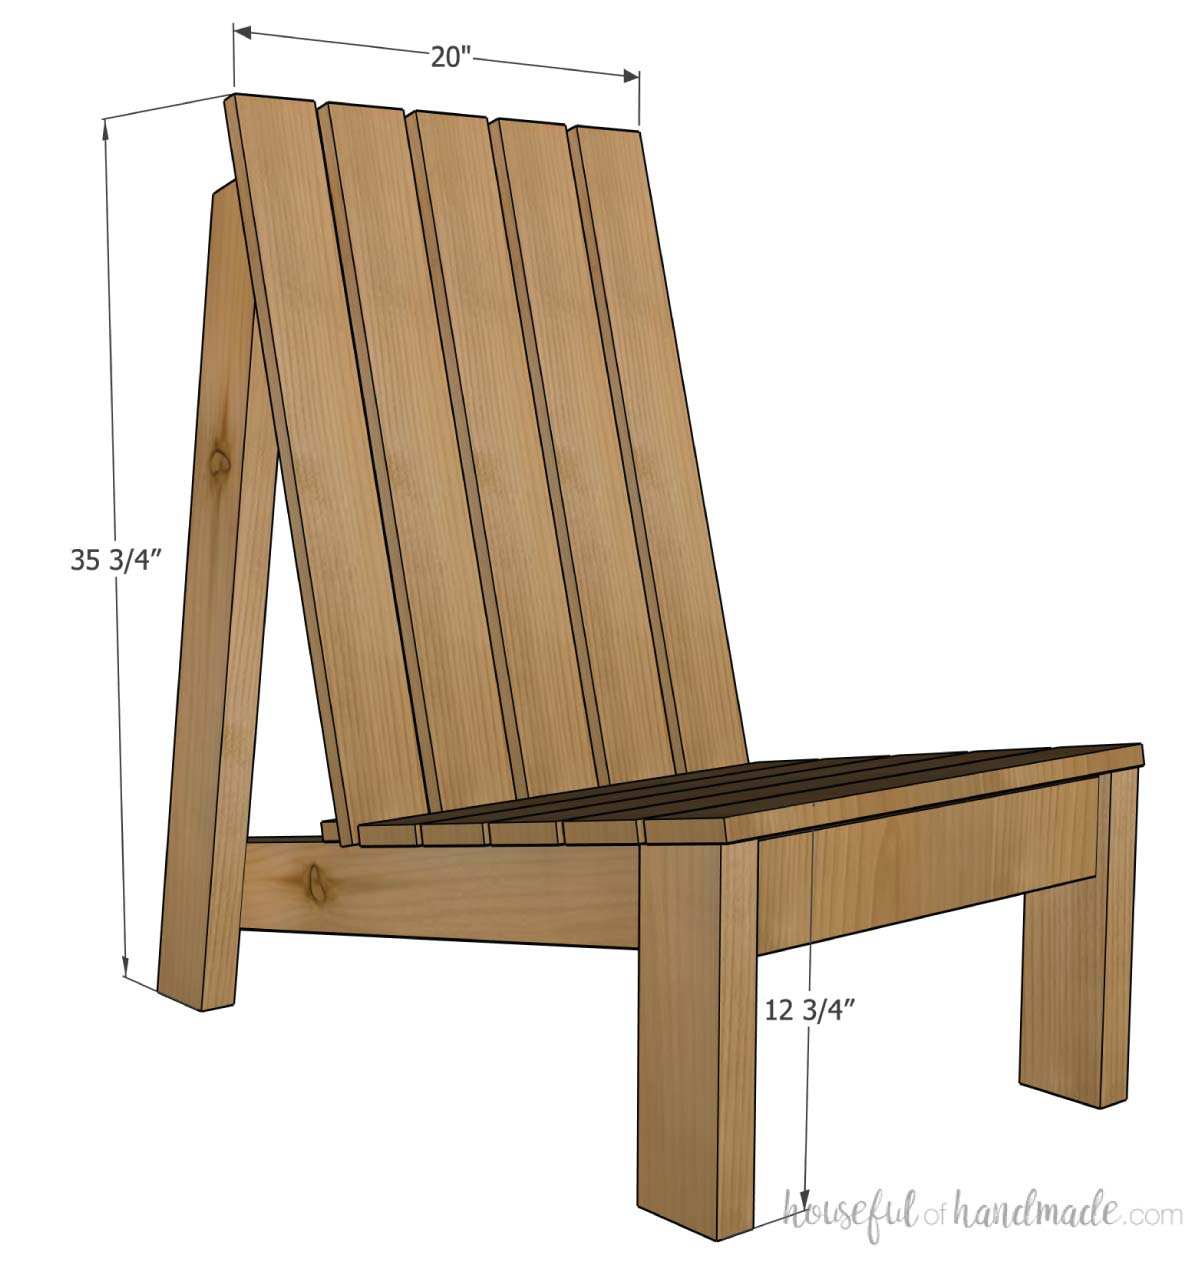
Overall Dimensions
The finished outdoor Adirondack chair is approximately 35 3/4″ tall and 33 1/2″ deep.
The front of the seat is 12 3/4″ up from the ground. The seat base is sized to fit a standard 20″ x 20″ seat cushion.
Cut List
Cut out the pieces according to the easy-to-read table in the PDF plans.

STEP 1- Cut the angled boards
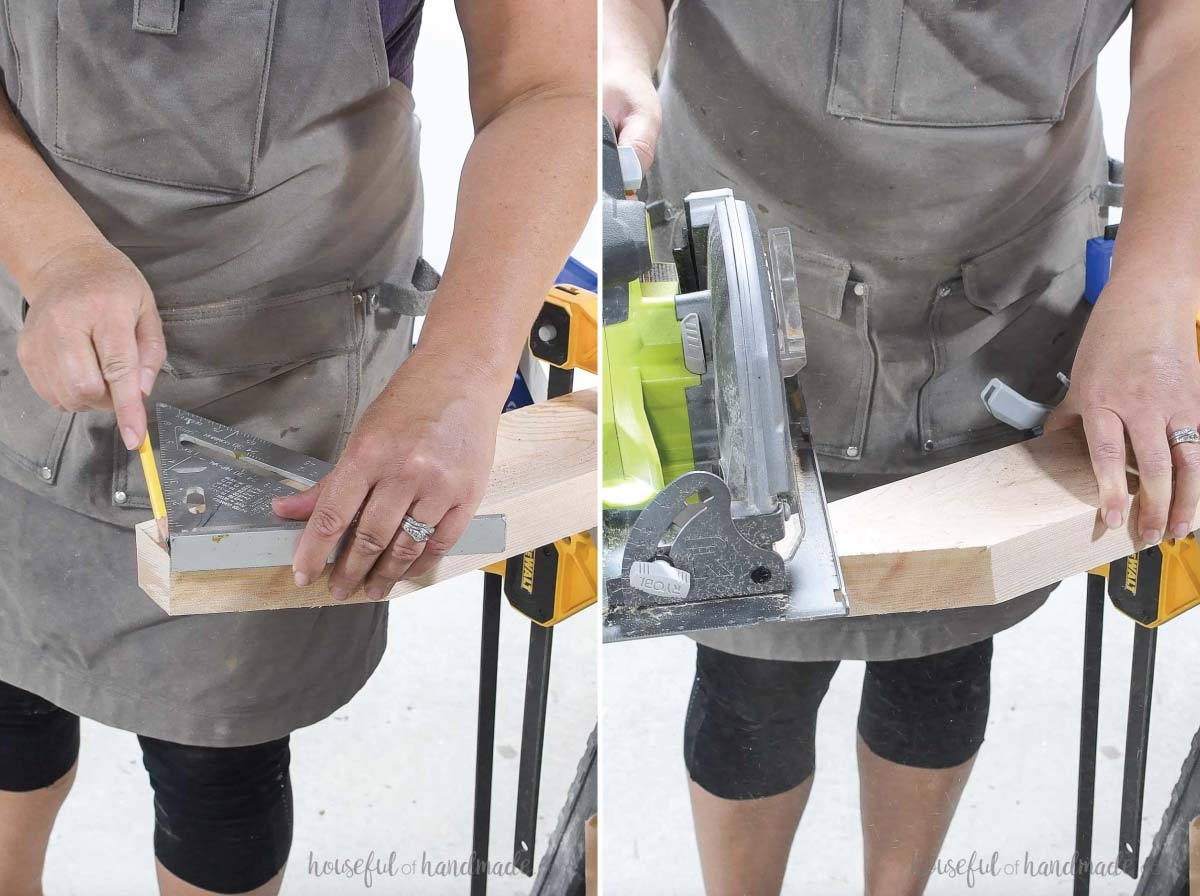
Cut one end of the back leg boards at a 10 degree angle.
On the non-angled end of the board, measure in 1 15/16” from the corner opposite the long angled side and make a mark. Then measure down from the same corner 4 1/8” and make a mark.
Draw a line between the two marks, then cut the angle with a circular saw.
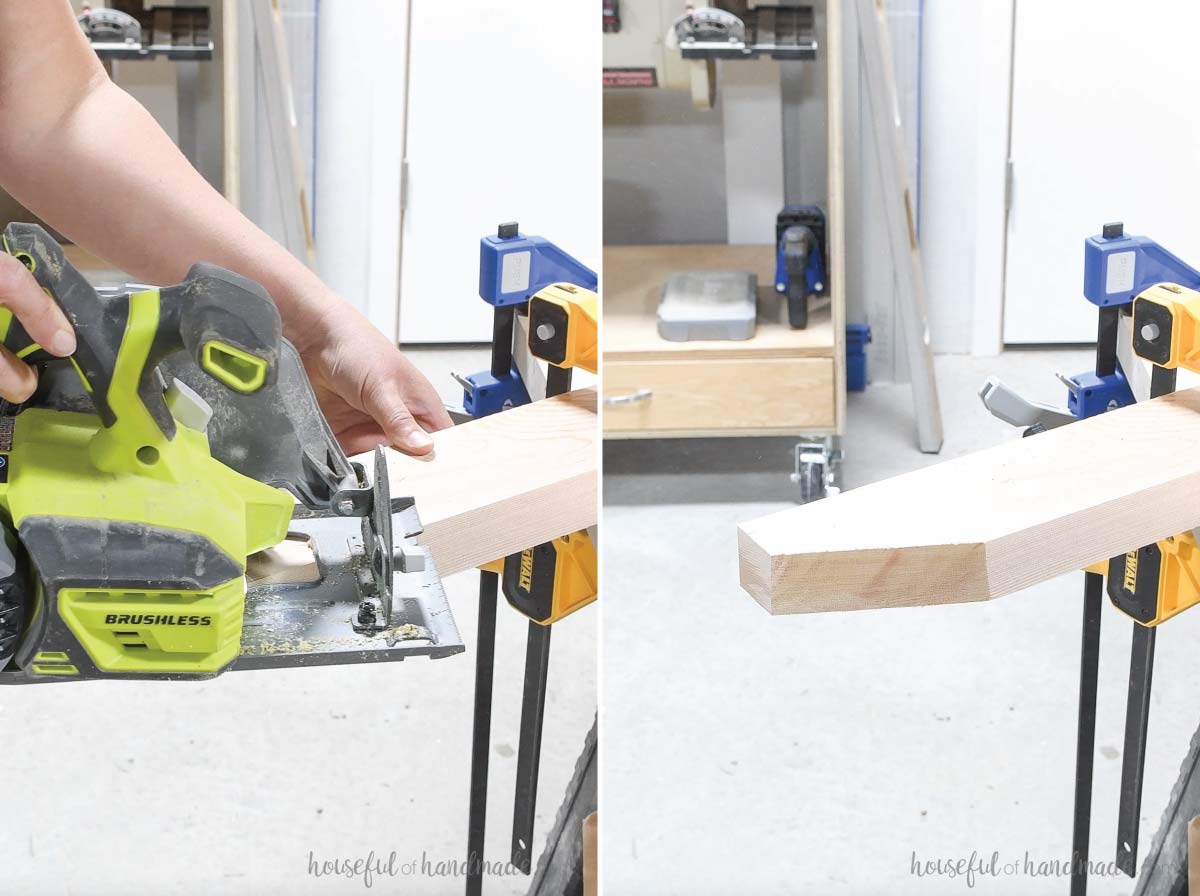
Use a square to mark a 90 degree angle from the newly cut angle. Then cut it off to create the top of the back leg board.
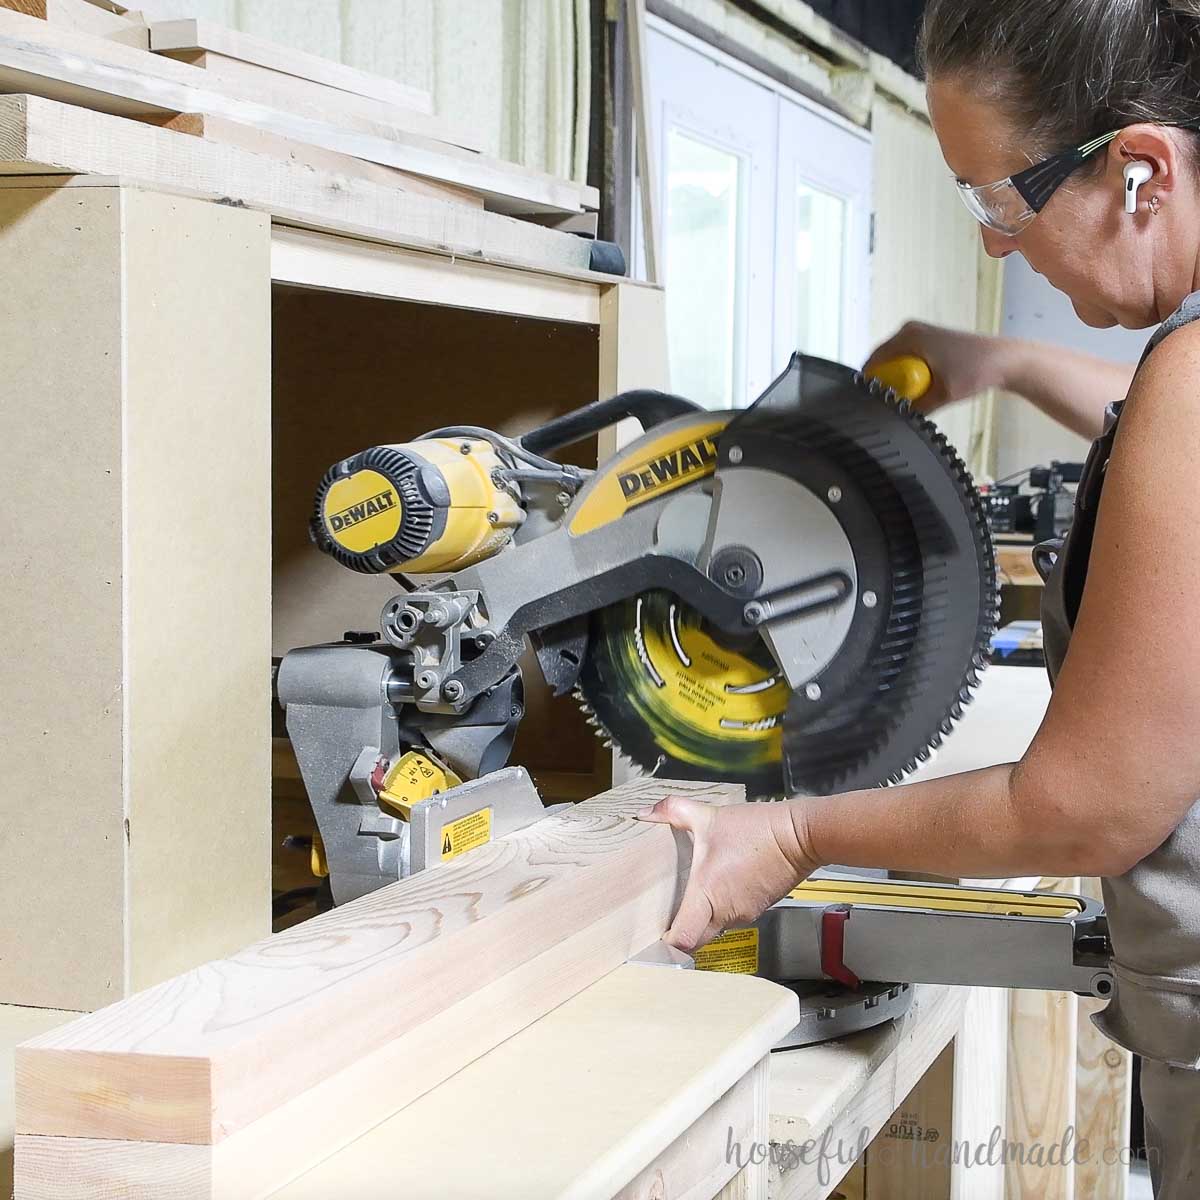
On the under seat board, cut one end at a 10 degree angle on the miter saw and the other end at a 20 degree angle.
Then angles should be cut according to the diagram in the premium plans.
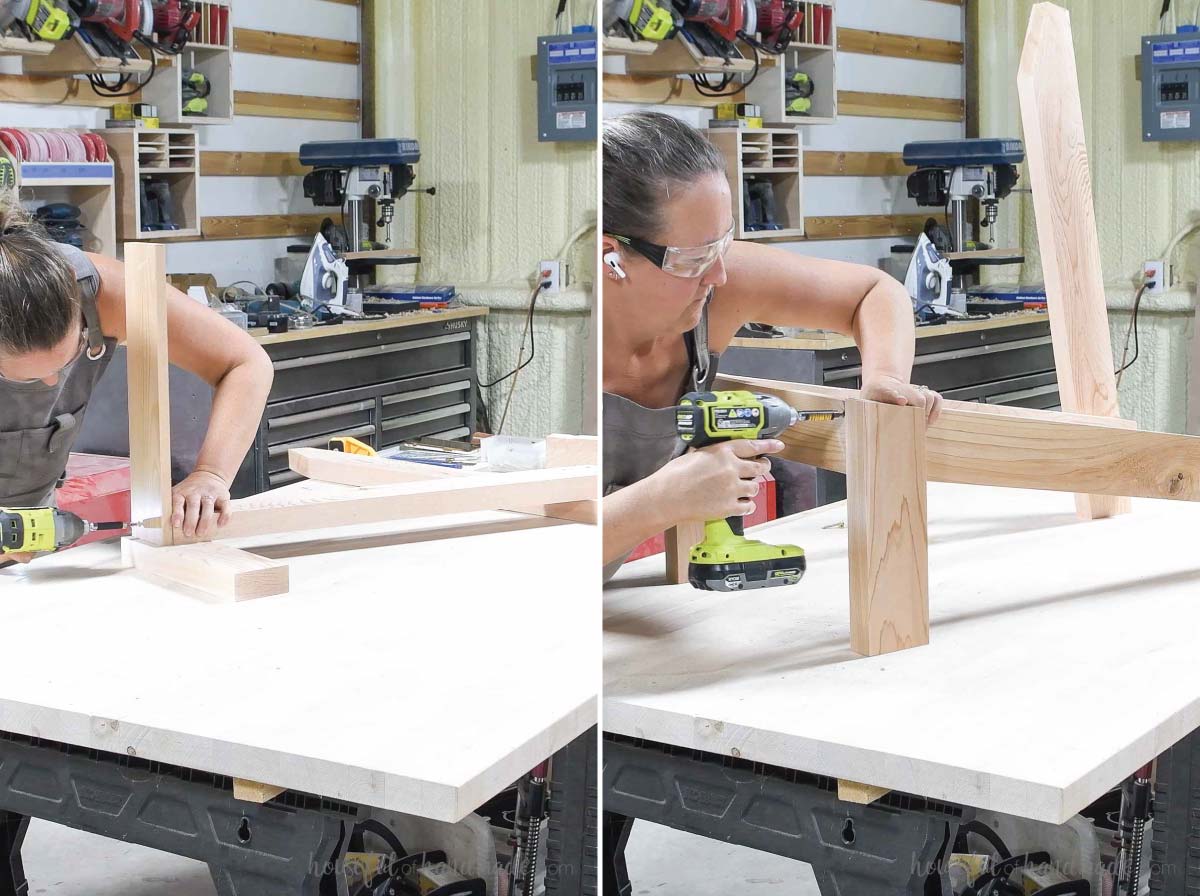
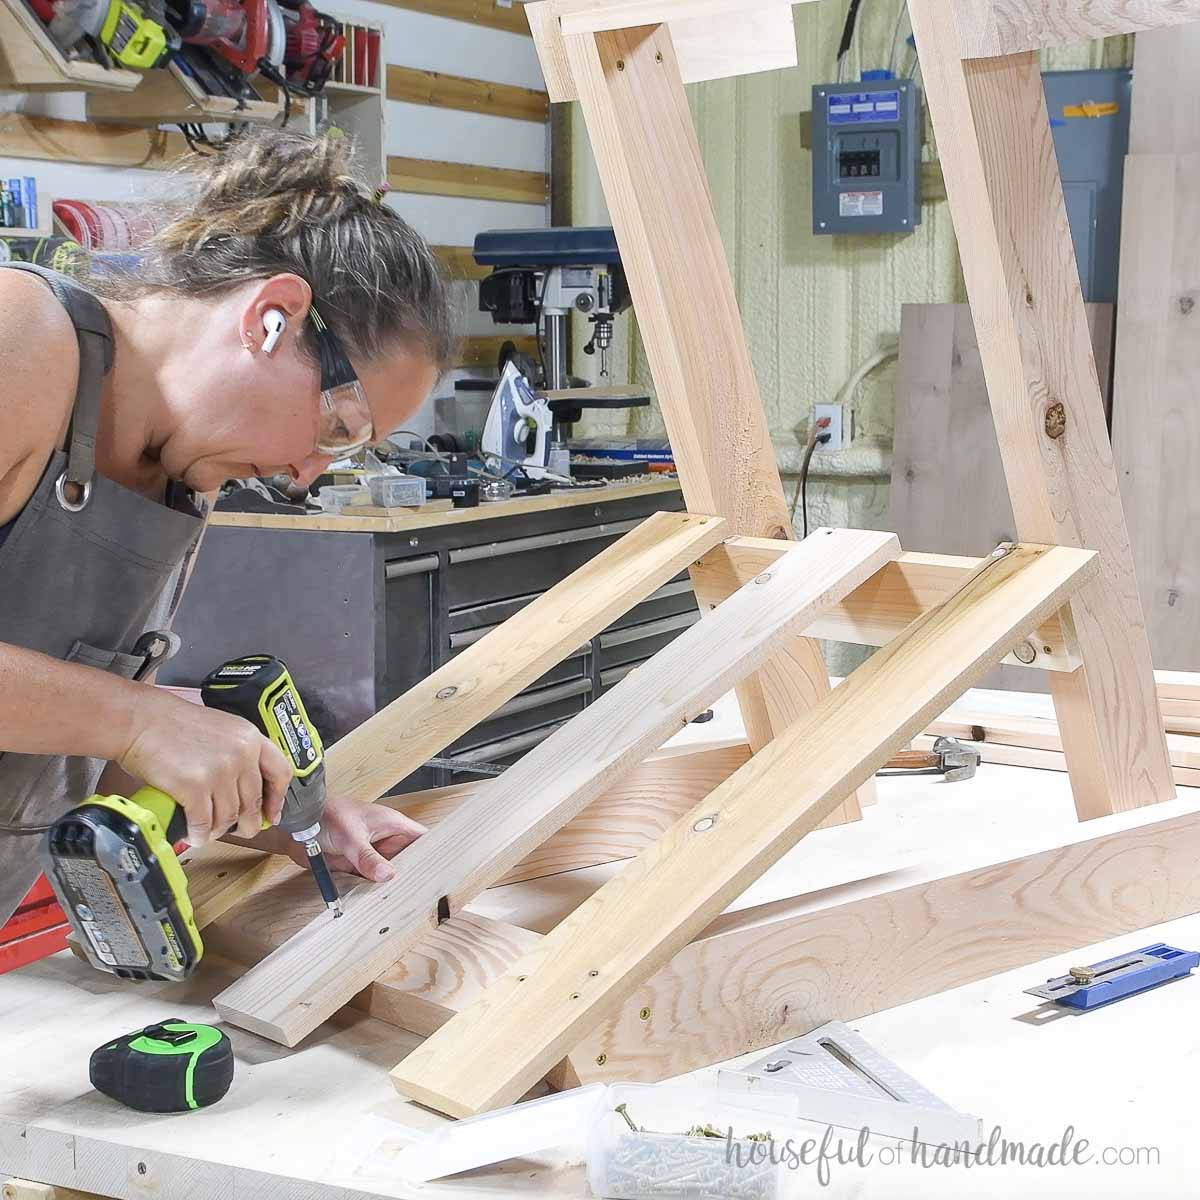
STEP 2- Build the chair frame
Lay the back and front leg down on a flat surface according to the 3D sketch in the PDF plans. Use a flat edge to properly line up the bottoms (I used a 4’ level and clamped it to my worktable).
Place the under seat board on top so it is back 1 1/4” from the front of the front leg and flush with the top, angled cut end.
Would you like to save this tutorial?
Line the back up so it is 3 5/16” up from the inside of the back leg board and at a 10 degree angle. The back angled cut should be flush with the back of the back leg.
Secure with 2 1/2” screws.
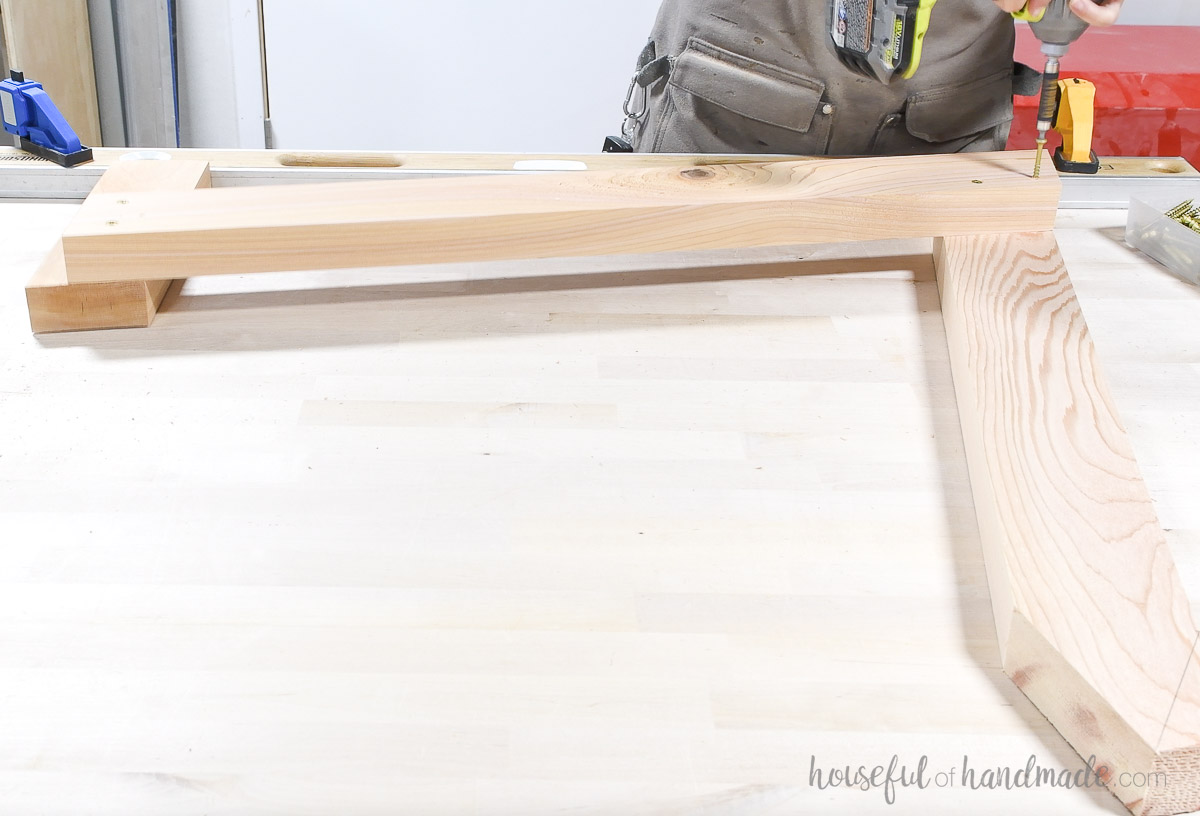
Then repeat again for the other side making sure to mirror it.
I secured the pieces together with (2) screws on the front and (3) on the back.
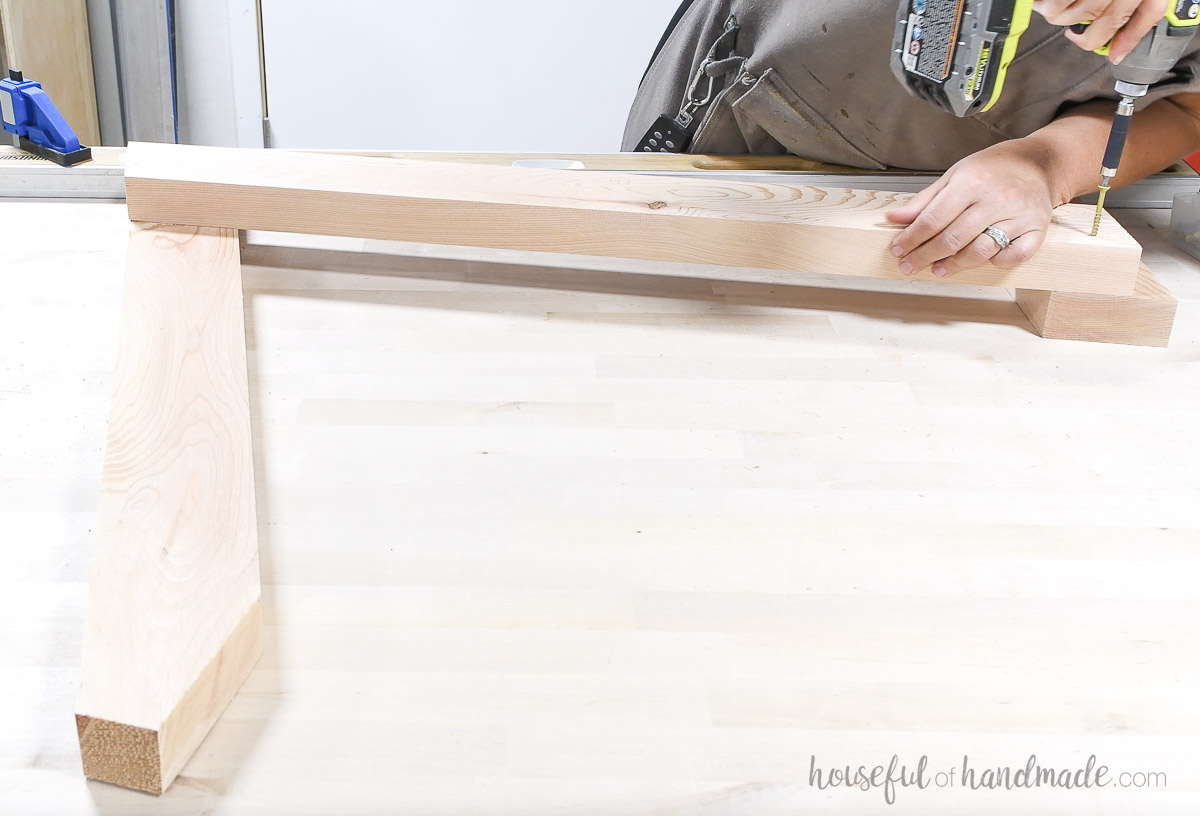
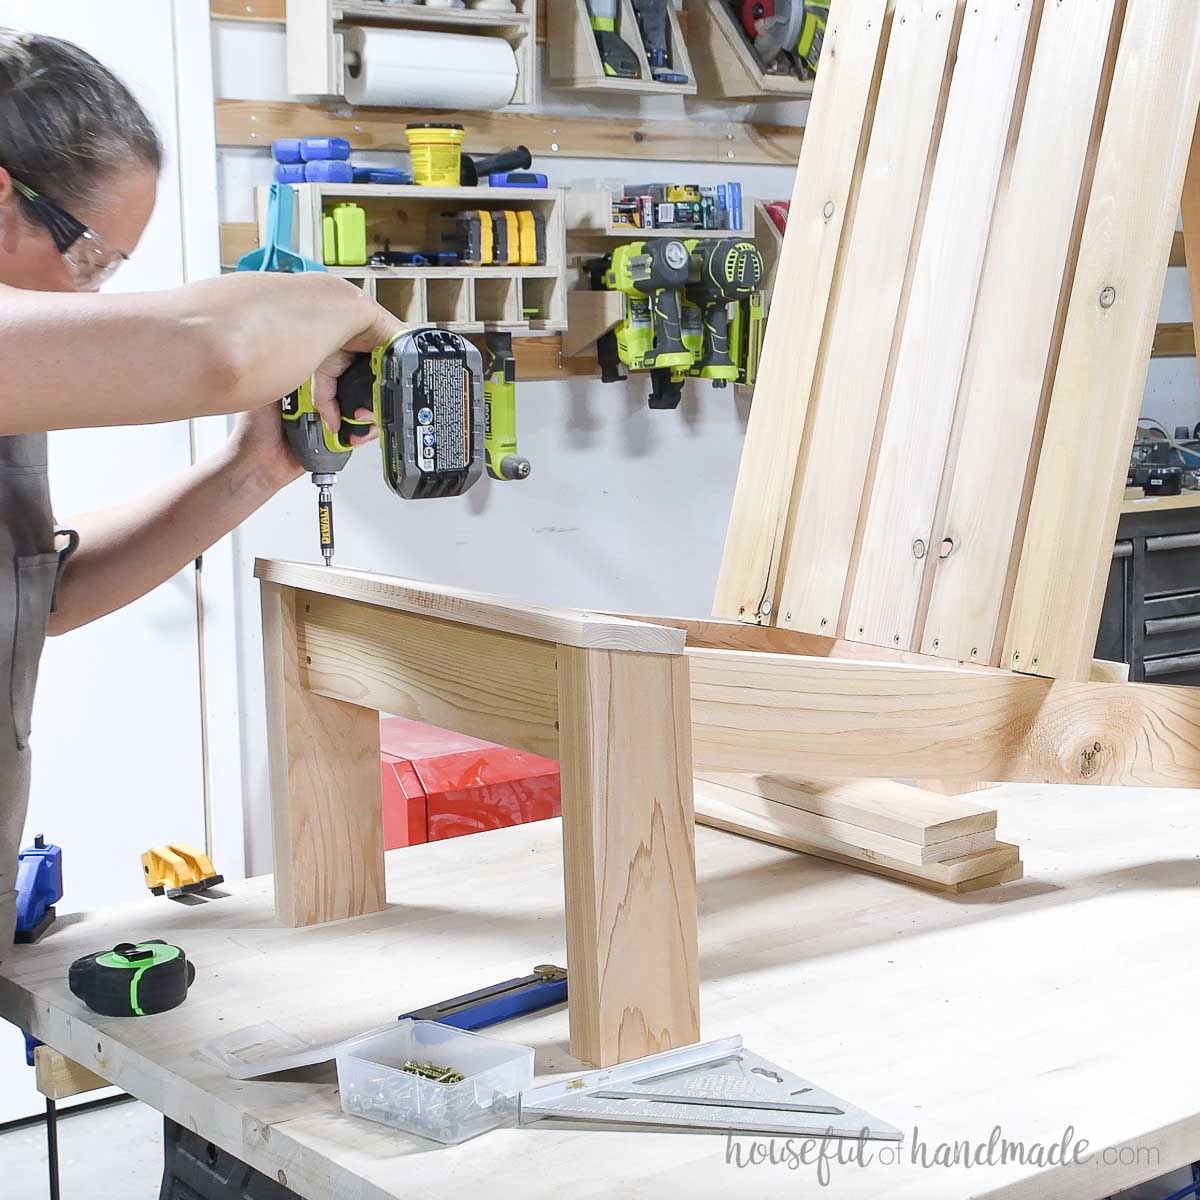
Attach the two sides together with the front seat support to the front of the under seat boards.
The back corner will be flush with the top of the seat supports but the front will not. Secure with 1 1/2” screws.
Then attach the back support board between the two back legs at the top. It should be flush with the front angle and top angle.
Secure with 2 1/2” screws.
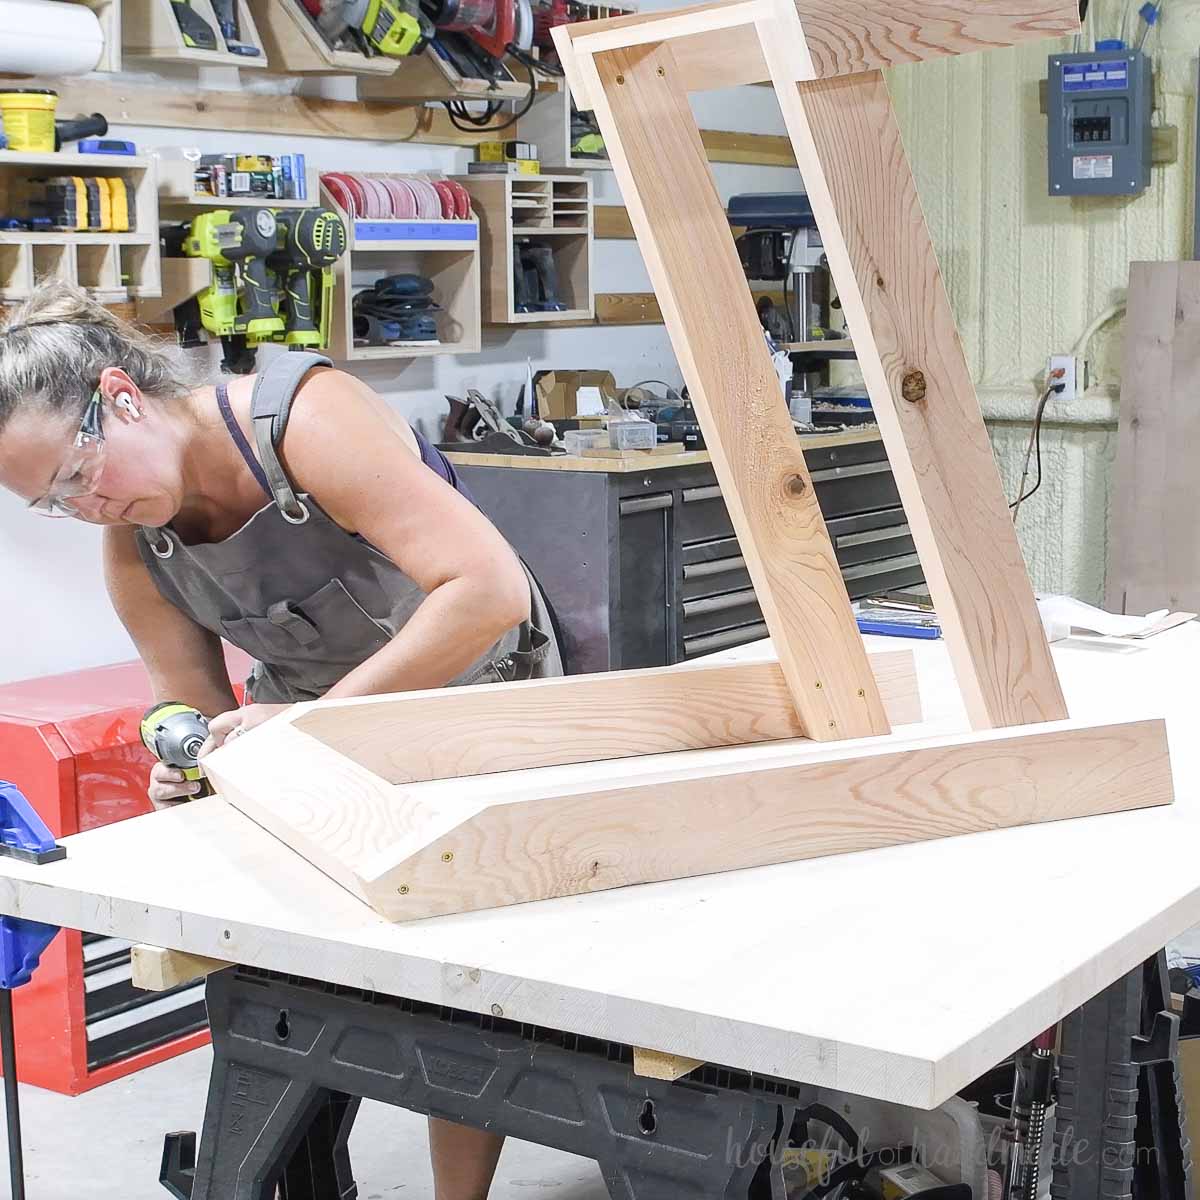
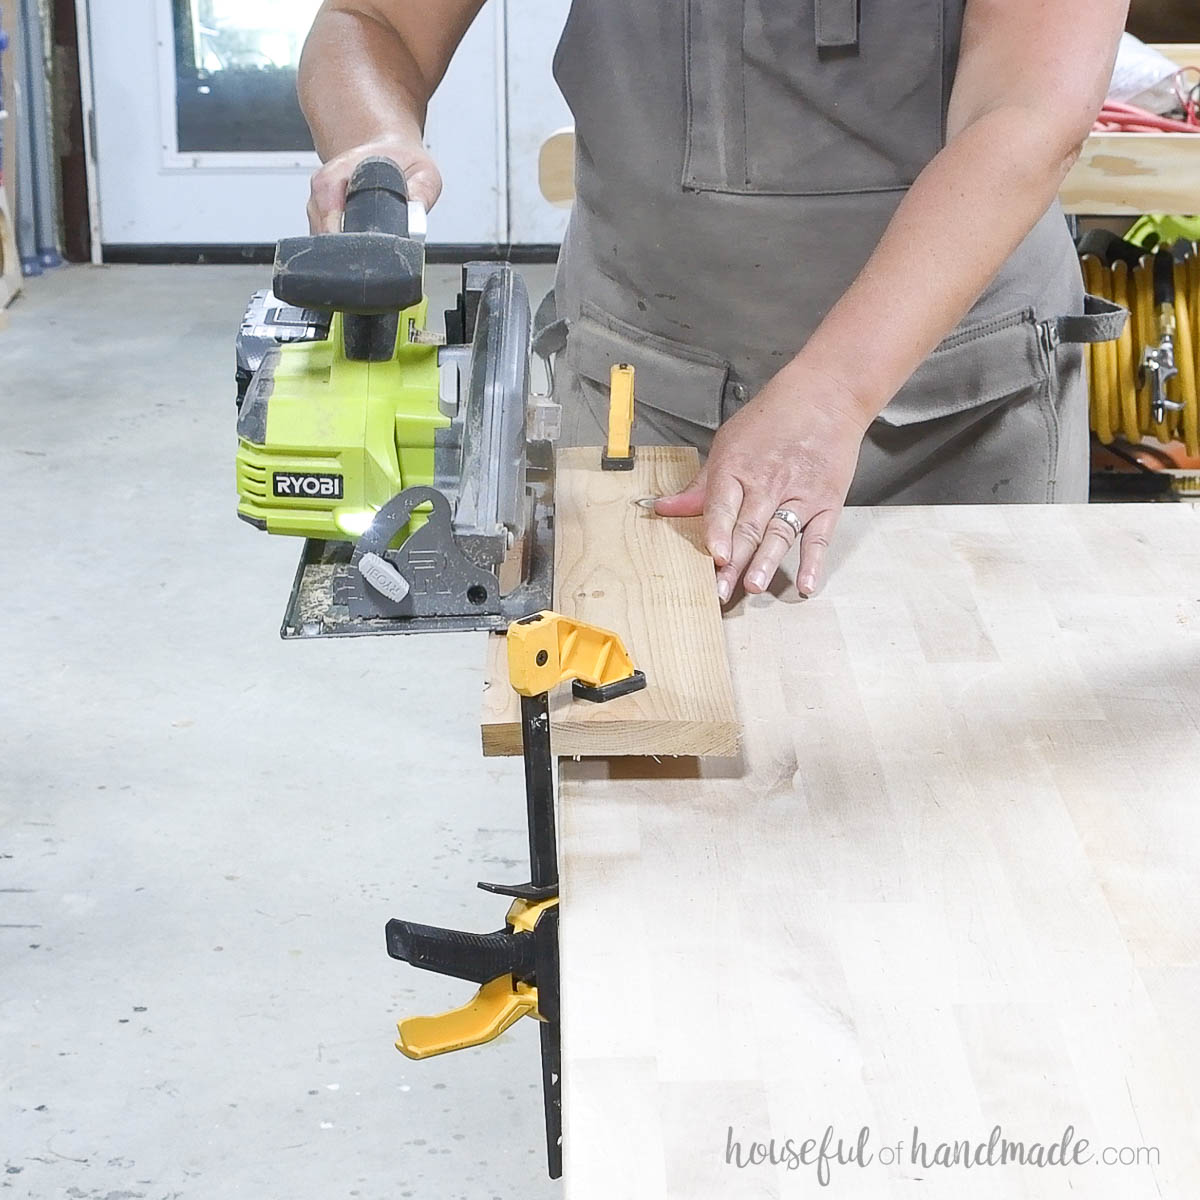
Rip the inside edge of the back slat support at a 5 degree angle with a circular saw.
Clamp a straight edge (I used one of the seat boards) to the top of your piece just to the side of your circular saw base to keep the saw straight.
Place the front of the board on the under seat support so it is set back 20” from the front of the leg board. Secure with 1 1/2” screws.
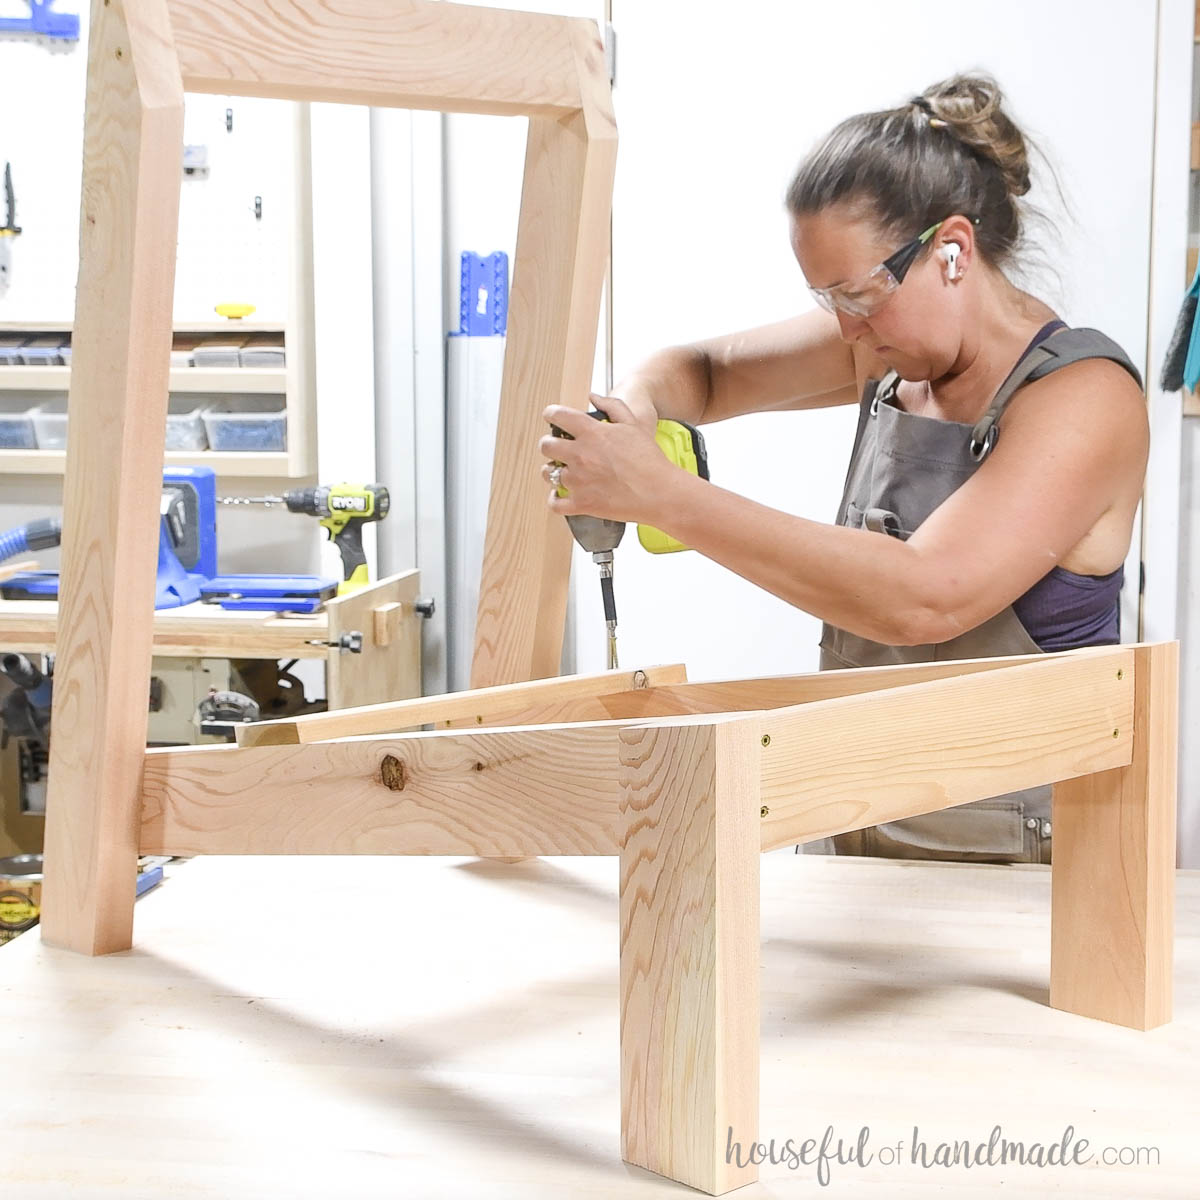
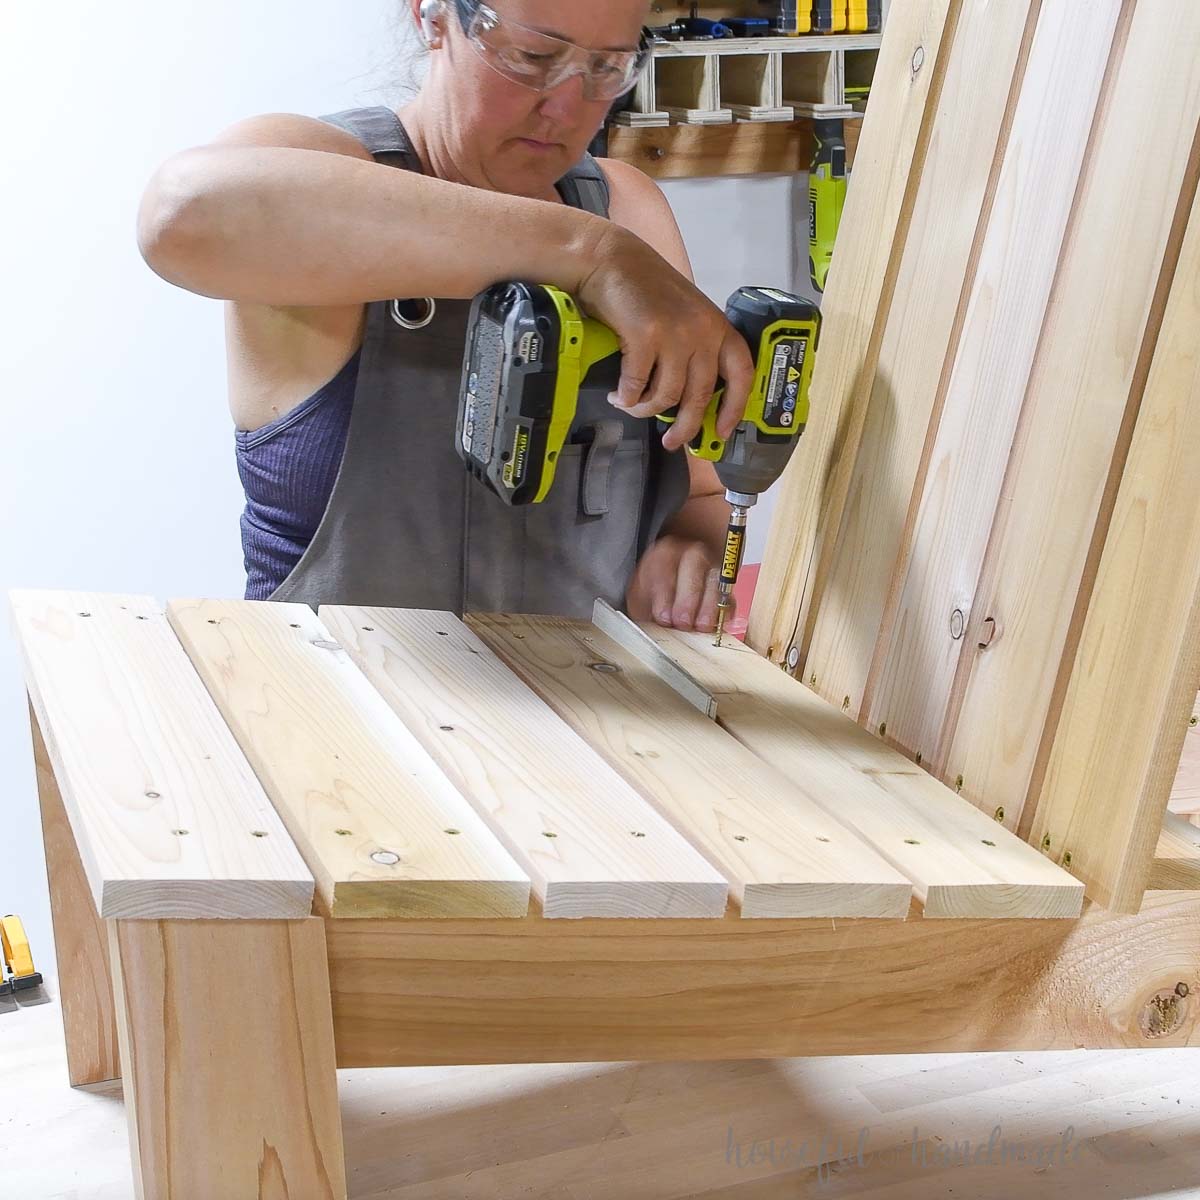
STEP 3- Attach seat slats
Line up the back slats so they are flush with the bottom of the back slat support and there is a 5/8” gap between the boards.
The outer slats will be flush with the edge of the back legs and hang over the edge of the back slat support 1 1/2”.
Secure with 1 1/2” screws, use (2) into the back slat support at the bottom and (2) into the back support toward the top.
Line up the front seat slat so it is flush with the sides of the front legs and the front should hang over the front of the leg 1/4”.
Secure into the under seat support board with 1 1/2″ screws.
Line up the remaining seat slat so they are hanging 1 1/2” over the under seat support board. There should be a 3/8” gap between the boards.
Secure with 1 1/2” screws, use (2) into the side of each board into the under seat support pieces.
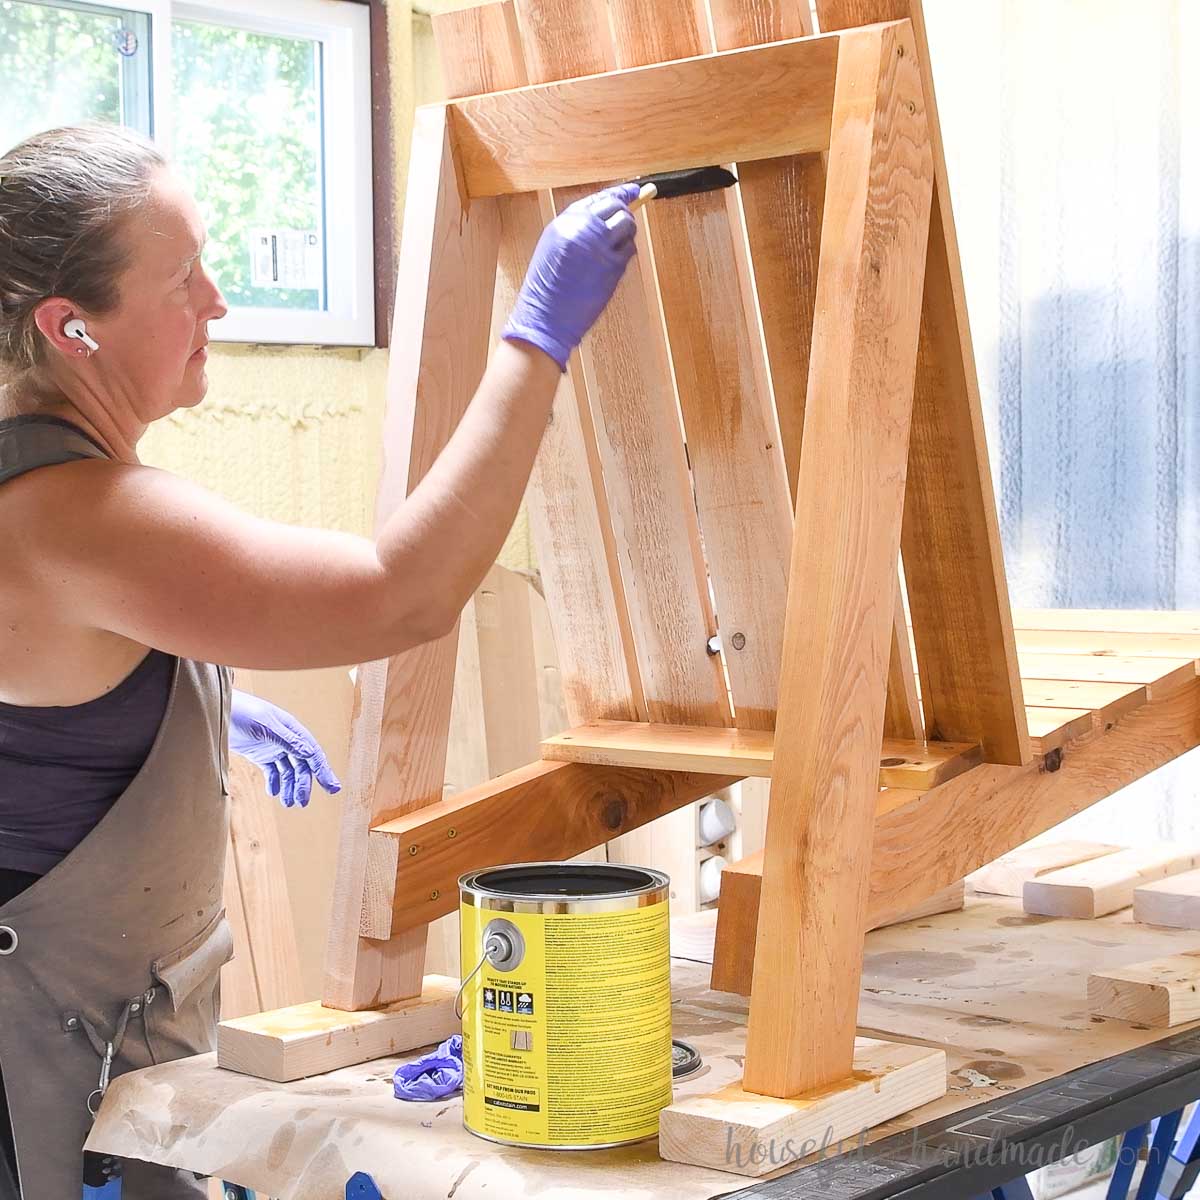
STEP 5- Finish
Sand your finished chair, then seal it for outdoor use.
I built my chairs out of cedar and use Cabot Australian Timber Oil in Natural to seal them.
Don’t forget to grab the printable PDF plans here!
Premium plans include:
- Recommended Tools
- Shopping list
- Easy to read cut list table
- Cut list diagrams
- Step-by-step instructions with 3D renderings
- Helpful resources
- BONUS: 3D SketchUp file
You did it!
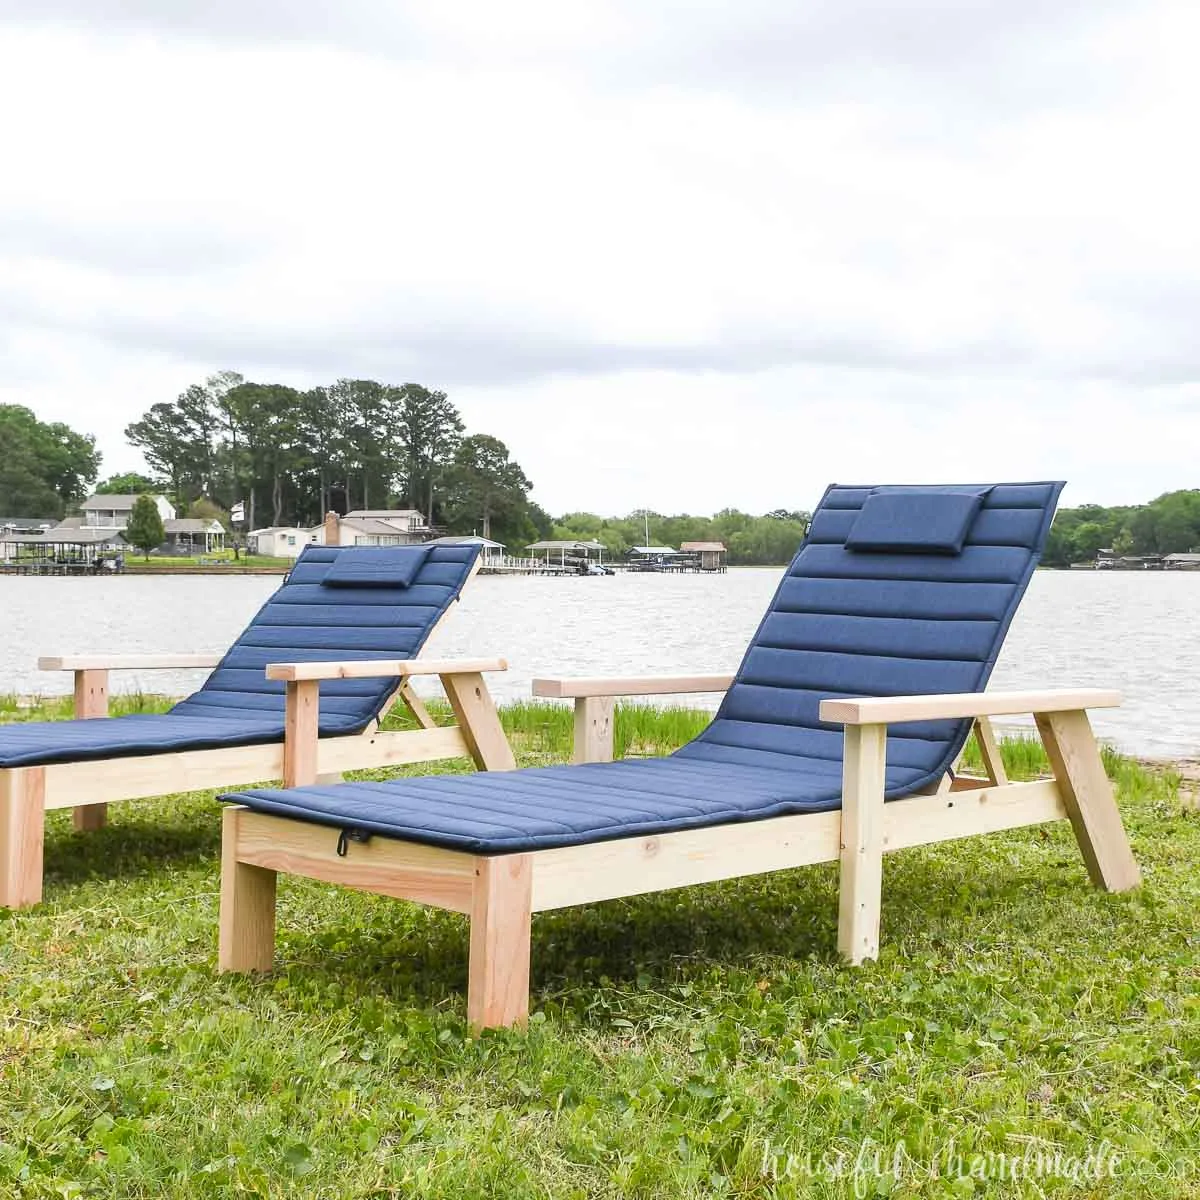
Add a 20” x 20” seat cushion if you prefer, then sit back and enjoy!
Happy building!