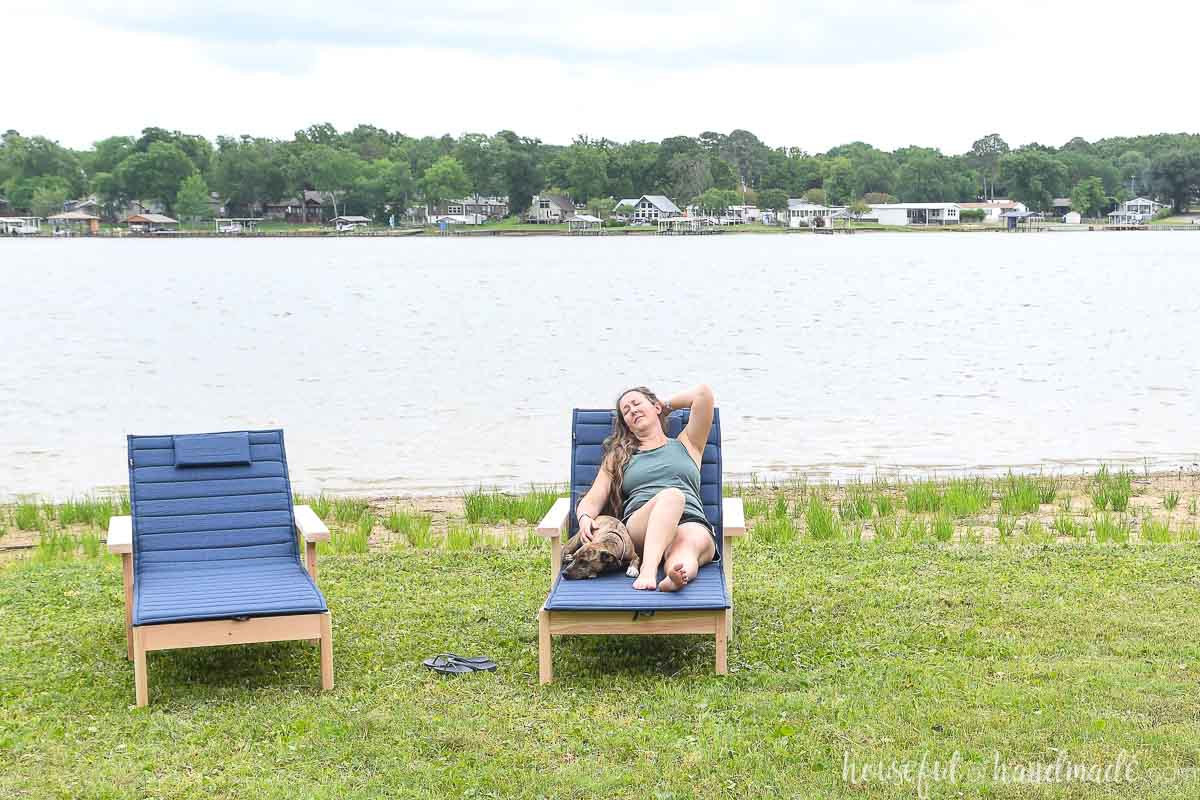
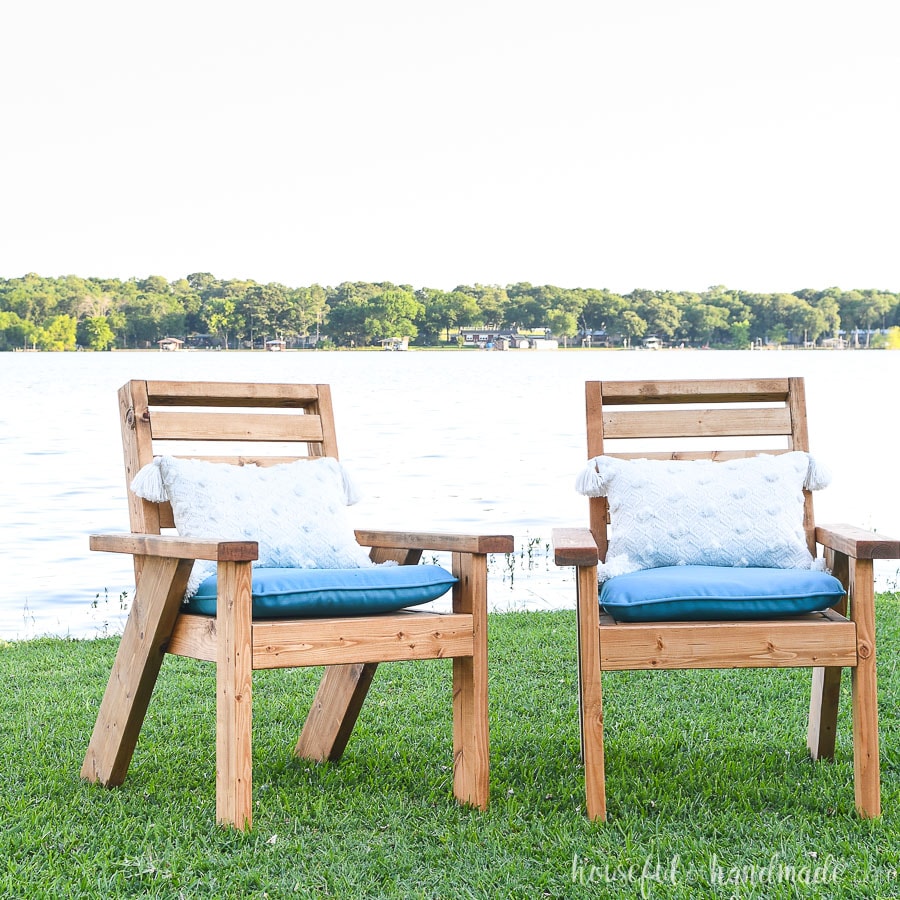
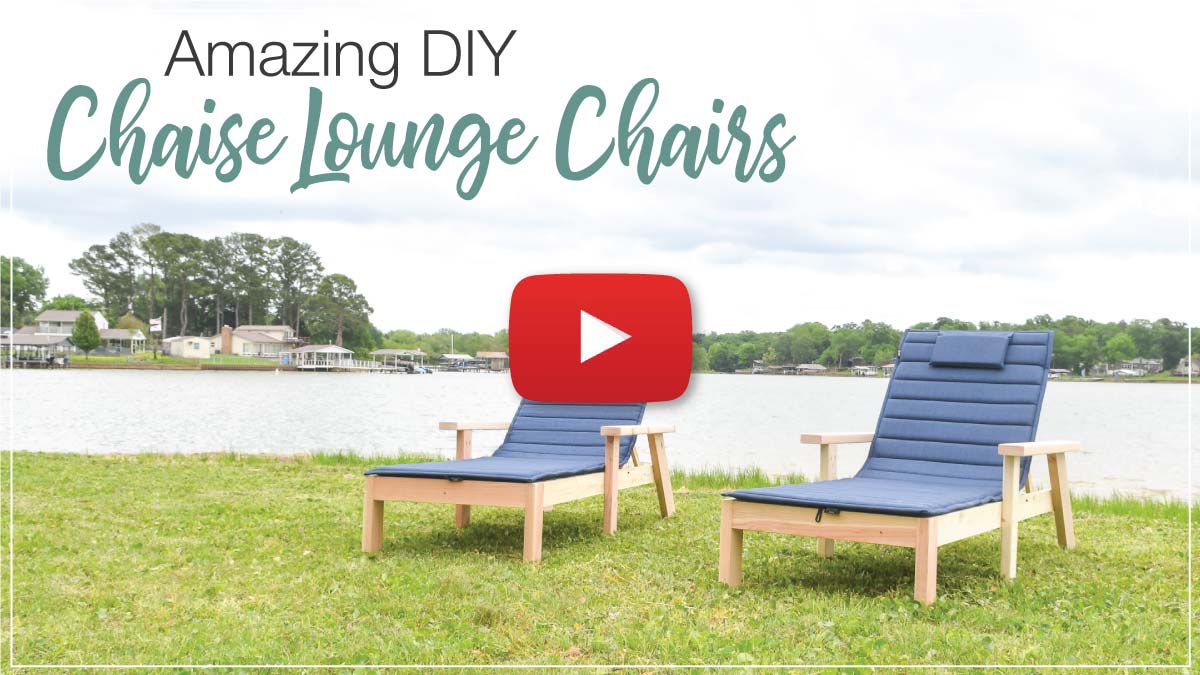
With summer right around the corner, it is time for another outdoor build project! A couple years ago I build these comfy outdoor lounge chairs, but I still needed something to lay out on too…
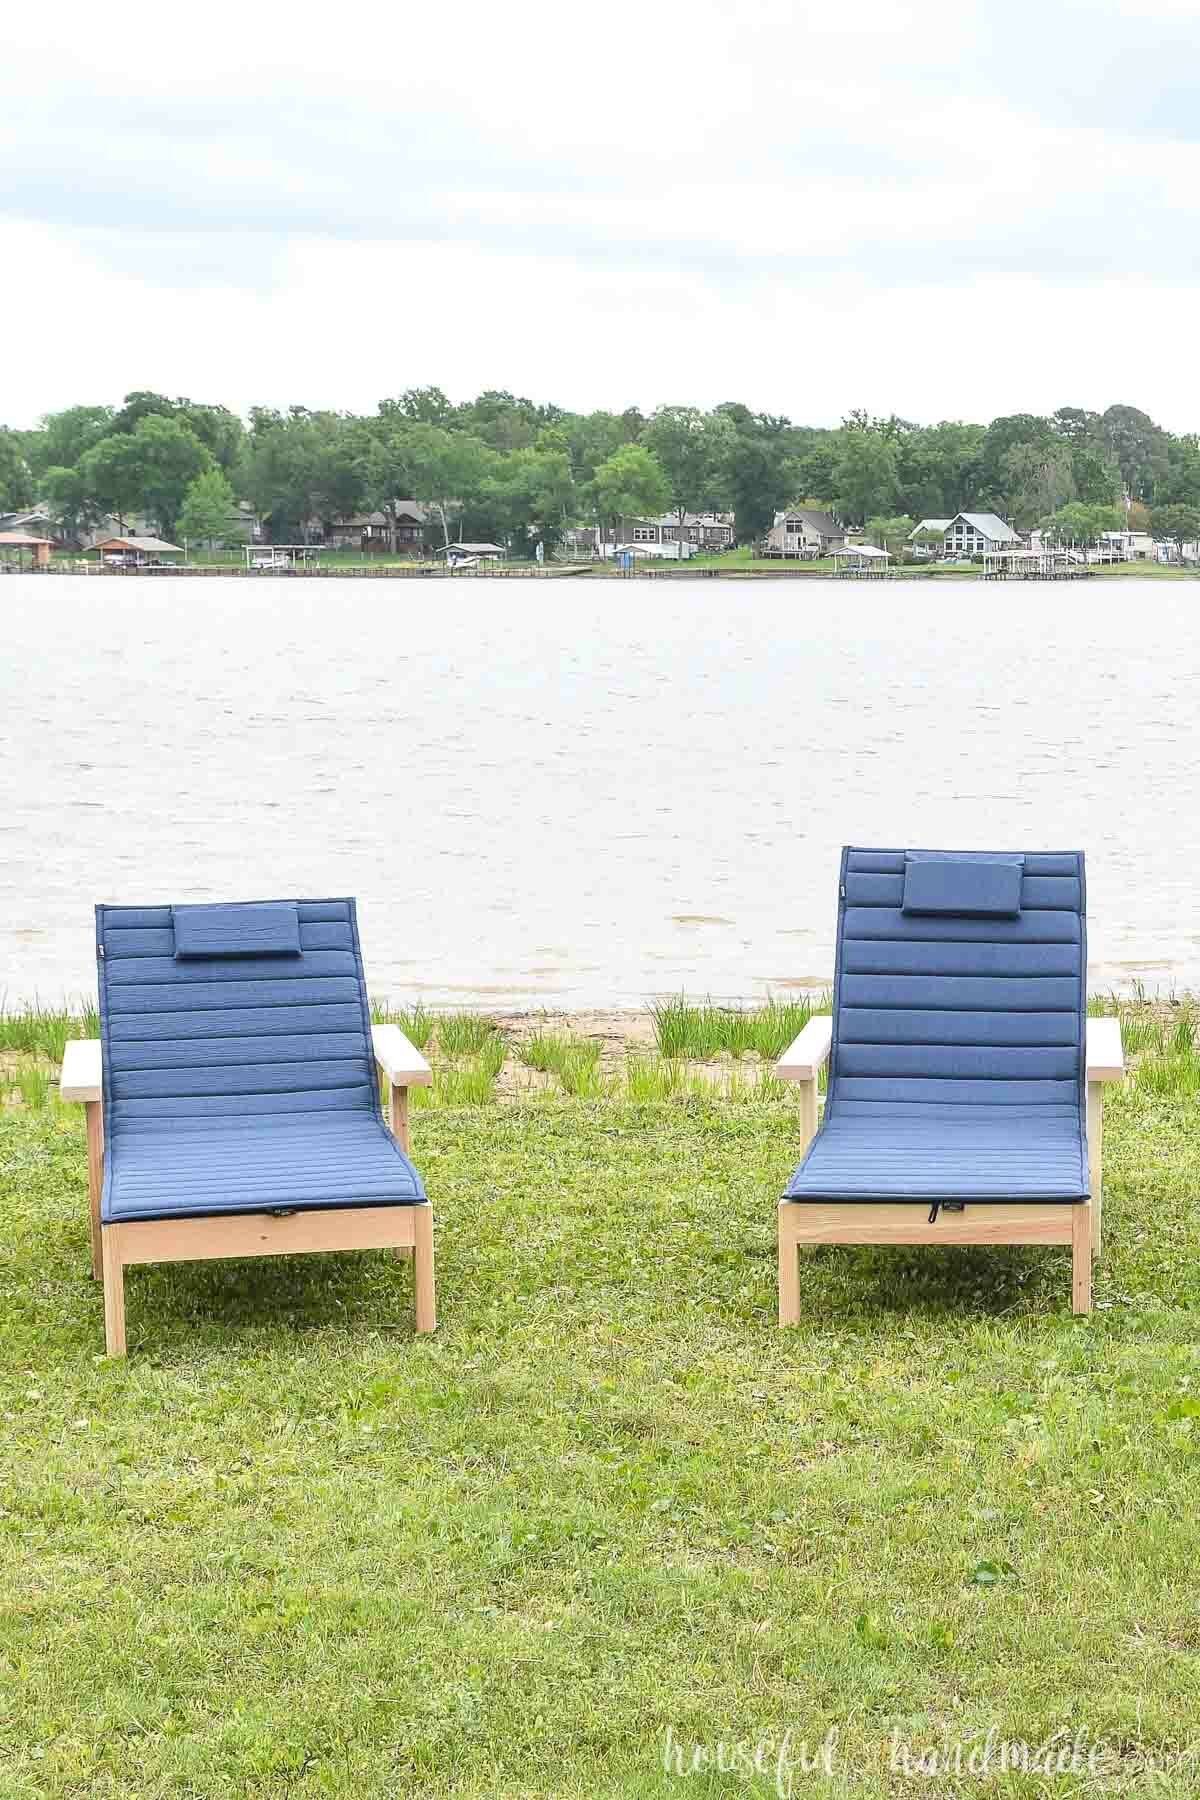
So I partnered with Kreg Tools to build matching chaise lounge chairs. They may look complicated, but the chairs are easy to build, even with the moving parts, thanks to the Kreg Pocket Hole Jig.
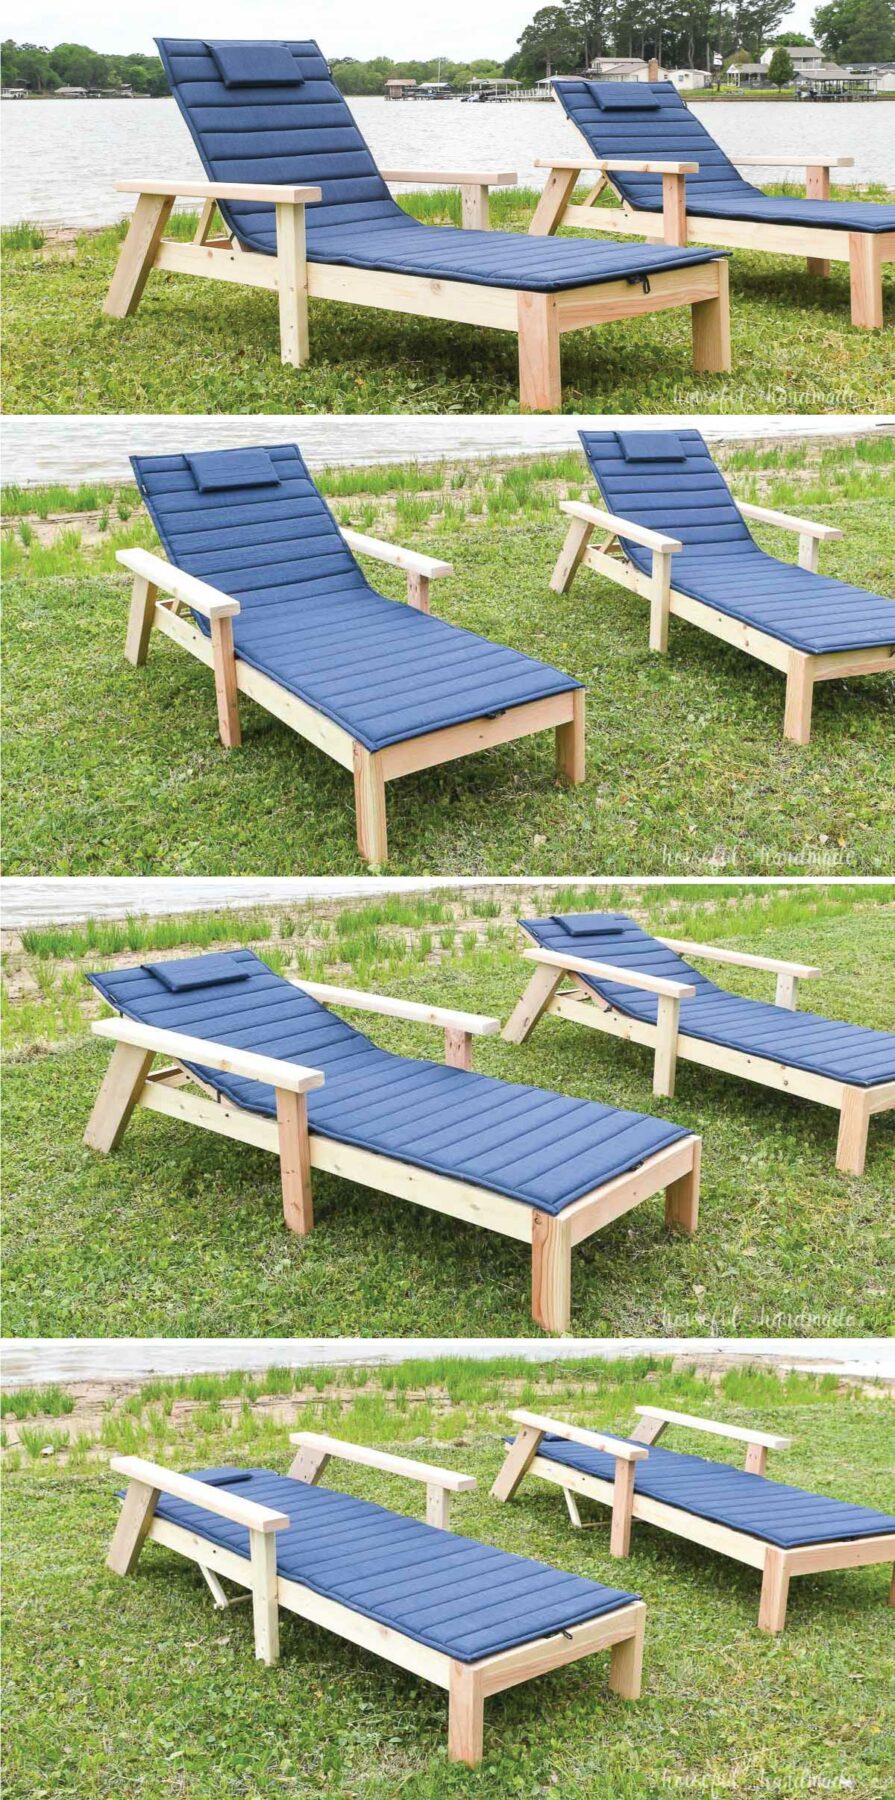
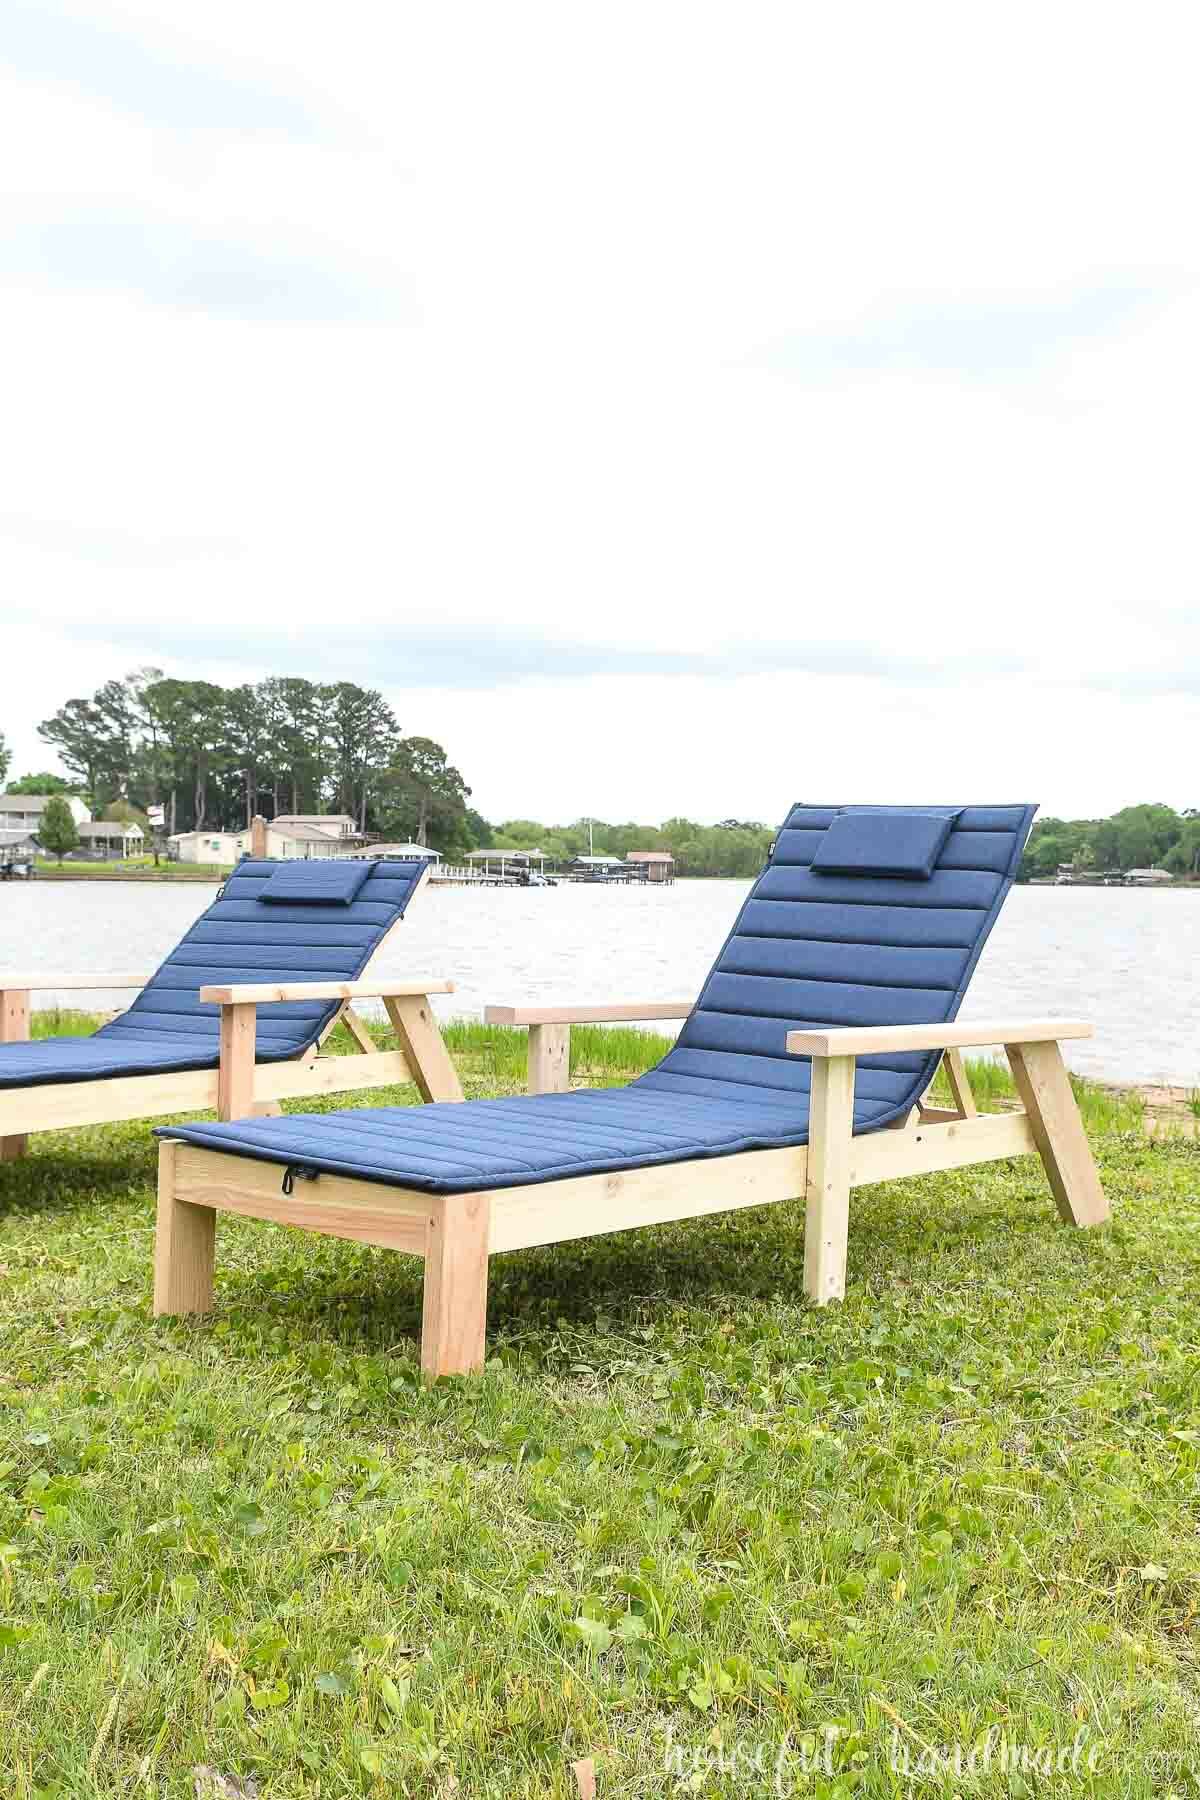
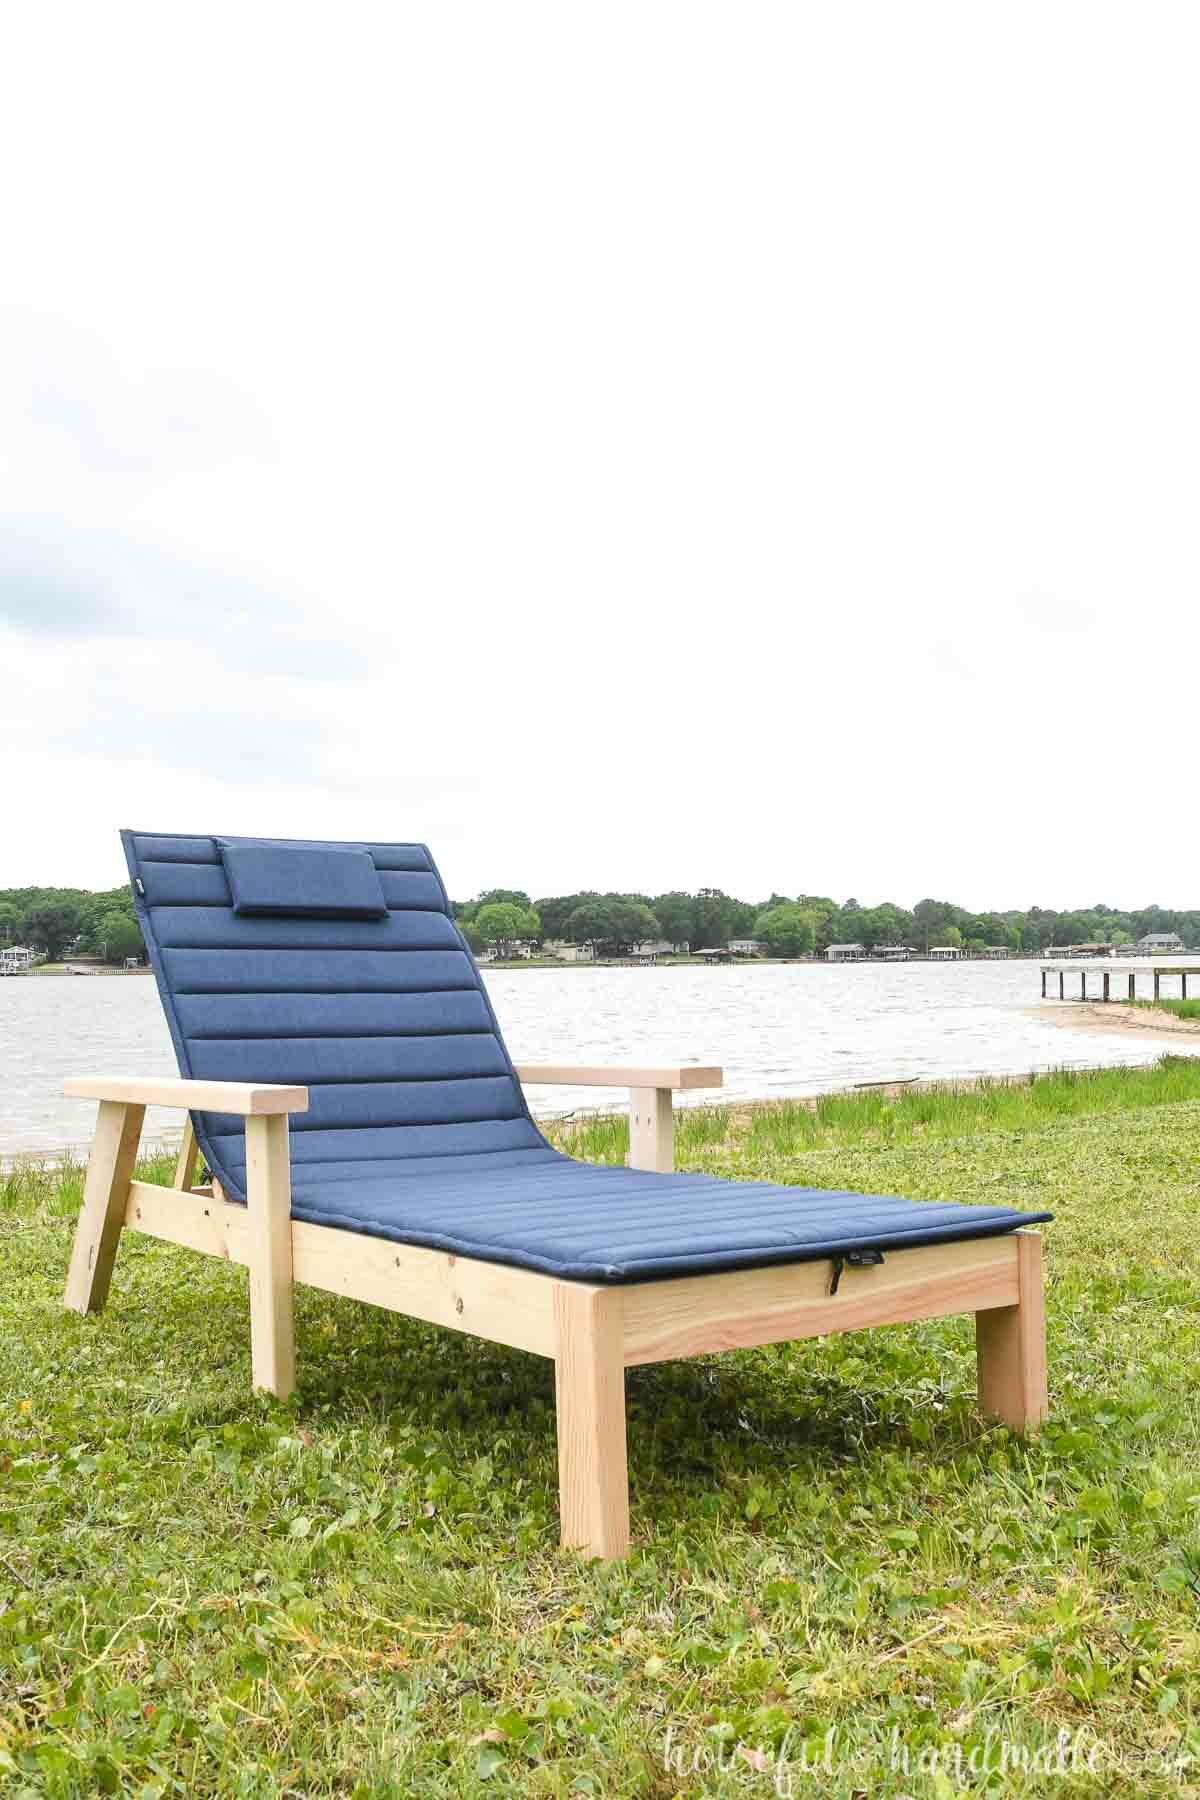
These patio lounge chairs are perfect for the yard, poolside, or in my case, lakeside. The back easily adjusts between 3 different angles or lays flat for the perfect tan.
This post may contain affiliate links. As an Amazon Associate I earn from qualifying purchases. Click here to read my full disclosure policy.
Adjustable back lounge chair
My favorite part of a chaise lounge chair is the adjustable back. Leave it upright for reading and watching the kids play. Then lay it back for relaxing or lay it totally flat so you can lay on your stomach.
So I knew these DIY chaise loungers needed to have the same adjustable back as the ones you can buy!
It took some figuring, and I had to remove and remake the pieces on the first lounge chair a couple times until I got it right. But I didn’t give up!
I persisted so I could share the perfect lounge chair build plans with you. This chair has 3 different back angles and a fully flat option.
To make the back of the loungers adjustable, you may be thinking it is now a complicated DIY… but it is not.
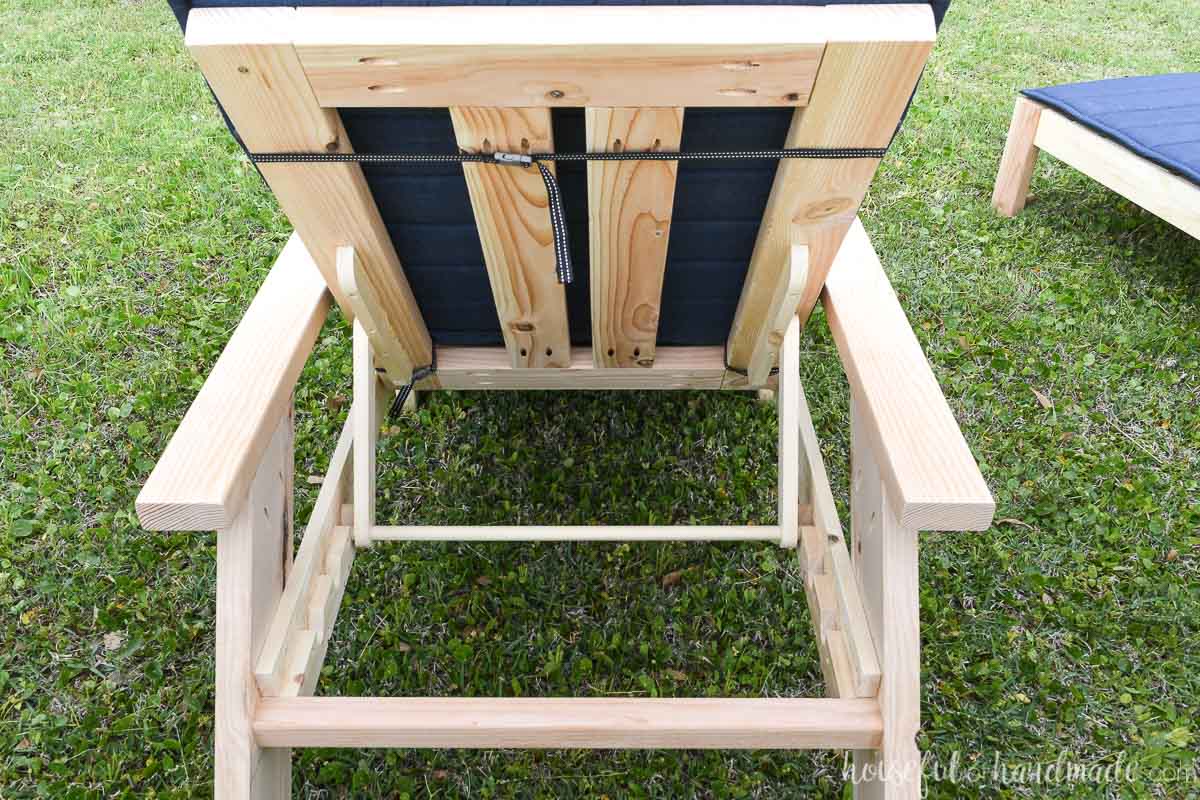
There are two pivot points on the chair that are made moveable by a simple little shoulder screws. This screw allows you to pivot around a hole drilled in the wood. If you can drill a straight hole, you can make this chair.
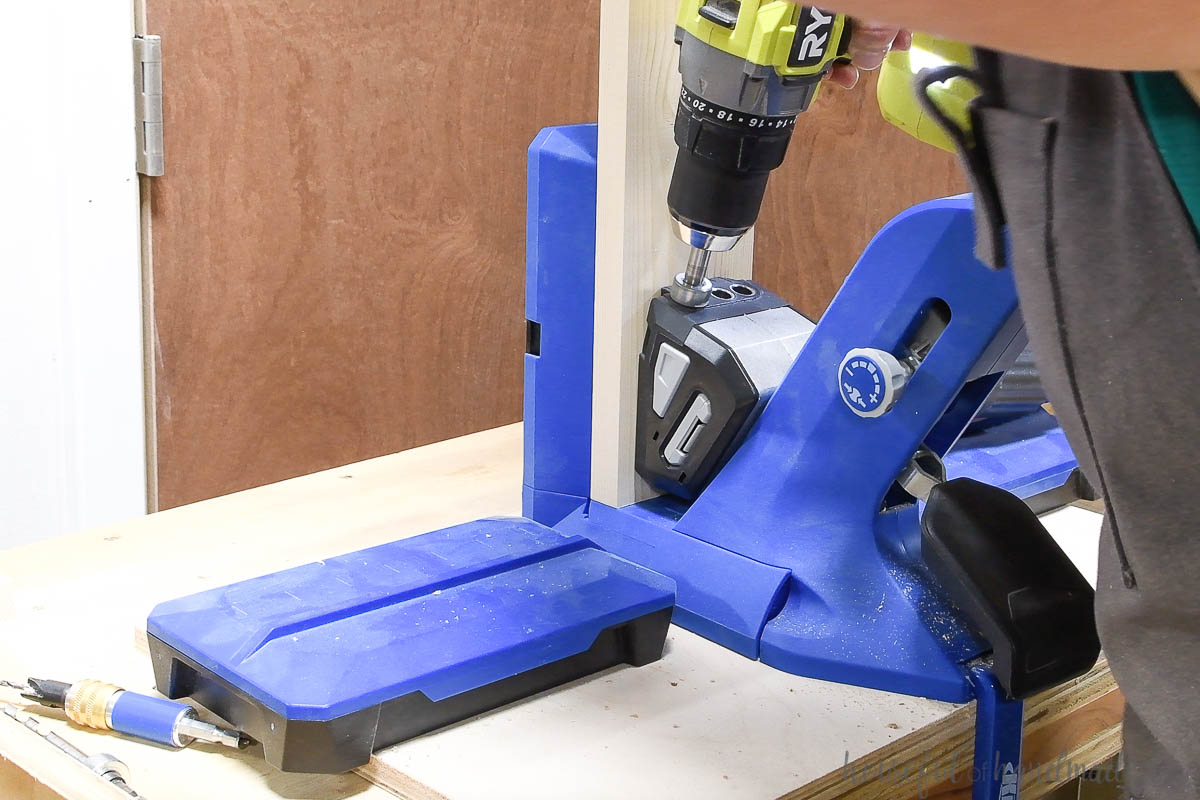
And if you cannot drill a straight hole, don’t worry. Kreg has released a new, super-simple, little drilling guide that will help anyone make straight holes.
To hold the back of your chaise lounge chair in the desired angle, you will be creating notches that the back rest support slide into. And these notches are easy to make too!
Again, they require you to drill a 1″ hole in the wood. Then trim around the outside to make it pretty and create a channel to slide the moveable back into.
But the best part is, I break it all down below in the tutorial so you too can make amazing adjustable chaise loungers.
Wood Patio Lounge Chair
These chaise lounge chairs are made from wood. You can use any wood, I kept it inexpensive by using basic construction lumber (Douglas fir 2x boards).
This inexpensive wood can be great for building outdoor furniture on a budget. Just make sure to protect it so your outdoor projects stay nice for years.
Use an outdoor sealer to seal the wood. Sealers that absorb into the wood and do not create a film on top will need to be applied regularly. Sealers that create a film will need to be reapplied when the film starts wearing off.
Keep the sealer from wearing off too fast by covering your lounge chairs when not in use. This will also protect any cushions you put on them from sun and weather damage.
You could also paint the chairs if you prefer a solid color or white chaise lounge chairs. Just make sure to use an outdoor paint and cover then when not in use to protect your paint so it lasts for years.
Other woods that are great for outdoor furniture are cedar, redwood and teak. These woods are more expensive, but resist rot and shrinking, plus look amazing.
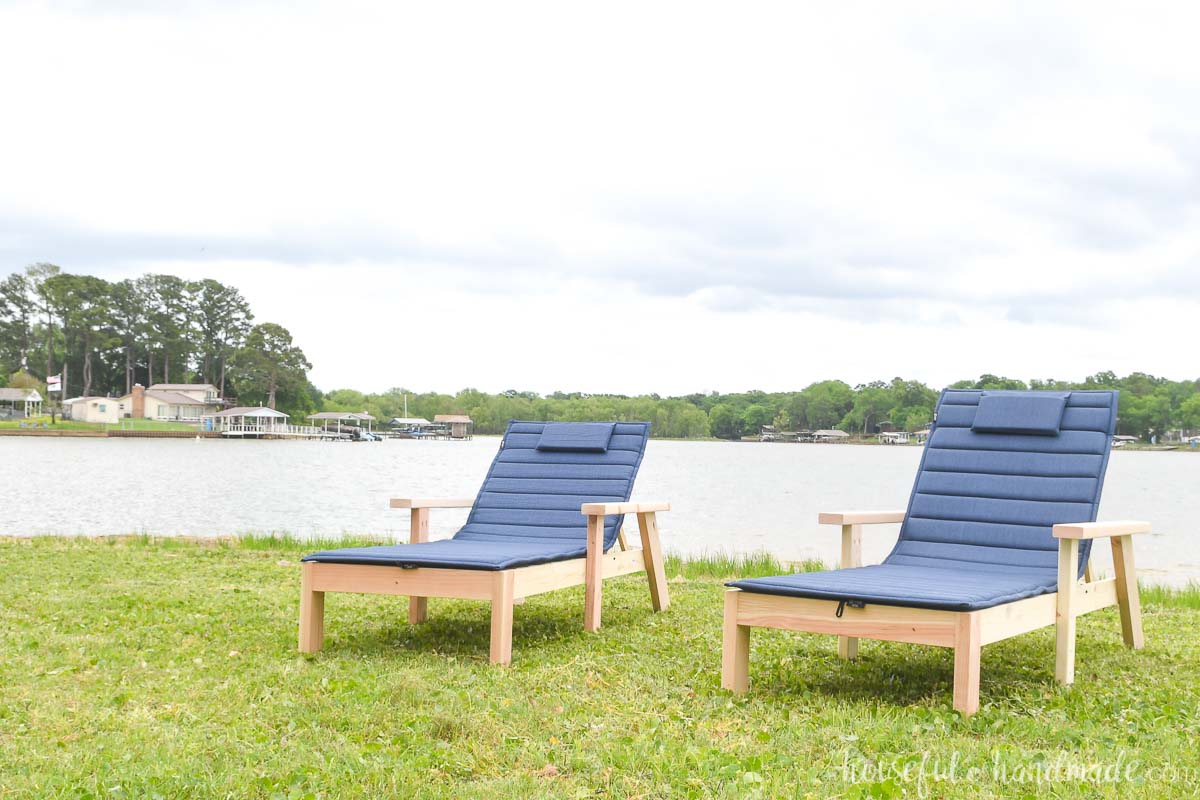
To make the lounge chairs super comfy (in case you plan to spend all day outside like I do), I designed them to fit a standard lounge chair cushion.
You can use any 26″ wide and 80″ long chair cushion that will match your decor. I found these thinner cushions that can quickly roll up when not in use.
My husband was shocked at how comfortable the thin cushion made these beautiful loungers. We are prepared for many sunburns to be had while relaxing (and maybe napping) outside!
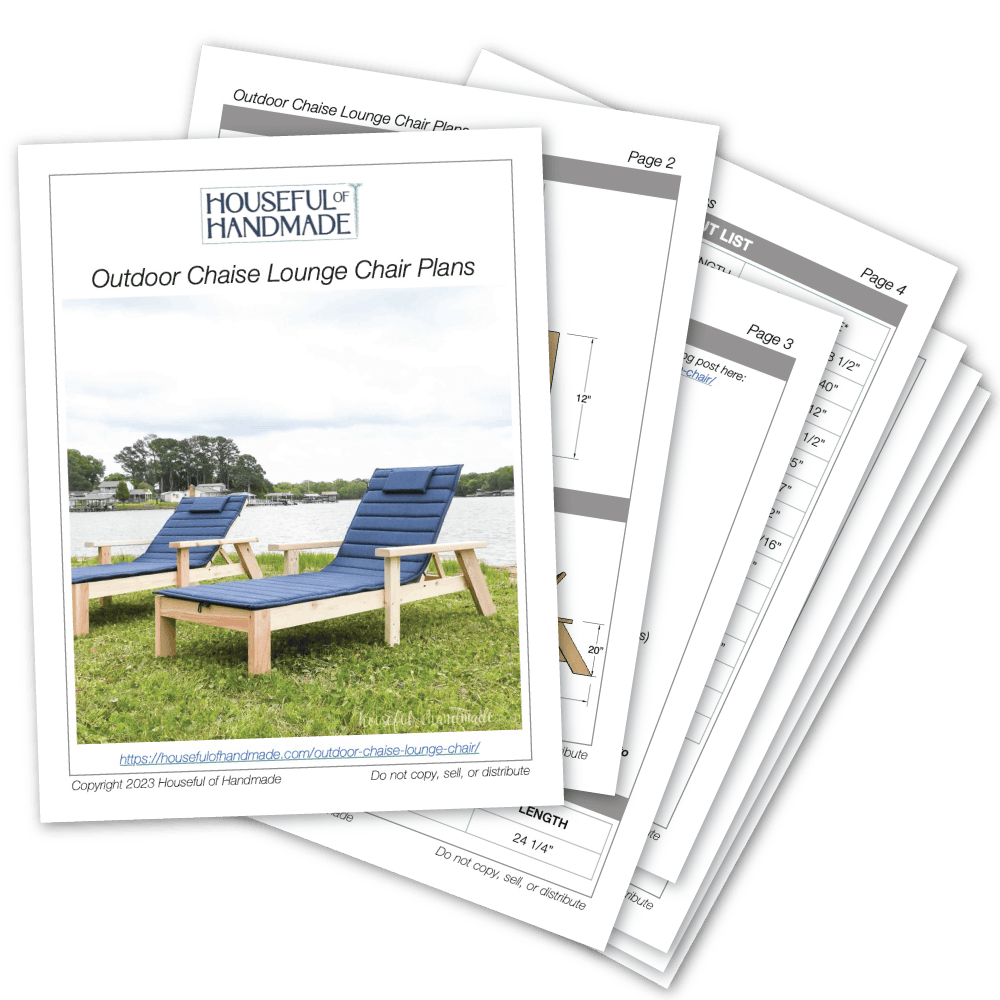
Printable PDF Woodworking Plans
You can grab the PDF woodworking plans for these chaise lounge chairs here.
Build matching outdoor furniture for your patio or yard with these other outdoor furniture plans.

Or Bundle and Save 30%!
Get the PDF plans for the complete matching outdoor furniture set in a bundle and save.
How to Build a Chaise Lounge Chair
Tools & Materials
Recommended Tools:
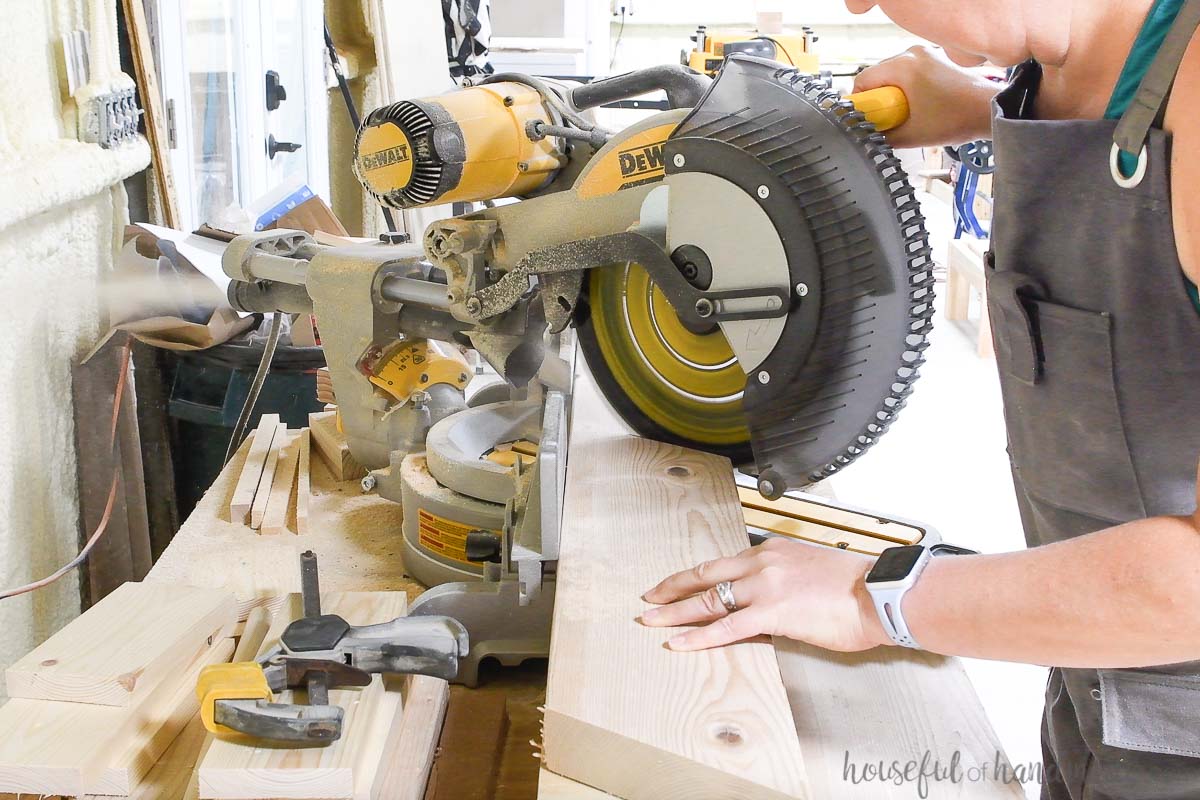
- Miter saw
- I recently upgraded to this larger sliding miter saw (watch for it to go on sale), but all my projects before were built with this inexpensive miter saw that I loved.
- Kreg Pocket hole jig
- I use the Kreg 720 since I do a lot of builds, but their less expensive 520 jig or 320 jig are great jigs for beginners or small spaces. Find the best Kreg pocket hole jig for you here.
- Kreg Quick-Flip
- Kreg Drilling guide
- Drill
- Impact driver (optional, but I love not having to switch bits with the drill)
- Jigsaw or bandsaw
- Brad nailer
- Sander
Supplies:
- Lumber-
- (3 1/2) 2×4 boards, 8′ long
- (1) 2×6 board, 5′ long
- (1) 2×2 board, 26″ long
- (5) 1×4 boards, 8′ long
- (2) 1×2 boards, 6′ long
- (1) 3/4″ dowel, 25″ long
- 2 1/2″ Blue-kote pocket holes screws
- 1 1/4″ Blue-kote pocket holes screws
- 1 1/2″ brad nails
- 1″ long shoulder screws
- 3/4″ long shoulder screws
- Threaded inserts (to match screw thread of shoulder screws)
- 26″ x 80″ chaise lounge cushions
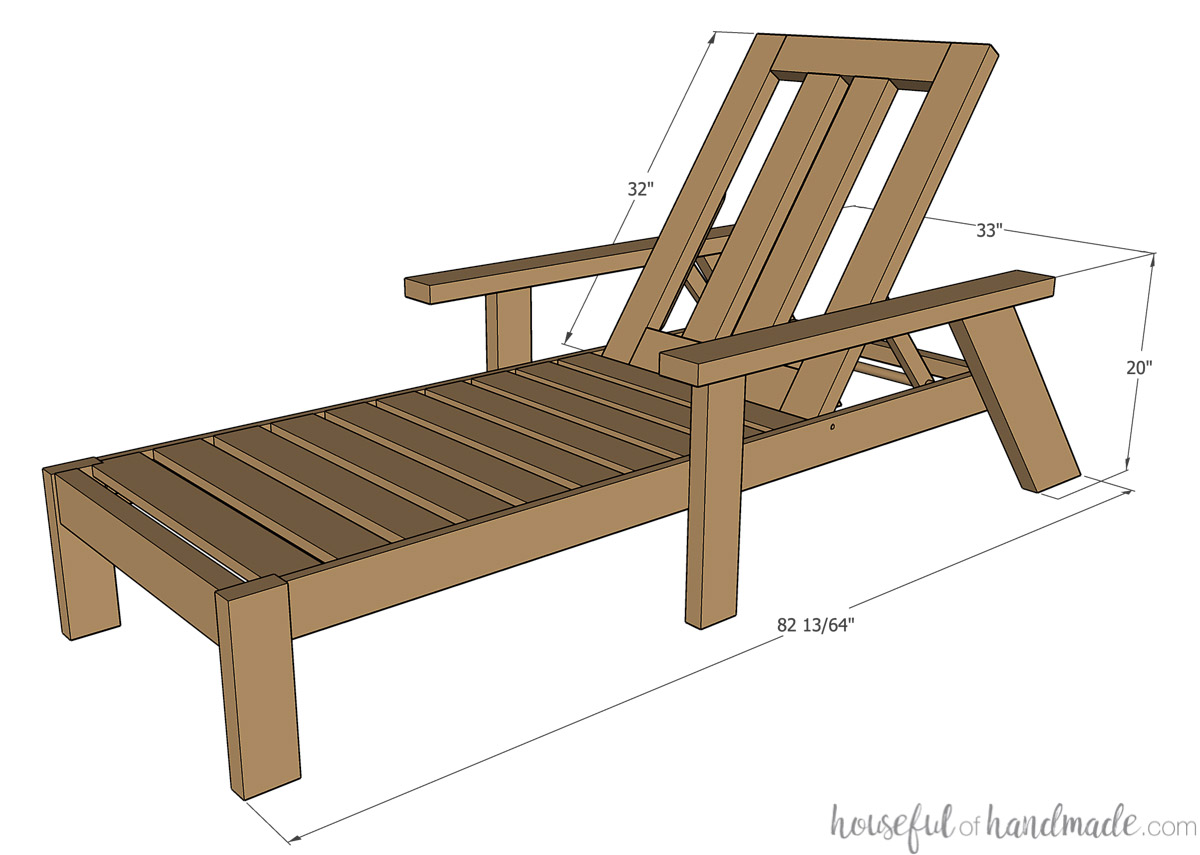
Overall Dimensions
The finished chaise lounger is 33″ wide x 82 1/4″ deep x arms at 20″ tall. It fits a standard 26″ wide x 80″ long chaise cushion.
Cut List
Cut out the pieces according to the detailed cut list in the PDF plans.
The back legs need to be cut a 37 1/2 degree angle on both ends. The angles should be parallel to each other.
See the diagram in the plans for details on the angled cuts.
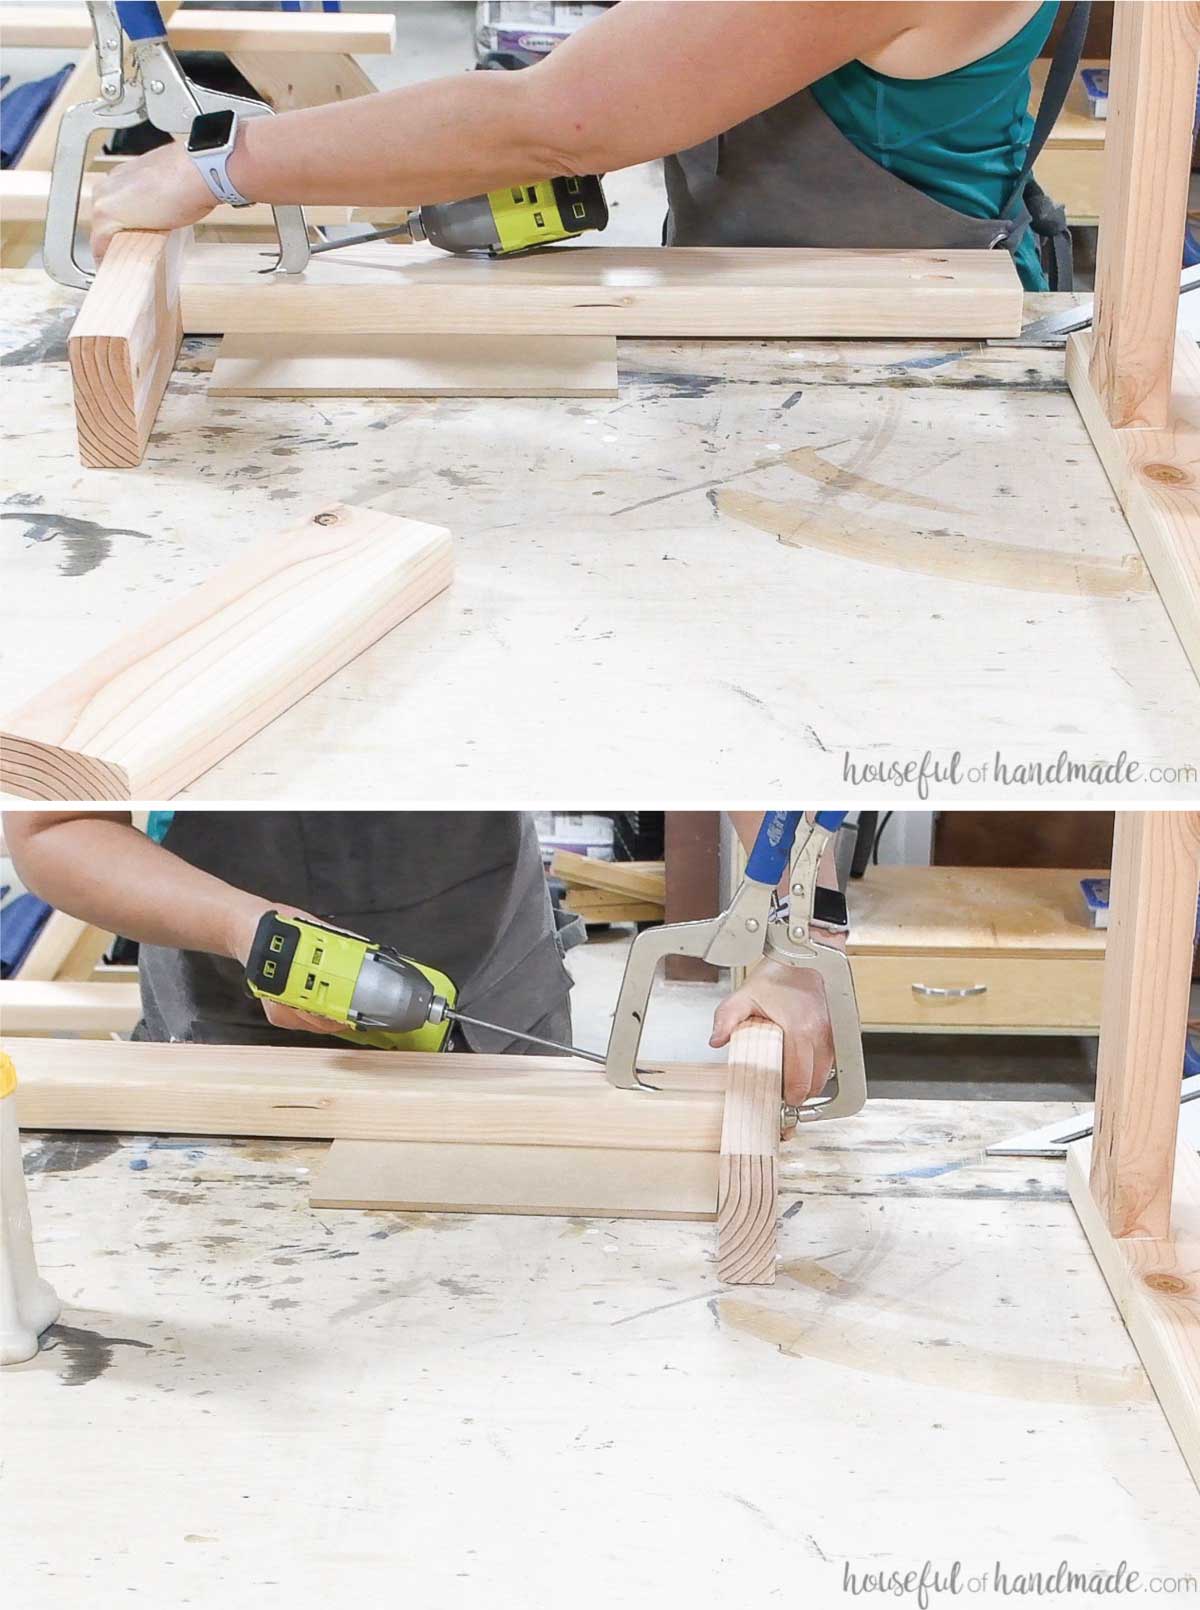
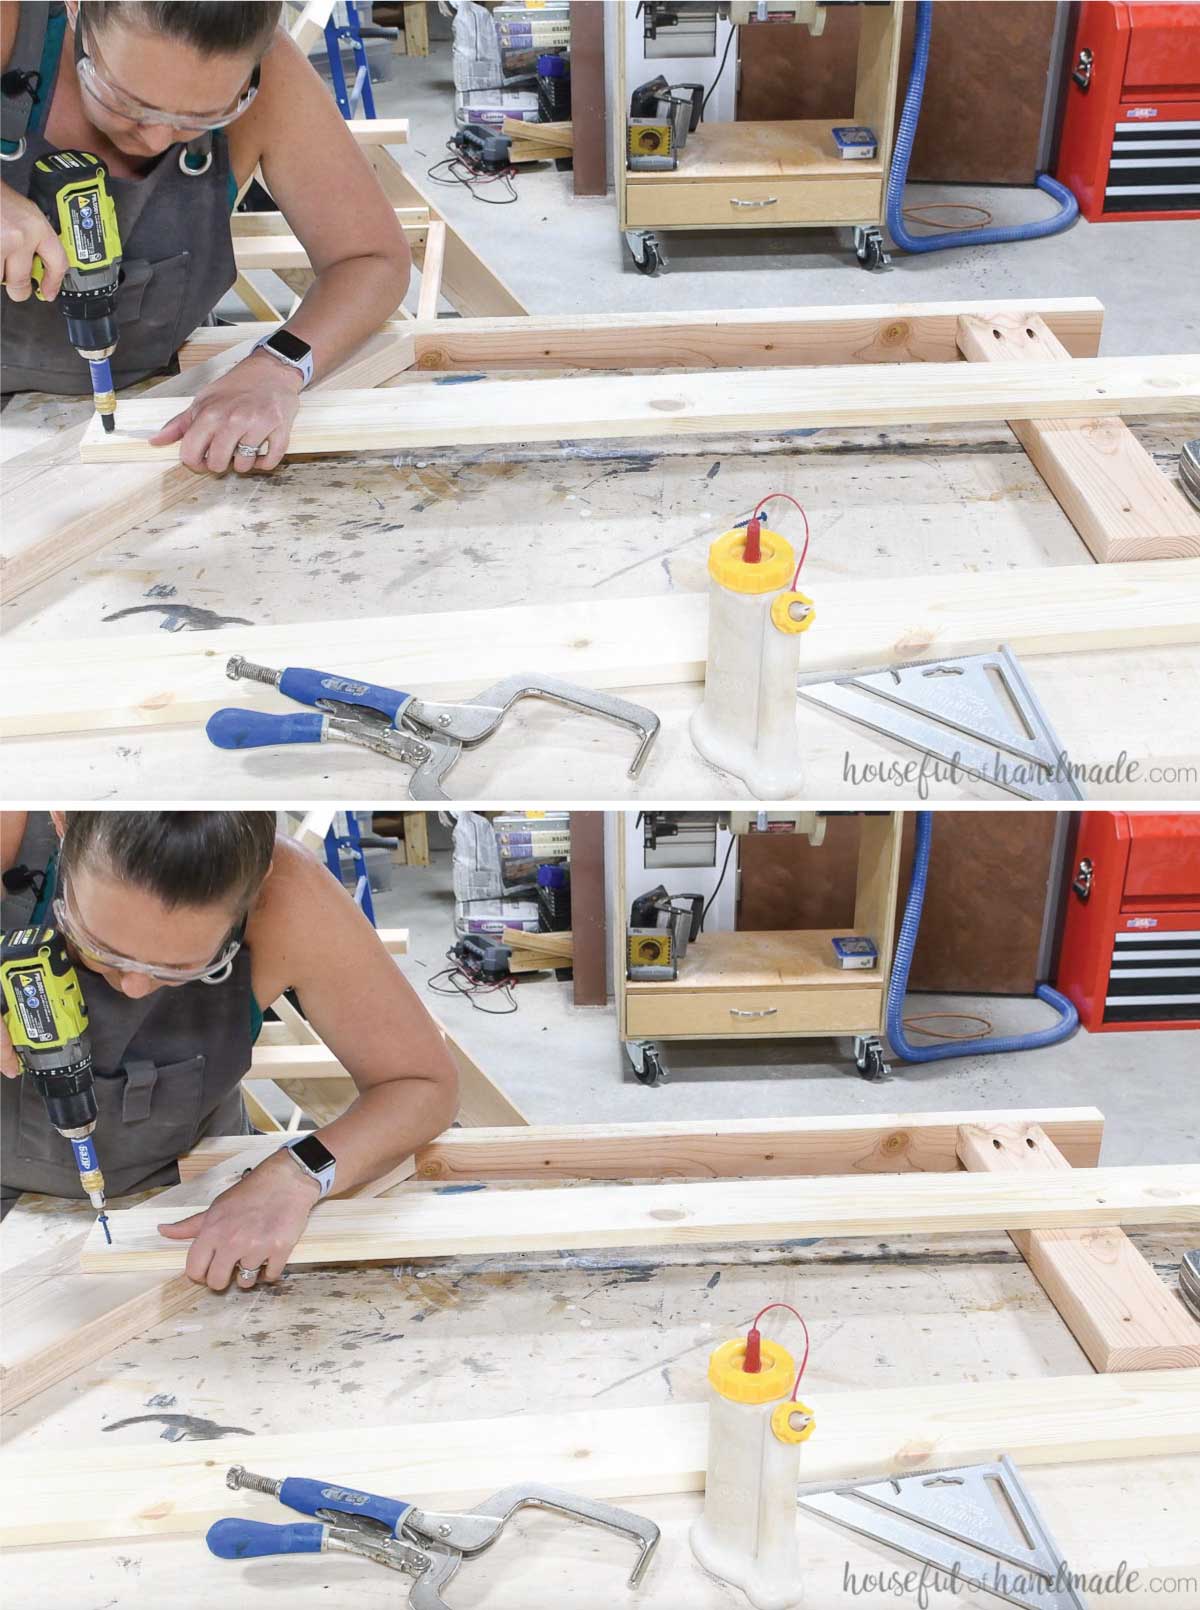
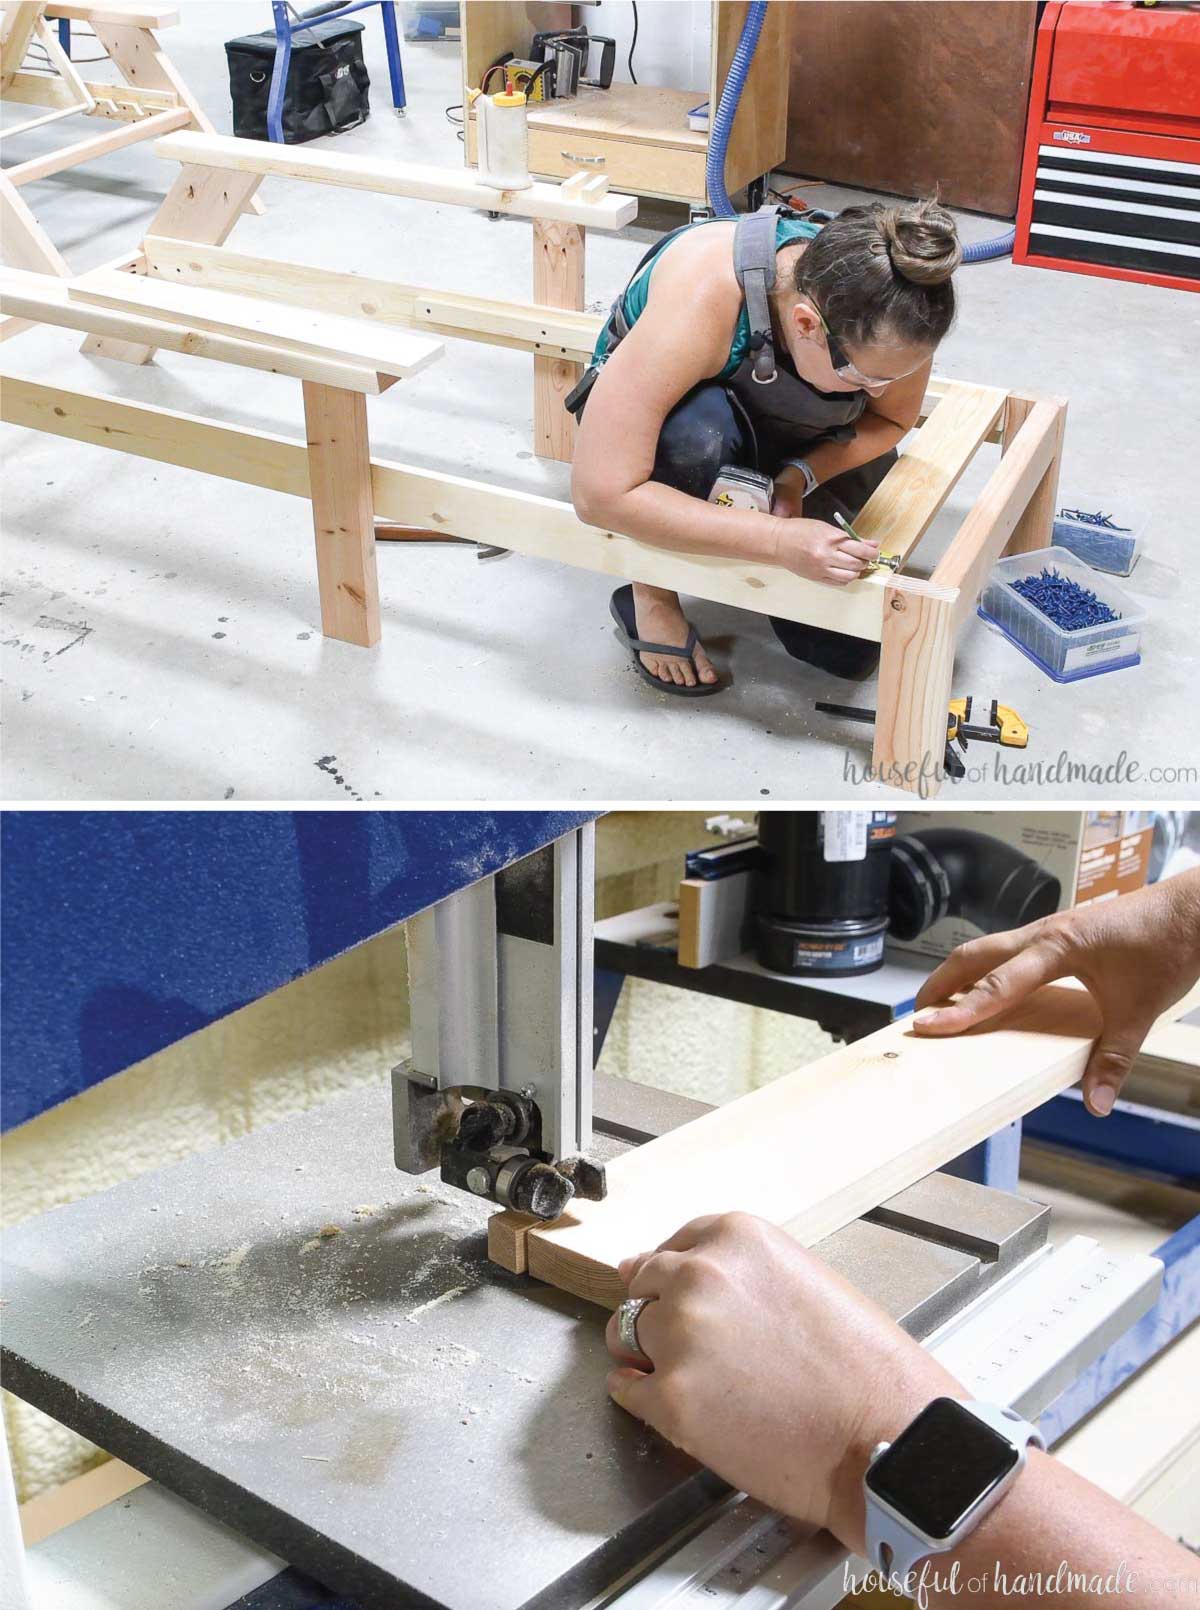
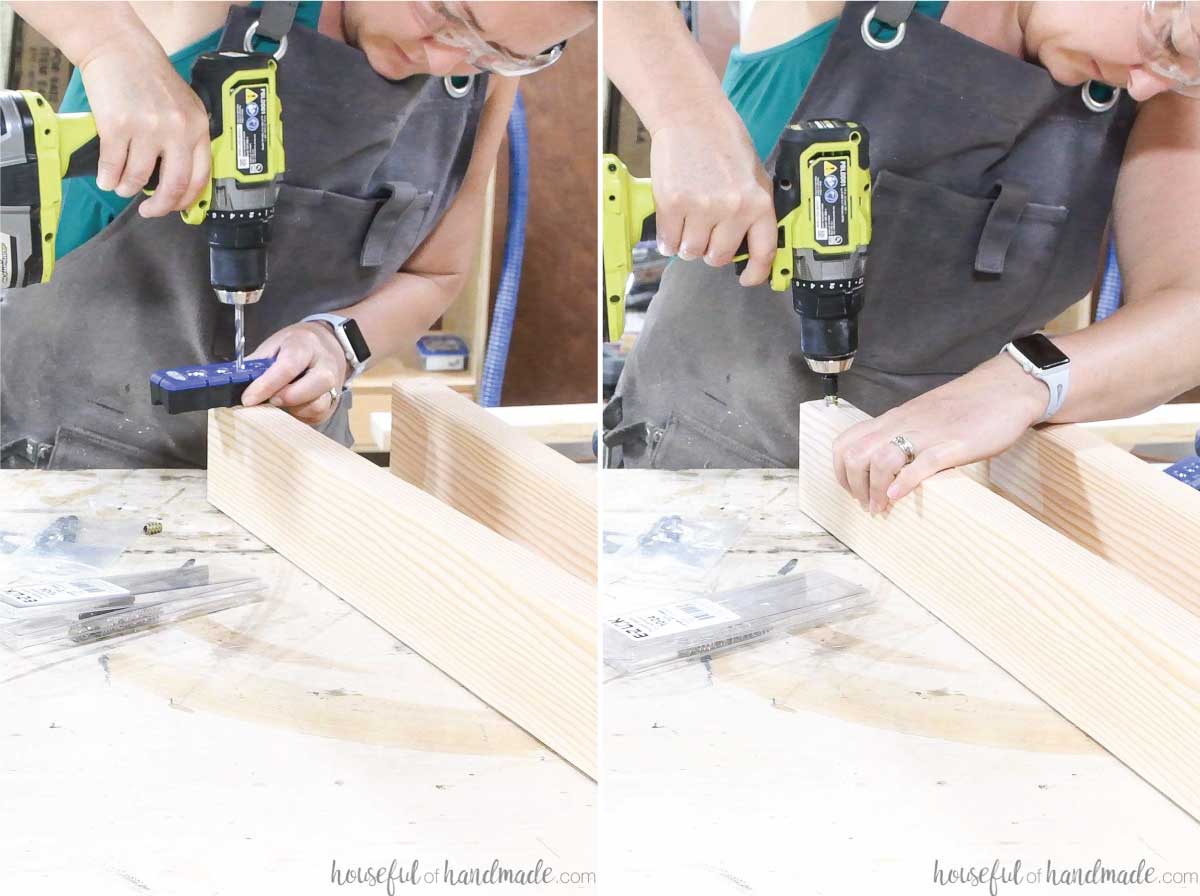
STEP 1- Build the legs
Drill pocket holes set for 1 1/2″ thick material in one end of each of the center leg pieces and both ends of the front brace.
Drill pocket holes in one end of each of the angled back leg pieces. The legs will need to be mirrored, so make sure the pockets holes are in opposite sides of the boards.
Measure 3″ in from the front and back of the arm pieces and draw a line. Attach the center legs to the front of the arms at this 3″ mark. Secure with wood glue and 2 1/2″ pocket hole screws.
Attach the back legs to the back of the arm rest so the leg angles toward to the back at the 3″ mark. Secure with 2 1/2″ pocket hole screws and wood glue.
Make sure both boards are flush with the inside of the arm. Also, remember to mirror the legs so they are opposite, not identical.
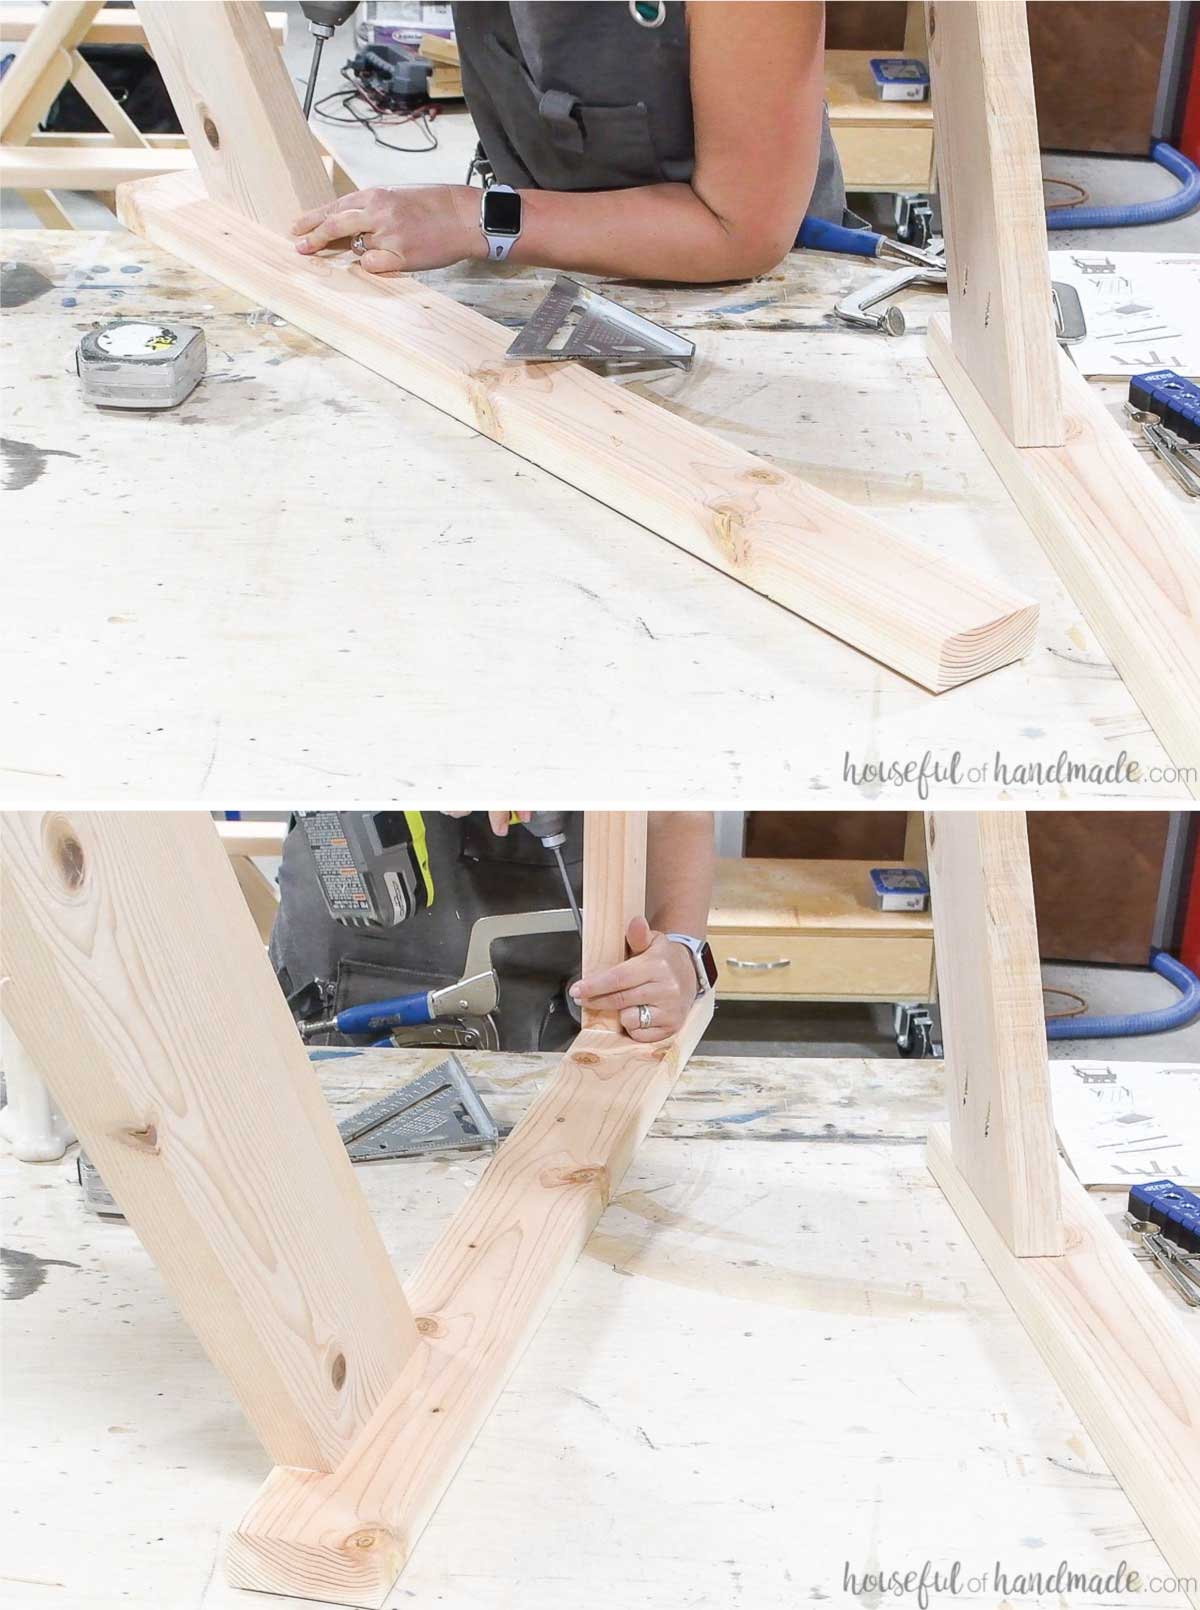
Attach the front brace between the front legs so they are flush at the top. Set the front brace back 1/4″ and secure with wood glue and 2 1/2″ pocket hole screws.
STEP 2- Attach rails to create frame
Drill pocket holes set for 3/4″ thick material in one end of the side rail boards.
Measure up 8 1/2″ from the bottom of the back leg and center leg boards. On the angled back legs, it can be helpful to use a flat board to measure from so the mark is 8 1/2″ from the floor, not the angle.
Attach the side rail to the inside of each leg assembly so there is 30 1/2″ sticking out the front of the center leg (the front is the side with the pocket holes drilled in them).
Secure with 1 1/4″ long blue-kote screws. Use the Kreg quick-flip to counter-sink the screws into the boards.
Make sure the screws are attached so they are 1″ up from the bottom of the rail (to make sure they are not in the way in future steps).
Drill pocket holes set for 1 1/2″ thick material in both ends of the back support piece.
Attach it to the back legs so it is set 1 1/2″ down from the top of the rails and up against the back of the rails. Secure with wood glue and 2 1/2″ pocket hole screws.
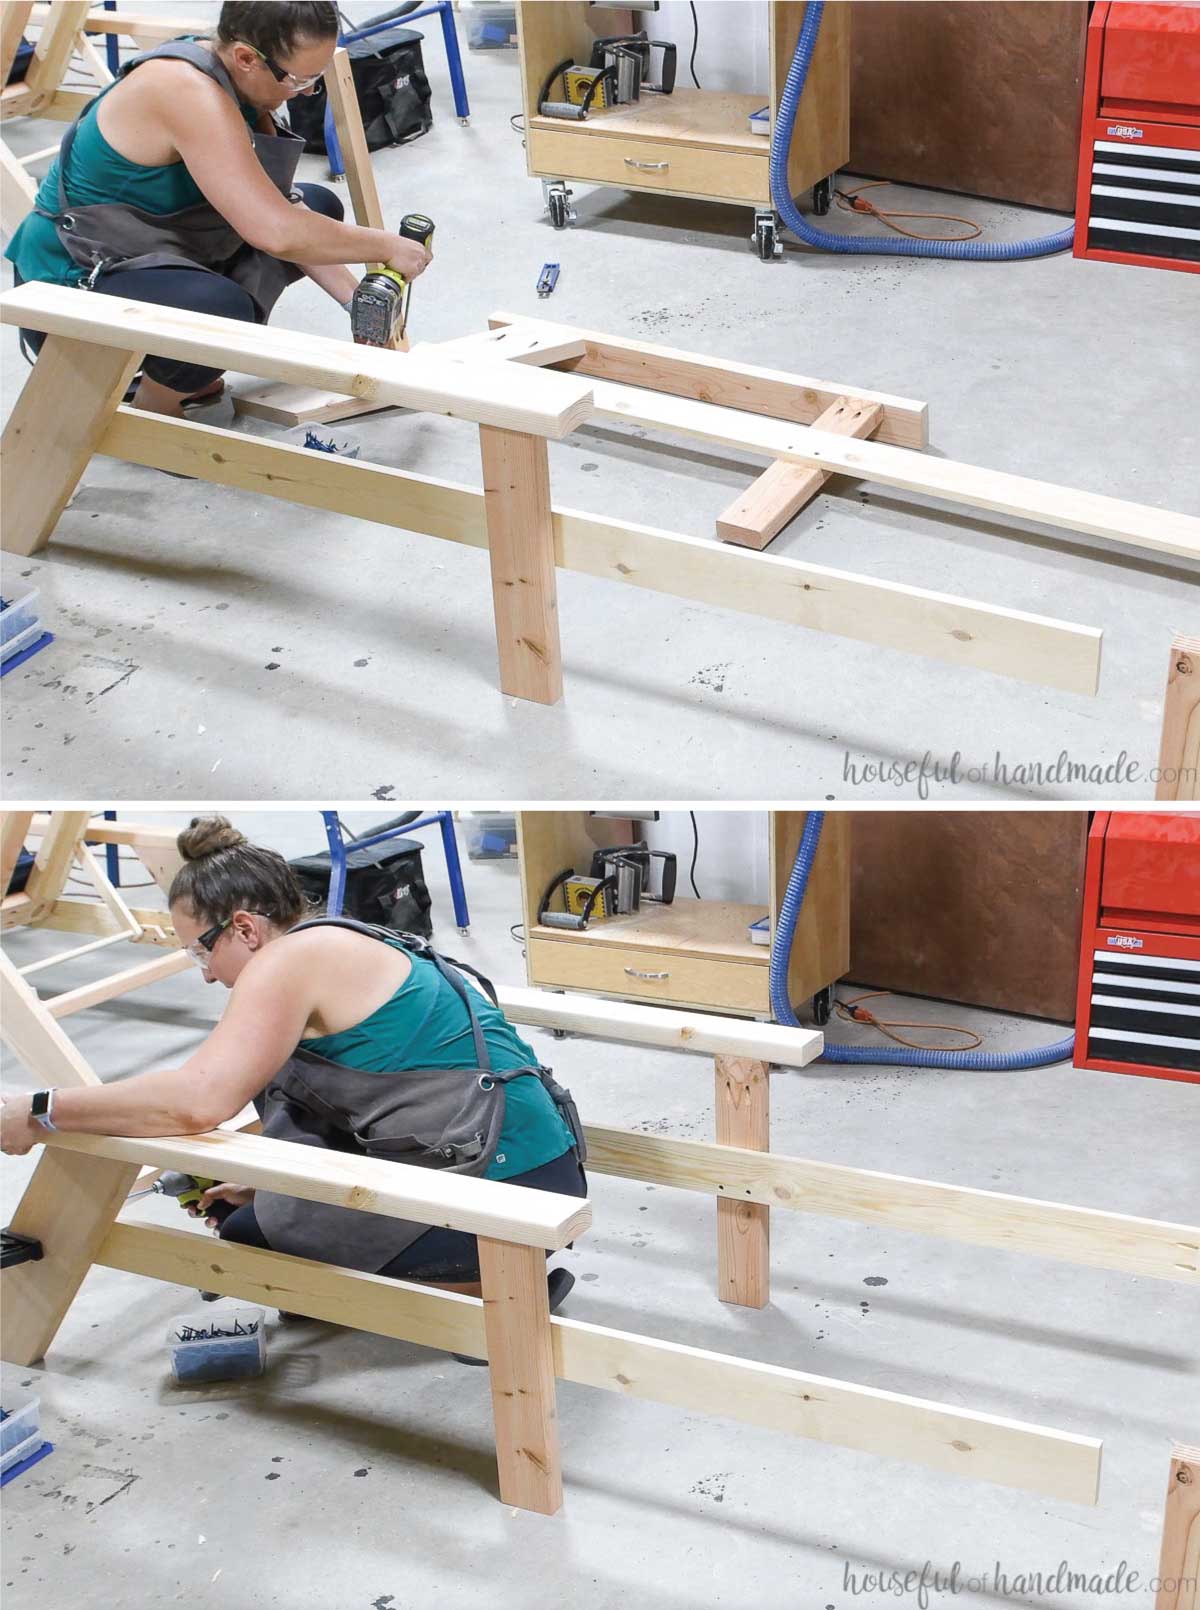
Attach the side rails to the front leg assembly with the pocket holes already drilled in the side rails. Use wood glue and 1 1/4″ pocket hole screws.
Set the side rails 1/4″ in from the legs and make sure they are flush at the top.
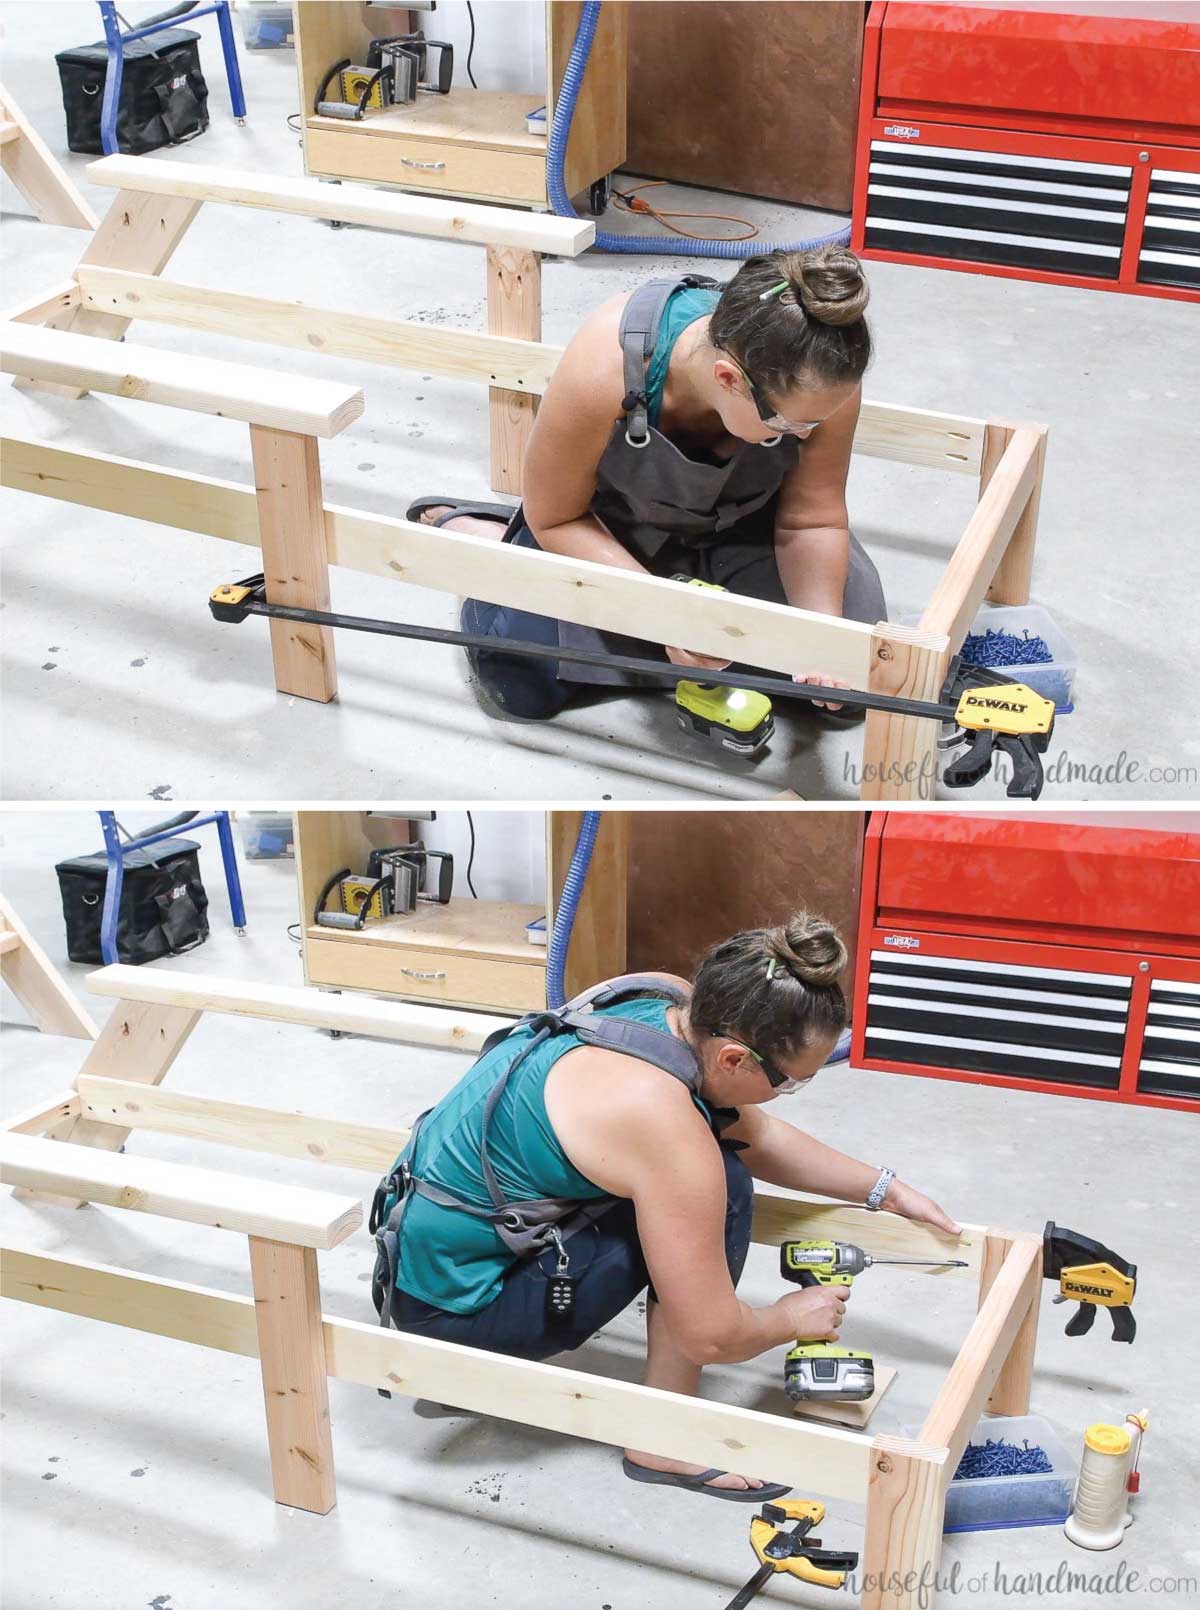
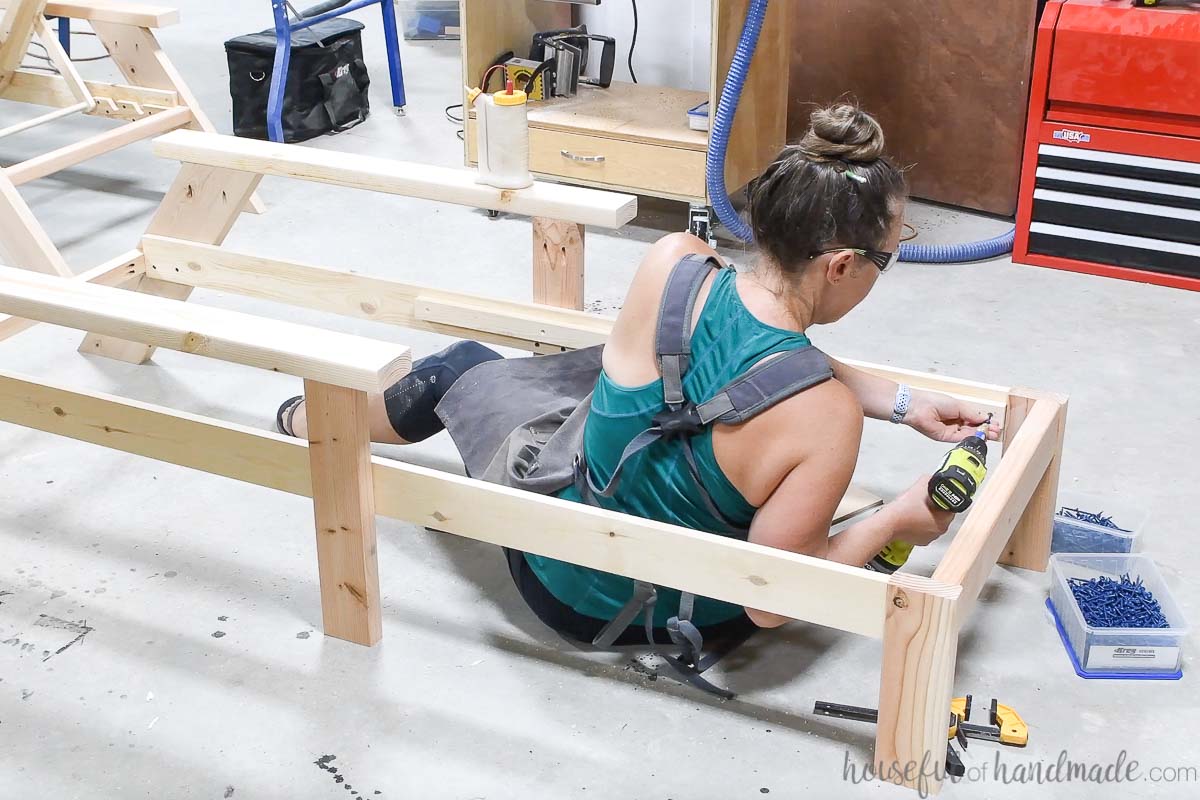
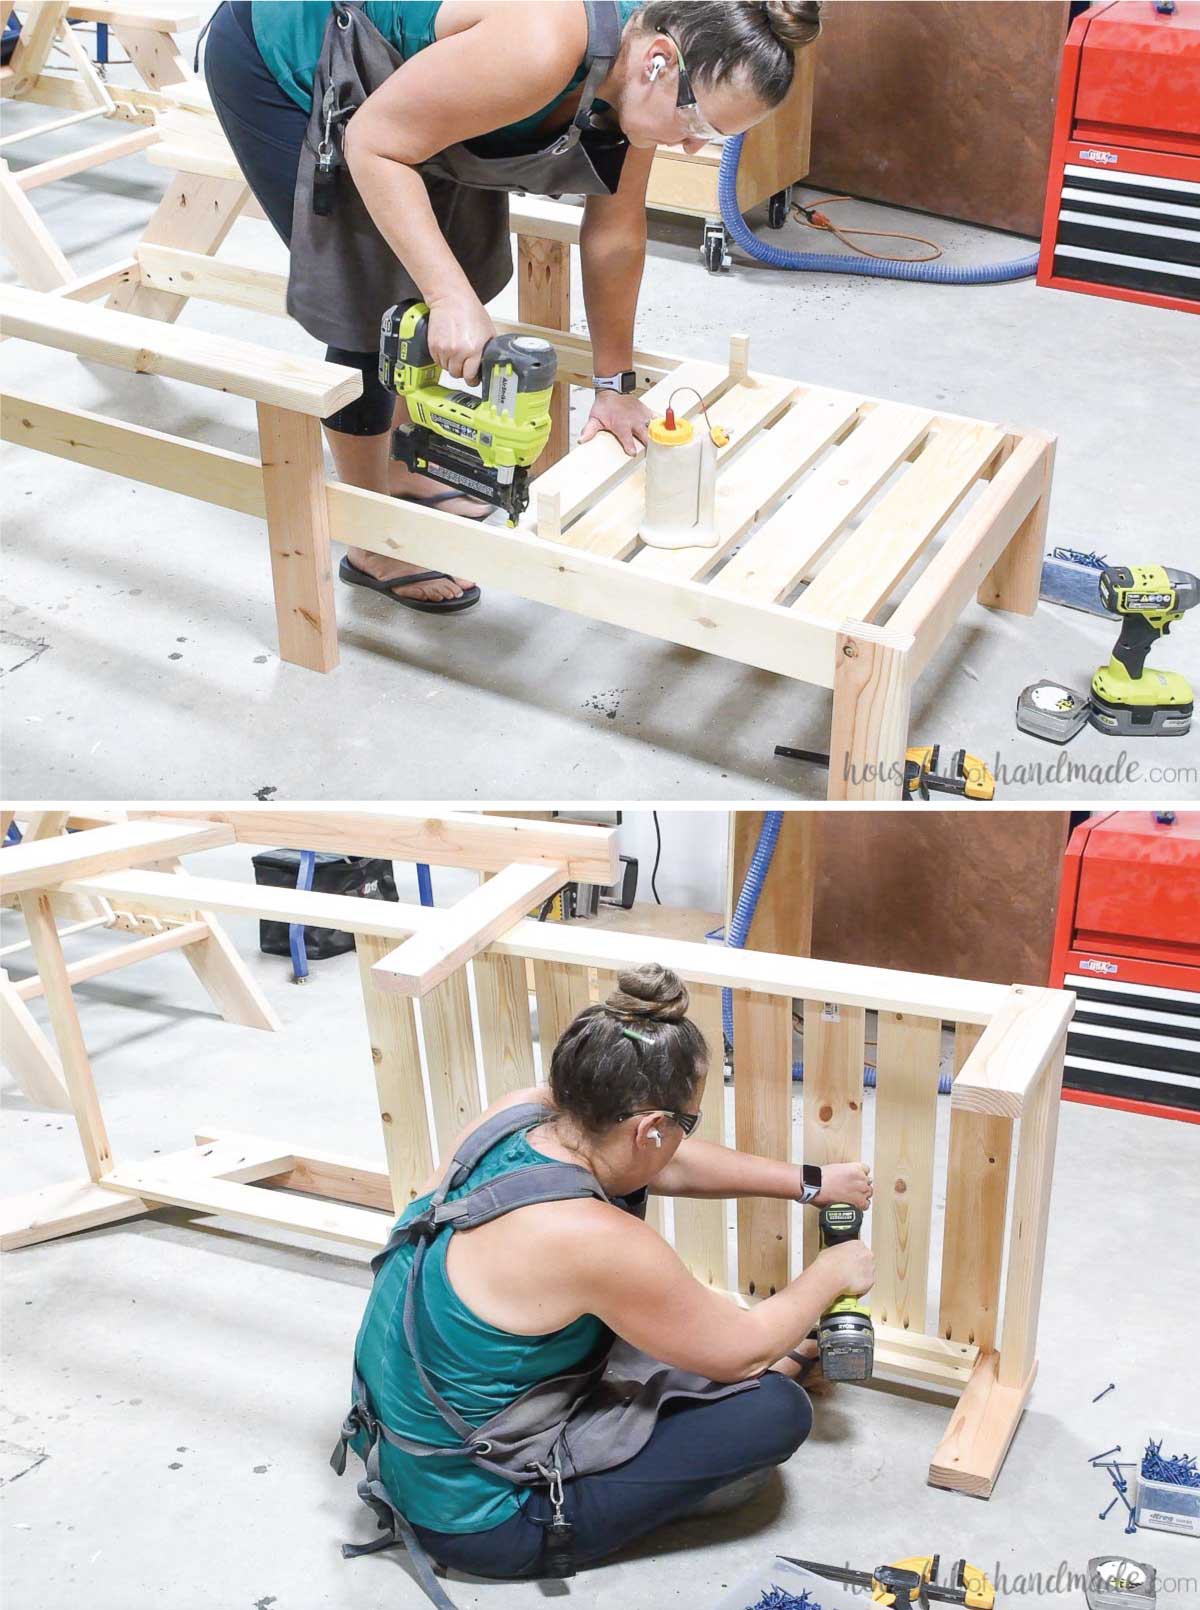
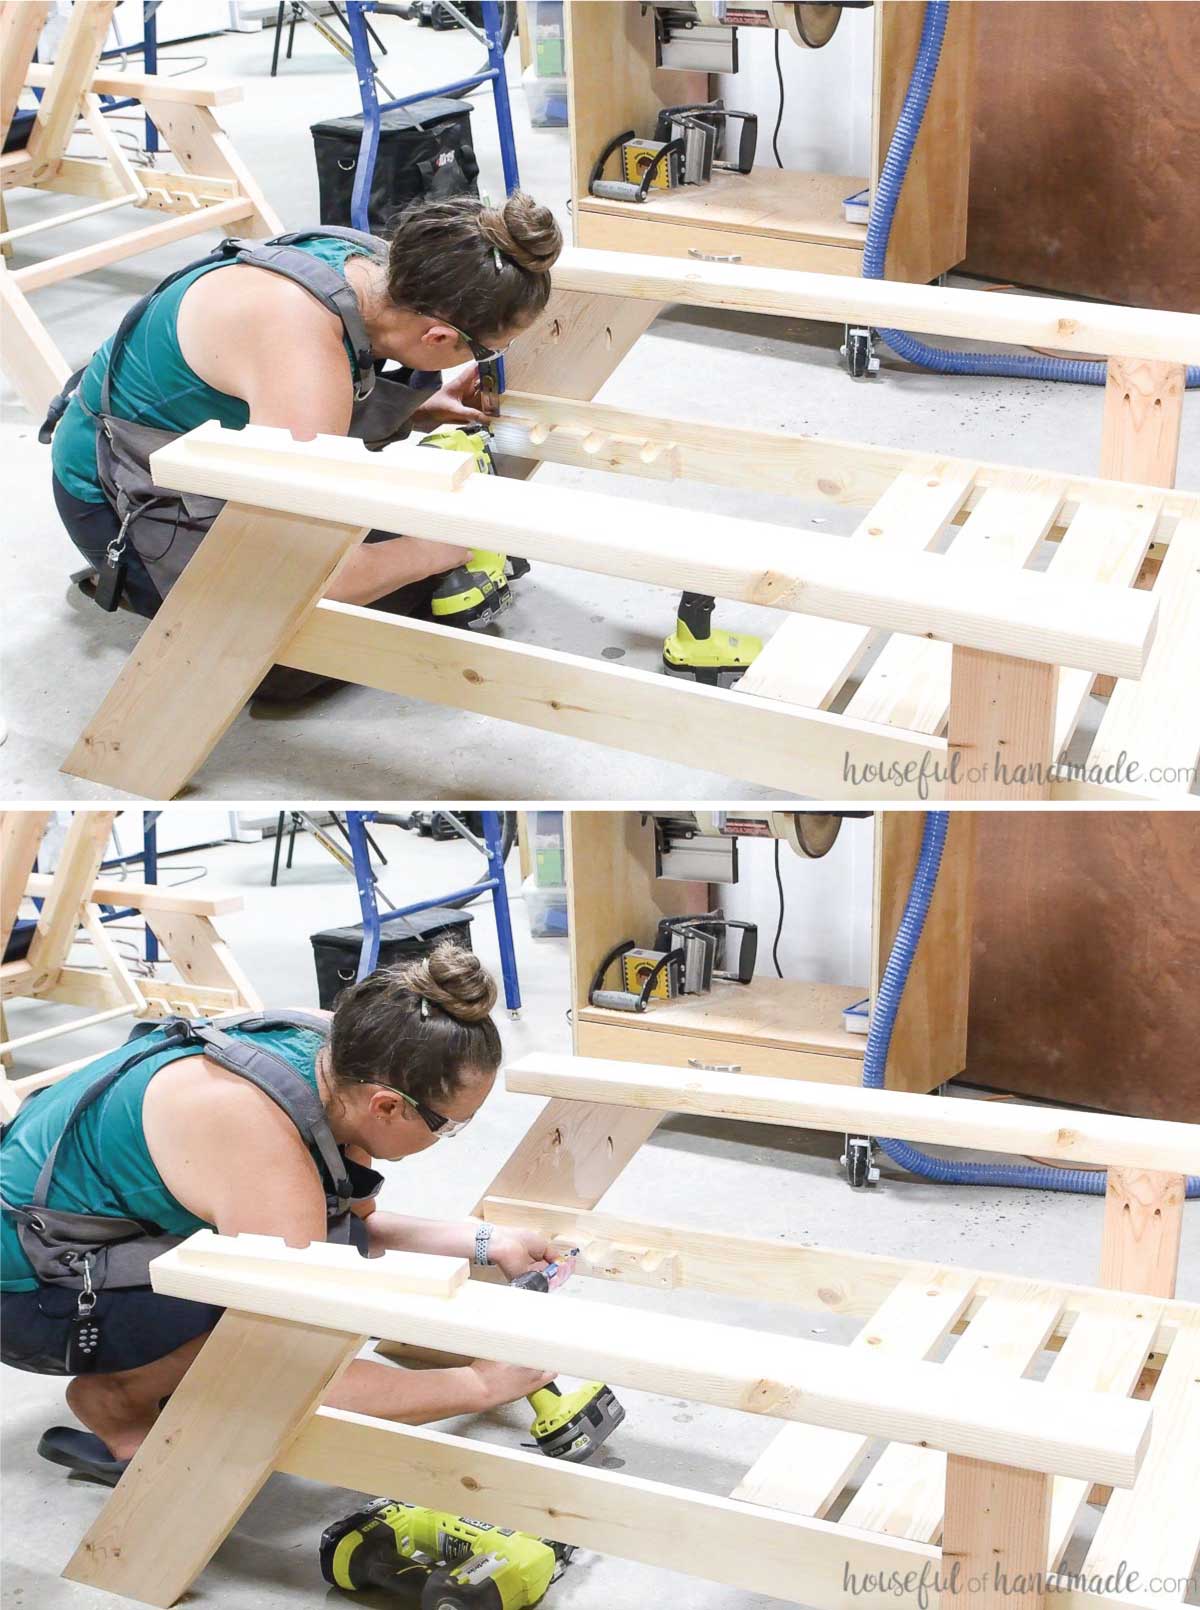
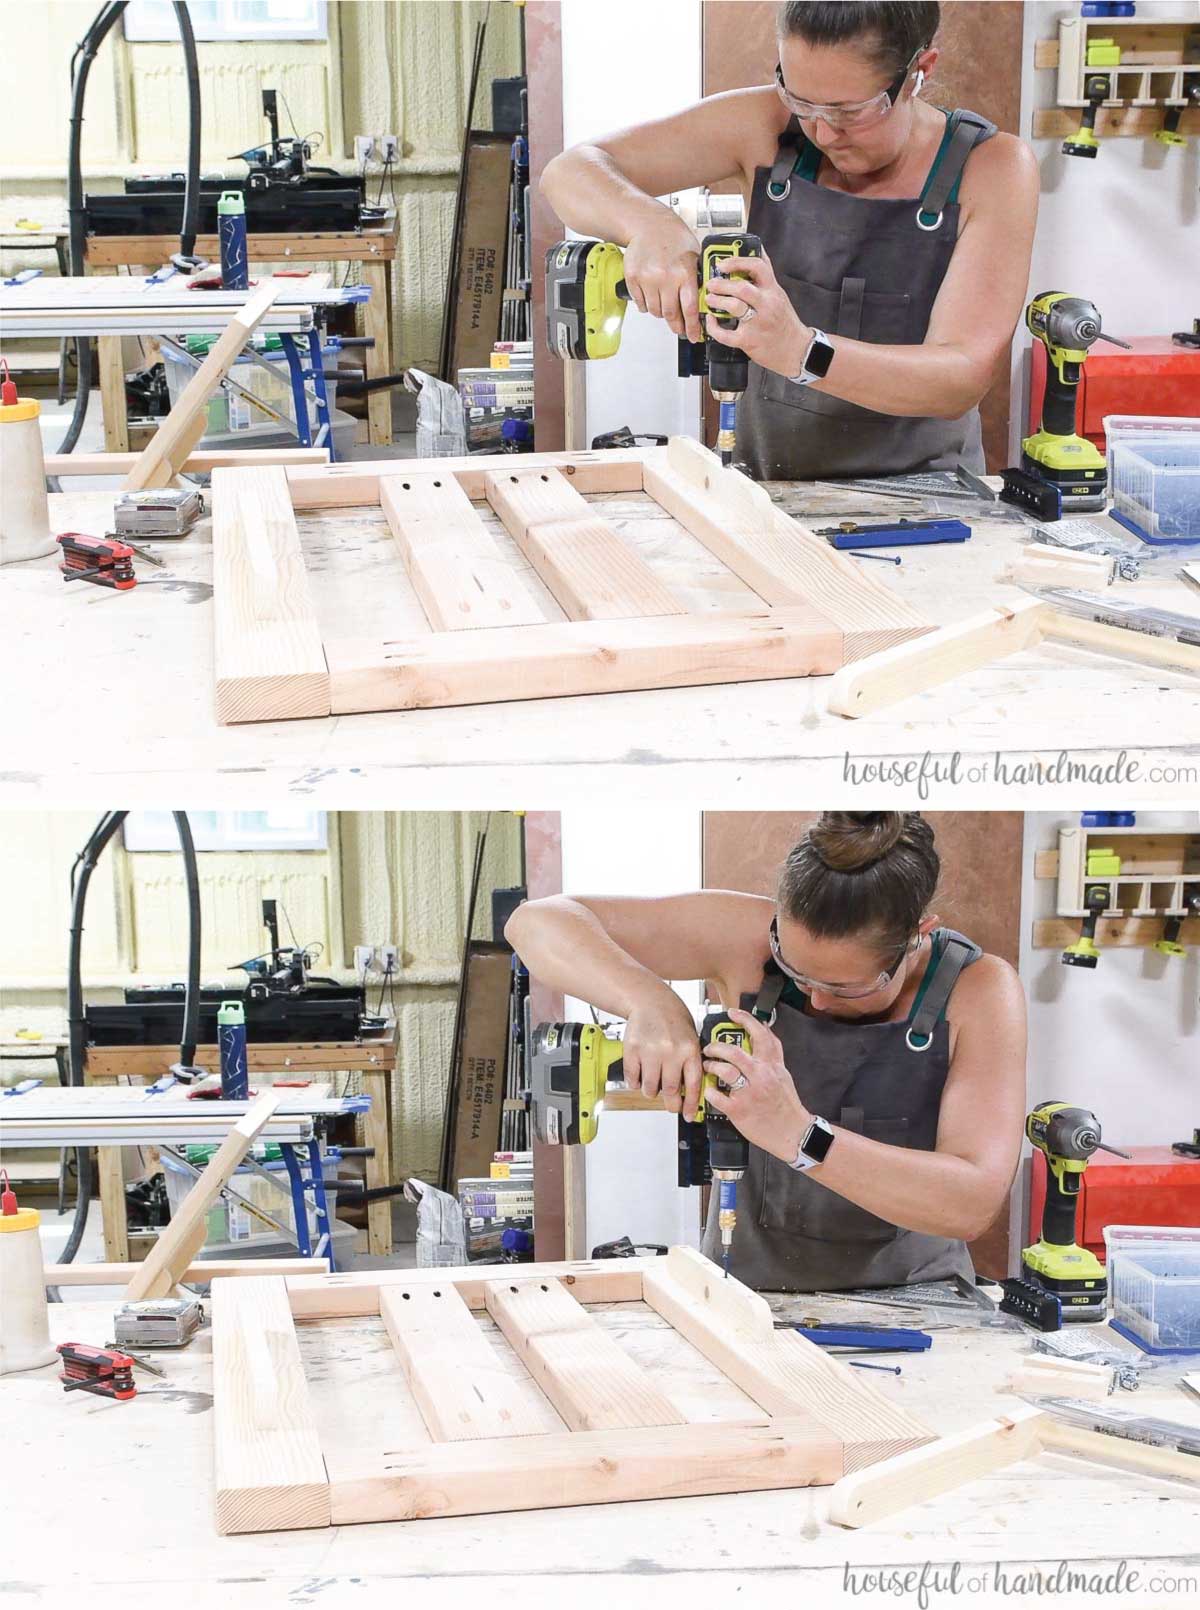
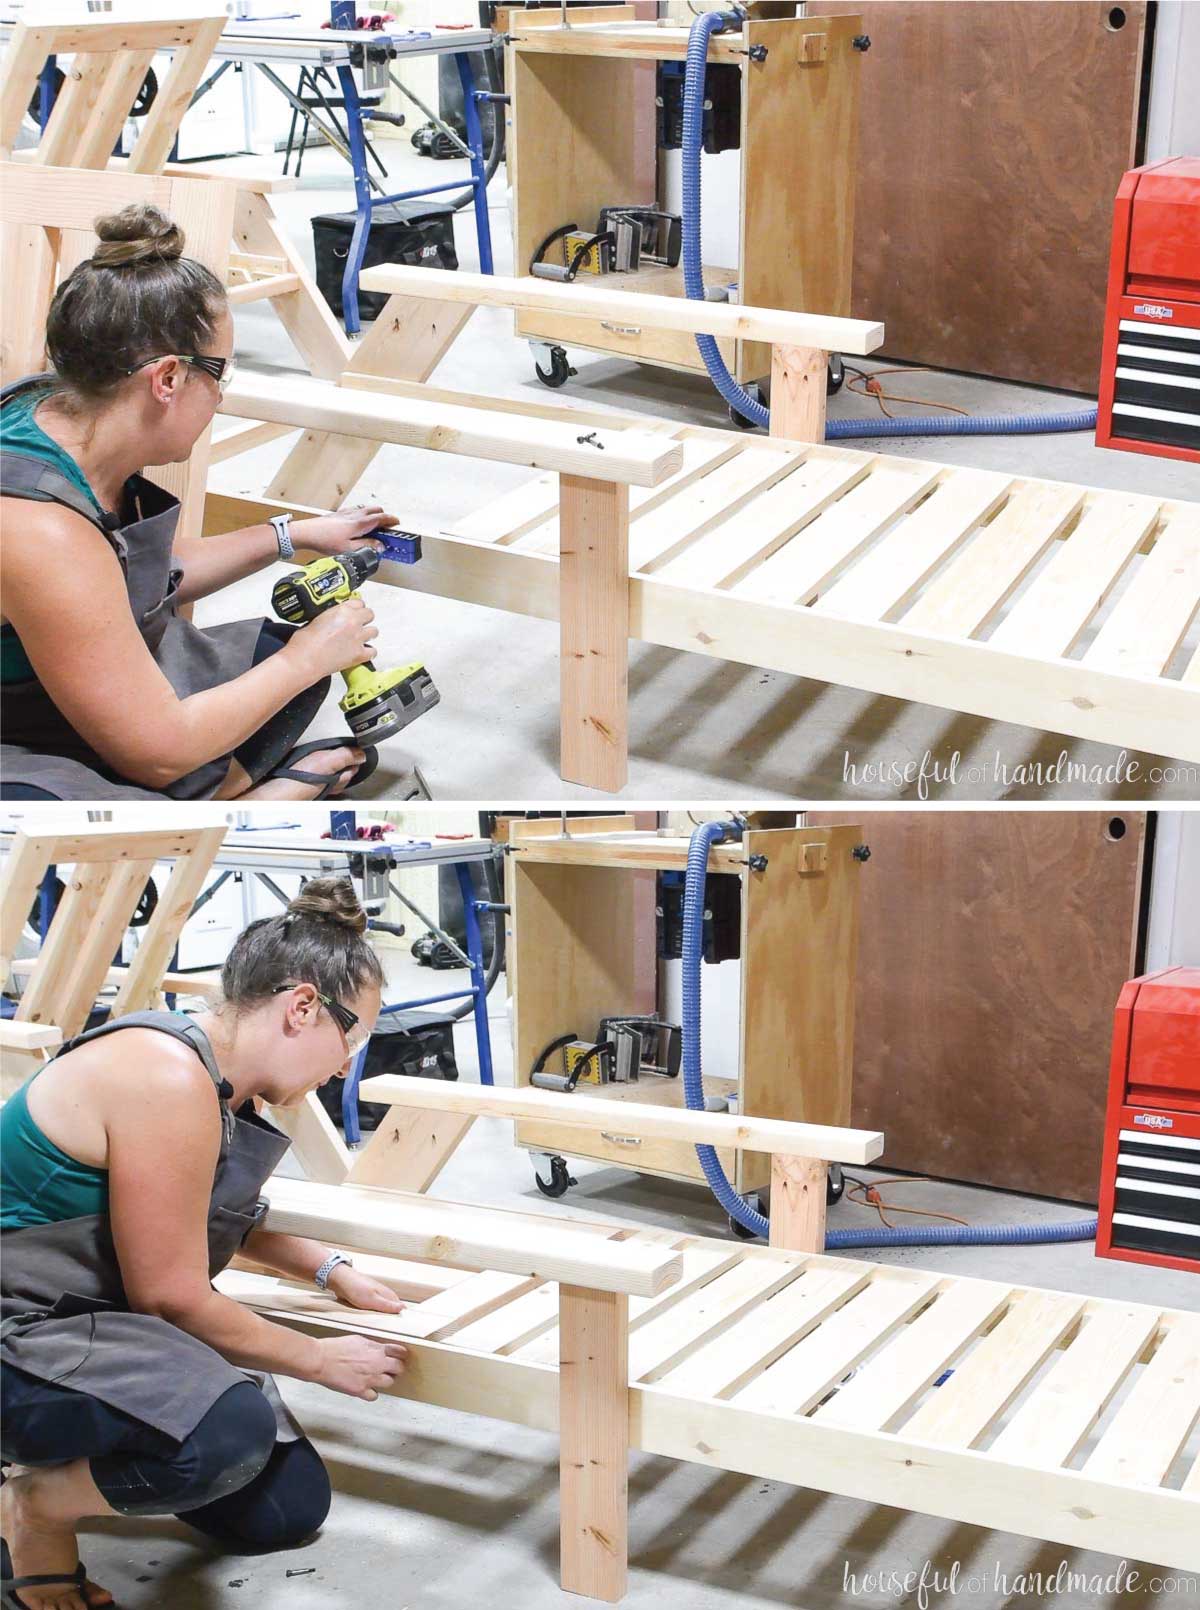
STEP 3- Attach seat slats
Attach the slat supports to the inside of the side rails so they are 3/4″ down from the top.
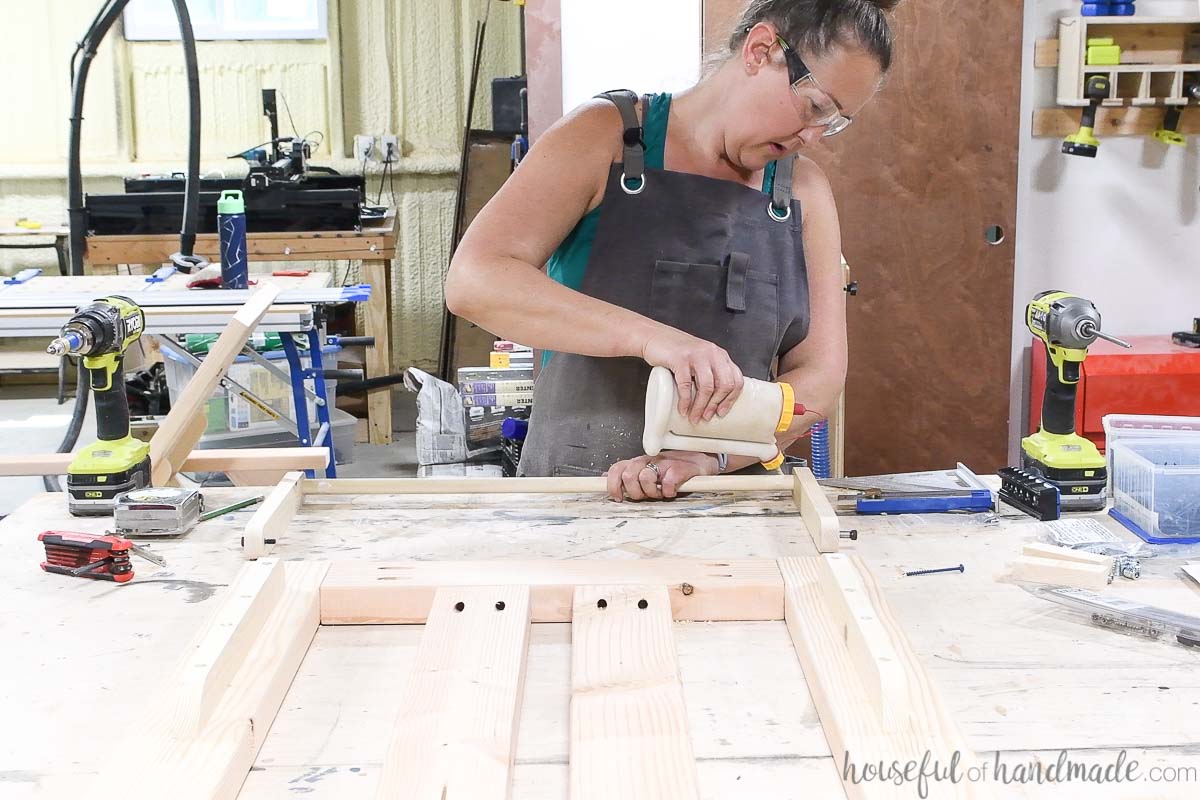
Use wood glue and tack them in place with 1 1/4″ long finish nails (no necessary, but they will help hold in place for the next step). The secure with 1 1/4″ blue-kote screws using the Quick-flip.
Measure and cut 10 seat slats to fit inside your chaise lounge frame. Make sure to measure to cut because they may be slightly different depending on your boards and how much you set the rails in.
Notch out the front corners of one seat slat so there is only a 1″ gap between the front brace and the first slat. Cut the notch with a jigsaw or band saw.
Drill pocket holes set for 3/4″ thick material in both ends of all the seat slat boards.
Space the seat slats onto the support boards so they are 1″ apart. Secure with wood glue and 1 finish nail right in the center of the board into the support. Make sure it does not get in the way of your pocket holes on the back.
Then flip the lounger on it’s side to secure the seat slats to the side rails with 1 1/4″ pocket hole screws.
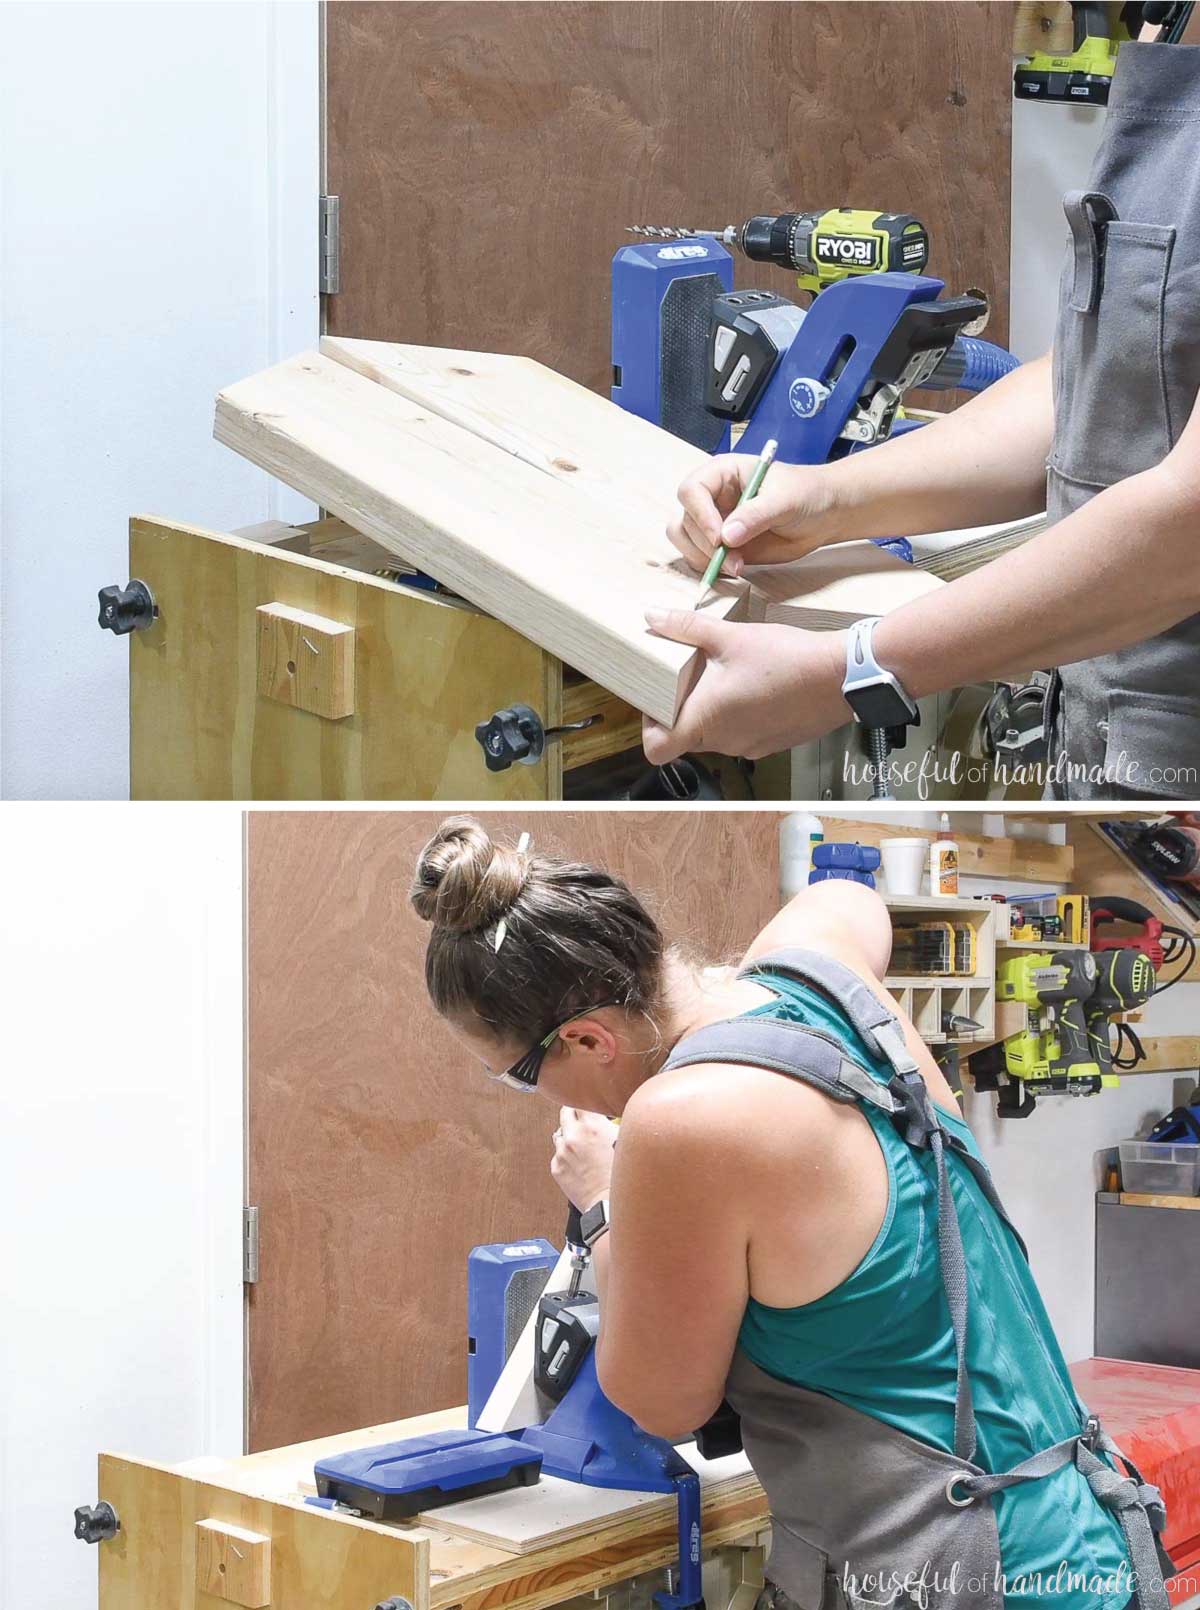
STEP 4- Create the adjustable back rest board
Cut the adjustable back rest boards from the 1×4 board according to the premium plans. Then rip the board to 2″ thick.
If you cannot rip the board down, you can use a 1×2 board instead, but it might not be as sturdy.
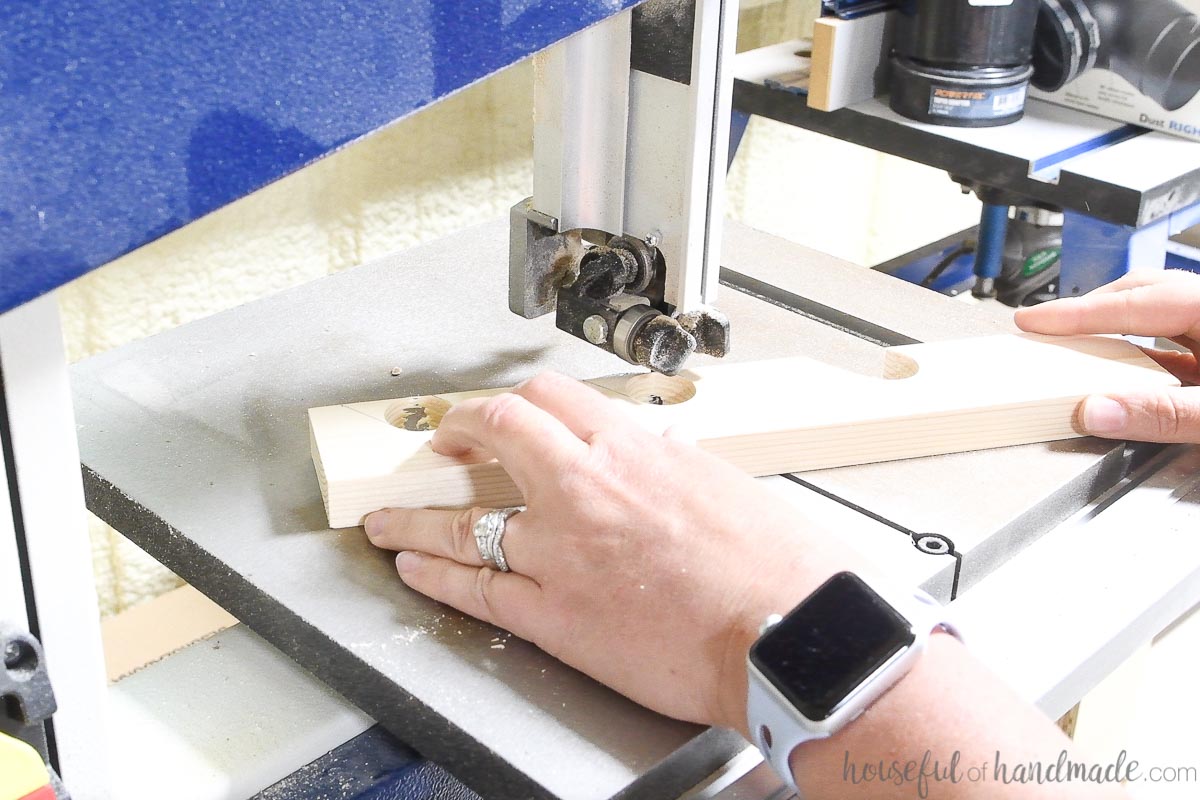
Measure and mark from one edge 1/2″, 1 1/2″, 4″, 5″, 7 1/2″, and 8 1/2″.
At the 1 1/2″, 5″, and 8 1/2″ marks, draw a line and mark 1/2″ down. This will be the center mark for you to drill your 1″ holes. I used a forstner bit to drill clean holes all the way through.
Make sure to mirror the markings and holes on the two pieces.
From the other marks, draw a line to the side of the drilled hole. Mimic that angle to draw a line from the other side of the hole to clean it up too.
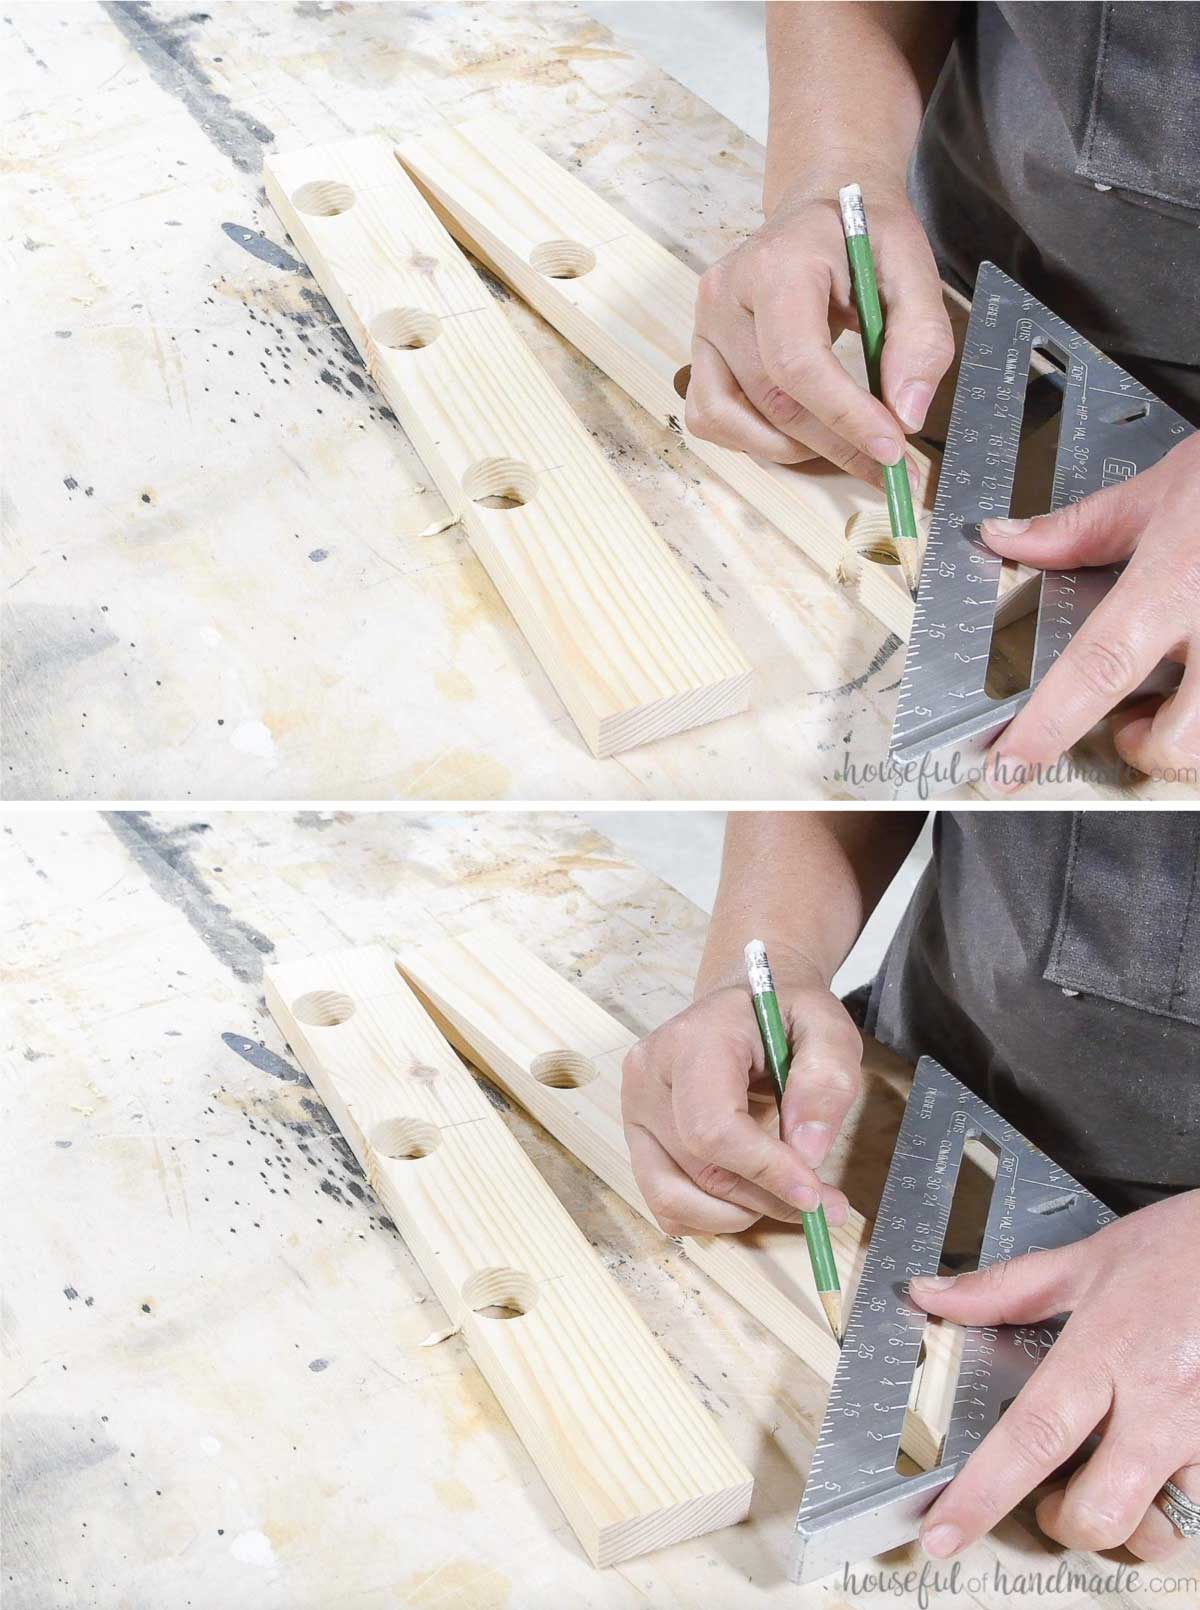
Cut along these lines with your bandsaw or jigsaw to create notches for the seat back dowel to sit into.
Attach the adjustable seat back rest board to the back of the side rails. The top should be set down 1 1/2″ from the top of the side rails.
Tack in place with finish nails, then secure with blue-kote screws using the Quick-flip.
Add your screws 1/2″ up from the bottom and 1/2″ down from the top so it does not hit the screws used to attach the side rails previously.
When attaching over the 2×6 leg boards, use 2 1/2″ long screws. This will attach the piece all the way into the back leg for extra support. When attaching to just the rails, use 1 1/4″ longs screws.
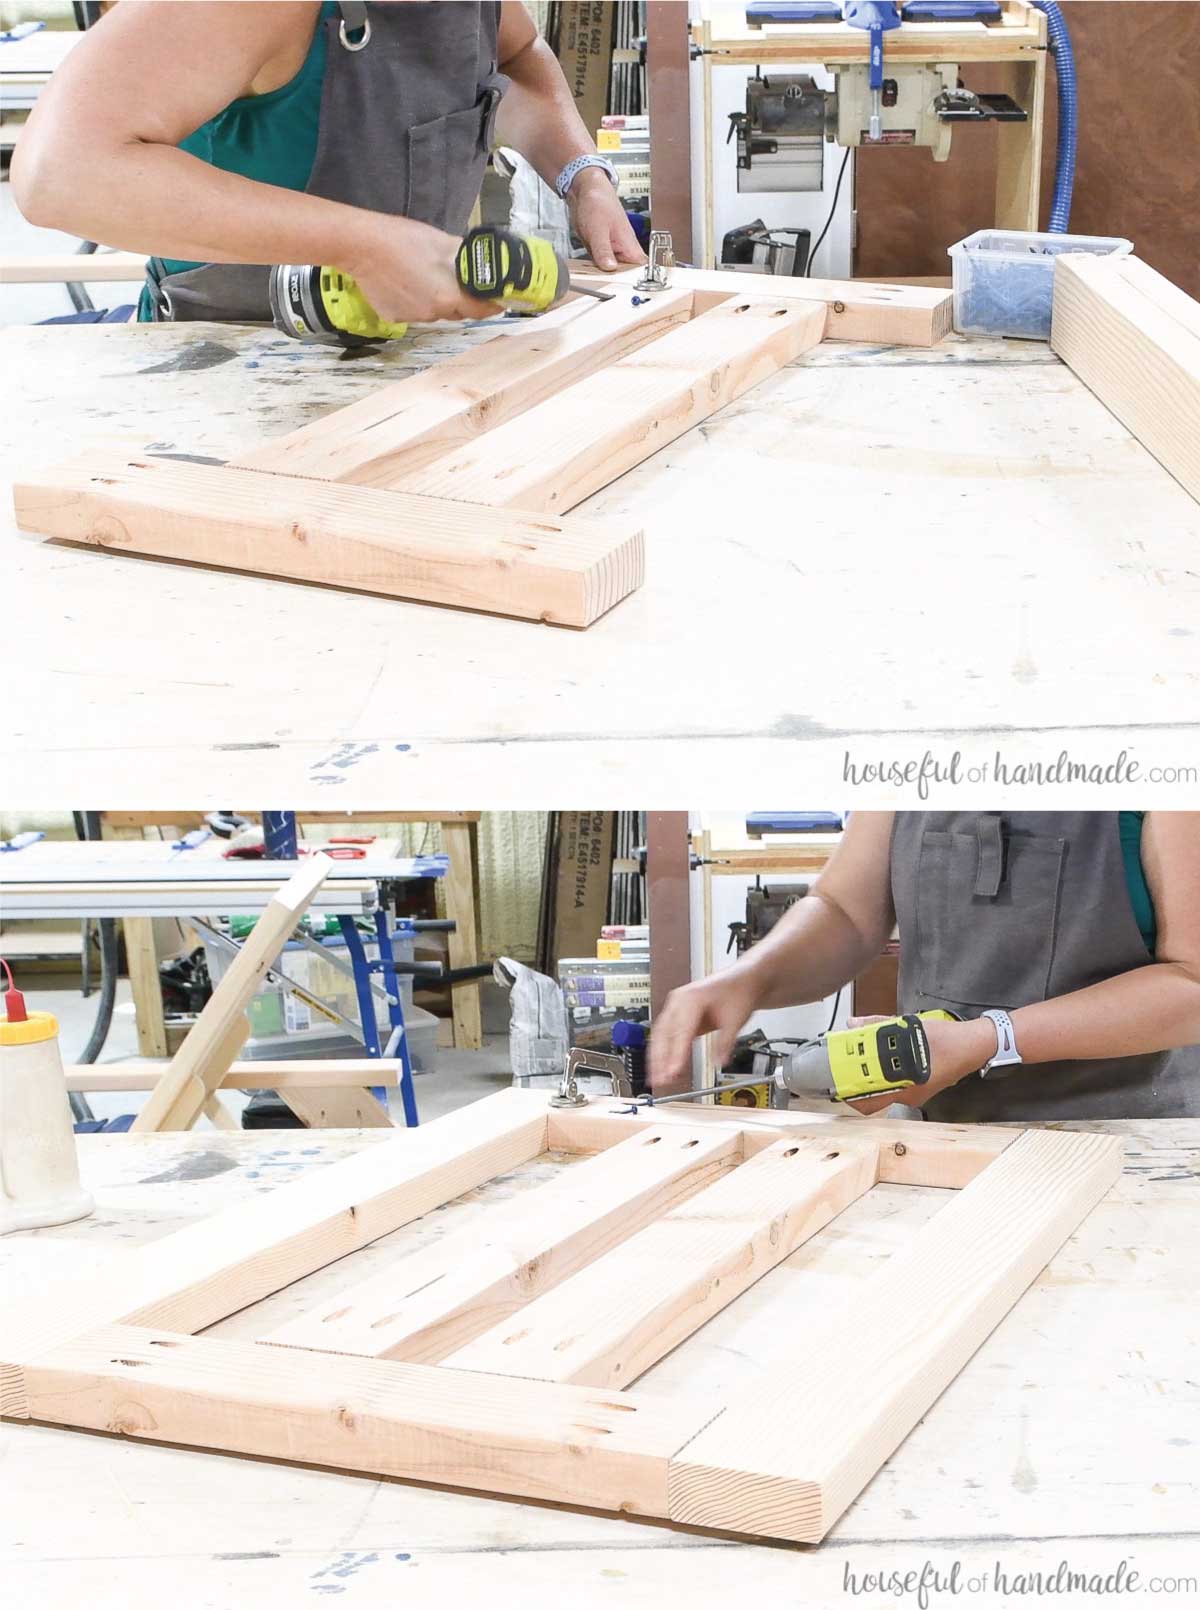
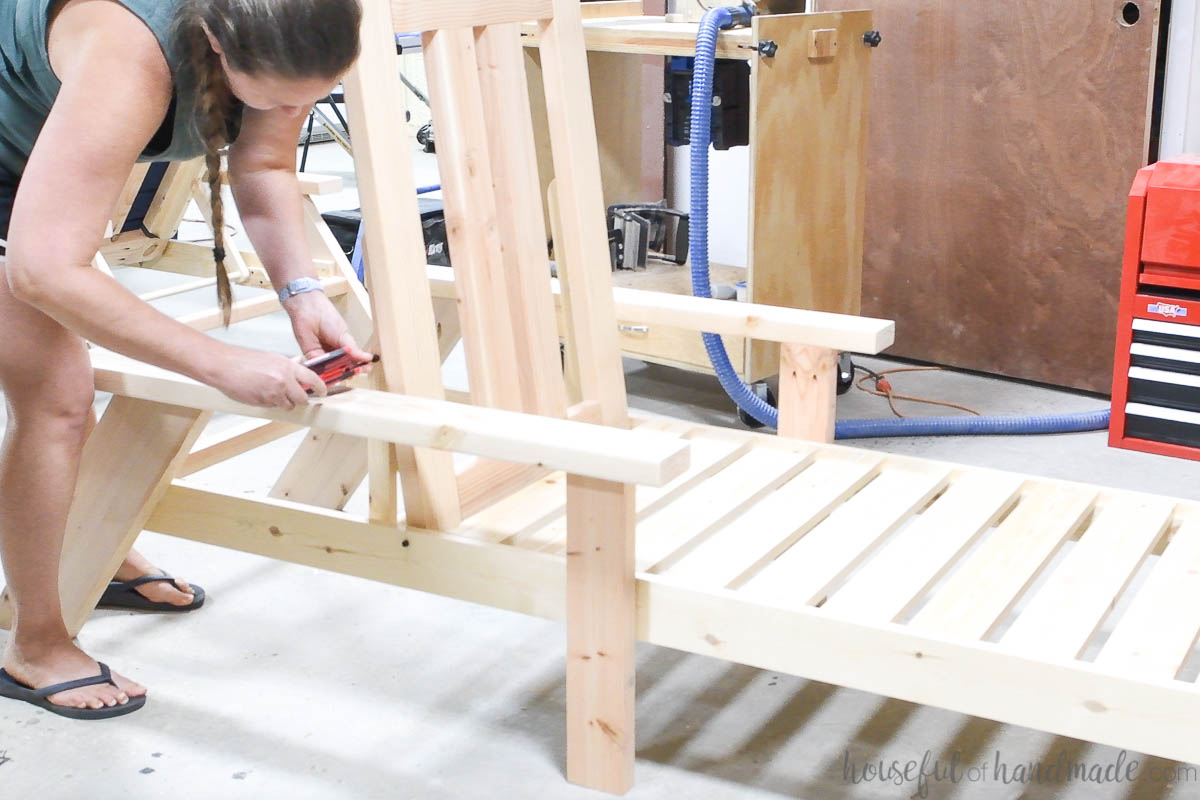
STEP 5- Build back rest
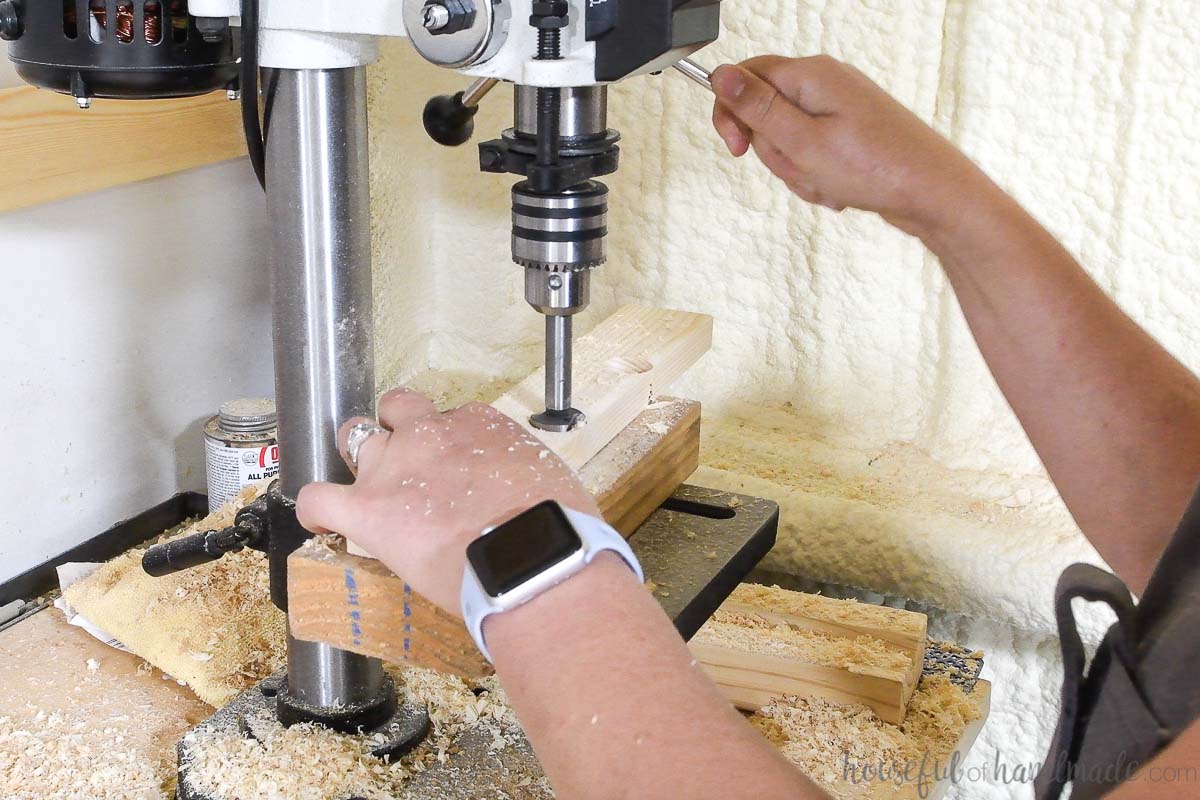
In the back side pieces, attach one of the threaded inserts 3/4″ up from the bottom and centered on the sides of boards.
Use the drill guide to keep your drill straight while drilling. Even if the size of hole needed is slightly smaller than the drill guide, it will still help you keep it fairly straight.
Drill pocket holes set for 1 1/2″ thick material in both ends of the back center and back top/bottom boards.
Build the back by attaching the back center pieces to the back top/bottom pieces so they are 4 1/4″ in from the sides. Use face clamps to ensure the boards stay flush and flat.
Secure with 2 1/2″ pocket hole screws and wood glue.
Then attach the side pieces to the sides in the same manner. Make sure the threaded inserts are on the bottom, outside of the assembled back.
On the dowel holder pieces, curve both ends of the boards according to the diagram in the plans. Measure and mark 3/4″ in from the edge and draw a 1 1/2″ wide arc across the entire end.
For the pivot pieces, draw a 1 1/2″ arc so one side of the board is flat and the other is curved.
I found it easiest to do this by clamping the two boards together, marking 1 1/2″ in from the ends, and using the compass to draw a 3″ arc across both boards.
Then unclamp the boards to reveal a half-curve.
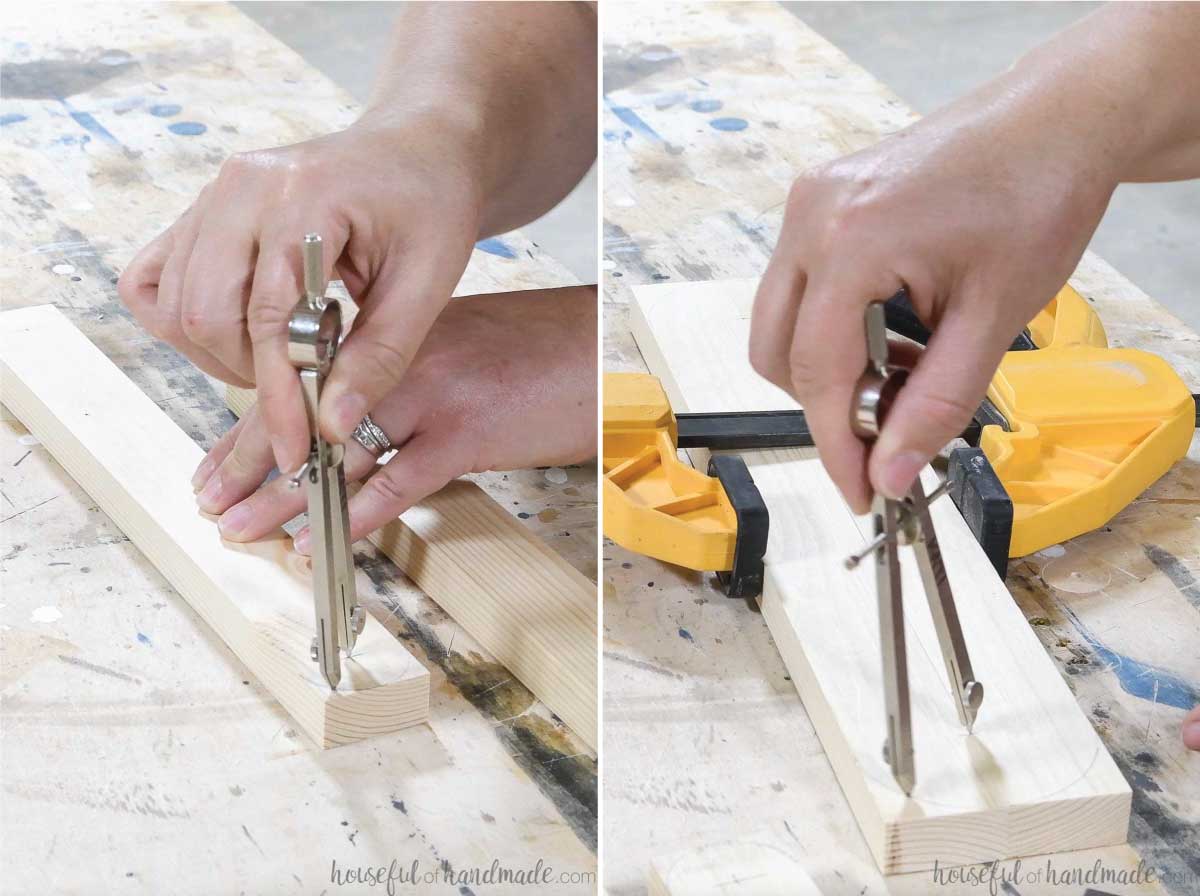
Cut or sand the curve into the boards.

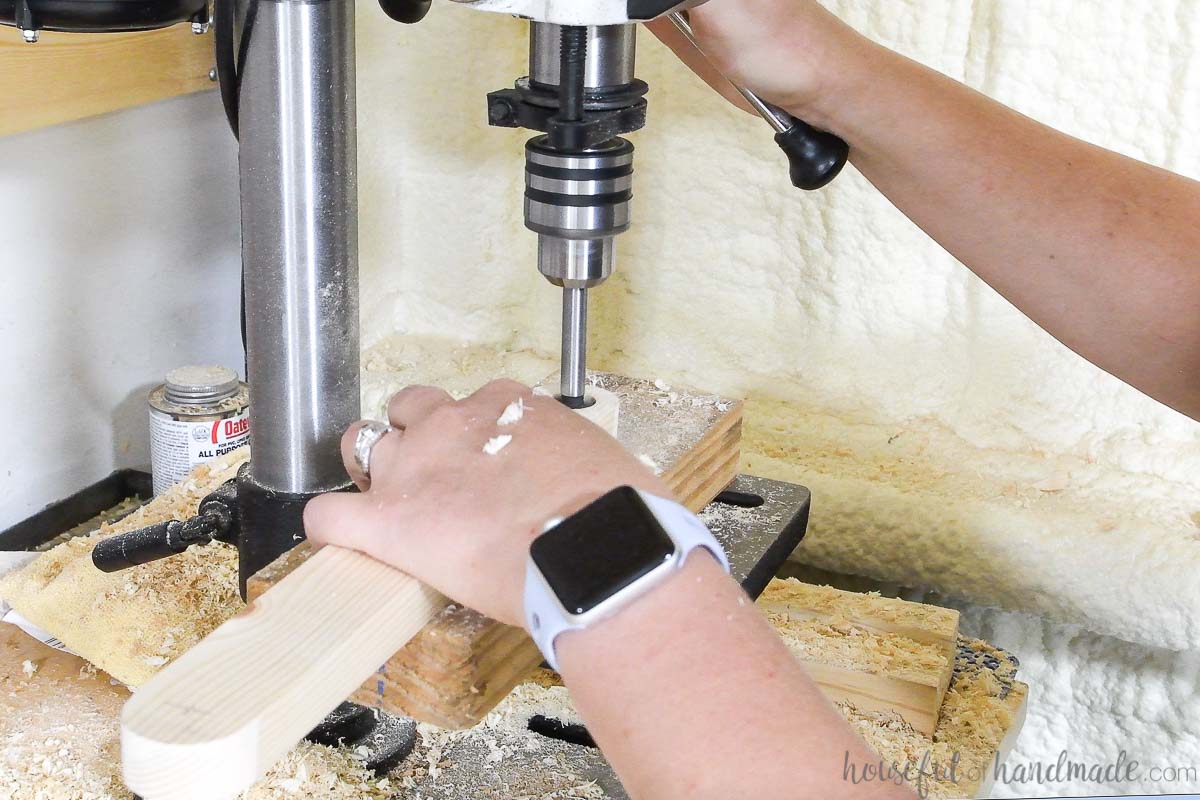
In the dowel holder boards, drill a 3/4″ hole centered in one end of each piece. Then drill a hole the same diameter as the shoulder on your shoulder screw centered in the other end of each piece.
For the pivot boards, drill a hole and attach a threaded insert in the side of each board.
Stand these pivot boards up on their sides on the back of the back of your chaise lounge. Align the board so it is 3 1/2″ up from the bottom of the back and 1 1/2″ in from the side. Make sure the threaded insert is facing the outside of the back.
Attach them with wood glue and 2 1/2″ screws with the Quick-flip making sure not to add a screw in the center where the threaded insert.
Measure from the outside of the attached pivot piece to the outside of the other attached piece.
Center the dowel between the dowel holder pieces so the amount measured above is the amount of dowel between the pieces. Glue the dowel into place and lay flat to dry.
STEP 6- Attach back rest
Measure and mark 48 3/4″ in from the front of the lounger on the side rails. Then mark 3/4″ down at that point. Drill a hole through the rail here the width of the shoulder on your 1″ shoulder screws.
Use the Kreg drill guide to keep your holes straight.
Lay the assembled back rest on top of the chair frame. It should sit right on top of the adjustable back piece and be flush with the top of the rails.
Press the 1″ shoulder screws through the hole and thread them into the threaded inserts in the side of the back piece. Repeat on the other side.
Now you can pivot the chair back at this point.
Once the glue on the dowel is dry, place the 3/4″ shoulder screws in the holes on the top of the dowel holder pieces and screw them into the threaded inserts on the pivot boards on the back of the back piece.
Now you can drop the dowel into one of the notches in the adjustable back board and it will hold your chaise lounge chair at that angle. Lift the back and move the dowel to a different notch to raise or lower the back.
You can disassemble the three pieces to stain or paint your new chaise lounge chairs. Then easily reattach them with the shoulder screws and you are ready to relax!
You did it!
Premium plans include:
- Recommended Tools
- Shopping list
- Easy to read cut list table
- Cut diagrams
- Step-by-step instructions with 3D renderings
- Helpful resources
- BONUS: 3D SketchUp file
Add your cushions and sit back, you've earned it.

Happy building!

Thank you to Kreg Tools for sponsoring this post. I only recommend products that I use and love and all opinions are 100% my own. Click here to read my full disclosure policy.