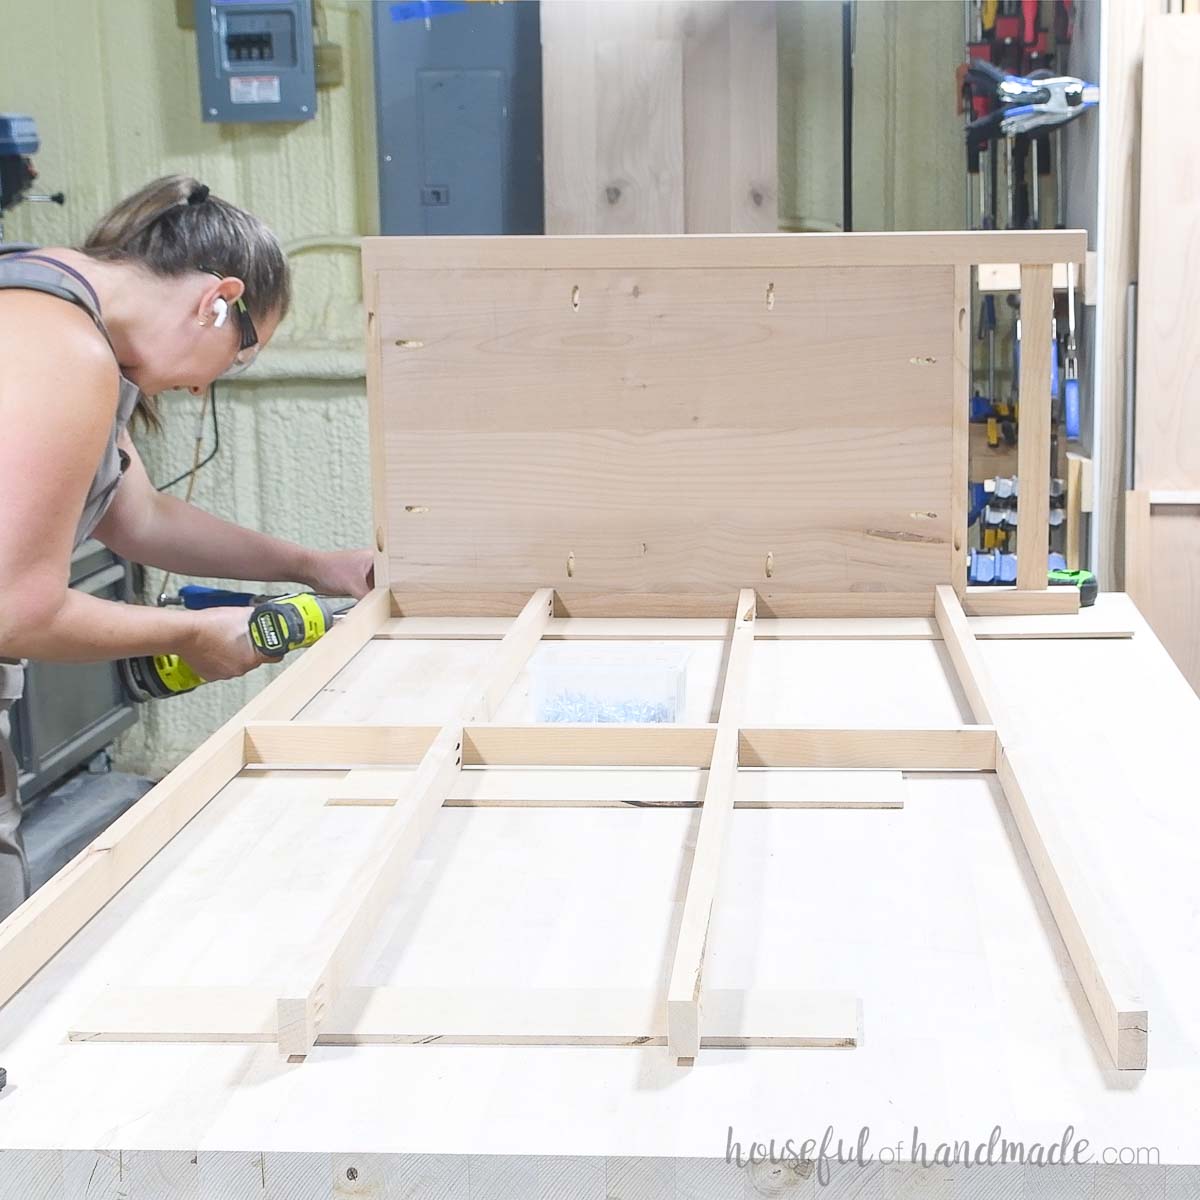
It is no surprise I love using pocket hole joinery to build DIY furniture!
I use pocket holes because they are easy and accessible to anyone wanting to start building. All you need is a drill and a pocket hole jig. You can get a quality pocket hole jig for as little as $40.
Plus, pocket hole joints are strong. I have never had one fail, and I have built a lot of projects over the last 10 years.
This post may contain affiliate links. As an Amazon Associate I earn from qualifying purchases. Click here to read my full disclosure policy.
But to ensure you have a strong joint that will last, you need to use the right pocket hole screw for your project. Stop guessing and learn exactly what screw you need to make your next DIY a success!
Do I really need to use special pocket hole screws?
Yes! Pocket hole screws are specifically designed to hold the pocket hole together creating the strongest possible joint.
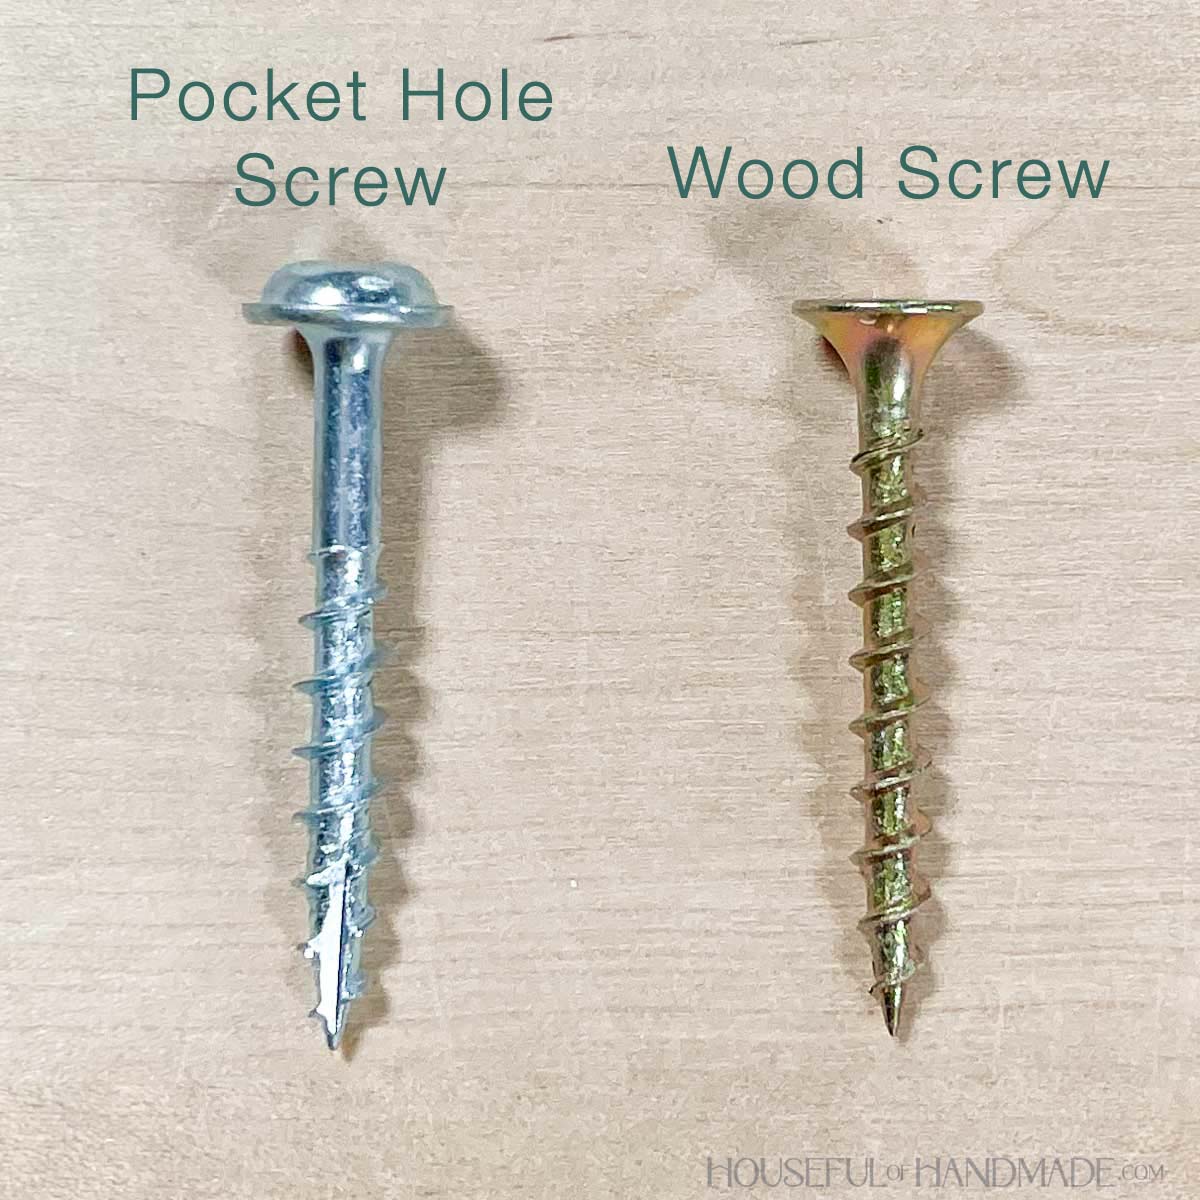
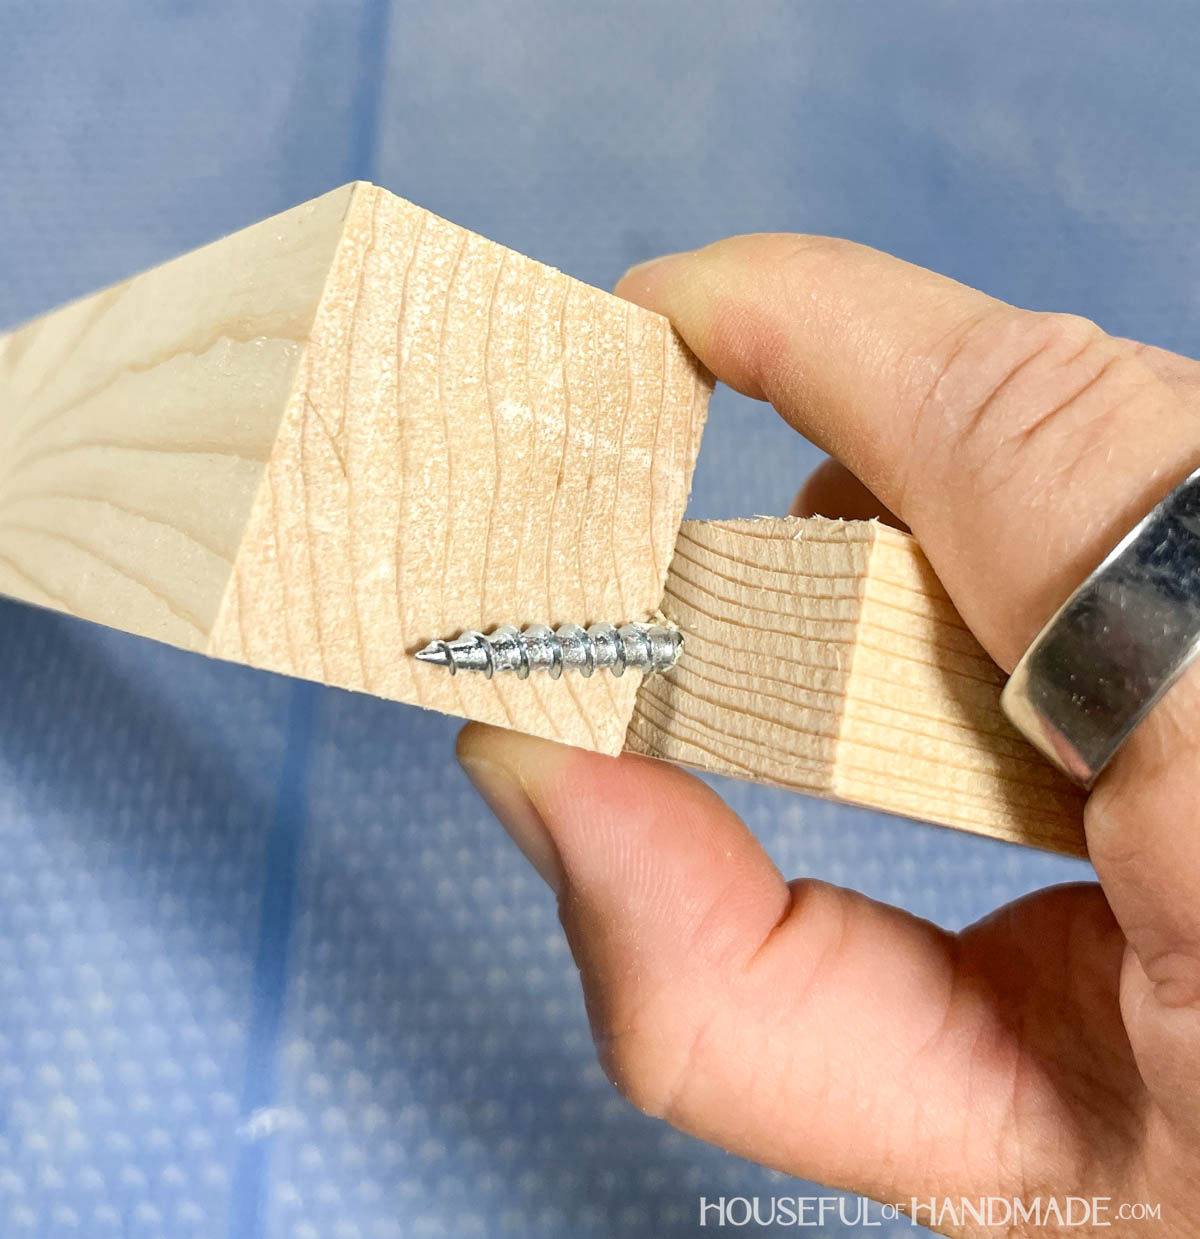
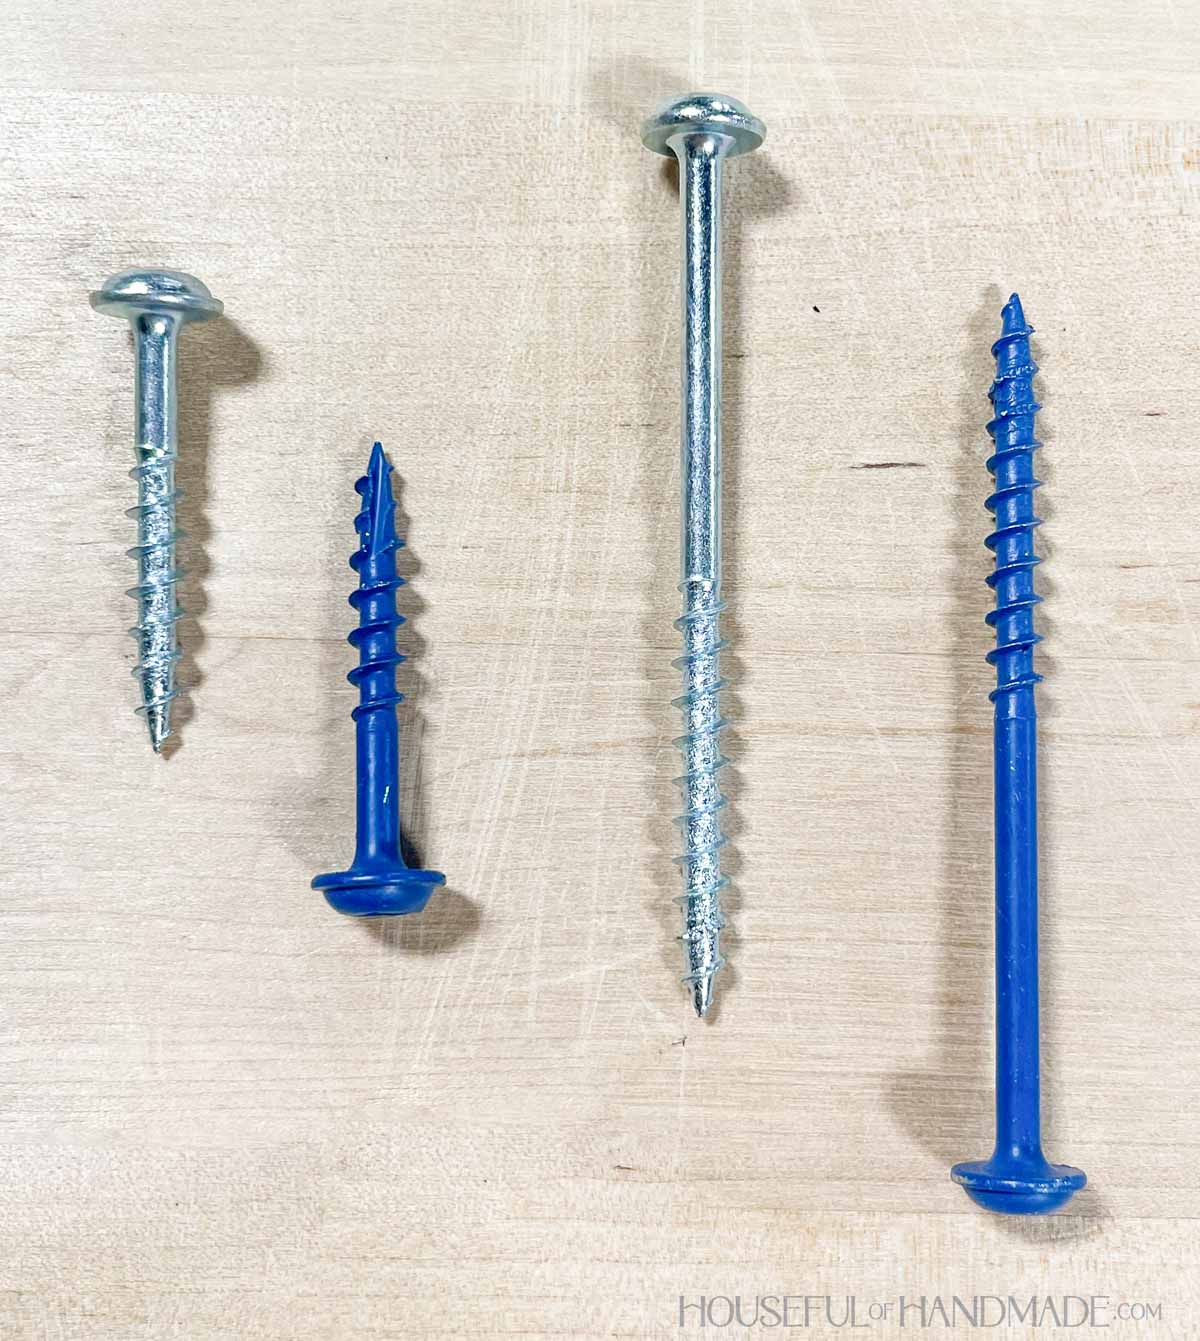
The head of a pocket hole screw is flat where it connects to the shank.
The flat part pulls against the flat edge of the pocket hole creating a tight joint. Without this your boards will be loose or come loose over time.
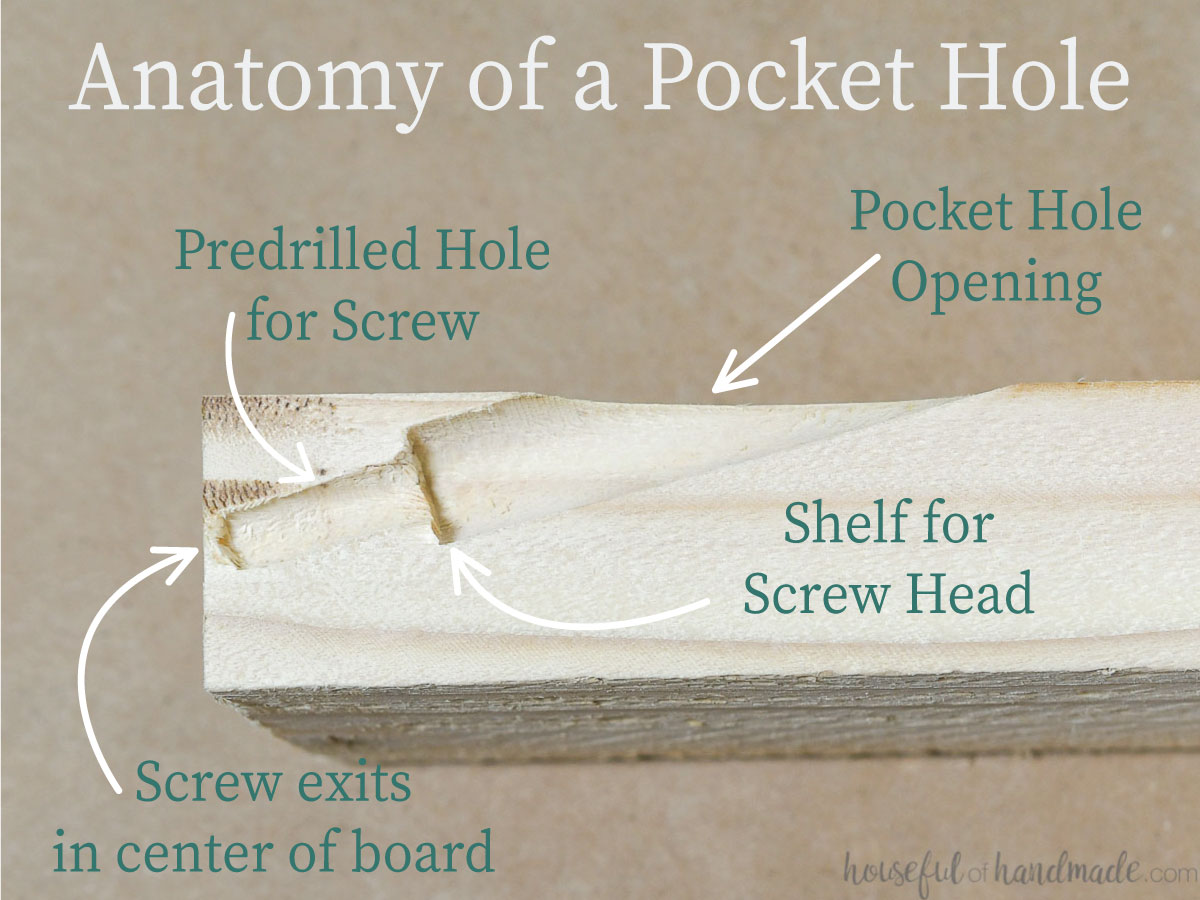
If you use a standard wood screw that is tapered where it connects to the shank, the screw could continue to drive into the wood instead of pulling flat against the pocket hole.
This means it will not pull the two boards tight together or hold them over time.
Also, look for a pocket hole screw that is self-tapping. This means the point of the screw is designed to be used without pre-drilling.
Self-tapping screws will prevent splitting in the wood that is common when you do not pre-drill.
Find the best pocket hole jig for you here.
How to Find The Right Pocket Hole Screw
All it takes to find the perfect pocket hole screw for your project is to answer these 3 questions:
- What type of wood are you using?
- What size is the wood?
- Is this an indoor or outdoor project?
The answer to these questions will easily determine the screw thread, length and material so you can get to building!
1. What type of wood are you using?
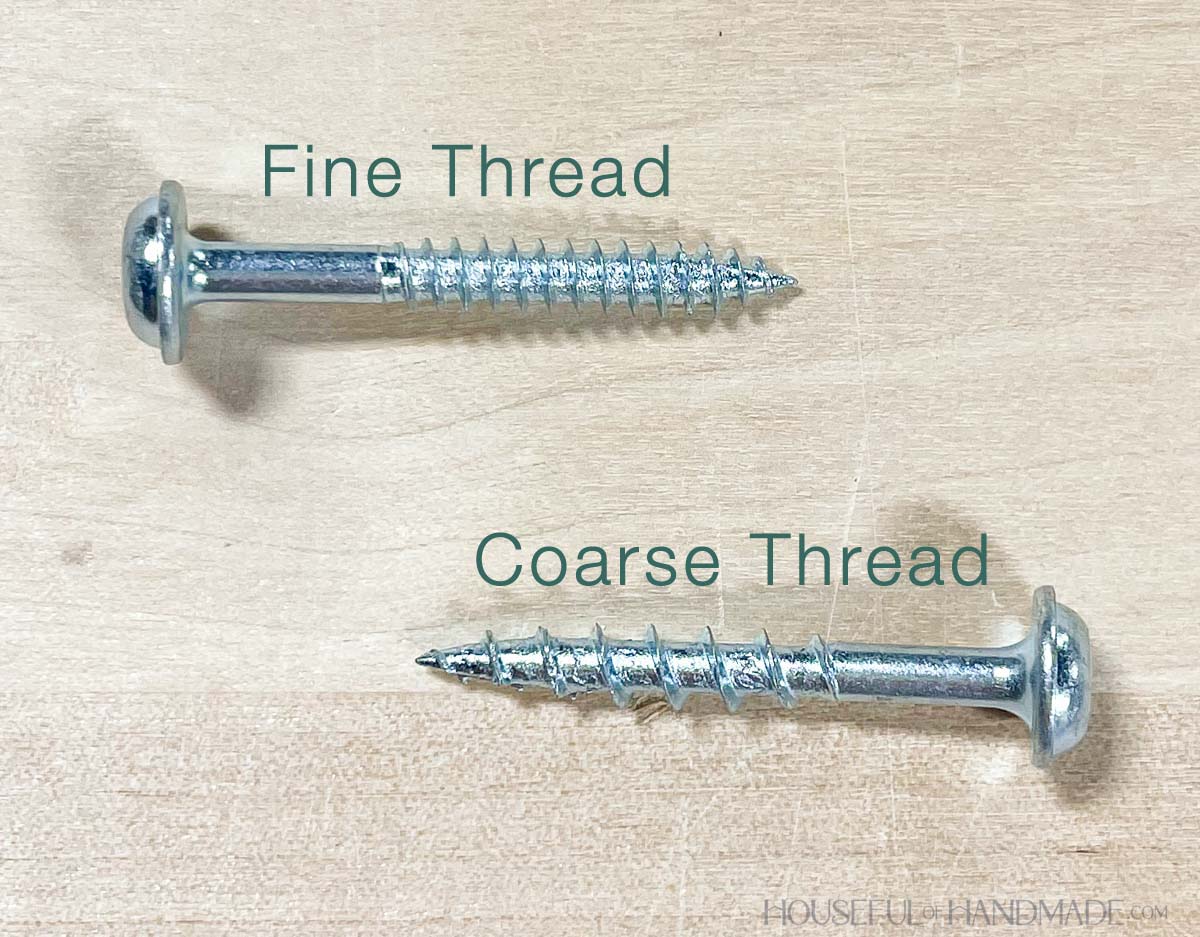
The type of wood you use will determine the thread of your pocket hole screw. Using the correct thread ensures you have a strong joint and prevents splitting in the wood.
Softwoods
When building a project using softwoods, you will need to use coarse-threaded screws.
The softer fibers of the softwoods need a screw with a deeper thread to hold tightly. If you use a fine-threaded screw in hardwoods, the screws will not get a good grip and can spin freely in the wood, therefore not creating a strong joint.
Softwoods include, but are not limited to:
- Pine
- Cedar
- Fir
- Spruce
- Whitewood
- Poplar*
- Alder*
*Even though poplar and alder are labeled as hardwoods, they are on the softer end of the hardness scale and benefit from a coarse threaded screw.
Plywood and Sheet Goods
When building using plywood and other sheet goods, you will need to use a coarse-threaded screw.
Even if the veneer on your plywood is a hardwood (like oak or maple), you will use a coarse-thread pocket hole screw to create strong joints.
Sheet goods include, but are not limited to:
- Plywood
- MDF (medium density fiberboard)
- Particle board
- Melamine
Hardwoods
When building your project with hardwoods, you will want to use a fine-threaded screw.
The more aggressive coarse thread can break the fibers of hard woods and cause splitting. The fine-thread screws have more threads for better holding strength in hardwoods.
Hardwoods include, but are not limited to:
- Oak
- Maple
- Cherry
- Ash
- Birch
- Walnut
- Hickory
- Mahogany
2. What size is the wood?
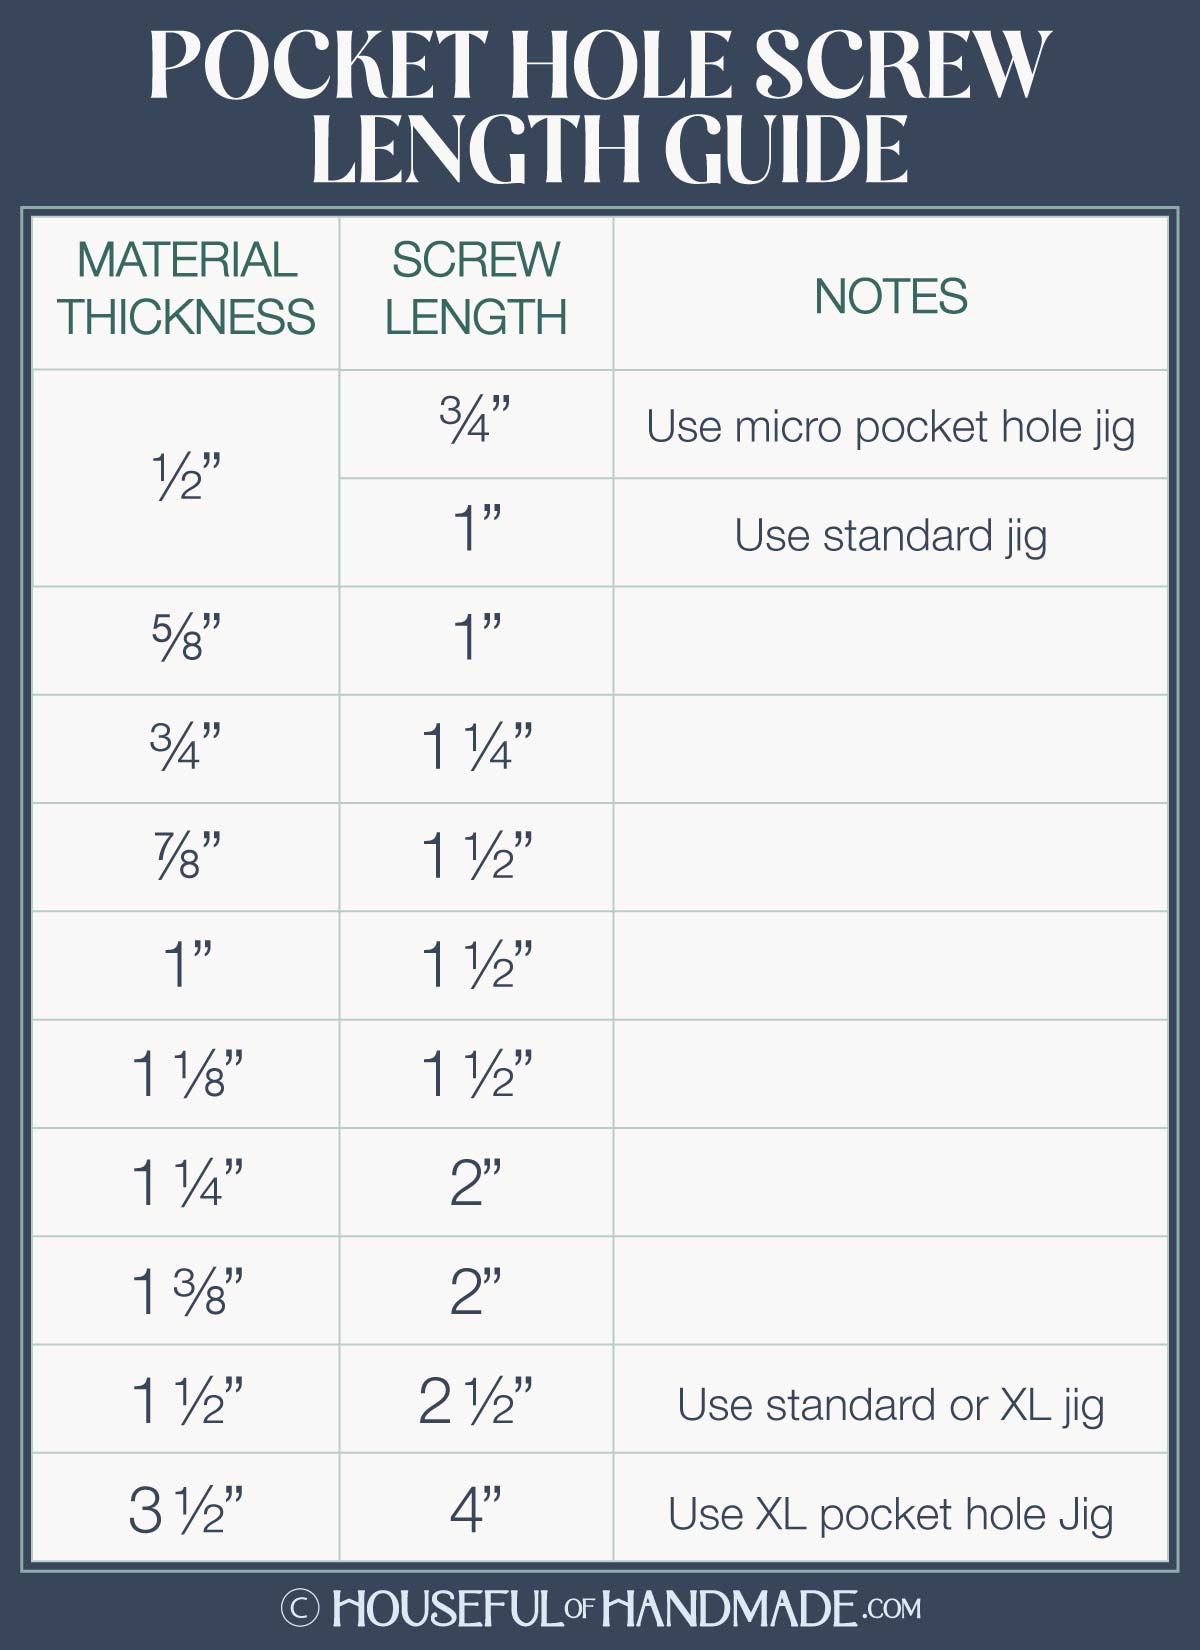
The thickness of your lumber is used to determine the length of the pocket hole screw you use.
When determining how thick your boards are, it is important to understand the difference between nominal and dimensional lumber.
The nominal size is the size the board was originally cut in inches (ie, 1×6 or 2×4).
Then the board is dried and planed down to its dimensional size. This is the actual size of the finished board you purchase in the store.

When figuring out what pocket hole screw to use, you need to use the actual thickness of the board, not the nominal thickness.
If you are purchasing your lumber from a home improvement store, you will likely find 1x or 2x lumber.
- 1x boards are actually 3/4″ thick
- 2x boards are actually 1 1/2″ thick
Once you know the actual thickness of your material (boards or sheet goods), you can use the following table to quickly determine the screw length.
What if the boards are different thicknesses?
When joining two boards that are different thicknesses, you have a few options.
But first we need to label the two boards:
- Board A- has the pocket holes drilled in it
- Bard B- the one you are attaching Board A to
When drilling pocket holes, you will always set the pocket hole jig up for the thickness of Board A. Then drill your holes.
If Board B is thicker than Board A, you can use the screw length designated for Board A’s thickness. However, if you use a longer screws, you can get an even stronger joint.
To determine the longest screw you can use, drill a pocket hole in a scrap piece of Board A. Drive a screw through the pocket hole until it is flat against the shelf.
Place the board up against the edge of Board B how it will be attached to see were the screw will drive into it. You want the screw to be in as much of the board as possible without it touching the edge.
You may have to test a few screw lengths to find the perfect one.
If Board B is thinner than Board A, you will need to do the screw length test above to find the perfect screw length.
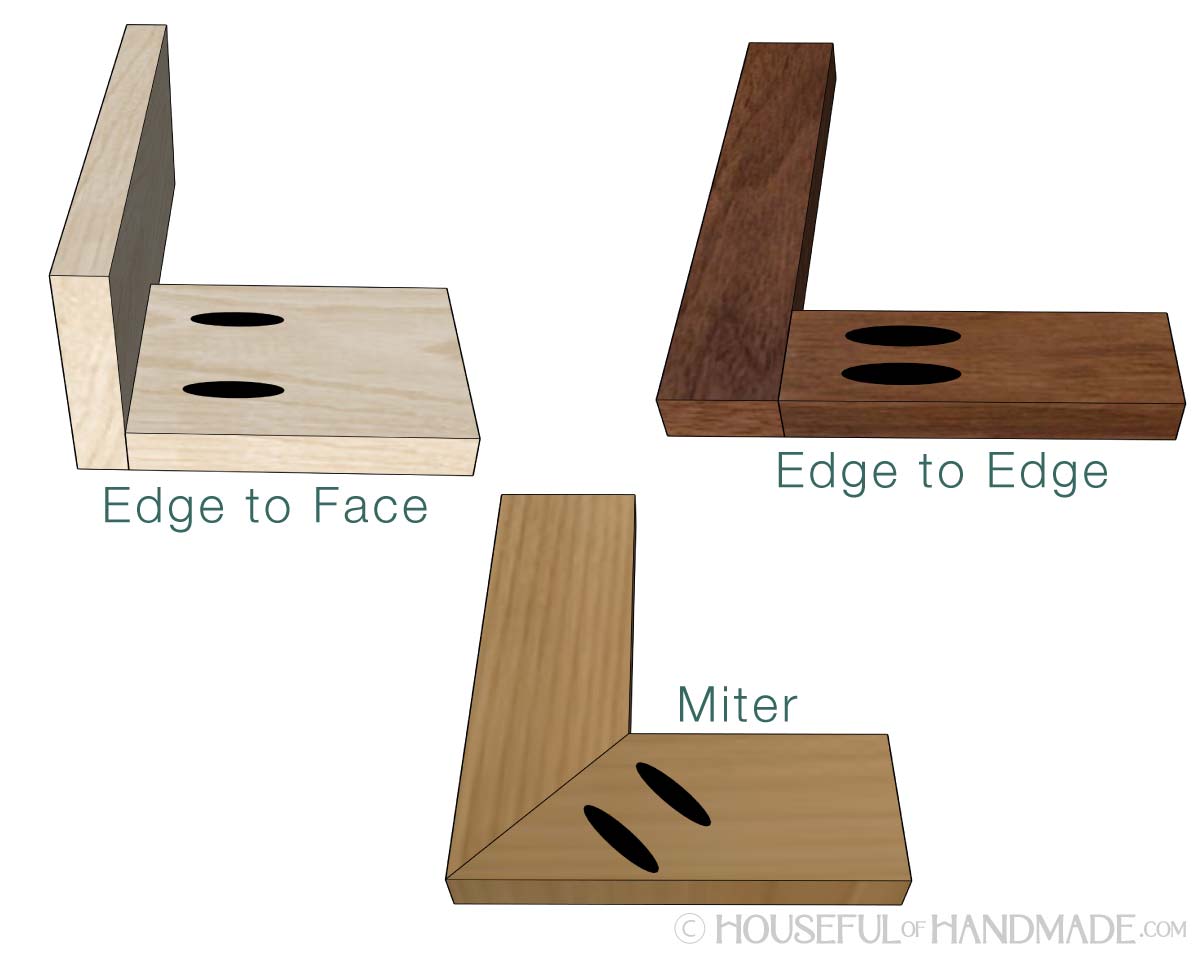
Does the type of joint change the screw length?
There are three main types of joints when using pocket hole screws: edge to face, edge to edge, and miter joints.
No matter what joint you choose, the thickness of the boards will determine the screw length.
3. Is this an indoor or outdoor project?
For all indoor projects, standard zinc screws will work great for building furniture that lasts! Even in more humid rooms like the kitchen or bathroom.
When building outdoor projects, you want to use a coated pocket hole screw or a stainless steel screw.
Since I use the Kreg Pocket hole jig, I use Kreg’s Blue-Kote™ screws for my outdoor projects. I know you can find other coated pocket hole screws labeled for outdoor use, but I have not used them so I cannot recommend any.
Stainless steel pocket hole screws will be the most expensive option. You will want to use these for projects that will get excessive exposure to moisture and the elements.
Kreg’s coated screws are only available in a coarse thread. If you are building outdoor furniture with a hardwood, stainless steel fine thread screws will be your best bet.
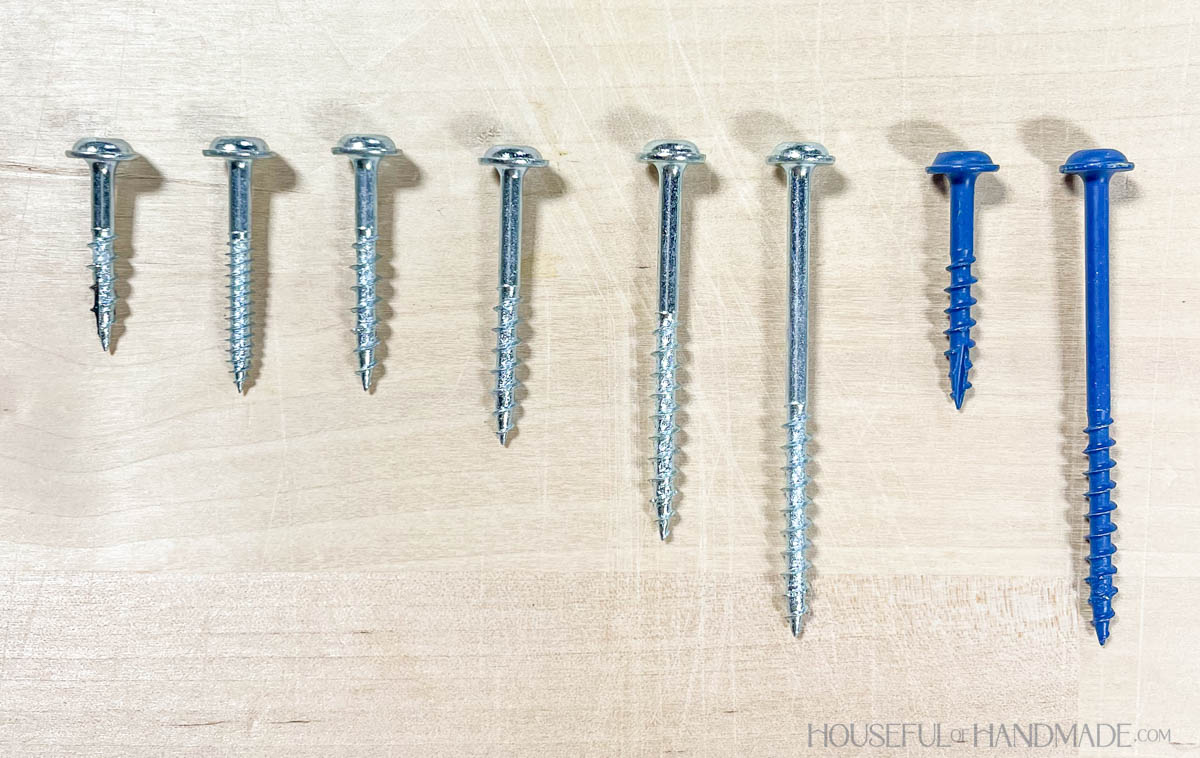
Pocket Hole Screws I Keep on Hand
I don’t want to have to run to the store to buy screws for every project. Instead I prefer to buy my pocket hole screws in bulk. This also makes them cheaper!
Most furniture is built from 1x or 2x boards and plywood. So I make sure to always have the following screws on hand so I am ready to build almost anything:
- 1″ zinc coarse thread screws
- 1 1/4″ zinc coarse thread screws
- 1 1/4″ zinc fine thread screws
- 1 1/4″ coated coarse thread screws
- 2 1/2″ zinc coarse thread screws
- 2 1/2″ coated coarse thread screws
The other types of pocket hole screws I use less frequently, so I buy them as they are needed.
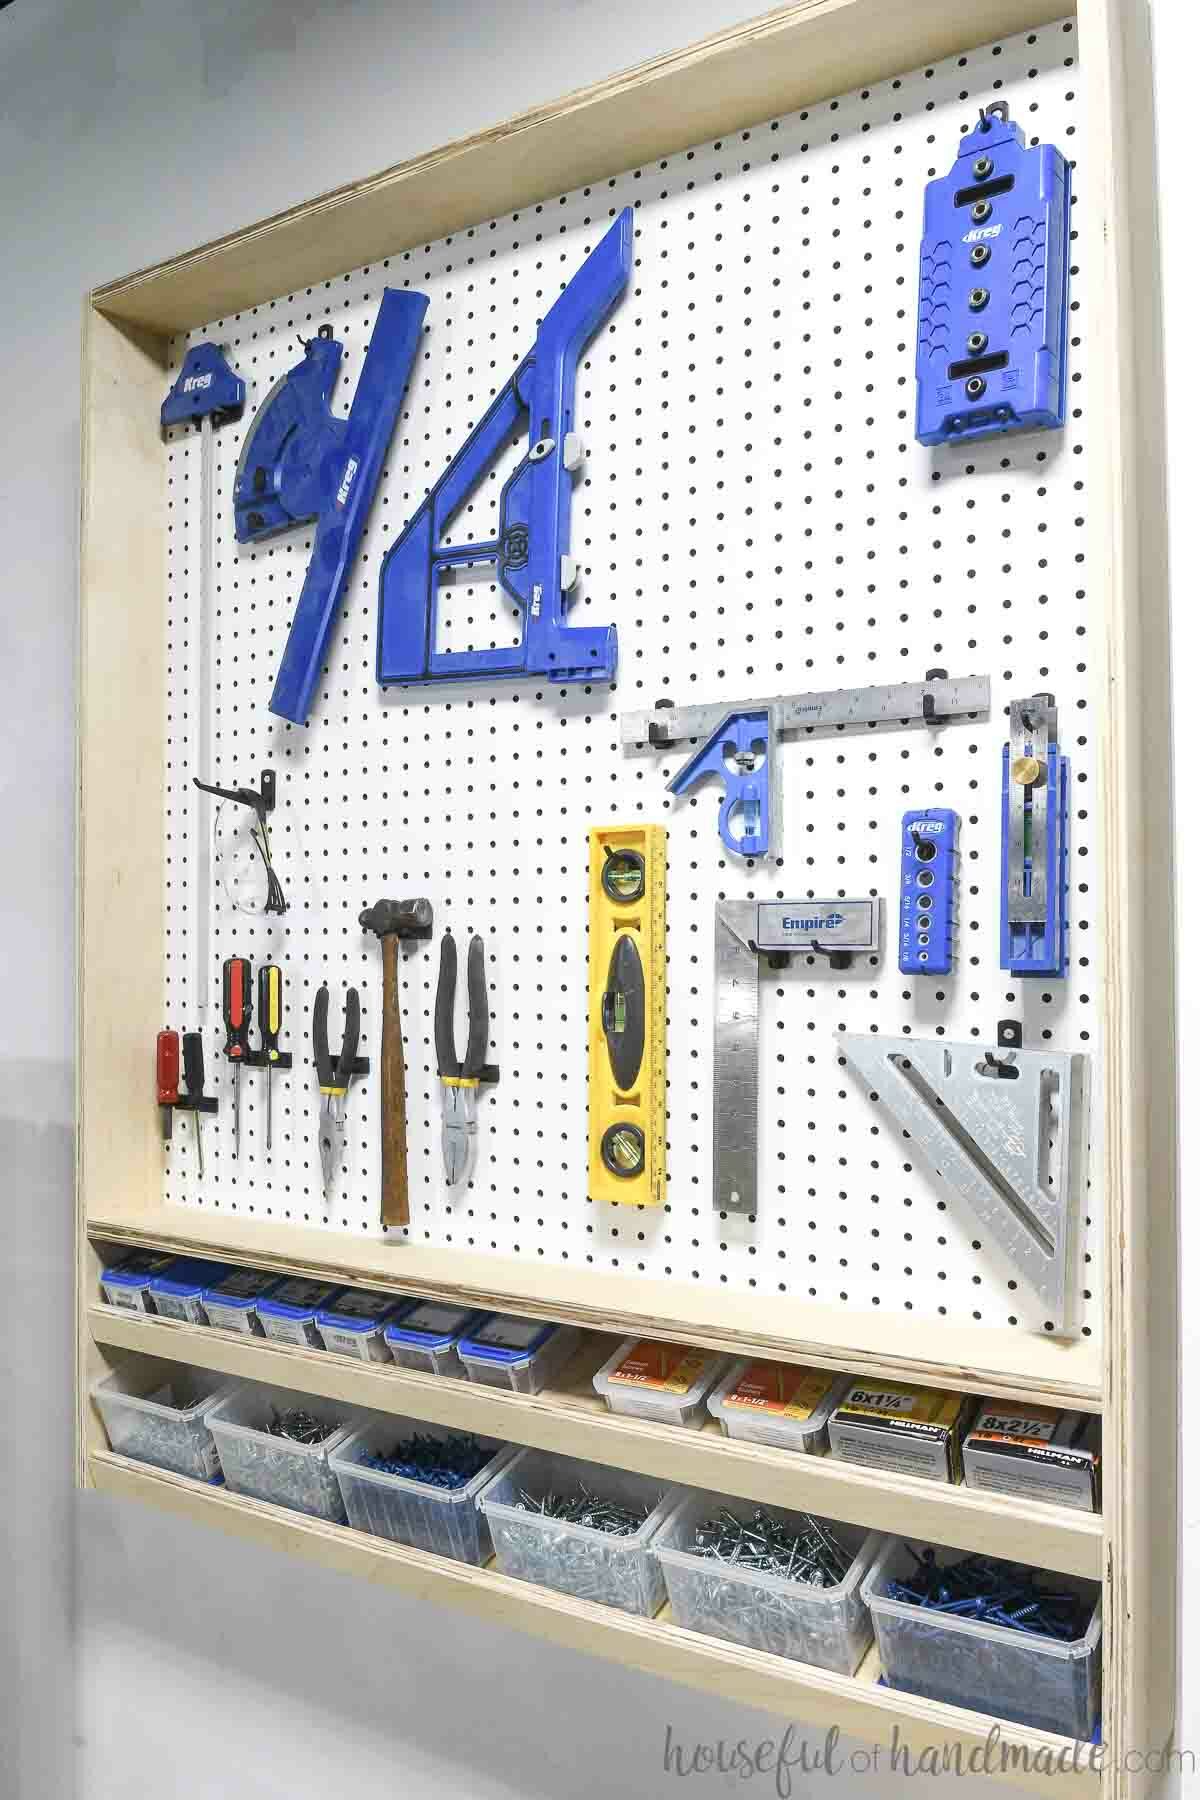
I built this pegboard storage cabinet for my shop and the bottom shelves perfectly hold all my pocket hole screws and more!
Now you knew everything you need to pick out the perfect screws for your next project!
Next step is to find your next project or learn more woodworking skills. Then get outside and start building!
