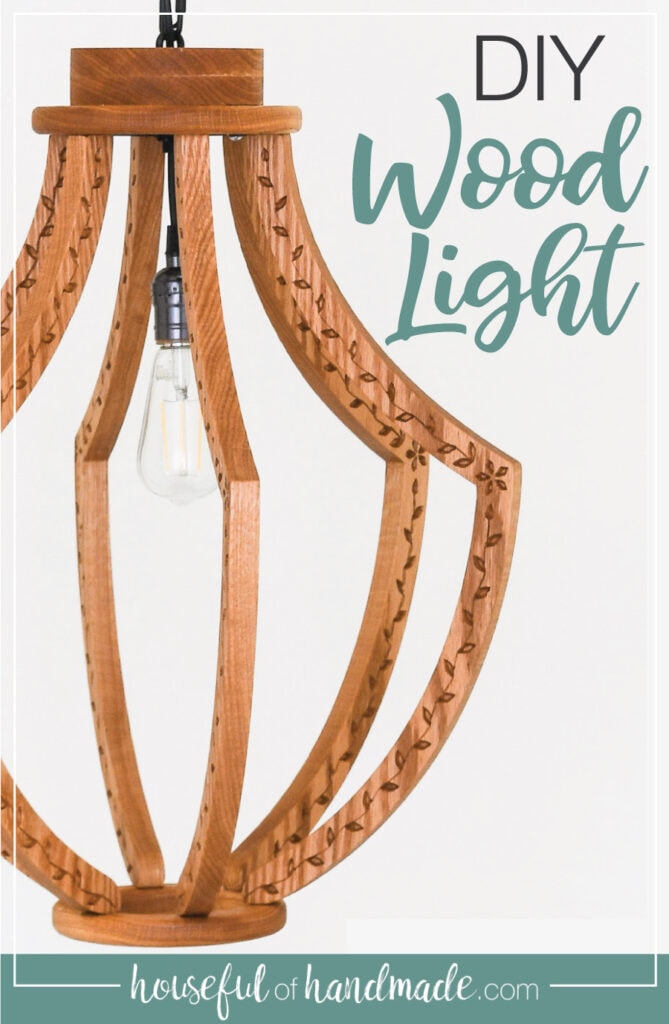
Build a stunning DIY wood light fixture with carved details with the X-Carve.
Every January, I make a list of the projects that I started, but never finished. One of those projects was adding a light fixture to our stairwell.
We took down the old, dated light fixture when we painted the tall walls a couple years ago. But I never found the “Perfect” light. So I partnered with Inventables to use the X-carve CNC machine to DIY the perfect light fixture instead!
Designing the Perfect Light
One of the reasons I kept putting off installing light in the stairway was because the top of the stairway is at eye level when you open the front door. If I picked the wrong light… it would be so visible to everyone who visits.
This post may contain affiliate links. As an Amazon Associate I earn from qualifying purchases. Click here to read my full disclosure policy.
But we needed a show-stopper piece. Something that would be able to stand on it’s own and shine in a tall stairwell with nothing around.
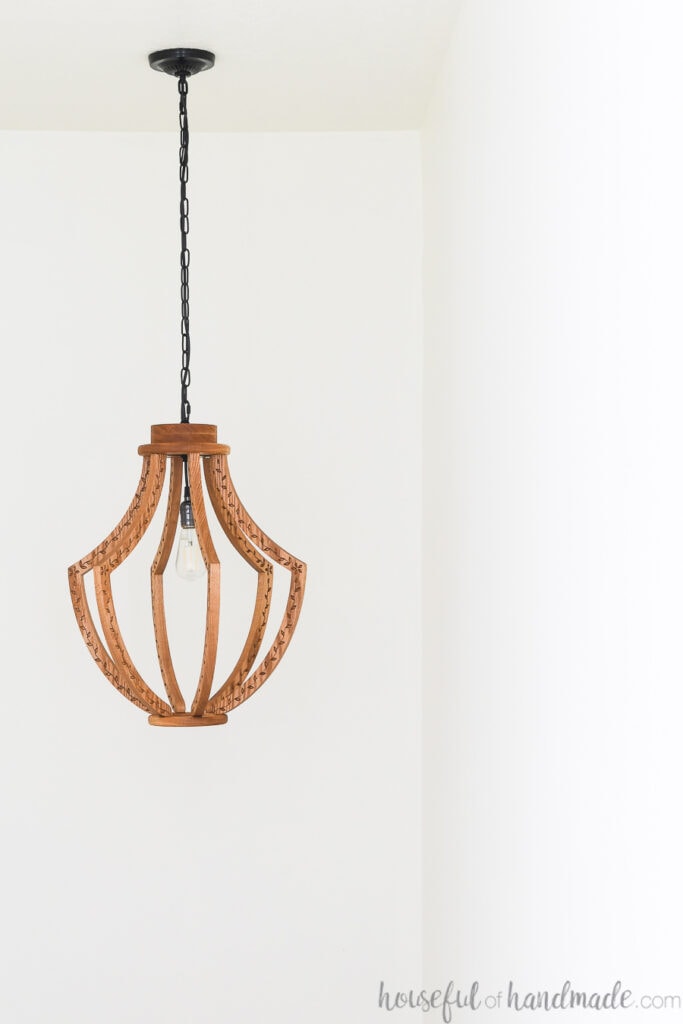
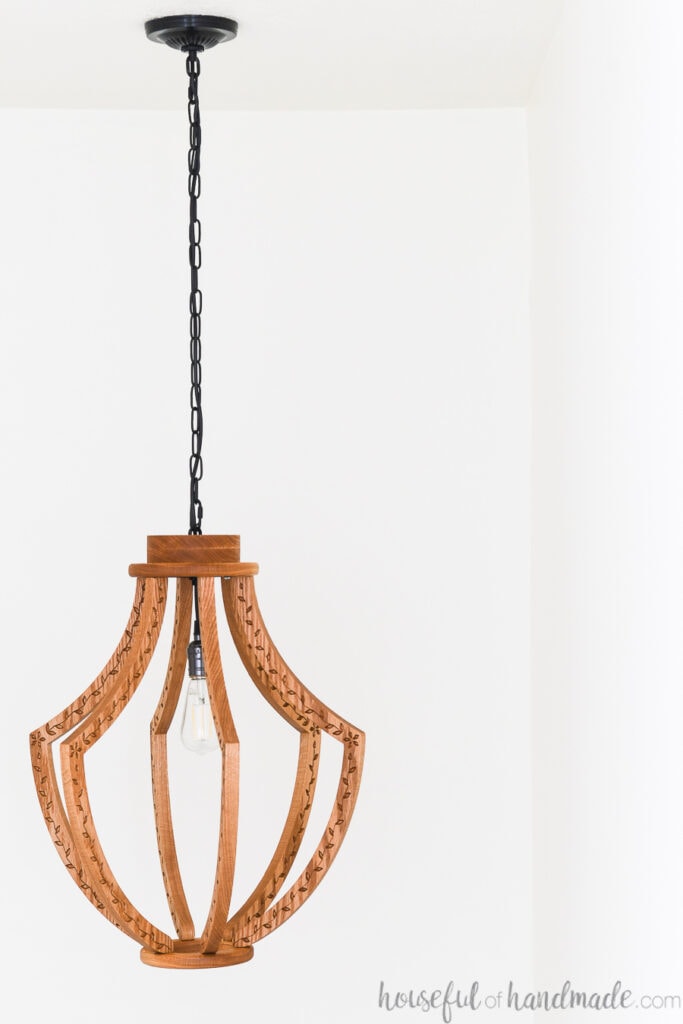
This DIY light is not small, it is 19″ wide and 22 1/2″ tall. It does looks smaller when standing alone in the stairwell, but just imagine how small a less grande light would look.
I knew I wanted to use wood as the feature of the light. Since I started my woodworking journey, I have developed a love for natural woods and their grain patterns.
With so many different woods to choose from, it was hard to decide. I did let my pocket book and lack of extra time to mill my own boards help with the decision. But I am super happy with the finished wood light fixture.
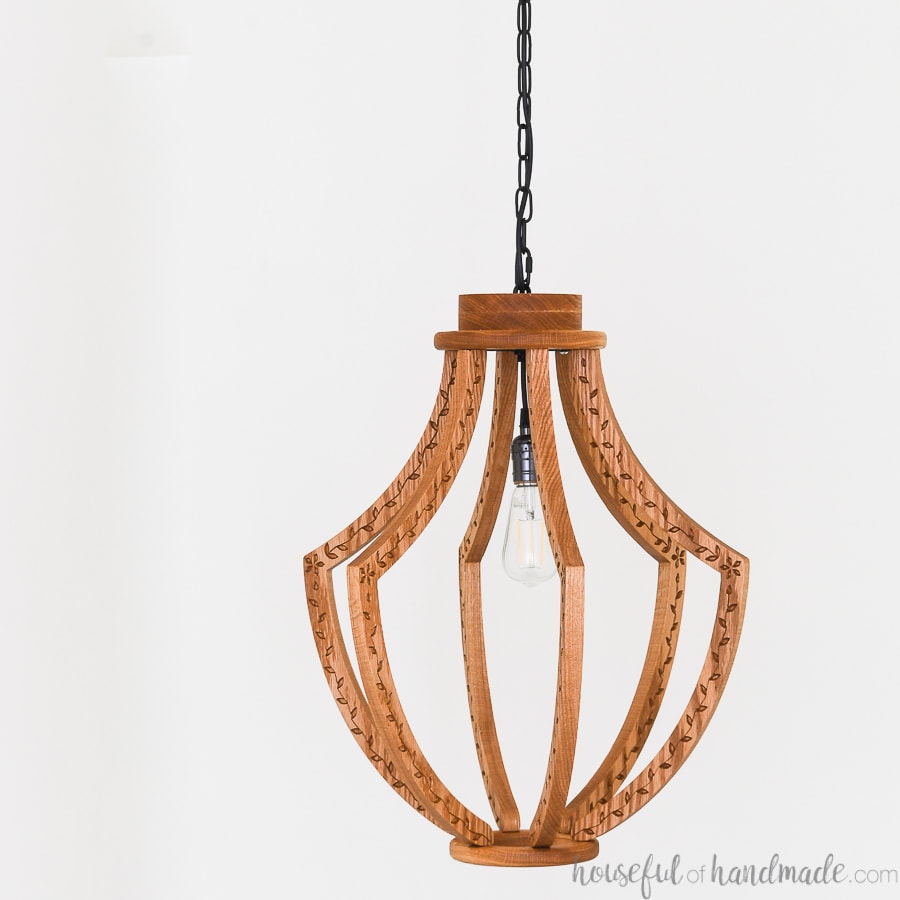
This gorgeous DIY wood chandelier was built out to oak! I know, oak gets such a bad rap because of all the boring, builder-grade oak cabinets of the late 90s-2000s. But the grain and texture on oak can be so pretty.
As you can see in the video, the oak is much paler before the wood sealer was applied. But the warmth of the oak when it is sealed is exactly what we needed in our white & gray stairway.
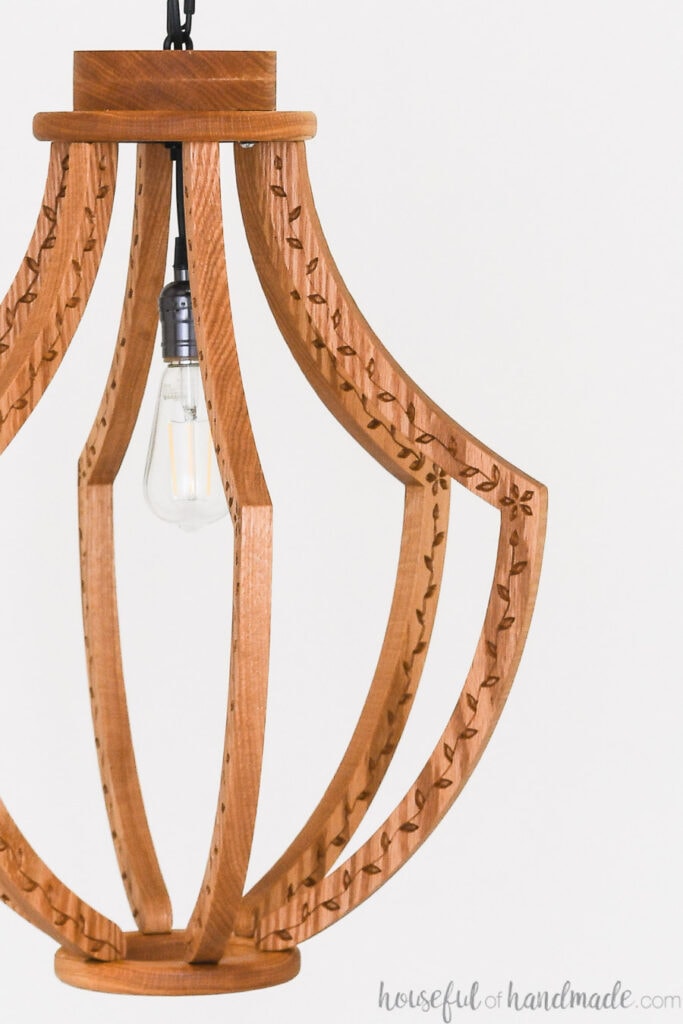
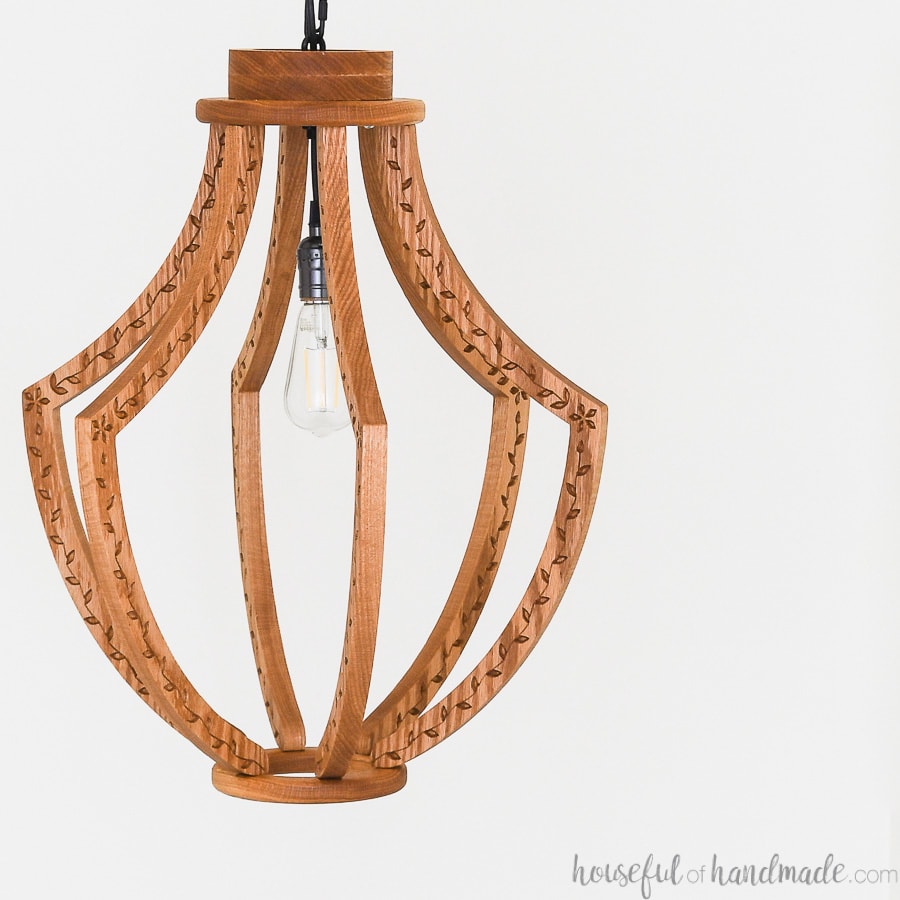
But the best part of this DIY light fixture is the carved details. I designed a simple hand-drawn flower and left motif that adds some depth to the pieces.
What if I don’t have an X-Carve?
I understand that an X-Carve is a bigger tool purchase. But there are so many fun things you can make with it, and lots of people even use theirs to make items to sell!
But if you do not have an X-Carve, you still have options.
- Some high schools, libraries, and maker spaces have X-Carves you can use. Use this link to find a location near you.
- The lines of this wood light fixture are easy enough to be cut with a scroll saw or bandsaw. You would just have to skip the carved detail.
Either way, you can always start by signing up for a free Easel account to test out designing in their software. I love the detailed preview to show you how it looks cut out of your wood with different bits.
And make sure to look out for fun contest from Inventables. Maybe you can use your design to win your own X-Carve or supplies!
How to Build a Wood Chandelier
Tools Needed:
- X-Carve
- If you do not have an x-carve, find a location near you where you can use one.
- Carving bits
- For the oak I used a 1/8″ straight cut bit.
- For the carving I used a 60 degree V-bit.
- Digital Calipers
- Saw
- Use a miter saw or circular saw to cut down the board.
- Router with round-over bit
- Drill
- Doweling jig
- Clamps
- Chisel or knife
Supplies:
- Wood light fixture Easel file
- You will need a free Easel account to use this file, sign up for one here.
- 48″ of 1×12 board
- Sand paper
- 1 1/2″ long 1/4″ doweling pins
- Wood glue
- Sealer
- Screw collar loop kit (Amazon link)
- Pendant light kit (Amazon link)
- Light canopy kit (Amazon link)
- Light fixture chain (Amazon link)
- Lightbulb
Carve the Wood Pieces
You can use the design I created for wood chandelier by first, signing up for a free Easel account, then clicking on the link below to open the file. The V-carving that is used for the carved details on the light is only available in Easel Pro.
When you open the link, it will not be editable unless you make a copy.
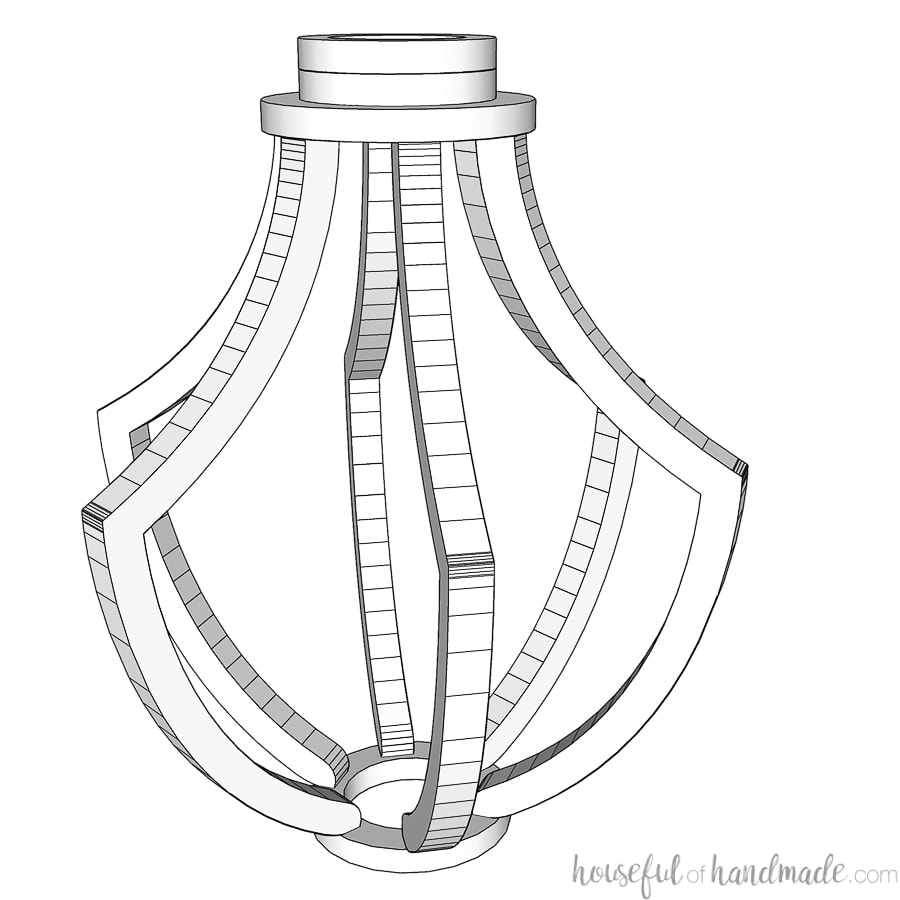
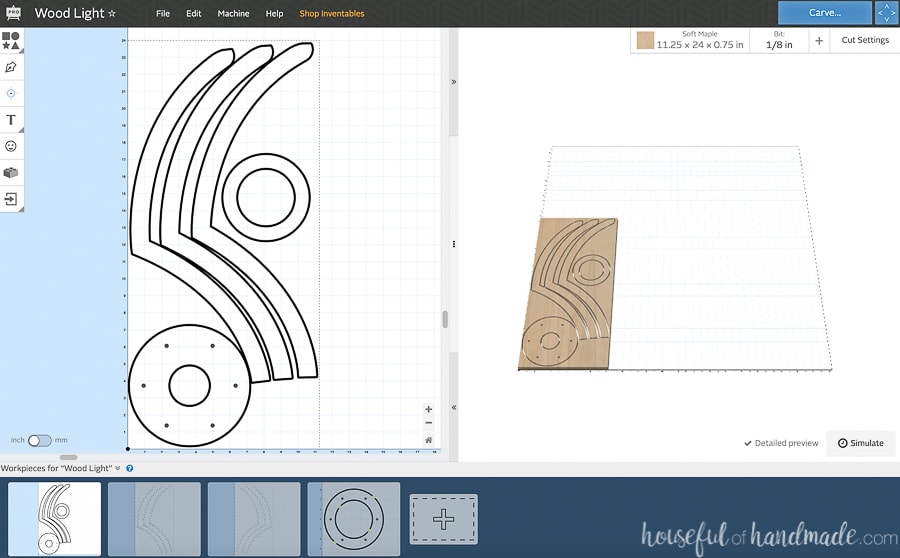
In the file, there are 4 different workpieces on the bottom: one for the perimeter carve, two for the carved details (mirrored so you can cut on each side of the board), and the forth workpiece only has the bottom ring that you can switch out with the top ring on the second set.
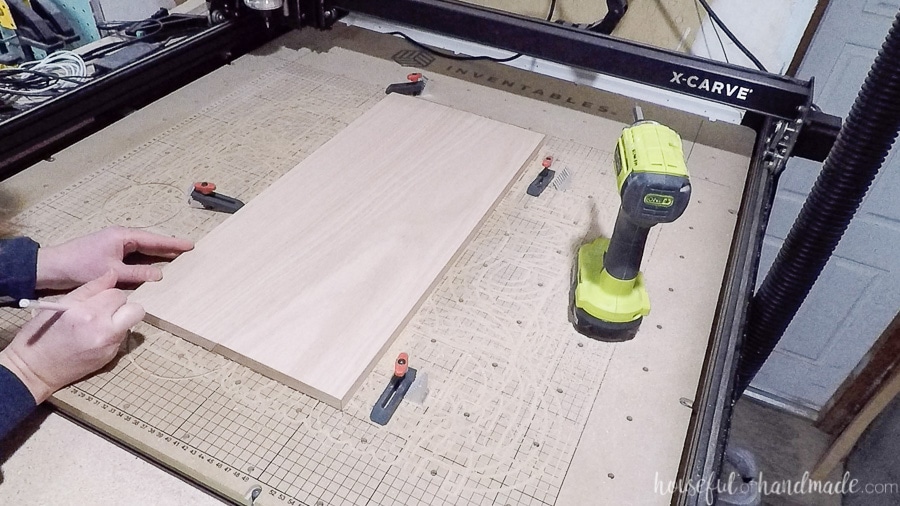
Cut your 1×12 board so you have 2 pieces 24″ long. Also note that the board must be 11 1/4″ wide to work with the design as laid out in Easel. It is made to perfectly mirror the carved design on an 11 1/4″ board.
Carving the First Side
Clamp one piece down to the X-Carve waste board. Be mindful of where the carve gets close to the edges and don’t clamp it there.
It is important that when you flip your board over to carve the second side and cut it out, the board is in the exact same spot. So mark the corners with a pencil.
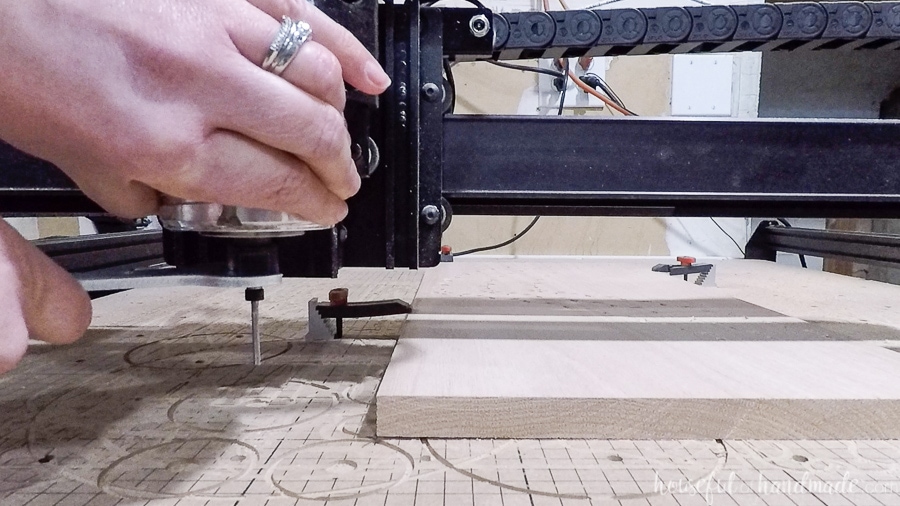
Using the v-carving bit, carve out workpiece #3. I used the soft Maple cut setting for the oak and it worked great.
Set up the machine by following the prompts after hitting Carve in the upper right-hand corner.

Carving the Second Side
Flip over the board so that the bottom two corners are still at the bottom, but the carved side is now touching the waste board.
Make sure to line the corners up with the marks you made on the waste board so the board is in the exact same spot. Clamp it down.
Carve out workpiece #2 with the v-carving bit. When going through the set-up, select “Use Last XY Zero” to start it from the exact same spot.
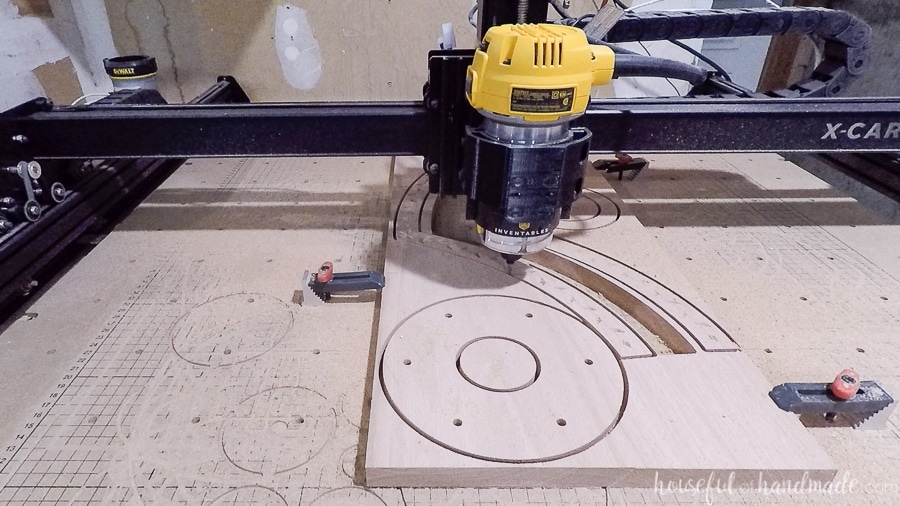
Cutting out the Pieces
After the carving is done, leave the wood clamped to the waste board.
Change out your bit to the 1/8″ straight cut bit. Be careful not to jog the machine or you XY Zero will be off.
Cut out the pieces by carving out workpiece #1. Again, use the “Use Last XY Zero” option in the set-up.
Be mindful that the small pieces between the boards can possibly come loose while carving. It did for my first set and broke my bit so keep an eye on them. Pause and remove the pieces if you can before they break your bit.
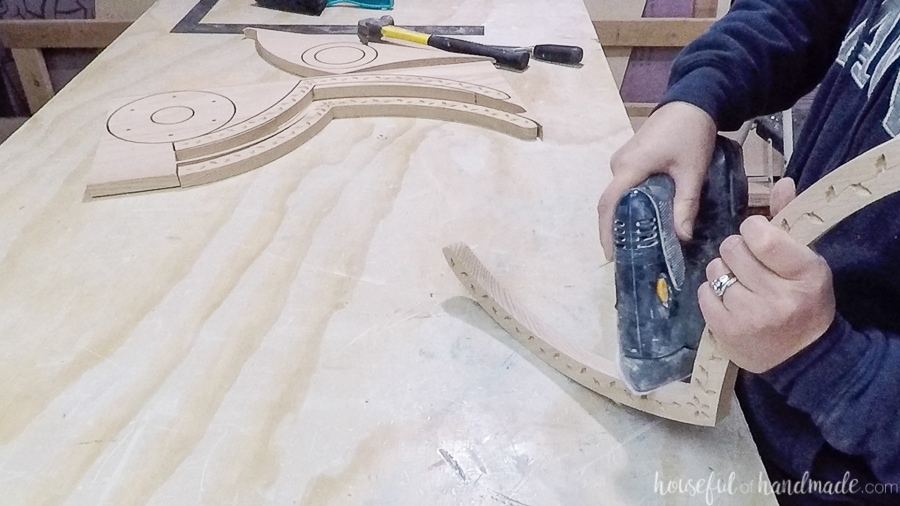
Remove the board from the X-Carve and use a chisel to break the tabs.
Repeat the process on the second piece of wood. But this time, switch out the piece on workpiece #4 with the large top piece on workpiece #1. You only need 1 of each of these pieces (the ones with holes in them). You will need 2 of the pieces without holes in.
Assembling the Wood Light Fixture
Once all your pieces are cut, remove all the tabs with the chisel or a knife.
Sand the pieces smooth with a 22o grit sandpaper. The straight bit cut the edges very cleanly so only a little sanding was needed. I also sanded the edges of the side pieces so they were very slightly curved.
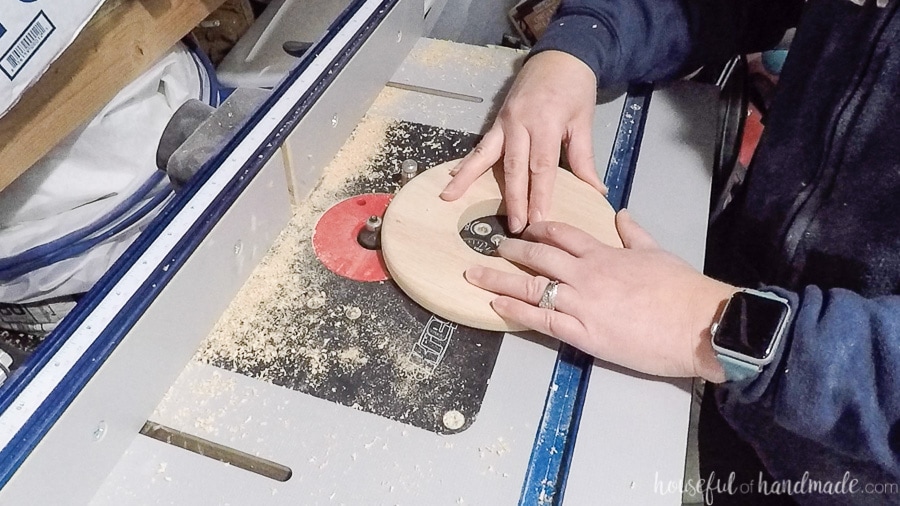
Round Over the Top & Bottom
Using a router with a round-over bit, give the outside of the top piece a rounded edge on the top and bottom. No need to worry about the center since it will be hidden by the light cords.
Also, round over the top & bottom of the inside and outside of the bottom ring.
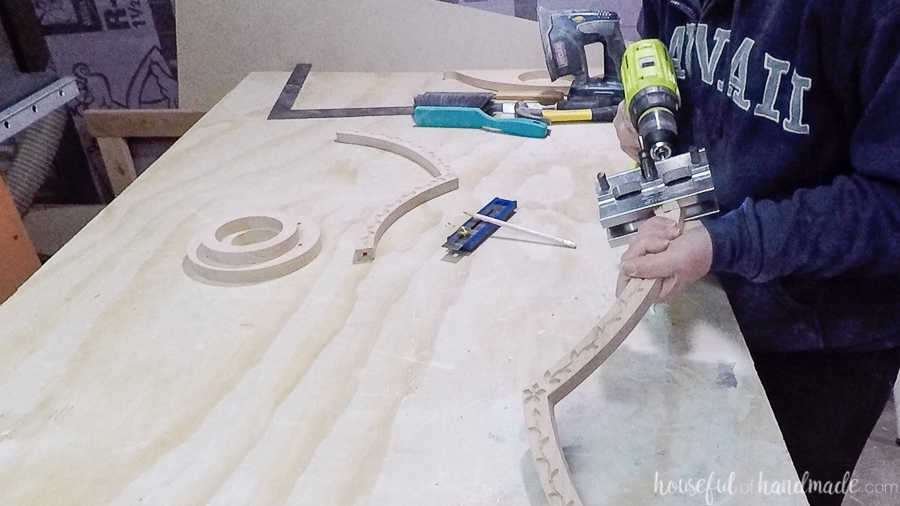
Drill for Dowels
Using your doweling jig, drill a hole in the top center of each of the carved side pieces (the flat side). If using 1 1/2″ long dowels, you need to drill your hole just over 1″ deep since the holes added by the X-Carve are only 1/2″ deep.
Also, drill a hole in the center of the flat section of the bottom of each side piece. Since the bottom piece is not very thick, only drill it 1/2″ deep. We will cut the 1 1/2″ dowels in half for the bottom.
Final Assembly
Start by glueing the two smaller top pieces together with wood glue. Make sure to keep the grain in the same direction on both pieces or it will be visible on the sides.
Clamp it tight and let it dry.
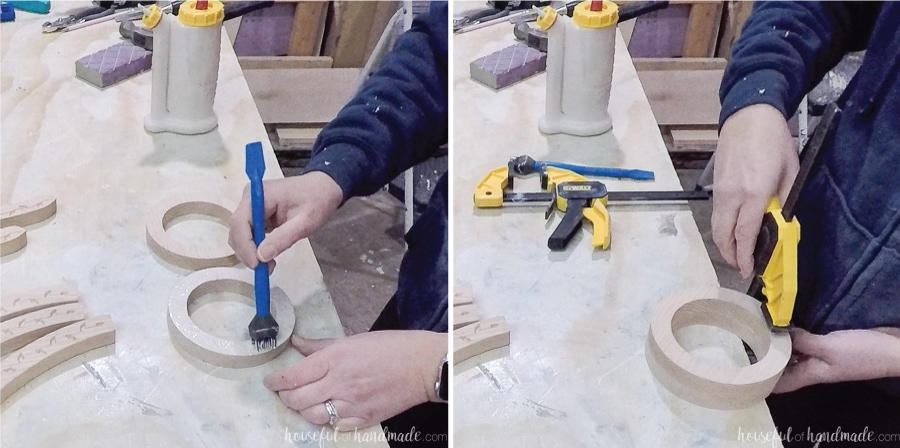
Add wood glue to the holes in the top of the side pieces. Push a dowel into it so only 1/2″ (or just shy) are sticking out.
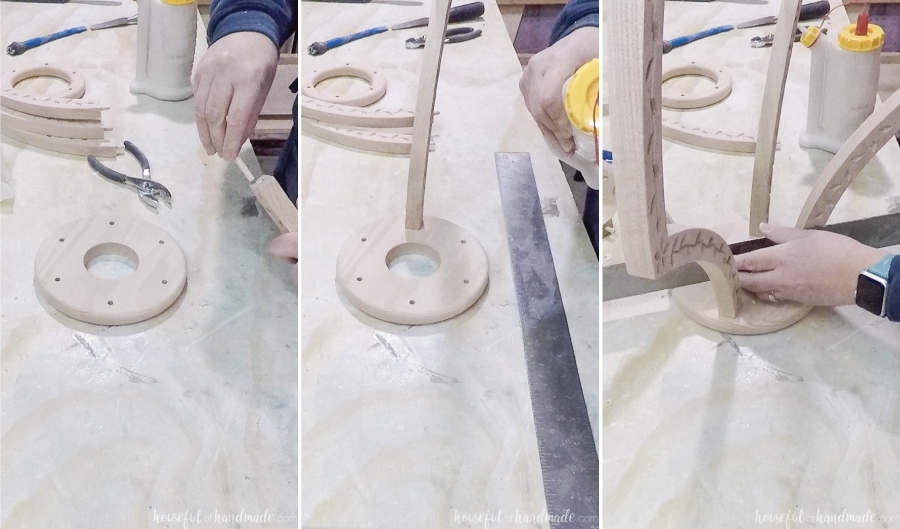
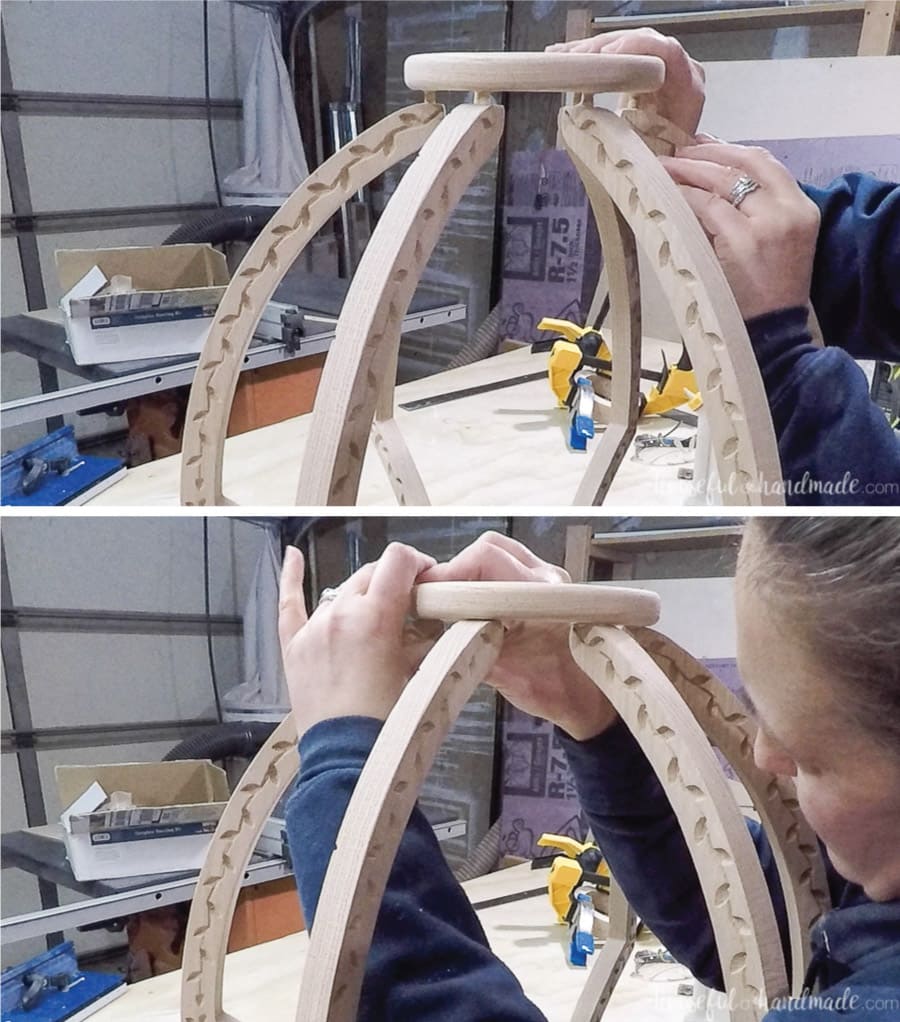
To attach the side pieces, add wood glue in one of the holes on the top piece. Then add wood glue to the top of the side piece, around the dowel. Press them together firmly.
Repeat on the side piece opposite the first one. Then use a straight edge to line them up to each other. This will ensure they are straight to the center of the circle.
Continue on all 6 side pieces.
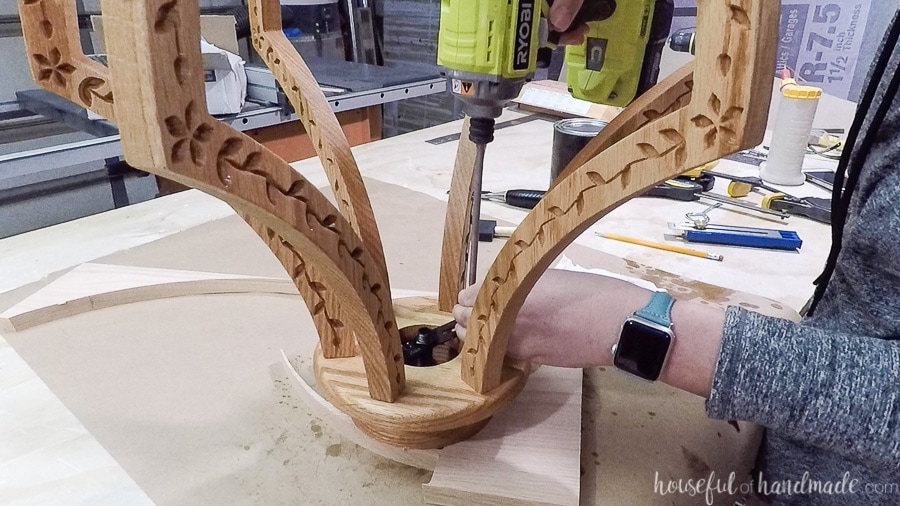
Cut 3 dowels in half so you have smaller dowels for the bottom. Insert them into the holes on the bottom of the side pieces using wood glue. Add wood glue to the flat part surrounding the dowels.
Add wood glue to the holes in the bottom ring. Carefully press the dowels on the side pieces into the holes on the ring.
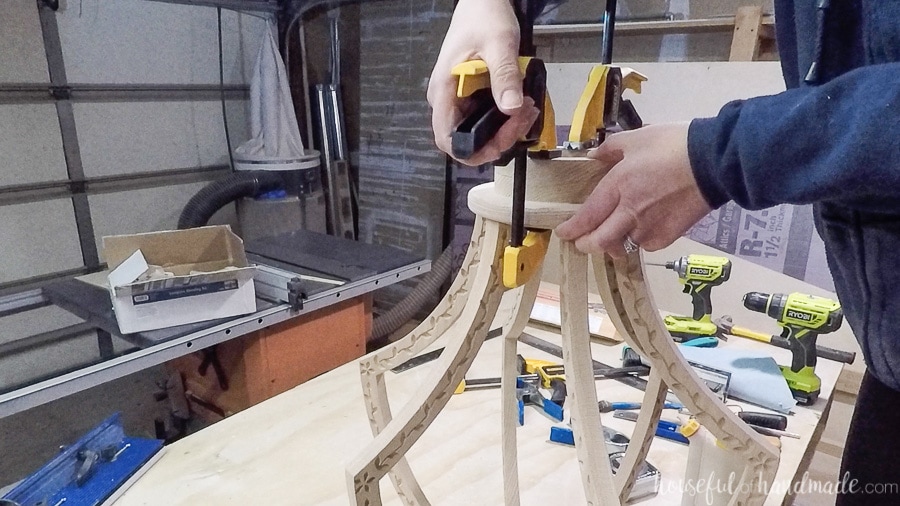
Now that all the pieces are attached, you can place something slightly heavy on top of the wood chandelier to act as a clamp while the glue dries. I used a half full gallon of paint which fit perfectly.
Finish by centering the small top pieces onto the top and secure with wood glue. Clamp tight and allow to dry.
Adding the Light
My screw collar loop kit was not all black, so I painted it black with spray paint before assembly.
Attaching the light to the wood fixture
Lay the cross bar on the underside of the top piece and center it. Attach it with 2 wood screws.
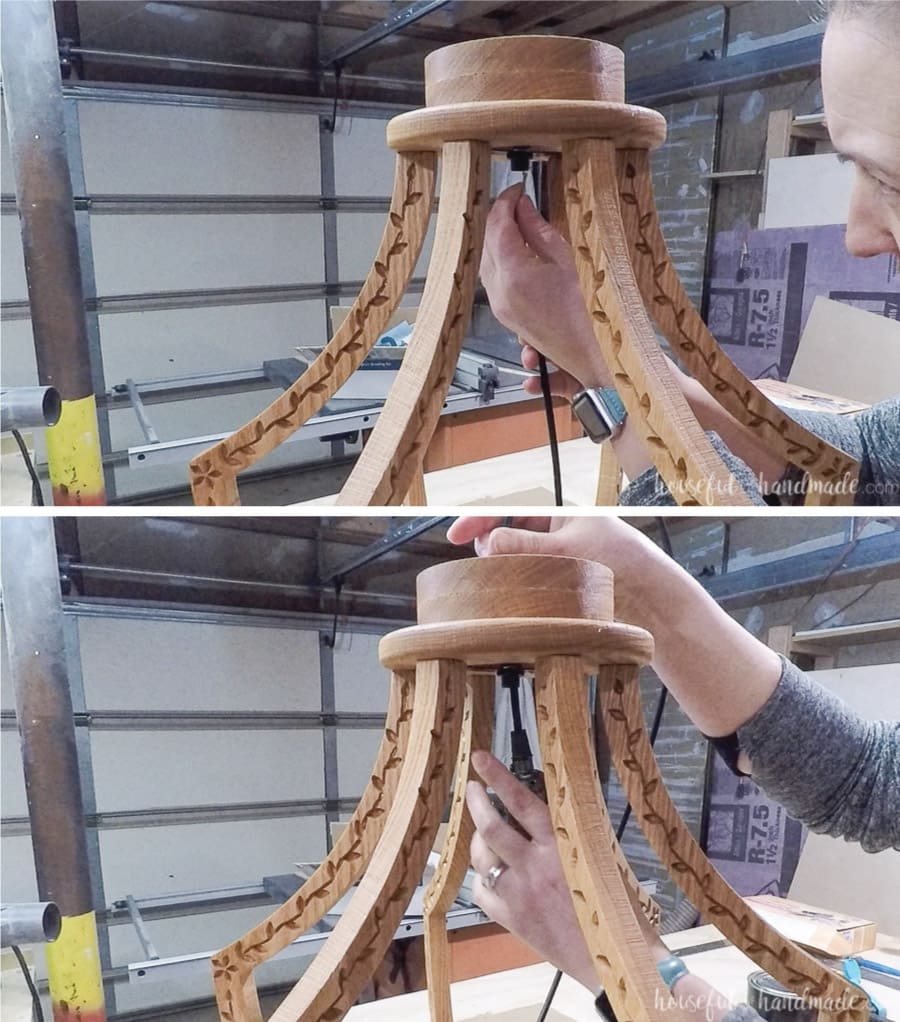
Twist the nipple into the center of the cross bar. Screw it in about half way. Use a locking nut to keep it from moving. Then screw the screw collar cap on the top. It will be inside the small wood top pieces.
Thread the cord of the pendant through the center of the nipple and screw collar cap.
Attaching the Light Canopy
Now before you can hang you light you need to add the chain and canopy. Determine how long you want the chain/light cord. Cut the chain to length.
Attach the chain to the screw collar cap on the light fixture. Thread the cord of the pendant back and forth through the chain to the top. I typically go through every 3rd chain loop.
Drop the locking washer of the canopy onto the chain. Then place the canopy over the chain. Make sure the open part of the canopy is facing up
The secure the chain to the screw collar cap for the canopy.
Attach the crossbar to you light box and thread the canopy nipple through the center.
To hang your beautiful DIY wood light fixture, you will need to thread the cord of the pendant through the nipple on the canopy. Then screw the collar onto the nipple.
Wing nut your wires together. Then place the canopy over the light box and secure it to the stop collar with the washer.
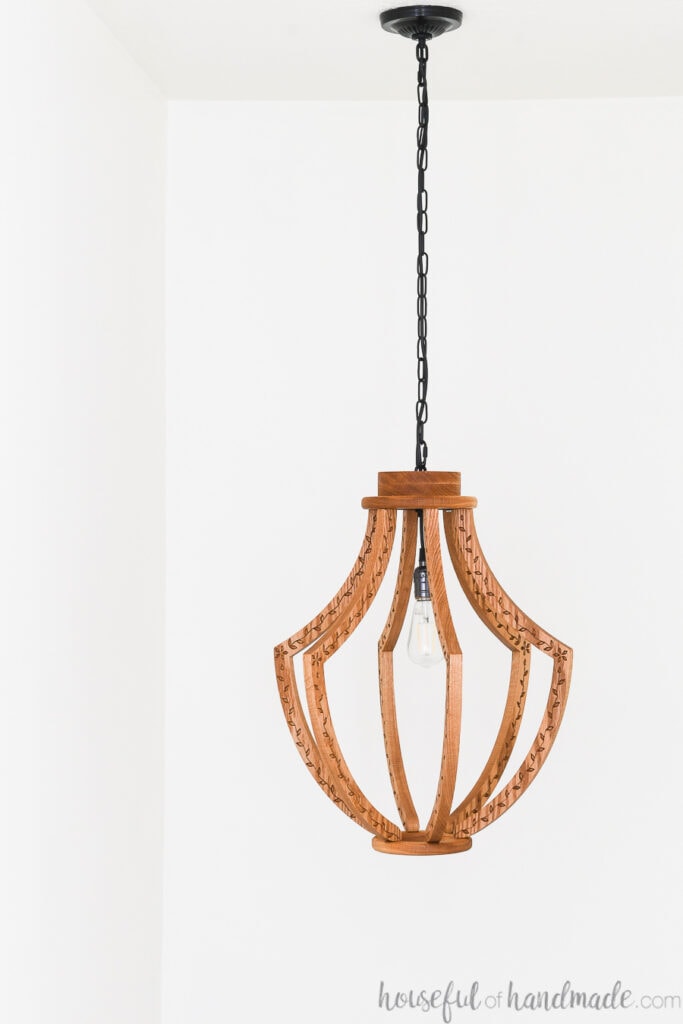
And now you can stand back and admire your amazing new DIY chandelier! It is such a stunning piece.
But now my mind is going crazy of all the other DIY lights I can make… too many ideas, too little time!
We used an LED lightbulb in the DIY wood light fixture. It gives off a ton of light for just 1 bulb. And since we have to get out the ladder every time we have to change the bulb, we want a bulb that will last a long time!

Thank you to Inventables for sponsoring this post. I only recommend products that I use and love and all opinions are 100% my own. Click here to read my full disclosure policy.